How to Make a MP3 Player With LCD Using Arduino and DFPlayer Mini MP3 Player Module
by DKArdu in Circuits > Arduino
4721 Views, 5 Favorites, 0 Comments
How to Make a MP3 Player With LCD Using Arduino and DFPlayer Mini MP3 Player Module

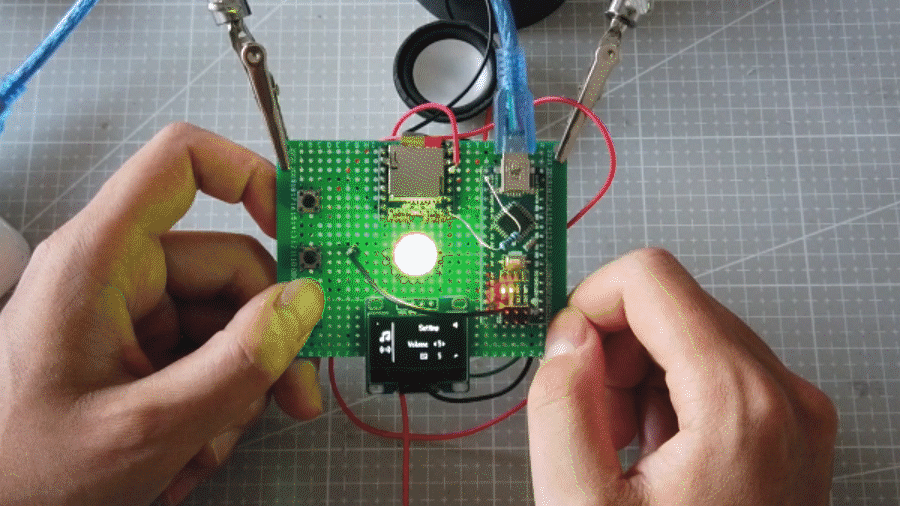
Today we will make a MP3 player with LCD using Arduino and DFPlayer mini MP3 Player Module.
The project can read the MP3 files in the SD card, and can pause and play the same as the device 10 years ago. And also it has previous song and next song function.
► Components

► Components
The following parts were used in this project:
Arduino Uno, https://amzn.to/3ihYFBl
MP3-TF-16P mini mp3 player, https://amzn.to/3lC8Rqn
Speaker
1K resistor, https://amzn.to/2OSGlBW
3 of 100Ω resistors, https://amzn.to/2OSGlBW
RGB LED, https://amzn.to/3iGb2qO
1.3 inch oled display, https://amzn.to/3gTMZnW
3 Switch buttons, https://amzn.to/3hKNL7N
Jumper wires, https://amzn.to/3jCHhZd
Breadboard, https://amzn.to/33yEavN
Circuit Diagram
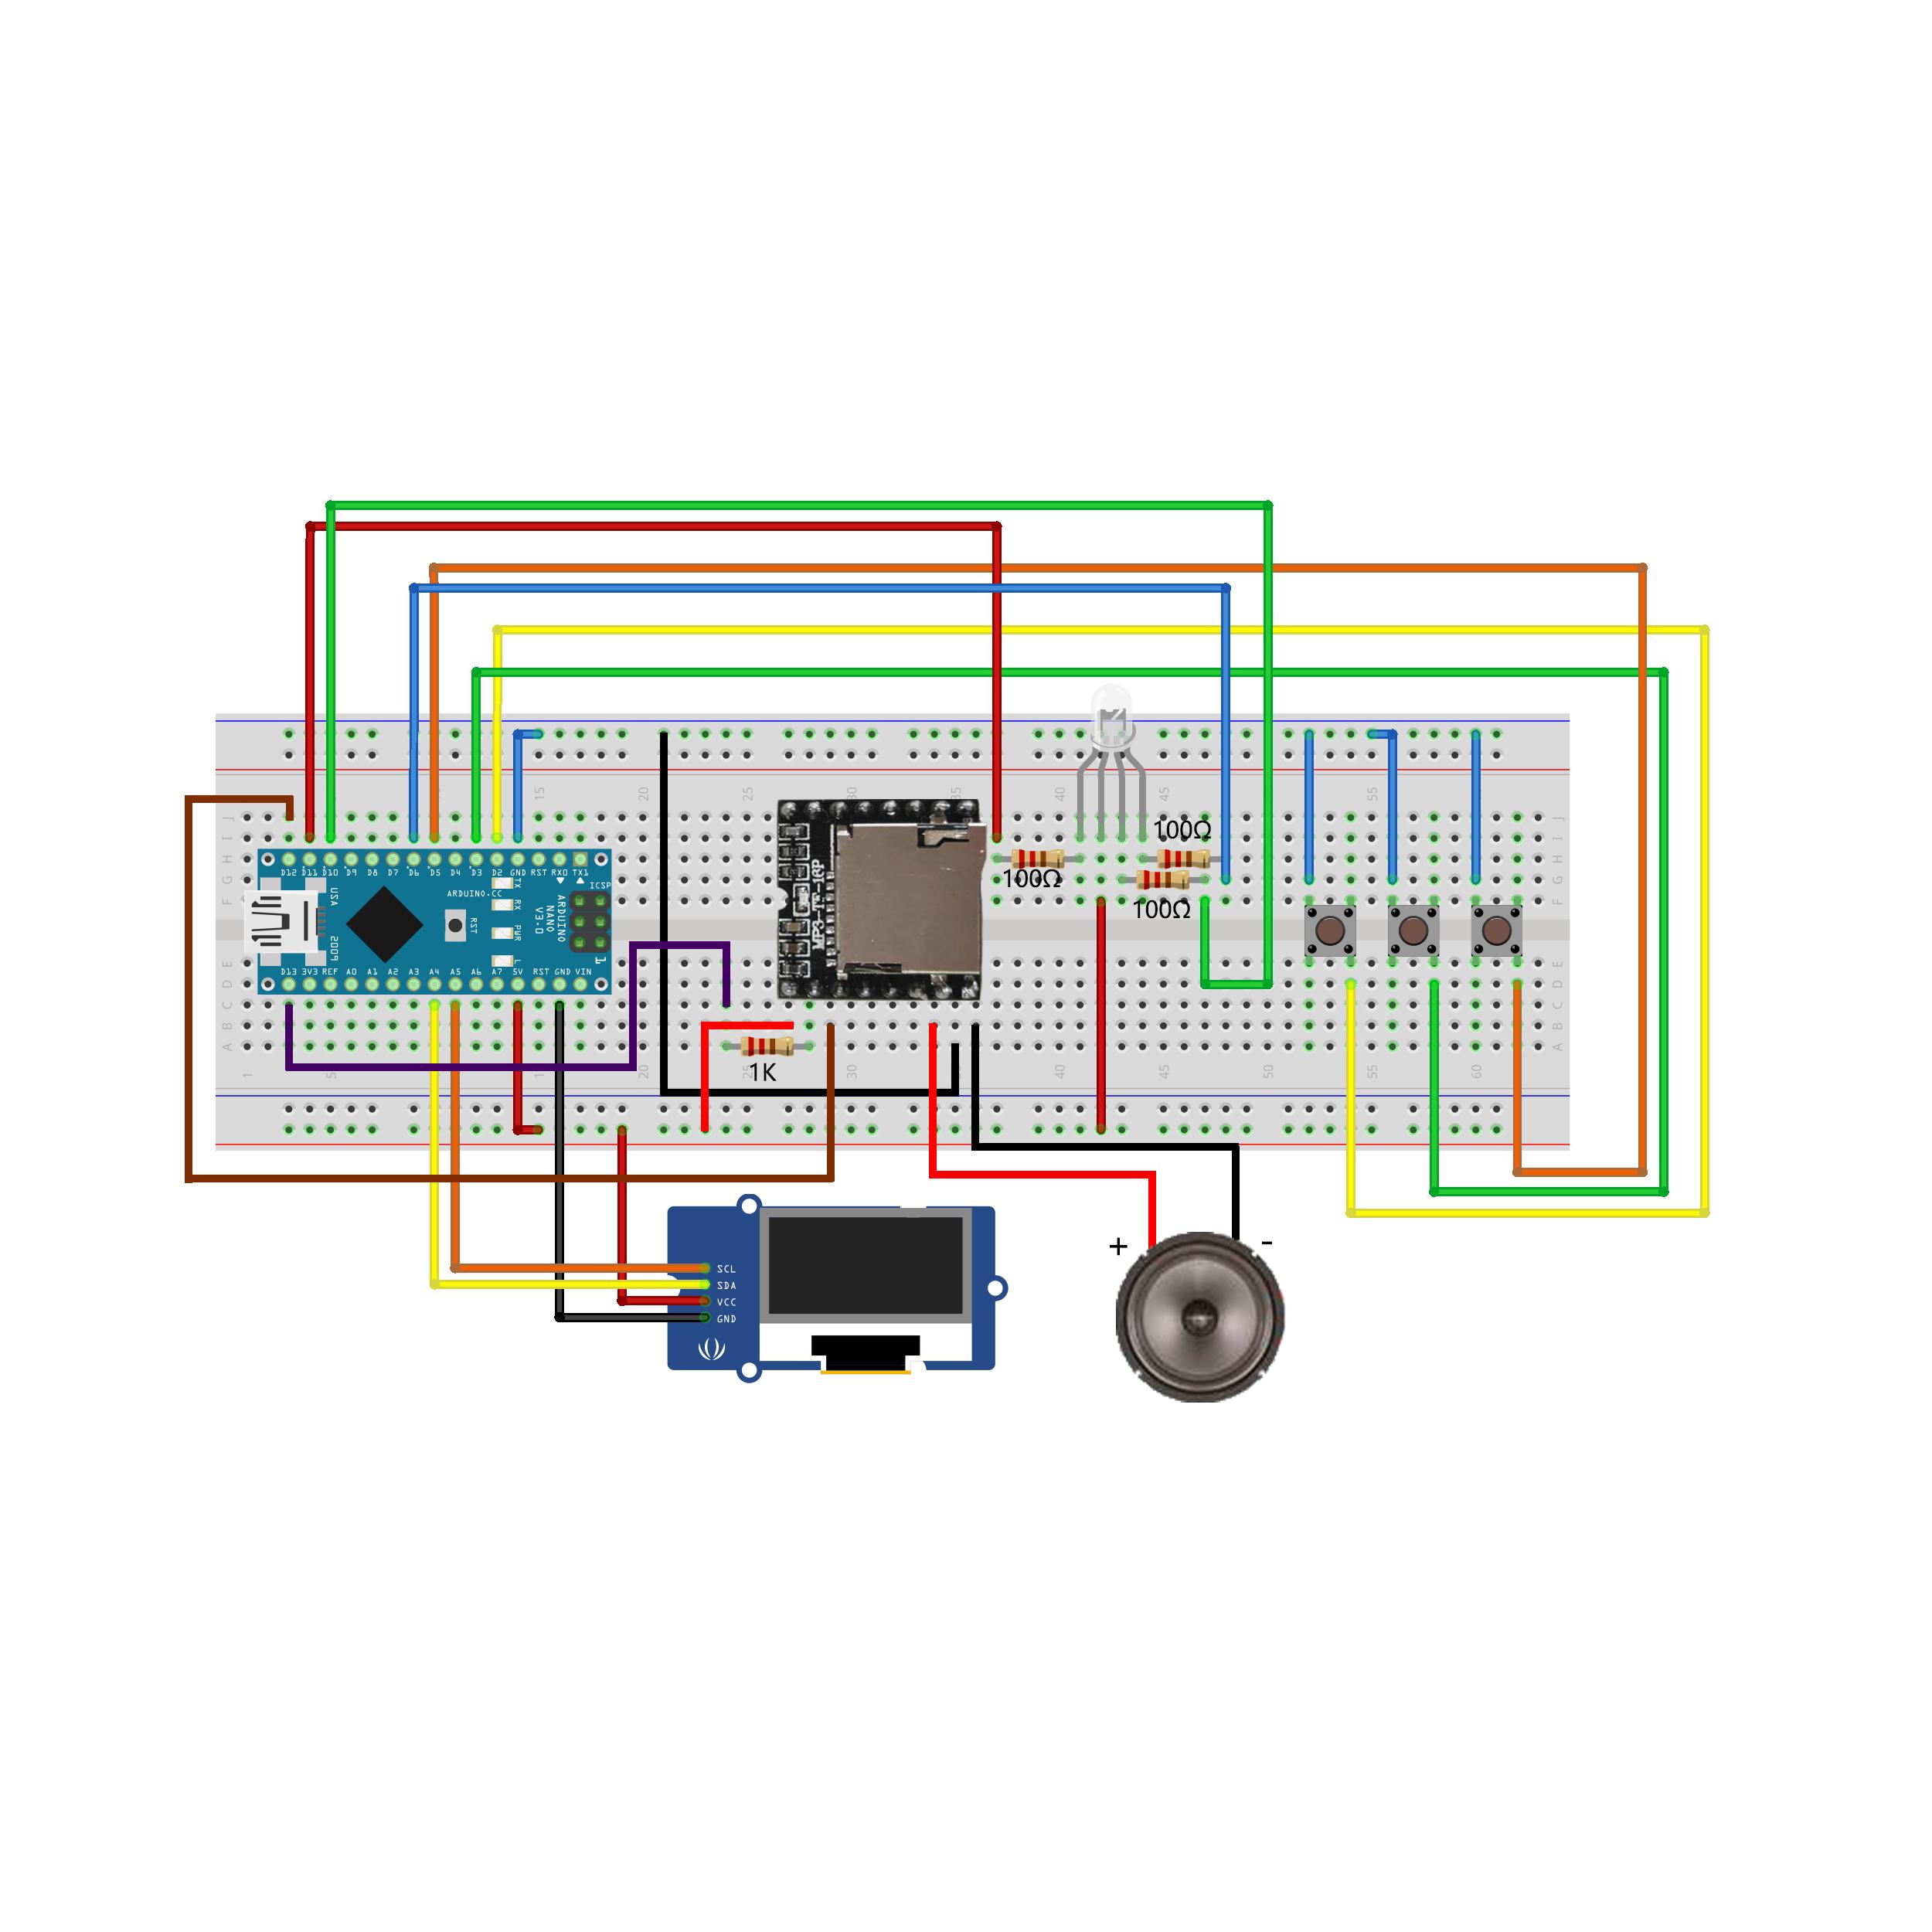
► Code in GitHub (scheme and sketch): https://github.com/DKARDU/mp3
Download Library
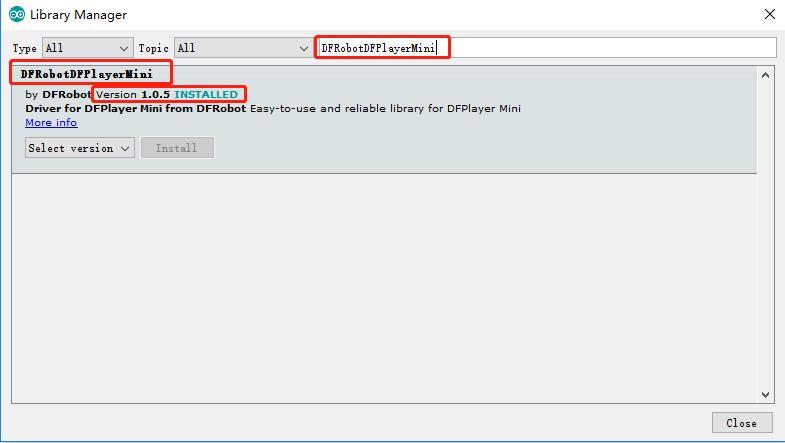
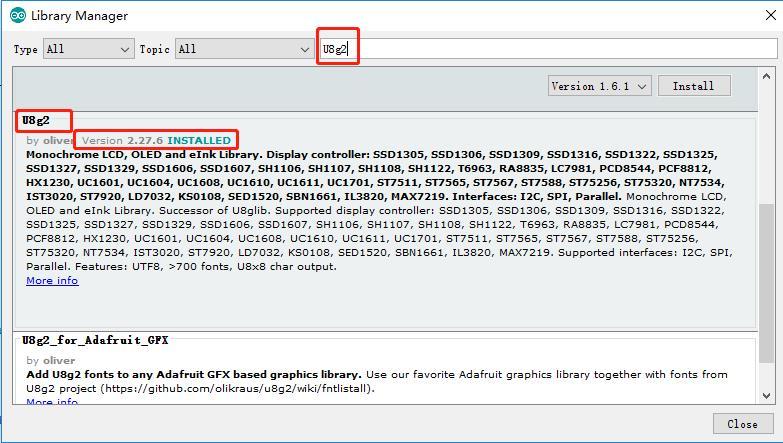
1. Install Library file: Open "Tools"-"Library Manager" in the Arduino development software, then search for “DFRobotDFPlayerMini” and ”U8g2”, and then install them.
Compile and Upload


1. Select the development board as Arduino Nano, this is choose the right.

2. Select the processor as ATmega328P(Old Bootloader), this is to choose the right.

3. Then select the port, this port should be the same as what you see in the device manager, so that you can burn the code into the development board.