How to Make a Low Poly Image (with Gimp)
by ranwithjesus in Design > Digital Graphics
21827 Views, 23 Favorites, 0 Comments
How to Make a Low Poly Image (with Gimp)

Ok, this Instructable is a step-by-step tutorial how to make a low-poly image using the program Gimp. Gimp is a free photoshop program for the Mac. This is easier than it looks, even for beginners. If you've only used Gimp once or twice, I'll be trying to make things as simple as possible. Good luck, and have fun!
Choose Your Image
For the purposes of this Instructable, I'm going to cut out the main subject, and make the background a solid color. Doing so makes it less confusing to the viewer, and brings the attention to the subject.
You should choose a reletively high-quality photo (if you can see the individual pixels, that's not usually a good thing). Making sure your subject has multiple colors, or shades of colors, is important, which you'll see why later on. You'll also want a pretty large subject (don't choose a person standing at the edge of the frame in the distance, for example). Faces turn out extremely cool looking with this edit, so that's what I'm going to use.
You should choose a reletively high-quality photo (if you can see the individual pixels, that's not usually a good thing). Making sure your subject has multiple colors, or shades of colors, is important, which you'll see why later on. You'll also want a pretty large subject (don't choose a person standing at the edge of the frame in the distance, for example). Faces turn out extremely cool looking with this edit, so that's what I'm going to use.
Open Your Image in Gimp
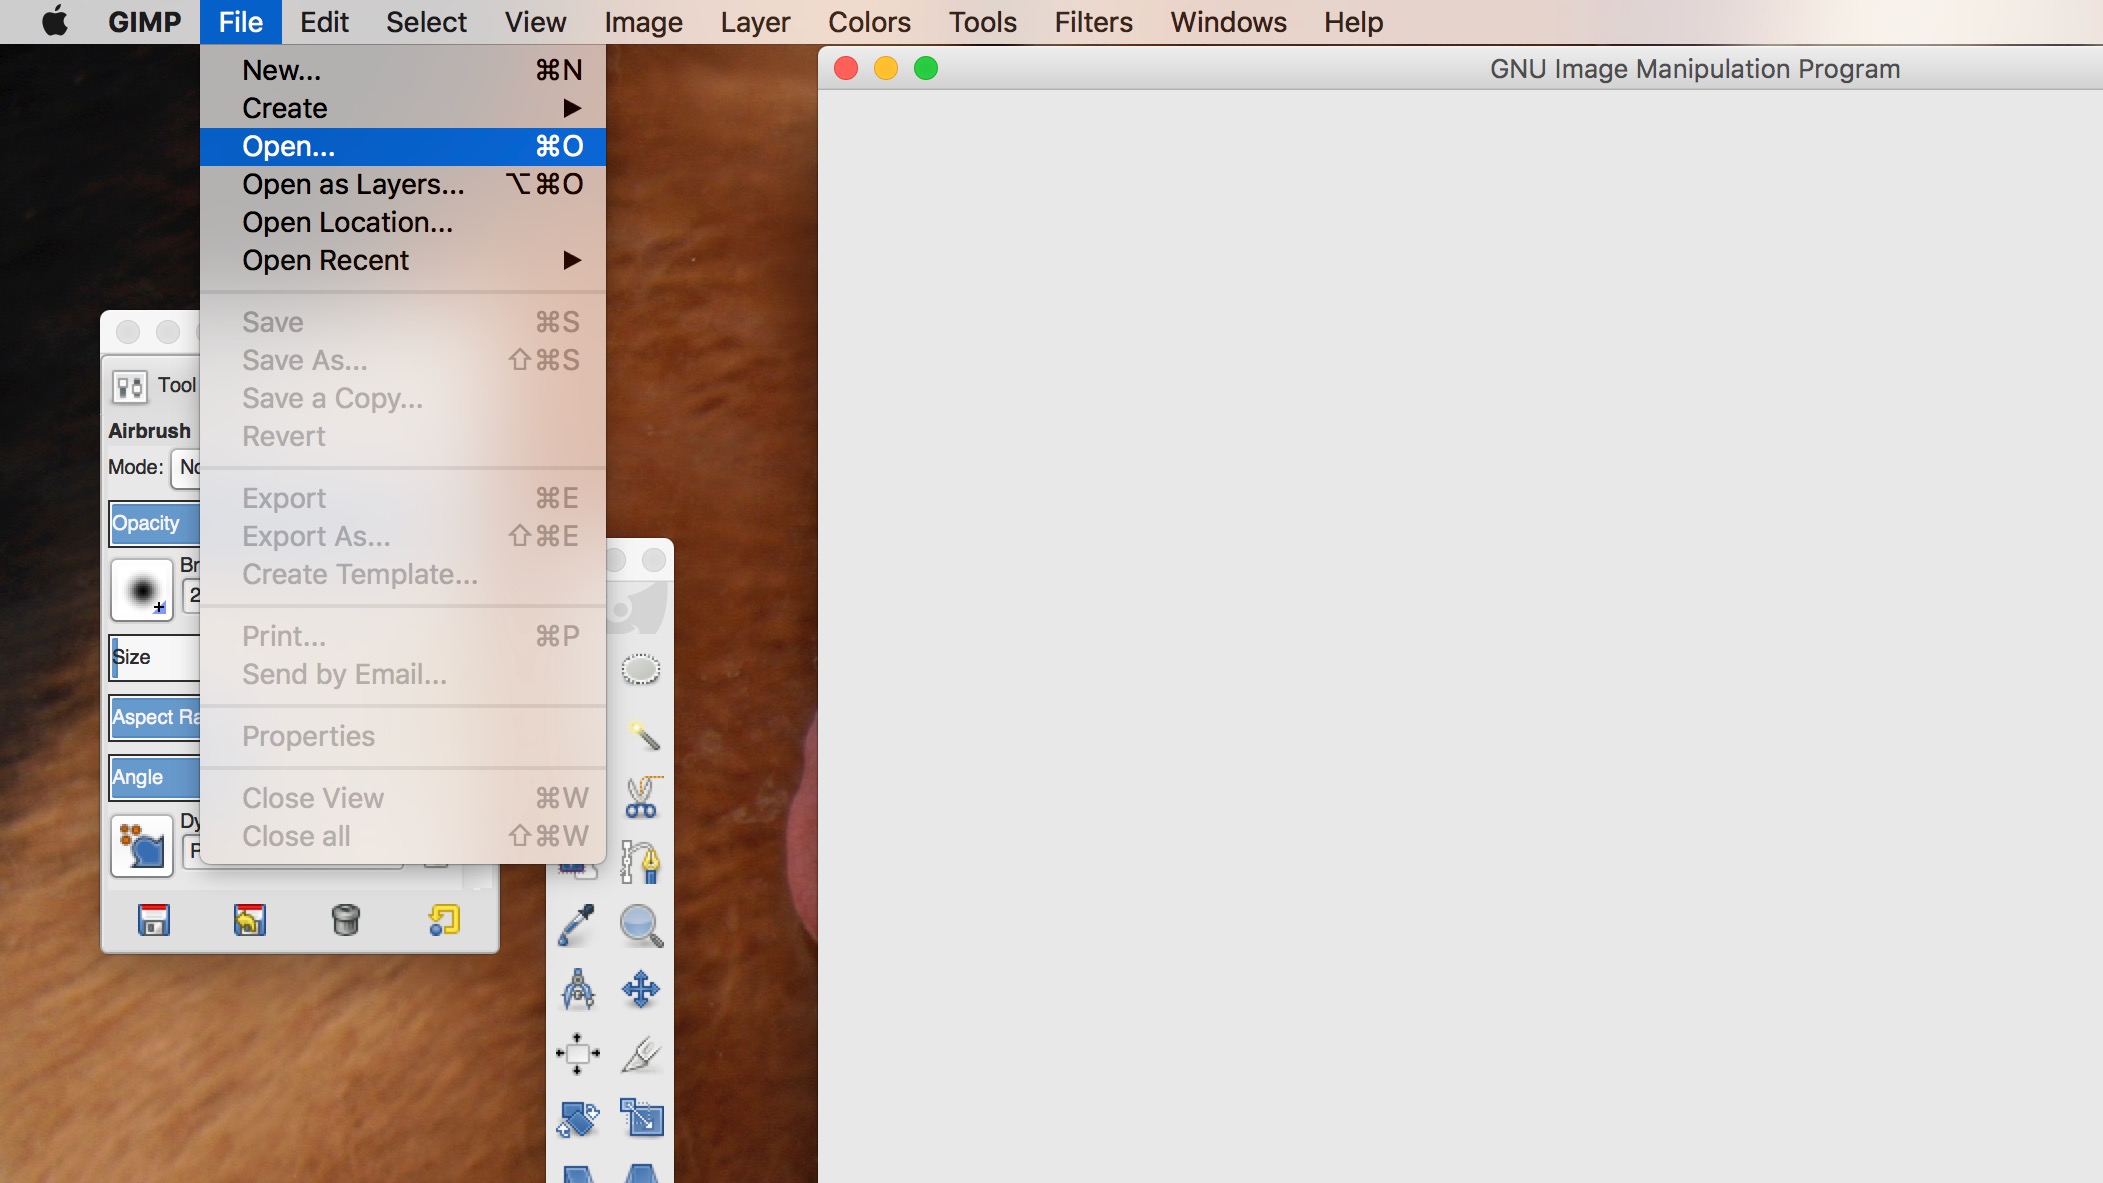
Ok, for you experts out there, I'm sorry if this Instructable is a little boring, but in case people don't know how to do it I'll just put this in there.
Open the application, then go in the top left corner, select "File" then "Open". A box will pop up, now you can select your photo.
Open the application, then go in the top left corner, select "File" then "Open". A box will pop up, now you can select your photo.
The Tools
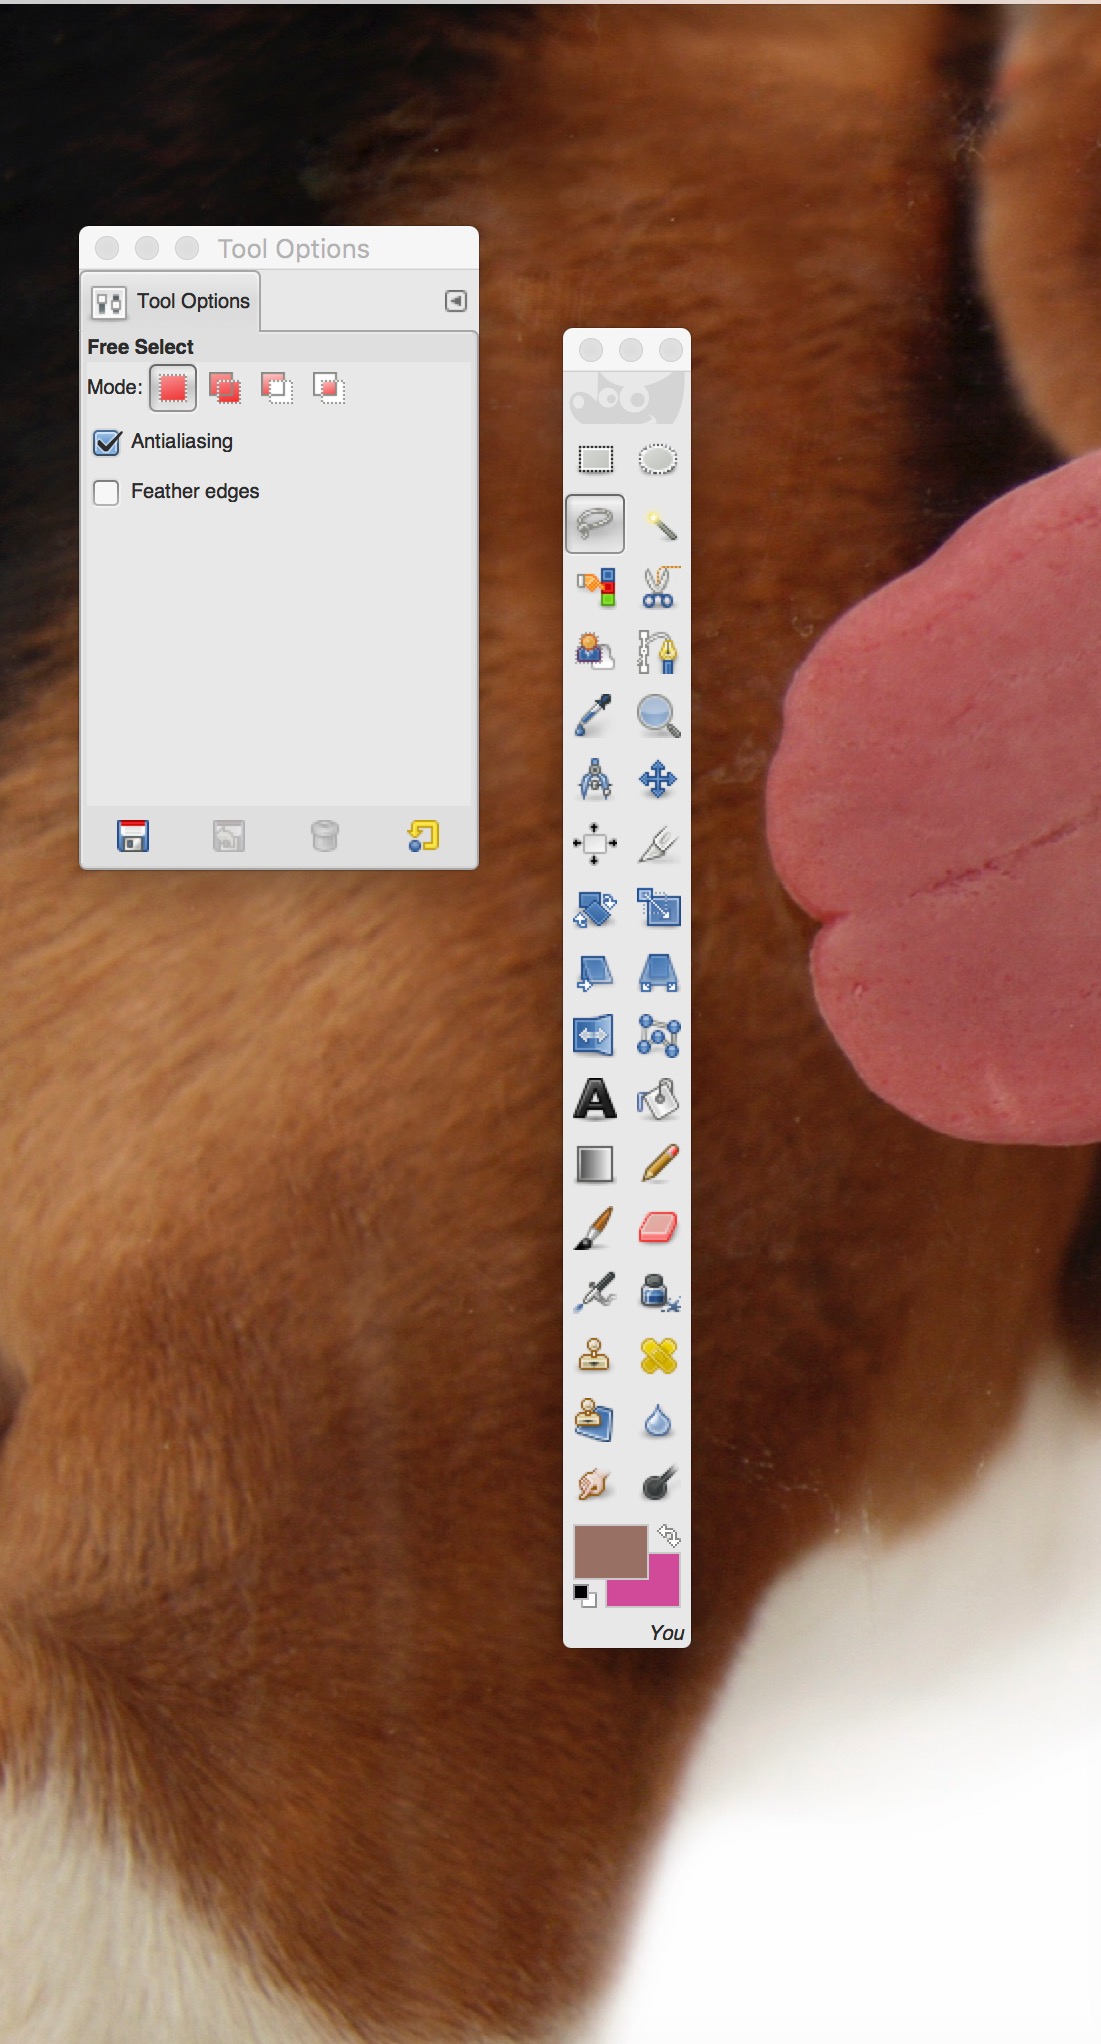
The main tools we will be using will be the lasso tool and the eye dropper tool. I don't know if that's actually what they're called but that's what we'll be calling them in this Instructable. We will also be using a few keyboard shortcuts.
Lasso It!
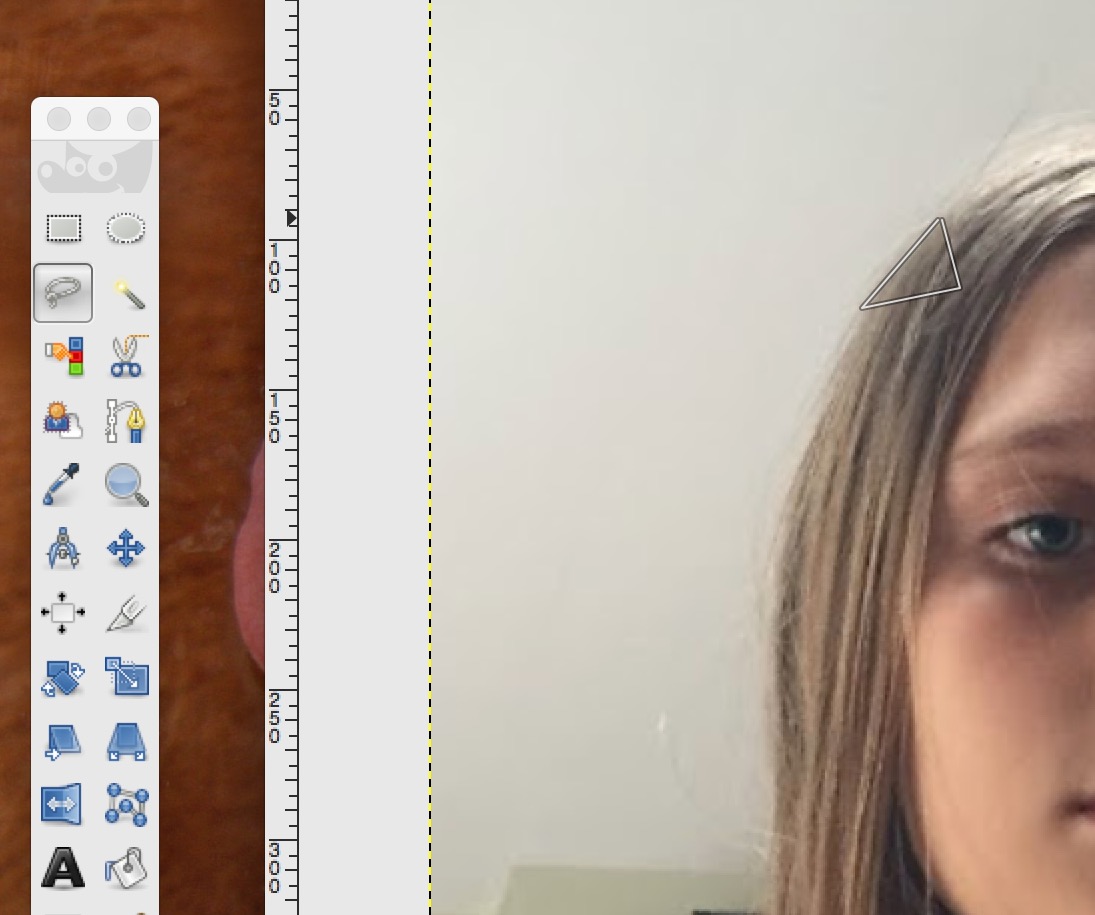
Use the lasso tool to "lasso" a little triangle.
Select Your Color
Use the eyedropper tool to select the main color in the area that you just selected with the lasso. This now becomes the foreground color.
Fill It With the Color
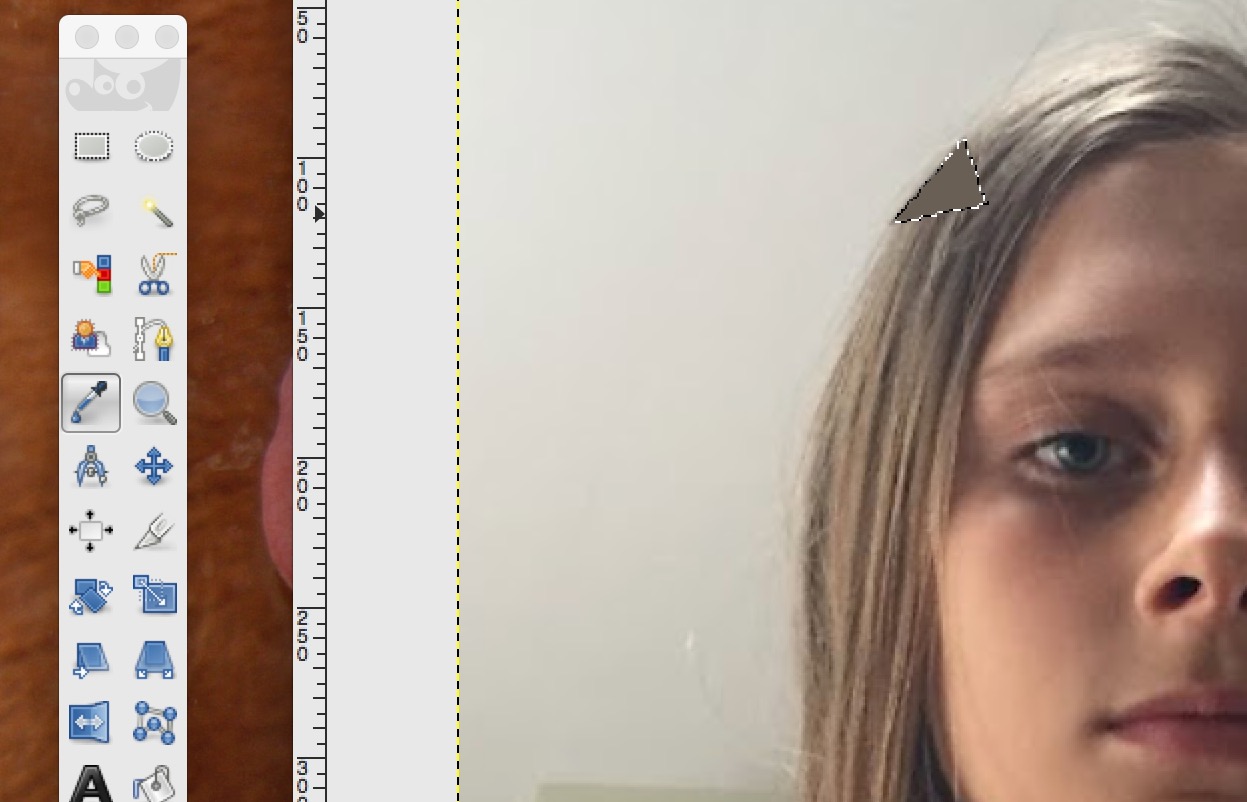
Use the keyboard shortcut ("command" and ",") to fill that little triangle with the color you just selected. What you're actually doing is filling the area with the foreground color (which is what you just selected using the eyedropper tool), which you can also do under the edit tab.
Repeat!
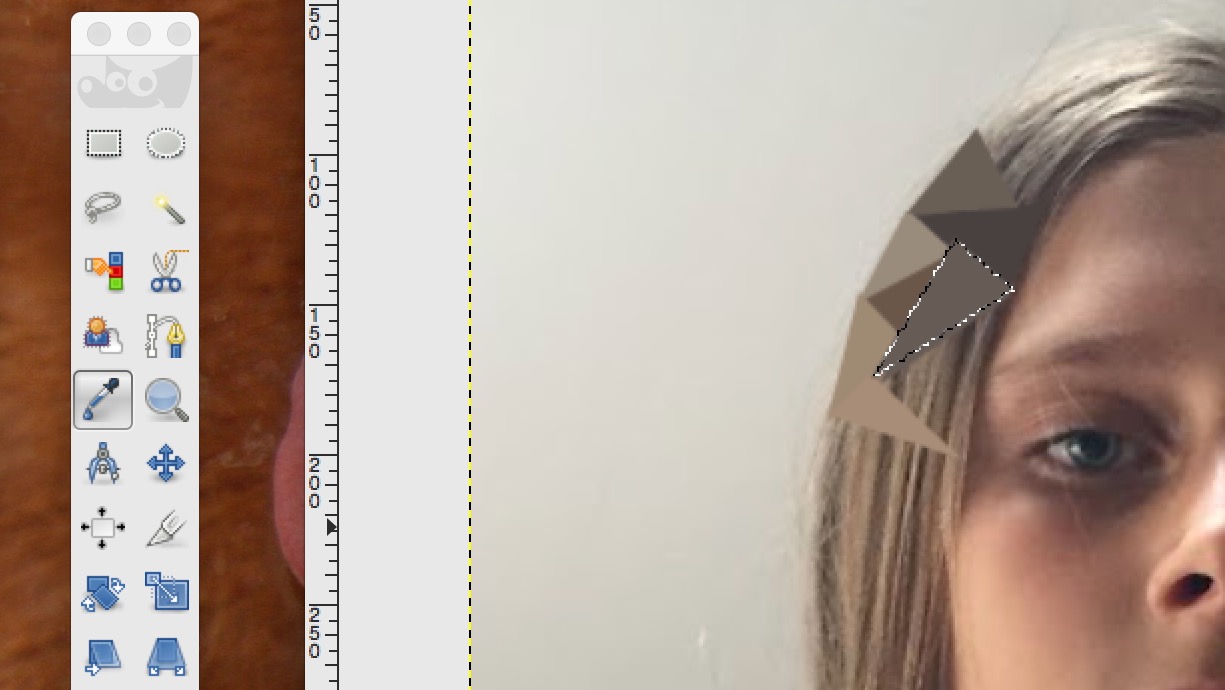
You just need to repeat steps 5 and 6 until your entire subject is filled in. Try to make the triangles next to each other slightly different colors, so you can tell they're separate. This takes practice, so believe it or not, your triangles will get better as you do more of them.
Cut Out the Whole Image (Pt. 1)
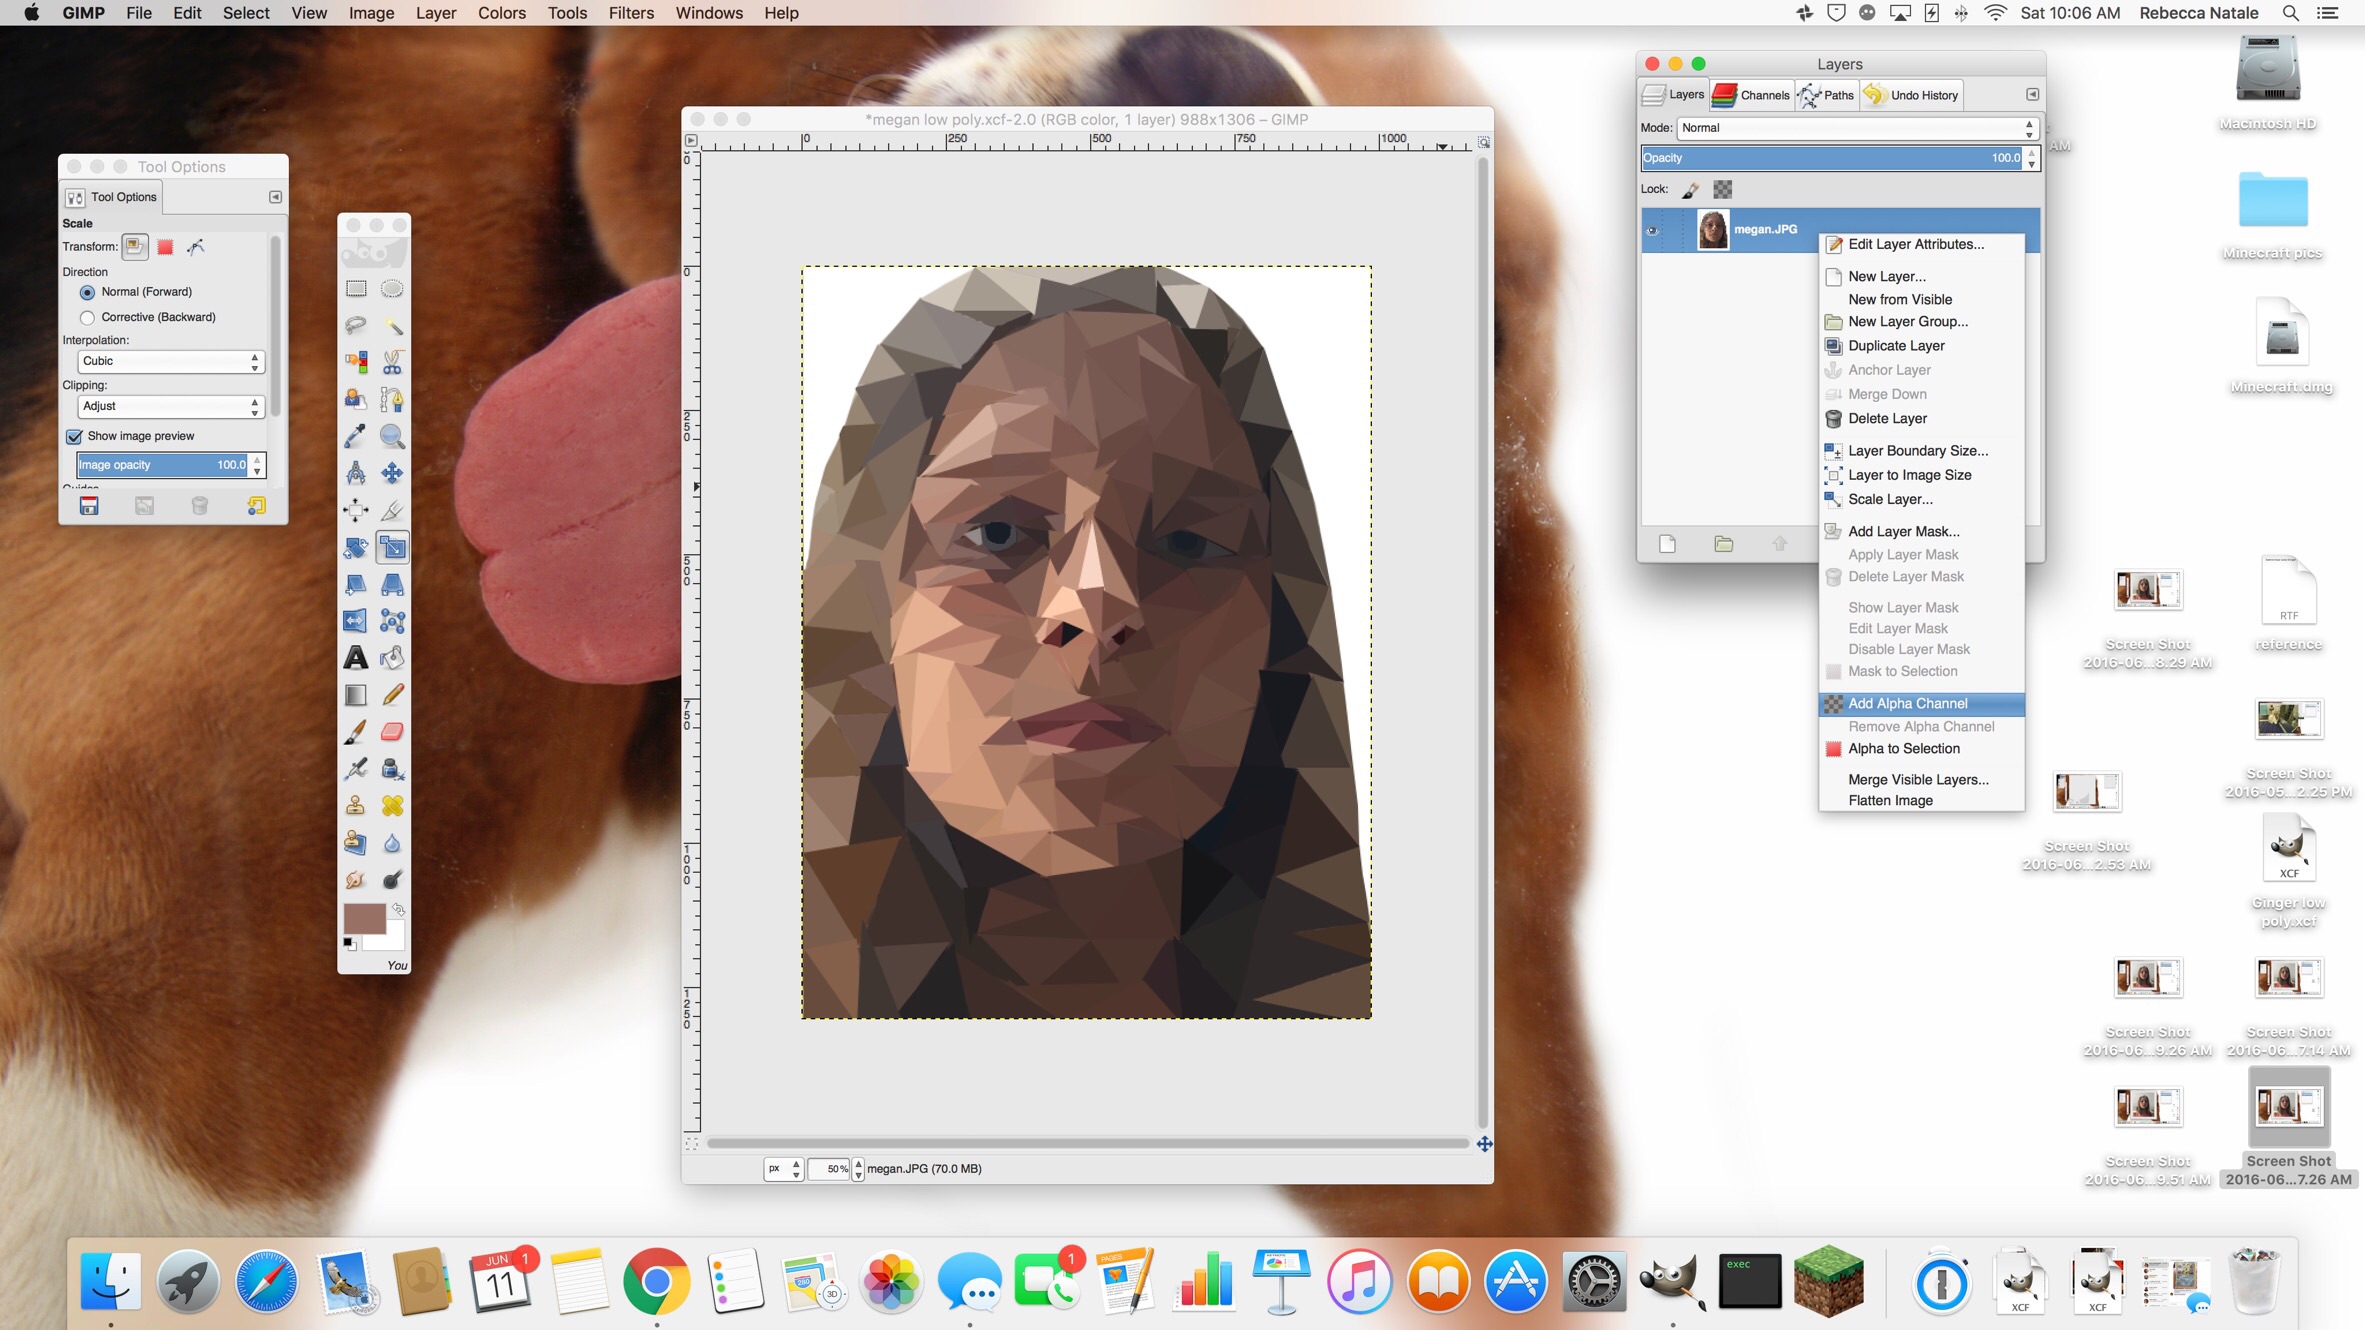
Finally done with your triangles? Well, you're not done yet! Just a few more steps. To cut out the image you just made, right click on the image's little bar in the box on the right hand side. That doesn't make sense but I don't know what it's called, so whatever. Just look at the picture. Click "Add Alpha Channel". If it somehow already has one added, great. This adds a layer of translucency to the image.
Cut Out the Whole Image (Pt. 2)
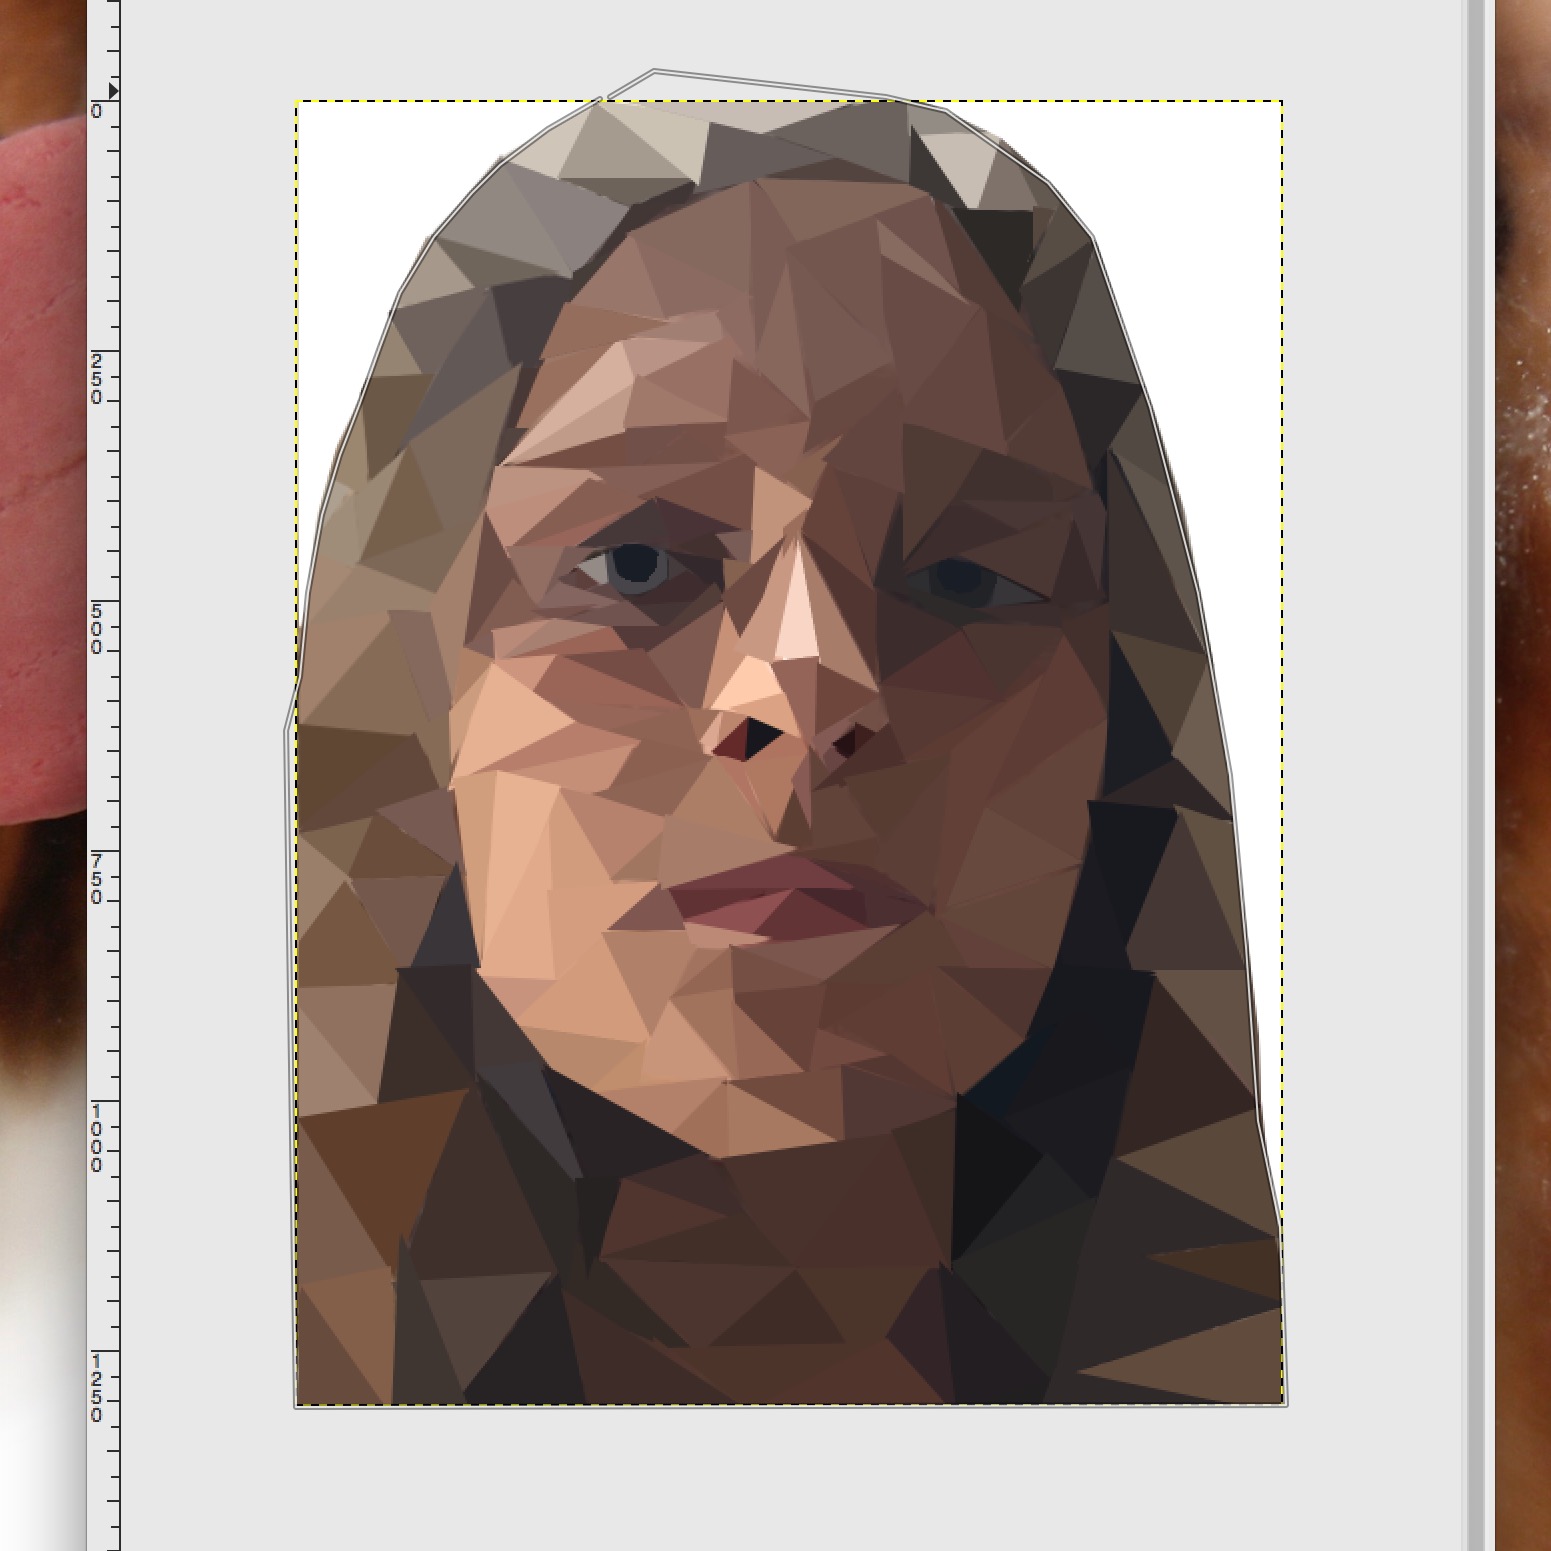
Now take your lasso tool, and carefully select the outside of the entire image.
Cut Out the Whole Image (Pt. 3)
Now you need to go into the "Select" option in the top right hand corner, and choose "Invert".
Actually Cut It Out
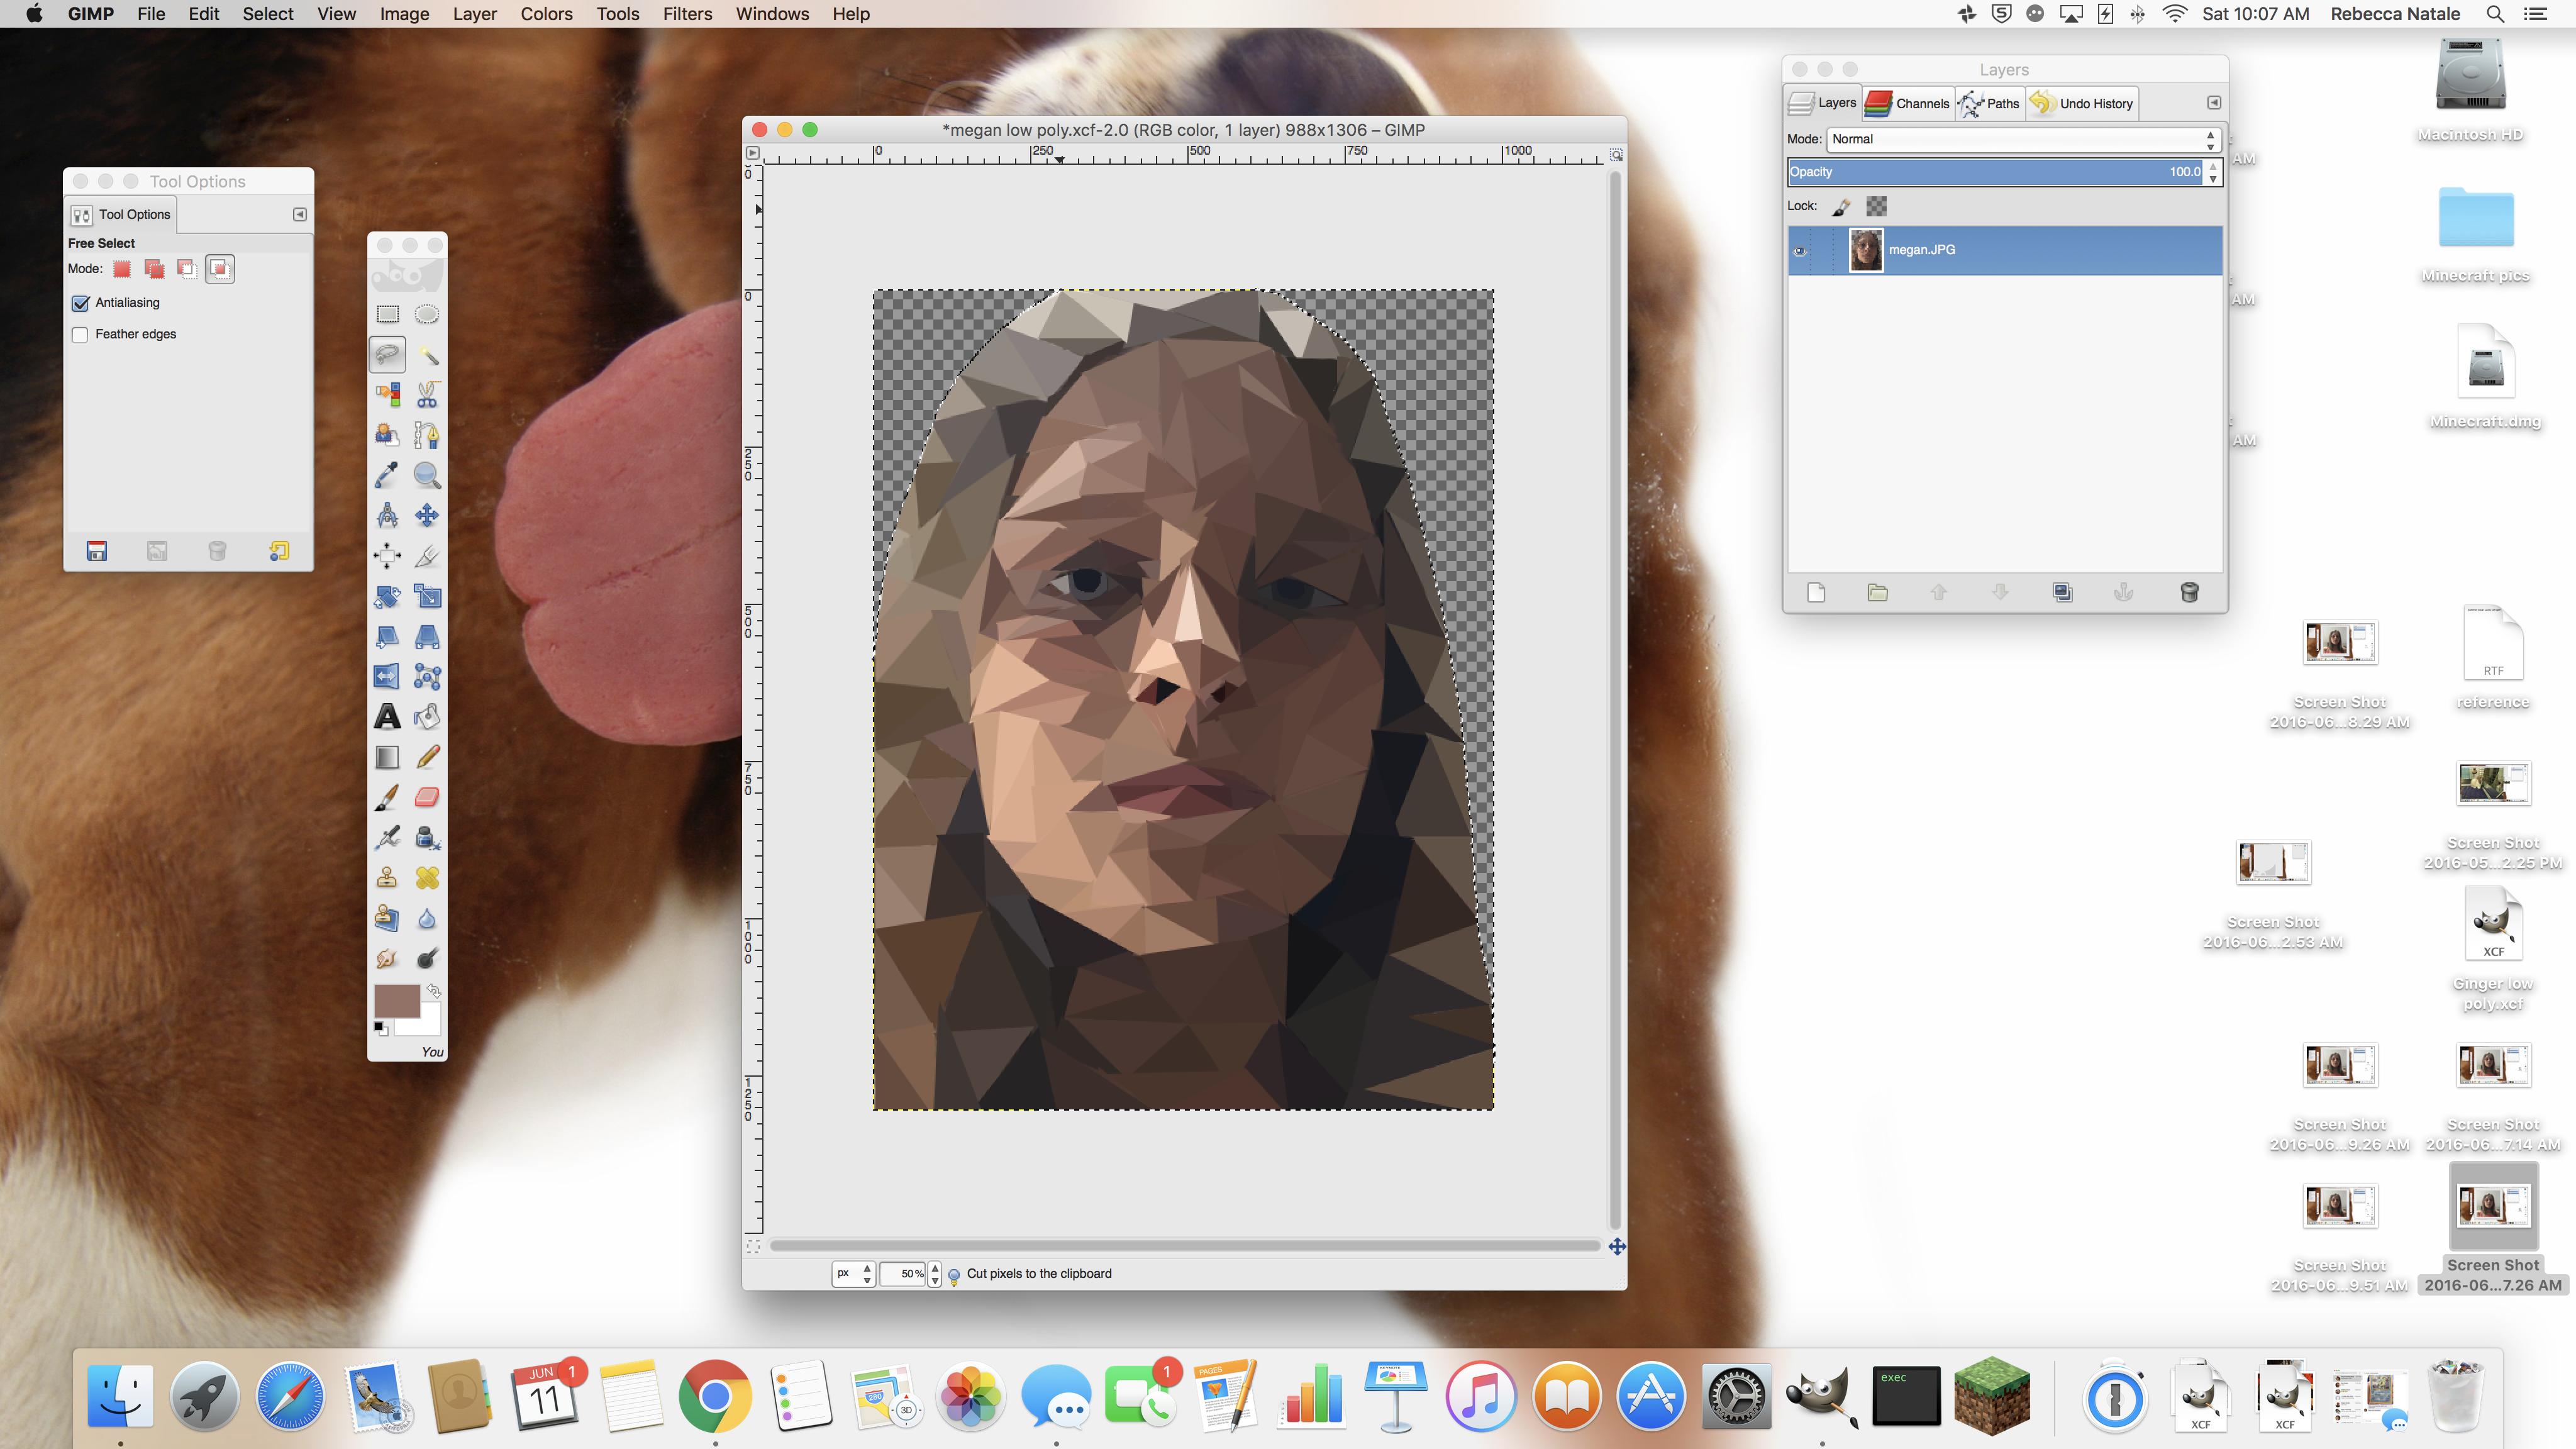
Now use the keyboard shortcut ("command" and "x") this will cut out the area around your image, leaving just your subject.
Make Your Background!
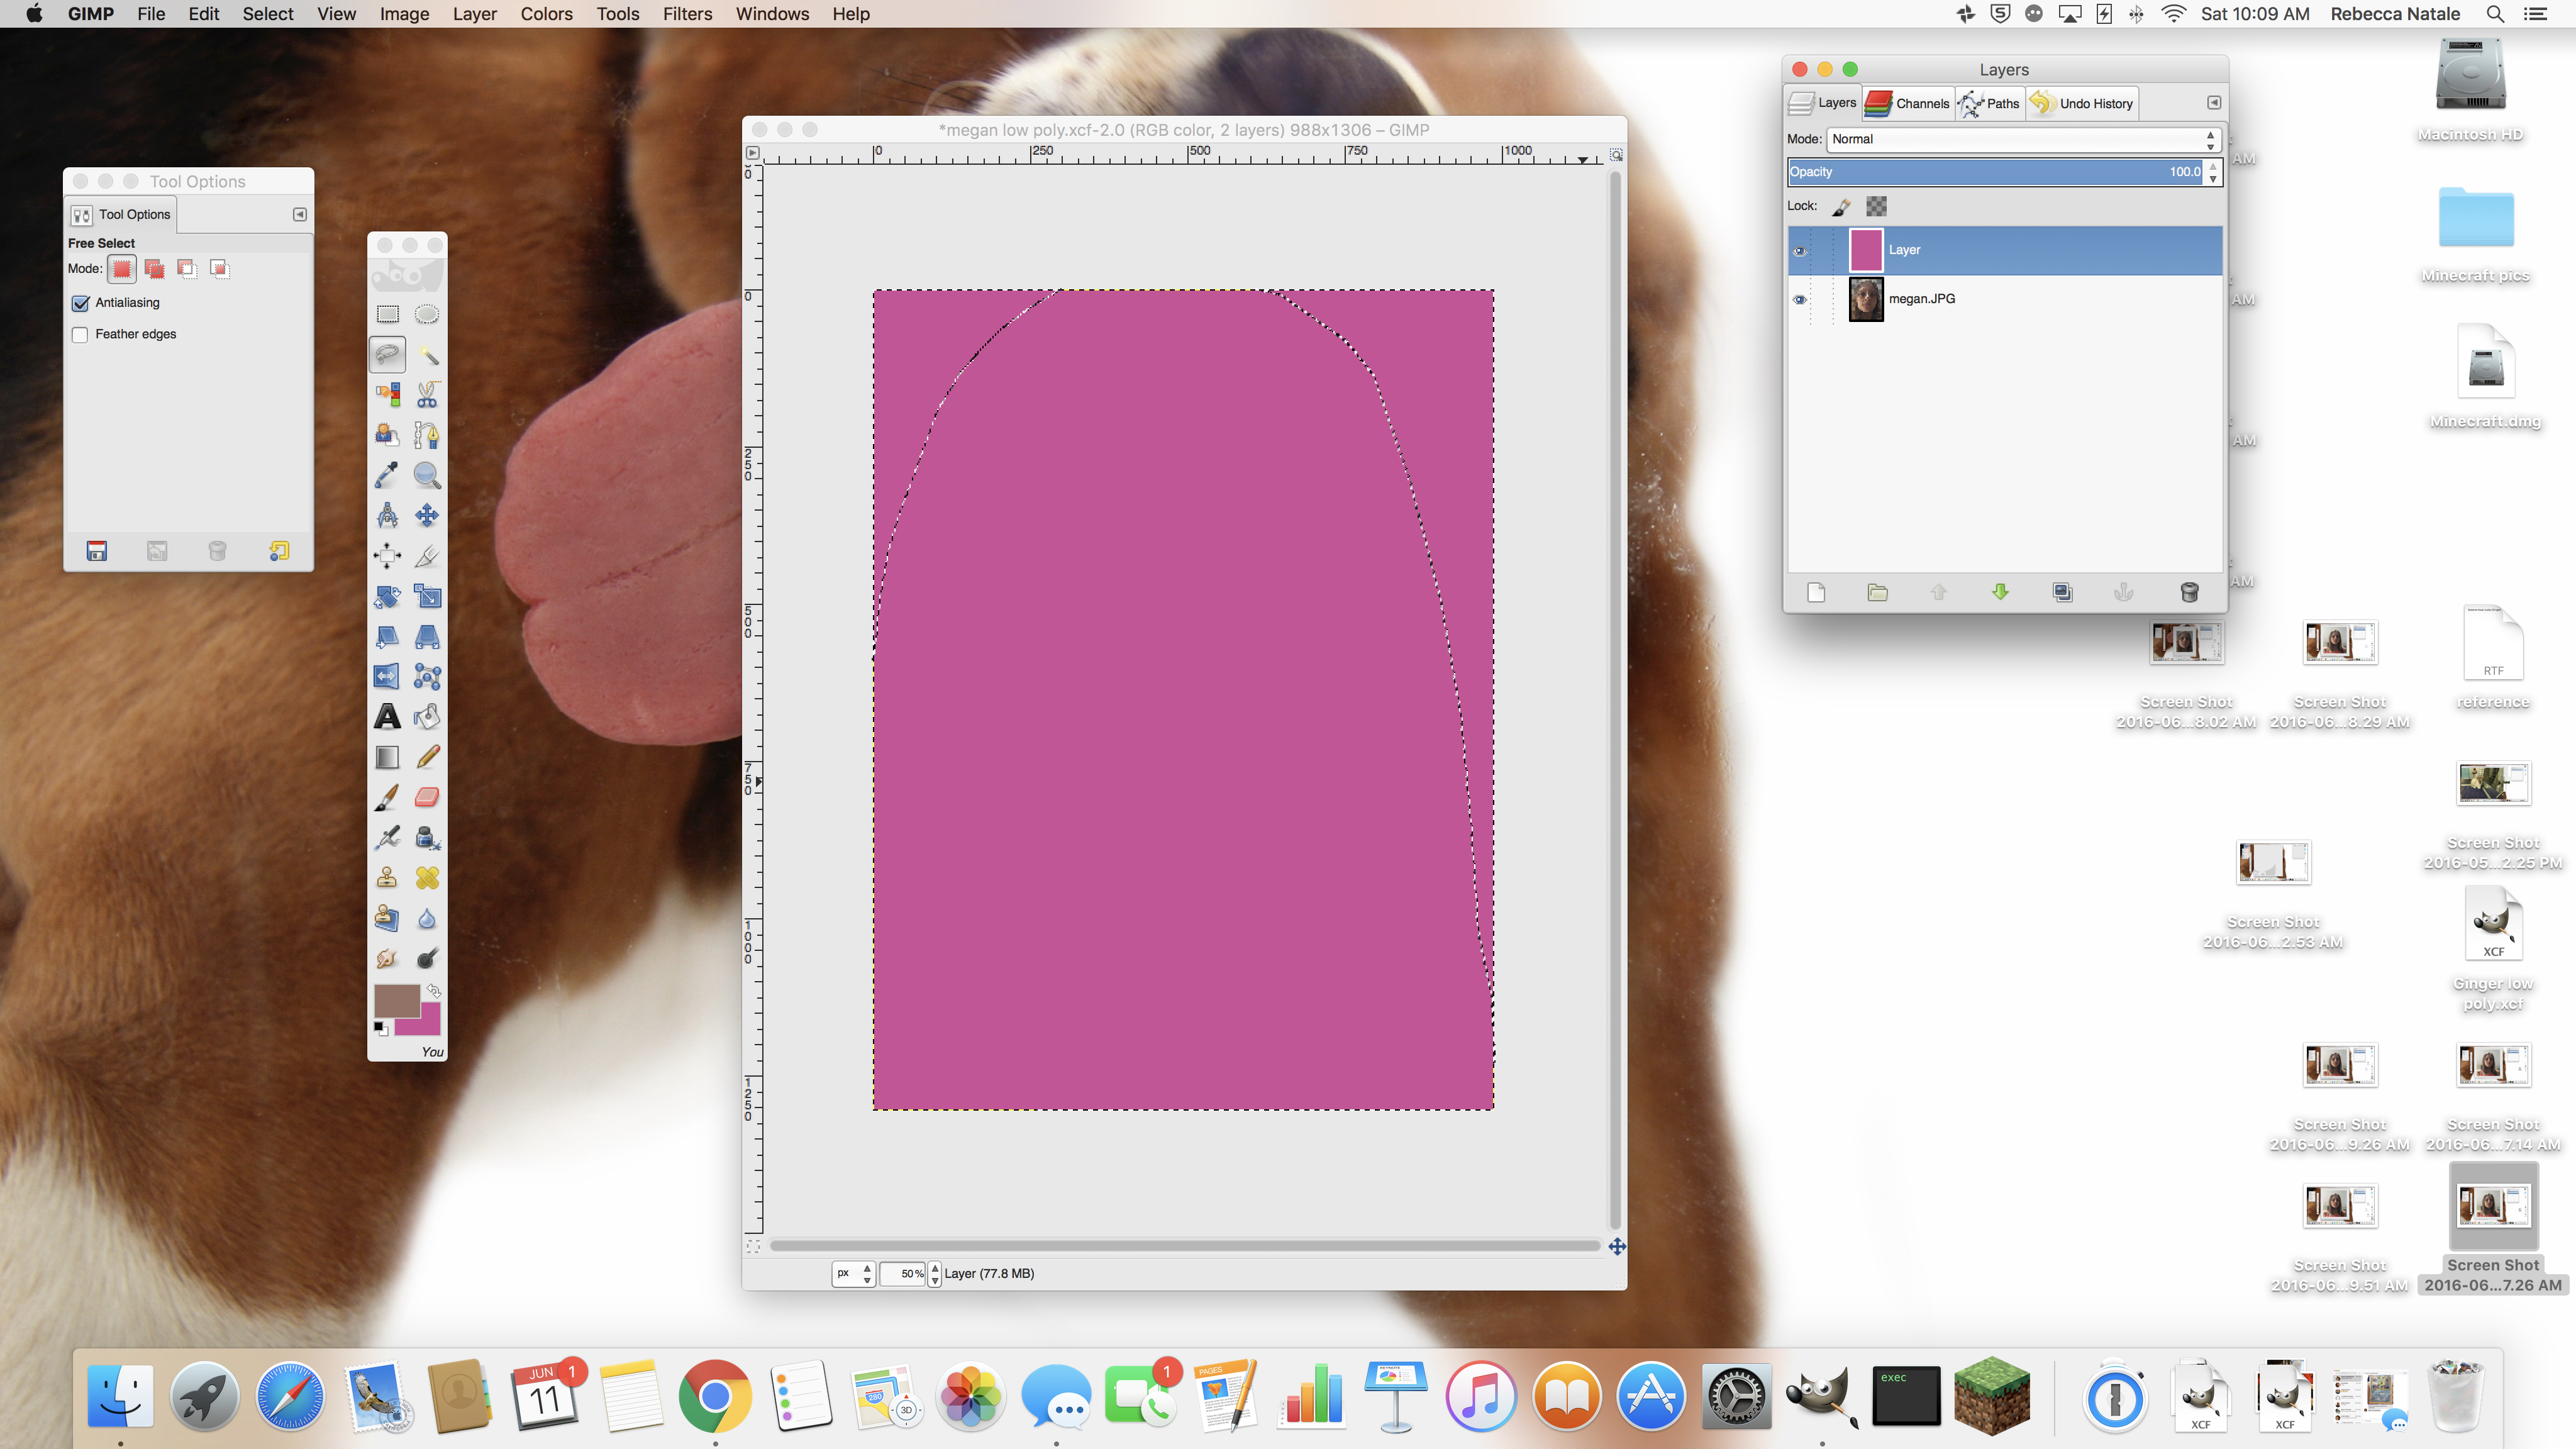
Fun part: making the background! First, choose your background color. Look down at the bottom of the toolbox (the thing on the left). You will see whatever color you last used. Click the color UNDER it (which should be black or white) and choose the color you want for the background. You'll need to add a layer in the box on the right hand side, click that little folder. Then choose "background color" under the "Layer Fill Type" section and click ok.
Put It in the Back
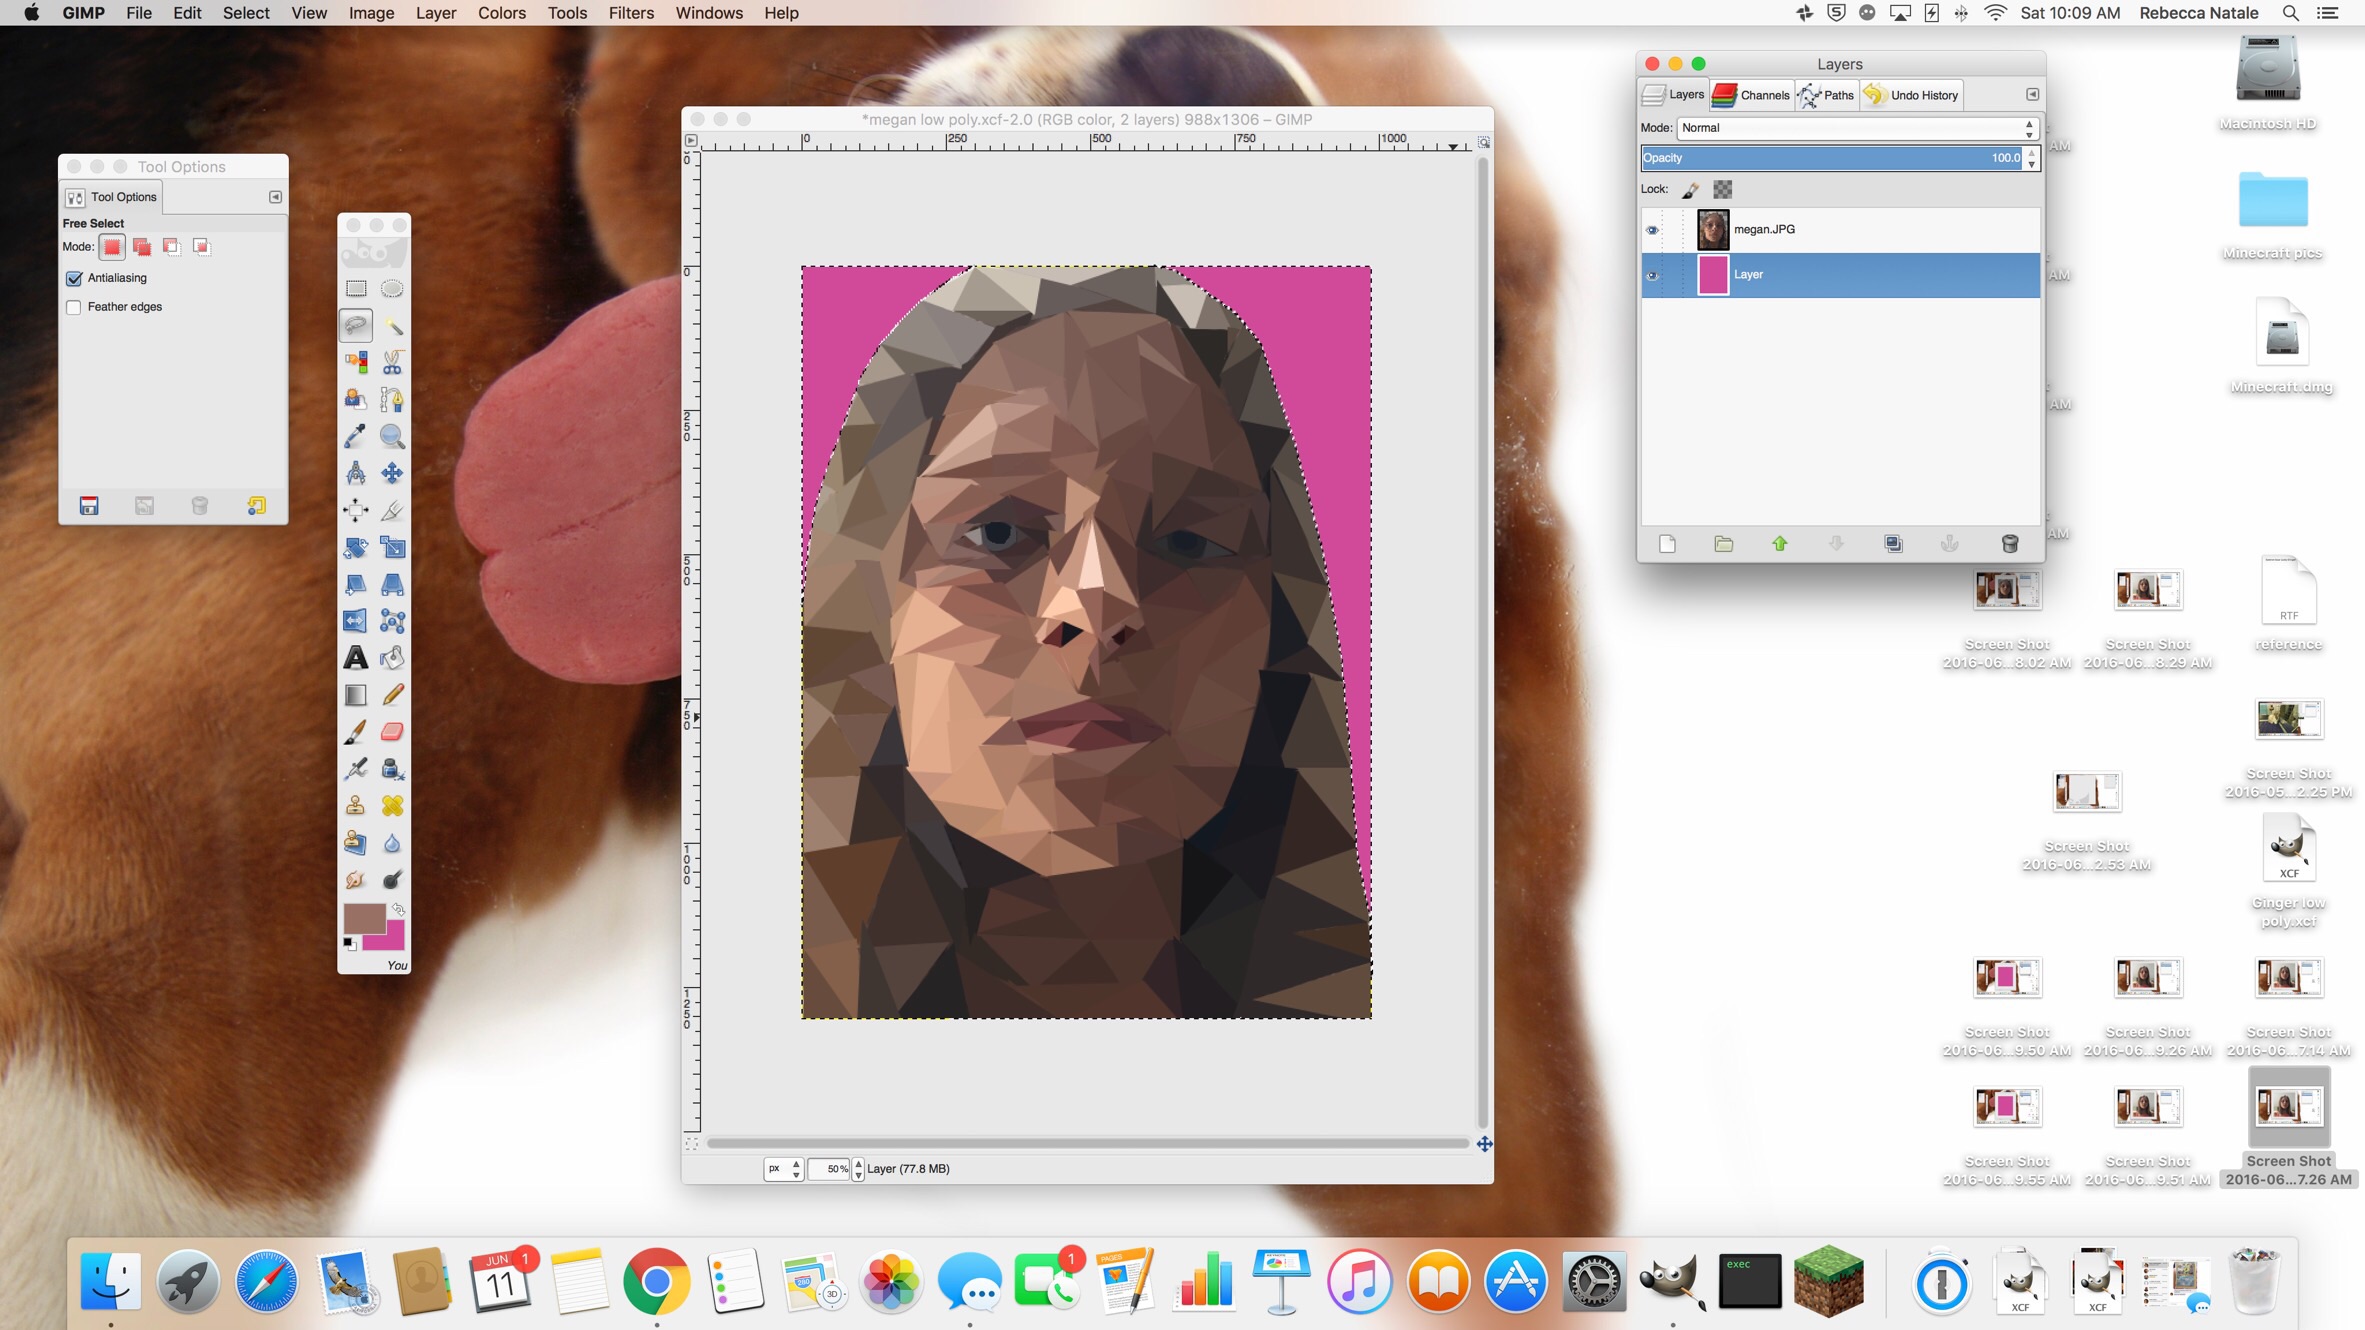
Click and drag it behind your main image.
Save It!
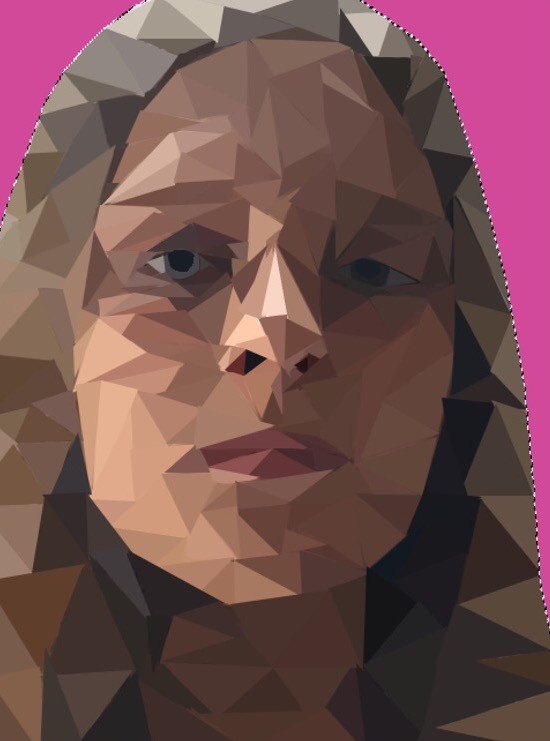
You're done! You made a really cool low-poly image! Good job! Make sure you save your image (you don't want to lose all that hard work). Thanks for reading, I hope you enjoyed it!