How to Make a Keys Accessory on TinkerCAD
by 823758 in Design > 3D Design
59 Views, 0 Favorites, 0 Comments
How to Make a Keys Accessory on TinkerCAD
I Reem Elguhiem I'm going to be demonstrating to the people on this app how to make a accessory to put with your keys with the help of the app TinkerCAD. The problem that we solving is peoples boring keychains to make them a little more fun with the accessory that we're making.
Supplies
All the tool you need is a computer because you can work better on it since the screen going to be big, that's why I don't advice you to use a phone since it's going to be a struggle.
And the only material that you need is TinkerCad.
What's fun about this is you can make anything with TinkerCad and make it into reality.
The First Needed Steps
1- Get a computer.
2- Log in.
3- Open the app TinkerCad and login.
First Shape
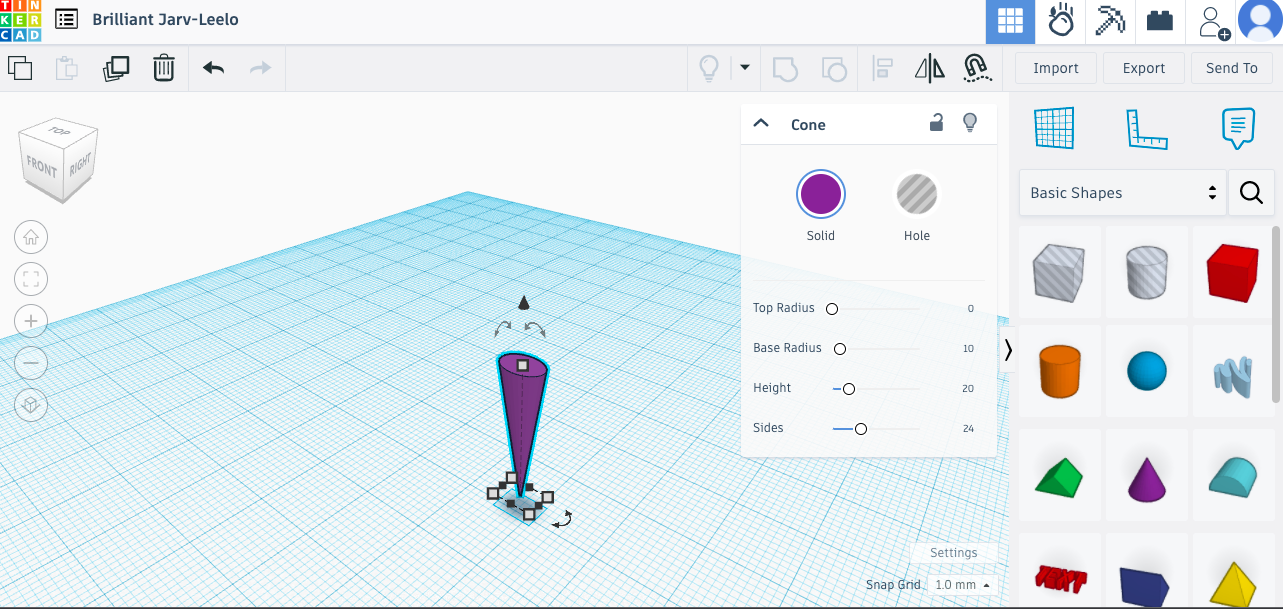
1- Grab a cone shape to the middle
2- Make the base radius 10
3- Make the height 20
4- And the sides 24
5- Make it any color you want.
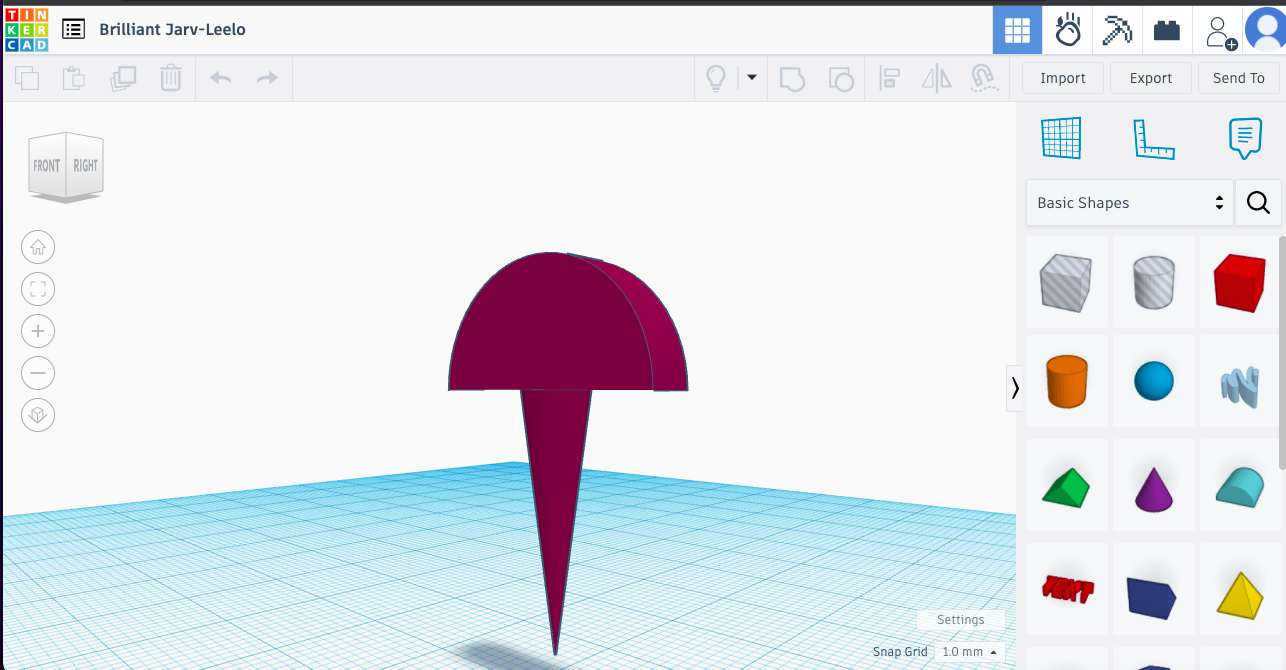
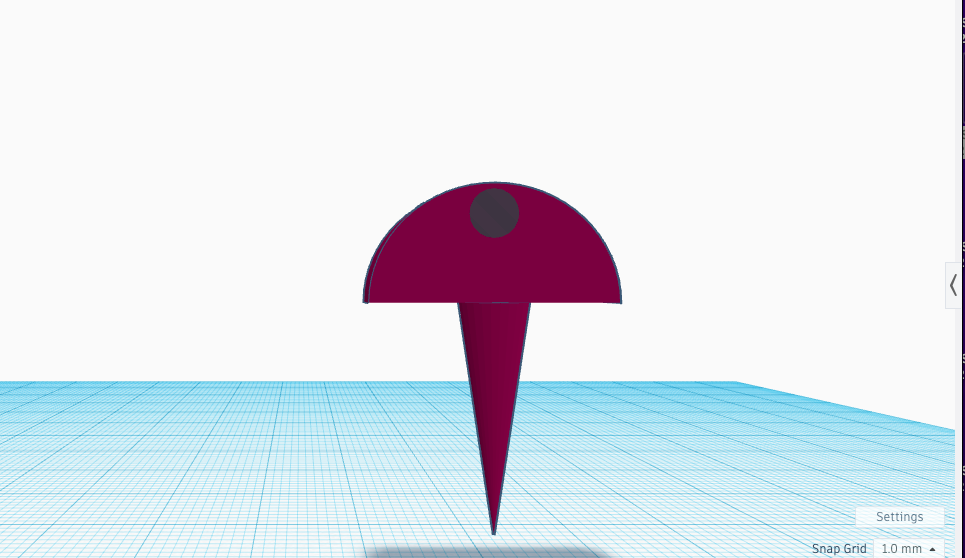
1- Grab a Round Roof shape
2- Change the shape size of to the same size of the cone.
3- Put it on top of the cone.
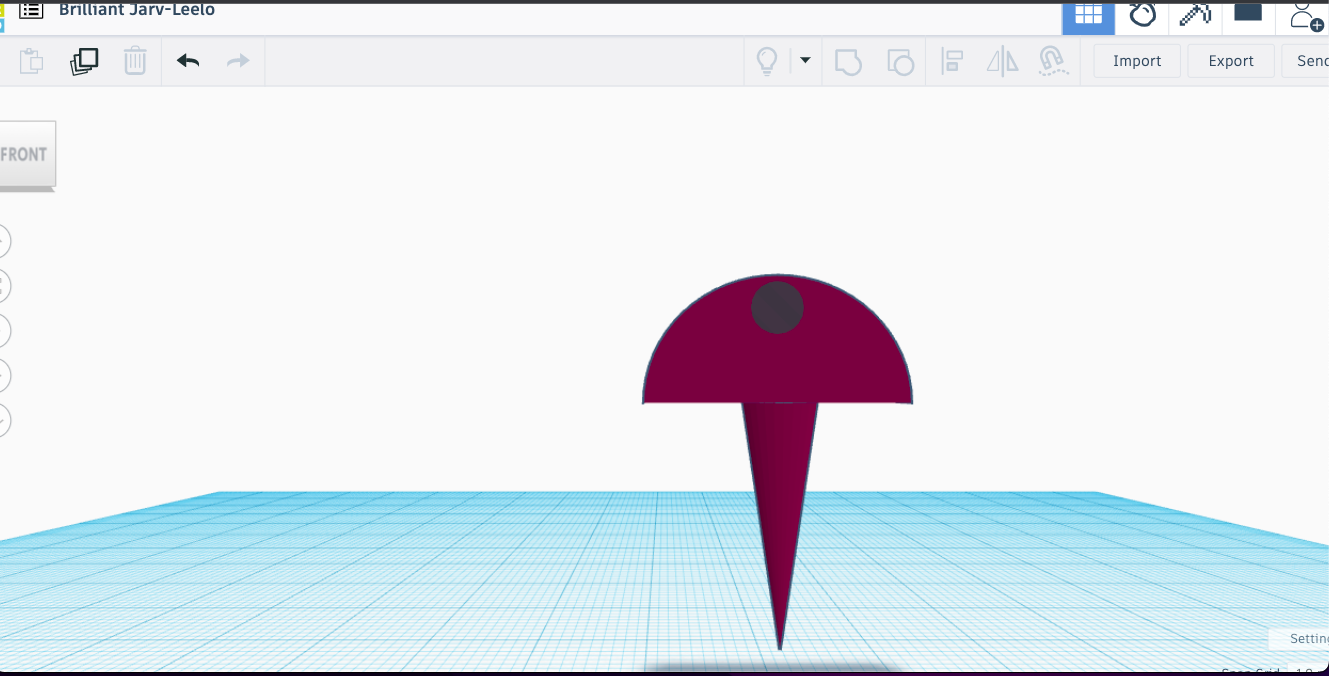
1-Grab a circle shape and make it the same size length and wide of the Round Roof shape.
2- Put it inside the round roof shape.
3- Make it a hole. (there's a button that said "Hole" on the left when you click the shape).
- That's how you have a hole you can put the Key Accessory with the keys of your car or house, etc.