How to Make a Dorm Toothbrush Stand
by JustinB326 in Workshop > 3D Printing
534 Views, 1 Favorites, 0 Comments
How to Make a Dorm Toothbrush Stand
.jpg)
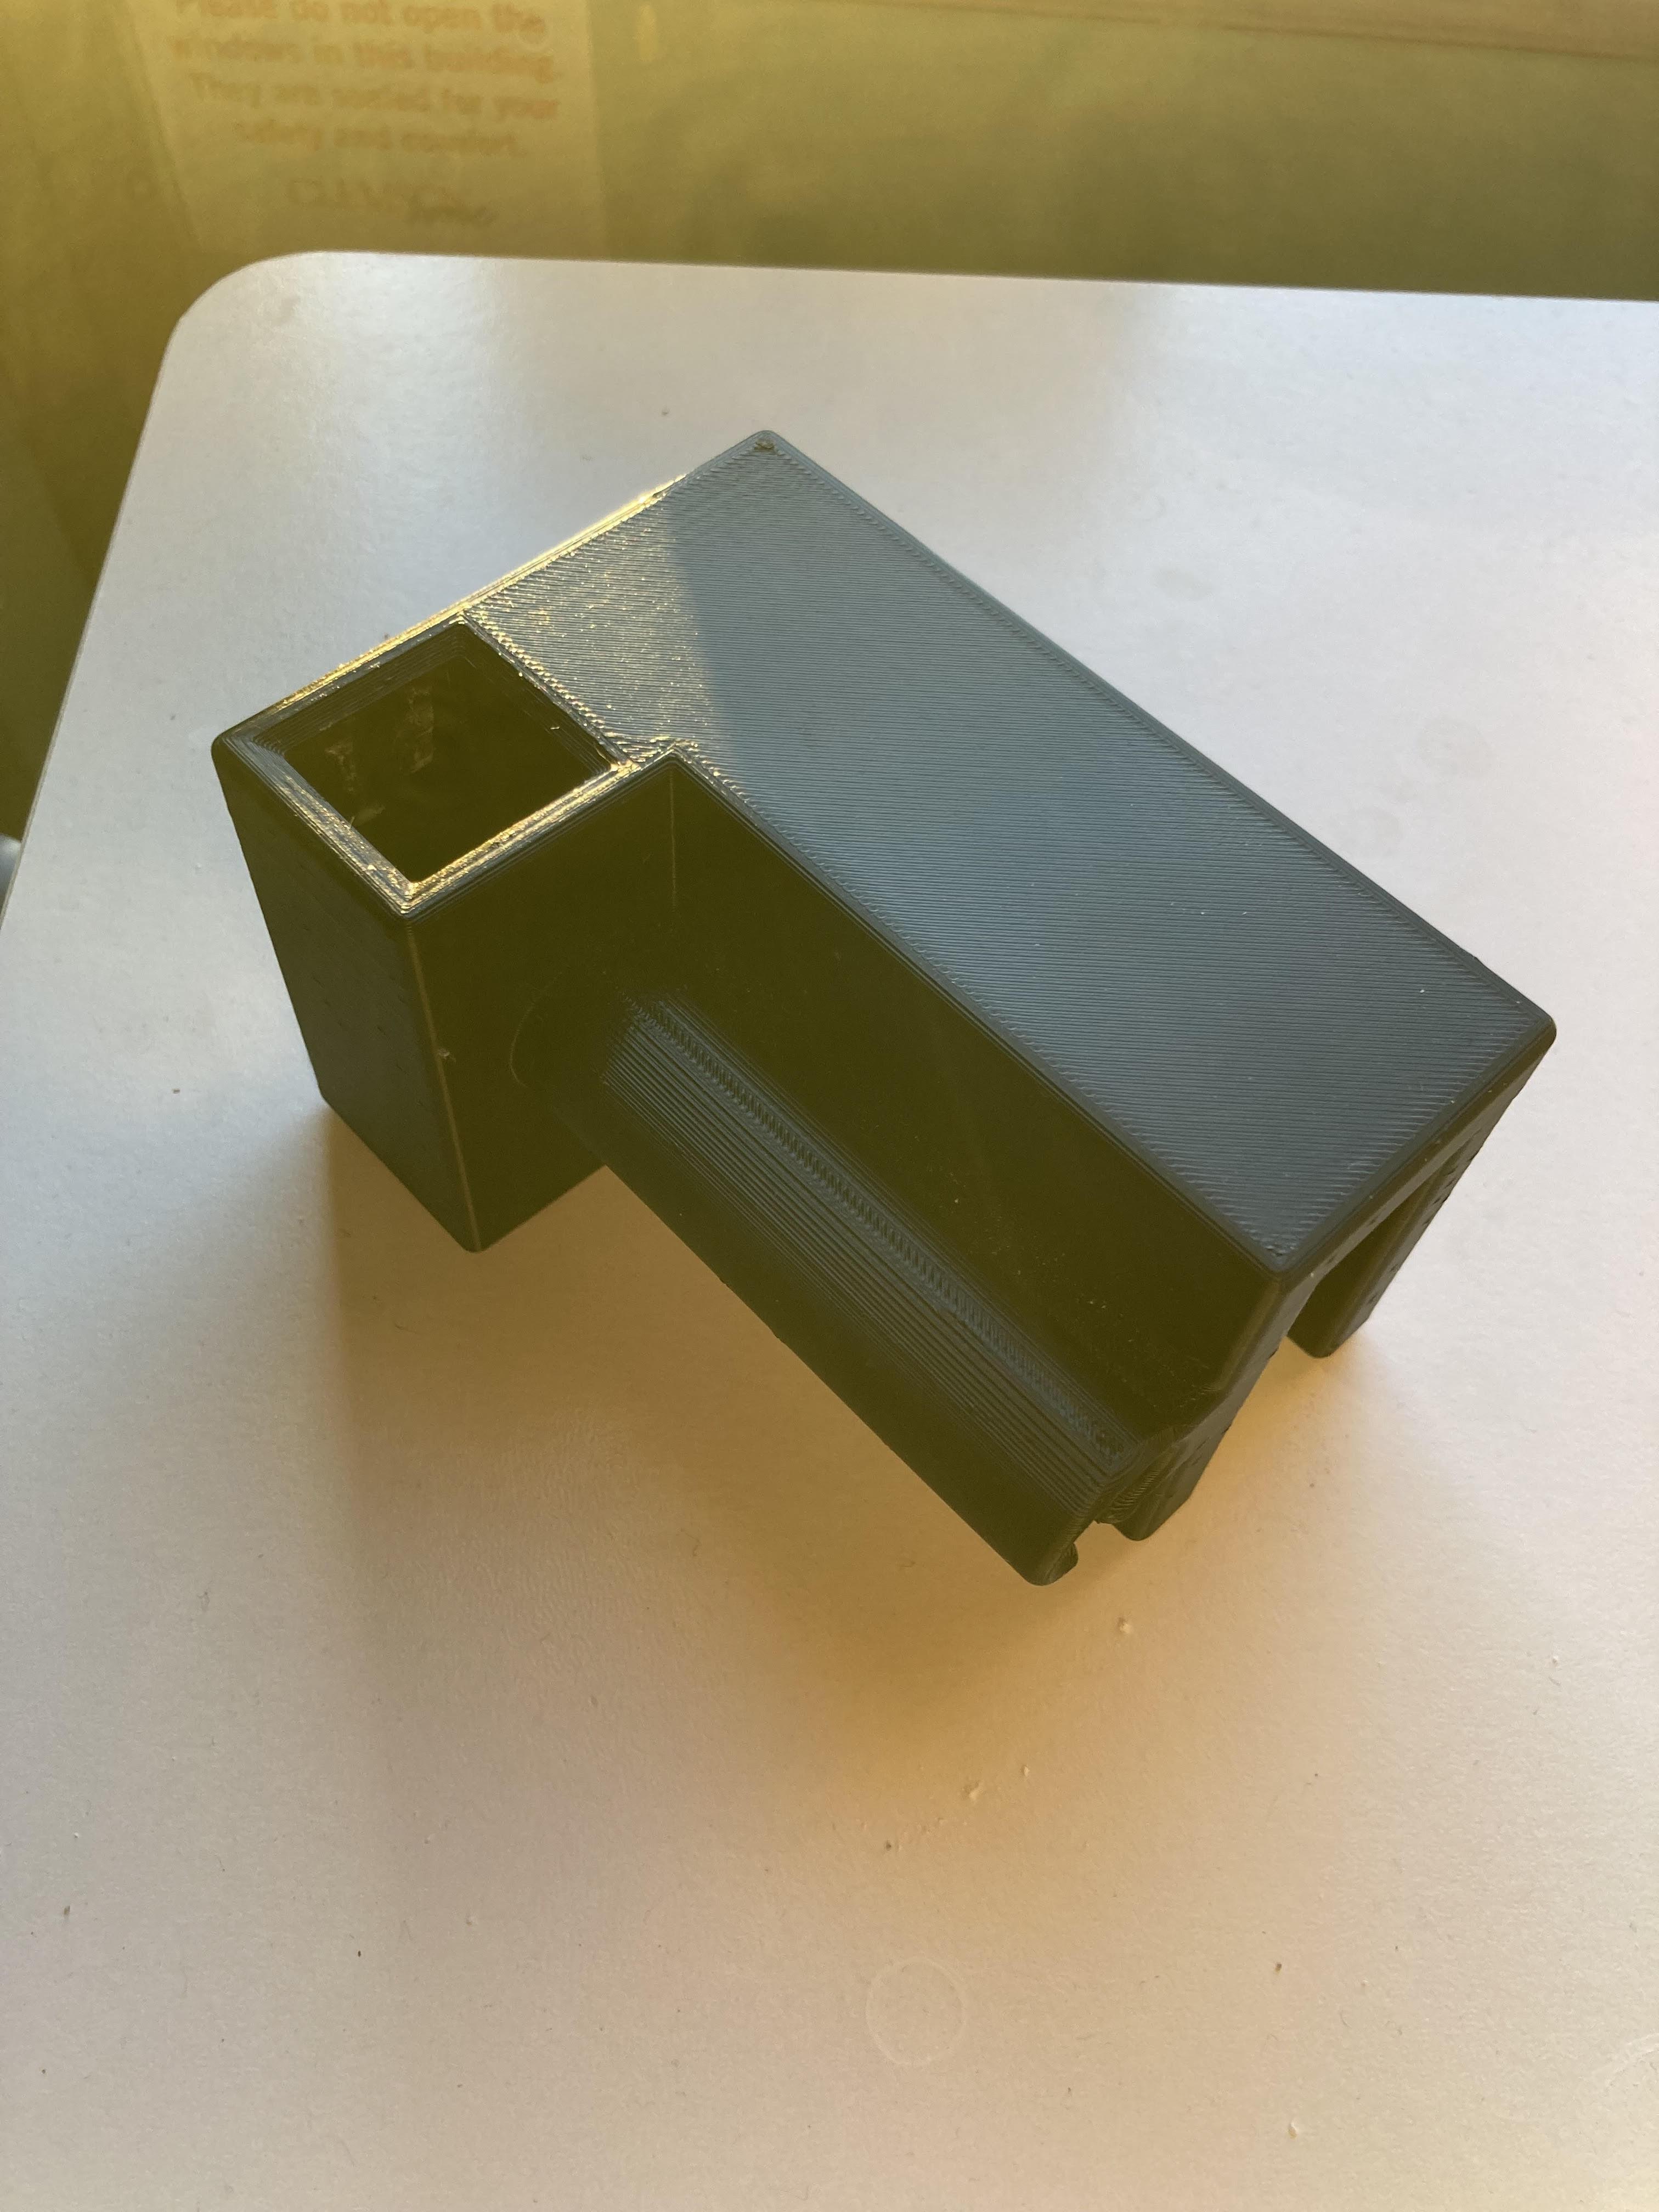
I designed a holder for my toothbrush and toothpaste for in my dorm, and today you will learn too!
I am currently a first-year student at Clemson University and have used the skills I learned here on campus to complete this project.
Supplies
You will need: Fusion360, a 3D printer, a computer, and Cura
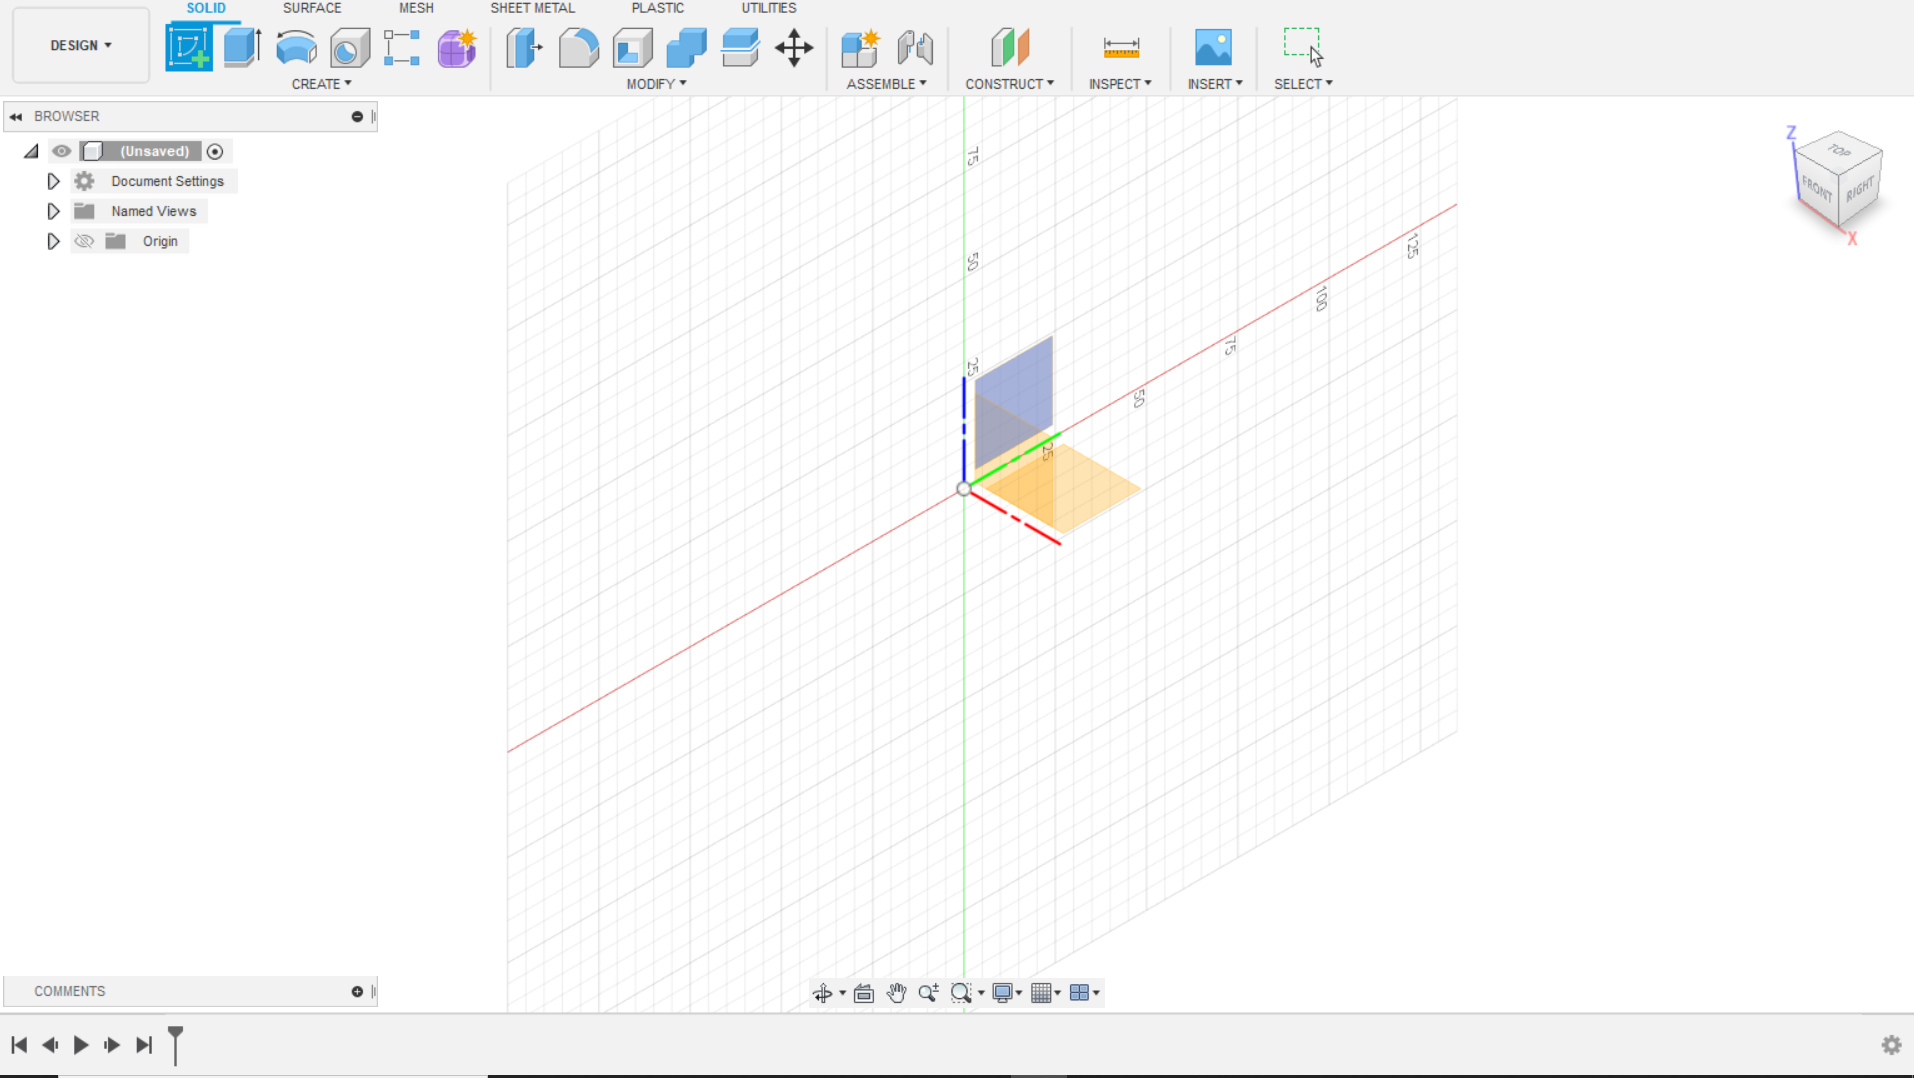
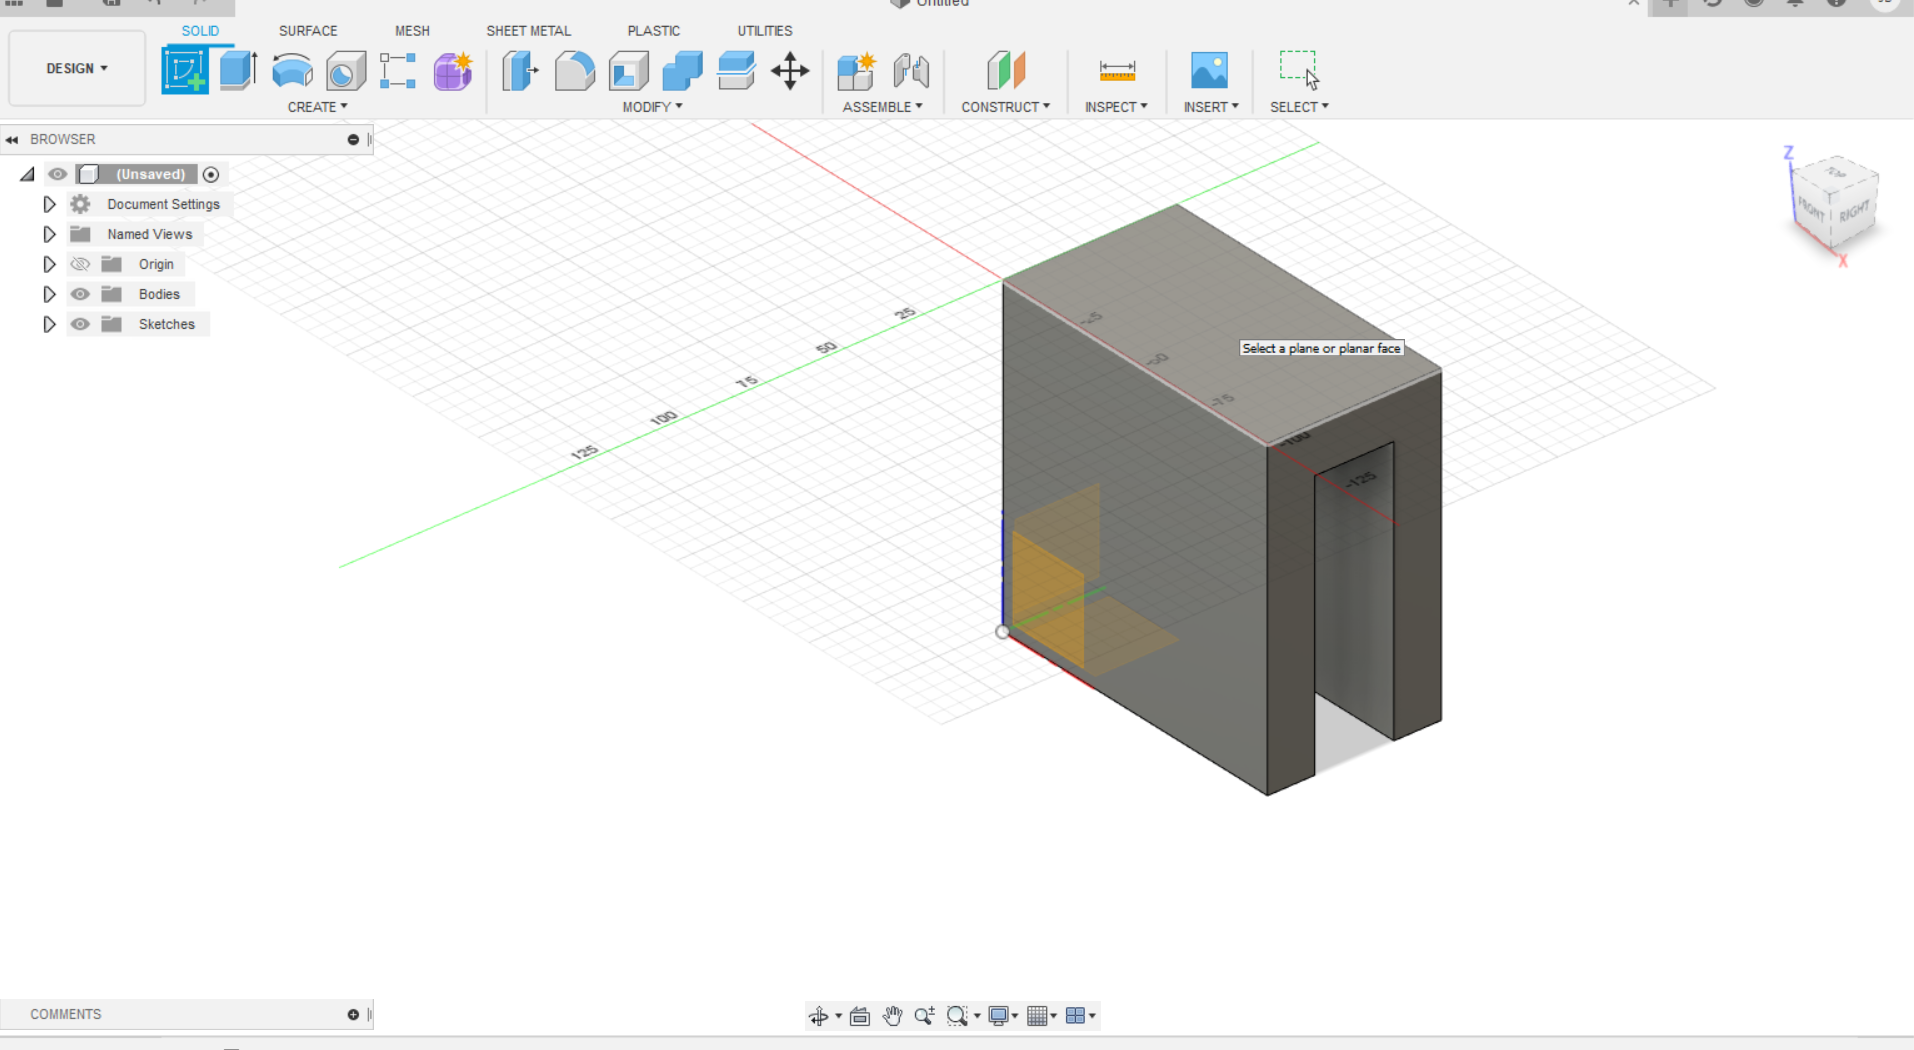
your first step is to open Fusion360 and start a sketch on the plane shown above.
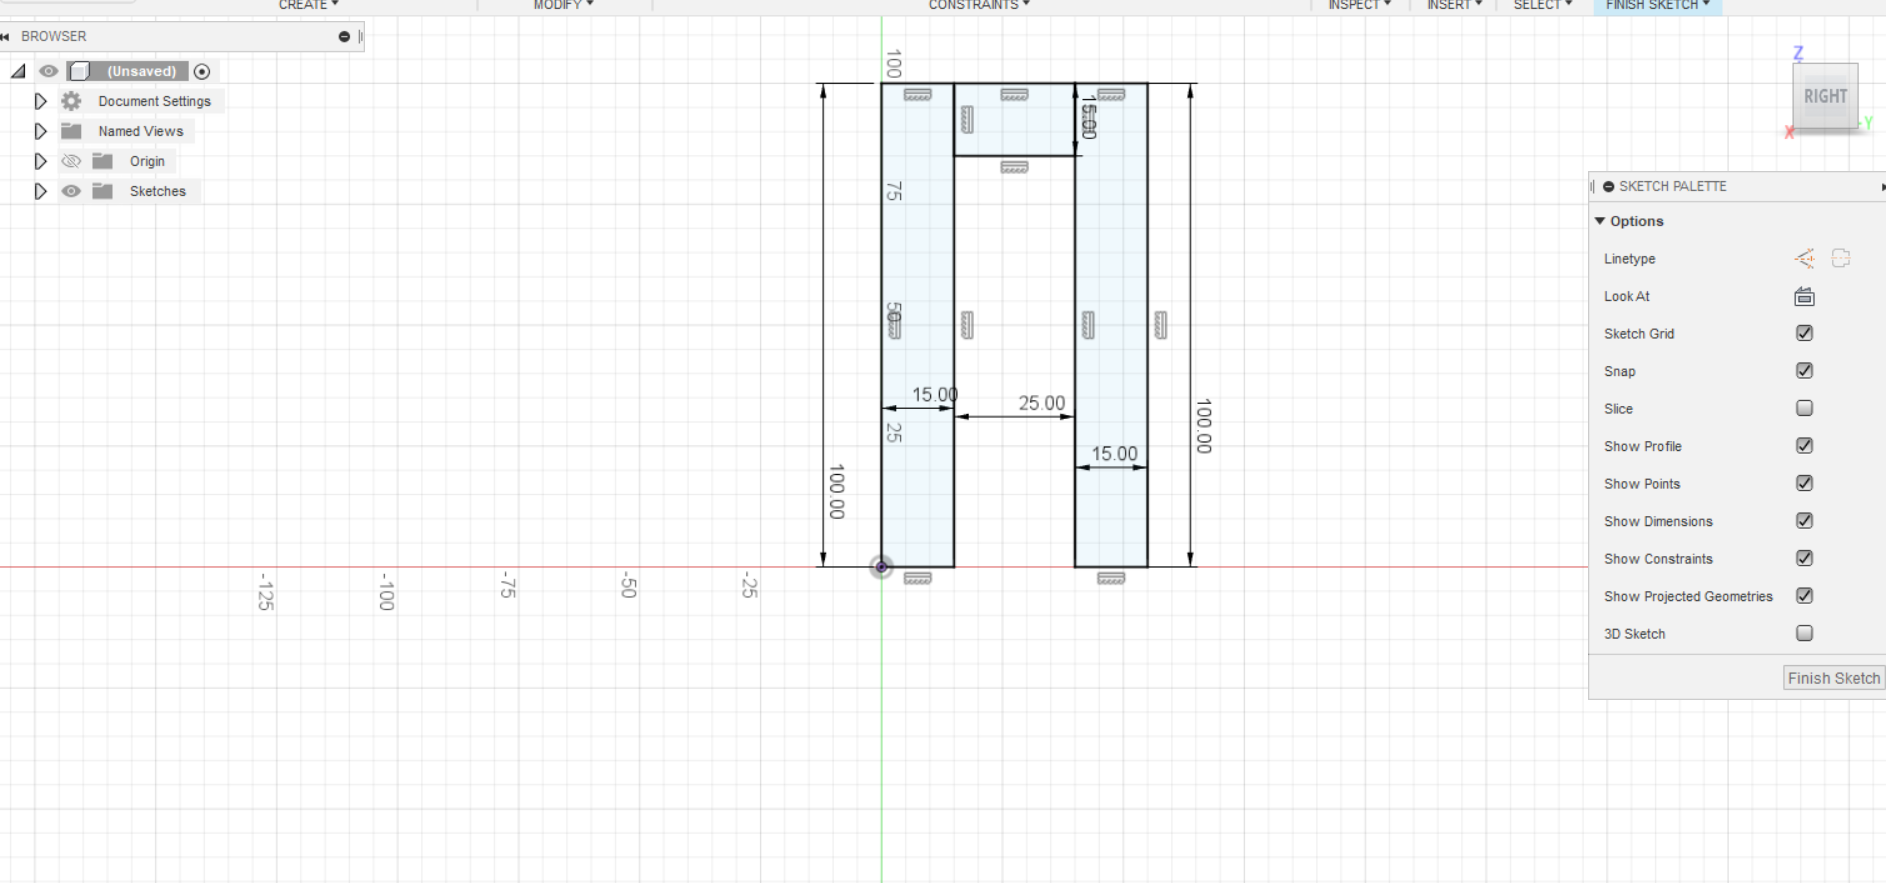
Next you will want to make a shape using 3 rectangles similar to this. Adjust the middle distance to fit over what you want to hold your toothbrush.
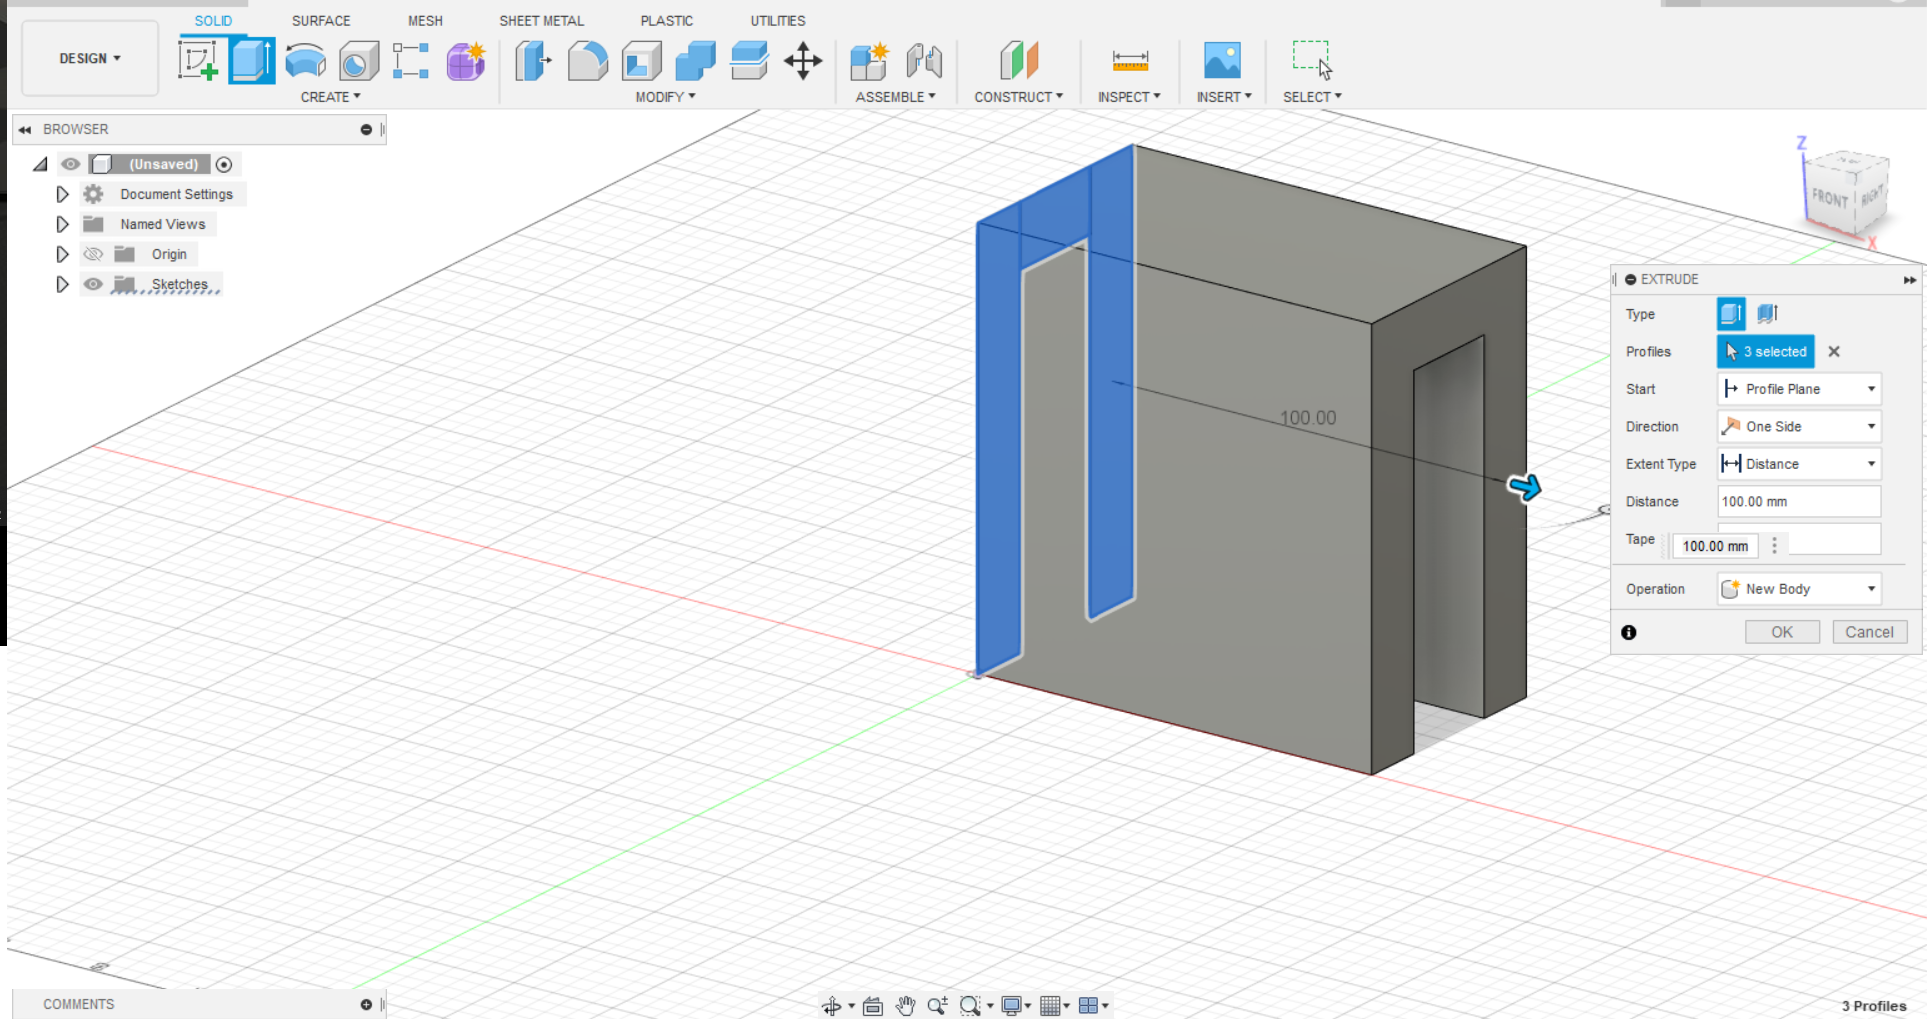
The next step is to extrude the sketch into a 3D shape by 100 mm!
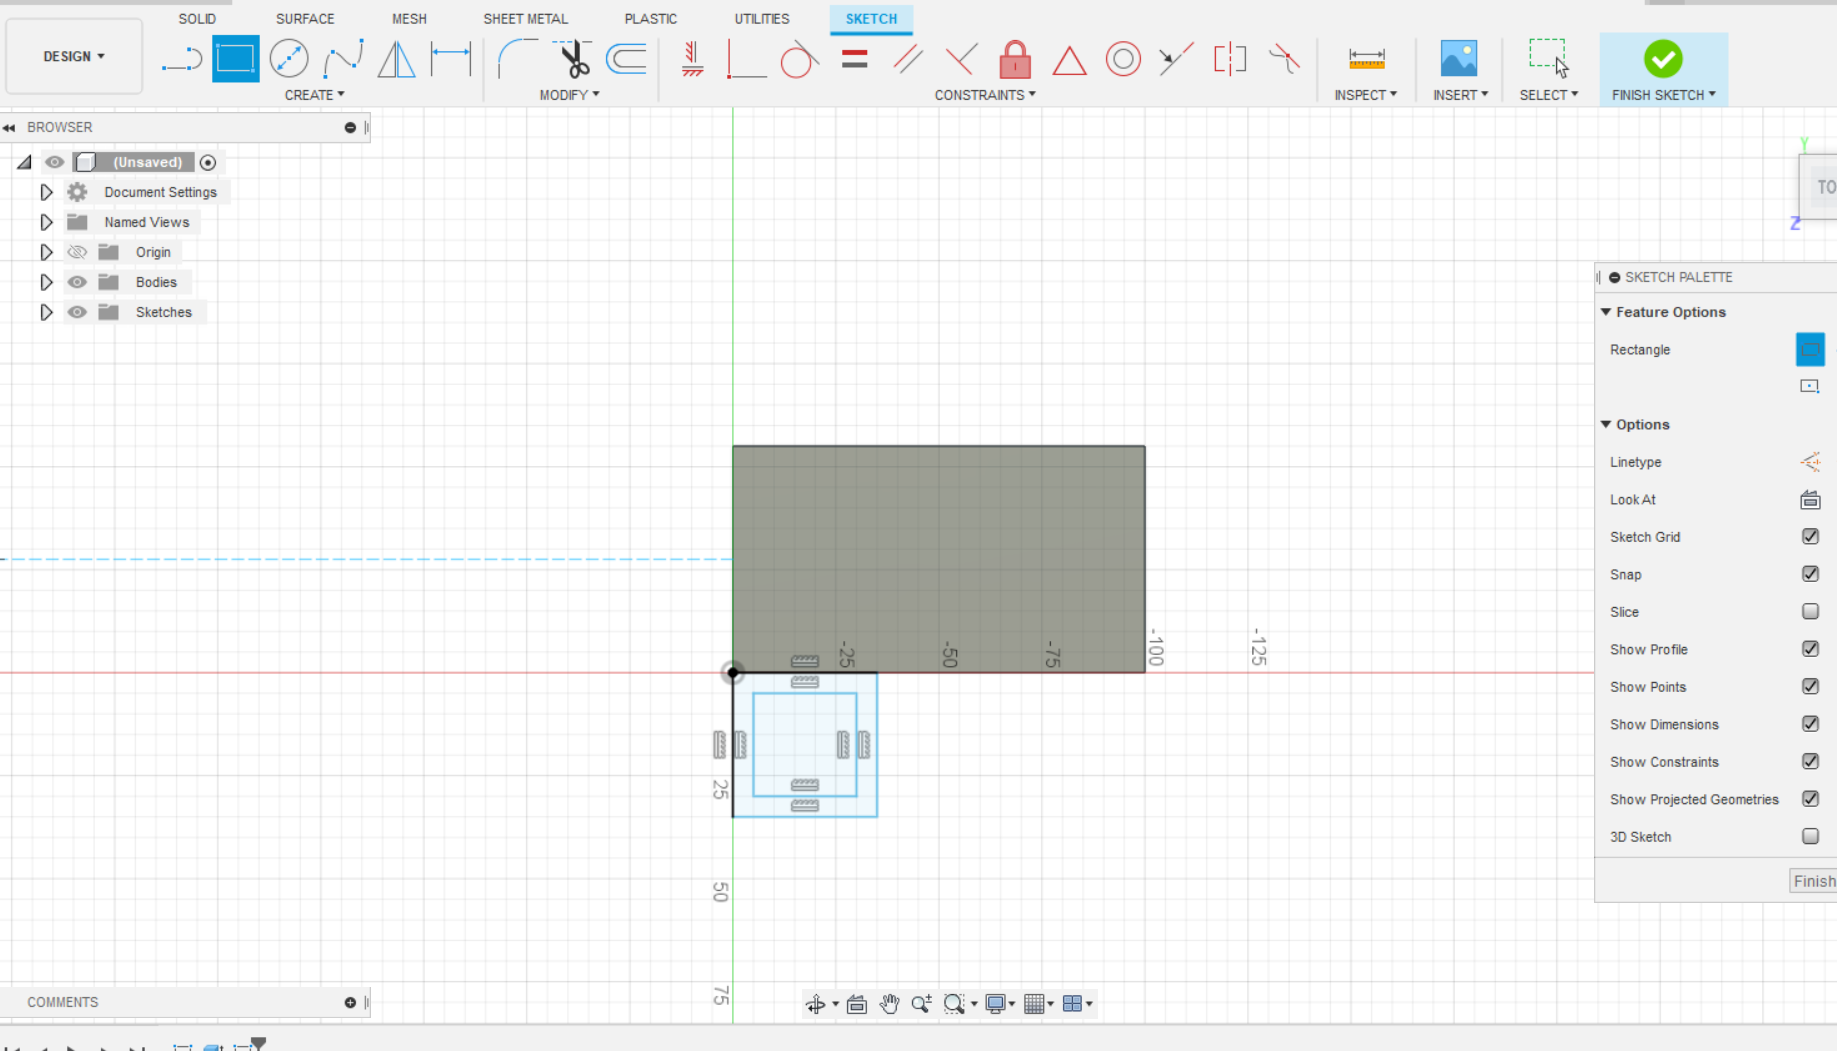
next, we will make a sketch along the top of the upside-down U shape. This will be the holder for the toothbrush.
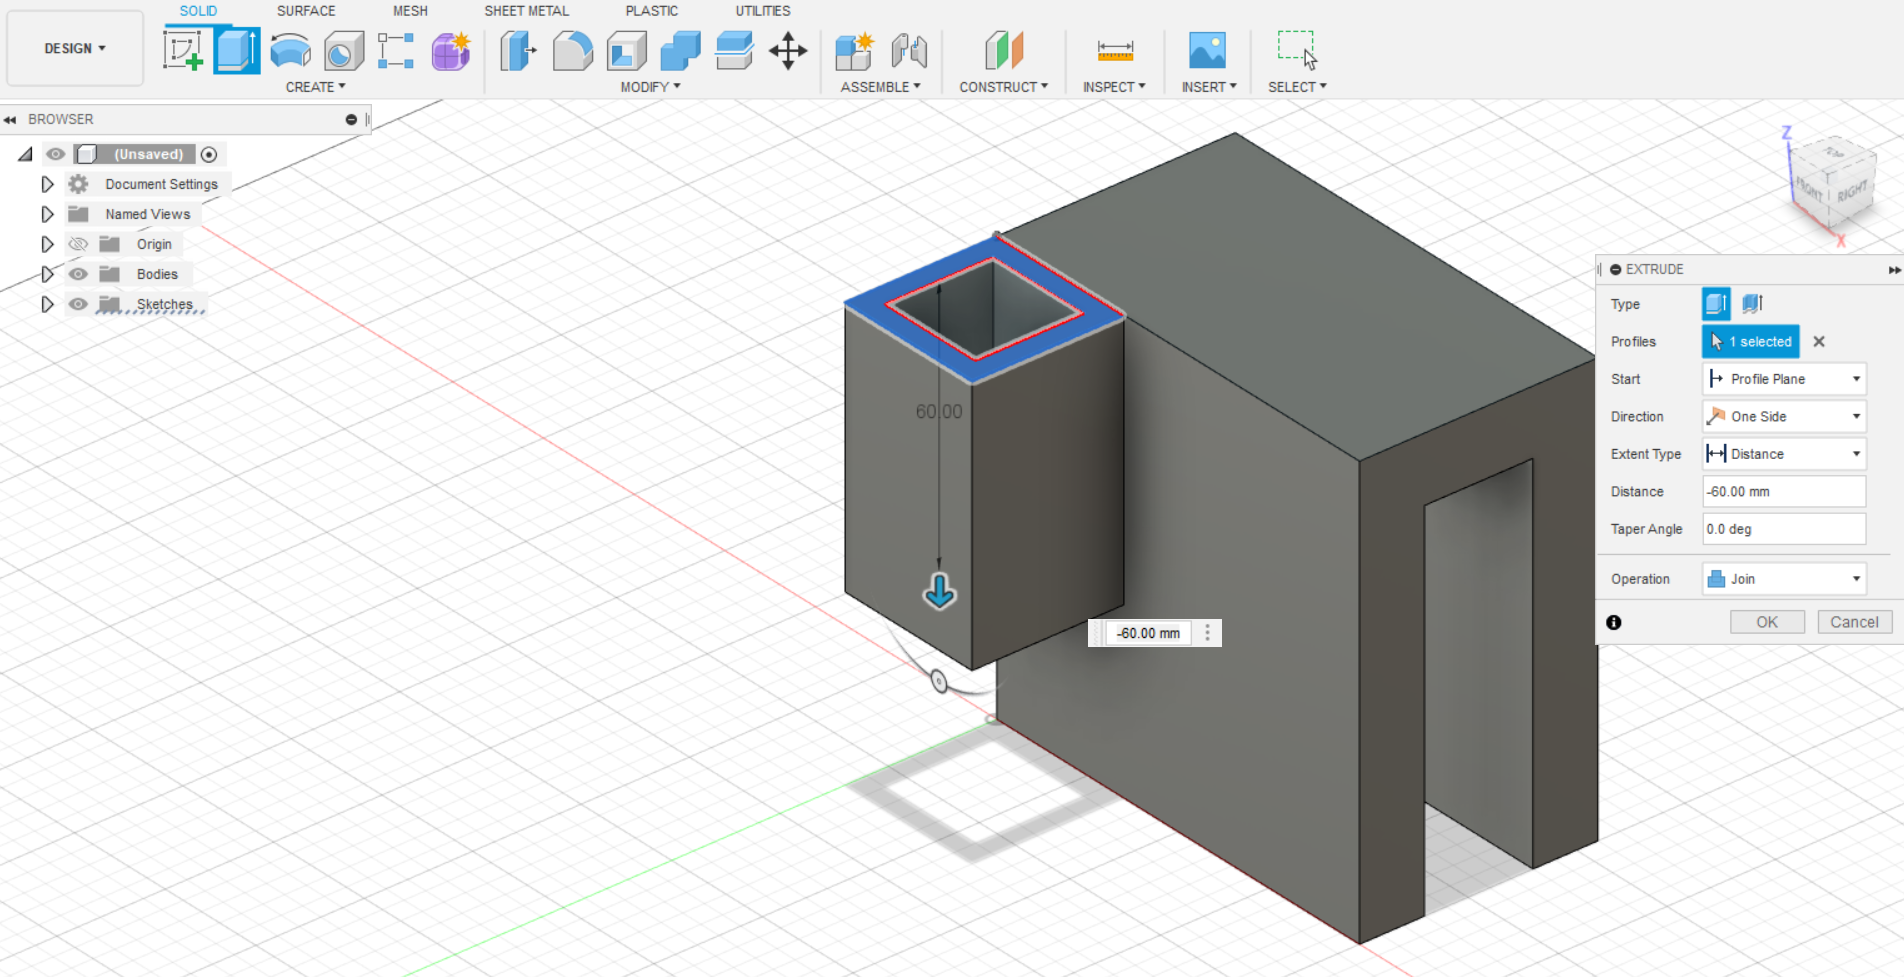
next we will extrude the outside of the square to make a hole for our toothbrush
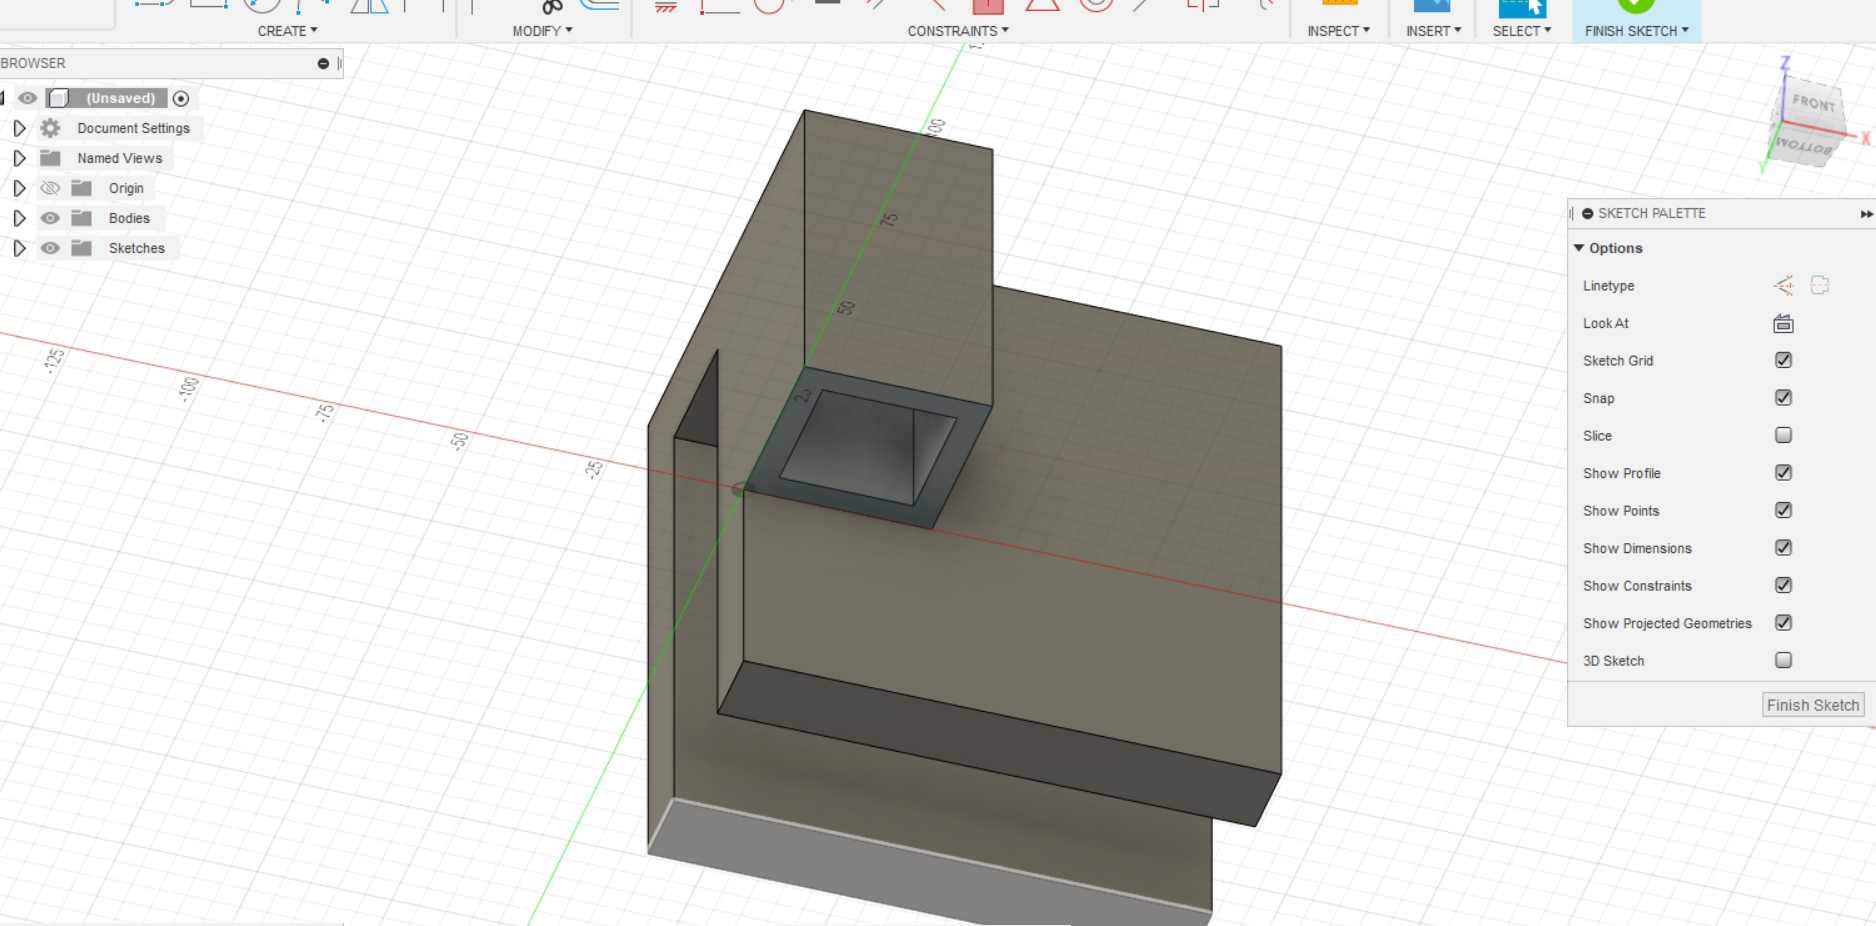
we will make a sketch on the bottom of the part we just extruded. this will be where we design the support for the brush to not fall through.
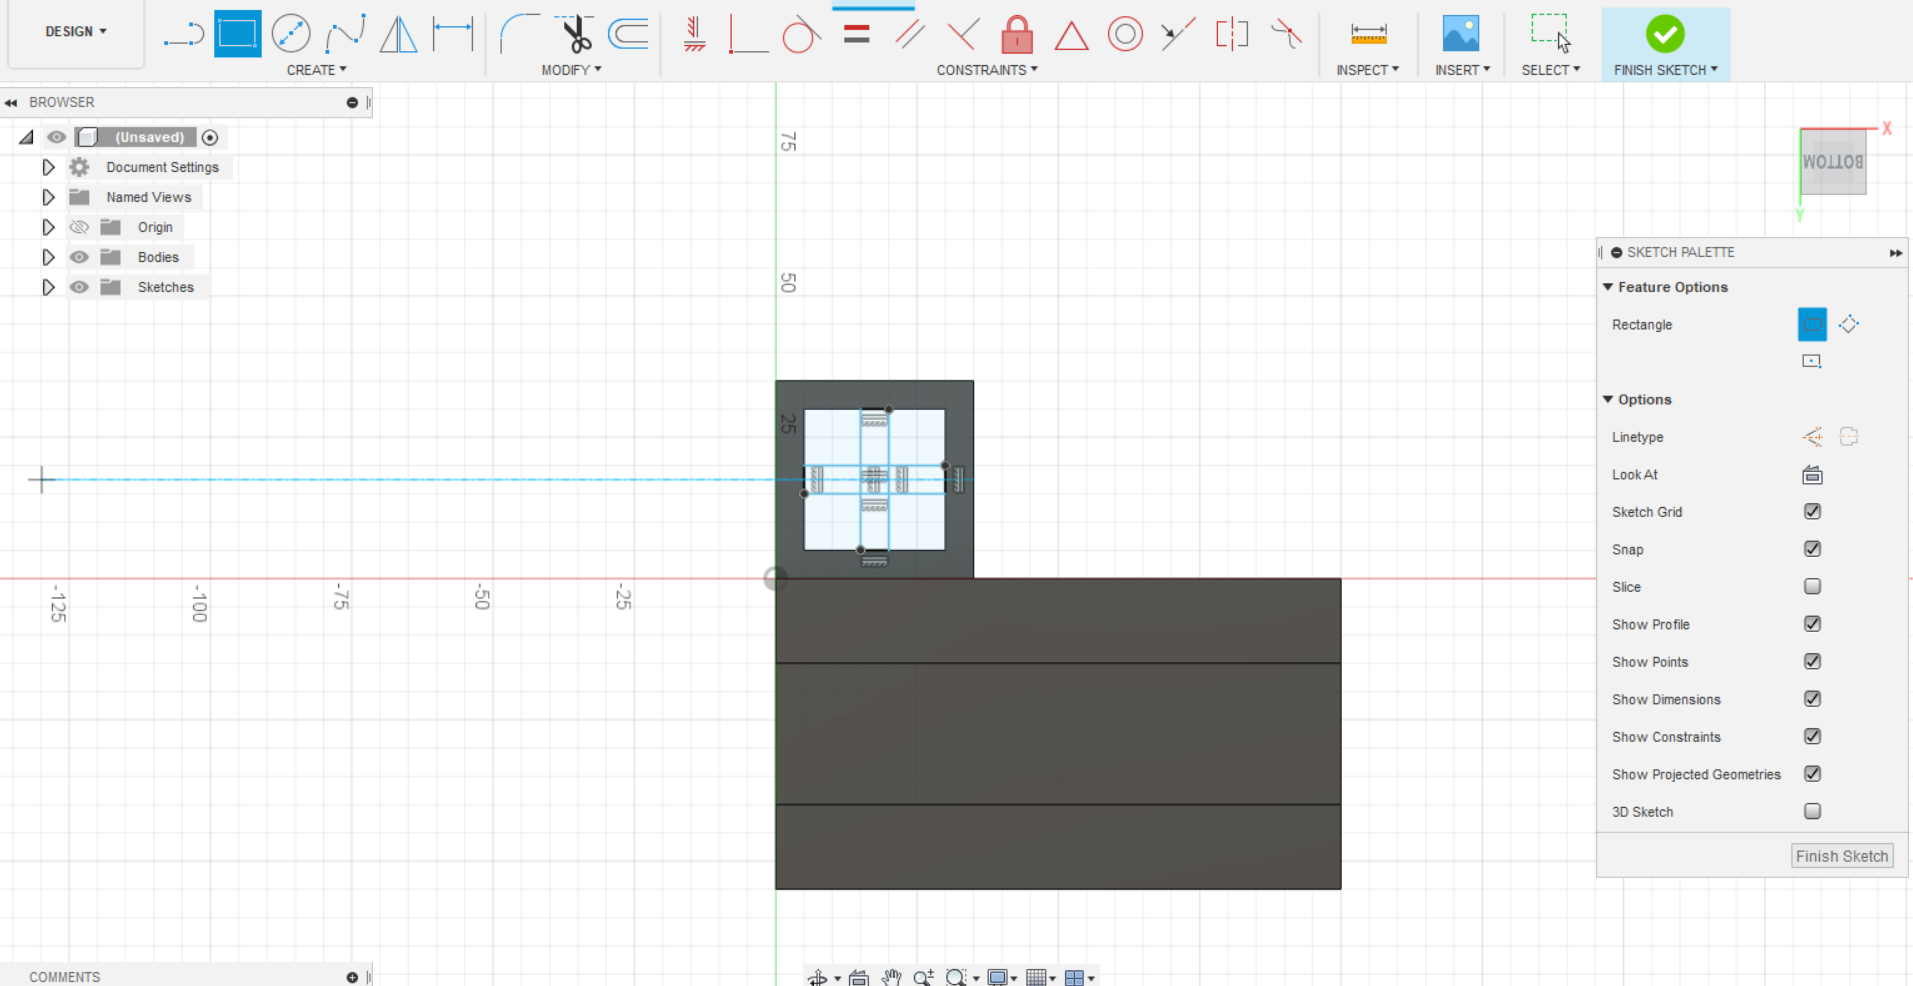
we will make a cross in the middle of the hole. match the dimensions to the photo.
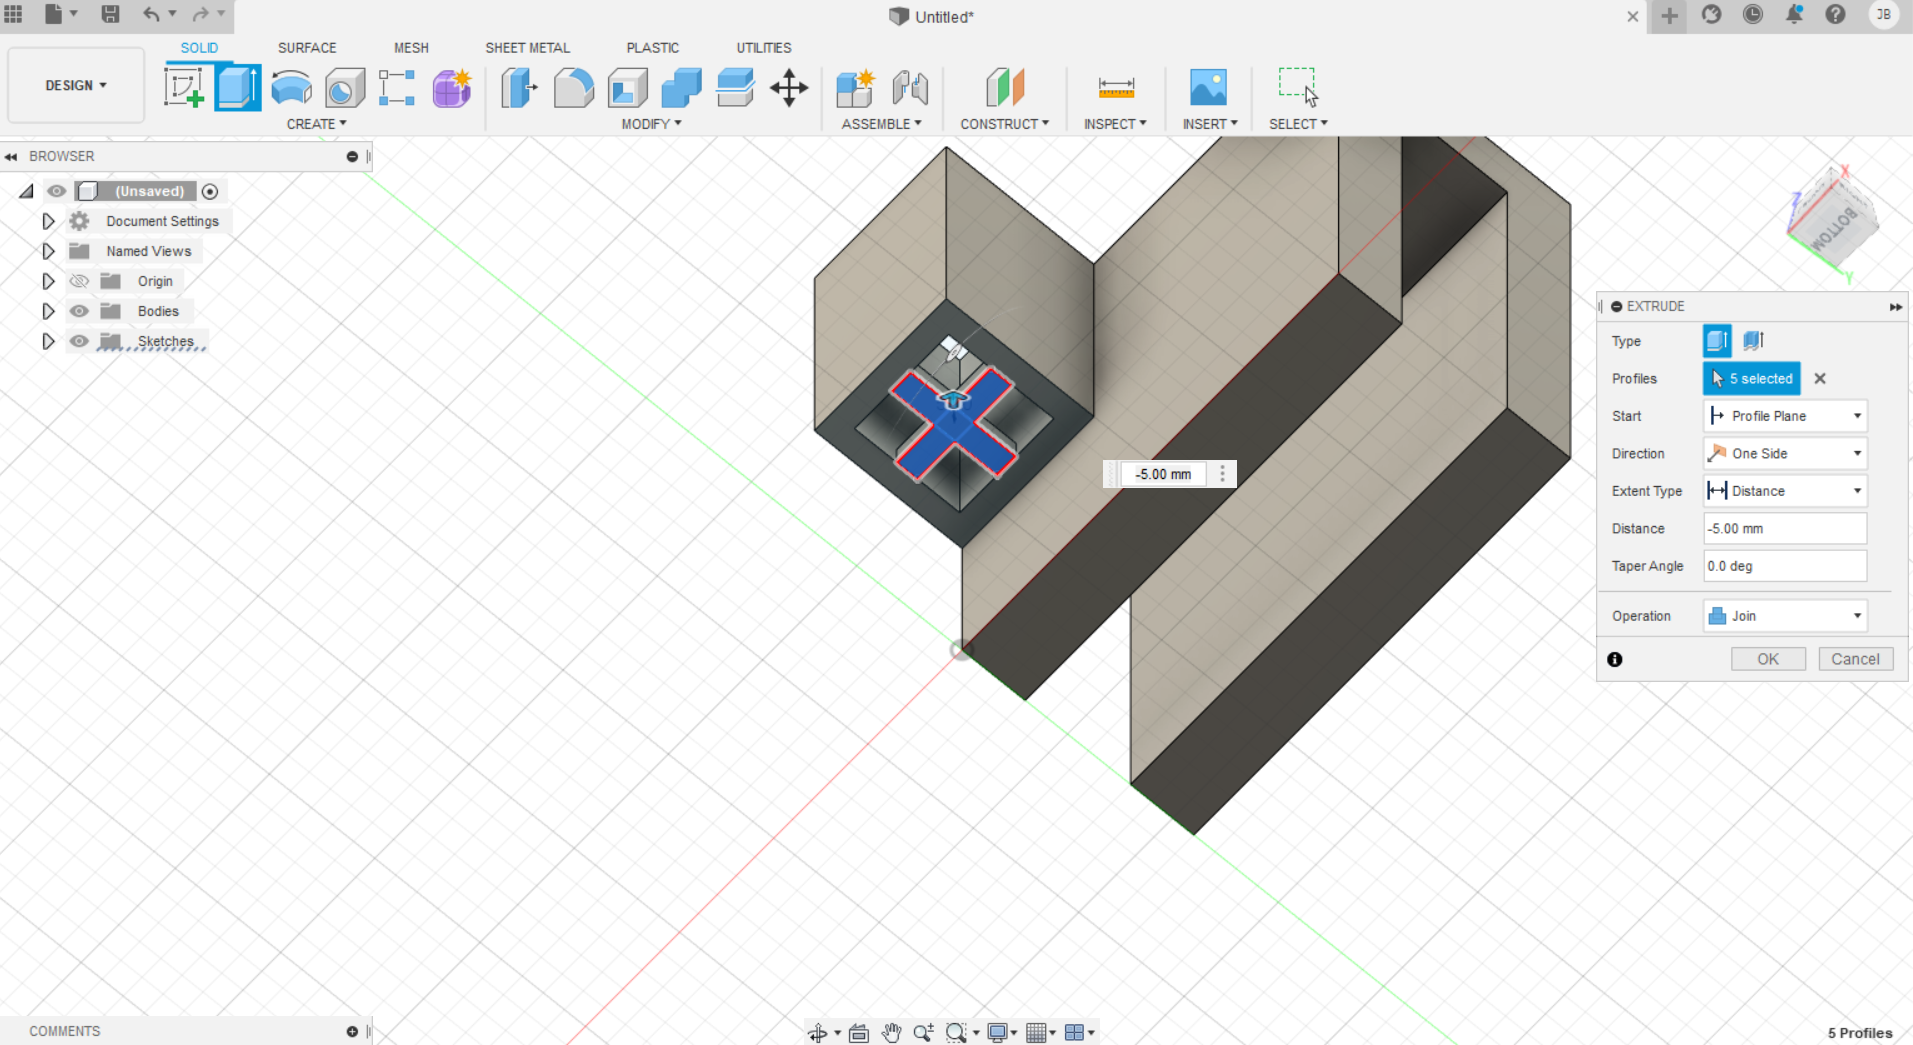
we will extrude this shape upwards to make the bottom of the brush holder flat.
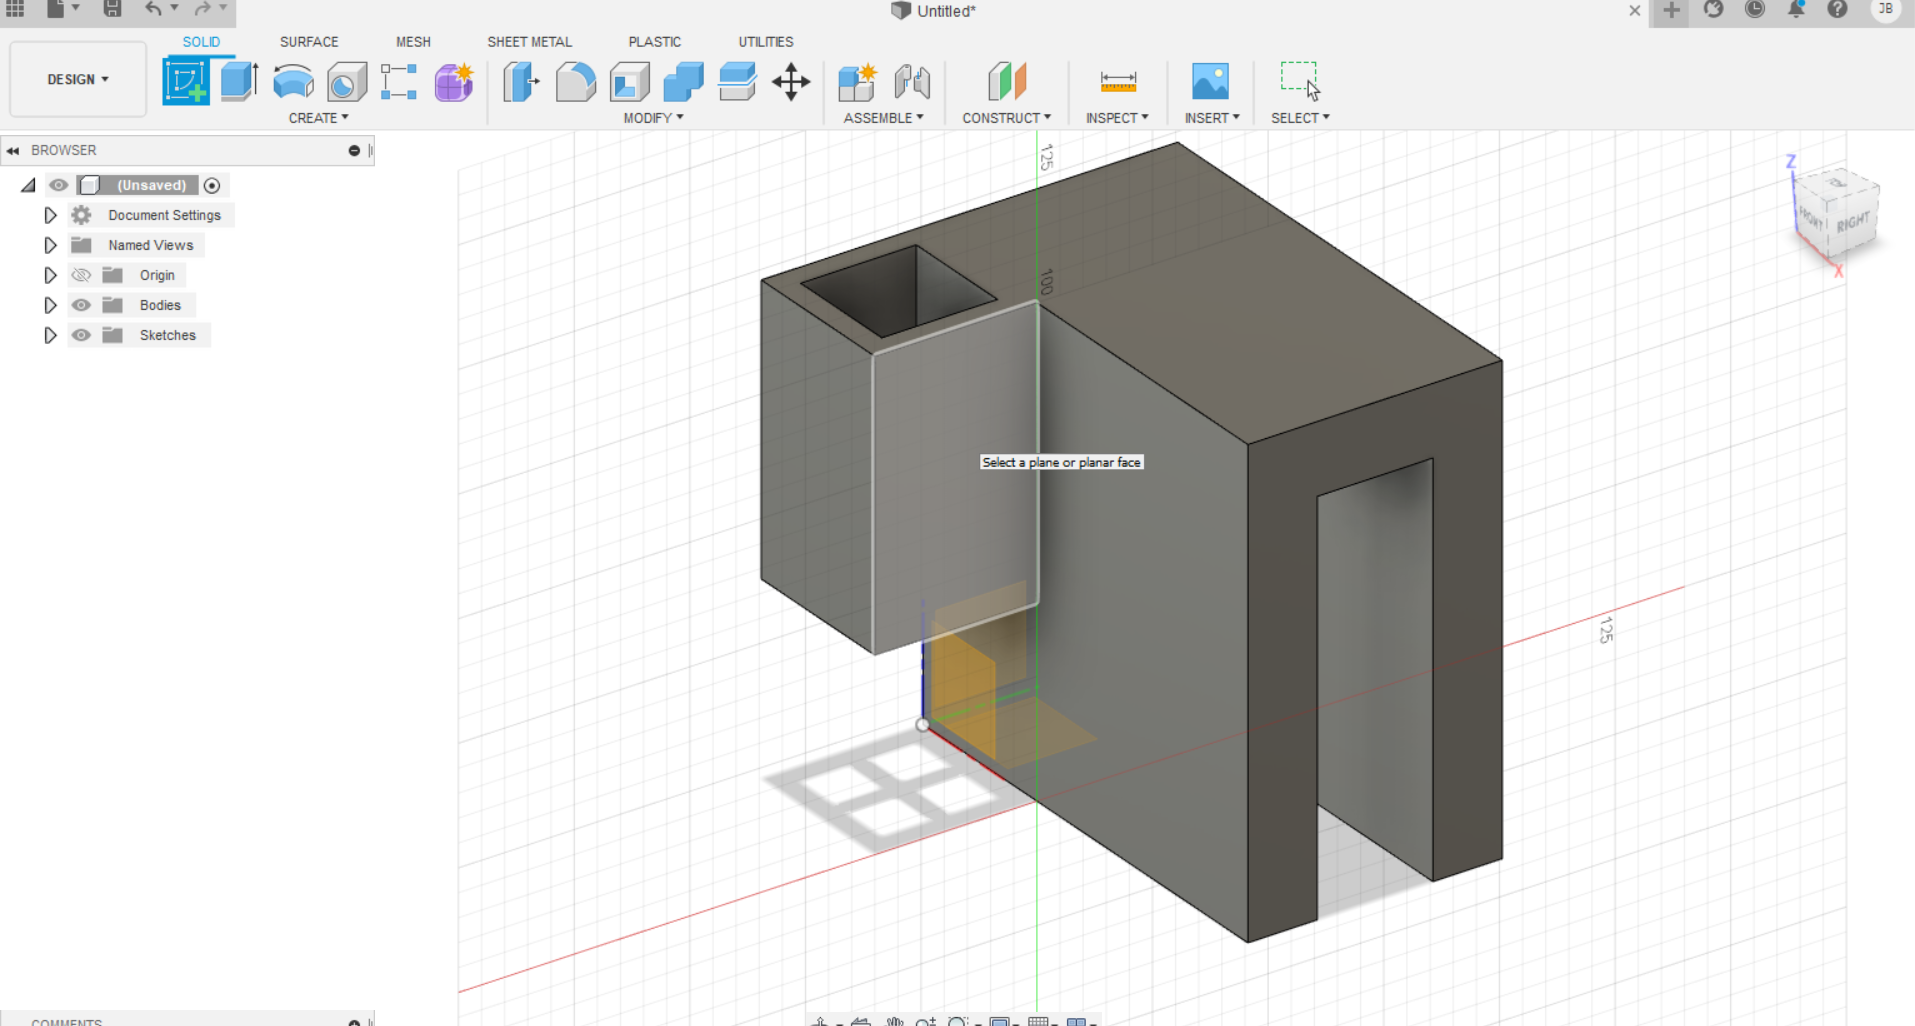
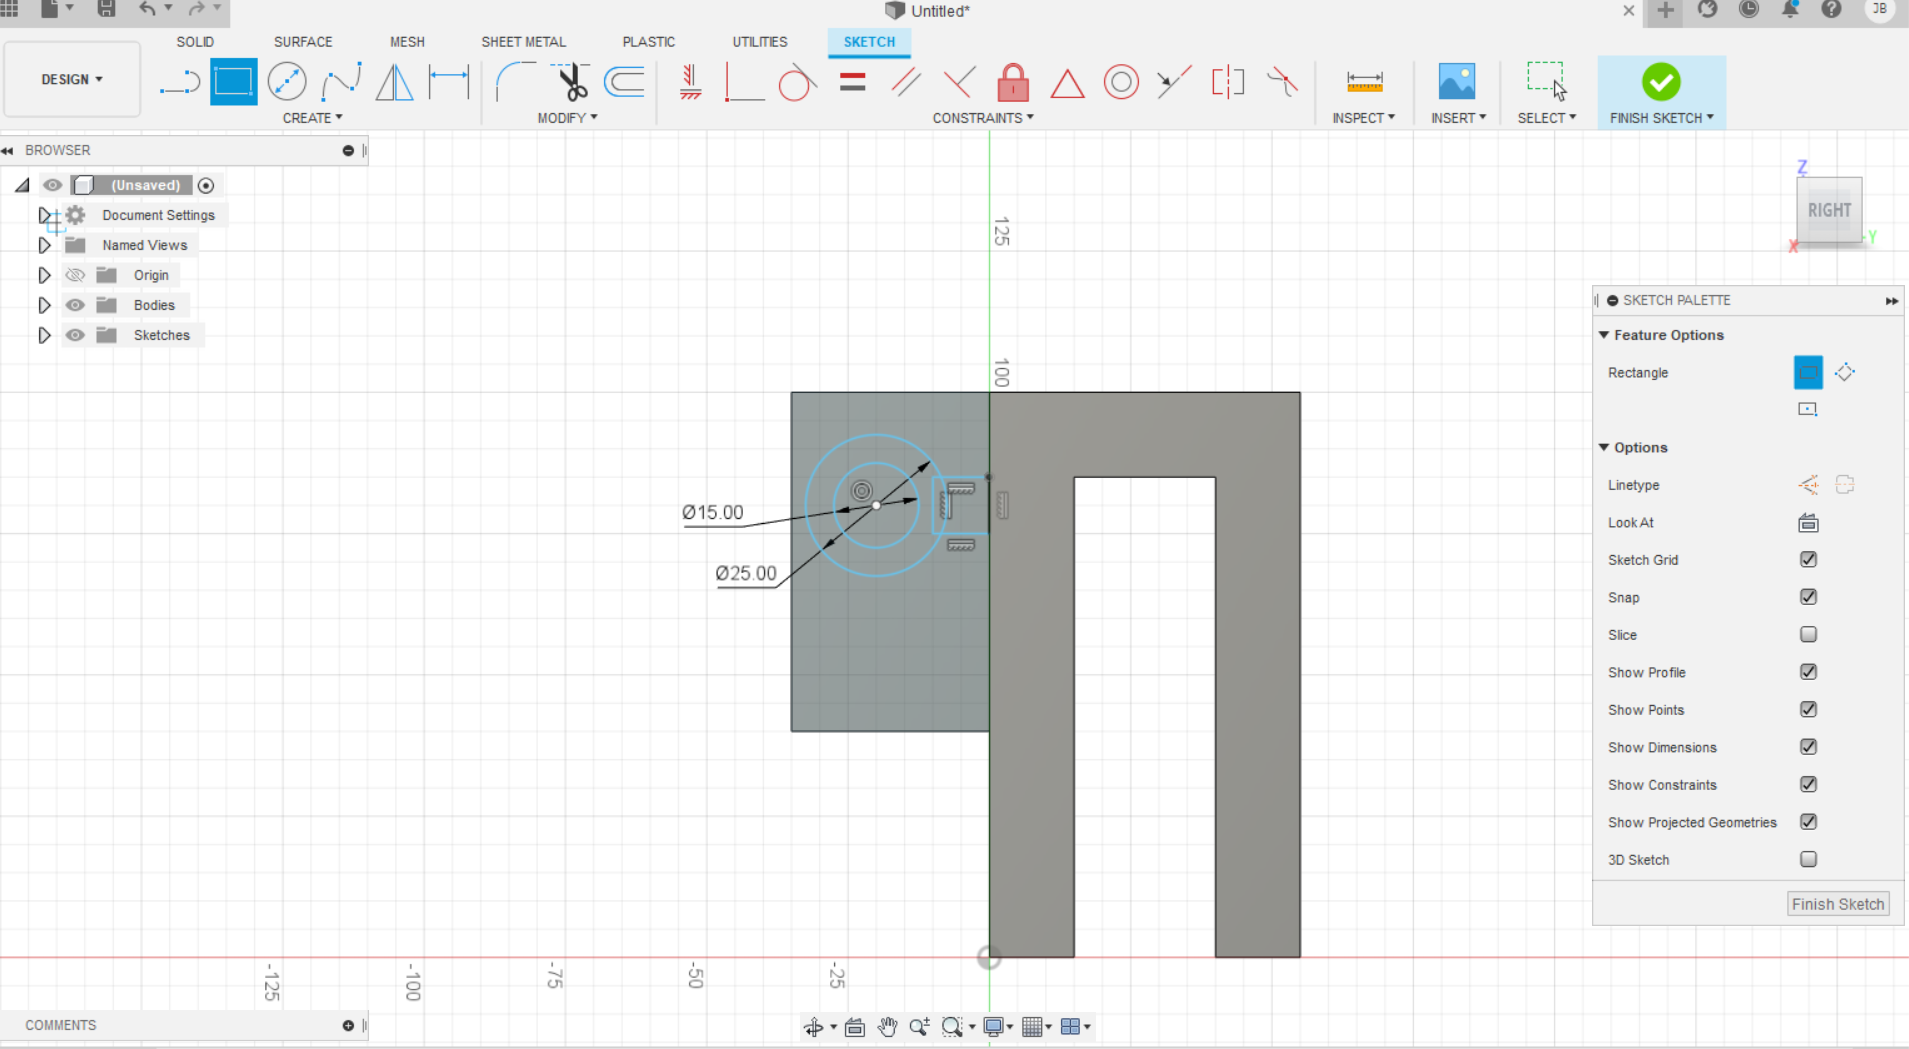
next, we will make a sketch on the side of the box for our toothbrush. this will be where the back of the toothpaste tube will go.
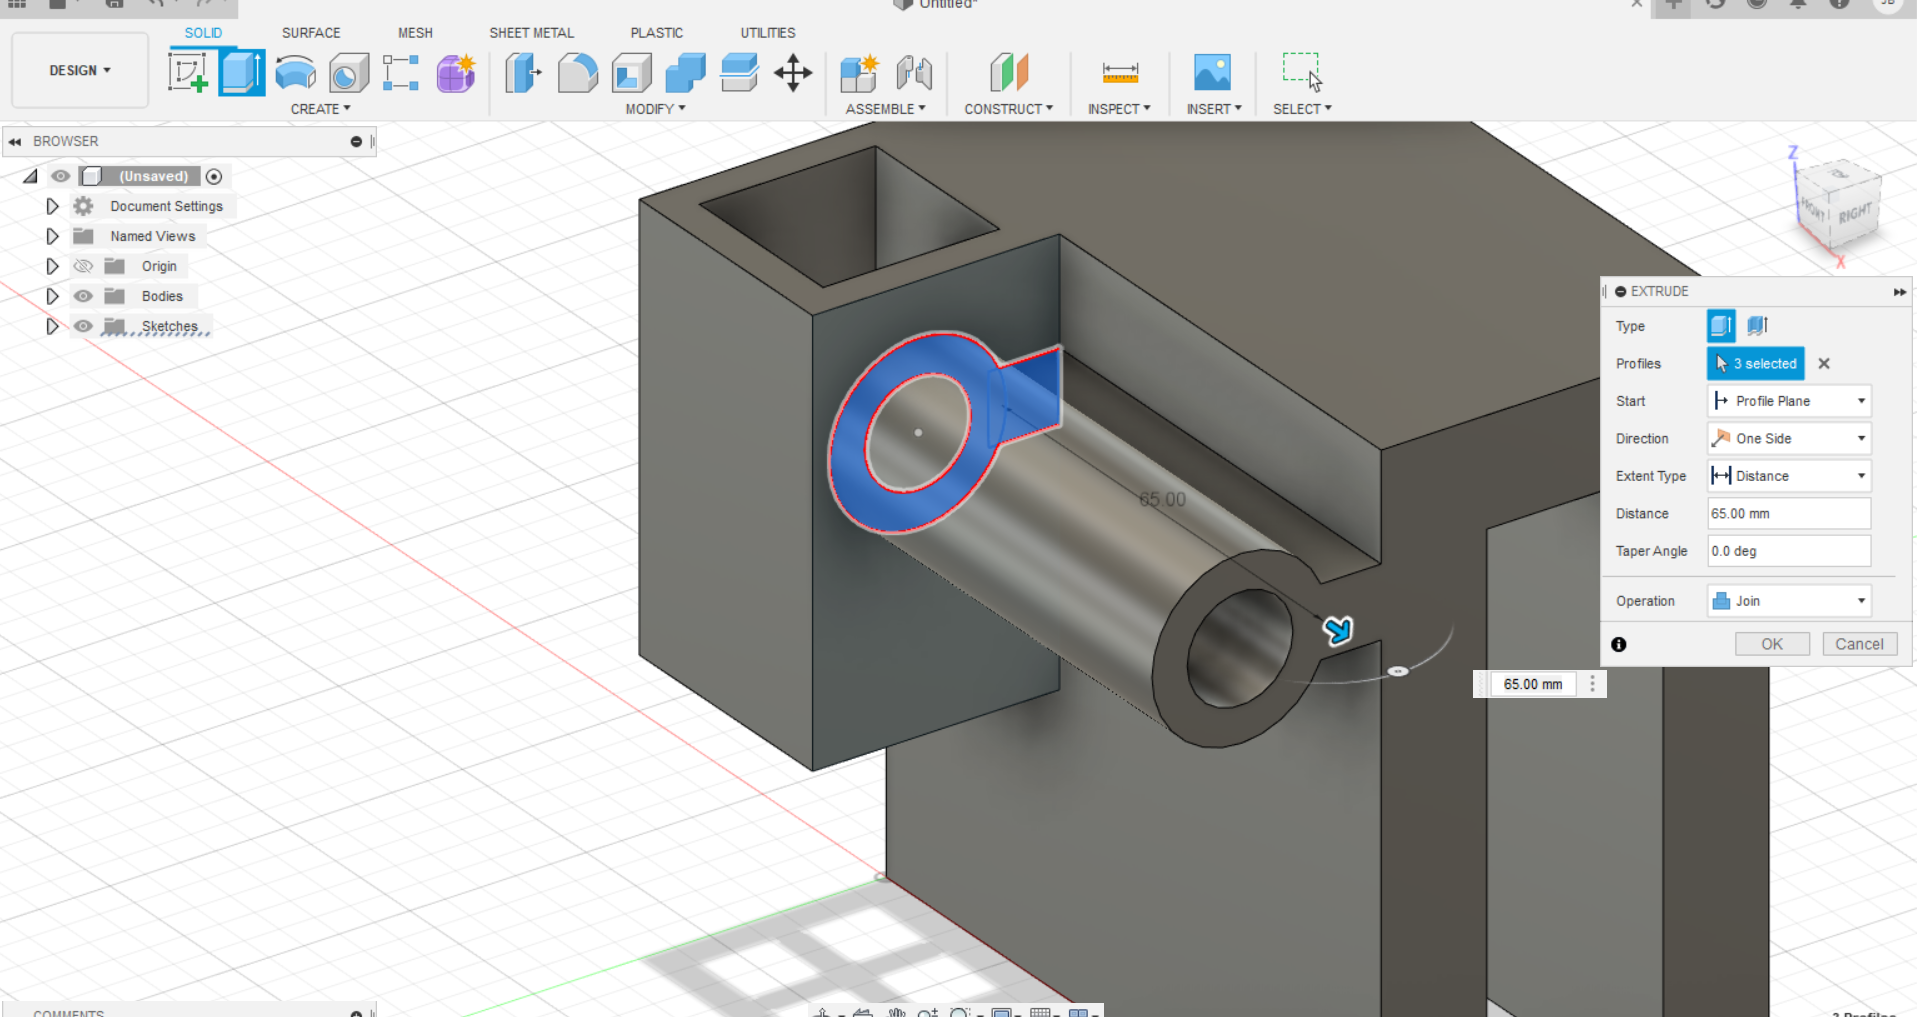
extrude the shape we just built to be flush with the edge of the holder.
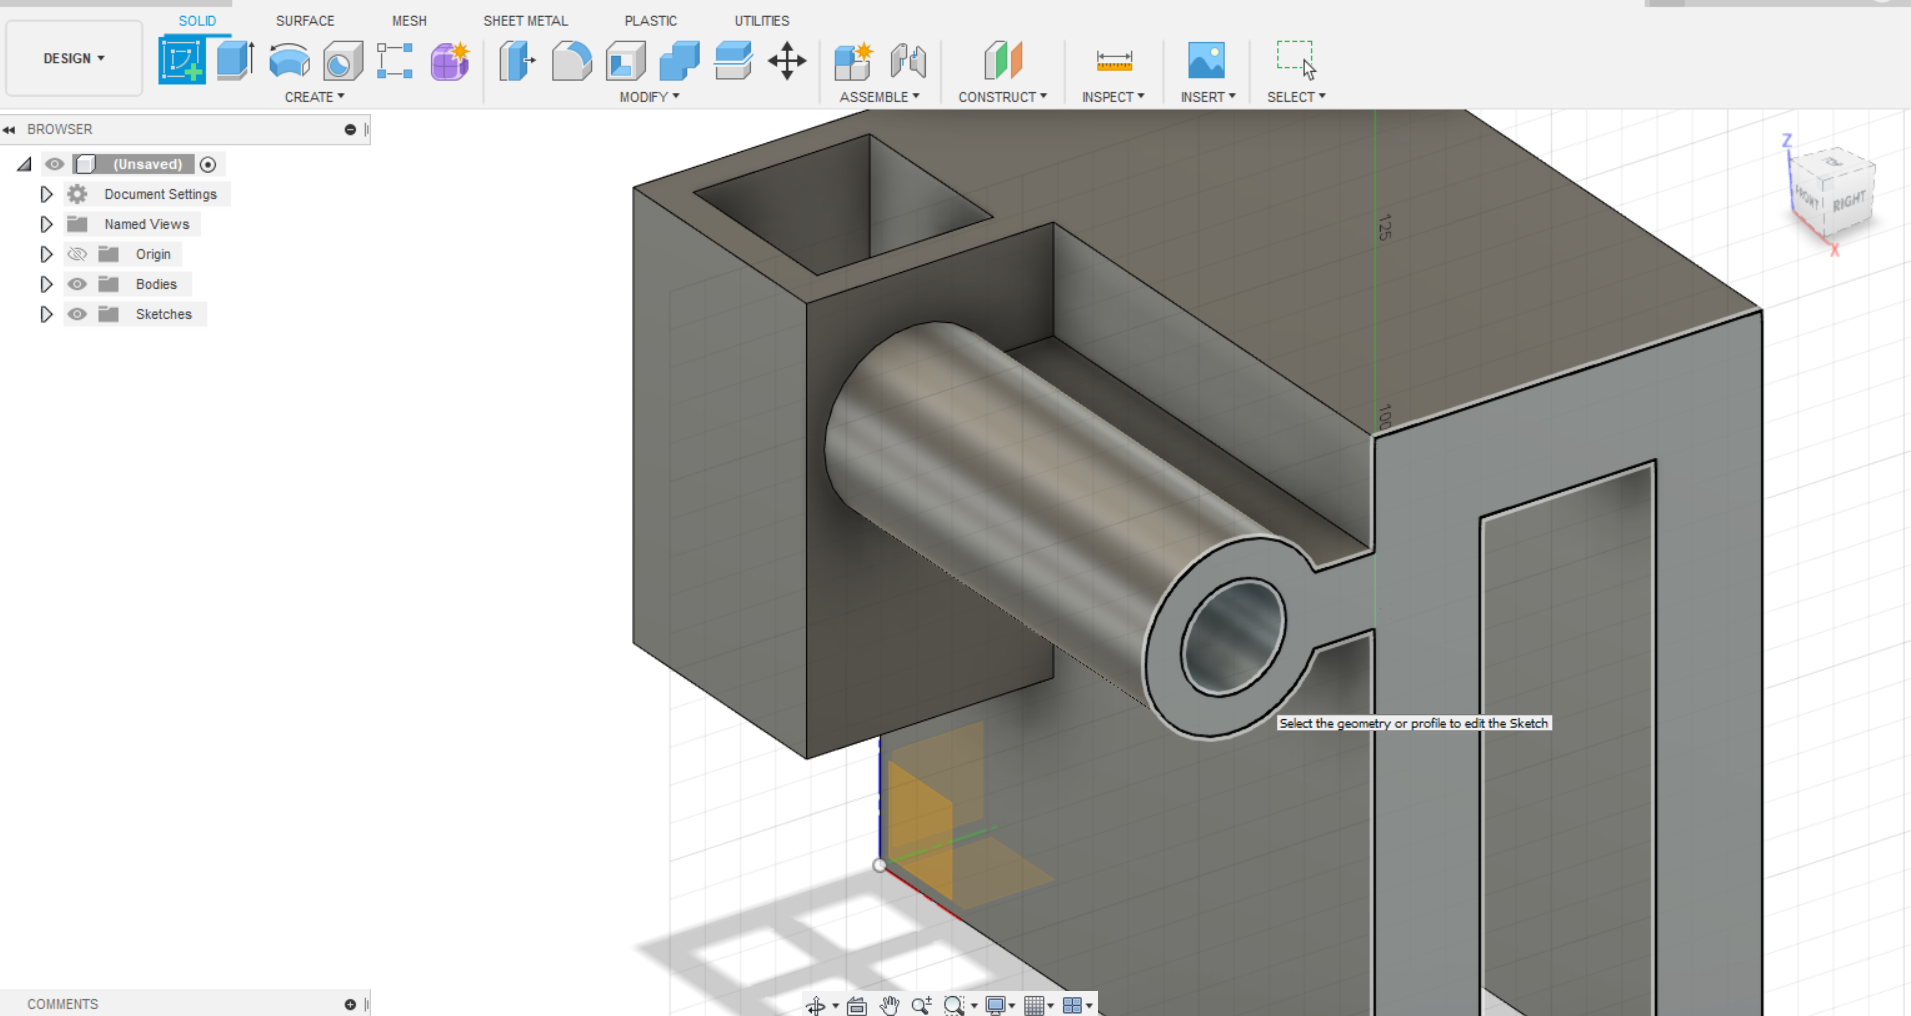
we will now make a sketch on the new face we extruded.
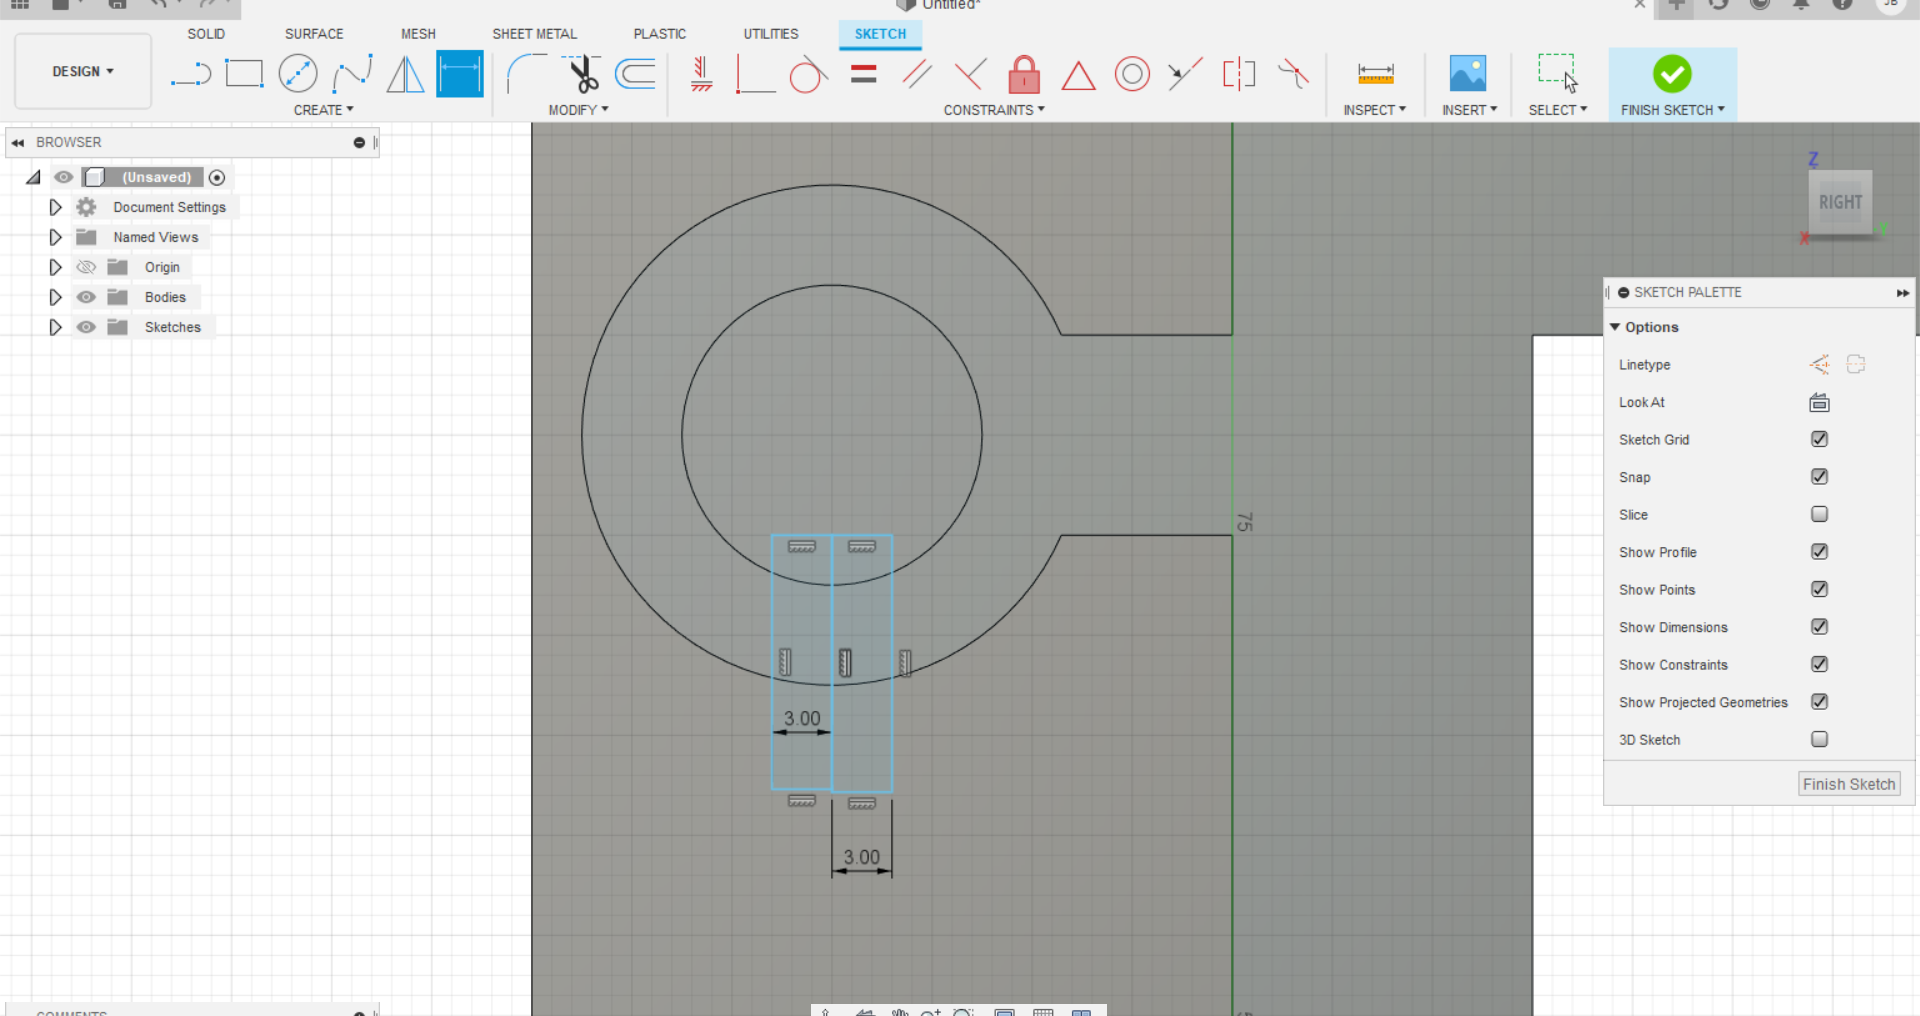
make a sketch to match the photo. This will be cut and will support the back of your toothpaste tube.
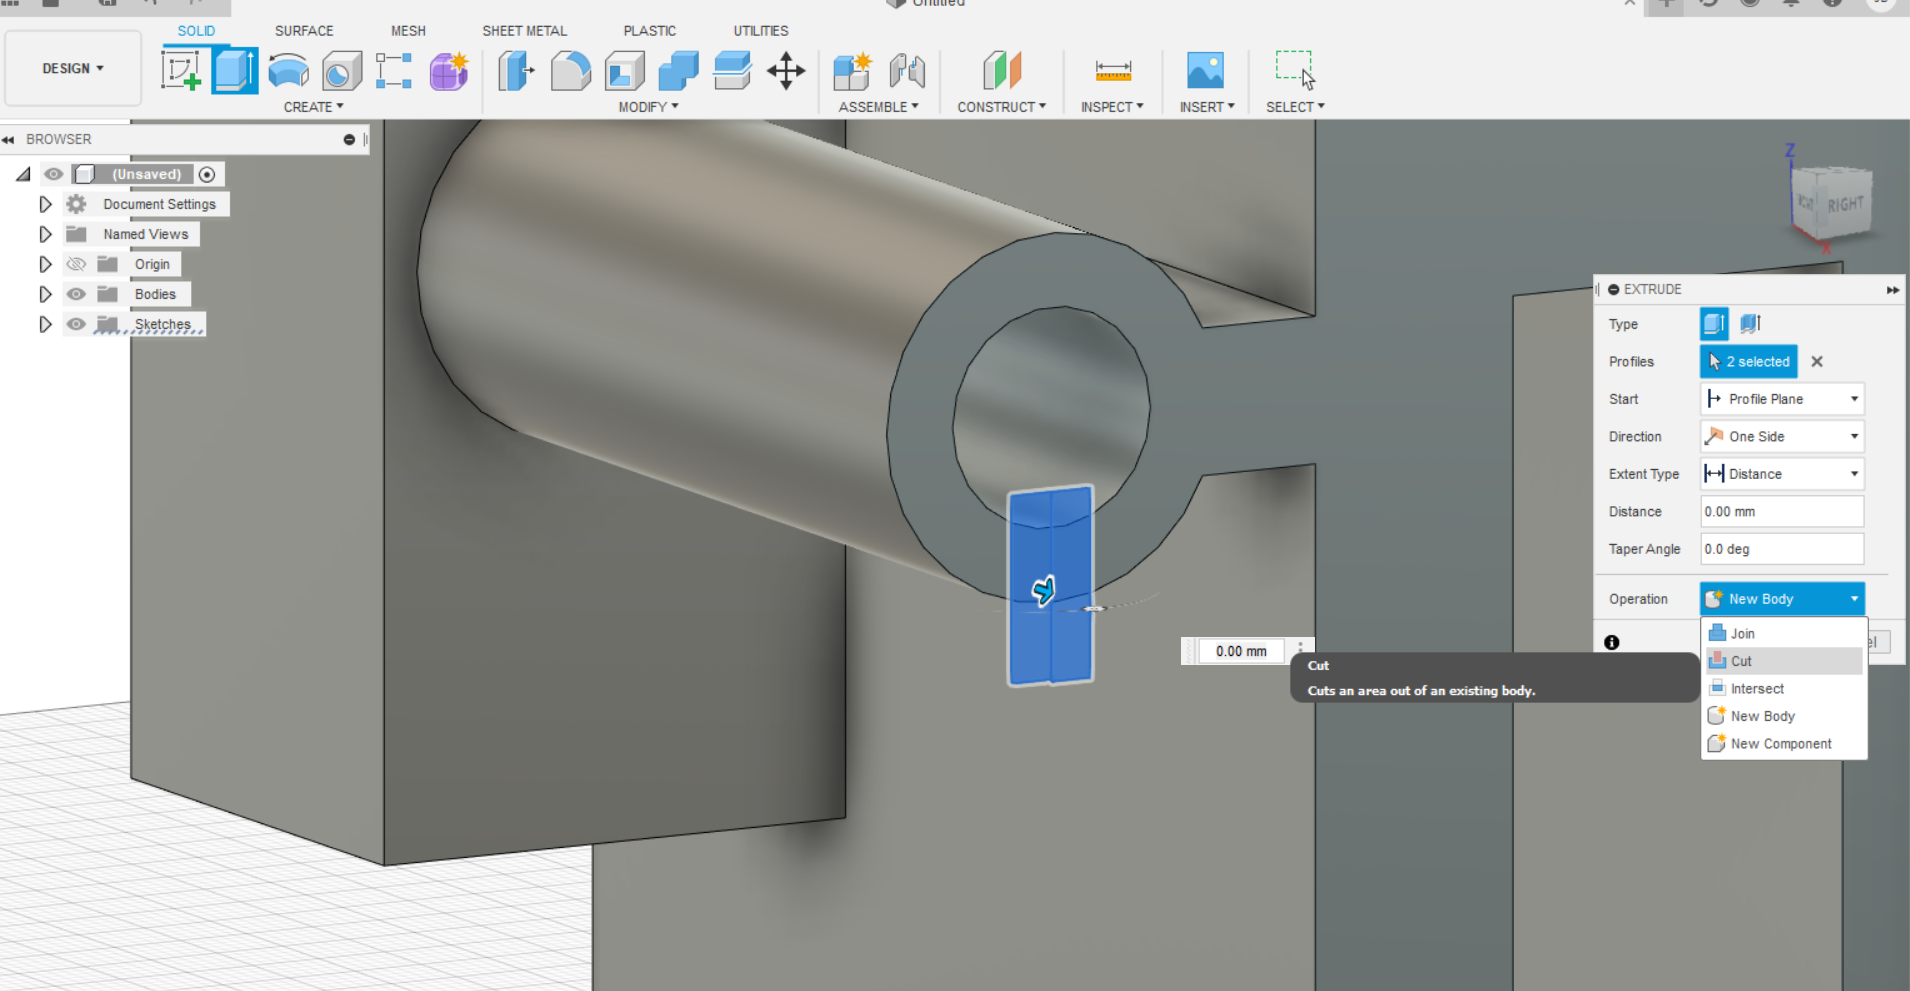
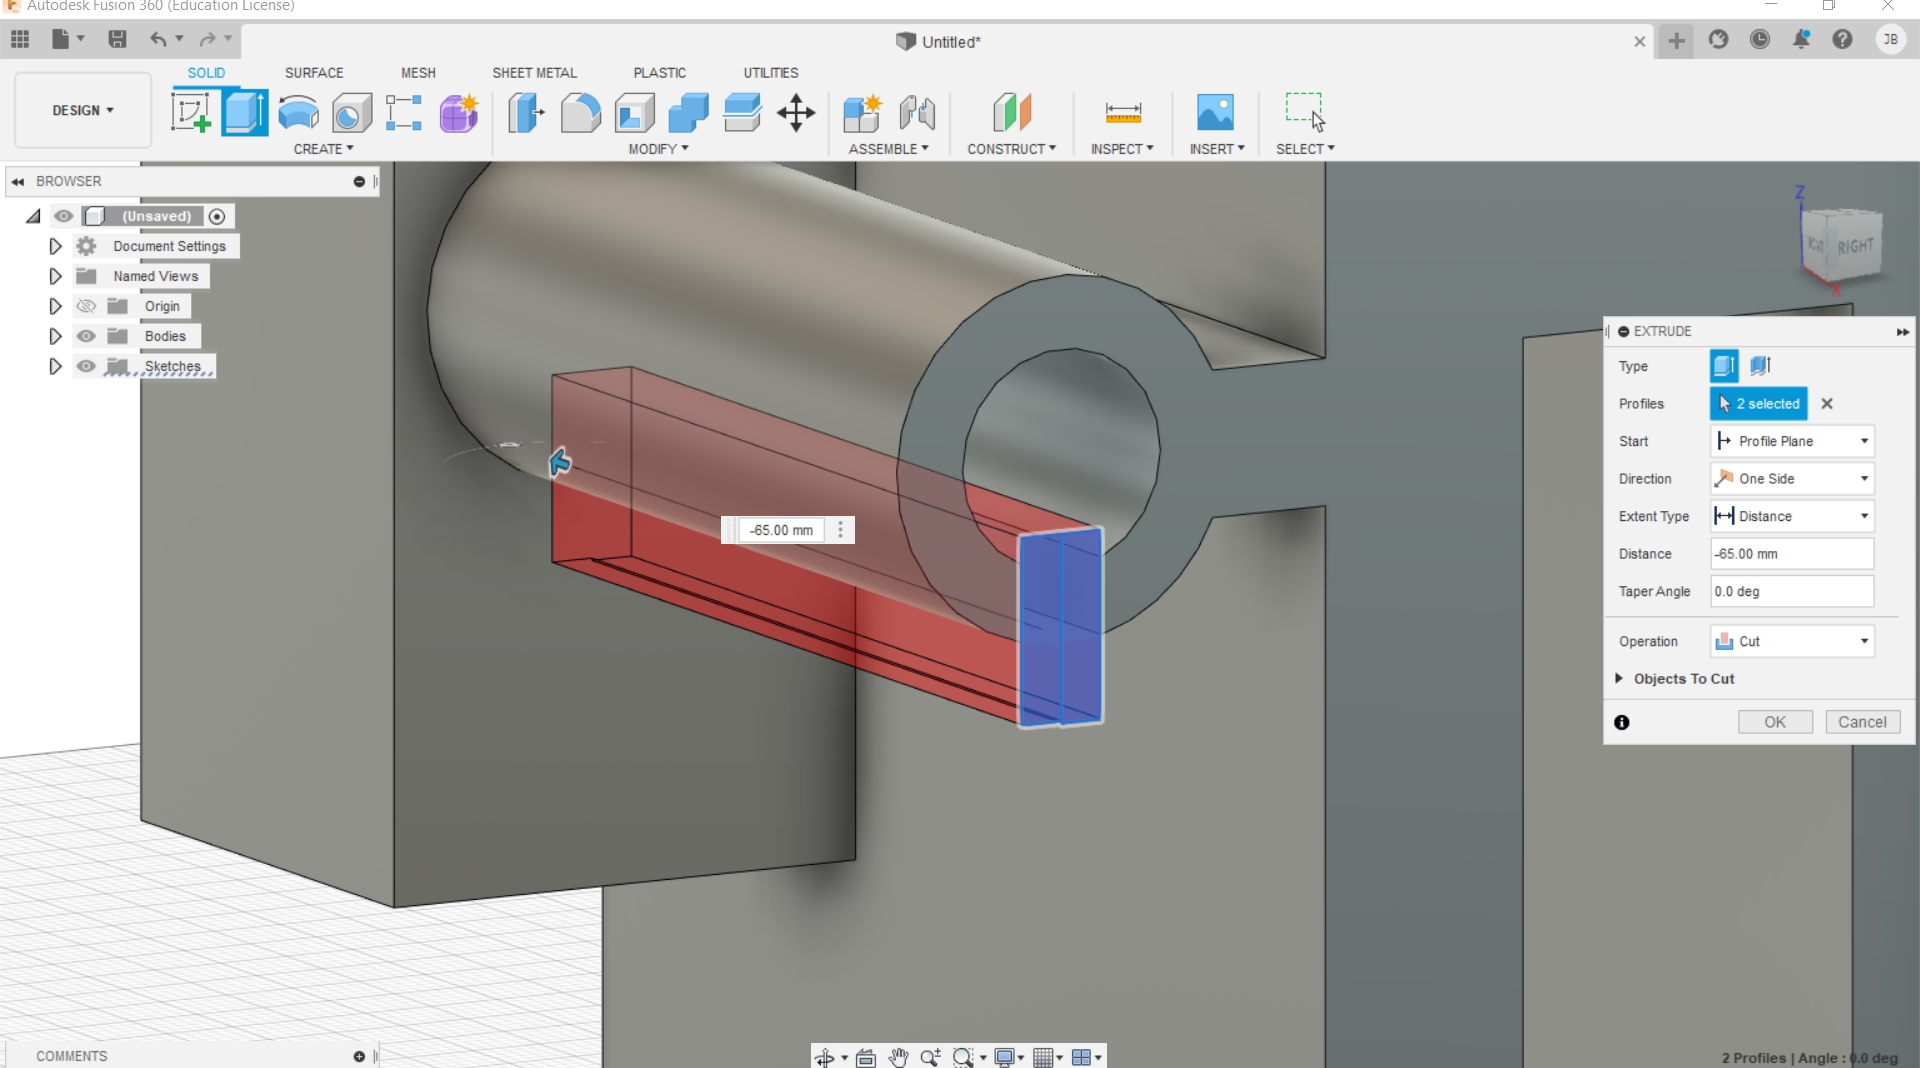
with the sketch just made perform an extrude cut and remove the bottom of the circle to allow your toothpaste to hang there.
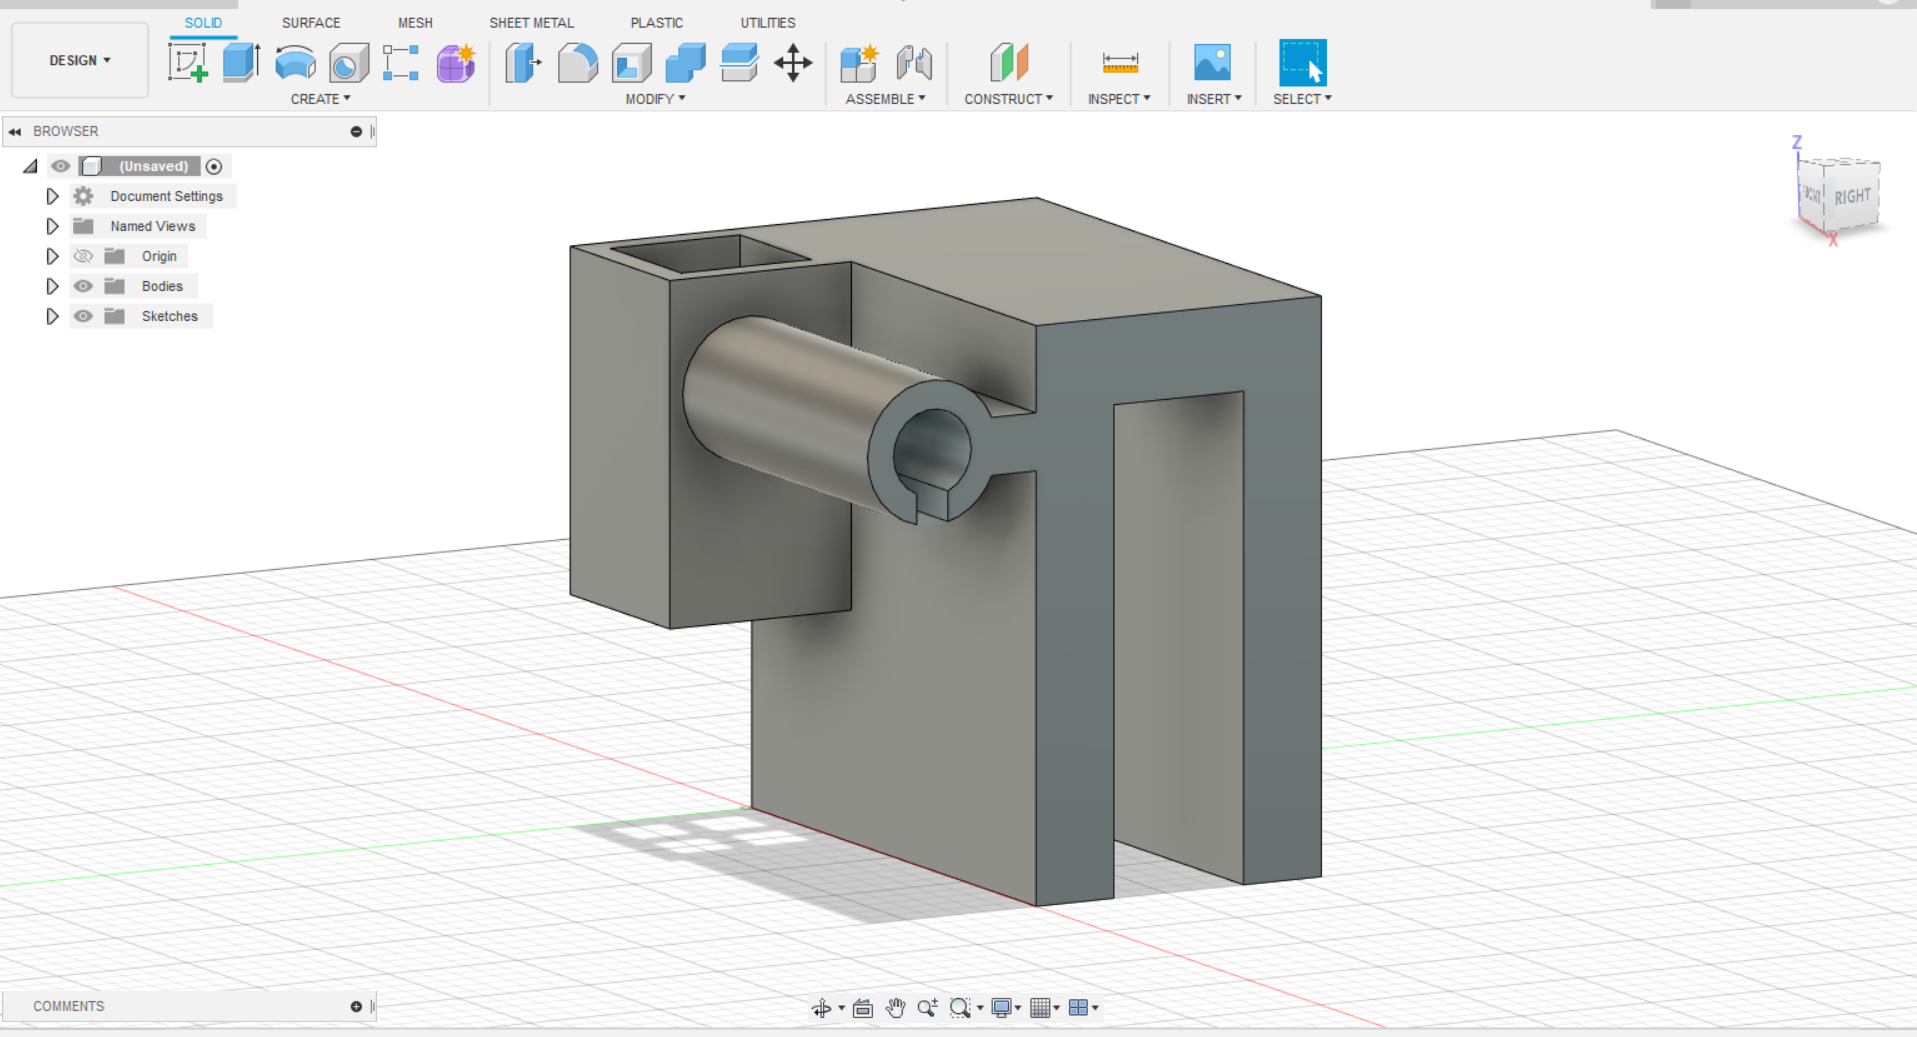
Now you have done all of the steps. perform any custom changes you wish.