How to Make a “Counting 3D Shapes” Touch Book
by sstanek in Design > 3D Design
57622 Views, 1 Favorites, 0 Comments
How to Make a “Counting 3D Shapes” Touch Book
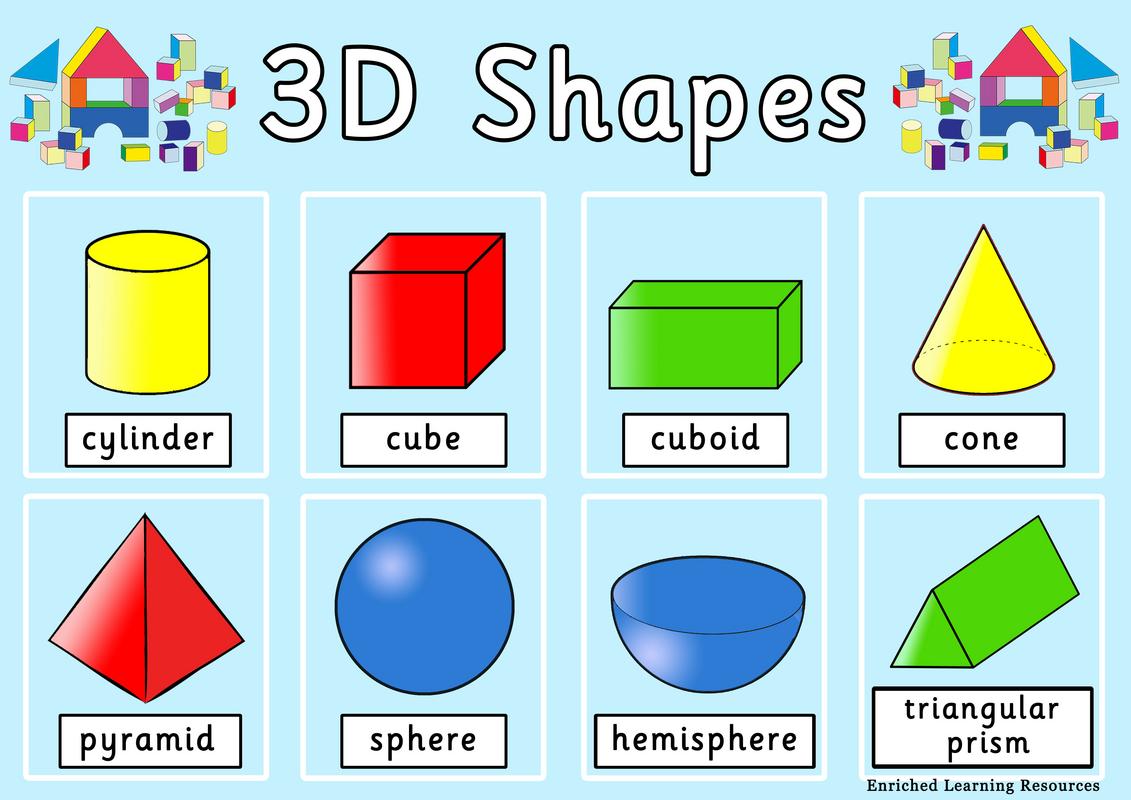
Hello, and welcome! In this tutorial I will be guiding you through the process of creating a touch book that uses shapes to teach counting with a tactile element that allows kids to see and feel what the three dimensional versions of the usual basic shapes are.
Sign Up for Tinkercad Account
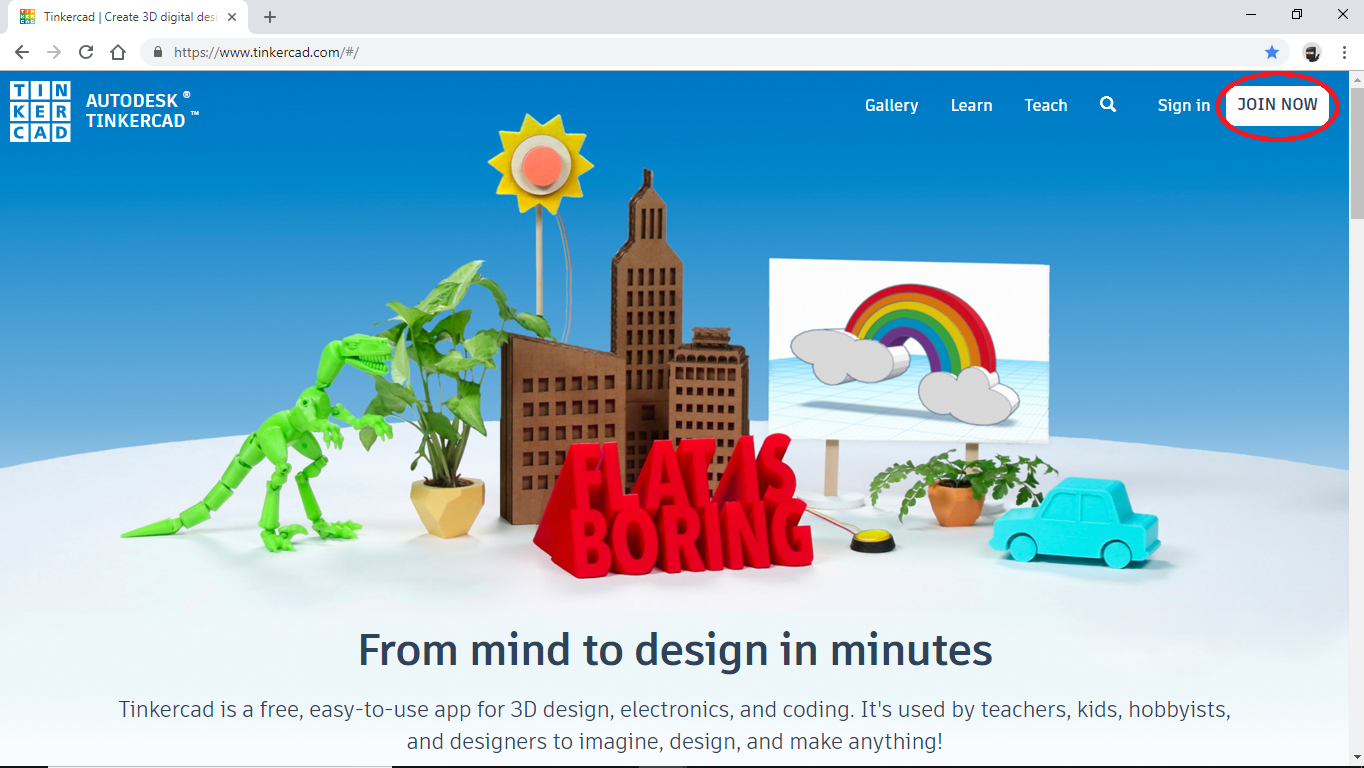
In order to get started with this project you must first head on over to www.tinkercad.com and create a free profile to have access to the tools you will need. I recommend that you do the basic tutorials once you have finished creating your profile, as these will give helpful hints and tips and show some of the techniques you will be using.
The first and most important step, is DO NOT GET OVERWHELMED AND STAY CALM! Working in a three dimensional space is a little tricky and will take some time to get used to, but I am confident that you will become a pro in no time! (PRO TIP: Holding down CTRL and left clicking will let you drag and rotate the object, holding CTRL+Shift and left clicking will let you drag and shift and reposition the object!) Now that you have finished creating your profile and learned the basics, we will get started.
Setup and Foundation

The first thing that you are going to want to do is set up the workspace grid. To do this, click the Edit Grid button then enter the dimensions of the workspace. Set the dimensions to 200x500.
Add Ruler

Next, add a ruler to the (0,0) position of the grid. This will allow you to directly manipulate the (x,y) coordinates of the objects you will be using.
Make Basic Page Shape
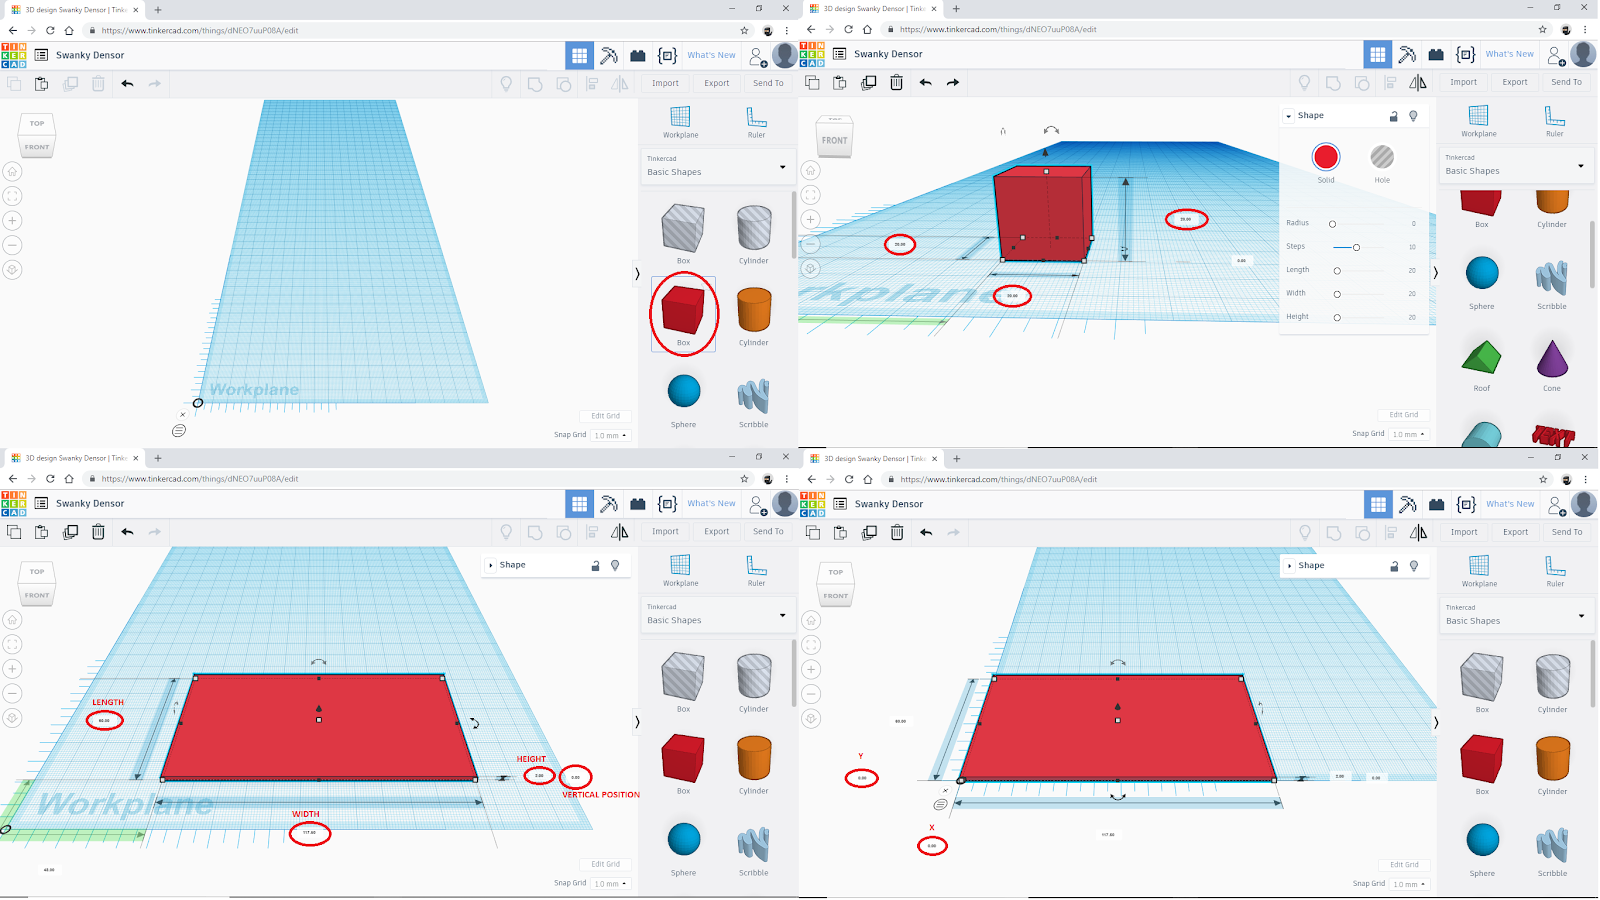
After setting up the grid, it’s time to make the page template of the book. What you are going to do is :
- Select the cube shape from the shape toolbox on the right side of the screen.
- Change the dimensions of the length to (60.00)
- Change the dimensions of the width to (117.50)
- Change the dimensions of the hight to (2.0) (leave vertical positioning alone for this object.)
- Set the (x,y) coordinates to (0,0)
Make the Rest of the Pages
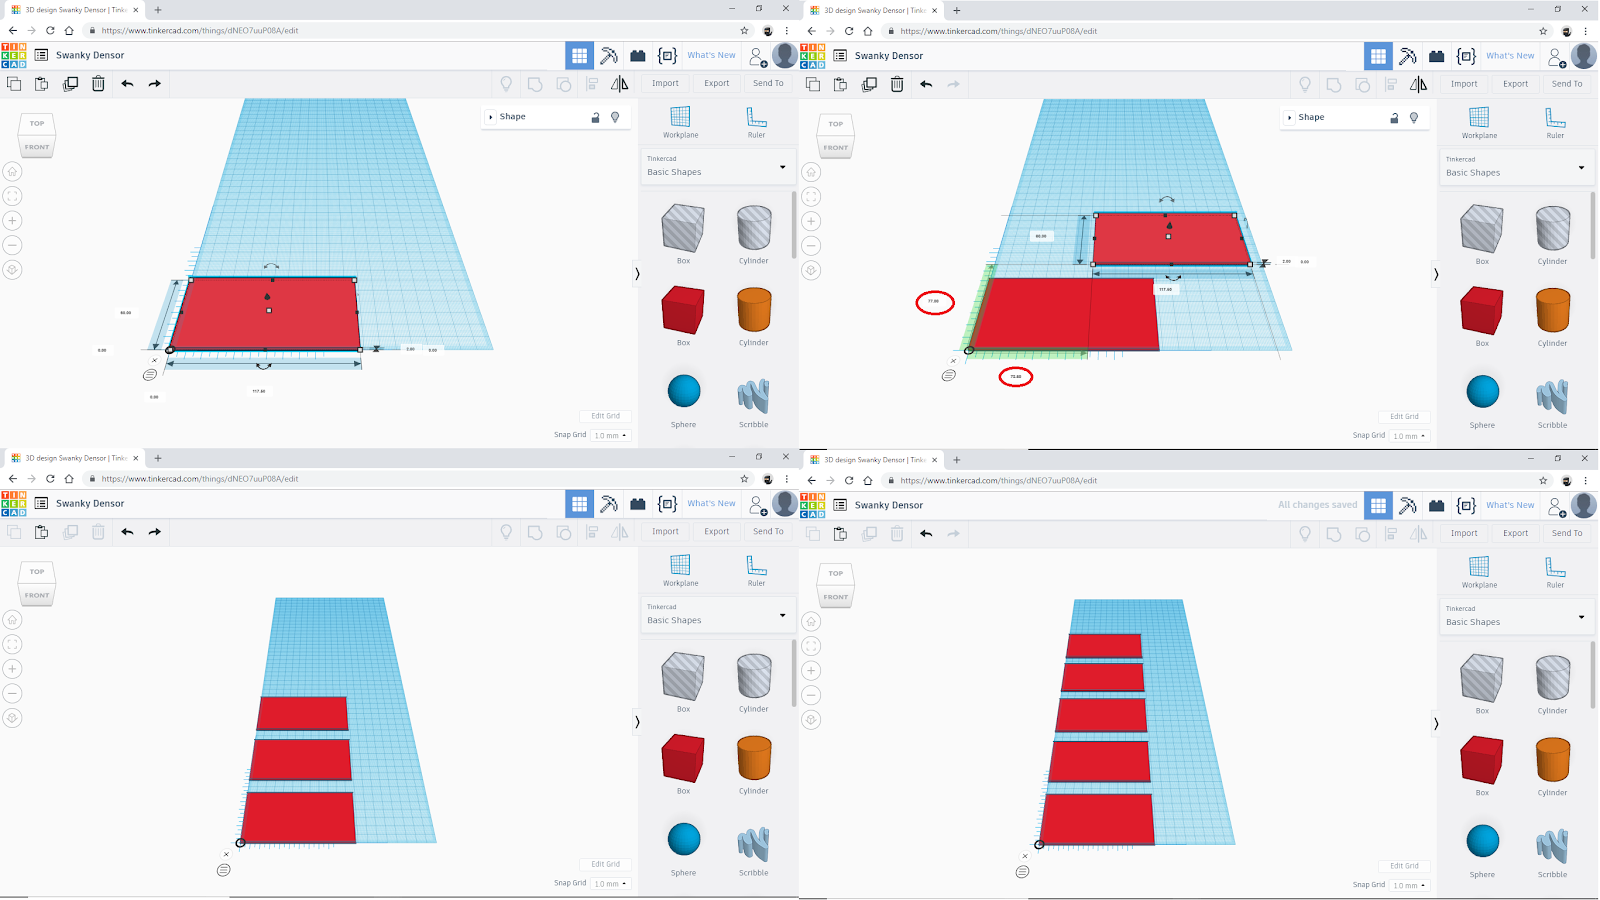
Congratulations, you have made the page template! Now that you have that step done, select the page by left clicking on it and copy it using (CTRL ‘C’). You will make four copies and follow this process:
- Press (CTRL ‘V’) Change (x,y) coordinates for ‘page 2’ to (0,80)
- Press (CTRL ‘V’) Change (x,y) coordinates for ‘page 3’ to (0,160)
- Press (CTRL ‘V’) Change (x,y) coordinates for ‘page 4’ to (0,240)
- Press (CTRL ‘V’) Change (x,y) coordinates for ‘page 5’ to (0,320)
Learning About Adding Shapes
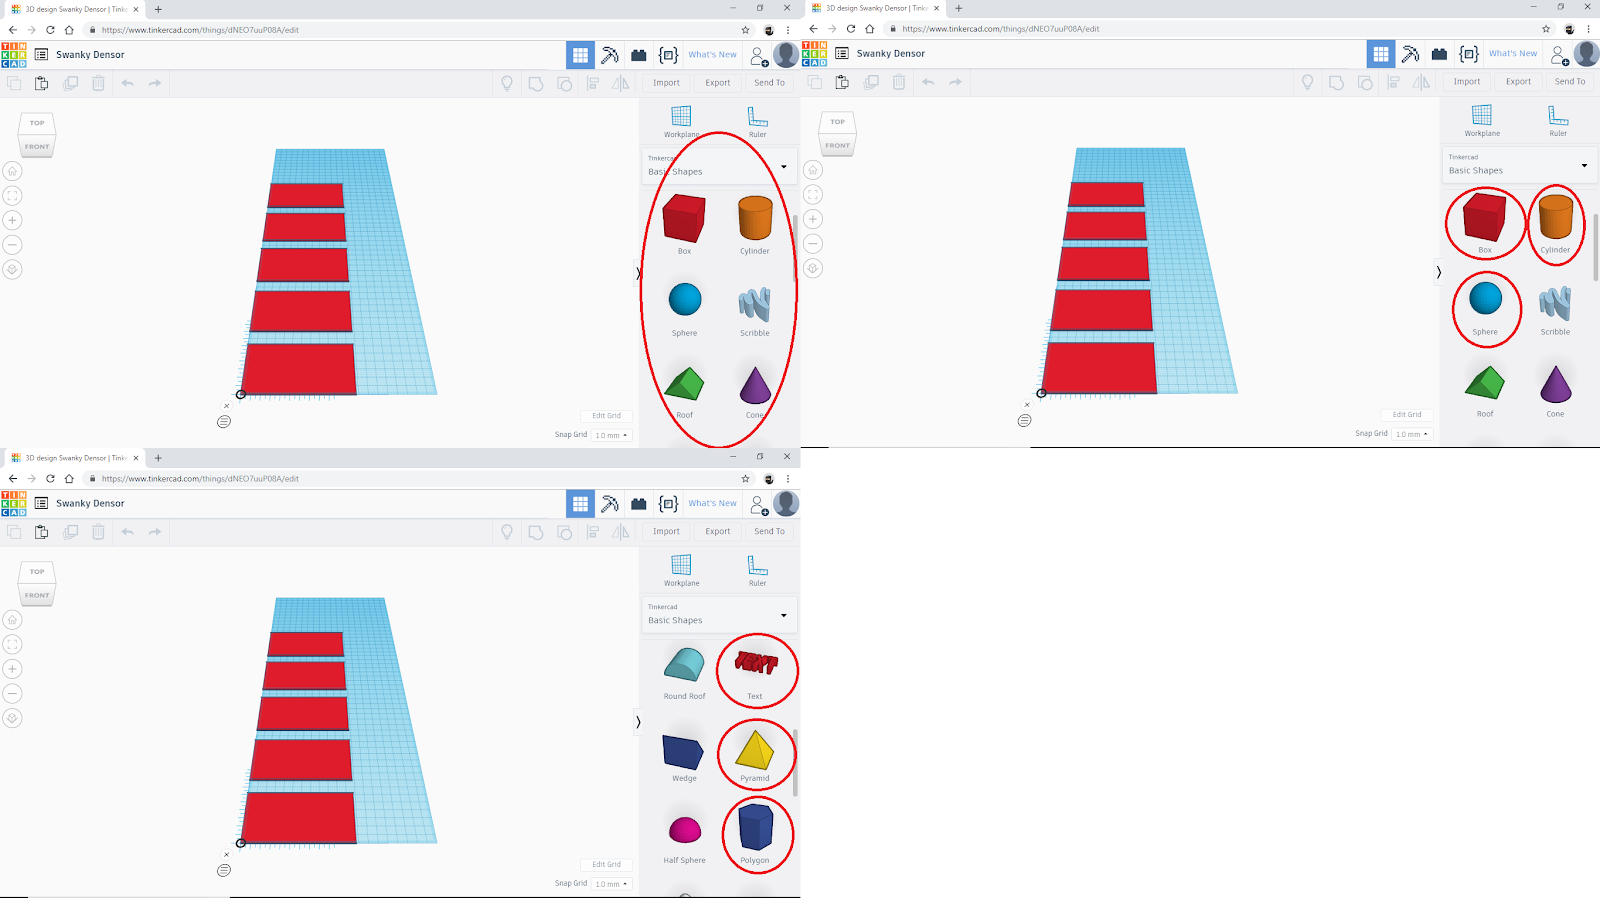
The next part in the process is to add and place the shapes to each of the pages. You will be given instruction on how to change the shape’s dimensions and how to make holes. There will also be included sets of dimensions and coordinates for each piece for each page you will make.
The shapes we will be using to complete the book are the box, cylinder, sphere, pyramid, polygon(hexagon), and “TEXT.” For the purposes of making holes, you will use the cube to make square holes and the cylinder to make round holes. The polygon is used to make the holes for the hexagon shape. From this point forward the dimensions will be explained like this: [(LengthxWidthxHeight) | (x,y) | (Depth)] for example [(5x5x20) | (15,30) | (2)]. They will also be listed from leftmost to right most if there are more than one of the same shape being used. Okay, start placing shapes!
Adding Shapes With Dimensions to Page 1
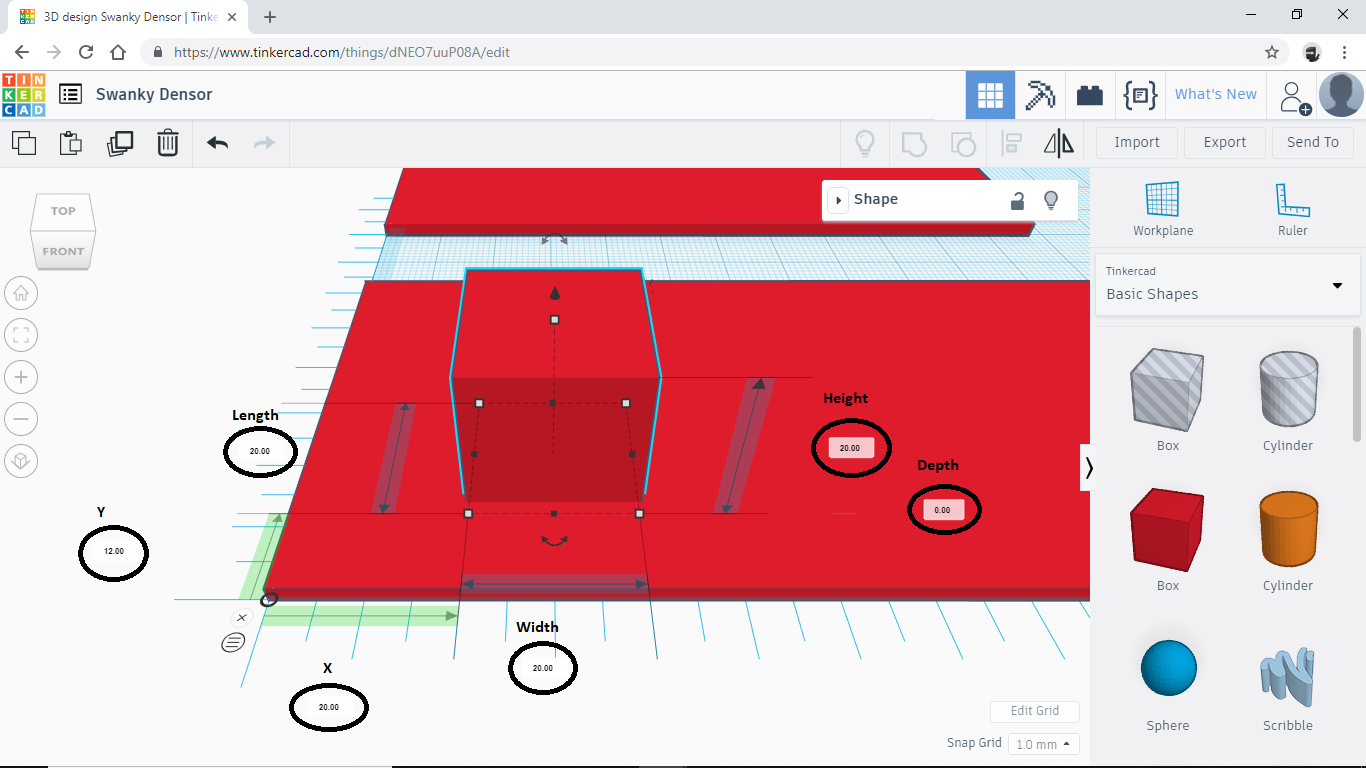
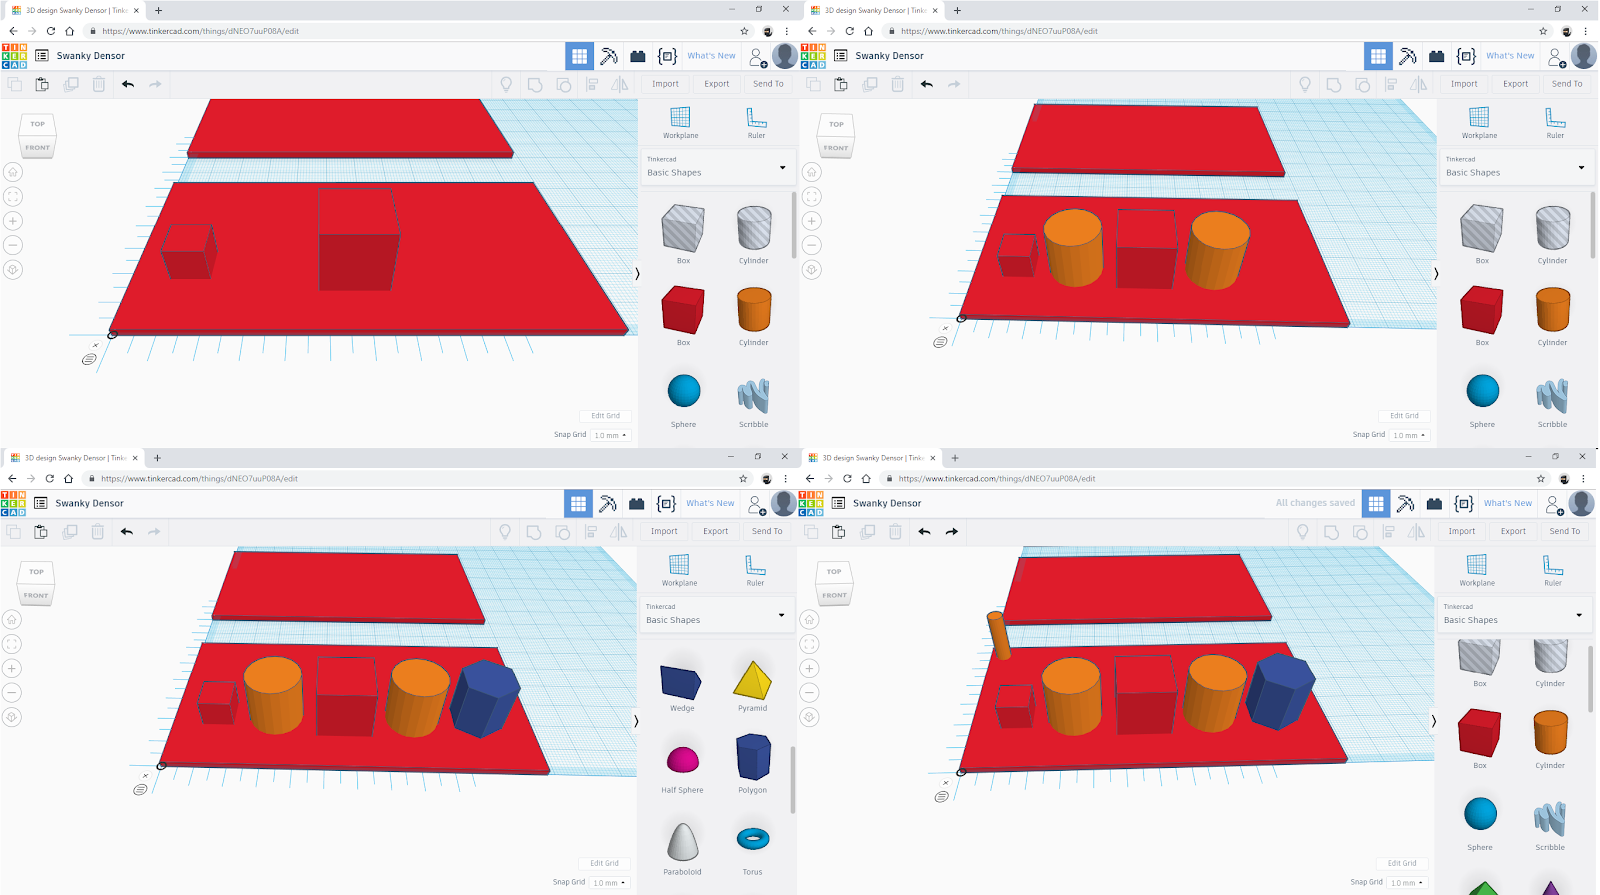
The first shape you are going to place is the cube. The object dimension and spacing settings boxes have been circled and labeled so you know which box does what when you change the values.
So the shapes for page one you are going to need for page one are:
- 2 cubes
- [(10x10x10) | (10,16) | (1.5)] - Cube
- [(17.5x17.5x20) | (47.5,12) | (0)] - Pyramid Hole
- 3 cylinders
- [(5x5x20) | (2.5,52.5) | (0)] - Ring Hole
- [(17.5x17.5x20) | (25,12) | (0)] - Sphere Hole
- [(17.5x17.5x20) | (70,12) | (0)] - Cylinder Hole
- 1 polygon
- [(17.5x14.82x20) | (92.5,12) | (0)] - Hexagon Hole
Making "Holes"
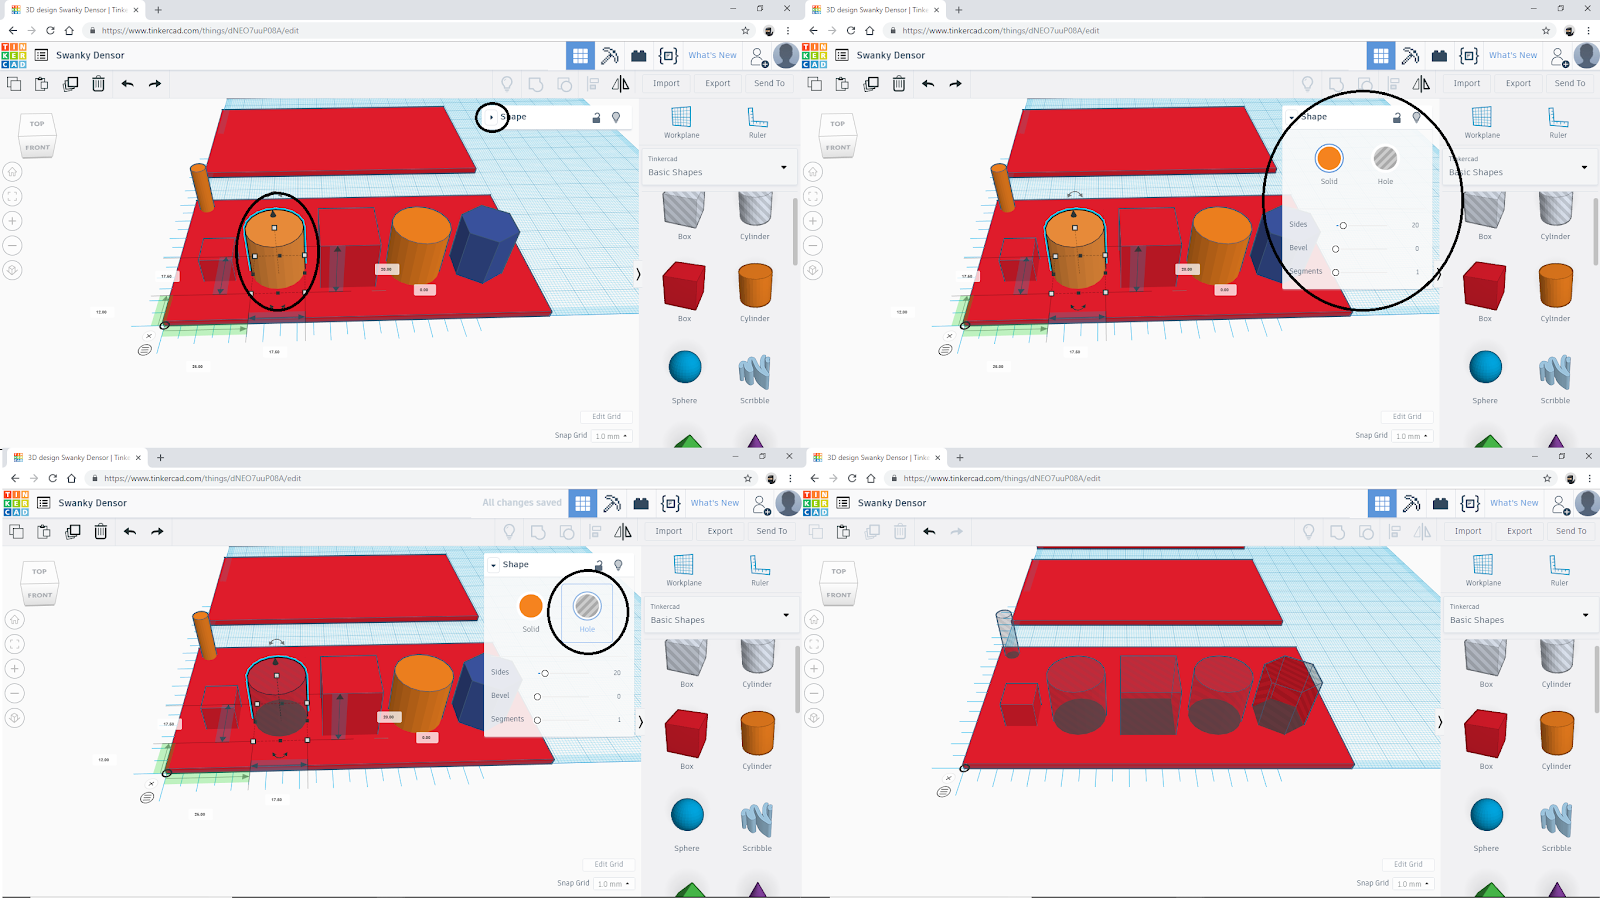
Now that you have added the shapes to the first page, you have to make the three cylinders, the large cube, and the polygon holes in the shape. What this will look like for now are kind of grayed out shapes. They will not be actual holes until we have finished the page and grouped the shapes together. The process for making holes is this: Select a shape, make sure the shape options panel is open, click “Hole” button.
Making Page 2

Now to page two! The process from here on out is going to be very similar to making page one. There will only be variation in in the dimensions of the shapes, and page two will use a sphere and page three will use a pyramid. Pictures will be included along with the dimensions as above so you can follow along with the process.
The shapes for page one you are going to need for page two are:
- 2 Cubes
- [(10x10x2) | (10,95) | (1)] - Flat Cube
- [(17.5x17.5x20) | (47.5,12) | (0)] - Pyramid Hole
- 1 Sphere
- [(10x10x10) | (28.5,95.5) | (1.5)] - Sphere
- 2 cylinders
- [(5x5x20) | (2.5,132.5) | (0)] - Ring Hole
- [(17.5x17.5x20) | (70,92) | (0)] - Cylinder Hole
- 1 polygon
- [(17.5x14.82x20) | (92.5,92) | (0)] - Hexagon Hole
Making Page 3

The shapes for page one you are going to need for page three are:
- 1 Cube
- [(10x10x2) | (10,175) | (1)] - Flat Cube
- 1 Sphere
- [(10x10x3) | (28.5,175.5) | (1)] - Flat Sphere
- 1 Pyramid
- [(10x10x10)] | (51.25,175.5) | (1.5) - Pyramid
- 2 Cylinders
- [(5x5x20) | (2.5,212.5) | (0)] - Ring Hole
- [(17.5x17.5x20) | (70,172) | (0)] - Cylinder Hole
- 1 Polygon
- [(17.5x14.82x20) | (92.5,172) | (0)] - Hexagon Hole
Making Page 4

The shapes for page one you are going to need for page four are:
- 1 Cube
- [(10x10x2) | (10,255) | (1)] - Flat Cube
- 1 Sphere
- [(10x10x3) | (28.5,255.5) | (1)] - Flat Sphere
- 1 Pyramid
- [(15x15x2.75)] | (47.5,253) | (1) - Flat Pyramid
- 2 Cylinders
- [(5x5x20) | (2.5,292.5) | (0)] - Ring Hole
- [(10x10x10) | (73.25,255.5) | (1.5)] - Cylinder
- 1 Polygon
- [(17.5x14.82x20) | (92.5,252) | (0)] - Hexagon Hole
Making Page 5

The shapes for page one you are going to need for page two are:
- 1 Cube
- [(10x10x2) | (10,335) | (1)] - Flat Cube
- 1 Sphere
- [(10x10x3) | (28.5,335.5) | (1)] - Flat Sphere
- 1 Pyramid
- [(15x15x2.75)] | (47.5,333) | (1) - Flat Pyramid
- 2 Cylinders
- [(5x5x20) | (2.5,372.5) | (0)] - Ring Hole
- [(10x10x2) | (71.5,335.25) | (1)] - Flat Cylinder
- [(5x5x20) | (2.5,372.5) | (0)] - Ring Hole
- 1 Polygon
- [(10x8.82x10) | (95.55,335.5) | (1.5)] - Hexagon
Grouping Objects Together


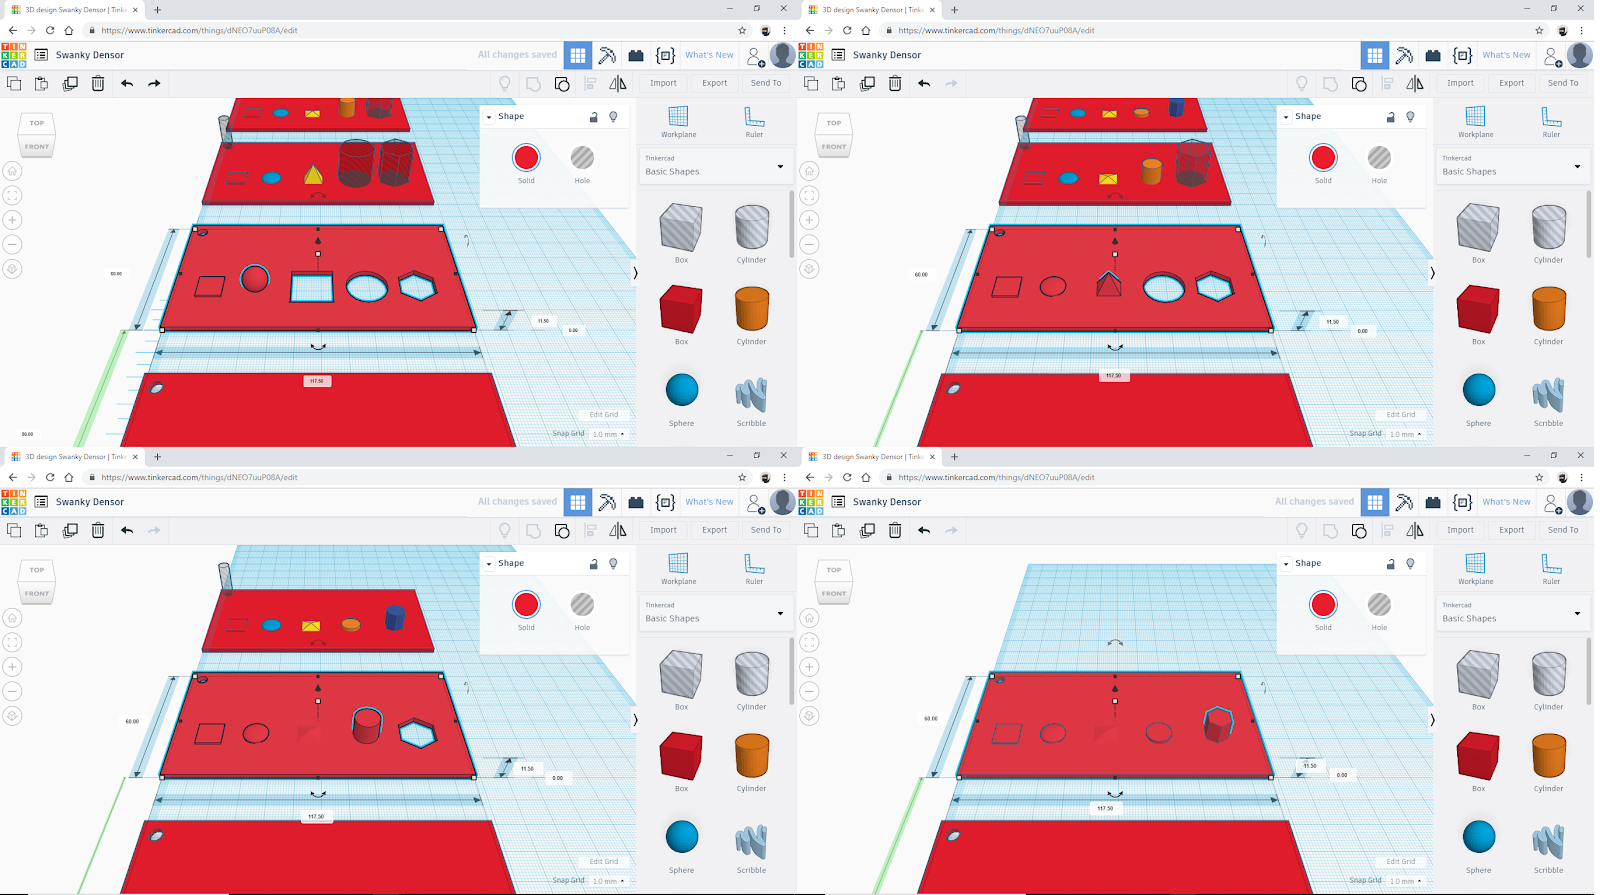
Alright, now that the pages have shapes and they have been placed properly, the next part is making all the pieces into a single piece. This is where actual holes will be created.
The first step in this process is to use left click to drag a selection box across one of the finished pages to select all the objects of a single page at once.
Once you have selected all the objects of a page, you will then click the “Group” button to make them all one item. Once they objects are grouped they will on longer move separately and their will be holes where they grayed out shapes are.
Repeat this process of selecting and grouping for the rest of the pages to finish this step in the process.
Adding Text

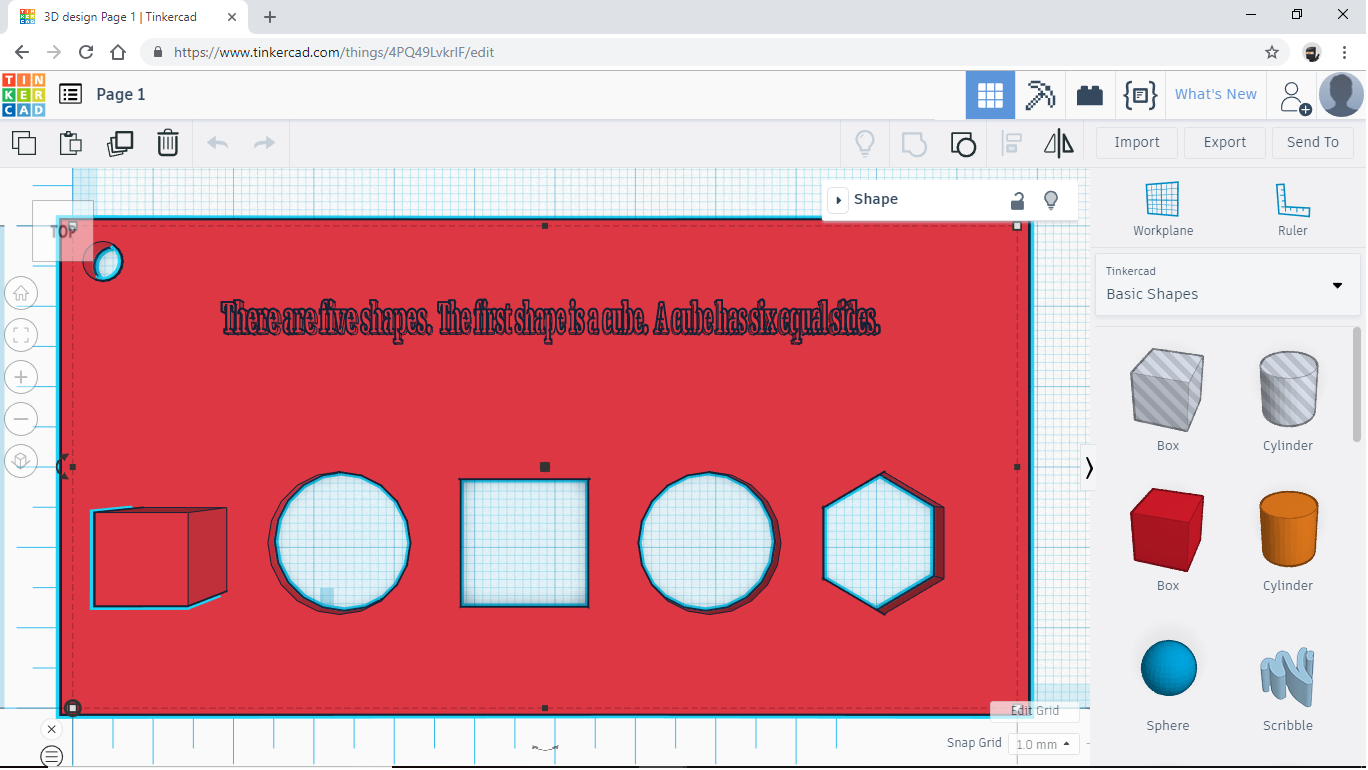
The final step in the process of making this book is to add the text to the pages. In order to do this, you must click the ‘TEXT’ object and set the dimensions just like you did with the shapes. The tricky part of this process is that you can only have a small amount of words per object so the text has been broken into strings that fit this limitation. Below are the settings for the text and pictures of what the process looks like.
Page 1 Text
- “There are five shapes.” [(5x25x2) | (20,45) | (1)]
- “The first shape is a cube.” [(5x25x2) | (46,45) | (1)]
- “A cube has six equal sides.” [(5x27x2) | (72,45) | (1)]
Adding Text to Page 2
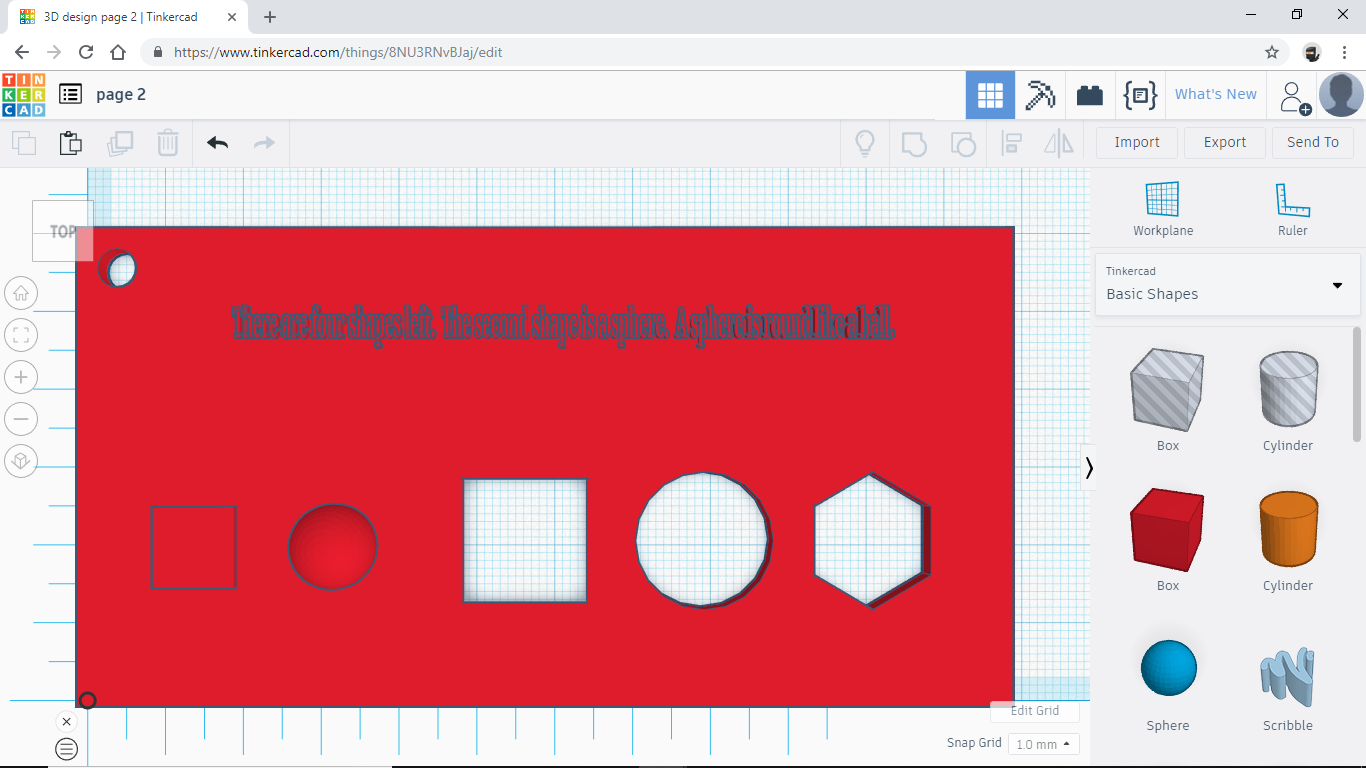
Page 2 Text
- “There are four shapes left.” [(5x25x2) | (20,125) | (1)]
- “The second shape is a sphere.” [(5x28x2) | (48,125) | (1)]
- “A sphere is round like a ball.” [(5x27x2) | (75,125) | (1)]
Adding Text to Page 3
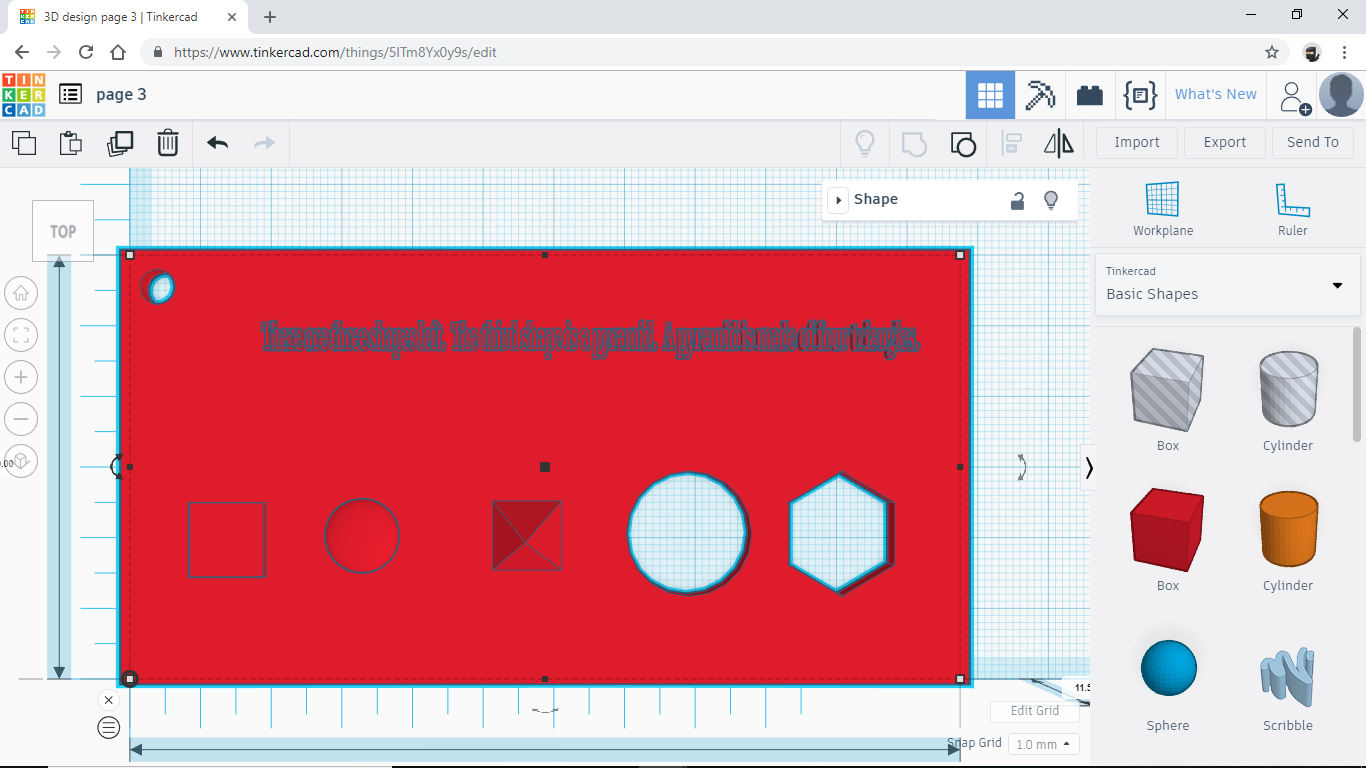
Page 3 Text
- “There are three shapes left.” [(5x25x2) | (20,205) | (1)]
- “The third shape is a pyramid.” [(5x28x2) | (46,205) | (1)]
- “A pyramid is made of four triangles.” [(5x35x2) | (70,205) | (1)]
Adding Text to Page 4
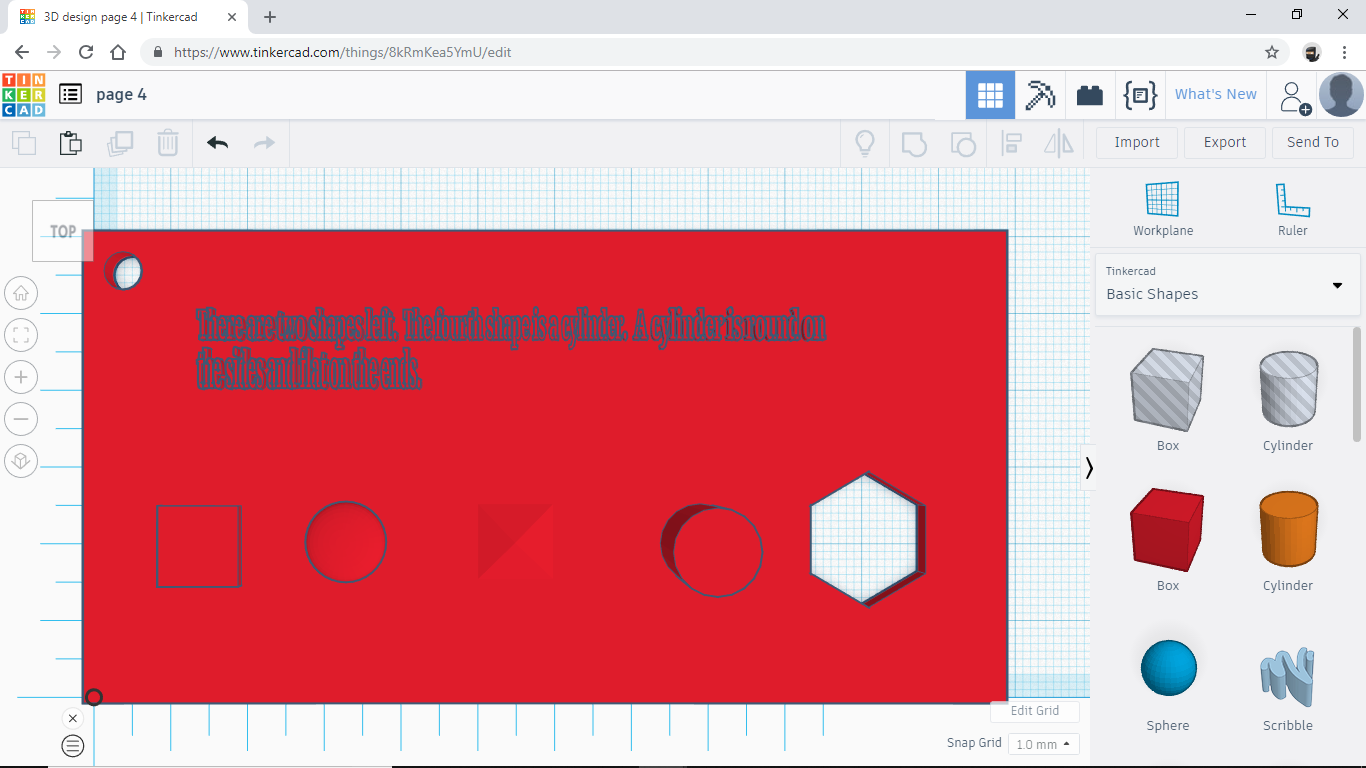
Page 4 Text
- “There are two shapes left.” [(5x25x2) | (15,285) | (1)]
- “The fourth shape is a cylinder.” [(5x28x2) | (41,285) | (1)]
- “A cylinder is round on” [(5x24x2) | (70,285) | (1)]
- “the sides and flat on the ends.” [(5x28x2) | (15,280) | (1)]
Adding Text to Page 5
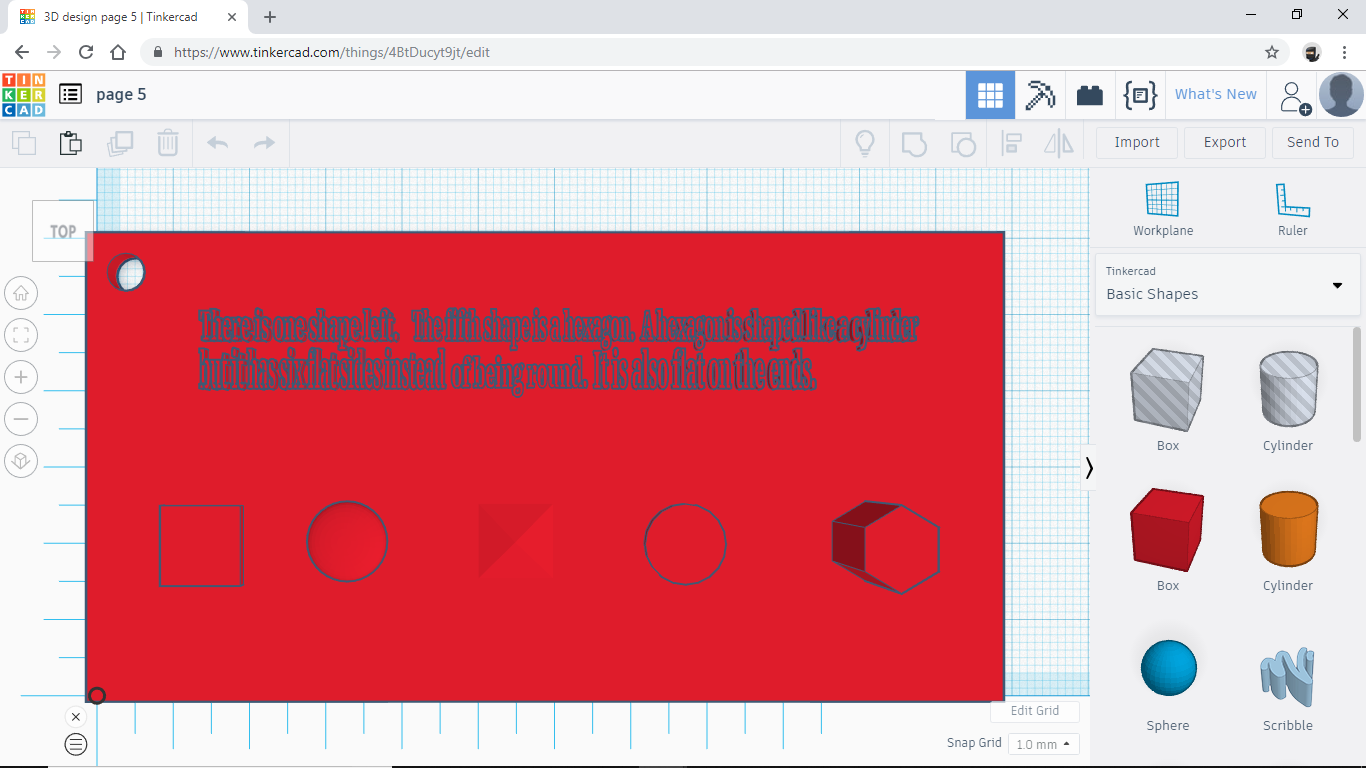
Page 5 Text
- “There is one shape left.” [(5x25x2) | (15,365) | (1)]
- “The fifth shape is a hexagon.” [(5x28x2) | (42,365) | (1)]
- “A hexagon is shaped like a cylinder” [(5x35x2) | (71,365) | (1)]
- “but it has six flat sides instead” [(5x31x2) | (15,360) | (1)]
- “of being round.” [(5x17x2) | (47,360) | (1)]
- “It is also flat on the ends.” [(5x28x2) | (65,360) | (1)]
After you have placed all the text, repeat the process of grouping and group the text to the rest of the page. After you have grouped the text to all the pages you are done with the building part of making the book.
Exporting Your File to Print

The last thing to do is to get your 3D book printed. Export the file from tinkercad to your computer as an STL file and find your nearest 3D printing center. After the book has been printed, you need to bind the pages together. The hole in the upper left corner of the pages is so you use a clip ring or ribbon or zip tie to keep the book together.
See What You Have Made
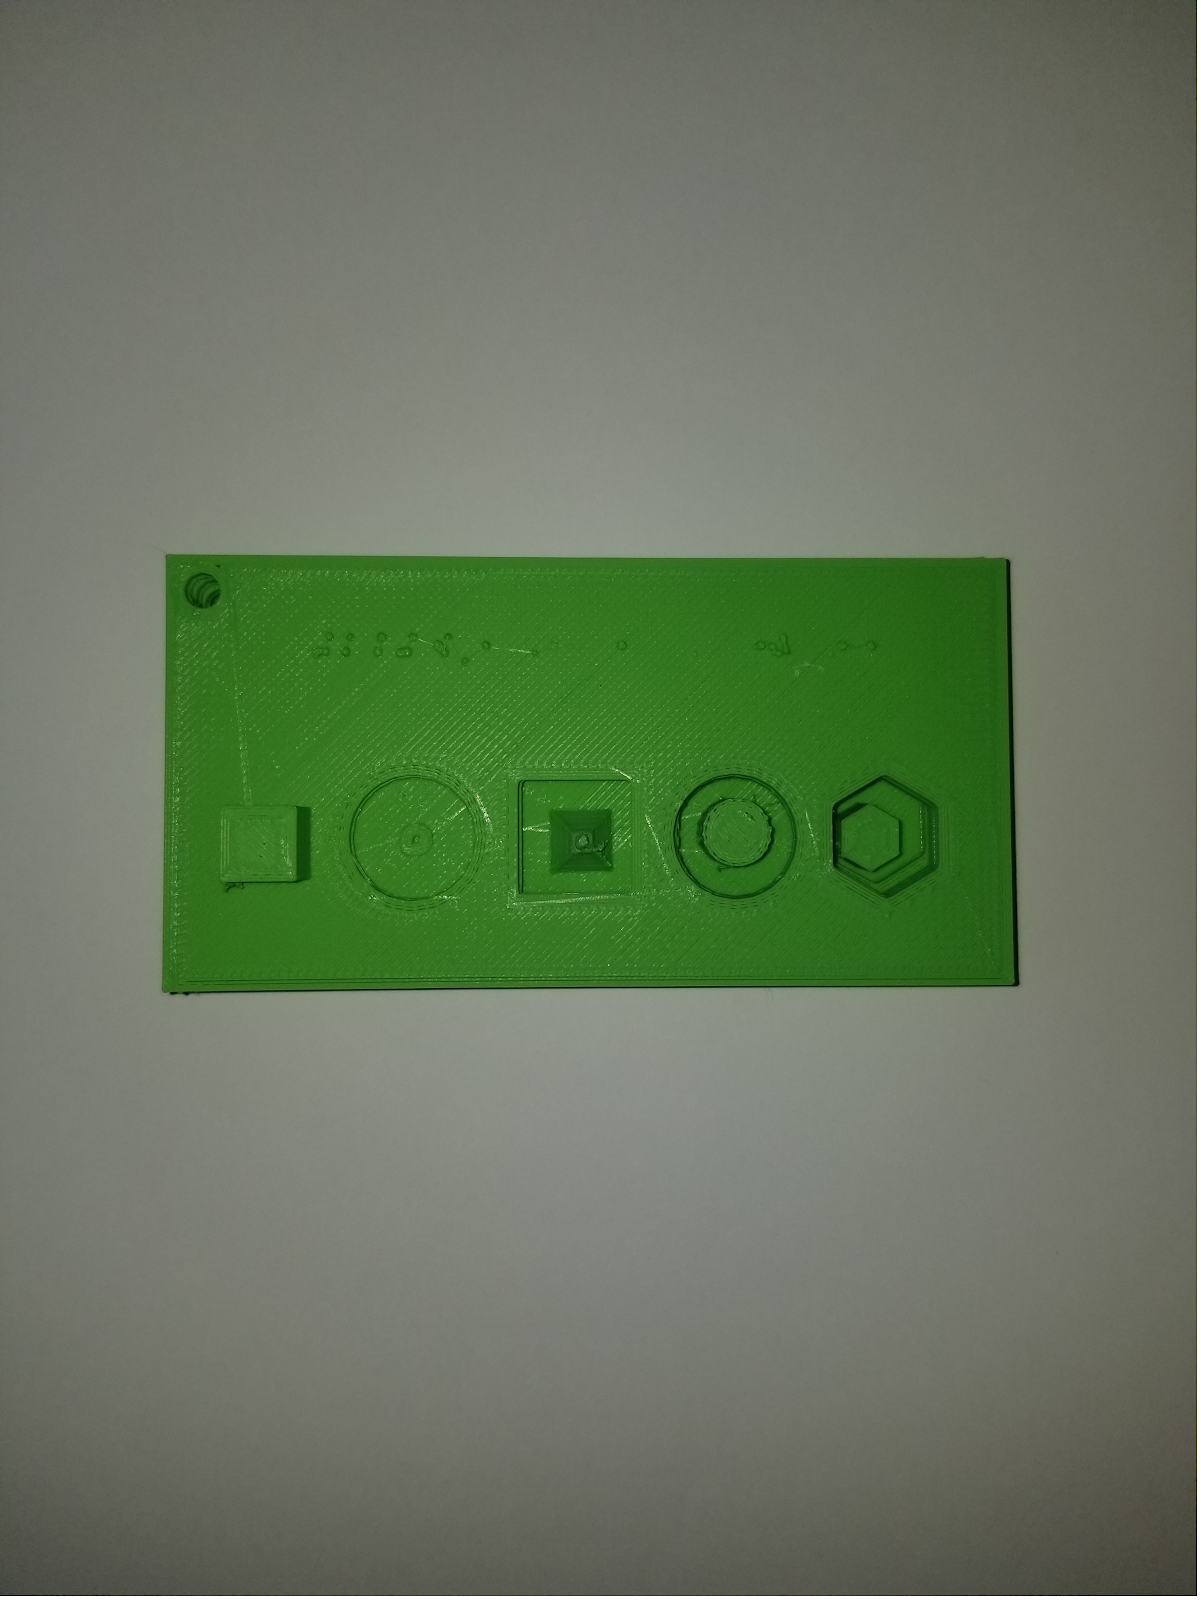
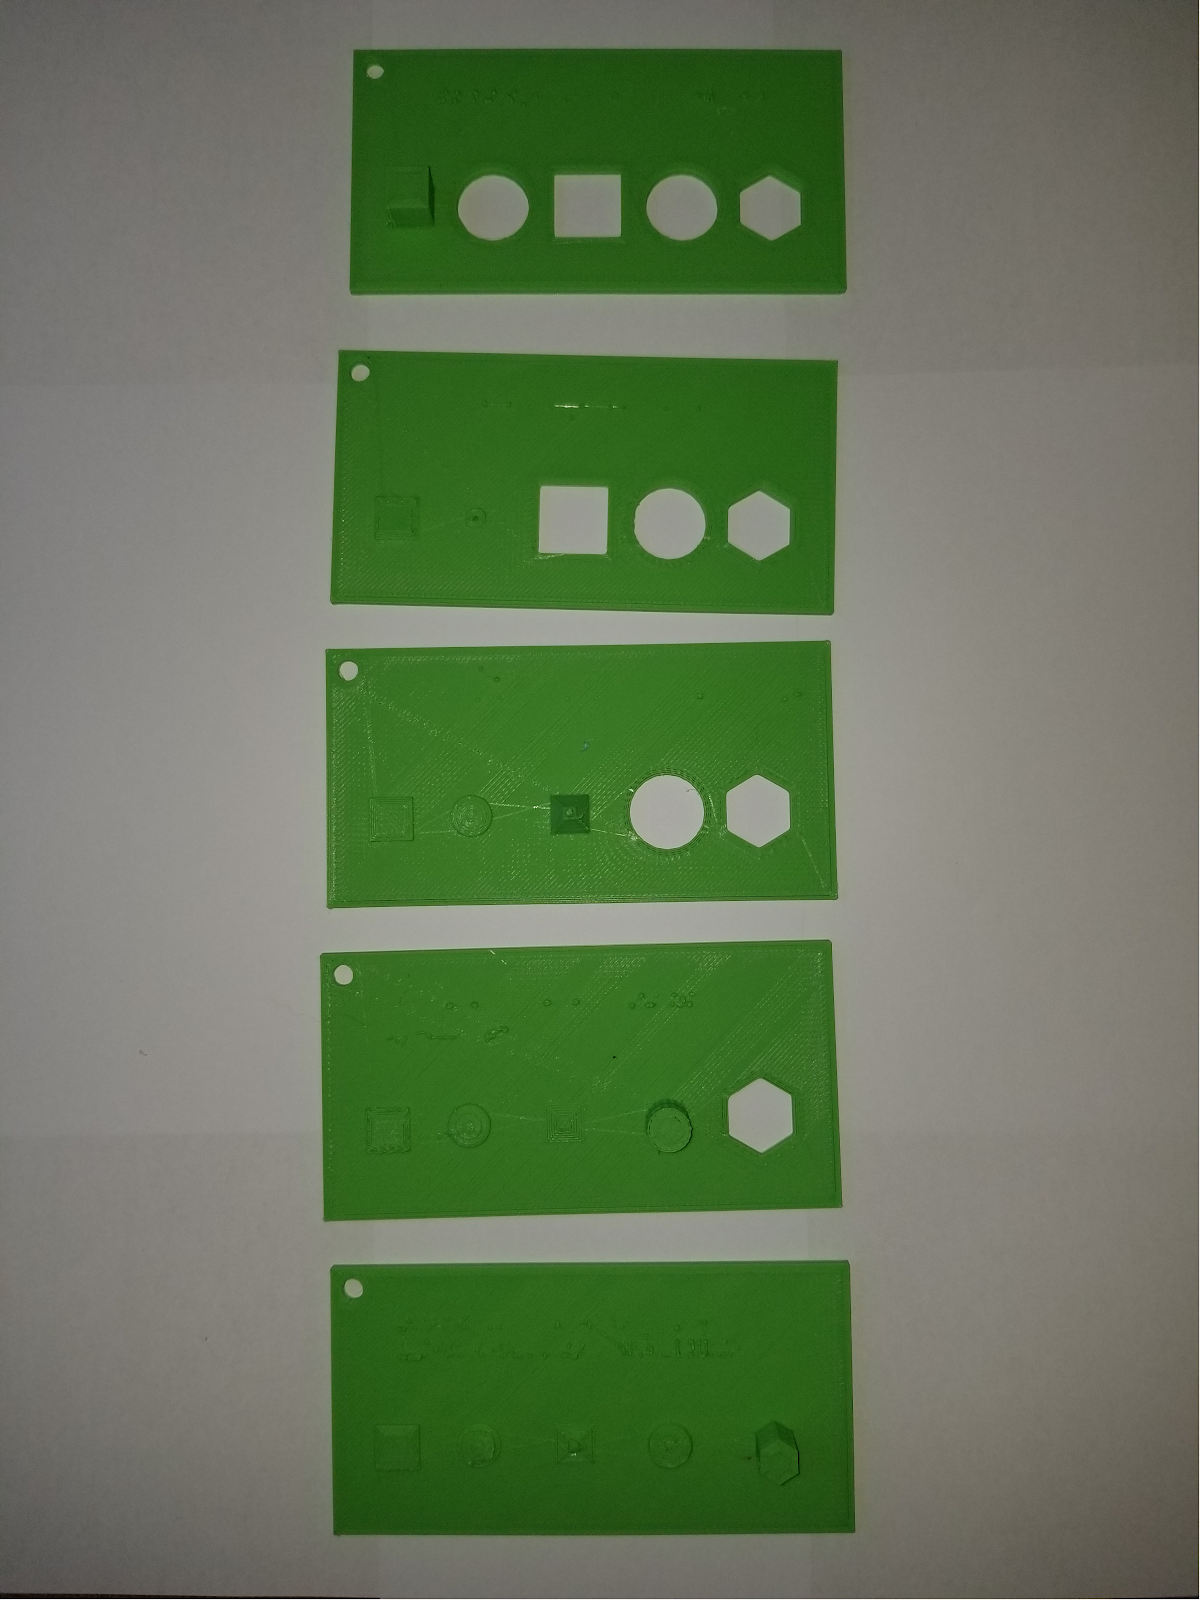
These are images of the proof of concept. Some modification may be necessary.