How to Make a Collage on Polyvore
by SockwunPhng in Circuits > Websites
31976 Views, 4 Favorites, 0 Comments
How to Make a Collage on Polyvore

Introduction
Polyvore is a website that enables people to create wishlists known as "sets." These sets are typically collages that comprise items that can be bought by simply clicking on a link. Each set contains information about every item in the set; it shows the name of the brand, the price of the product, and the website where the product can be bought.
On Polyvore, users can share sets as inspiration for other users. Generally, each set created revolves around a specific theme. Since Polyvore is mainly a website for beauty and fashion products, themes range from Halloween makeup ideas to celebrity red carpet style.
Creating sets on Polyvore can be confusing for a beginner user of the website. This tutorial is aimed at making the process as easy as possible to understand.
Overview of Main Page
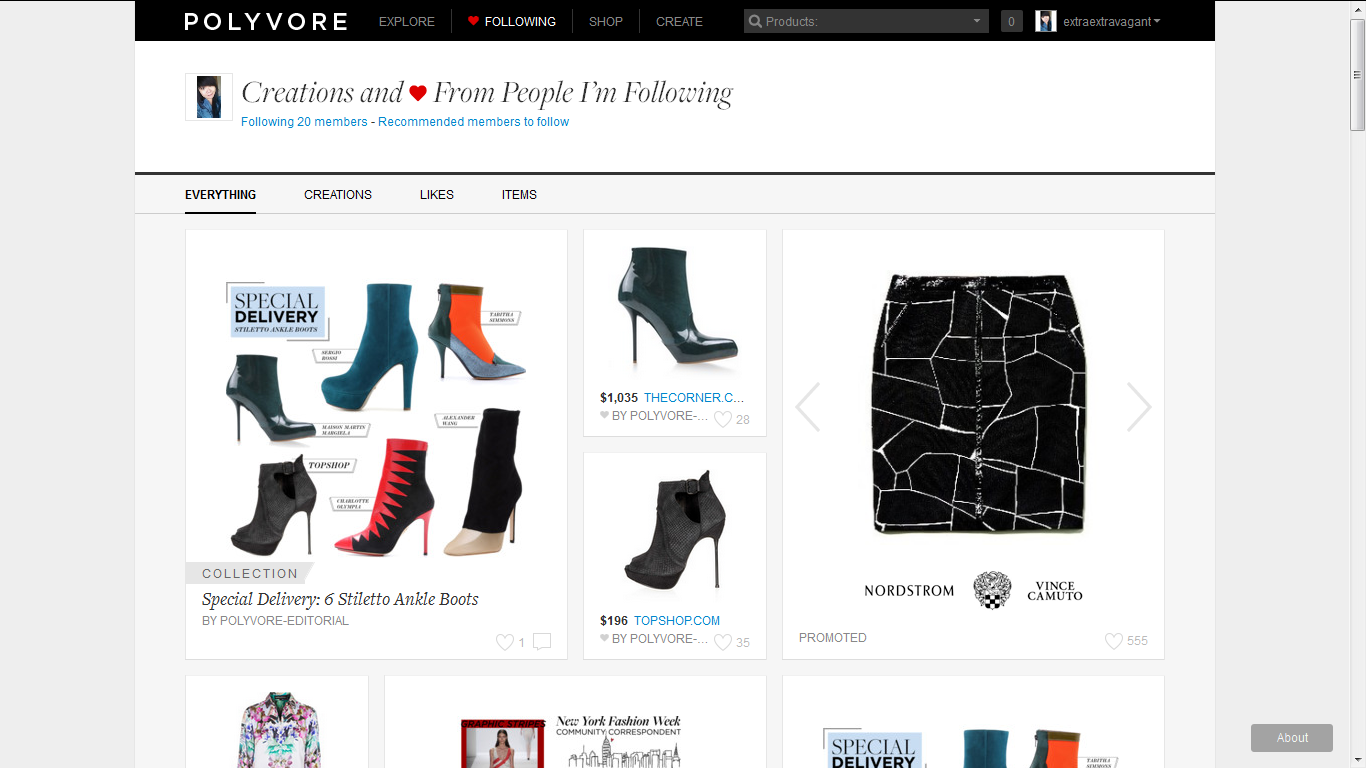
You will first need to set up an account. This should be a fairly straightforward process that need not be covered in this tutorial. If you do need help with this, send me a message and I will gladly lend a hand!
Once you have an account, this will be what the main page looks like. I am a Polyvore user, and this is my main page. As you can see in the image above, it is made up of sets created by the users that I am "following." When you follow someone, your main page will be updated with sets that they create and post.
Once you have an account, this will be what the main page looks like. I am a Polyvore user, and this is my main page. As you can see in the image above, it is made up of sets created by the users that I am "following." When you follow someone, your main page will be updated with sets that they create and post.
Getting Started
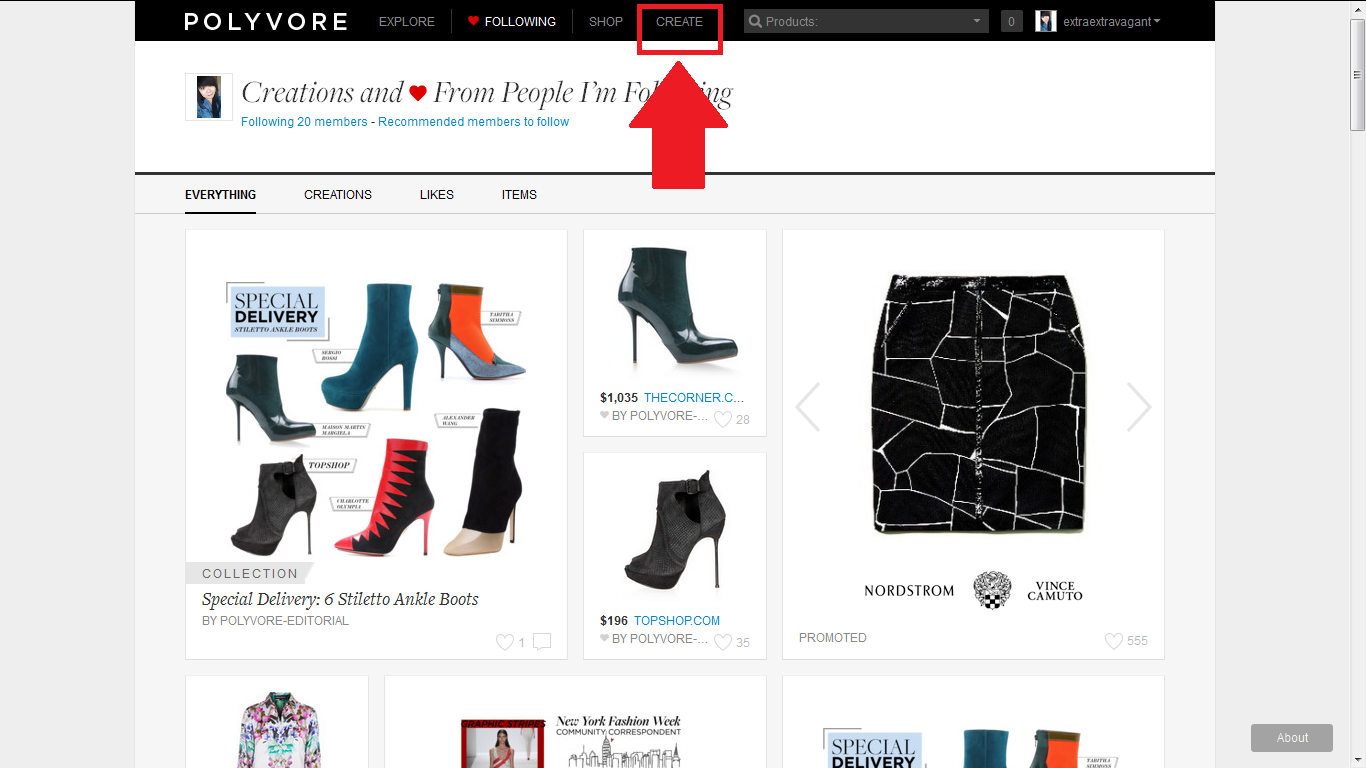
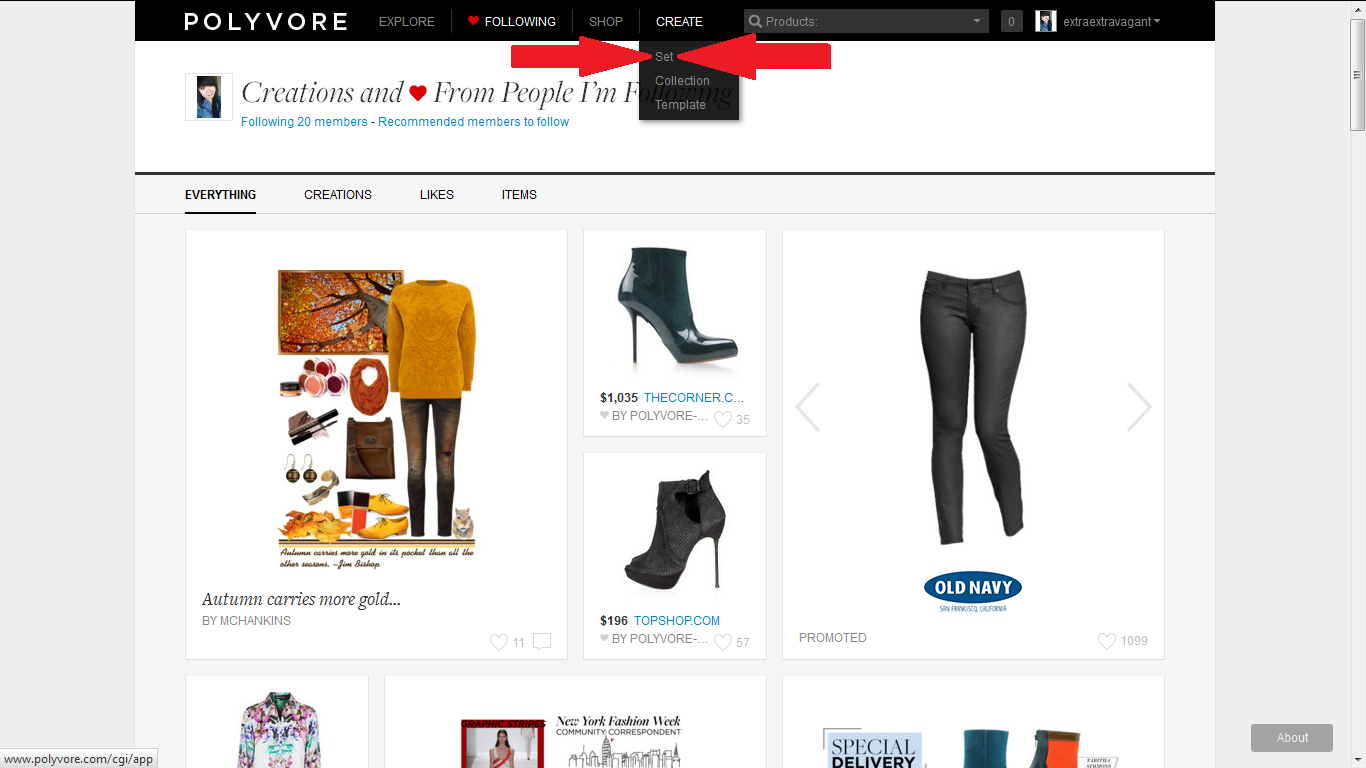
Image 1:
At the top of the main page, there is a button that says "Create."
Image 2:
When you hover over the button, a dropdown menu should appear with three options: Set, Collection, and Template. Click on "Set."
We will not be discussing Collections and Templates. If you would like to know more about those two options, send me a message and I'll create an Instructable for it.
Overview of Create Page
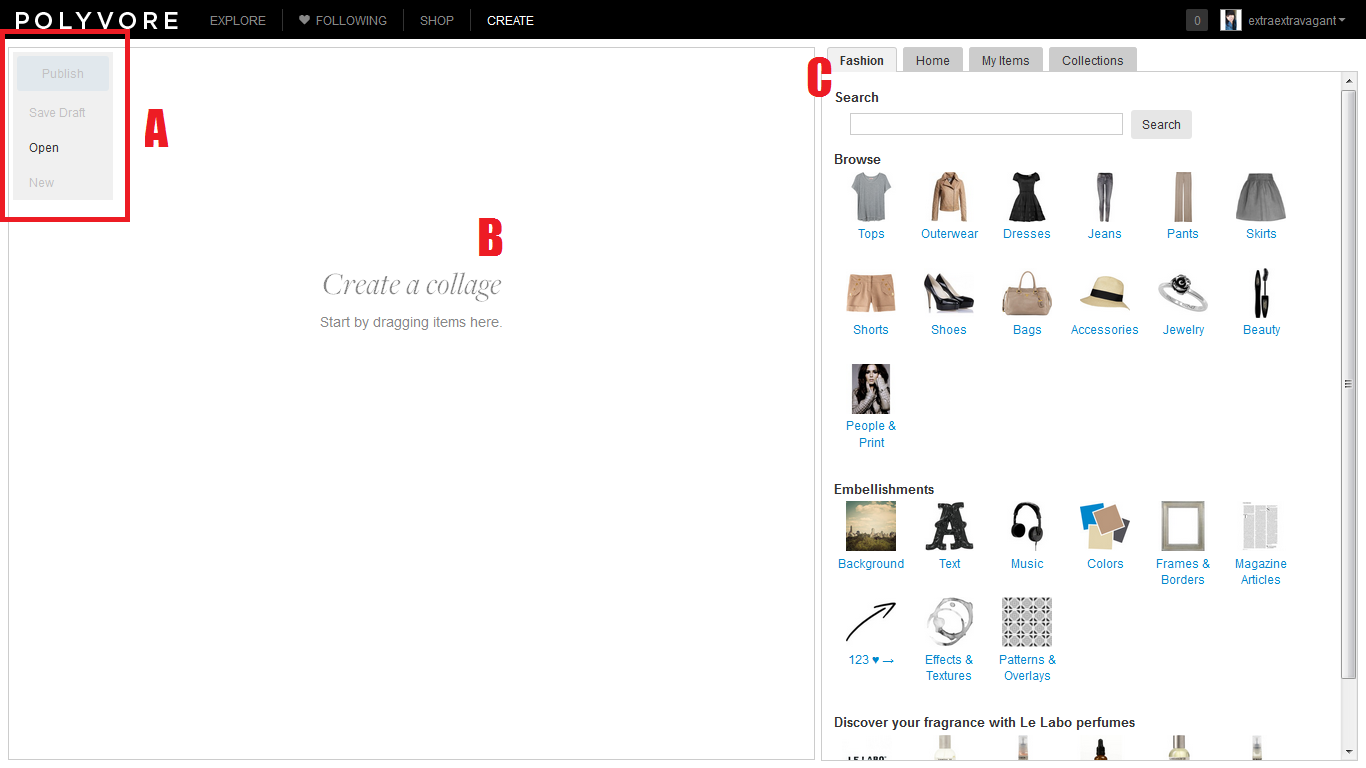
This is what you will see once you click on "Set."
A:
Publish - This is the button that you click once you have completed your collage. It publishes your collage, or set, onto the website.
Save Draft - If you want to save a draft of your collage to be edited at a later time, this is the button that you will click.
Open - This is one of the two ways to start a collage. We will address this button in further detail in the next step.
New - If you are unsatisfied with your collage, clicking this button will erase your current collage and give you another blank canvas to work on.
B:
This is the general area for you to place the items to build your collage.
C:
This panel contains all of the elements that you can use in your collage. We will delve deeper into this in Step 5.
Overview of Open Button
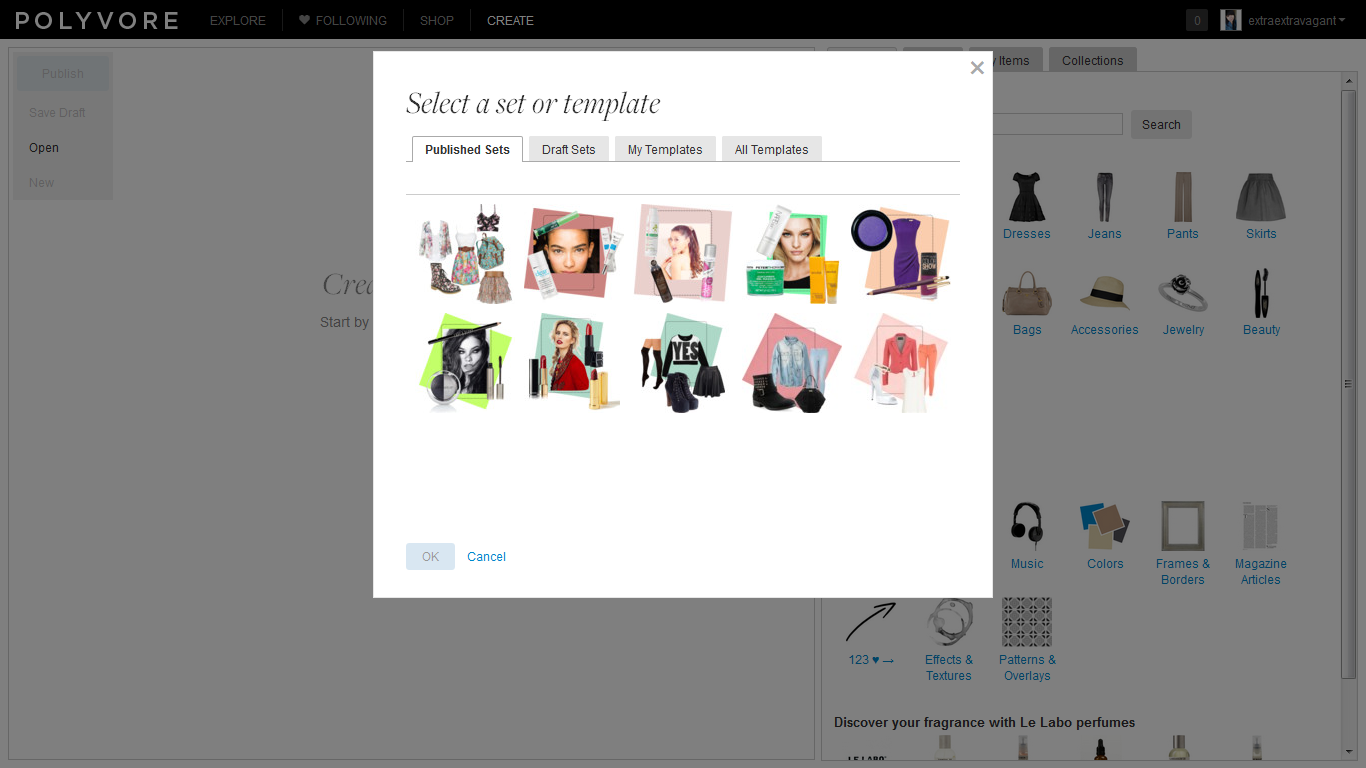
This window will pop up when you click on "Open."
Published Sets:
Since this is my account, it shows the sets that I have published. If you are a new user, this should be empty. Sets that you publish will show up here for you to edit, add to, or refer to.
Draft Sets:
In the previous step, we talked about the "Save Draft" button. This is where those drafts will show up.
My Templates:
This is not something that we will cover in this Instructable.
All Templates:
This is a collection of all of the templates that you can use to build your collage. If you do not wish to use a premade template, go on to the next step!
Start Creating Your Collage
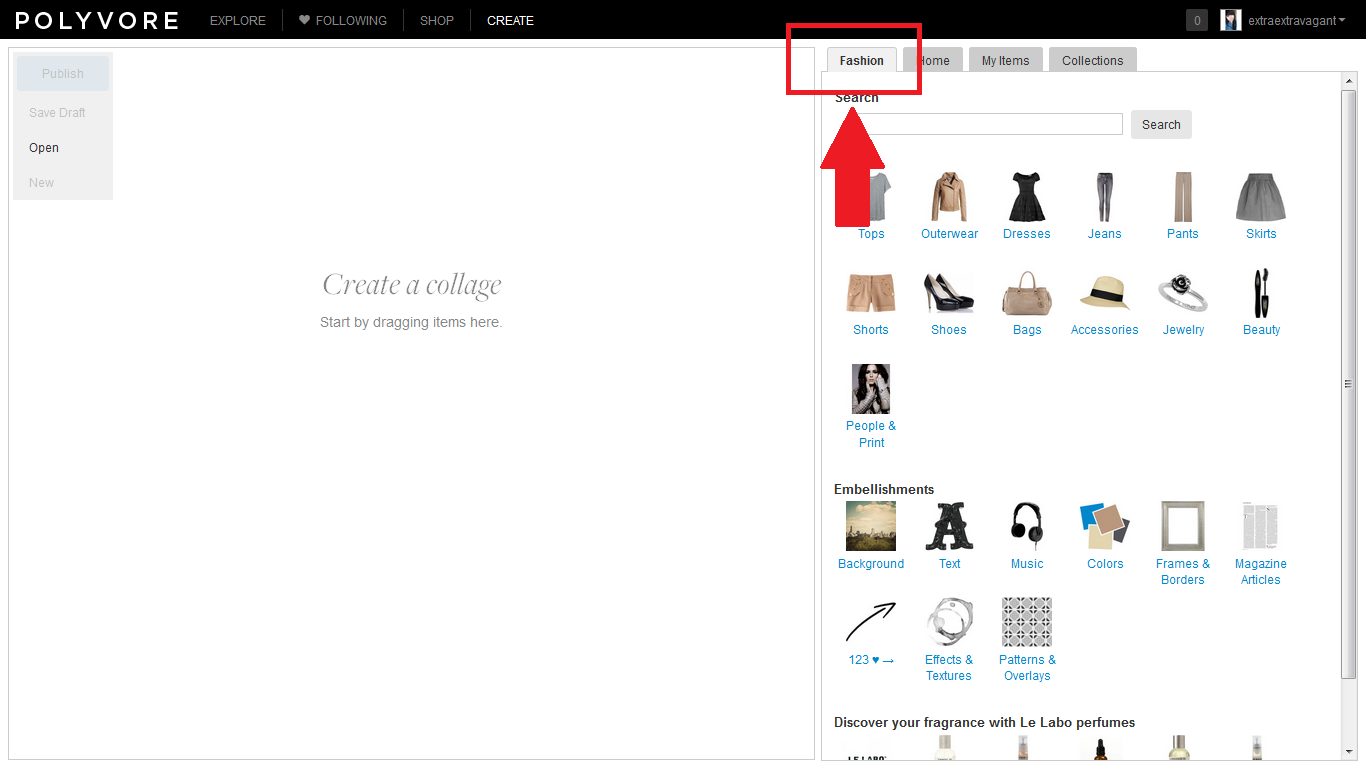
For the purpose of this Instructable, we will only concern ourselves with the "Fashion" tab.
This is where you will find the items to put in your collage. All you have to do is click on a category. That will bring up a whole slew of items for you to pick from!
The rest of the process is completely up to you! Draw upon your creativity and arrange things however you like! There are embellishments, pictures, backgrounds, a whole arsenal of tools that you can utilize to create your collage.
Publish Your Collage
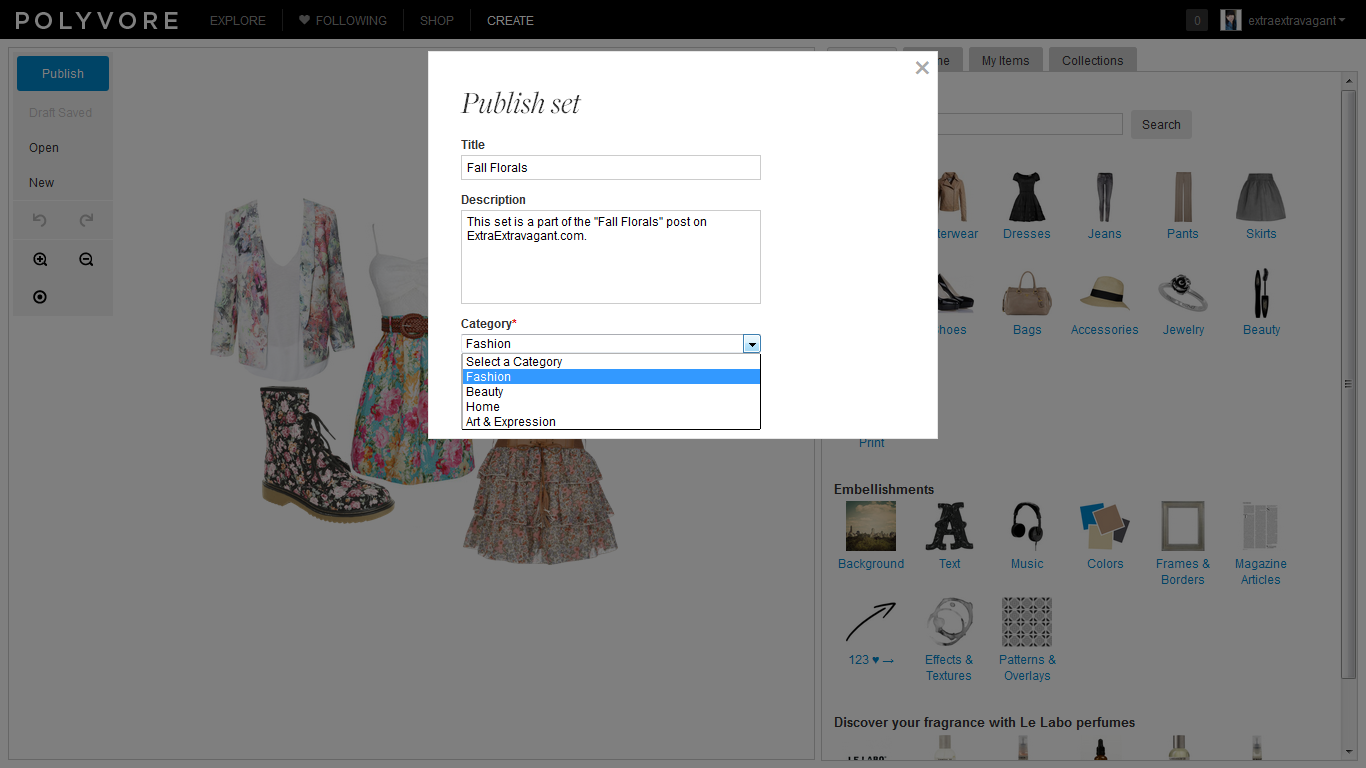
Once you are done with your collage, click "Publish."
A window will pop up. In this window, enter a title and a description for your set. Then, you want to make sure that you assign it to a category. The choices are: fashion, beauty, home, and art and expression. Since my set is built with fashion pieces, and it has a fashion theme, I will put it under the fashion category.
A window will pop up. In this window, enter a title and a description for your set. Then, you want to make sure that you assign it to a category. The choices are: fashion, beauty, home, and art and expression. Since my set is built with fashion pieces, and it has a fashion theme, I will put it under the fashion category.
Published Set
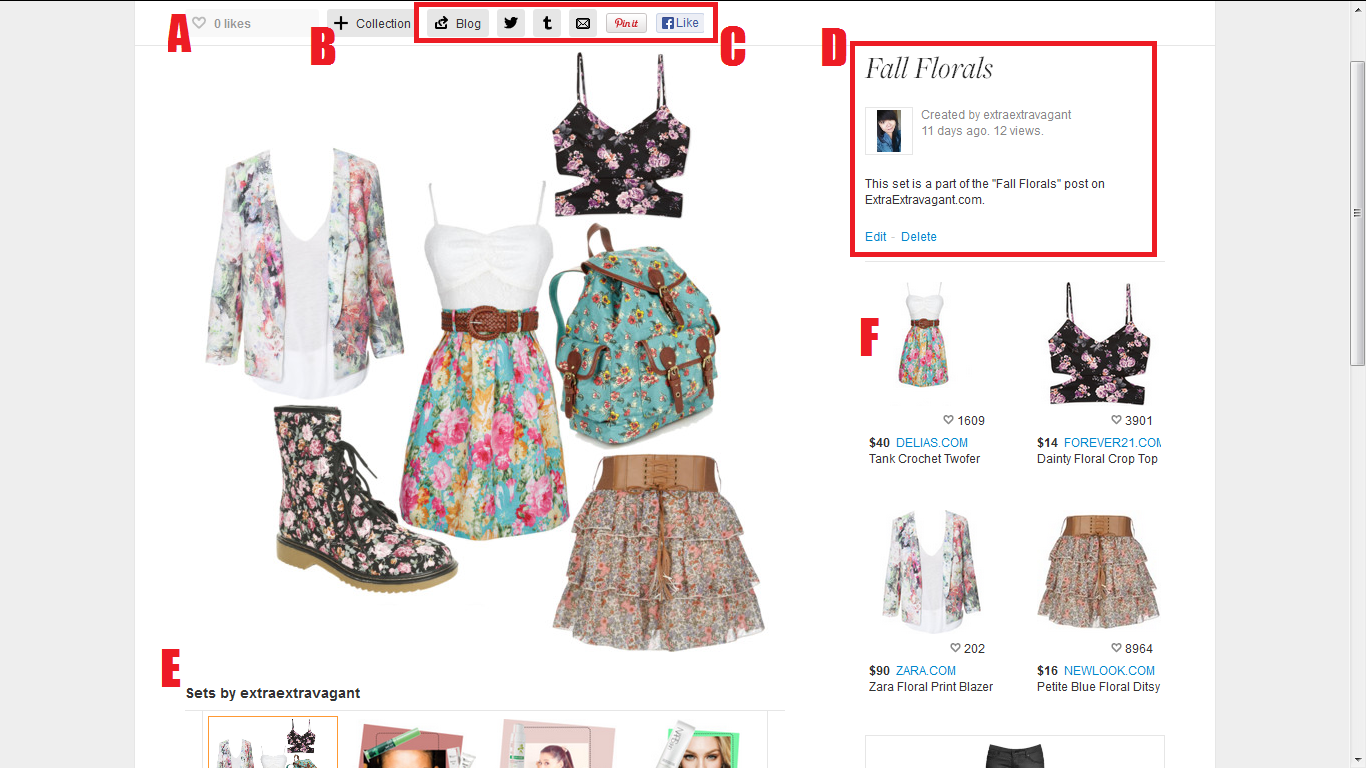
Once you have published your set, you will be redirected to this page. It is an overview of the set that you just published.
A:
This shows you the number of "likes" that your set has gotten. You can also "like" other users' sets.
B:
We won't be talking about collections in this Instructable, but they are basically a collection of different sets. This button allows you to add the selected set into new or existing collections.
C:
This panel contains everything that you need to share your published set. We will go into more detail in the next step.
D:
This shows you the information of your set: the title, the description, when it was published, how many views it has gotten, and it also allows you to edit or delete the set.
E:
This panel shows you your other sets. If you are viewing someone else's set, this panel will show other sets that they have created.
F:
This is where detailed information for the pieces in your set will be shown. We will talk more about this in Step 9.
How to Share Your Published Set
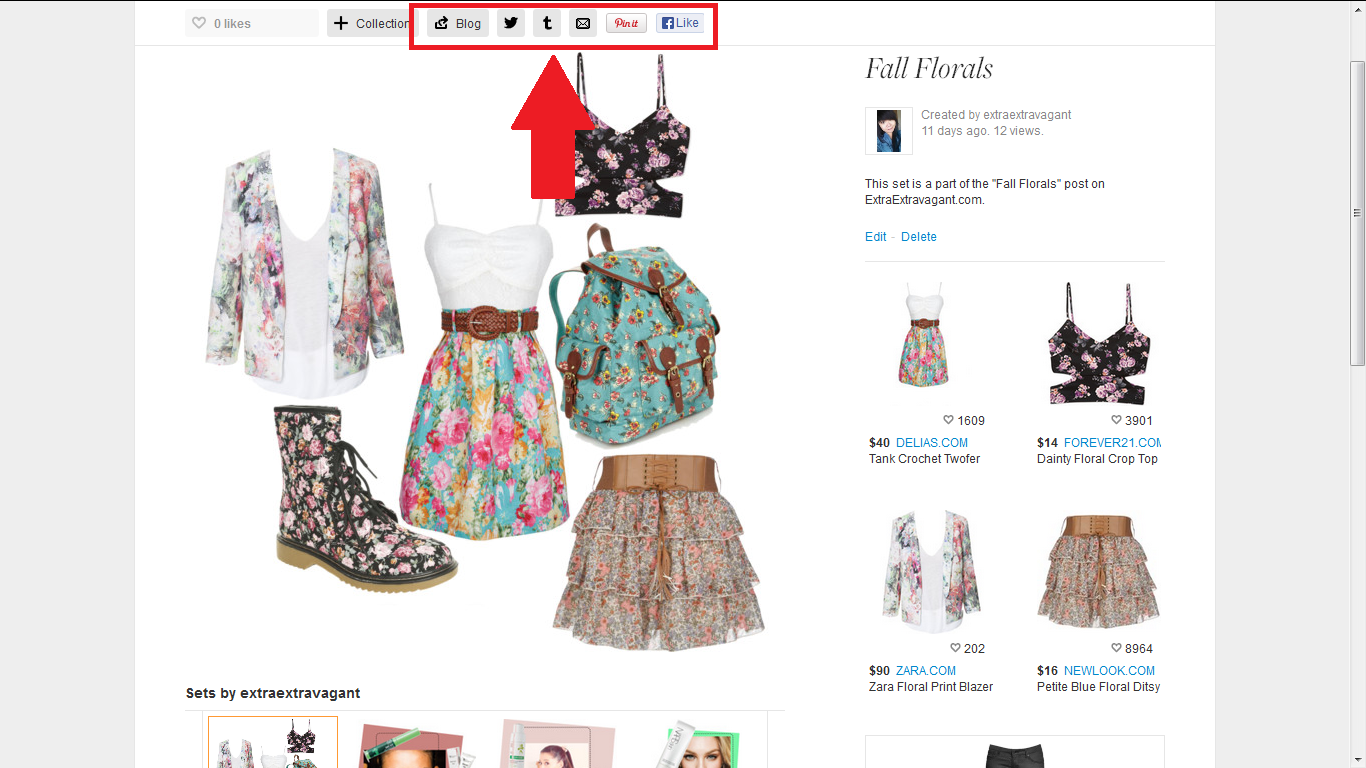
This is the panel that you will use if you wish to share your collage, or set, outside of Polyvore. All published sets are visible to all users of Polyvore, but if you want to share it via other social media platforms, this is where you would do that.
The first button allows you to embed (insert) your set in your blog or webpage. It will pull up a window that gives you the ability to customize the settings (size, what to show, etc) before getting the HTML (code that translates into web elements) to plug into your blog or webpage.
The second button allows you to share your set on Twitter. It will pull up your usual Tweet window.
The next button allows you to share on Tumblr. I'm not familiar with Tumblr so I won't go into detail about this. If you do have information, let me know and I would love to put in on here!
The fourth button allows you to email your set to someone.
The next button allows you to Pin your set on Pinterest.
The final button is just a Facebook "like" button that, when pressed, will show your Facebook friends that you viewed this collage. They will also have the link to access it.
Item Description Overview
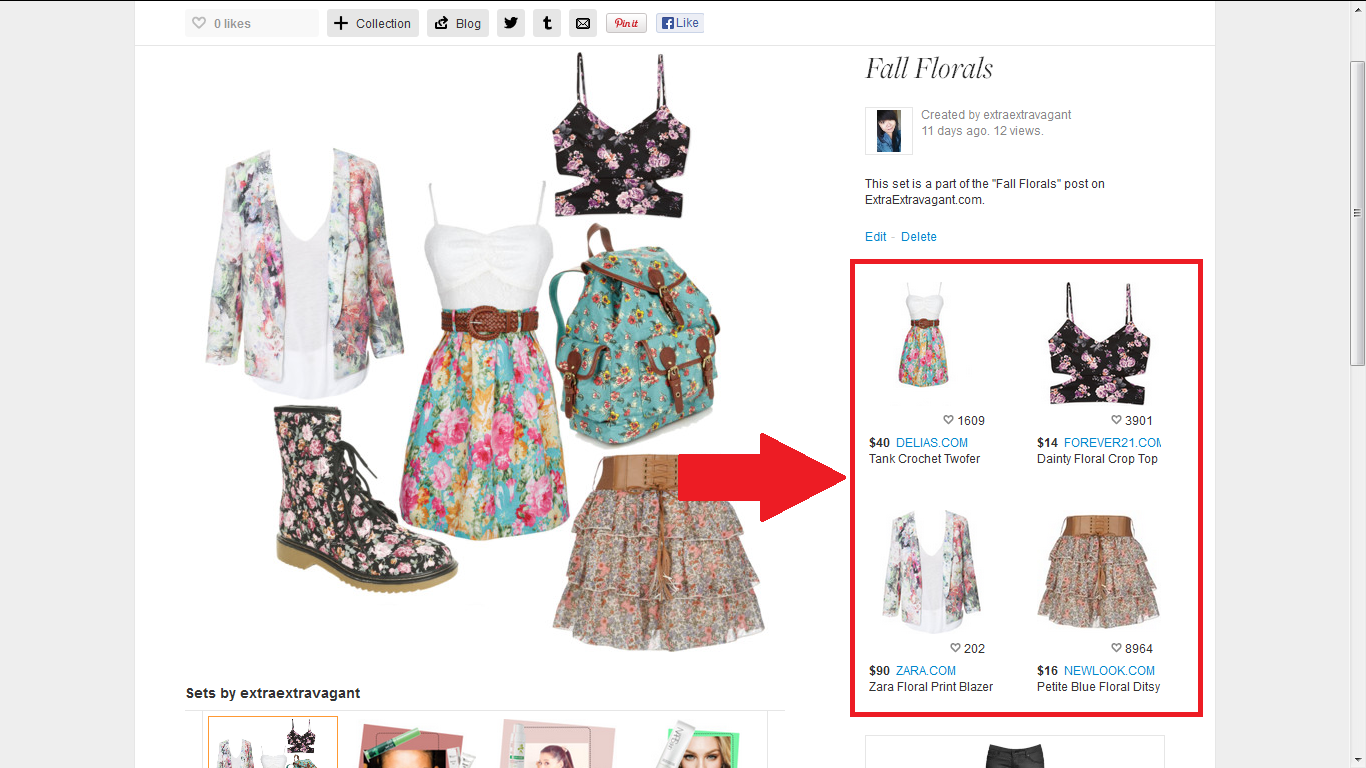
This panel provides details about the pieces in your collage. This is how users go about purchasing the items in your sets.
Note: Not all pieces are shown at one time. They are shown on a rotating basis so that all pieces get maximum visibility while still maintaining enough space on the page for other elements.
It will show the picture of the piece so that people know which one the description is referring to. The heart underneath the picture shows how many users have "liked" the specific piece. Then, there is the dollar amount shown in USD (converted from other currencies in some cases) because the site automatically detects your location. If you live in, for example, the UK, it will be shown in GBP. The link next to the dollar amount is the website you can purchase the item from. Clicking on the link takes you directly to the retailer's website where you can actually purchase the item. The final element is just the name of the piece.
Congratulations!
Well, there you have it! You now know how to create sets on Polyvore. Now, go out there and make some collages!