How to Make a 3D-Printable CAD Model From MR Scans
by SelkeyMoonbeam in Workshop > 3D Printing
9597 Views, 46 Favorites, 0 Comments
How to Make a 3D-Printable CAD Model From MR Scans
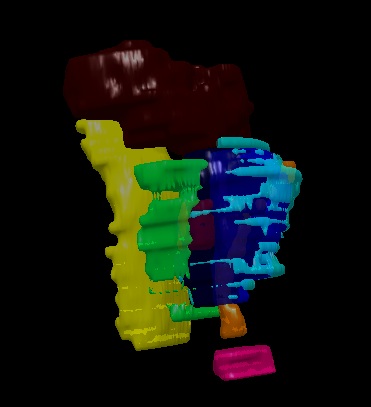
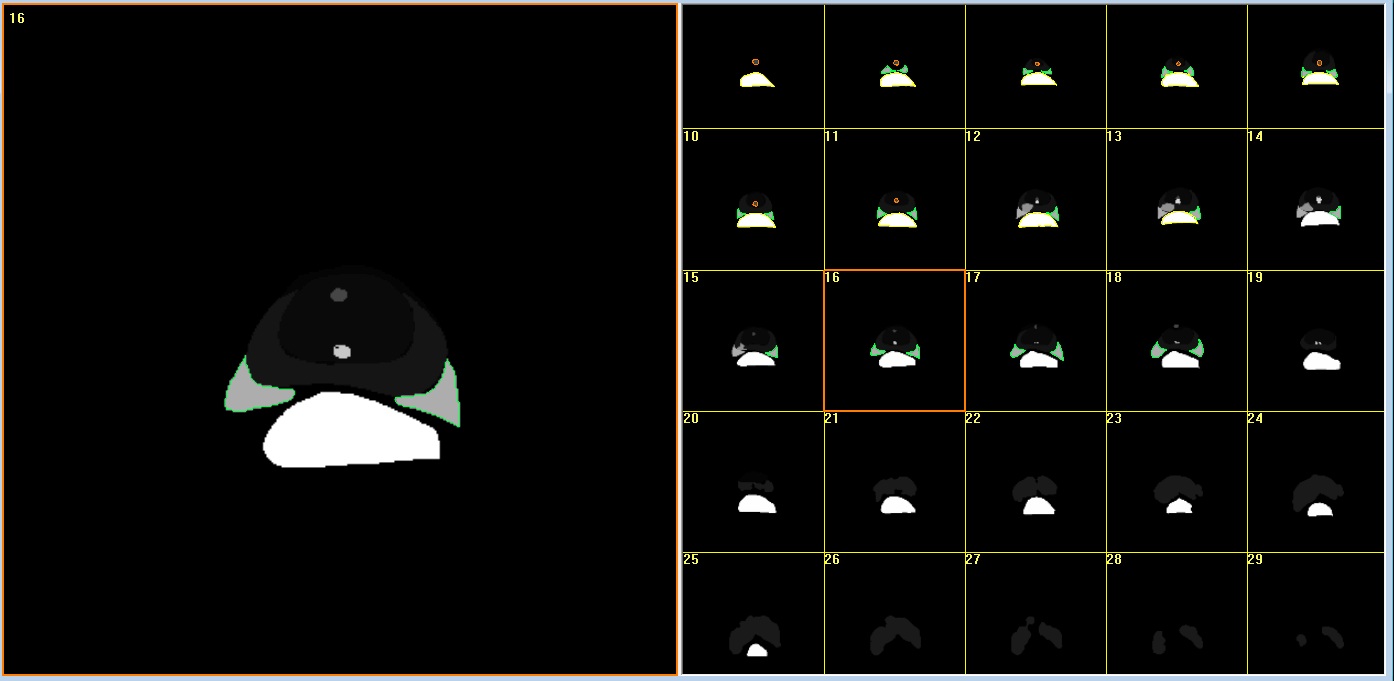
I'm doing research with Professor Chris Lee at Olin College on turning medical scans into 3D-printable models for use in cancer treatment.
The basic concept is to take a stack of 2D medical scans, in this case of prostates with cancerous tumors, and extrapolate a 3D model from them. The model can then be printed out.
That's pretty cool, right? A doctor can scan a patient's cancer and then explain, with a physical model (clear, perhaps, with the tumor opaque) exactly what the problem is.
But wait! It's great to be able to show someone the problem- a good device for the patient and other doctors to immediately understand what's going on.
But there's more. Before we 3D print the model, we make a slight modification: we extrude a series of small slots into the model: within the tumor, in the nearby prostate, in the neurovascular bundles. Then, when we print it out, we put tiny radiography chips into the model. This means that now we have a patient-specific device that we can shoot radiotherapy at. Doctors can use this to focus the beam and find out more about peripheral damage.
The end goal of this process is to improve cancer treatment, particularly in prostates and through radiotherapy.
Software

I have been using 3D-Doctor as my primary means of converting magnetic resonance (MR) images into a 3D model; it's a software that is designed to address this issue, and as such is very effective. However, it's quite expensive.
Theoretically, this process can be accomplished on free software, and I'll go into that in the next step. However, here is what I used for this instructable.
-3D Doctor
-3D Slicer
-Netfabb (I've been using the free version)
-SolidWorks (or another CAD software which works with STL files, such as SketchUp + a plugin)
For Free?
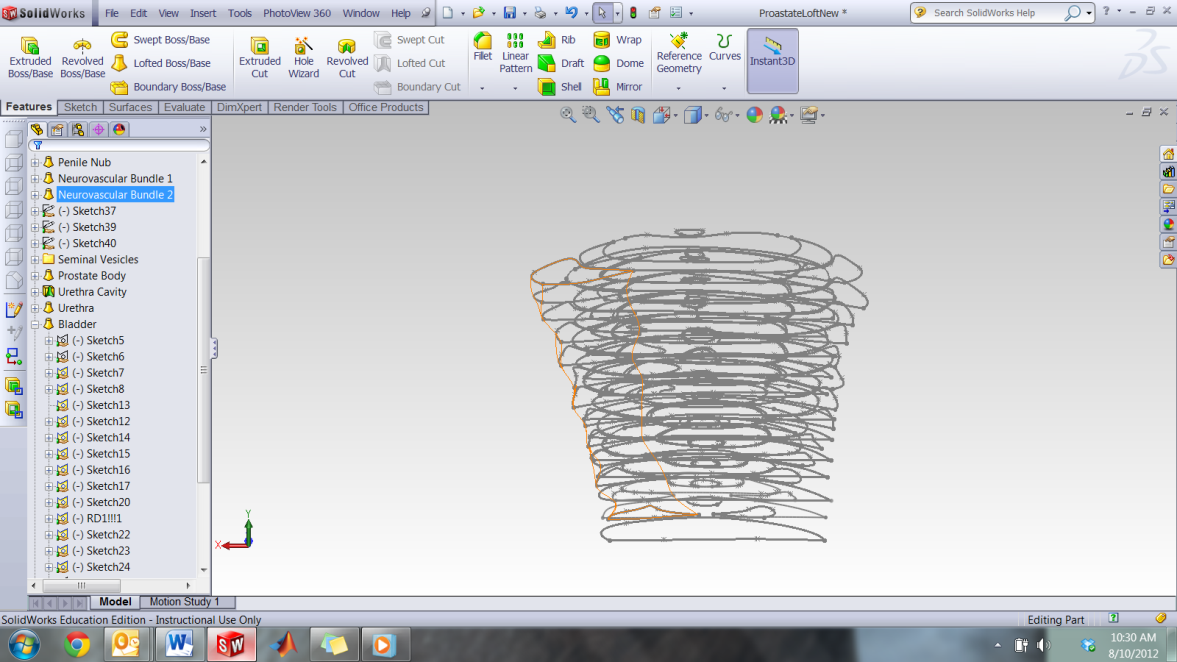
One admirable goal is to reduce the cost of this project by using free software. It's not the goal of this Instructable, but this step should give you enough information to point you in that direction.
However, the current tradeoff is to add labor-hours, so I'd only recommend this approach if you have a lot of time to spend on this. 3D Doctor is expensive, but image recognition and 3D modeling software is difficult to make, so this is unsurprising.
An alternate approach involves acquiring MR files and converting them into DICOM files using Slicer (as demonstrated in this Instructable), and then using a DICOM viewer such as MicroDicom to convert the DICOM files into jpegs.
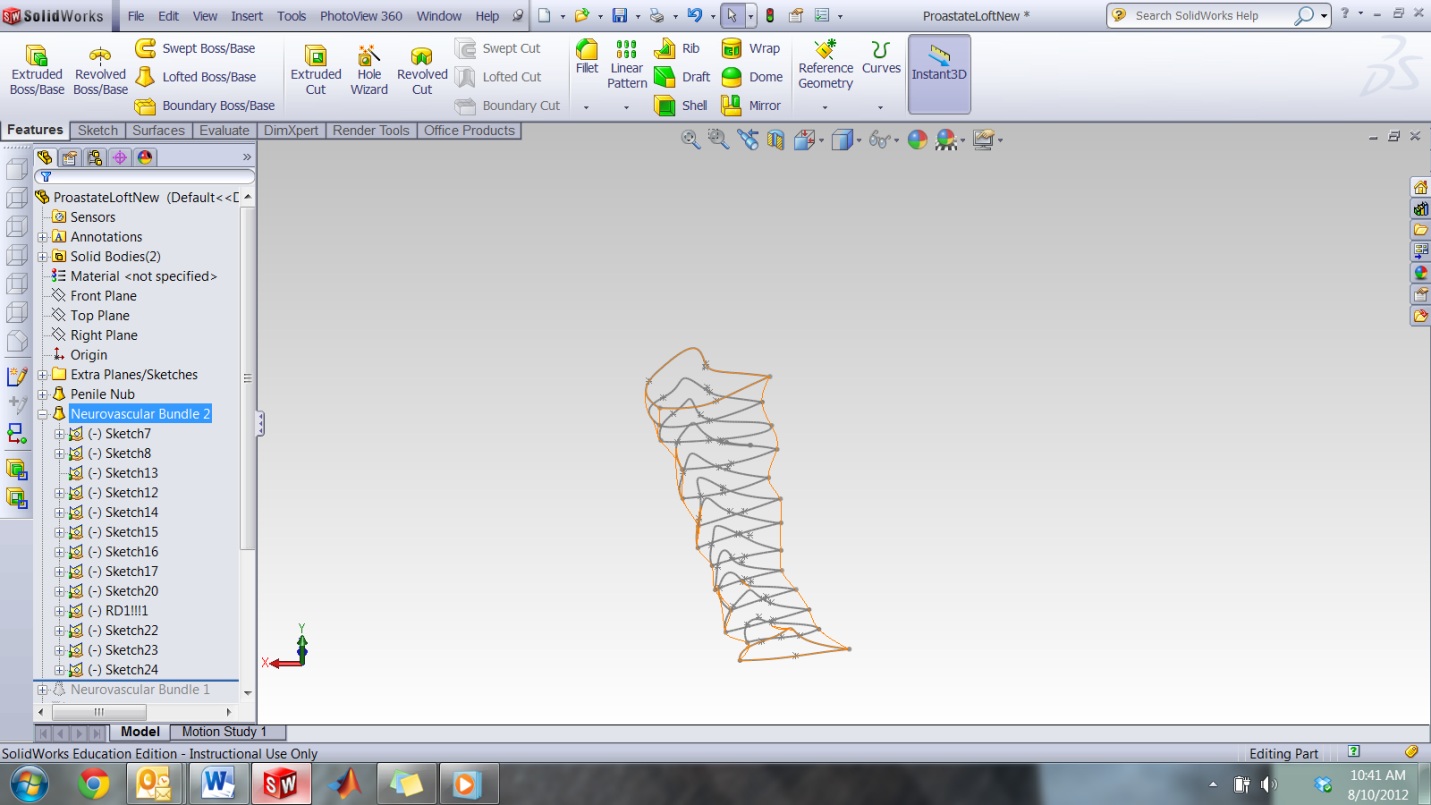
The next step is to import these jpegs into your CAD program of choice as templates on appropriately spaced slices.
Hand-trace the curves of the various pieces of anatomy. Loft between them.
(There are free CAD programs, but my information comes from SolidWorks- so you might have to poke around a bit to find the appropriate functions in another program.)
If you're using Solidworks, here are some tips from Scott Harris, a member of the Olin faculty with lots of background in CAD.
1. Keep the profiles as simple as possible
2. Make sure that each profile has the same number of curves.
3. When you Loft, make sure you select the roiles on corresponding locations.
4. Put each loop (closed contour) on its own sketch. You can reuse the plane.
5. Create a new part for each solid. Currently, you have one part with several solid bodies. It will be easier to work with them separately.
6. Play with the STL output parameters... I think that it does not have to be too fine. To print them, I would try to print each body separately. I think the machine might choke on trying to print a multi-body part where they all intersect.
7. I was able to separate the bodies into separate parts by using the File/Make Assembly From Part function.
Time consuming, but functional!
Getting the Models
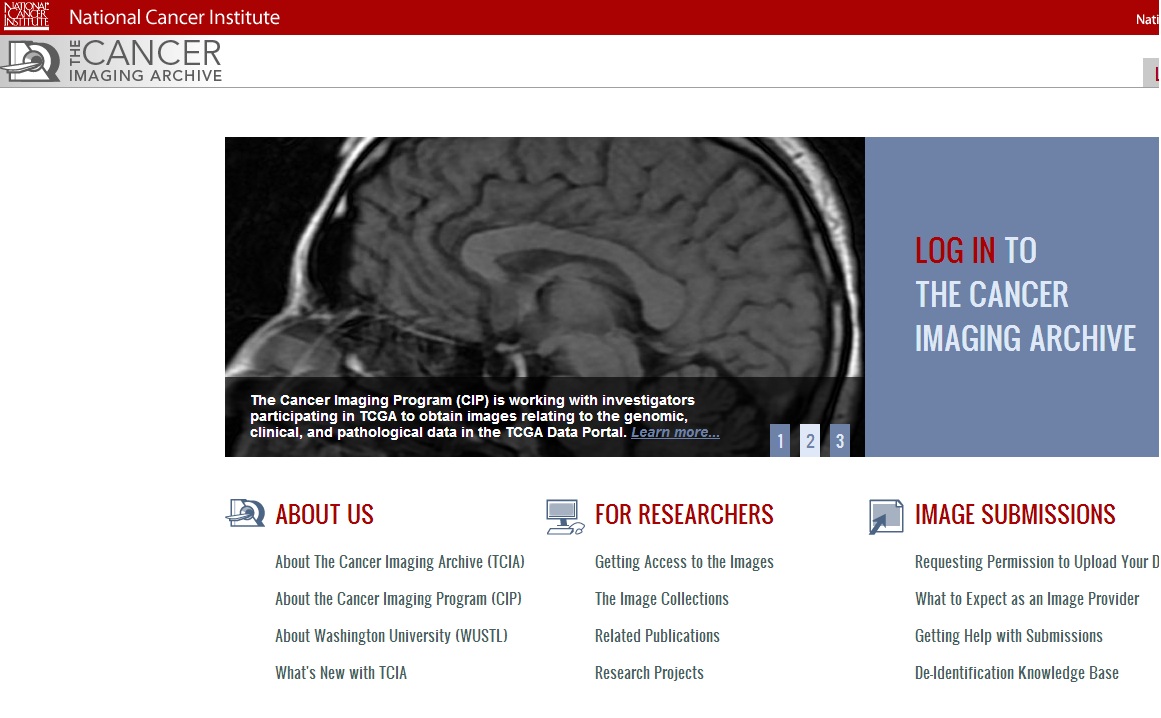
The Cancer Imaging Archive provides a free and searchable database of cancer images. The data is anonymized from various patients and can be found for various parts of the body.
Download a set of .nrrd images.
Download a set of .nrrd images.
NRRD to DICOM
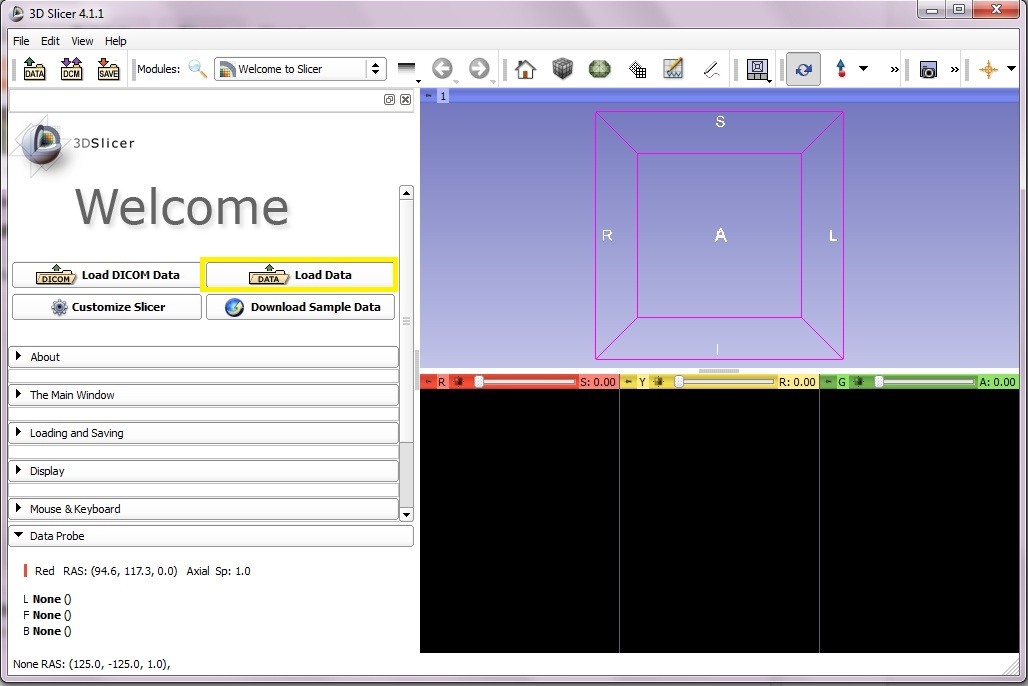
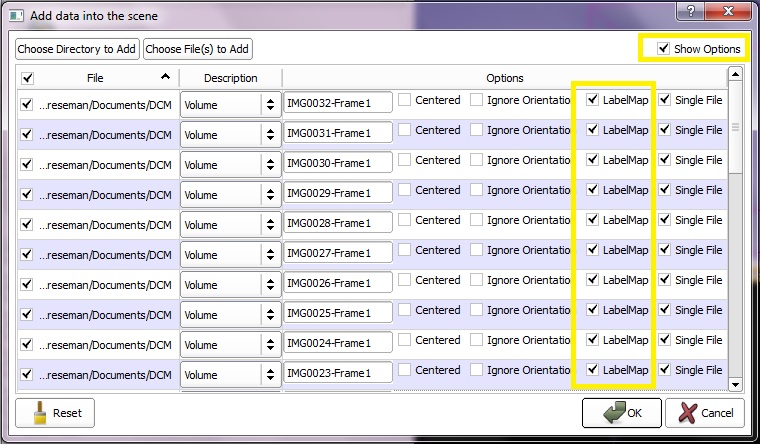
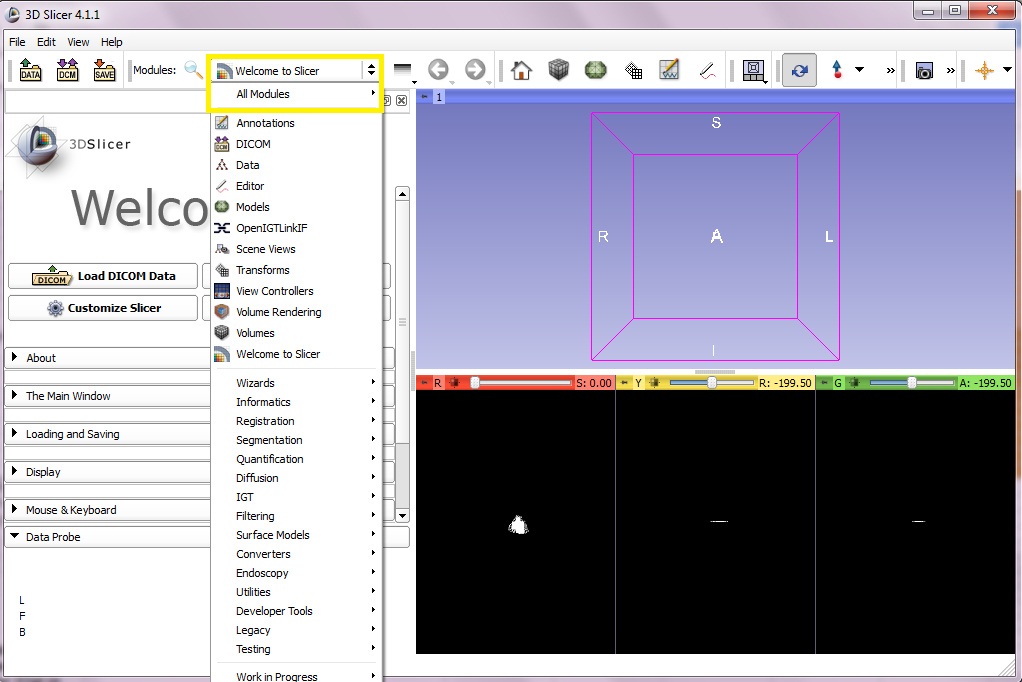
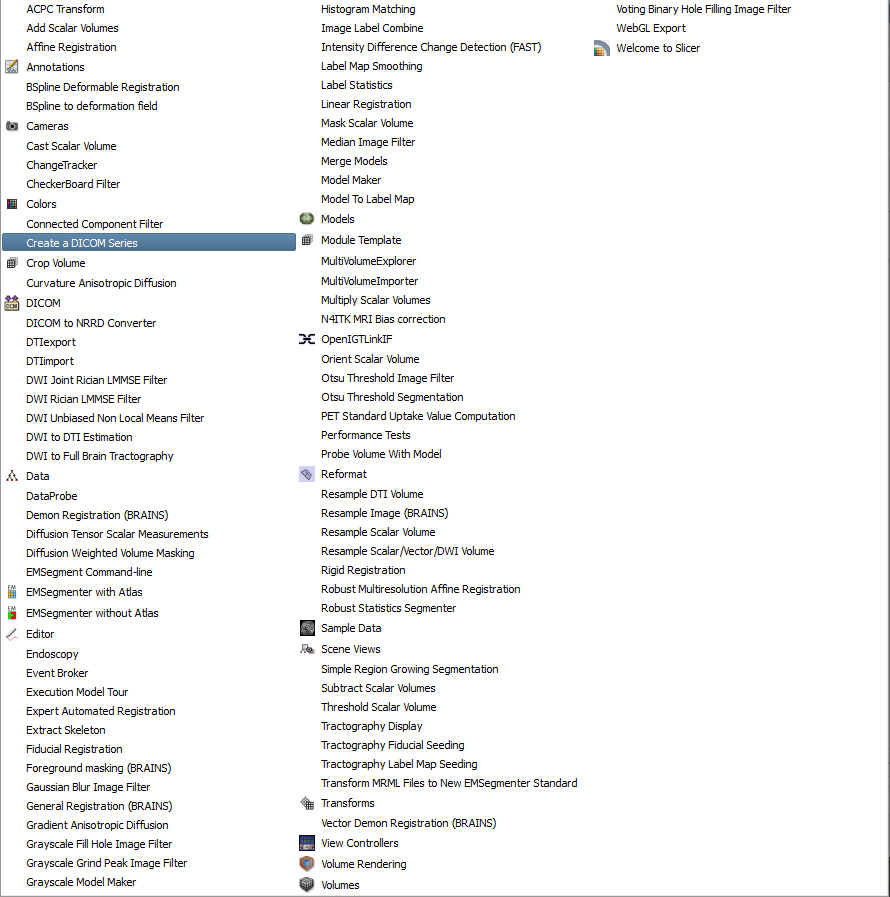
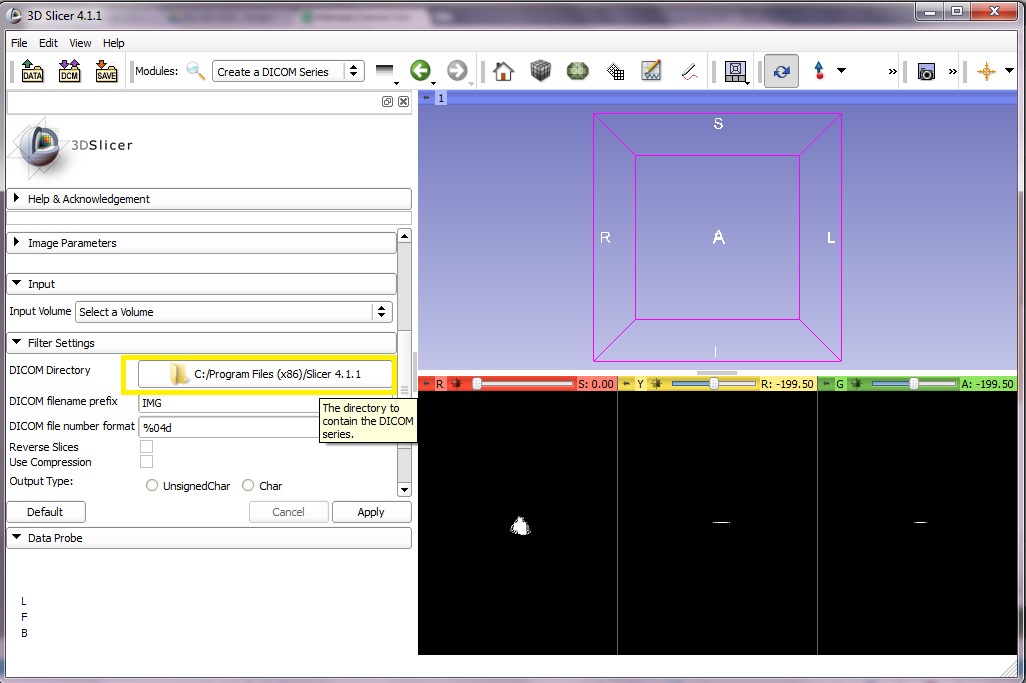
Open 3D Slicer.
The pictures should walk you through the button presses in order, but here is a text version:
Click on "Load Data", navigate to the folder that contains your NRRD data, then select "Load Directory".
On the "Add data into the scene" window, select "Show Options", then check "LabelMap" for each file. Hit OK.
Go to the top of the screen and click on "Welcome to Slicer" to choose a new module. Hover over "All Modules".
Select "Create a DICOM Series".
Scroll down on the left sidebar until you find "DICOM Directory". Browse to choose a directory to import the DICOM files into. Click "Apply".
Your DICOM files should now be populated in the directory you selected.
Opening the Project in 3D-Doctor

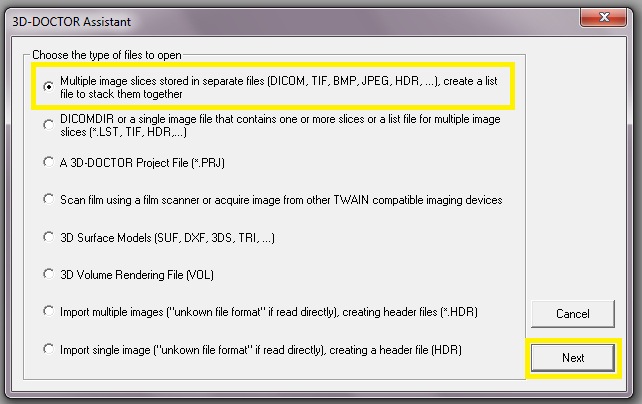
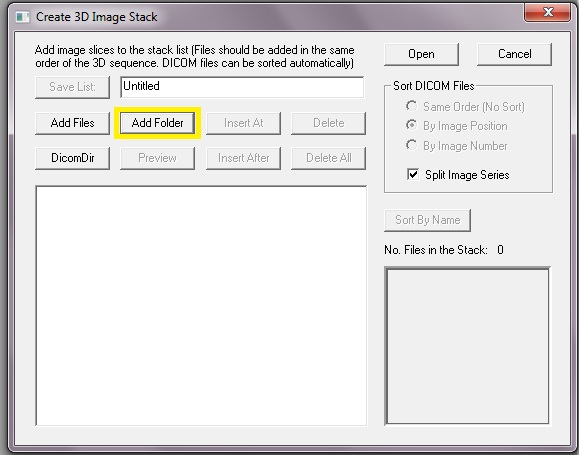
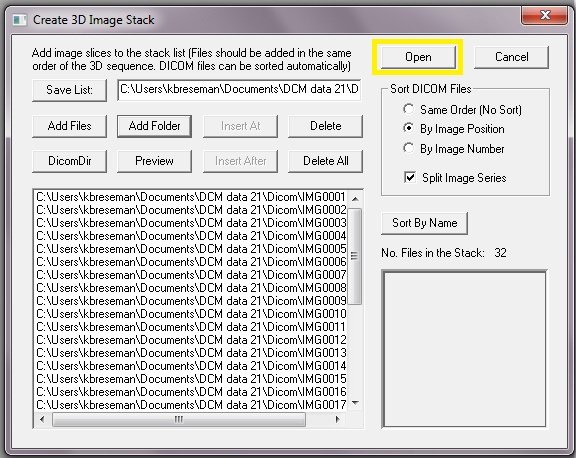
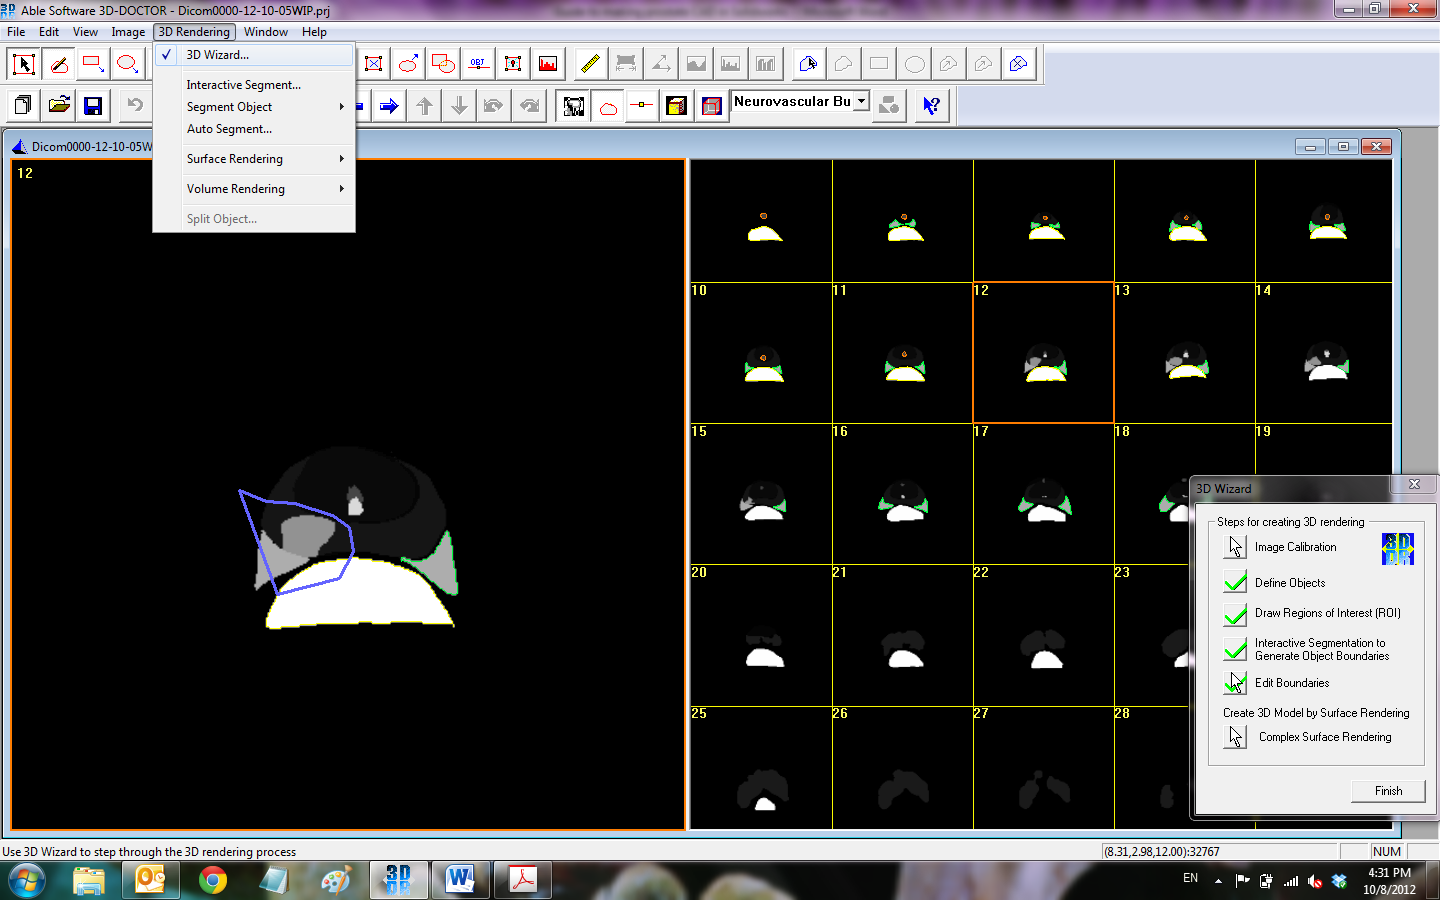
Open 3D Doctor.
The main screen should pop up with an option of file types to open.
Select the first option: multiple DICOM files.
The next dialog box should direct you through the process of opening your files: Add Folder (a list of files will populate), then Open.
We will be working through the 3D wizard for the next several steps. If it isn't already open at the bottom right corner of your screen, you can open it by going to 3D Rendering>3D Wizard.
Image Calibration
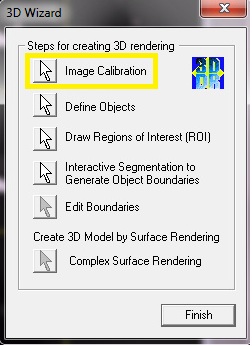.jpg)
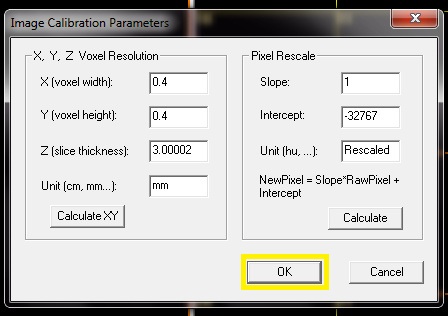
Select "Image Calibration" from the 3D Wizard.
A dialog box will pop up with options for voxels and slice thickness.
Default values will be filled in, since DICOM files contain some of this information, but you can adjust as necessary.
A dialog box will pop up with options for voxels and slice thickness.
Default values will be filled in, since DICOM files contain some of this information, but you can adjust as necessary.
Defining Objects
.jpg)
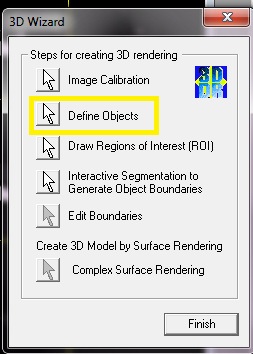
Select "Define Objects" from the 3D Wizard.
Here, you have the opportunity to trace the distinct parts of your MR scans and differentiate between different organs or other important classifications.
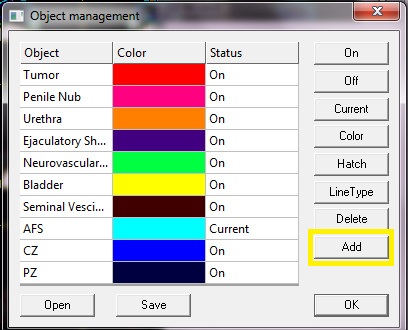
In the dialog box, "Add" objects, name, and color them as necessary.
The objects I used are:
Here, you have the opportunity to trace the distinct parts of your MR scans and differentiate between different organs or other important classifications.
In the dialog box, "Add" objects, name, and color them as necessary.
The objects I used are:
- tumor
- penile nub
- urethra
- ejaculatory shaft
- neurovascular bundles
- bladder
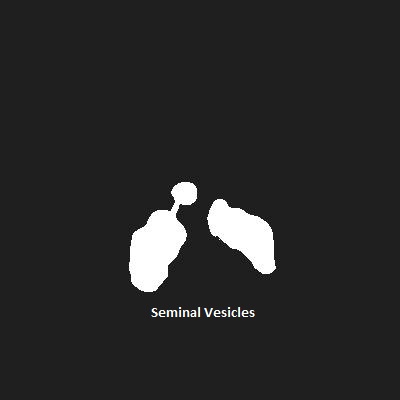
- seminal vescicles
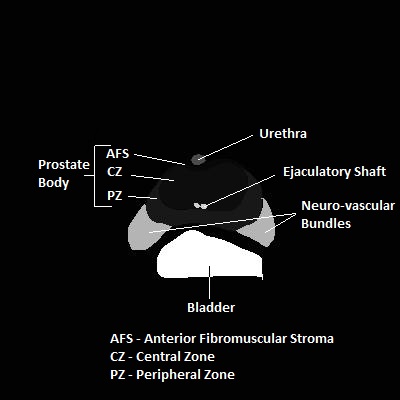
- Parts of the prostate (AFZ, CZ, PZ)
Drawing Regions of Interest
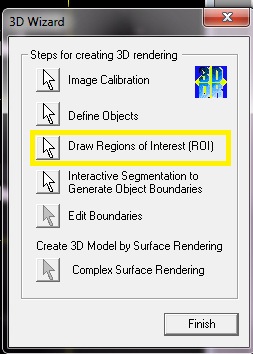
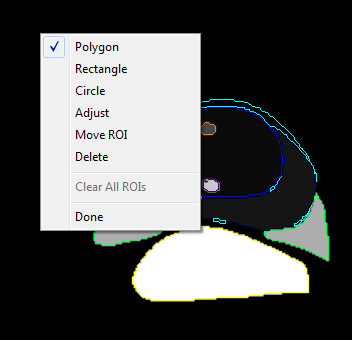

In case you are only interested in a specific segment of a larger image, 3D Doctor lets you draw ROI around a specific piece of the picture.
Select "Draw regions of Interest" from the 3D Wizard.
Right click on the large MR image on the left of the screen, and select an option for the ROI shape.
Left click to draw.
I drew a circle around all of the available objects in my image.
Select "Draw regions of Interest" from the 3D Wizard.
Right click on the large MR image on the left of the screen, and select an option for the ROI shape.
Left click to draw.
I drew a circle around all of the available objects in my image.
Tracing Objects

.jpg)
.jpg)
.jpg)
.jpg)
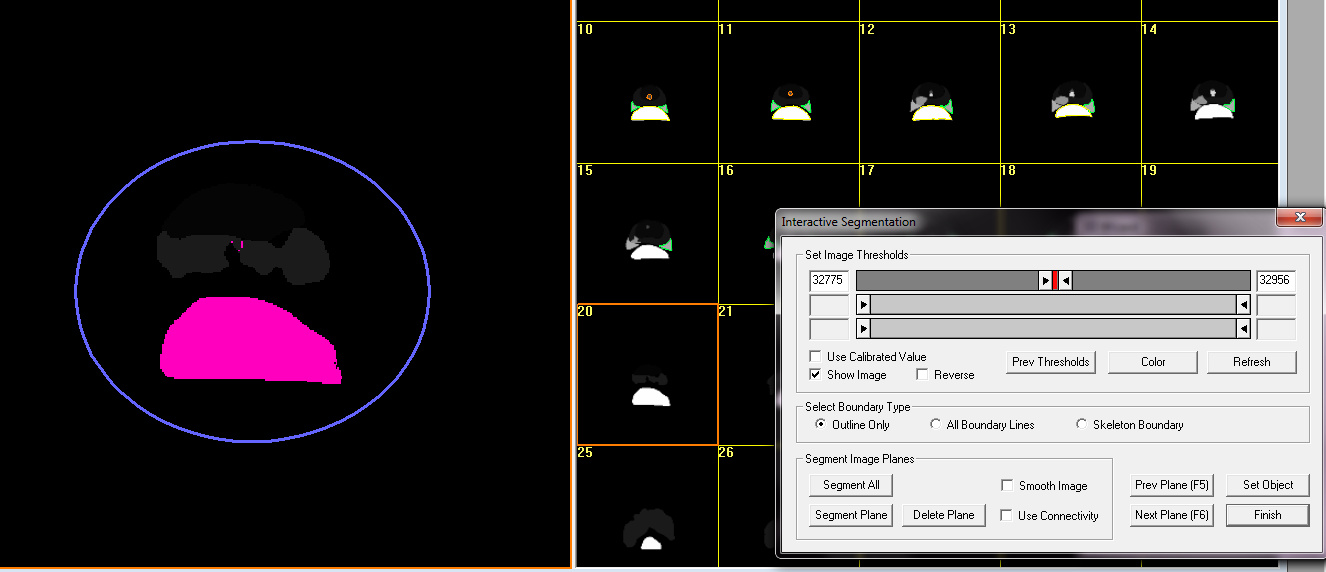
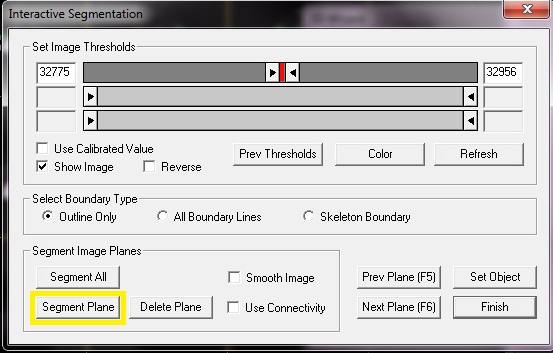
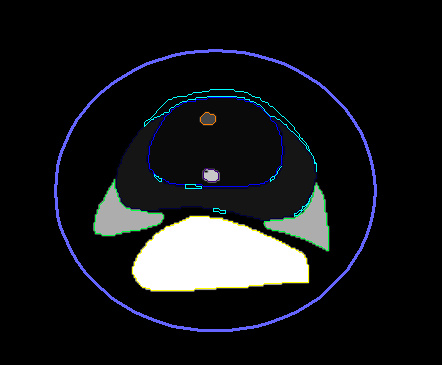
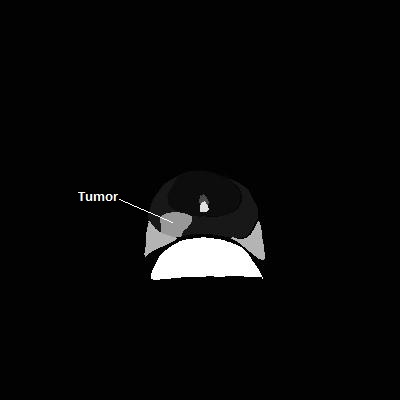
This step should help you define what part of the image is what organic object.
The first few pictures on this step help to define various parts of the prostate MR images I used.
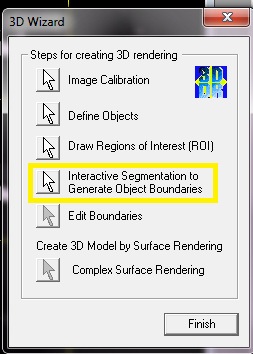
From the 3D Wizard, select "Interactive Segmentation to Generate Object Boundaries".
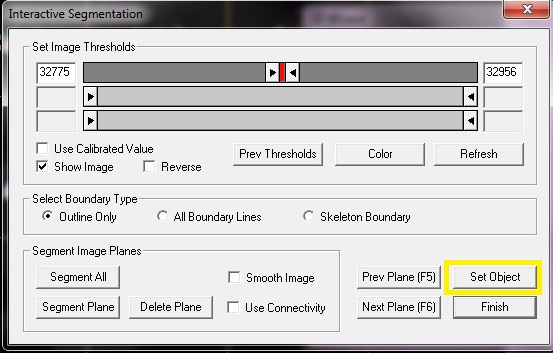
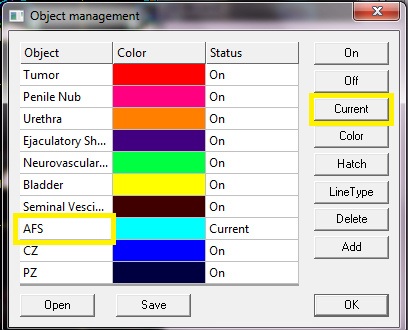
Decide what object you want to define. Click "Set Object" and choose from your list of objects by clicking on the object's name, then clicking "Current". Return to the image segmentation dialog box.
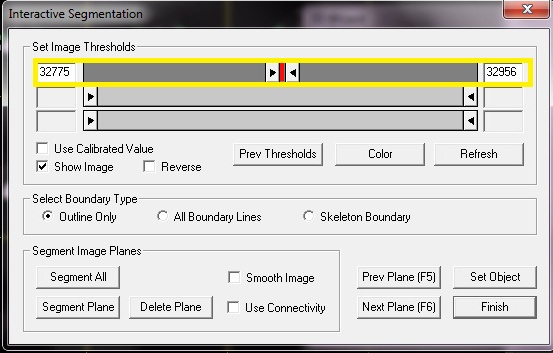
Use the slider to define what range of colors apply to the object you have selected. As you move the slider, the image on the left will highlight what is both within that color range and within the ROI.Tip: You can move the slider with your arrow keys.
Once you are satisfied with the highlighted areas, click "Segment Plane" to segment the image you are on. Navigate between image planes (use F5 and F6)and segment each plane that contains your selected object.
Each segmented object should be outlined in the color of the object you've defined.
Rendering

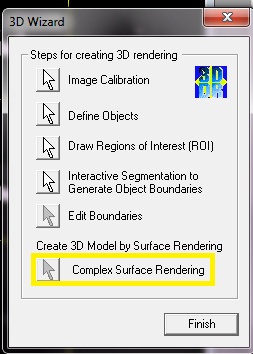
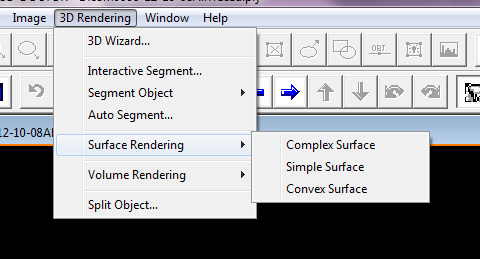
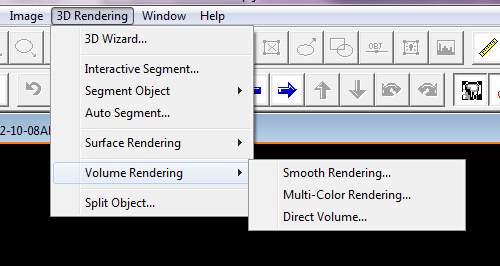
Once you have traced every object to your satisfaction, you can render the model!
The easiest way to do this is by simply clicking "Complex Surface Rendering" on the 3D Wizard.
You can also try out the various other options available under the 3D rendering menu at the top of the screen.
The easiest way to do this is by simply clicking "Complex Surface Rendering" on the 3D Wizard.
You can also try out the various other options available under the 3D rendering menu at the top of the screen.
Export to STL

The STL files can be exported through File > Export Model.
To export models of individual components, return to the object window and click on the word “On” next to objects to turn them to “Off”. Apply and render.
To export models of individual components, return to the object window and click on the word “On” next to objects to turn them to “Off”. Apply and render.
Repair With Netfabb

Netfabb is useful in checking to make sure each STL piece is a printable, closed surface.
Open the STL file and go to Extras > New Analysis > Standard Analysis. The program will run, then display facts about the part on the right sidebar. The important part for 3D printing is the box showing “Surface is closed” and “Surface is orientable”, each of which should say “Yes” or “No”. If the surface is closed an orientable, the STL file is ready for 3D printing, and can be sent directly to a 3D printer.
If the surface is not closed, go to Extras > Repair part, then Repair > Automatic repair > Default repair > Execute. In the bottom of the right sidebar, select “Apply repair”. On the dialog box that pops up, select “Yes” to remove the old part.
Print!
So I’ve been thinking more about the whole CT scan – mesh data – STL file – Solidworks Part file dilemma, and may have another solution to propose, it’s been done before, but I think could be modified to something that would work very well.
It involves a combination of the CT scan data (DICOM) or CT scan movie, InVesalius, and Blender. All of this software is free/open source. See the video below for a brief introduction.
Converting a CT scan movie into a 3D mesh
http://www.youtube.com/watch?v=s5N-UMP7EE8
InVesalius is a free software (GNU GPL 2) build in collaboration with the community. It generates 3D medical imaging reconstruction based on a sequence of 2D DICOM files acquired with CT or MRI equipment, providing several visualization tools.
http://svn.softwarepublico.gov.br/trac/invesalius
http://svn.softwarepublico.gov.br/trac/invesalius/wiki/InVesalius/Screenshots
Blender is a free and open-source 3D computer graphics software product used for creating animated films, visual effects, interactive 3D applications or video games. The InVesalius file can be imported into blender and massively manipulated in ways no other applications I’ve seen can. Blender can smooth, sculpt, add, subtract, fix meshes, smooth meshes, create and delete offending and intersecting facets, interpolate to create new facets and surfaces, and significantly, can allow the user to easily alter the resolution and facet count of the final STL file, such that it might better meet the 25,000 facet Solidworks import requirement. If needed, a larger file could be created that the Meshlabs to DXF importer could import easily as well. Overall I think this will work much better so that we can get usable STL file data into Solidworks for custom phantom design.
http://www.blender.org/
I managed to import this as a solid body (three which perfectly mesh together) this afternoon using just Blender as I already had the base STL file, but it definitely works and works well I think.
A great side project would be to get someone to build a plugin for blender that automatically does all of this for you. Blender uses a Python framework so a lot of Oliners would be familiar with this, and there are lots of existing plugins out there which could be modified or built on to get this to work. What’s more, Invesalius was also built in Python, so it would be totally possible as a summer research project perhaps to get someone with Python skill and perhaps Blender familiarity to build a program which can take DICOM files or raw CT scan data and output those files directly to Solidworks-ready STL files.