How to Make a 3D Designed UFO With TINKERCAD Codeblocks and How to Use It in 3D Designs
by AnniBot in Workshop > 3D Printing
2380 Views, 8 Favorites, 0 Comments
How to Make a 3D Designed UFO With TINKERCAD Codeblocks and How to Use It in 3D Designs
.png)
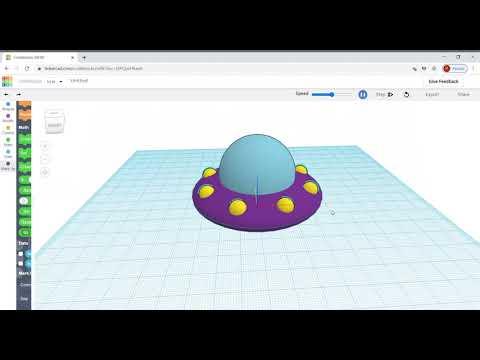
Hello Everybody! This is a 3D UFO made with TINKERCAD Codeblocks. It is very easy to make with just a few steps. I am also going to show you how you can use your codeblock project as a shape in TINKERCAD 3D designing...
Supplies
TINKERCAD Codeblocks
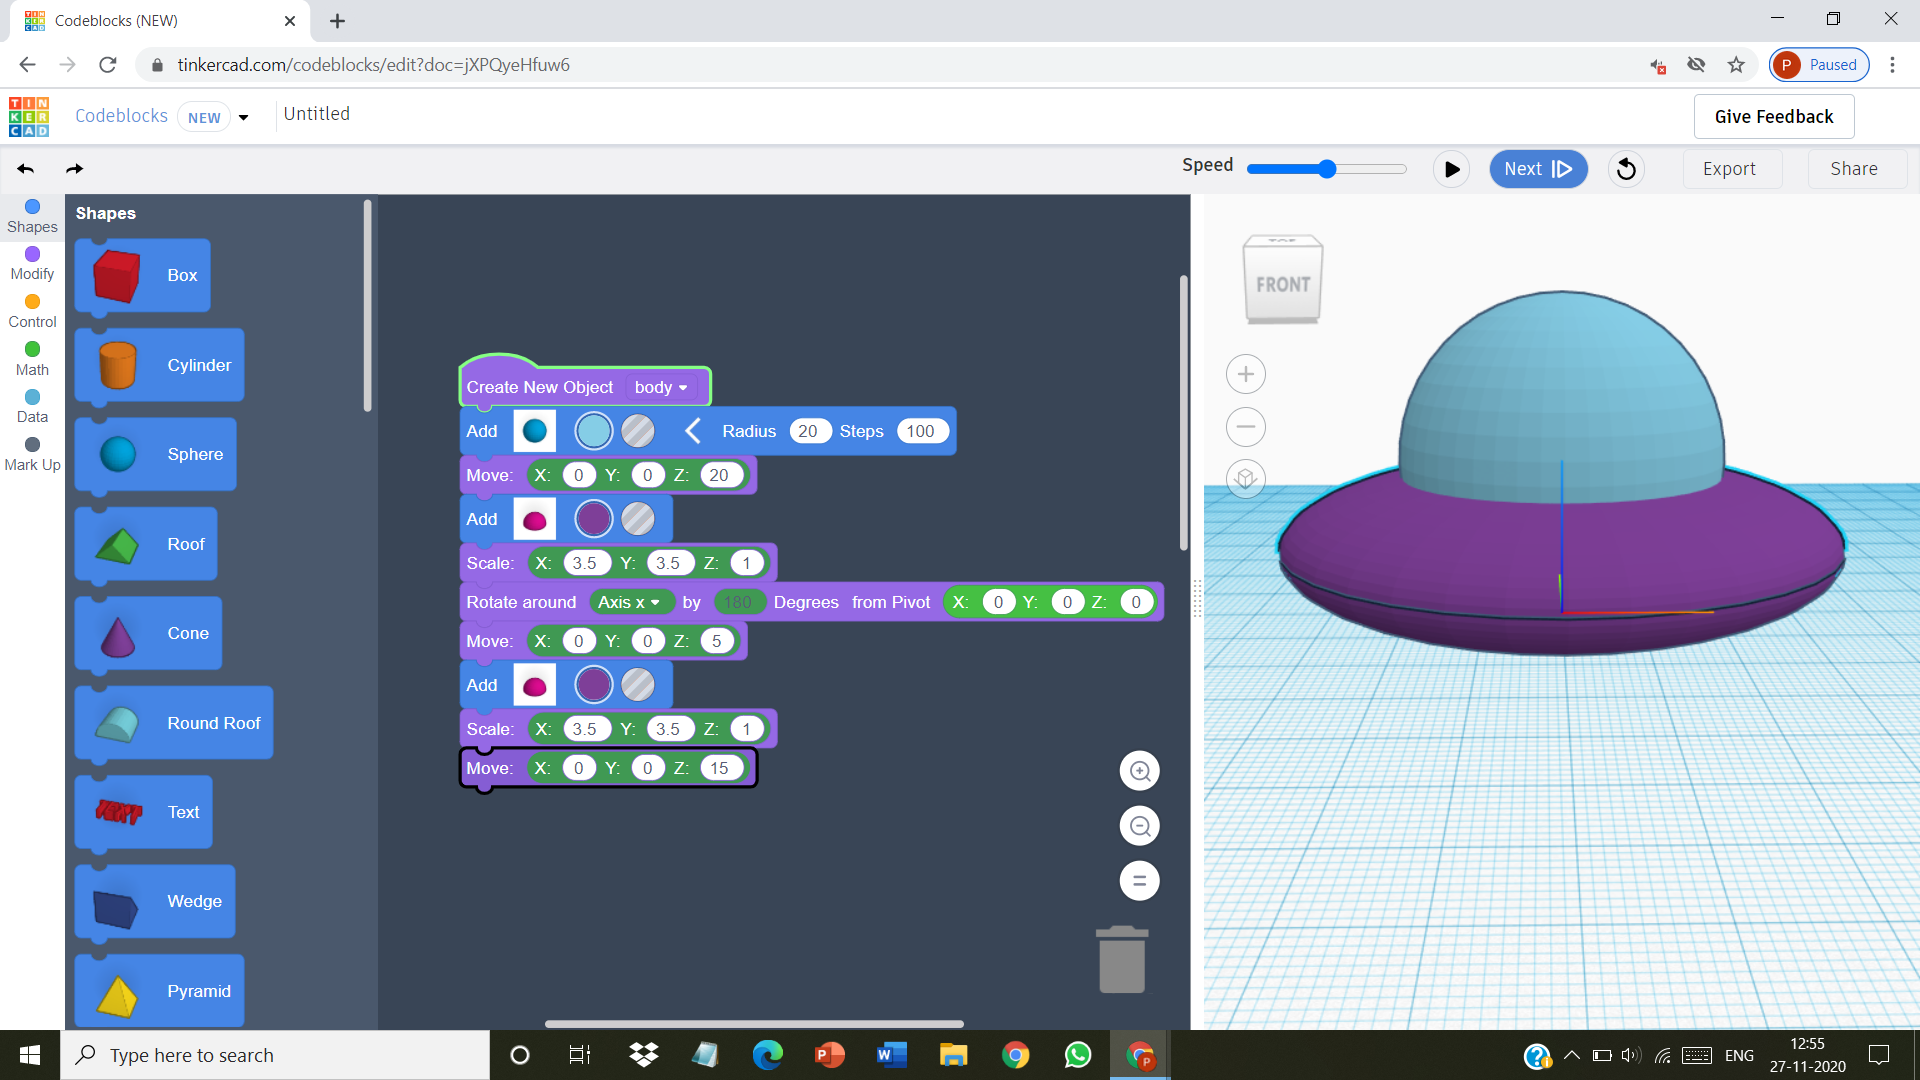
Body of the UFO
.png)
Open TINKERCAD Codeblocks and click on "Create a new Design". Put the blocks exactly as shown in the image. You will get those blocks in the "Modify" and "Shapes" panel on the left. Now click on the play button at the top and see the body of the UFO in the Workplane.
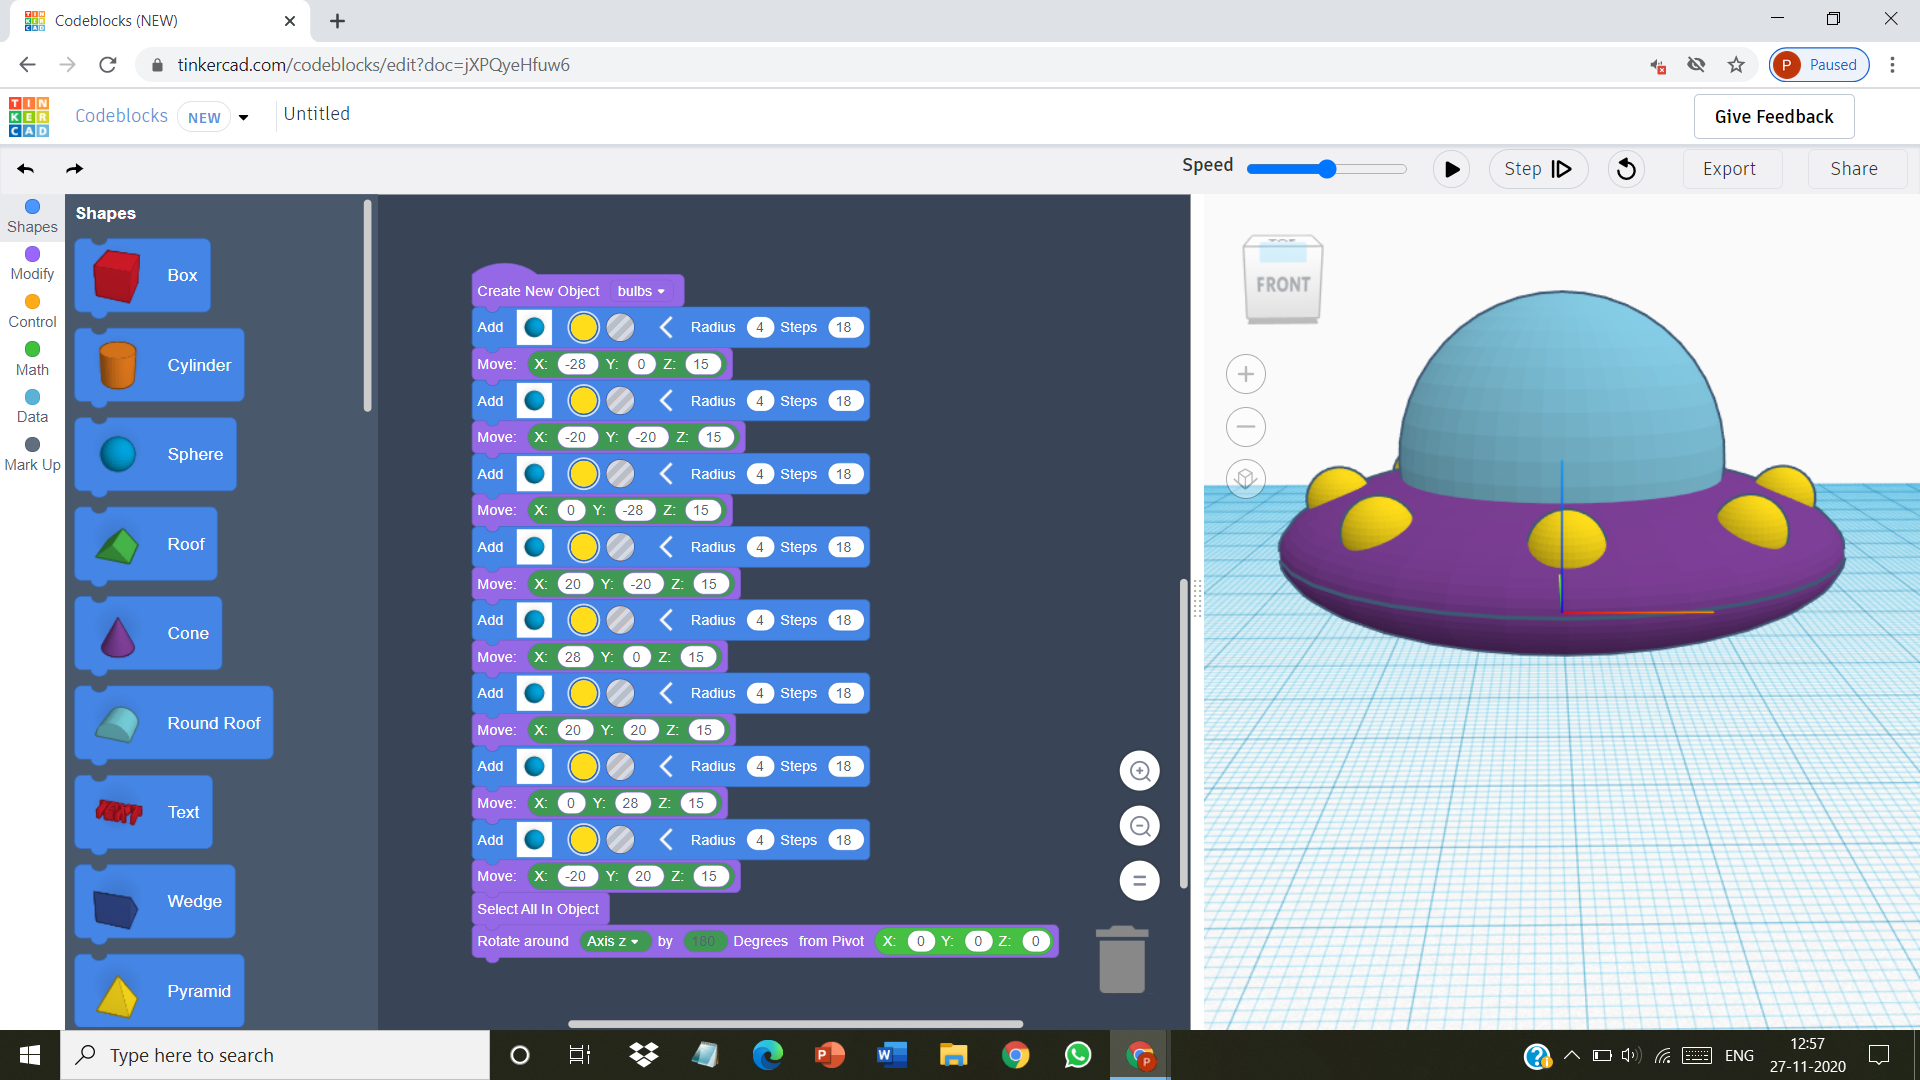
Bulbs of UFO
.png)
This time also put the blocks as per shown in the image. The last 2 blocks are added to give our project an Animated Effect .
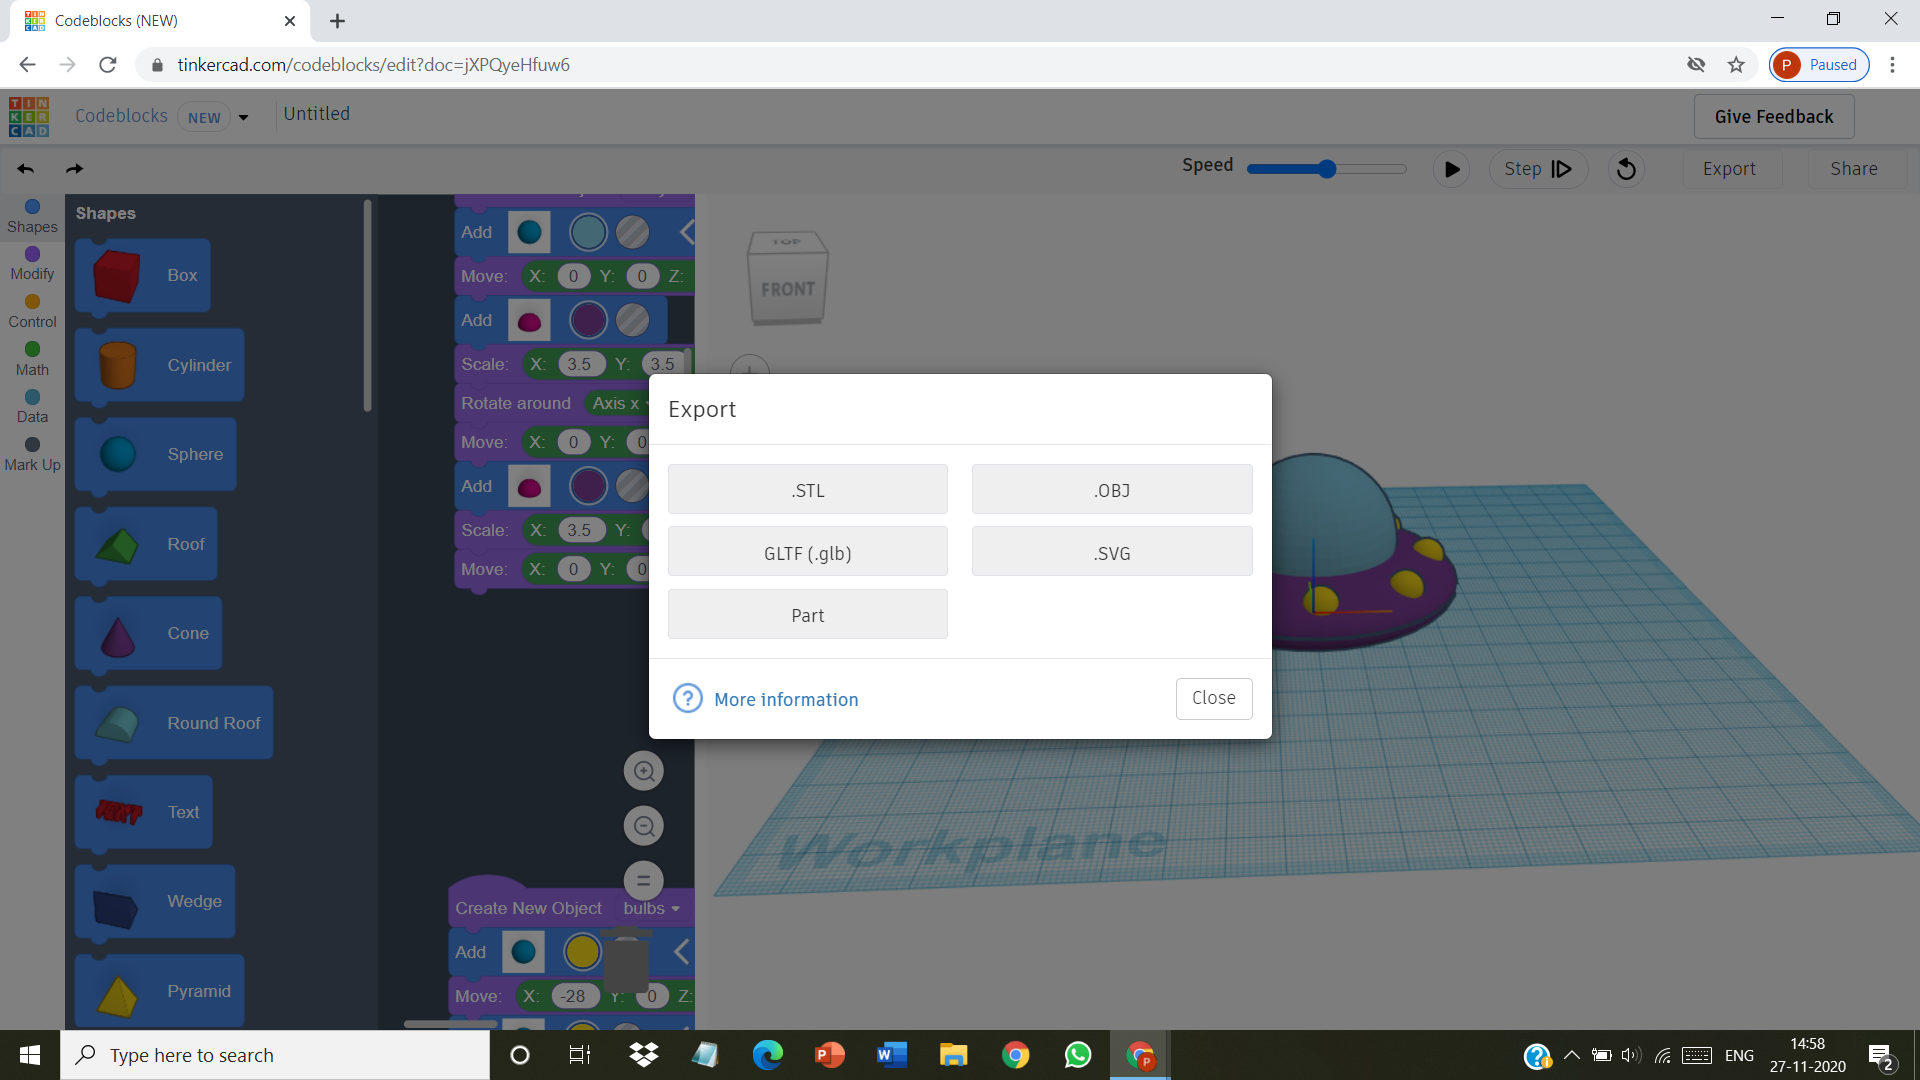
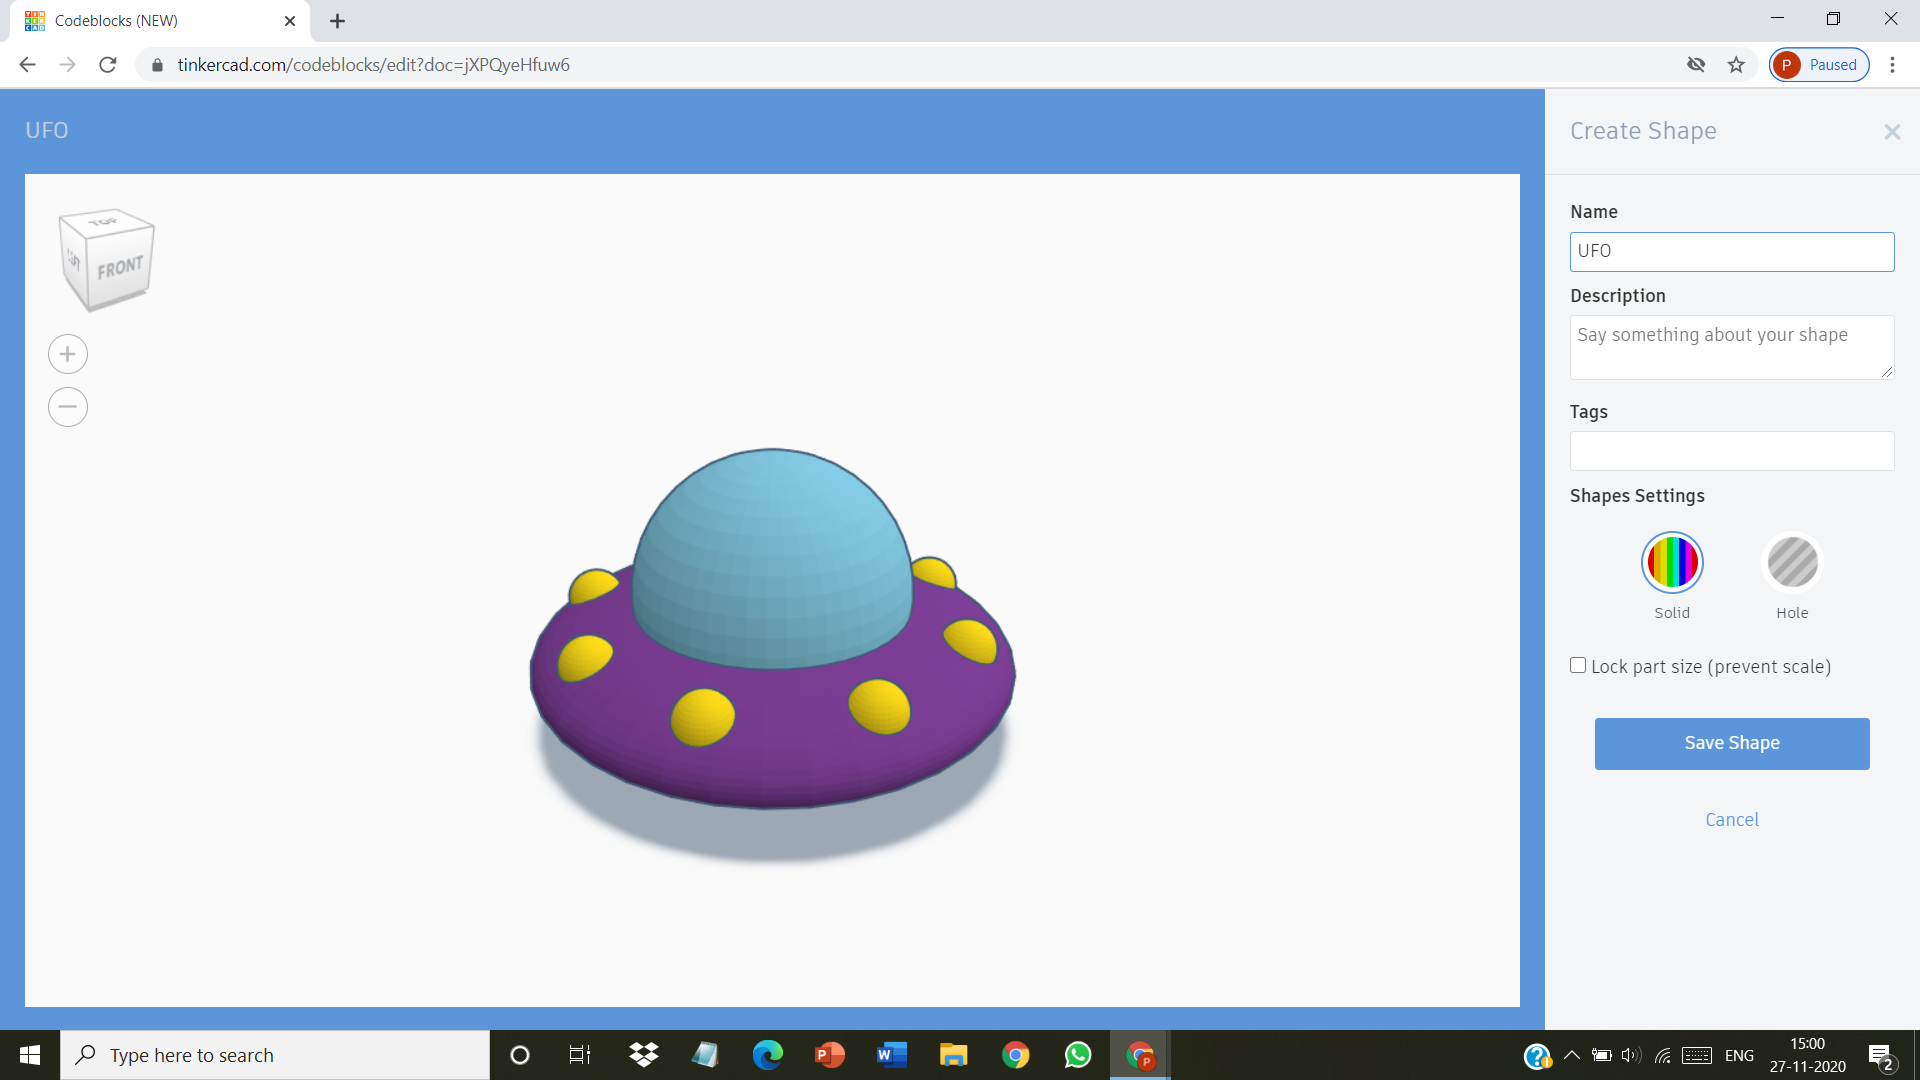
Creating Shape of the UFO for Tinkercad 3D Designing
.png)
.png)
Click on "Export" button at the top right corner an select "Part". Give your shape a suitable name, now you will find the UFO in the 3D designing when you will search in my collections.
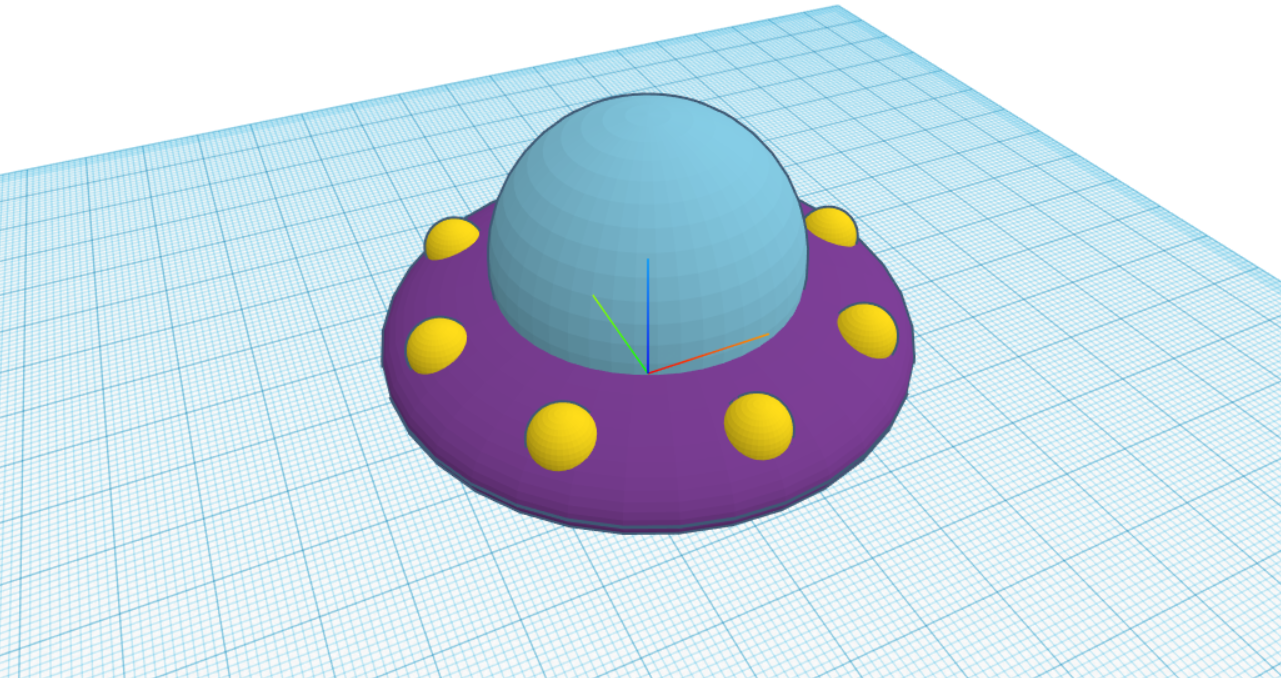
Your UFO Is Ready!
If you liked this instructable , don't forget to favorite!