How to Make a 2x2 Square Inch Space Rocket Key Chain Using TinkerCad
by lighteningbuddy in Workshop > 3D Design
802 Views, 0 Favorites, 0 Comments
How to Make a 2x2 Square Inch Space Rocket Key Chain Using TinkerCad
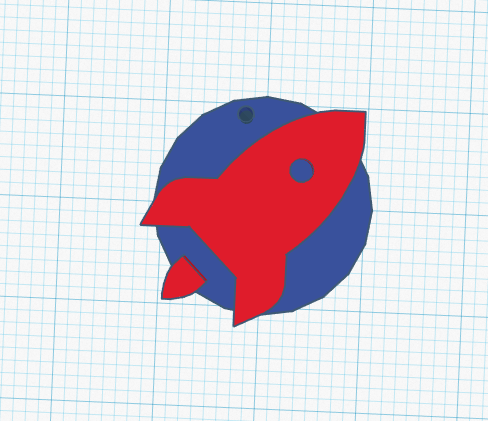
This Instructable will show you how to make an easy space rocket key chain.
Create a TinkerCad Account
All you have to do is go to this link to create your account: New Account
Click, "Create New Design"

This will allow you to create the key chain.
Change the Grid to Inches
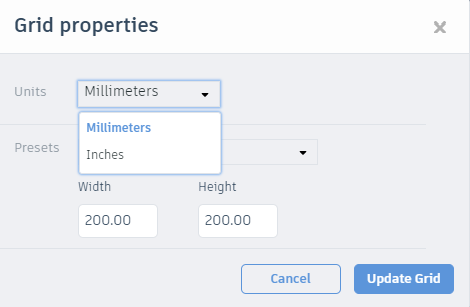
Click, "Edit Grid". Beside, "Units" it says millimeters. Click it and under millimeters it says, "Inches". Click it. Then click, "Update Grid".
Make the Cylinder a 2x2
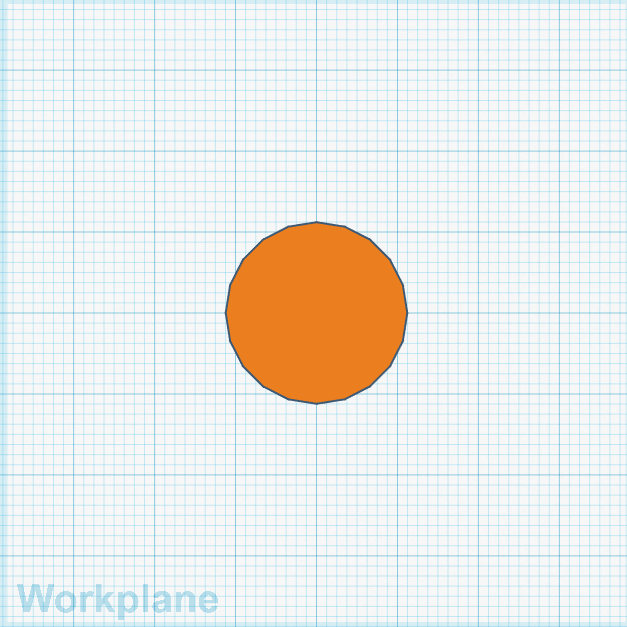
Drag a cylinder on to the WorkPlane. Pull it by the corners and stretch it out to make the cylinder a 2x2.
You can change the color of the cylinder to what ever you want.
Make the Cylinder Half an Inch Tall.
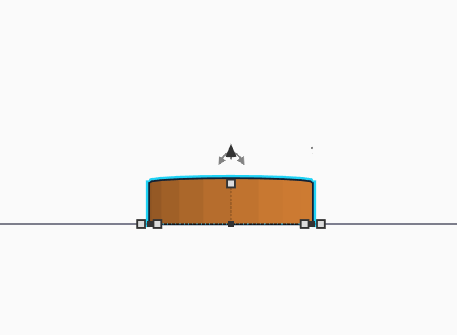
Again you can change the color of the object to your liking. I'm just using the default.
Time to Import the Image of Your Rocket

Here is the image of the rocket. I know the image is black but trust me when you import it, it won't be black. Now right now the image is an svg.png ,but we need to make it an stl. So what I did is I imported this picture into Microsoft 3D Builder and saved the image and changed the file type to stl. Then I took the new stl image and imported it into TinkerCad.
Make the Rocket a 2x2
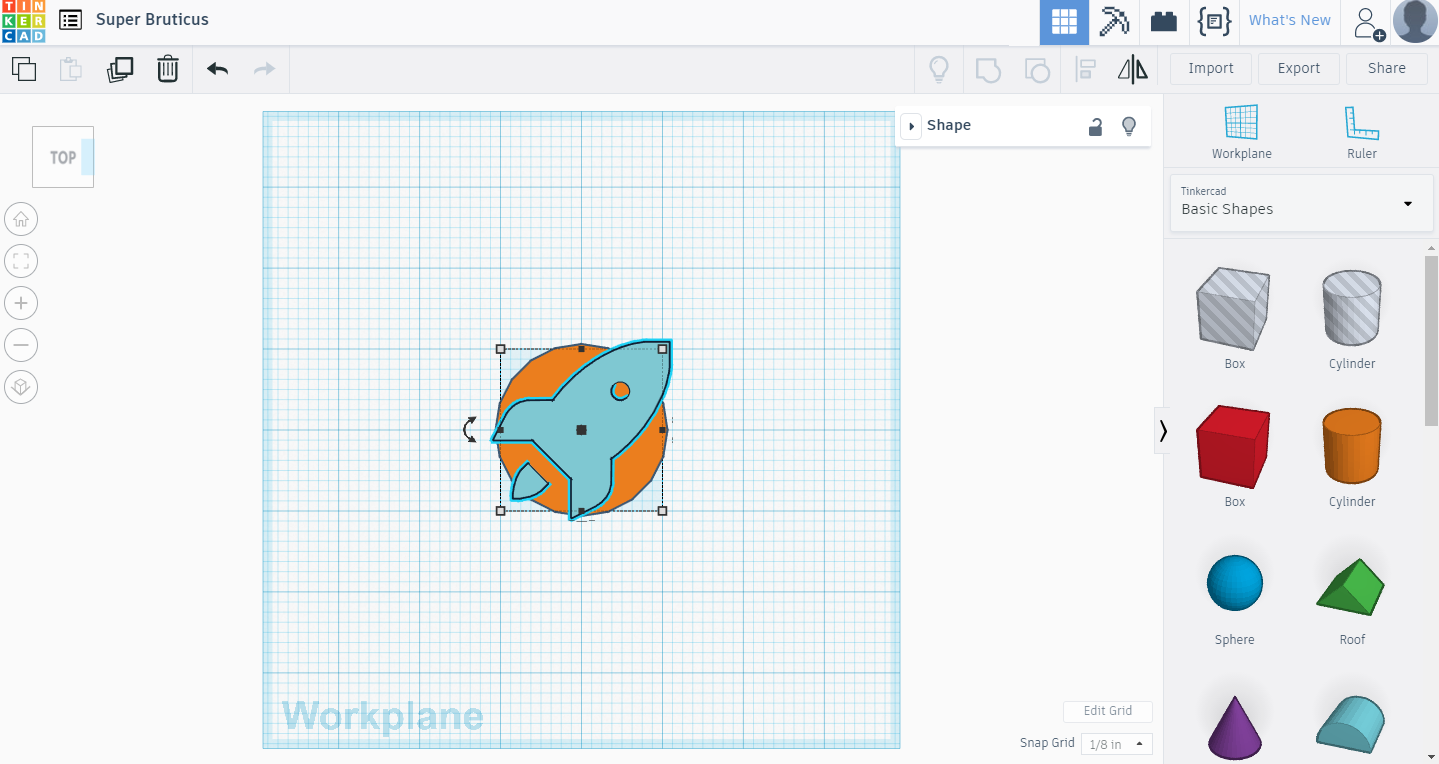
Once the rocket is imported you need to make it a 2x2 and center it with the cylinder. You can also leave the hight of the rocket alone.
Adding a Hole
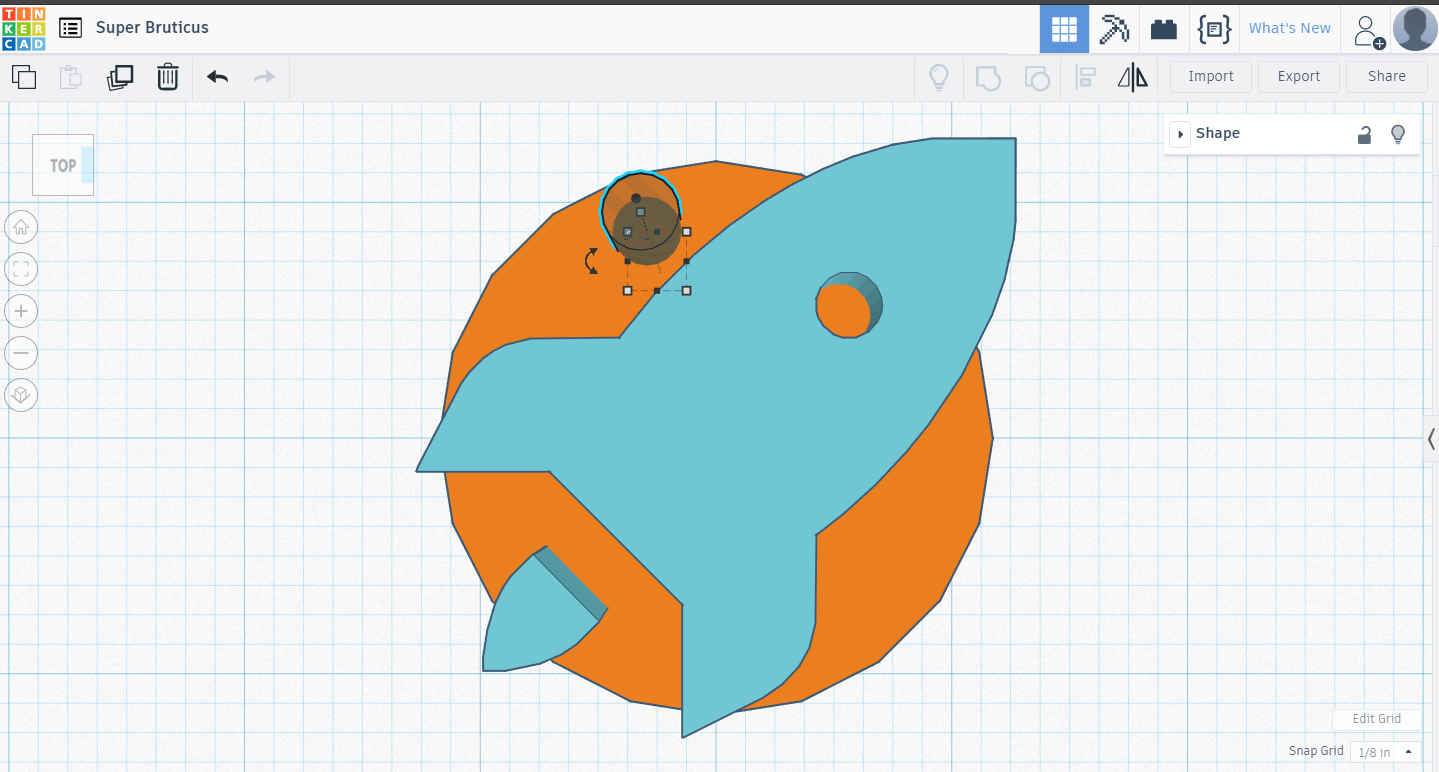
This hole will be used so that is you want to hang it from something all you have to do is put a string through it. Now to add the hole all you have to do is drag the cylinder hole on to the WorkPlane and make it a 0.25x0.25. Then put it on the cylinder above the rocket.
Now It's Time to Print
Now I don't have a 3D printer, but this was made for those that do have a 3D printer and want to make something. So I hope this was helpful.