How to Make Your Own Custom 3D Printed Wood Block Paintings
by eitanmakestuff in Craft > Printmaking
1063 Views, 5 Favorites, 0 Comments
How to Make Your Own Custom 3D Printed Wood Block Paintings
.jpg)
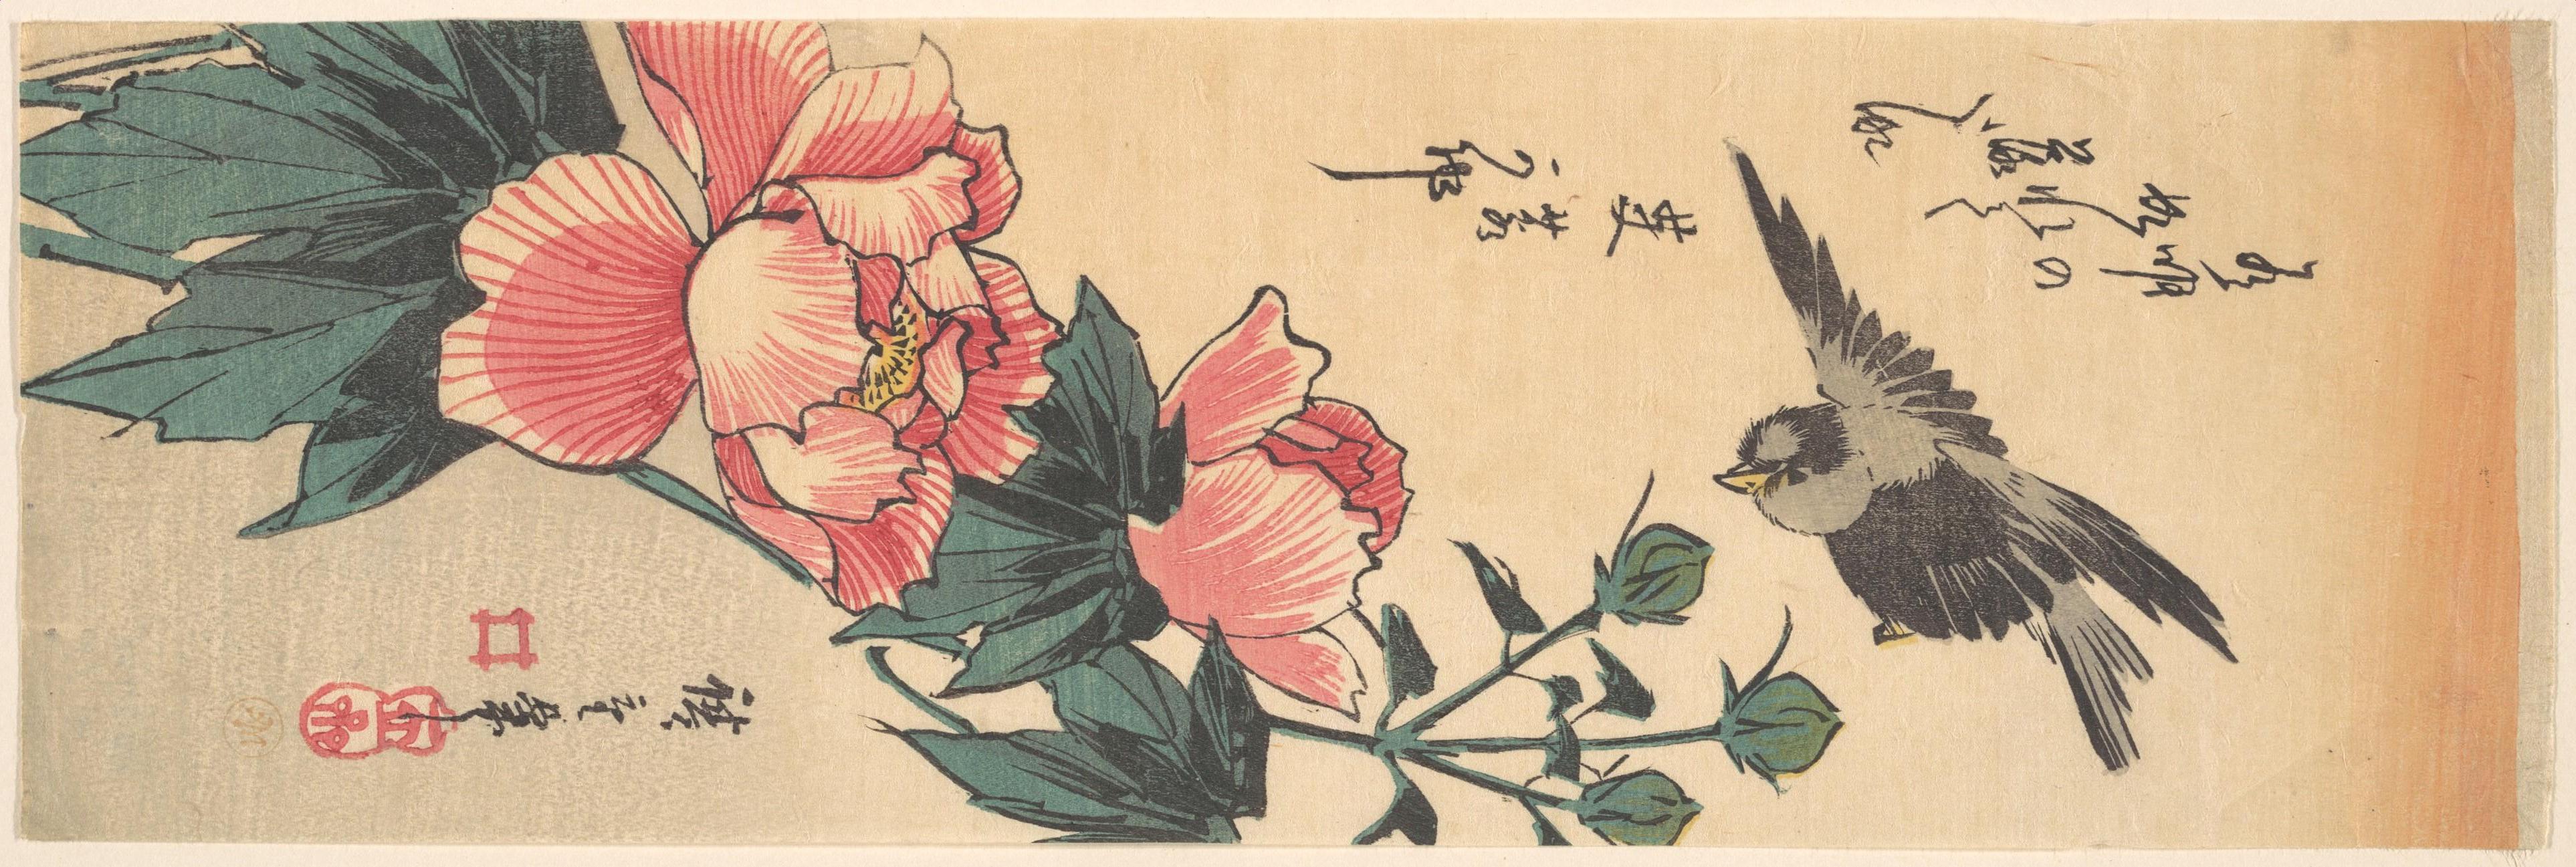
I first got the idea for the project after seeing a woodblock painting made by Utagawa Hiroshige, an Edo-period ukiyo-e artist. His "Sparrow and Hibiscus" painting really stuck out to me because of the vibrant colors and details, and I found it cool that the painting could be easily replicated using the woodblock stamp set.
After a little more research into the art of classical woodblock printing, I learned a lot about how these paintings were traditionally made. The process usually began with a sketch on paper, which was then transferred to a wooden block. Using a sharp chisel, the artist would carefully carve away the negative space in the design, leaving behind raised areas that would hold the ink. Once the carving was done, they would apply ink to the surface of the block. After creating one of these blocks for each color in the painting, the artist would then place a sheet of paper on top of the block and apply pressure to transfer the ink onto the paper. The result was a highly detailed and vibrant painting that could be replicated many times. Woodblock prints from the Edo period in particular are celebrated for their vibrant colors, intricate details, and rich textures, demonstrating the skill and craftsmanship of artists at that time. I thought it would be awesome to be able to replicate the process using modern technology, not just for Hiroshige's paintings but any picture or image.
In this article, I'll show you how you can turn any image or painting into your own set of 3D-printed stamping blocks, so you too can create a printed masterpiece like a true Edo-period artist. This project uses a couple of different software programs like Photoshop and CAD, but don't worry, no prior experience is needed. I'll walk you through finding an image, isolating the colors, creating 3D models, printing your stamps, and making the prints. Let's get started!
Supplies
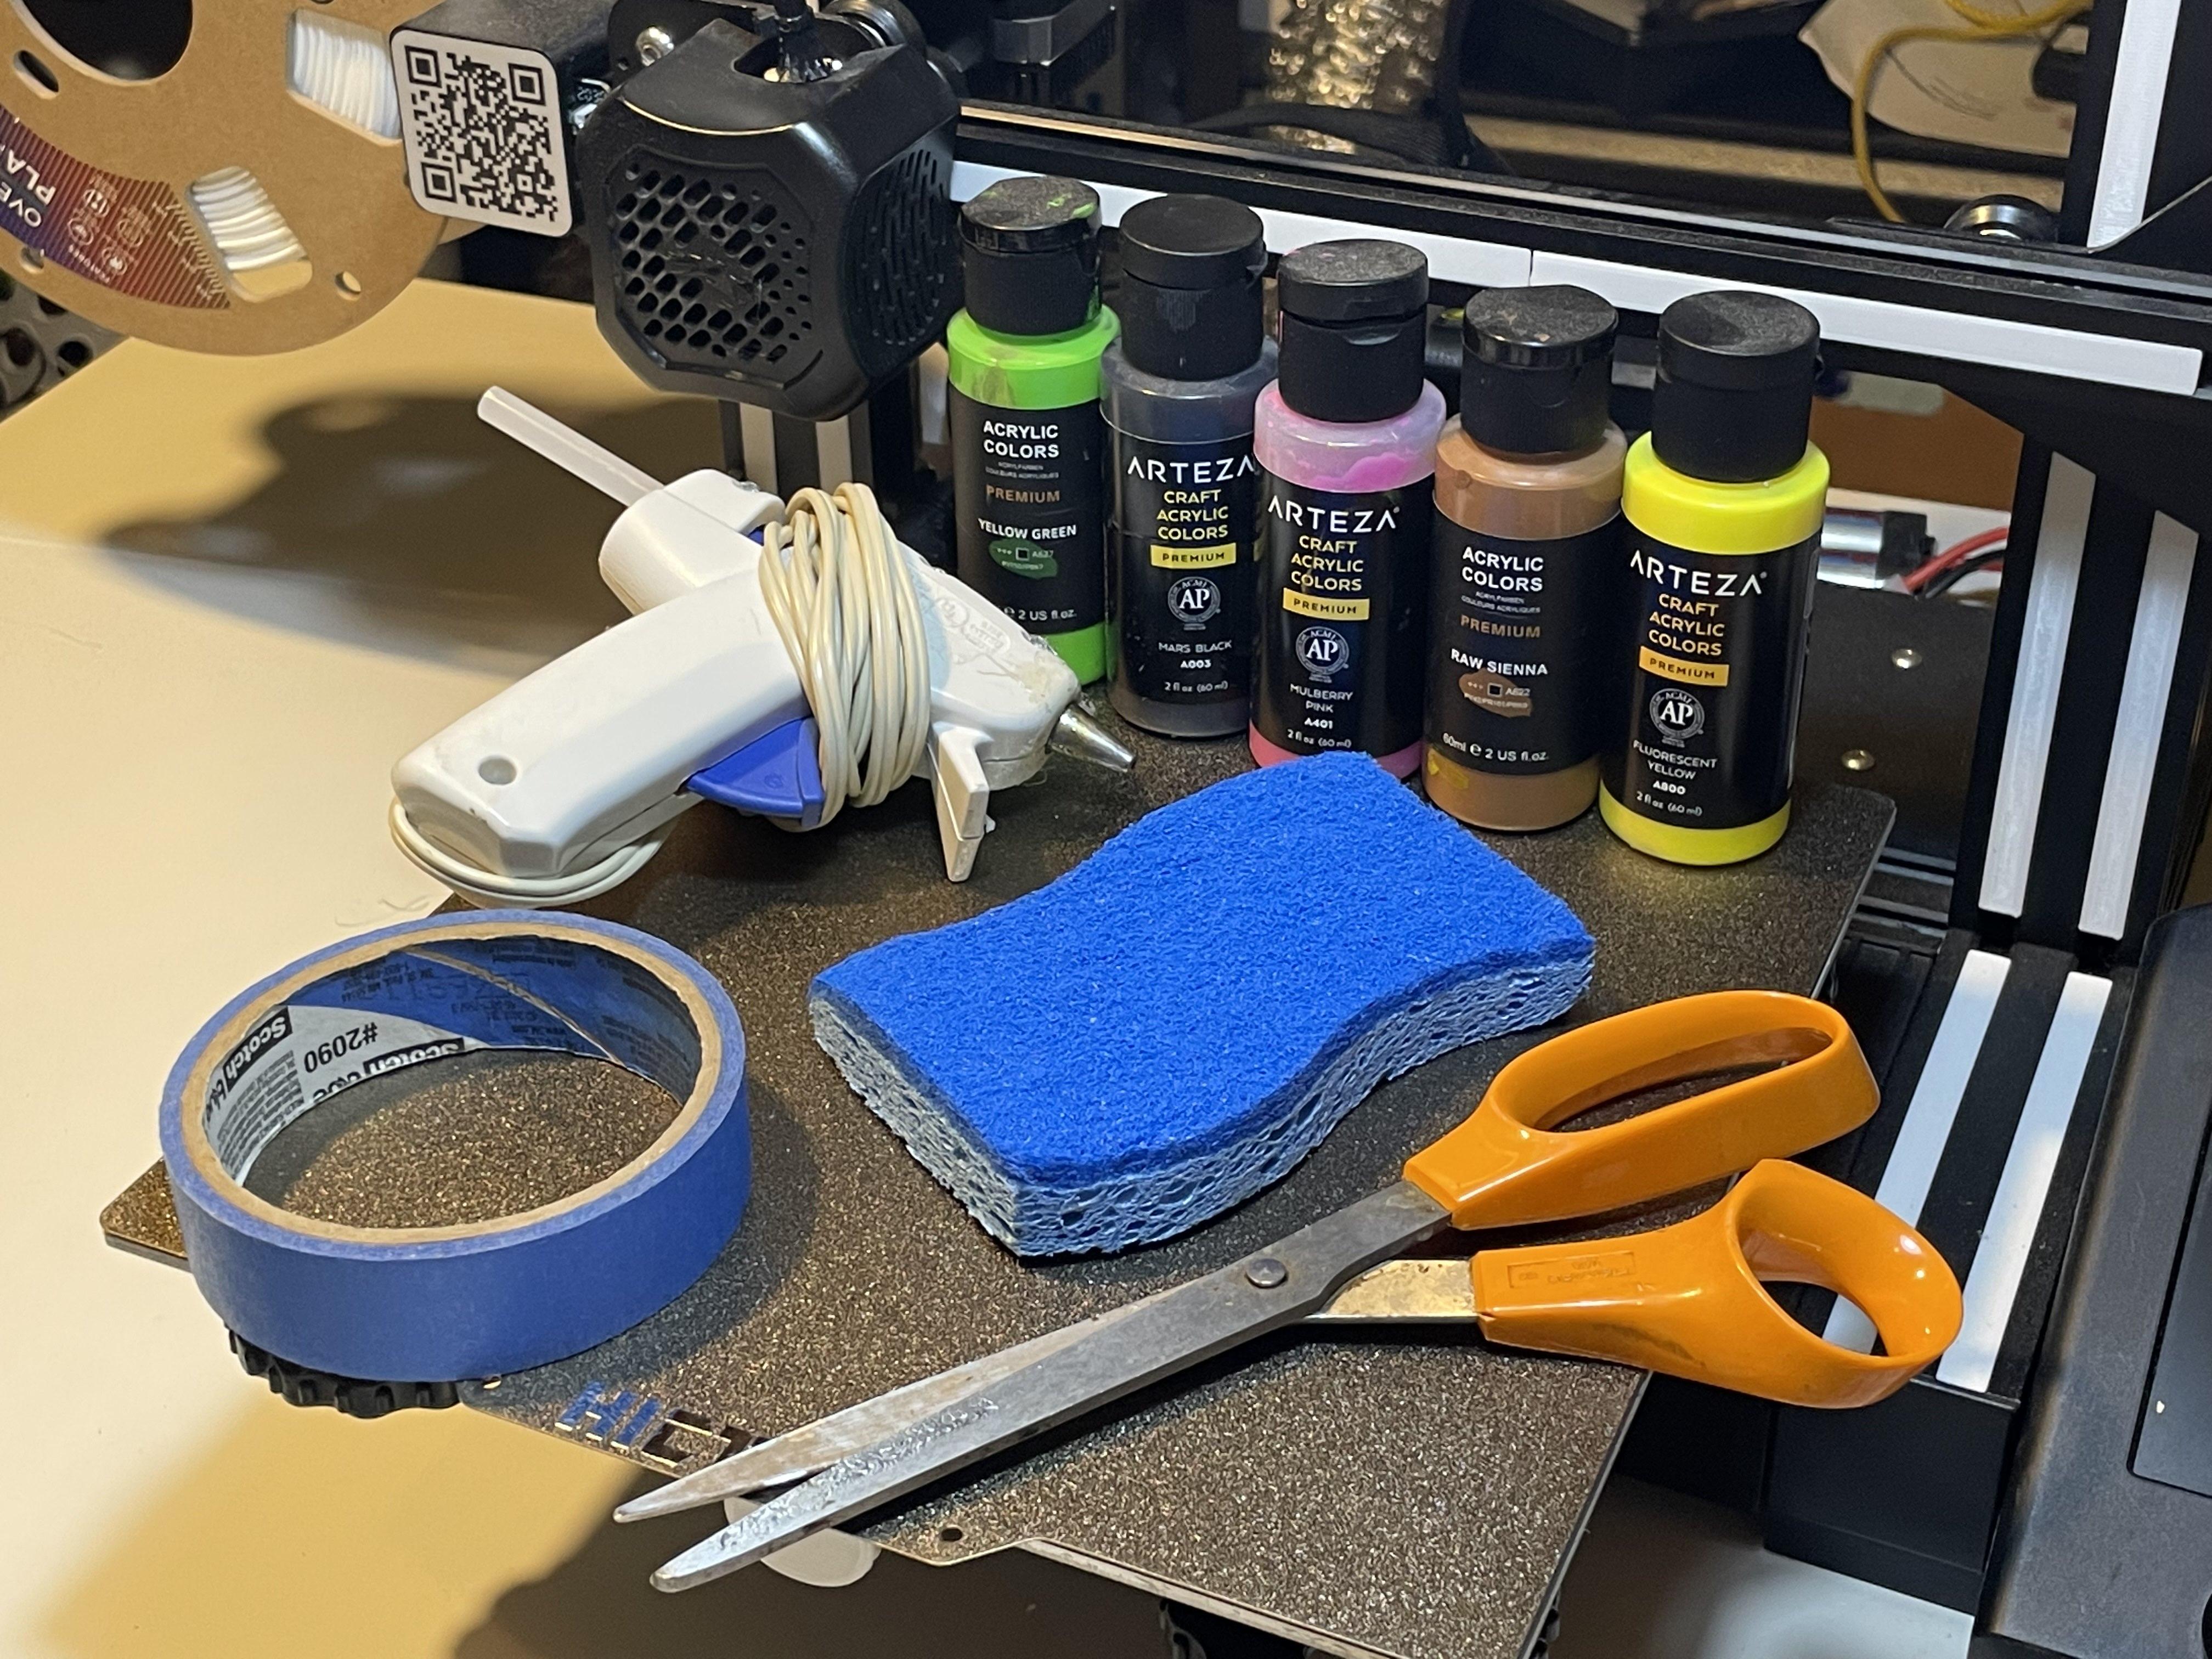
For the stamps:
- CAD Modeling Software - for this project I used Autodesk Fusion
- Slicing Software - whichever works best for your printer
- 3D Printer - I used my Ender 3 V2
- Filament - anything strong but not too brittle, I used PLA
For making your prints:
- Thick Paper or Canvas
- Acrylic Paints
- Painters Tape
- Sponges - I used dishwashing sponges, but any size works
Finding Your Inspiration
When picking the image for your print, there are a few things to keep in mind:
- The more colors there are, the more printing blocks you will need. Since each color is stamped on by its own printing block, paintings with a ton of different shades of colors will be more difficult to replicate
- Printing blocks cannot do color gradients. Because each printing block stamps a single color, you can't get smooth gradients. However, if the color gradient is in the background, you can paint it beforehand and then stamp the colors over it as some traditional artists did.
- Finer details are hard to replicate with 3D-printed blocks. Since these will be made on a 3D printer, they can only get so fine in resolution. Choosing an image with less intricate details will result in a sharper final painting.
- Having a higher-resolution image makes the process easier. It's okay if your image is low-resolution, Step 3 will just take a little more time.
Importing Into Photoshop
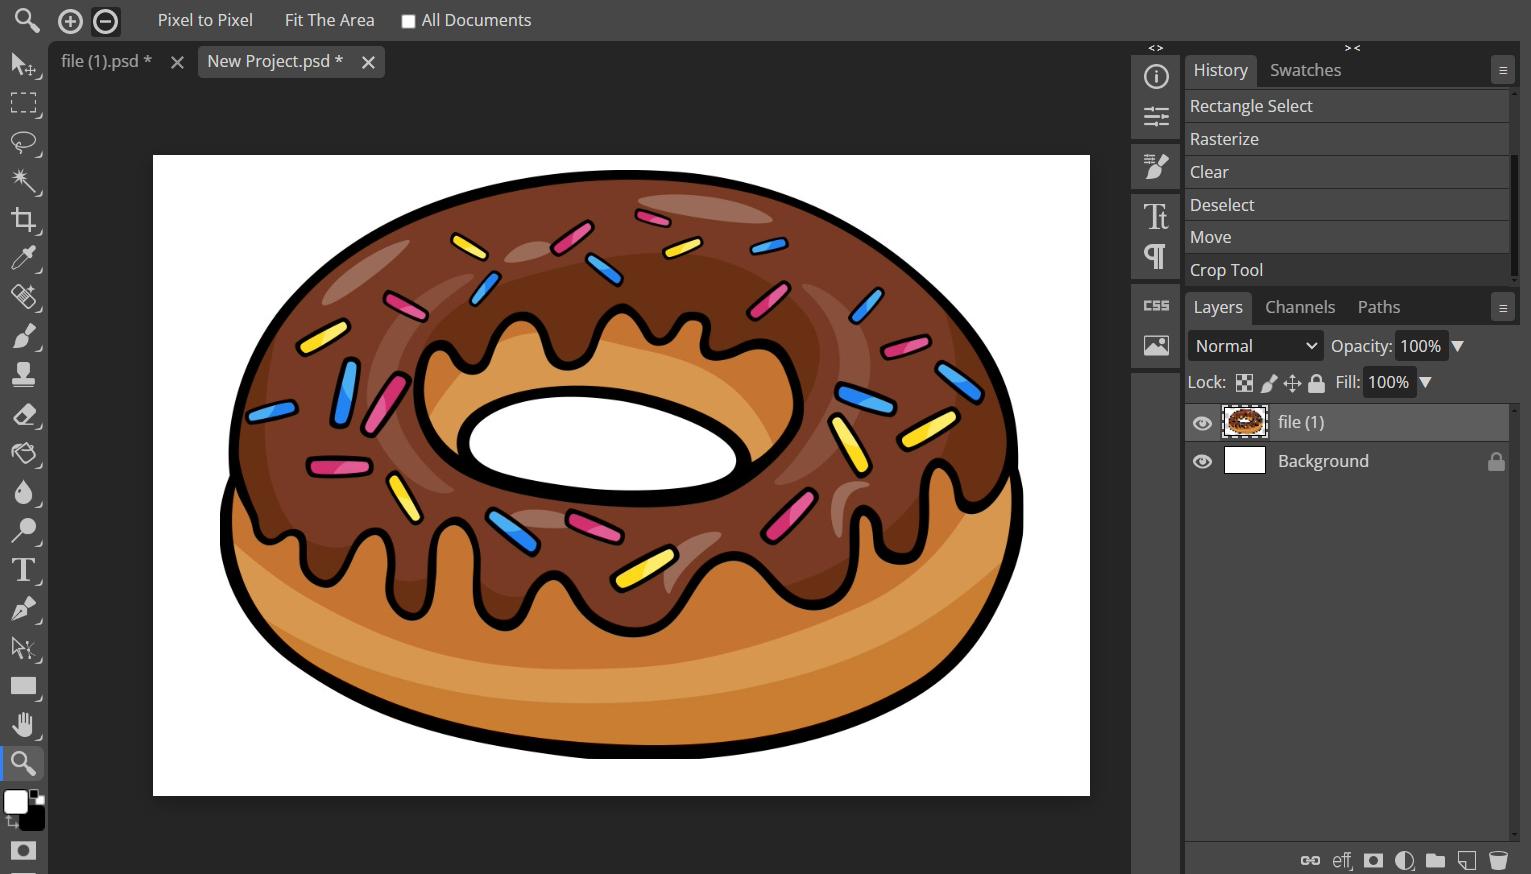
For this project, I used Photopea, a free, web-based photo editing software very similar to Adobe Photoshop, but any well-equipped photoshop software will work perfectly. For this tutorial, I will use a simpler image of a donut with colored sprinkles to demonstrate the process.
Once you have a downloaded file of your image (any format works), select the "Open From Computer" option on the homepage and select your file. This will create a new workspace with your image loaded and ready to go!
Using the Magic Wand Tool
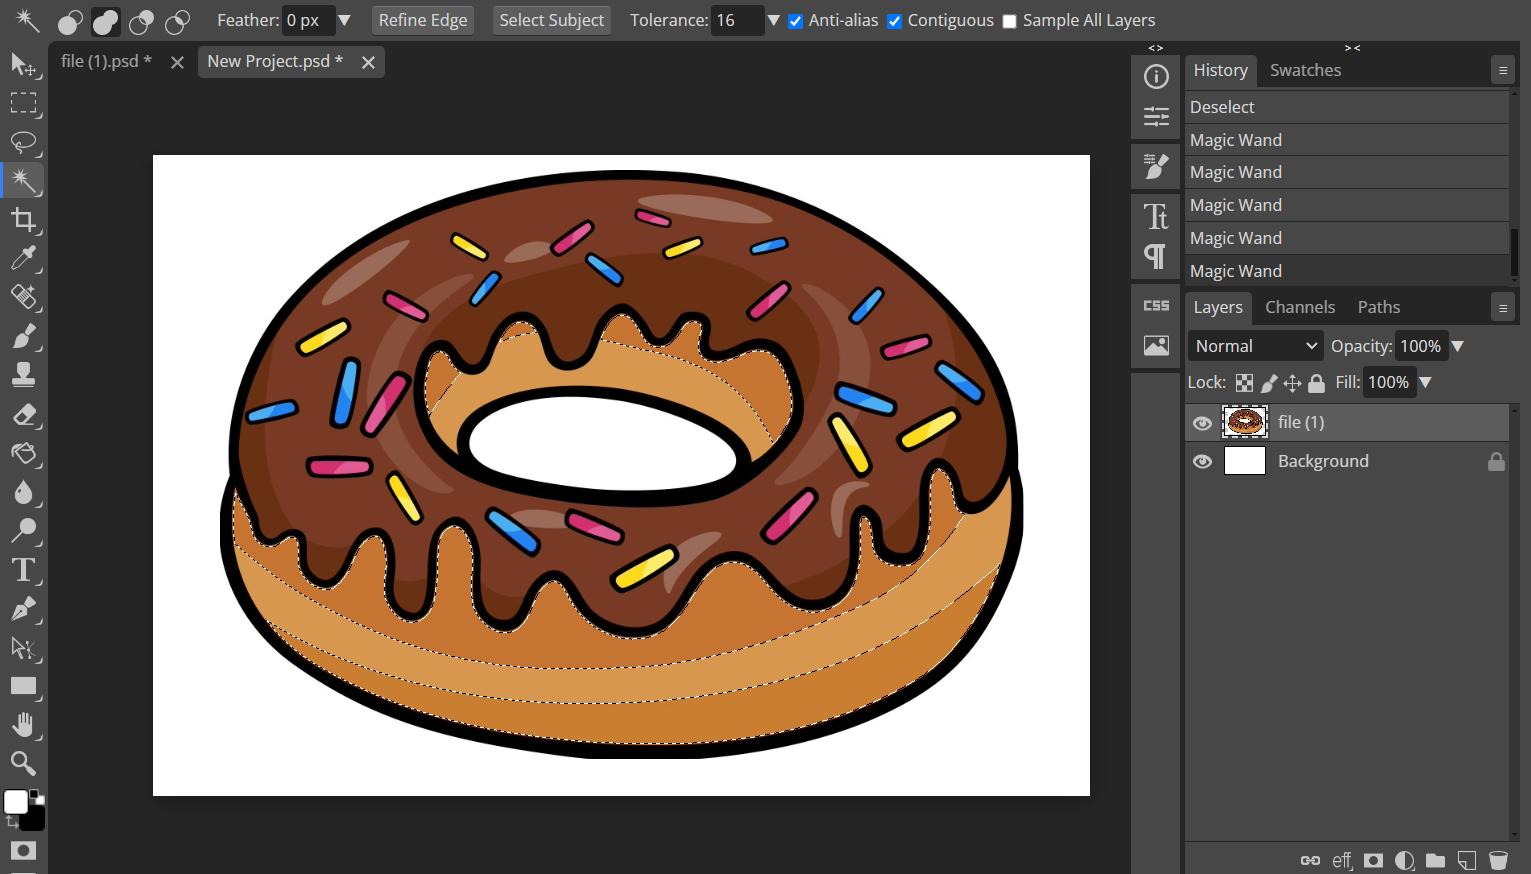
Now we need to isolate each color in the image and separate them out into their own layers. There are a few different ways to do this but by far the quickest and easiest method is using the "Magic Wand" tool:
- Select the wand icon, the fourth tool from the top in the toolbar on the left side of the workspace
- Click on the color you want to isolate - the more defined the boundaries of the color are, the easier it will be to select it
- While holding down the shift key, click on all of the other instances of the color in the image
When complete, there will be dashed outlines around the selected parts of the image
- It's okay if your selections aren't perfect, and there are still stray pixels of color left on different layers. We can fix any imperfections when converting the PNGs to SVGs in Step 9.
- If you accidentally misclick, click the accidentally selected area again while holding shift to deselect it
- If you want to restart your selection, use the shortcut Control+D to deselect everything
- If the outlines of the color you want to select are not clearly defined, you can use one of the other selection tools (tutorial)
Creating a New Color Layer
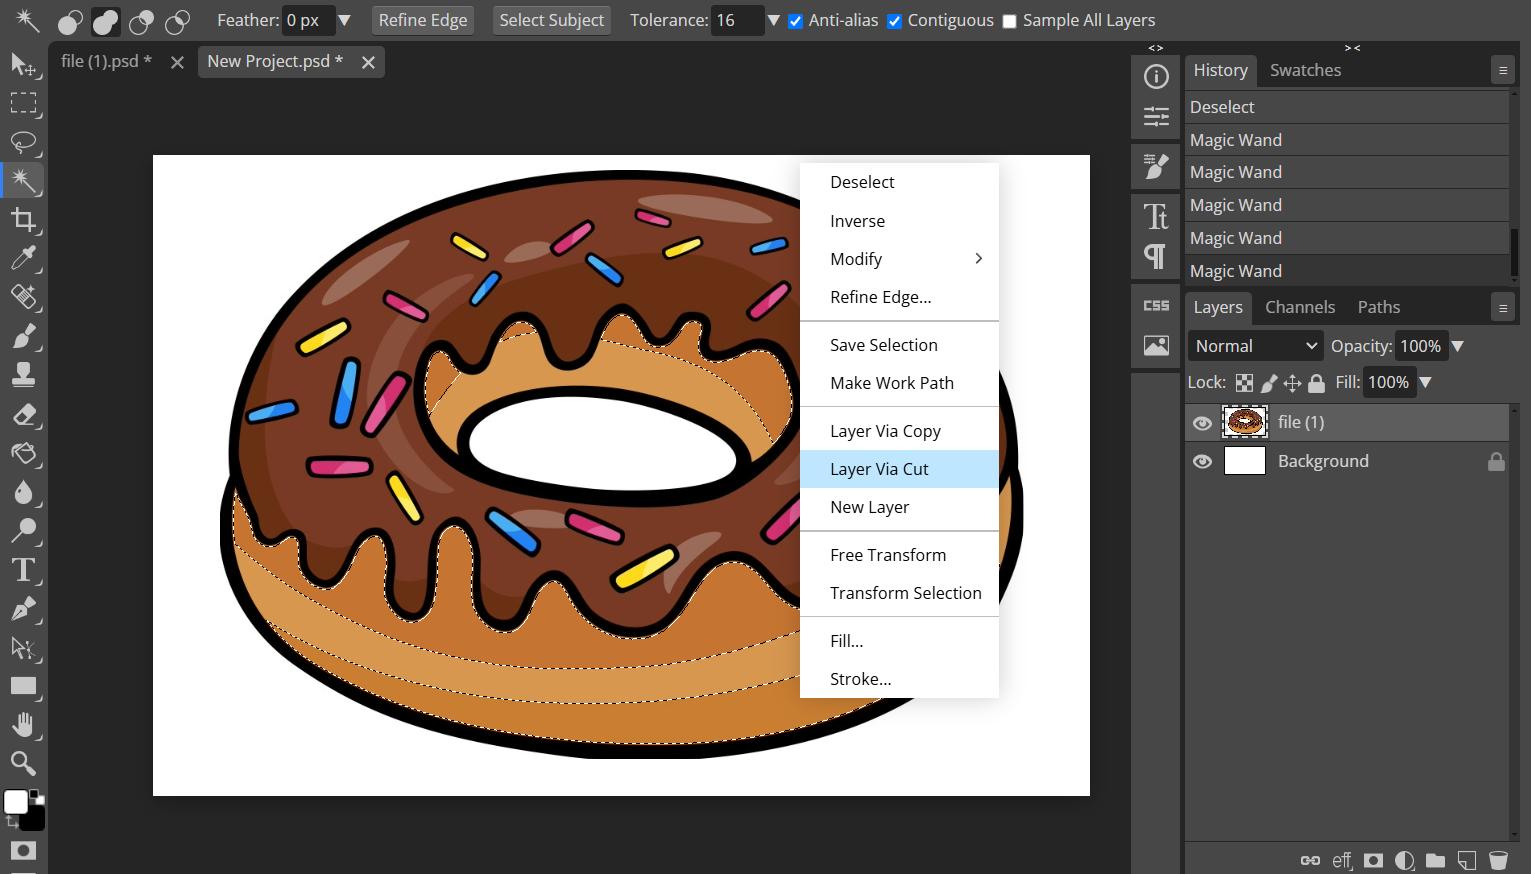
Once you have all the instances of the color in your image selected, right-click anywhere on the selected area, and select the "Layer Via Cut" option. This will create a new layer in the document containing the selection, removing it from the first layer.
Checking Your Work
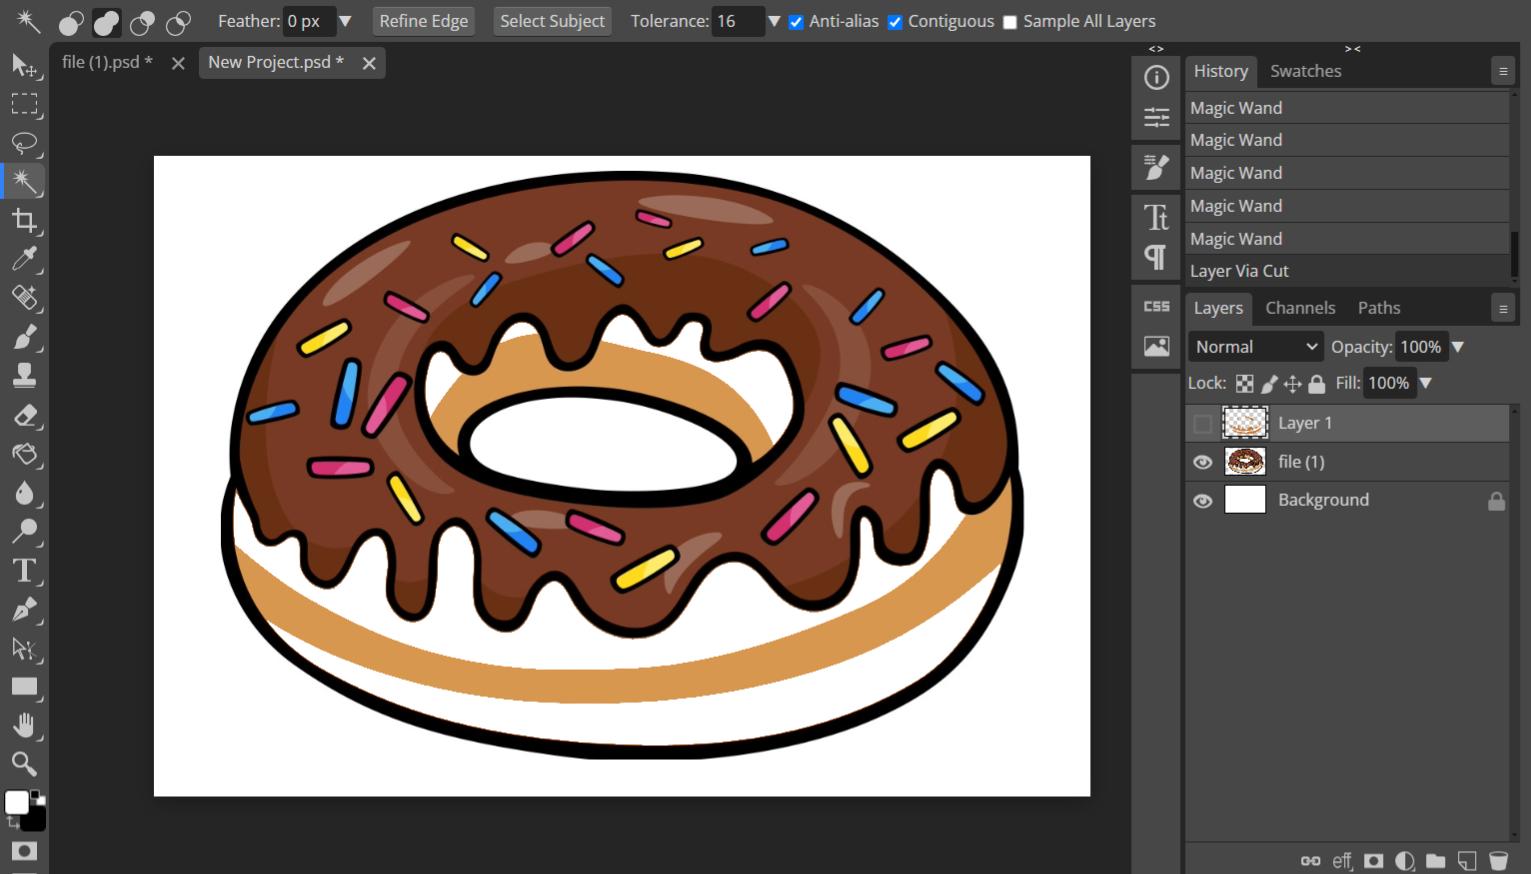
Now, if you click on the eye icon next to the layer you just created, it will hide the layer and you can see that color disappear from your image.
Isolate the Other Colors
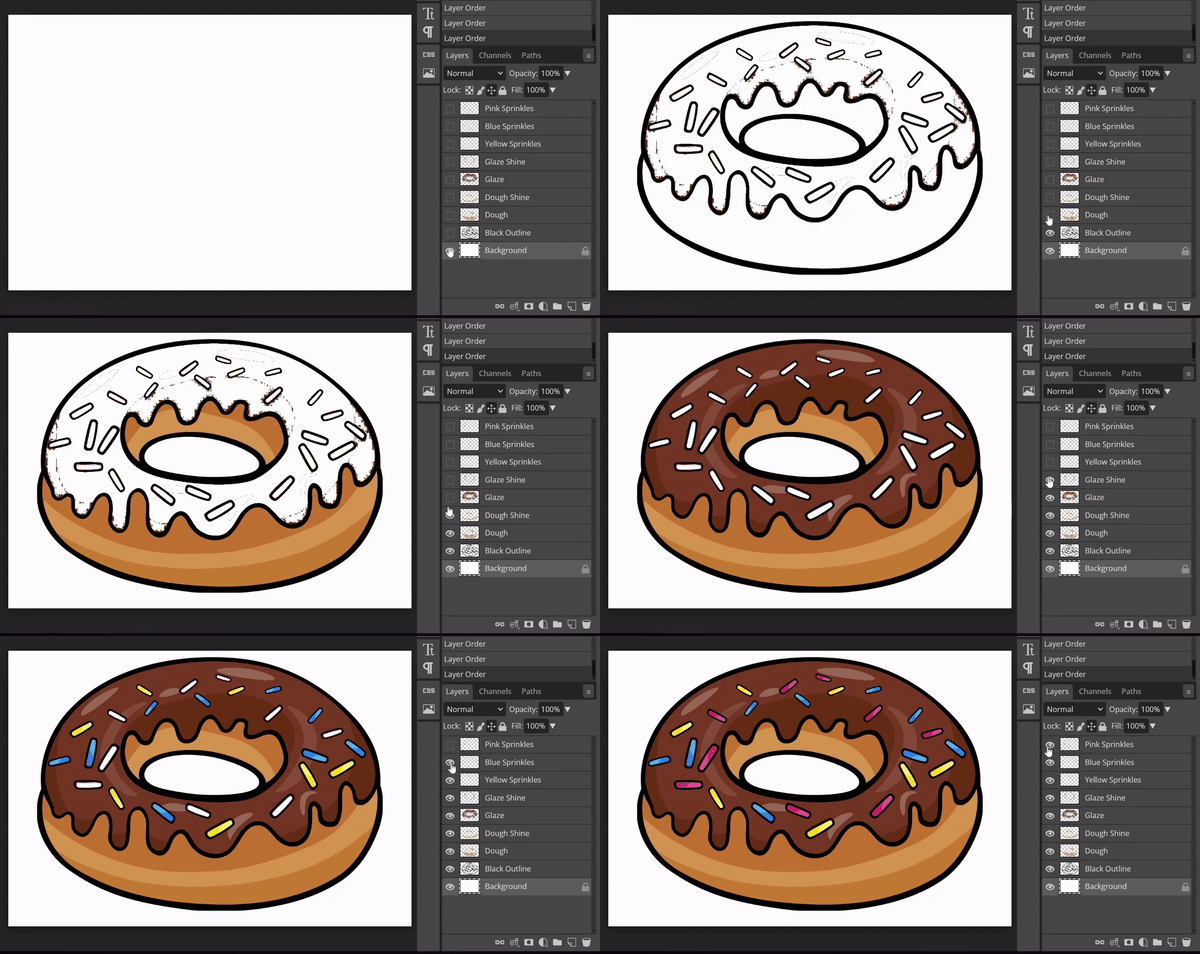
Once you are familiar with the process, go ahead and isolate the rest of the colors. As you go, make sure to name each layer according to what parts of the image they represent and what color, for instance, "Pink Sprinkles". This makes it easier to work with the files once we export them and ensures that they don't get mixed up during the 3D modeling process.
Exporting From Photoshop
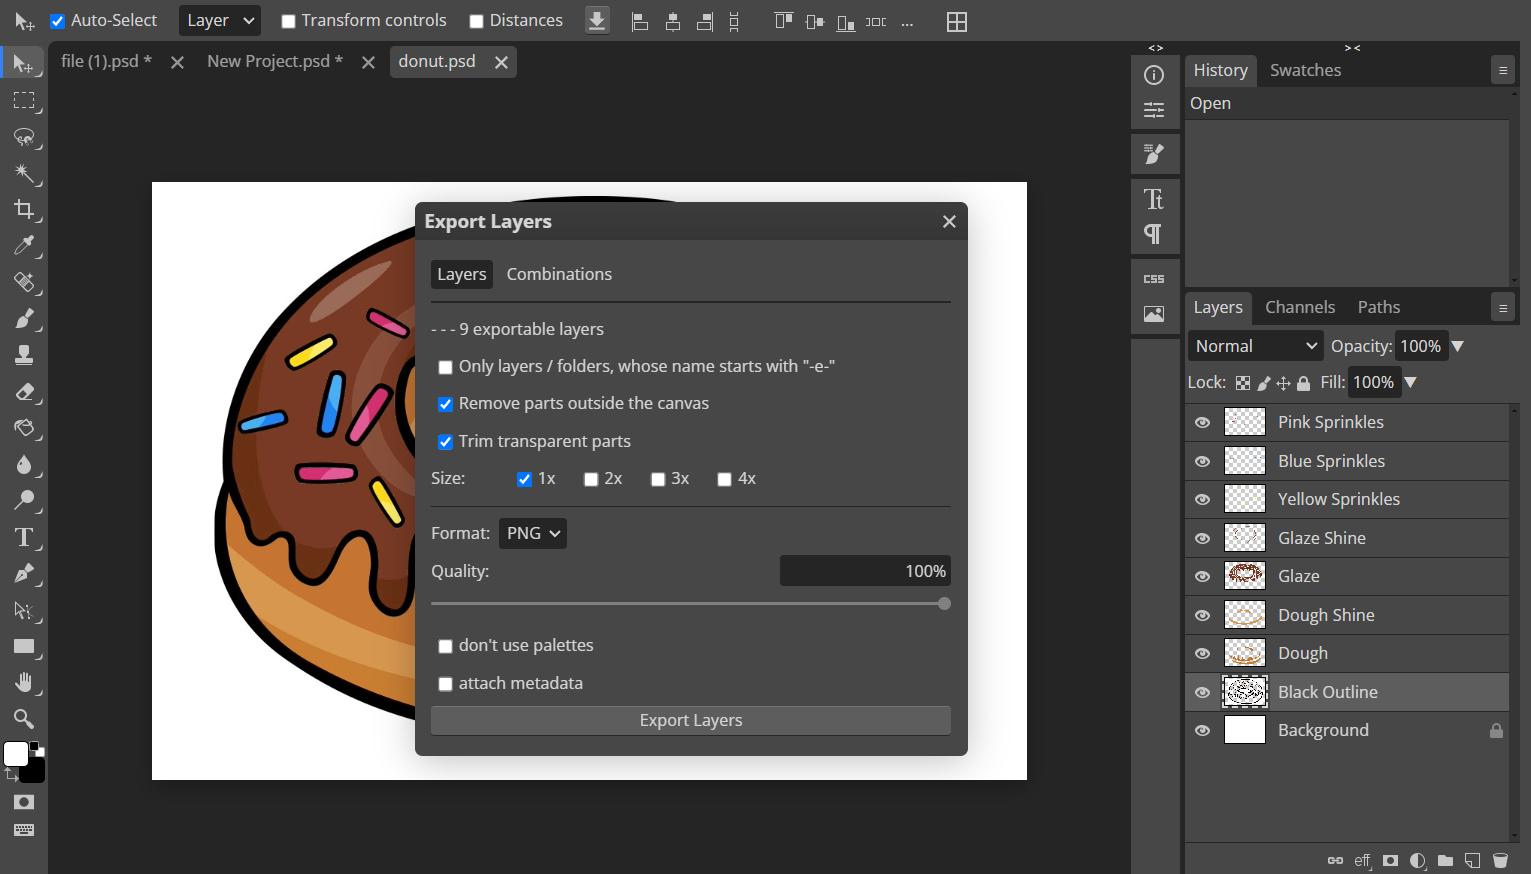
After all of your colors are isolated on separate, named layers, it's time to export them! Head to the top left of the workspace, under the "File" tab, select the "Export Layers" option. This will export each layer individually as its own file, and save them in a ZIP folder. When the dialog box pops up, deselect the first checkbox, select the "PNG" file type, set the "Quality" slider to 100%, and hit "Export"!
Converting to Vector SVG Files
Now we have a PNG of each color's presence in our image. However, to turn them into 3D models, we need to convert them to a file type called a Scalable Vector Graphic, or SVG for short. This basically turns the PNGs into black and white only, so the CAD program we use can identify the outline of the shapes. To convert the PNGs into SVG files, I used imgvector, one of the many conversion tools available for free online, but any conversion software will work.
Click on the "Choose Image to Convert" button, and select the PNG of your first color.
Finding the Perfect Balance
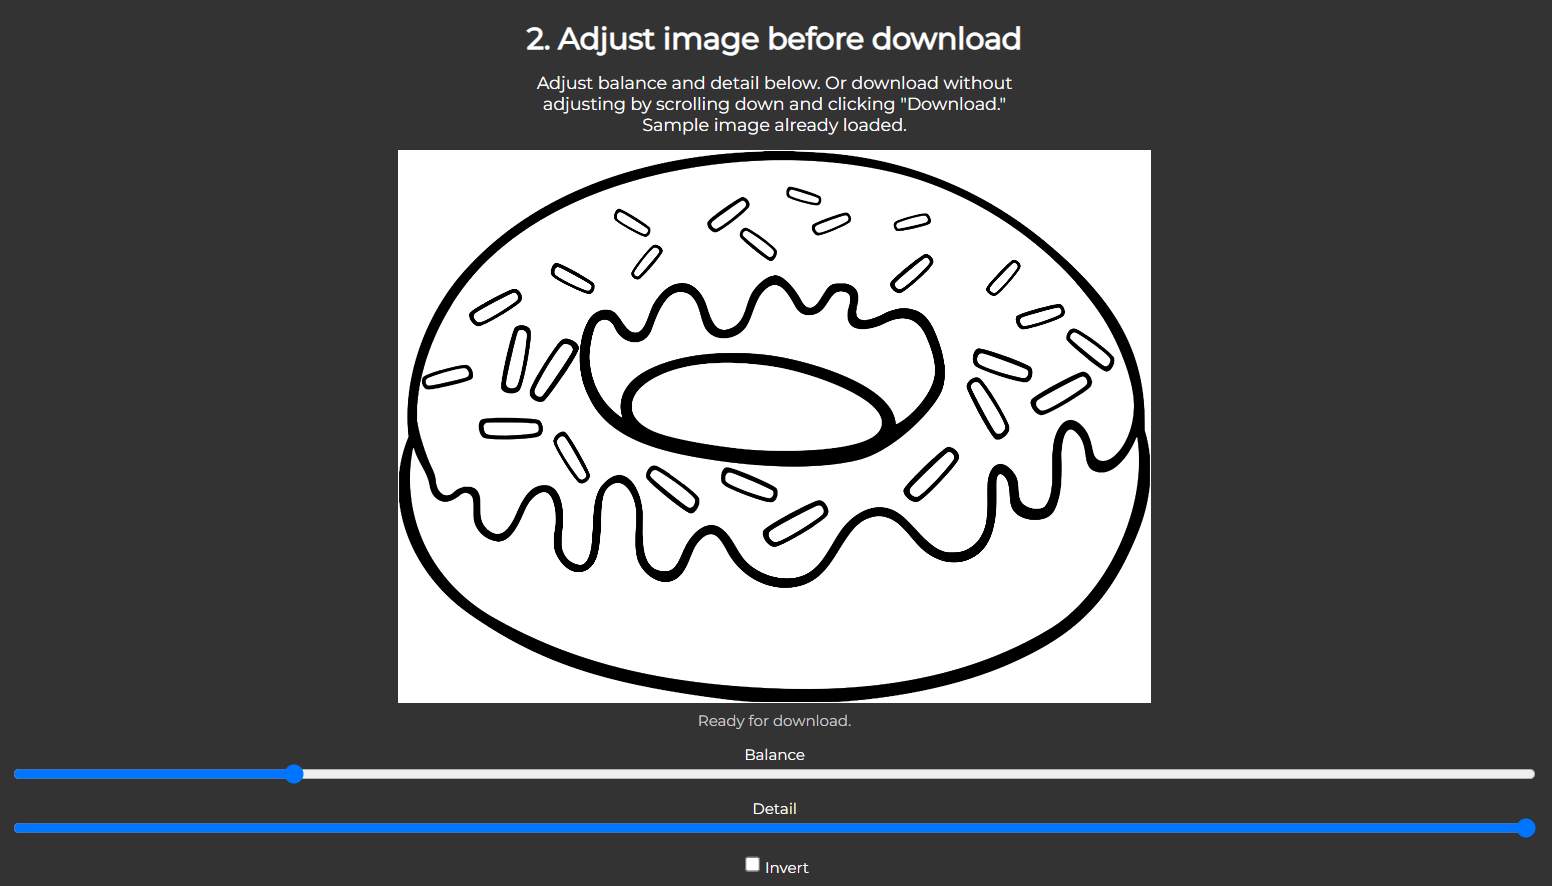
Now that you have your first PNG uploaded, we can select a "balance" value for the conversion. The balance value determines how sensitive the conversion algorithm is. The higher the balance value, the more detail will be designated as black, and the lower it is, the less details will be recorded. At the right balance value, the outline of the shapes will be clear and smooth, and any extra noise or stray pixels will be removed.
Once you have found a decent balance value, scroll down and hit the "Download" button!
Repeat these steps for each of your PNGs, so you have an SVG for each color in your image.
Importing Into CAD
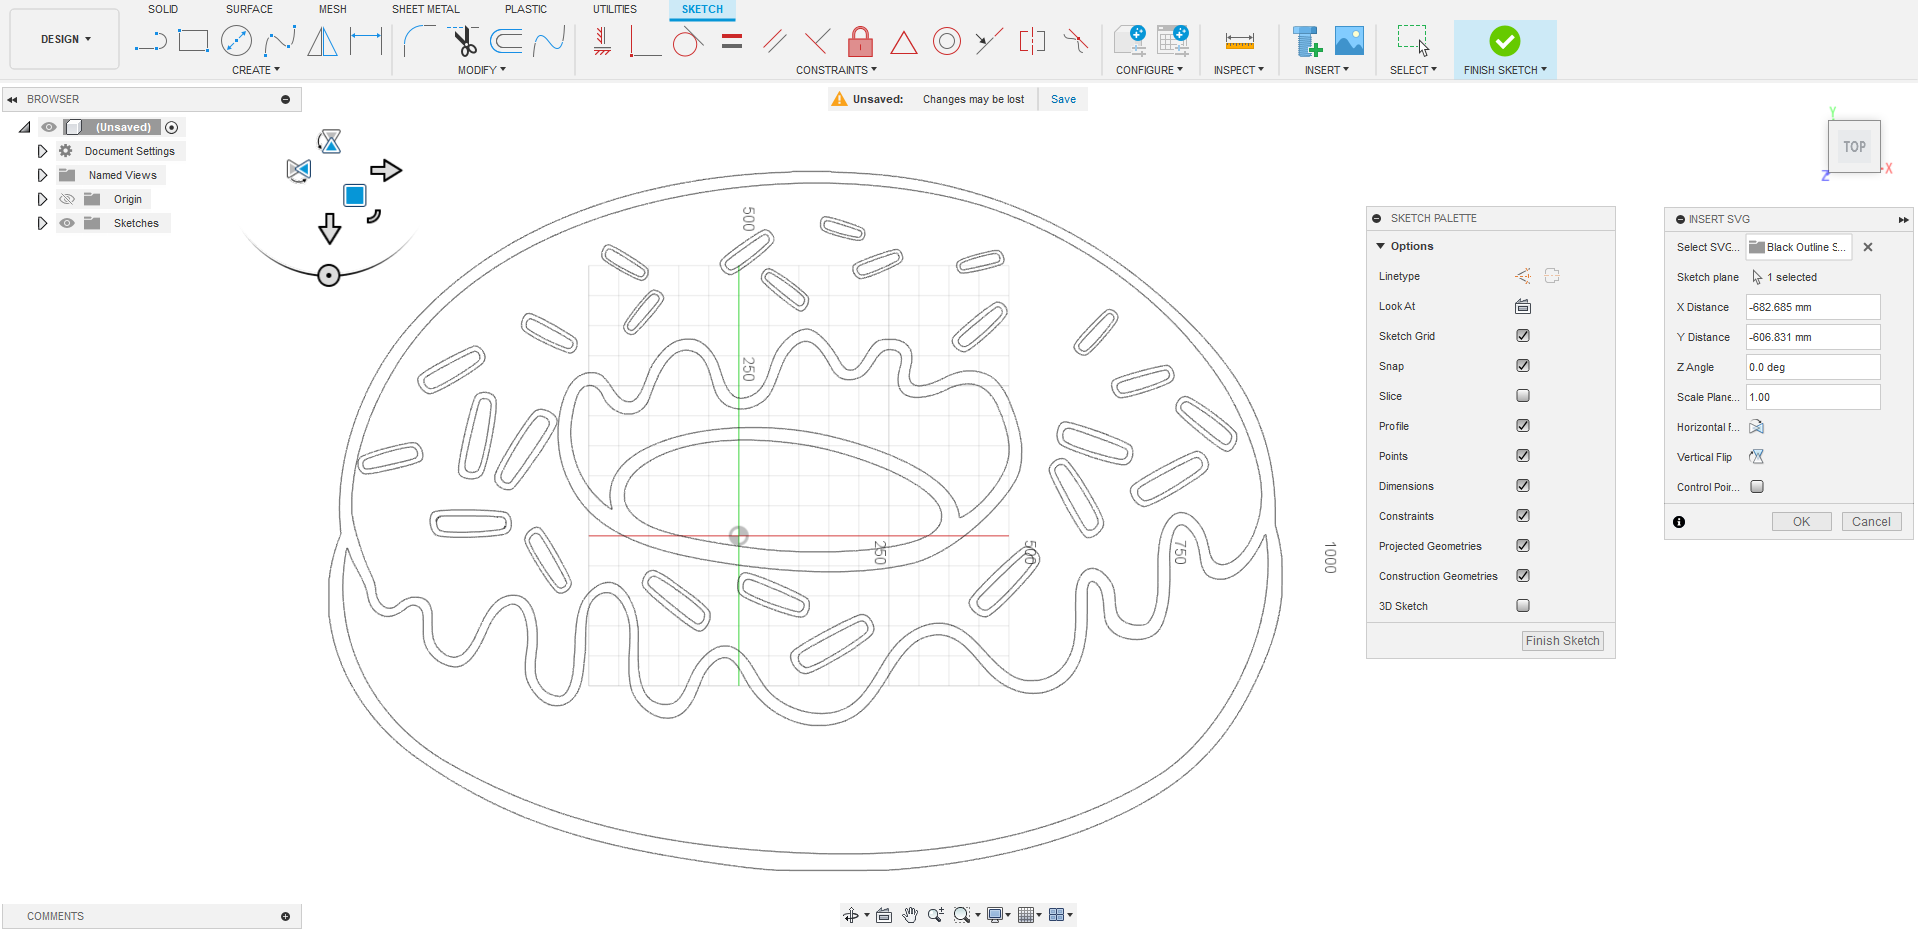
Now that we have our SVGs, it's time to get modeling! I used Autodesk Fusion for its power and ease of use, but any fully equipped CAD program will work.
- At the top, at the right of the toolbar, select the "Insert" dropdown, then select the "Insert SVG" option
- Upload one of your converted SVG files
- Click the "OK button"
Now you have a sketch of your SVG in your workspace!
Extruding the Sketch
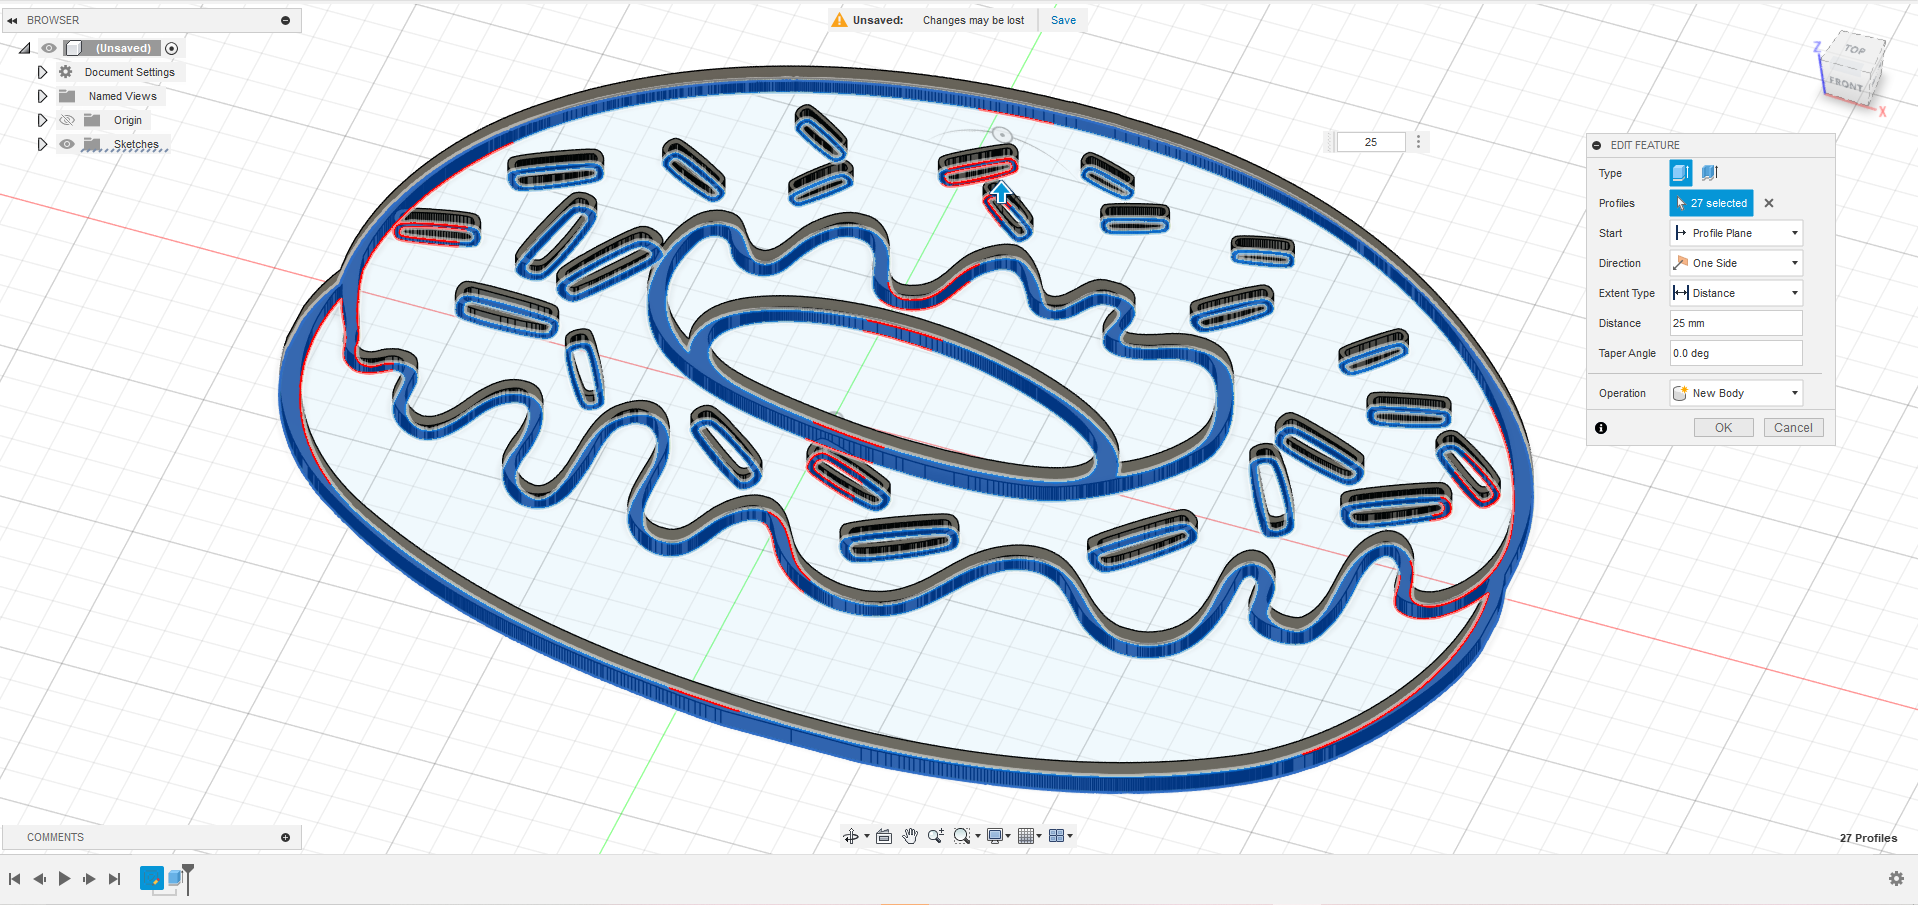
Select the shapes in the sketch, and hit the "E" key to extrude them. Make sure that the extrusion distance is at least 25 millimeters so that when you apply paint or ink to the stamps later, only the raised parts will be covered.
Creating the Stamp Base
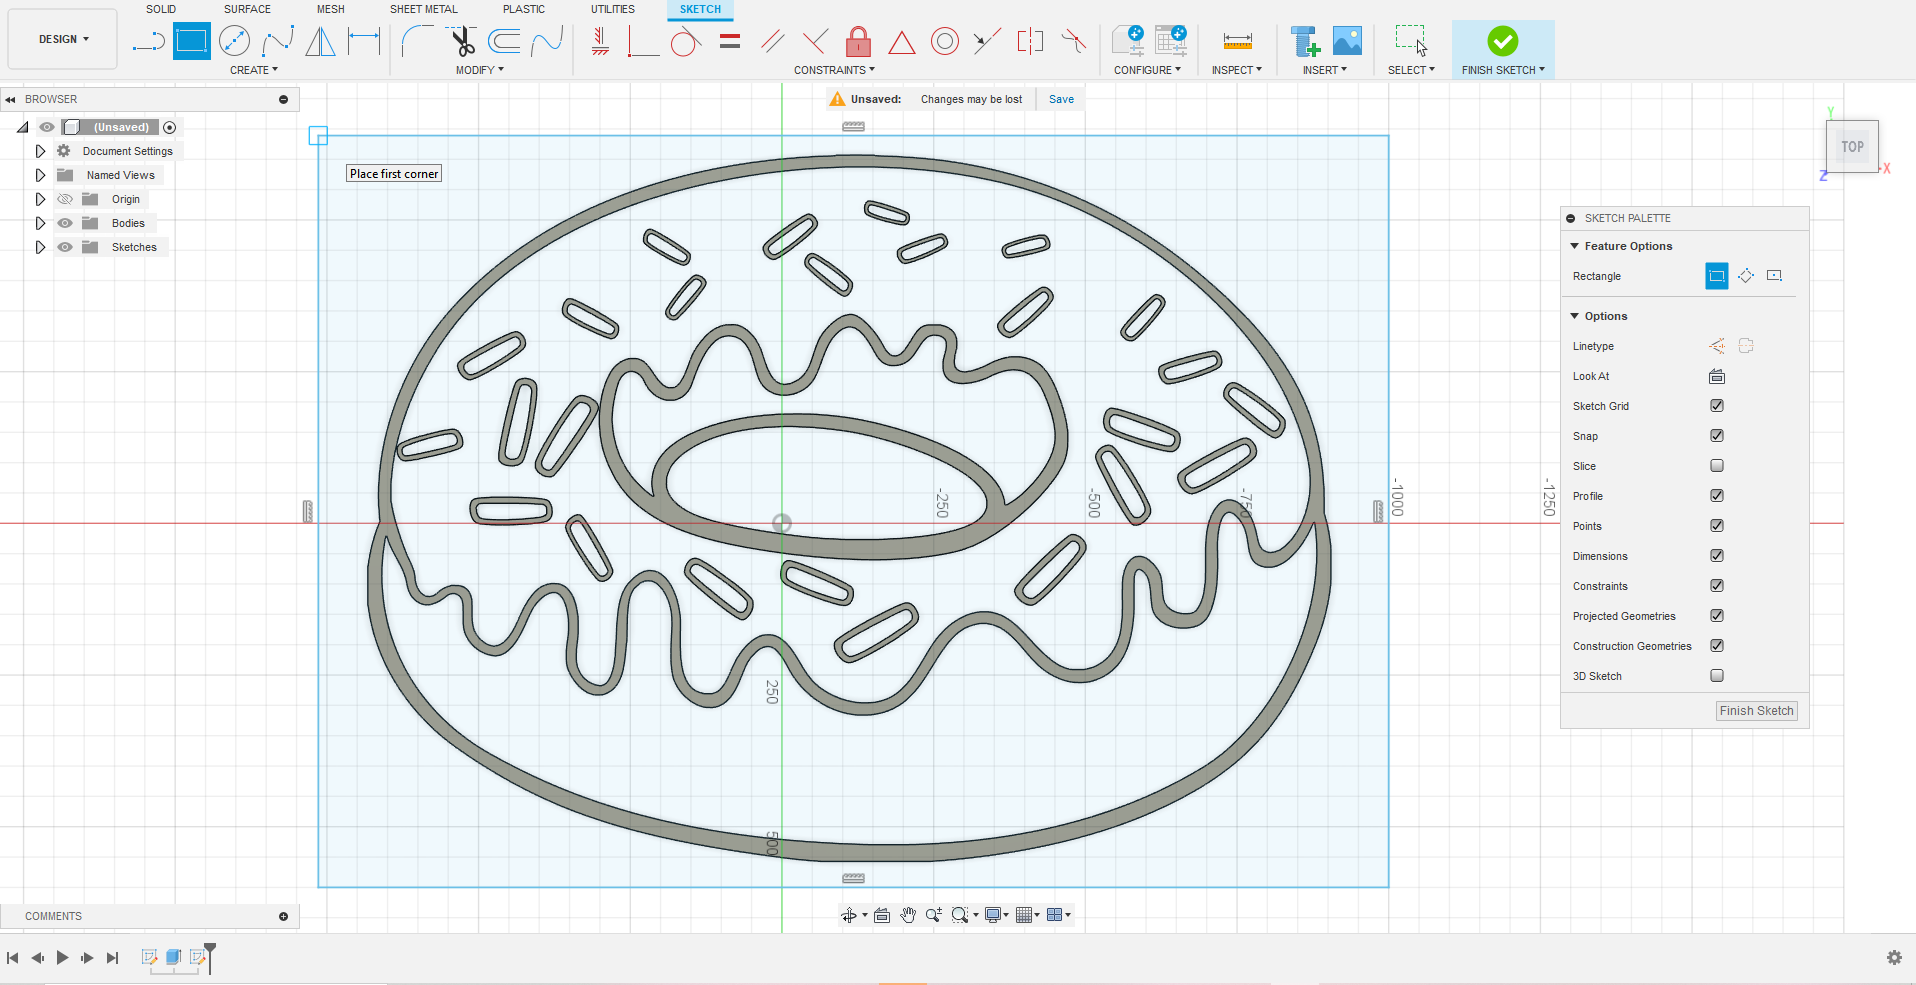
Now, we need to create a base for the stamp.
- Hit the "Sketch" button, and for the sketch plane, select the top face of any part on the stamp pattern
- Using the "Corner Rectangle" tool, draw a rectangle that encompasses all of the extruded parts of the stamp pattern.
- Hit the "Finish Sketch" button!
Extruding the Base
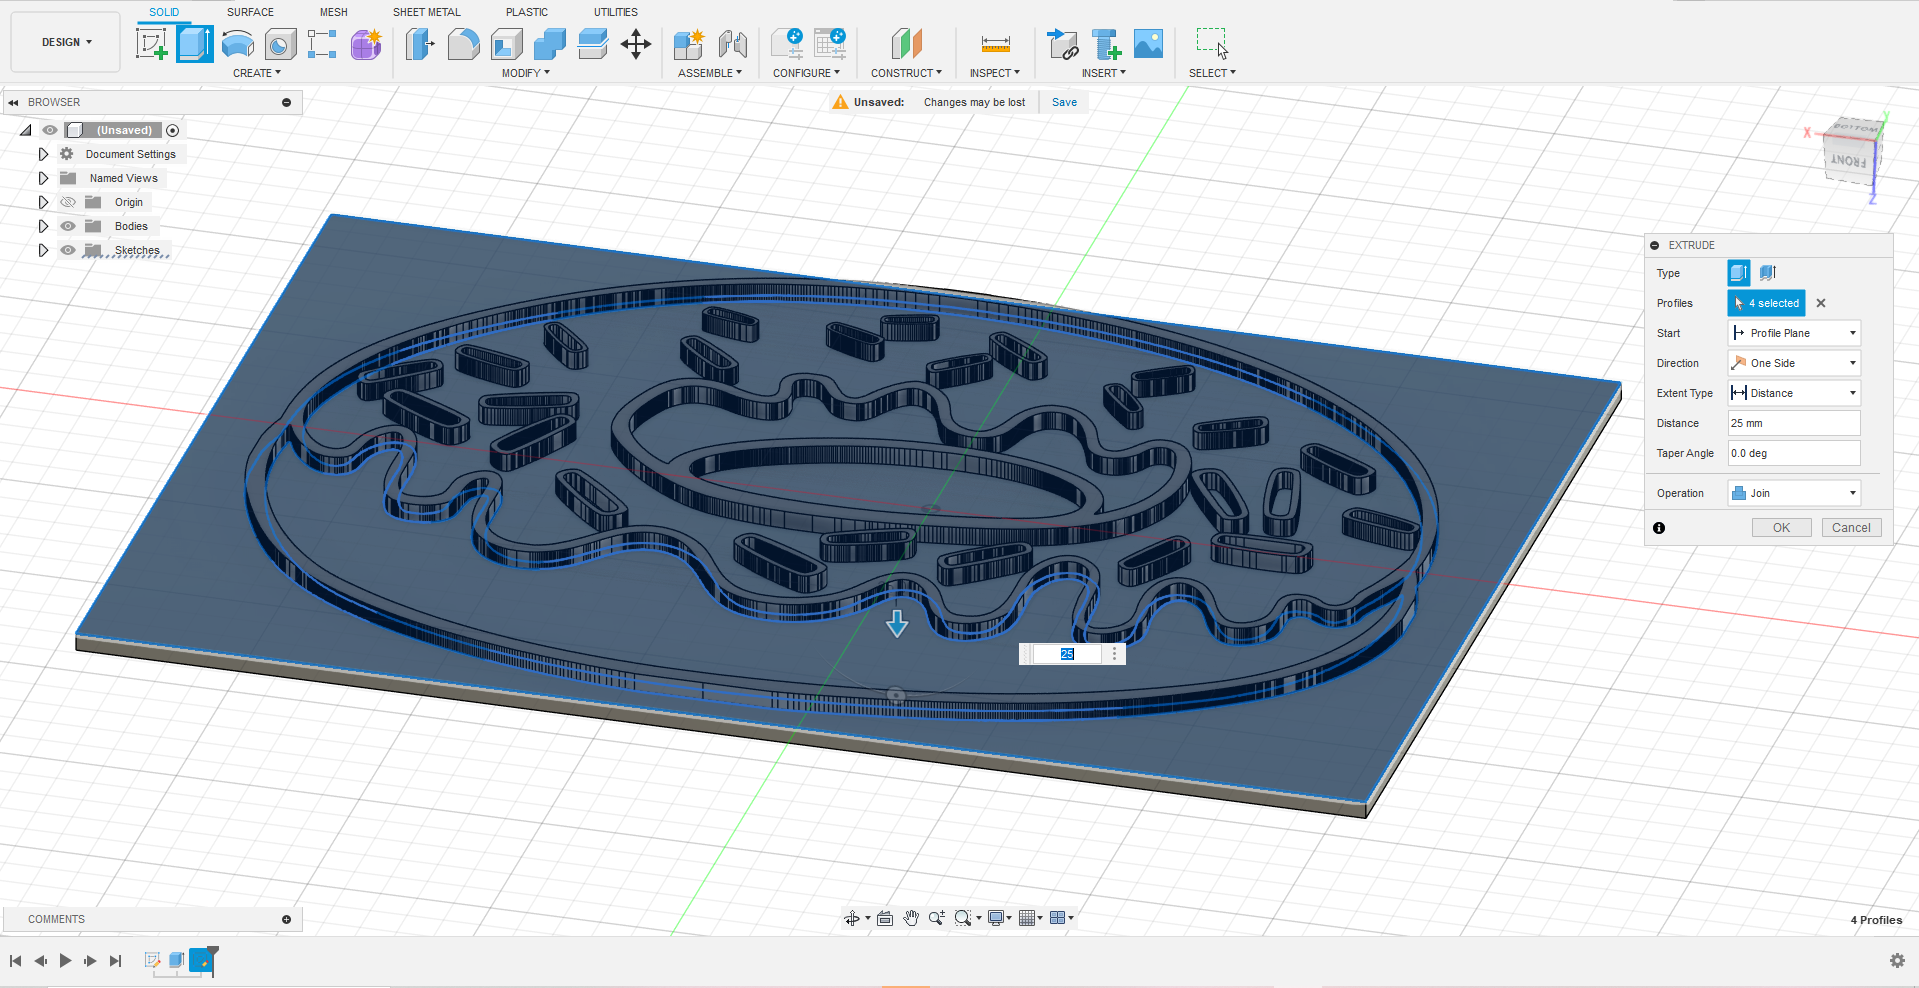
Select the base rectangle and any other shapes in the sketch, and hit the "E" key to extrude them. Make sure that the extrusion distance is at least 25 millimeters so that when the stamp is printed, it won't flex or bend while in use.
First Stamp Complete
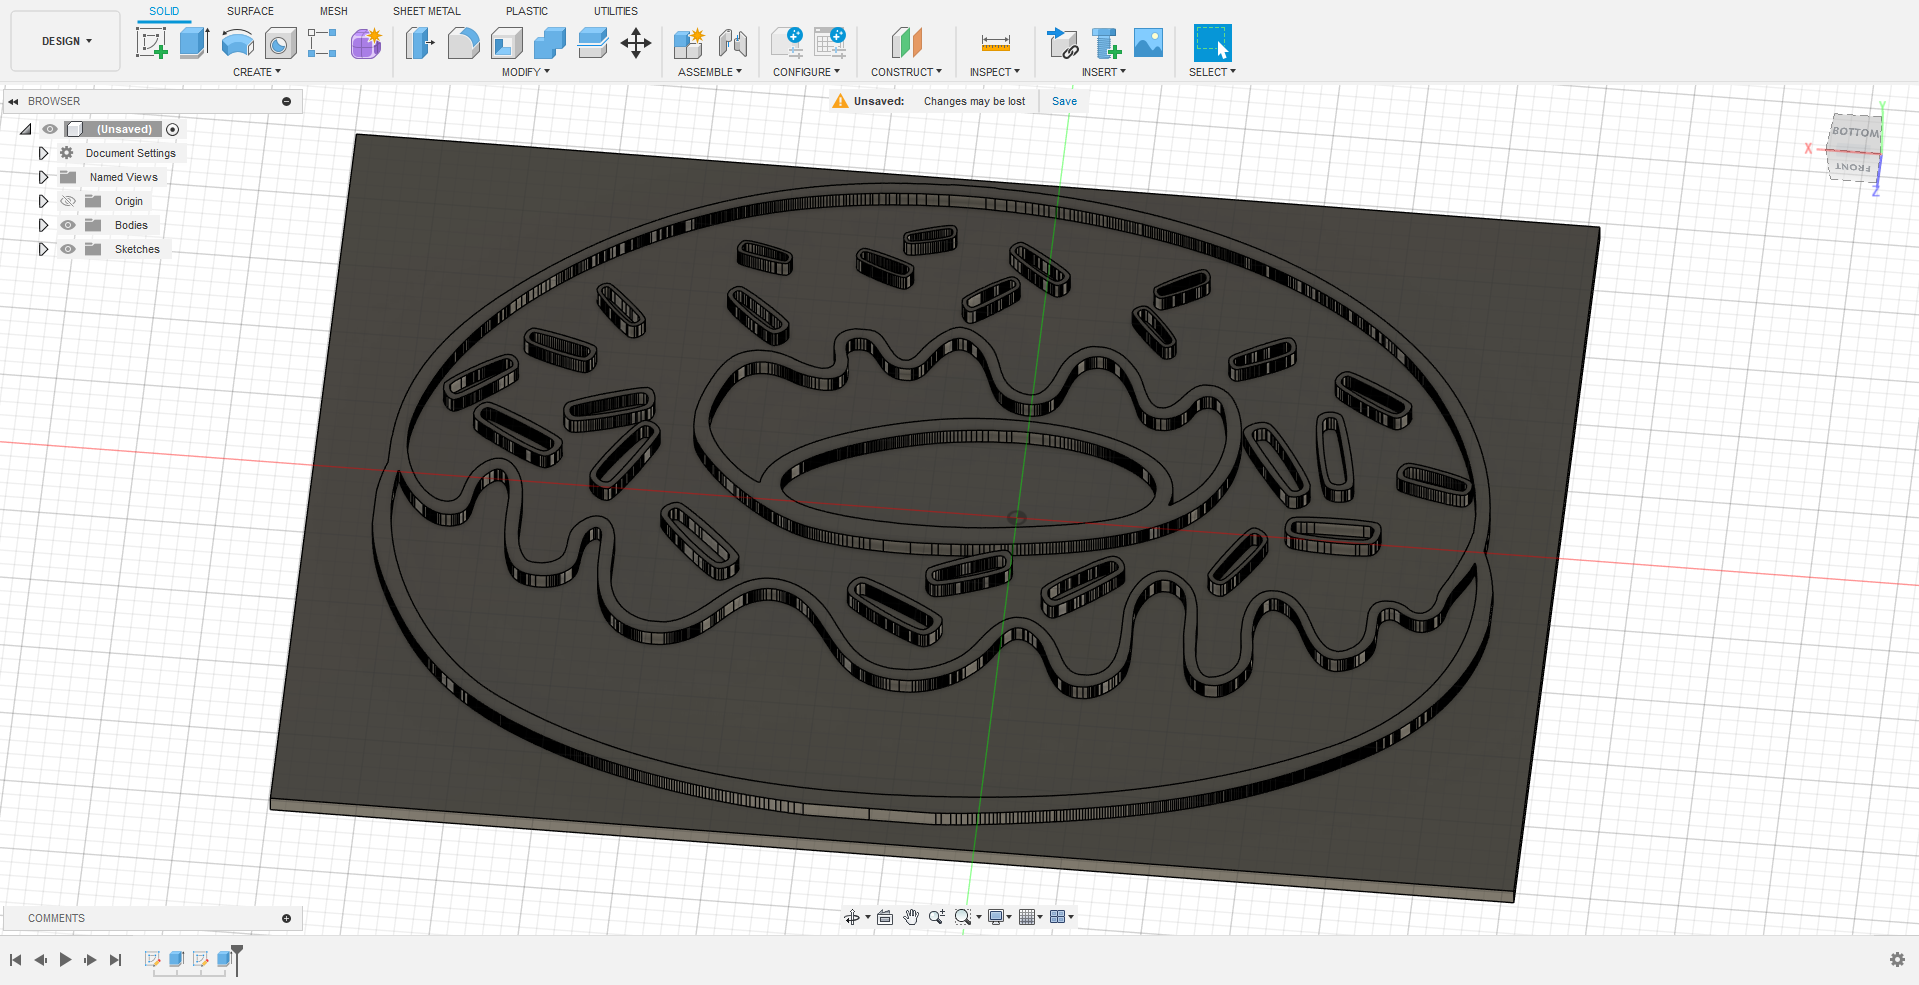
Congrats, you just modeled your first color stamp! Repeat steps 10-13 for each of your other color pattern SVGs to make the complete set.
Exporting From CAD
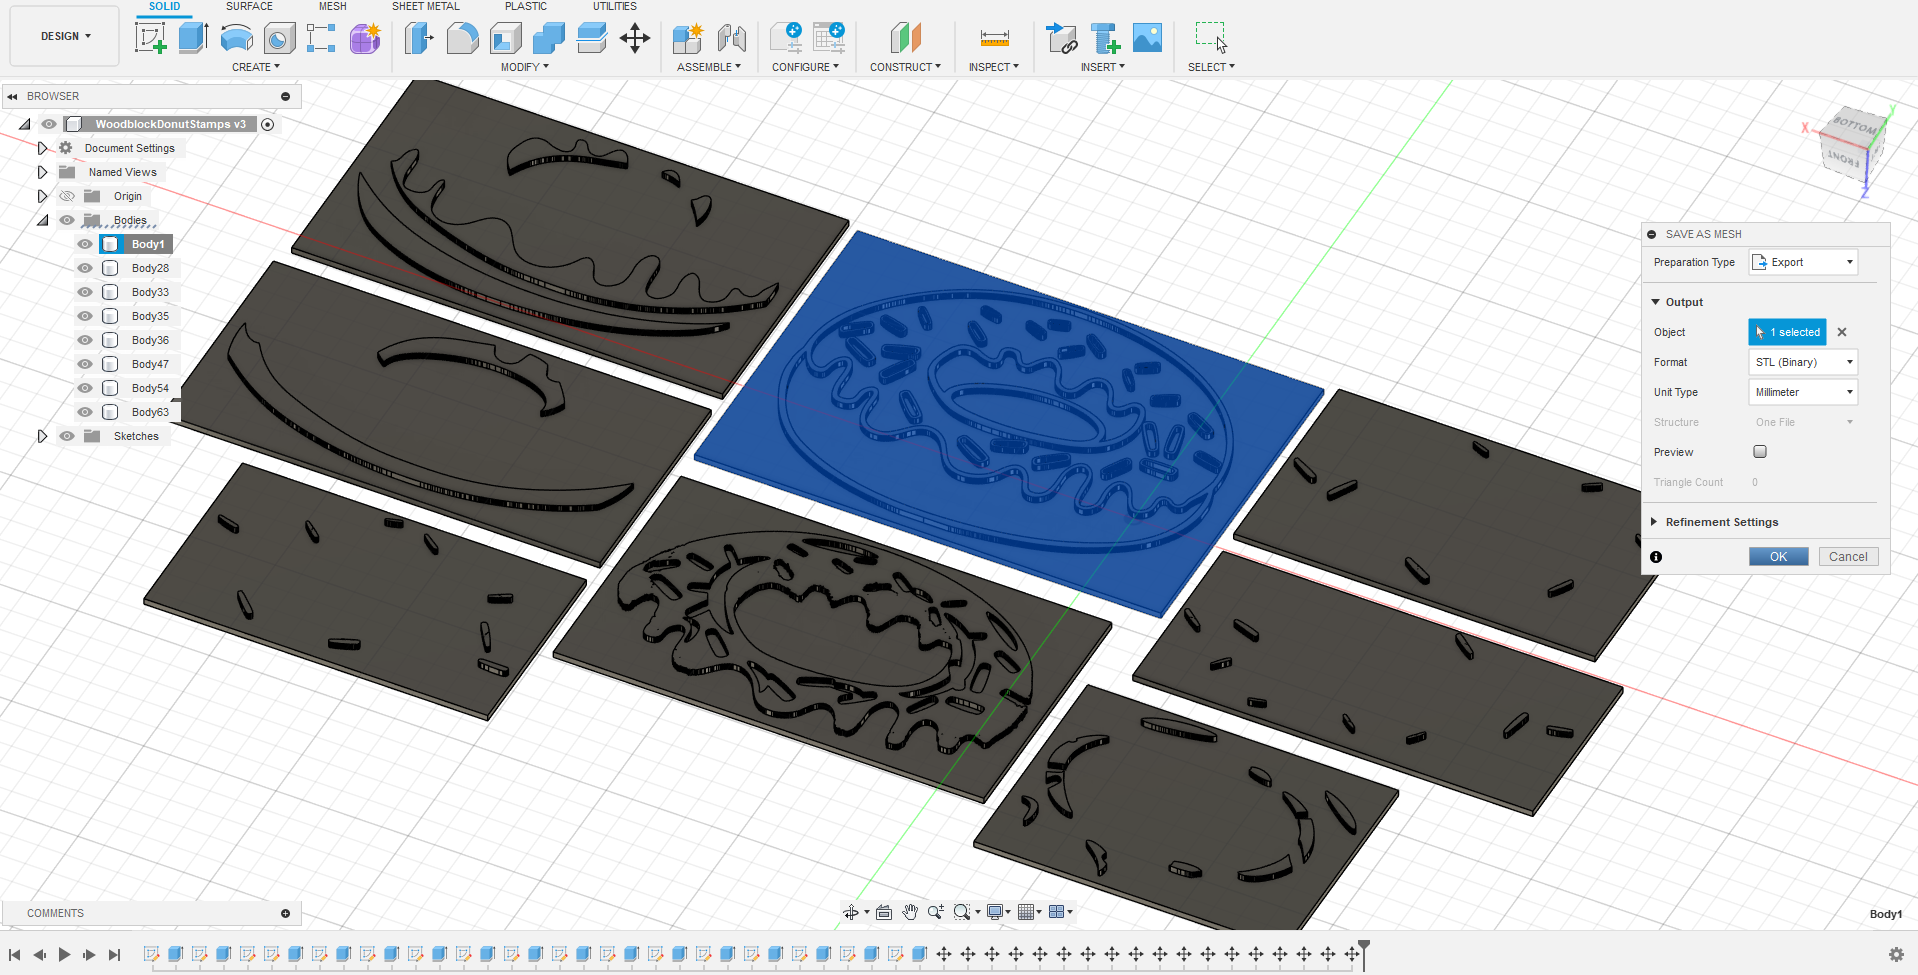
With all of your stamps ready to go it's time to finally print! To export your models for printing:
- At the top left of the workspace, in the design tree, click on the dropdown for the "Bodies" tab
- Right-click on the first body tab, and select the "Save as Mesh" option
- In the dialog box, and for the Preparation Type select the "Export" option
- For the Format select the "STL (Binary)" option
- Click OK to download the file
After repeating the same process for all of the bodies, you're ready to slice!
Slicing the Models for Printing
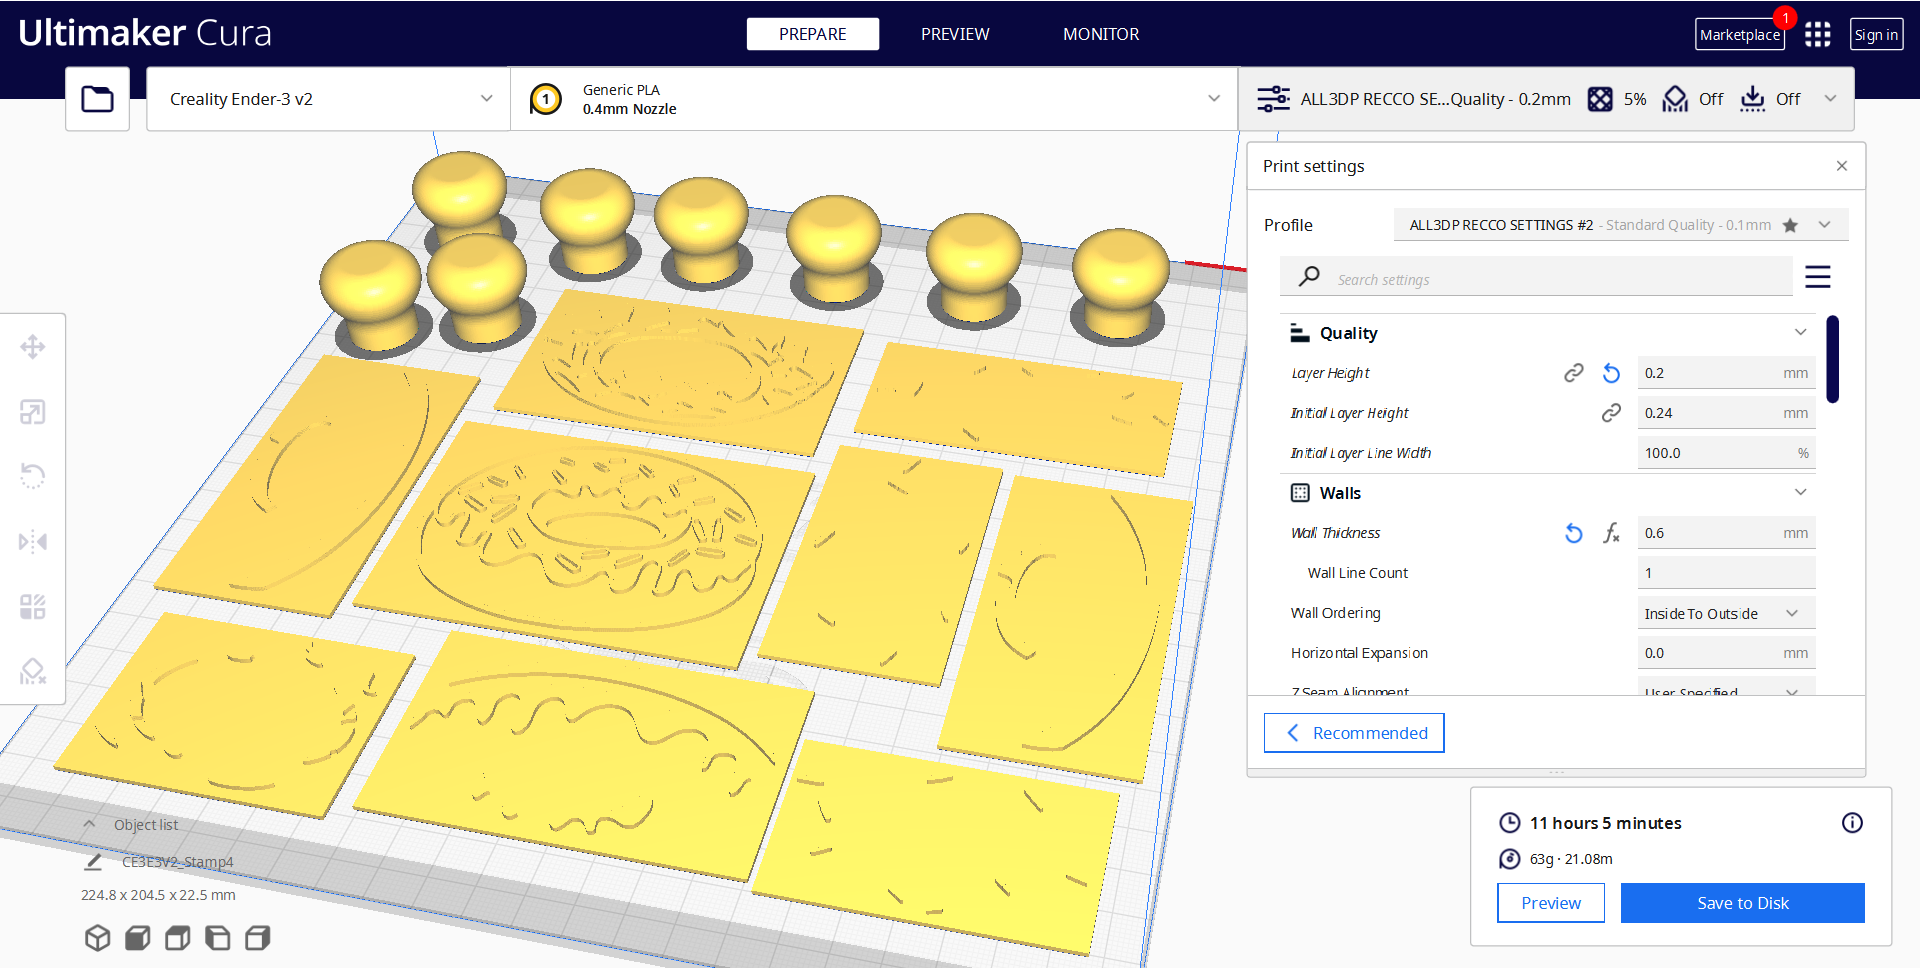
When you import your models into the slicing software, be sure to scale them properly. Mine were huge when I imported them, so I ended up printing them at 5% of their original size to make an 8.5"x3" print but scale yours to whatever size you want. Just keep in mind that the size of the stamps of course affects the size of the final print and that stamps with a lot of detail need to be printed a little larger to account for printing tolerances.
For these models, the print settings won't make much of a difference in the final product. Just make sure that they are printed with the pattern side facing upwards, and that the infill is at least 15% to prevent the stamp from flexing or bending under use.
I've attached the stamp handle I modeled below for your use, but feel free to make your own!
Downloads
Printing the Stamps
.jpg)
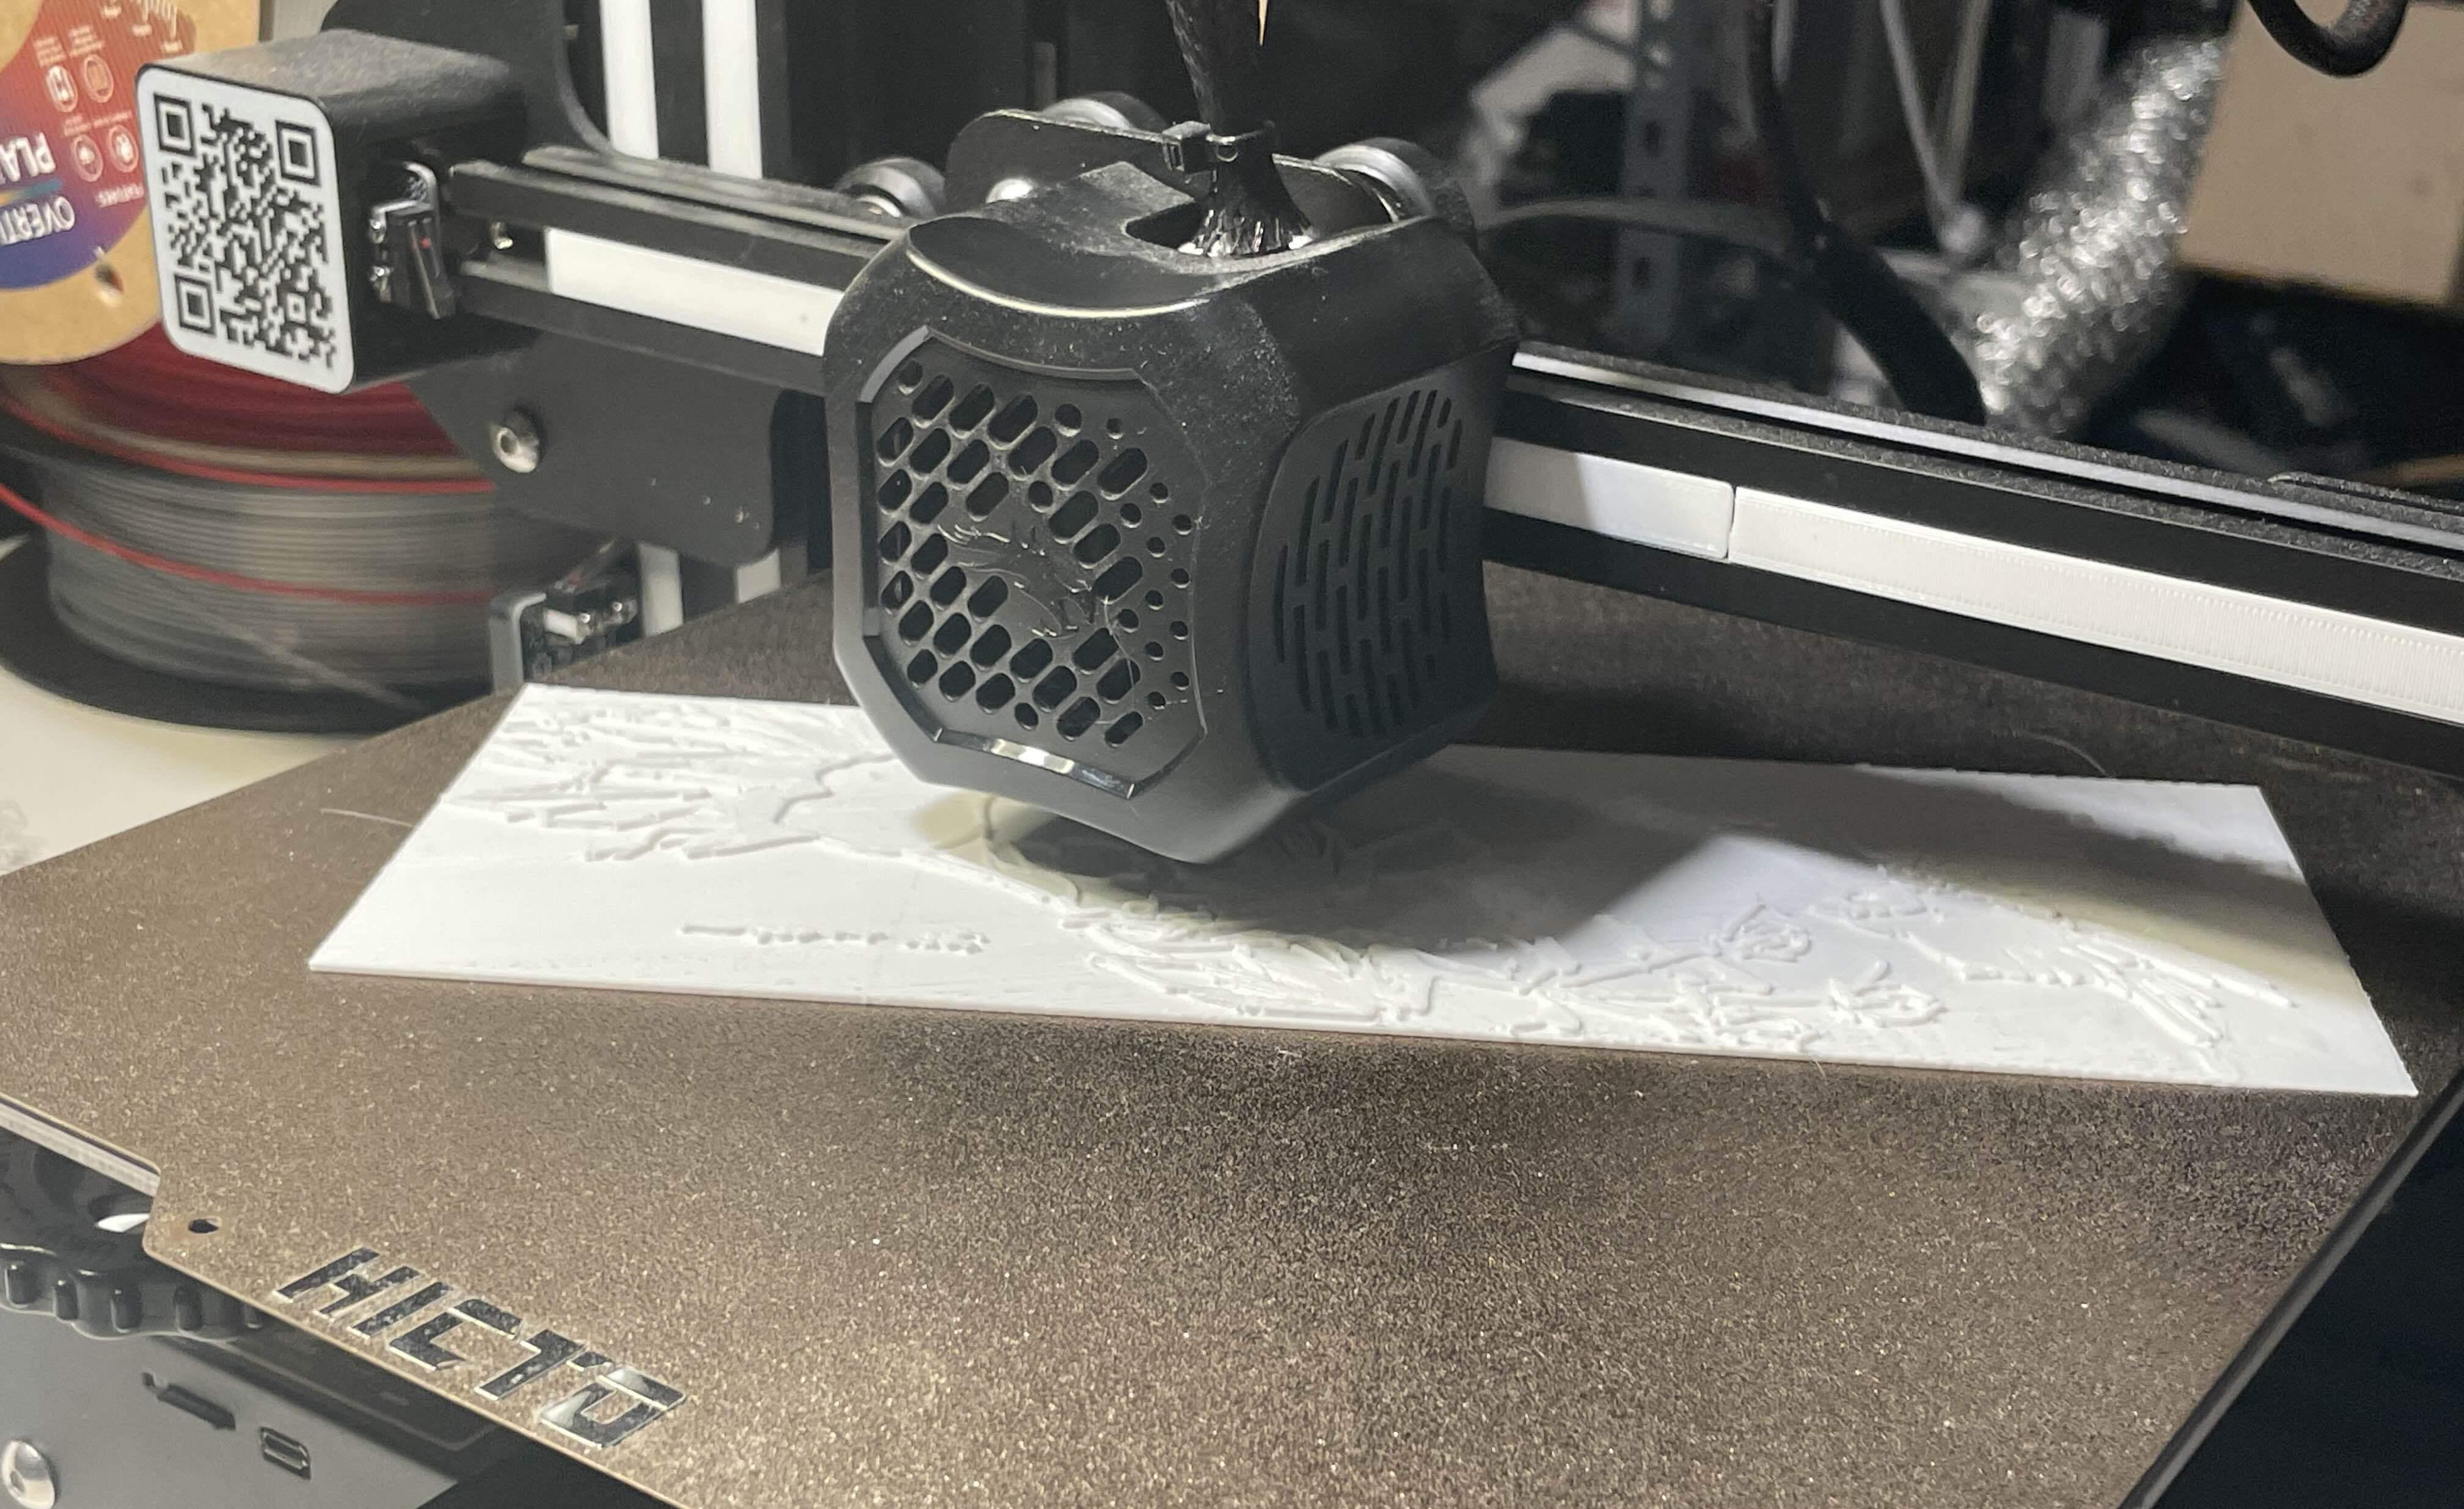
To demonstrate the 3D printing and painting process, I'll use these stamps from l4z4rus in the form of Hiroshige's Sparrow and Hibiscus painting, my favorite. I printed the stamps on my Ender 3 V2 in white PLA from Overture.
Attatching the Handles
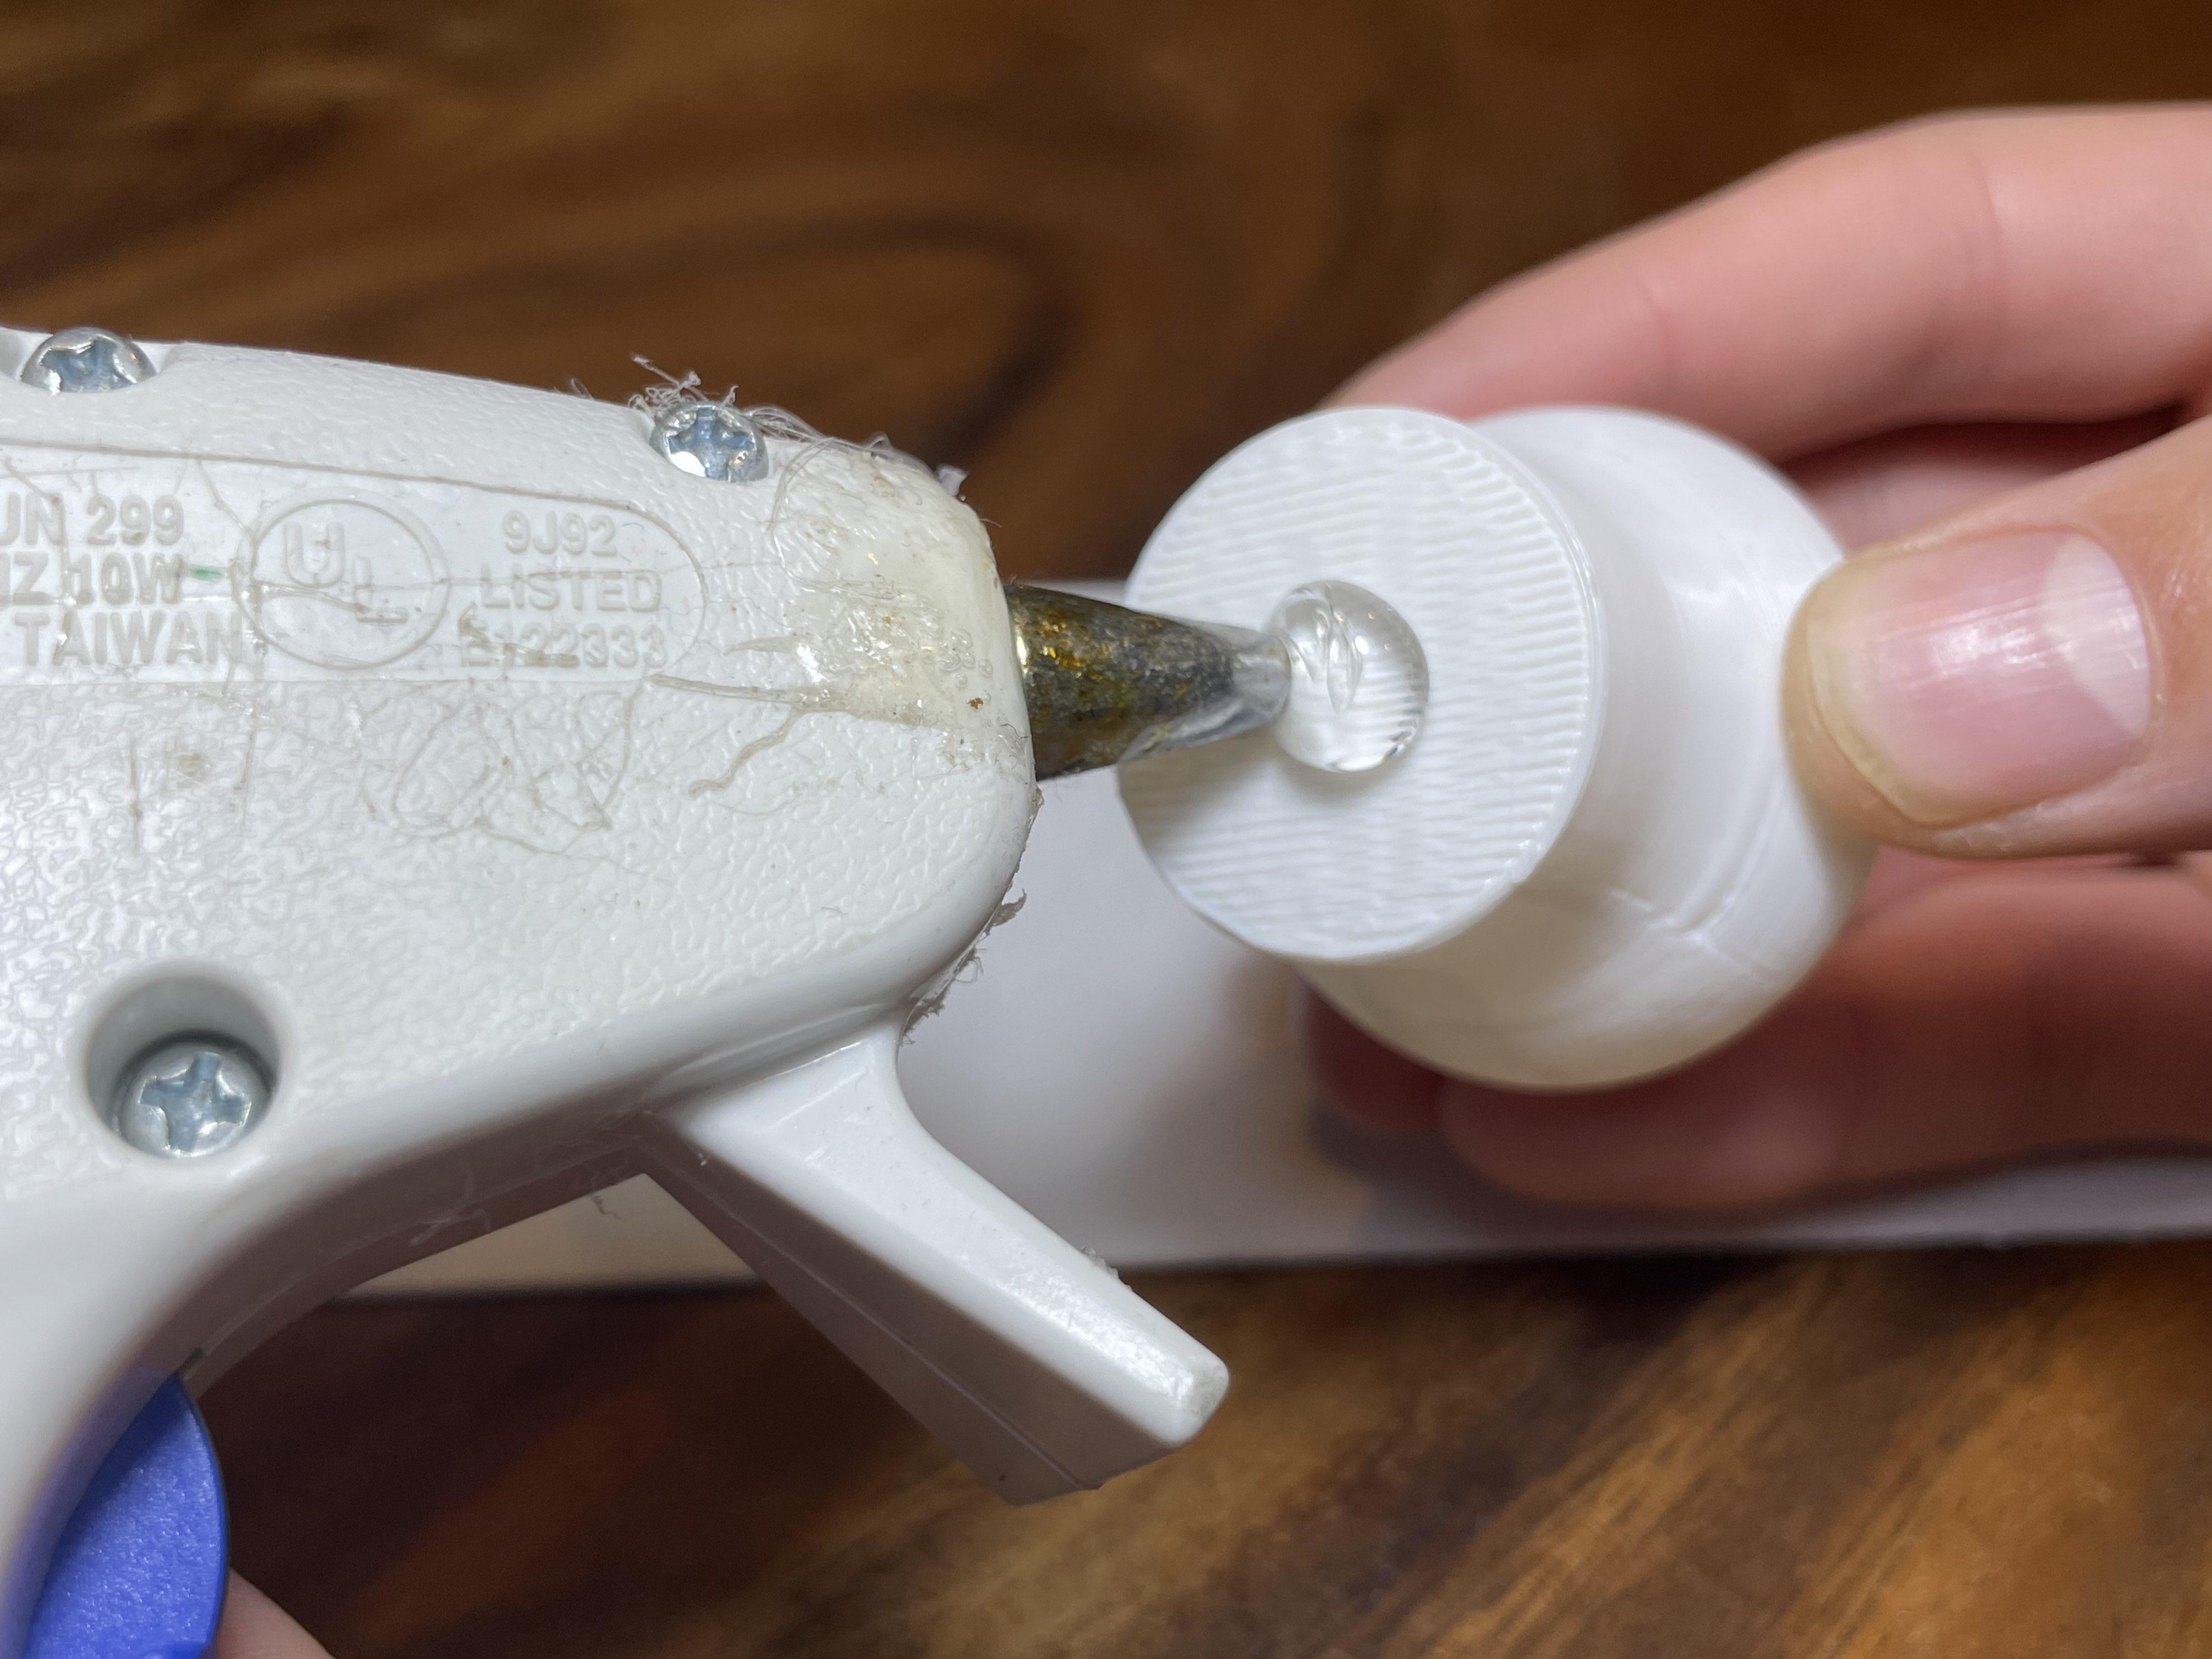
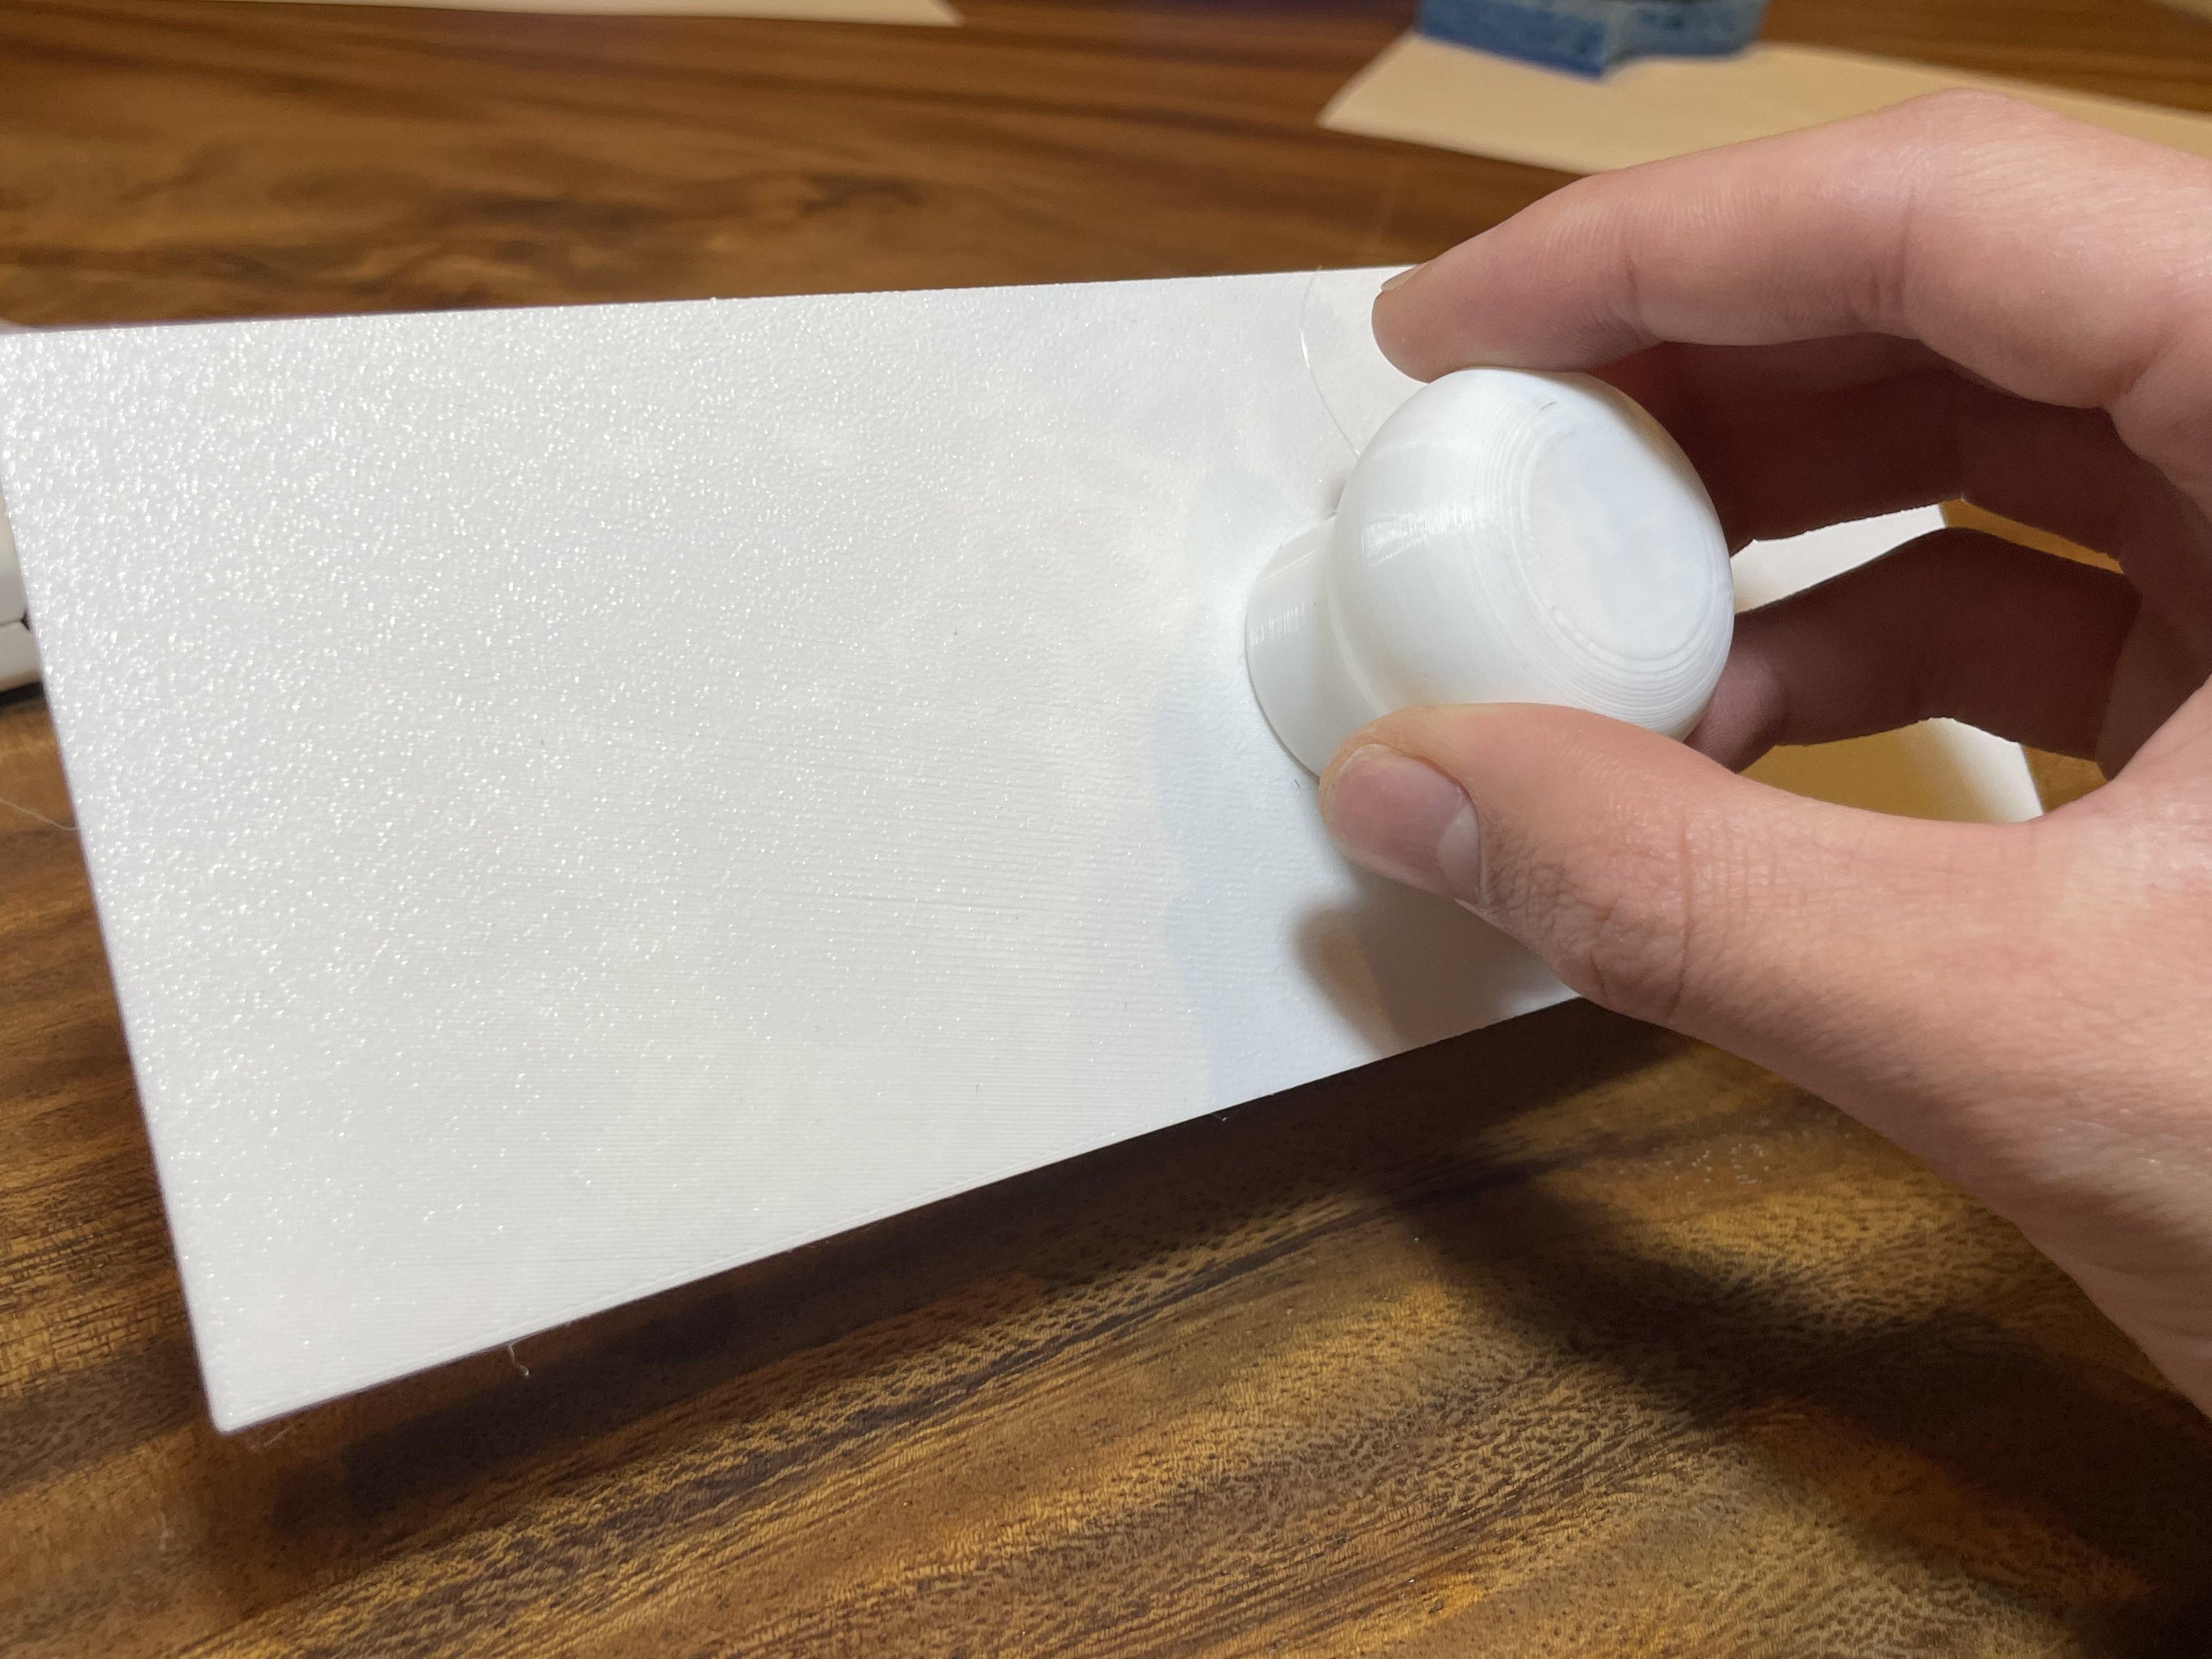
To fully finish your printed stamps, attach a knob squarely on the back of each stamp using hot glue or any other adhesive.
Time to Paint!!!
With your stamps completed, it's time to put them to use! To start making prints, you will need:
- Paper or Canvas - Since we are using acrylic paint, the paper that the print will be made on needs to be thick and absorbent. If using paper, go for thick cardstock or watercolor paper. If you want to go a little fancier, you can use canvas, just make sure to support it from underneath while stamping so that it doesn't stretch.
- Paint - Any paint that is on the thinner side will do, but I've found that Acrylic works best. Thinner oil paint will give a more historically accurate color, but in the process of stamping some of the paint is wasted, and oil paints can be expensive.
- Tape - Any tape commonly used for painting will be perfect, just be sure that it releases cleanly from the paper and doesn't rip.
- Sponges - The sponges are used to apply the paint to the stamps, so you might not want to use them for cleaning purposes afterward. Used sponges are perfectly fine as long as they are clean - I used old dishwashing sponges
Preparing the Paper/Canvas
Using the painter's tape, attach your paper or canvas securely to a table or countertop.
Apply Paint to the Sponge
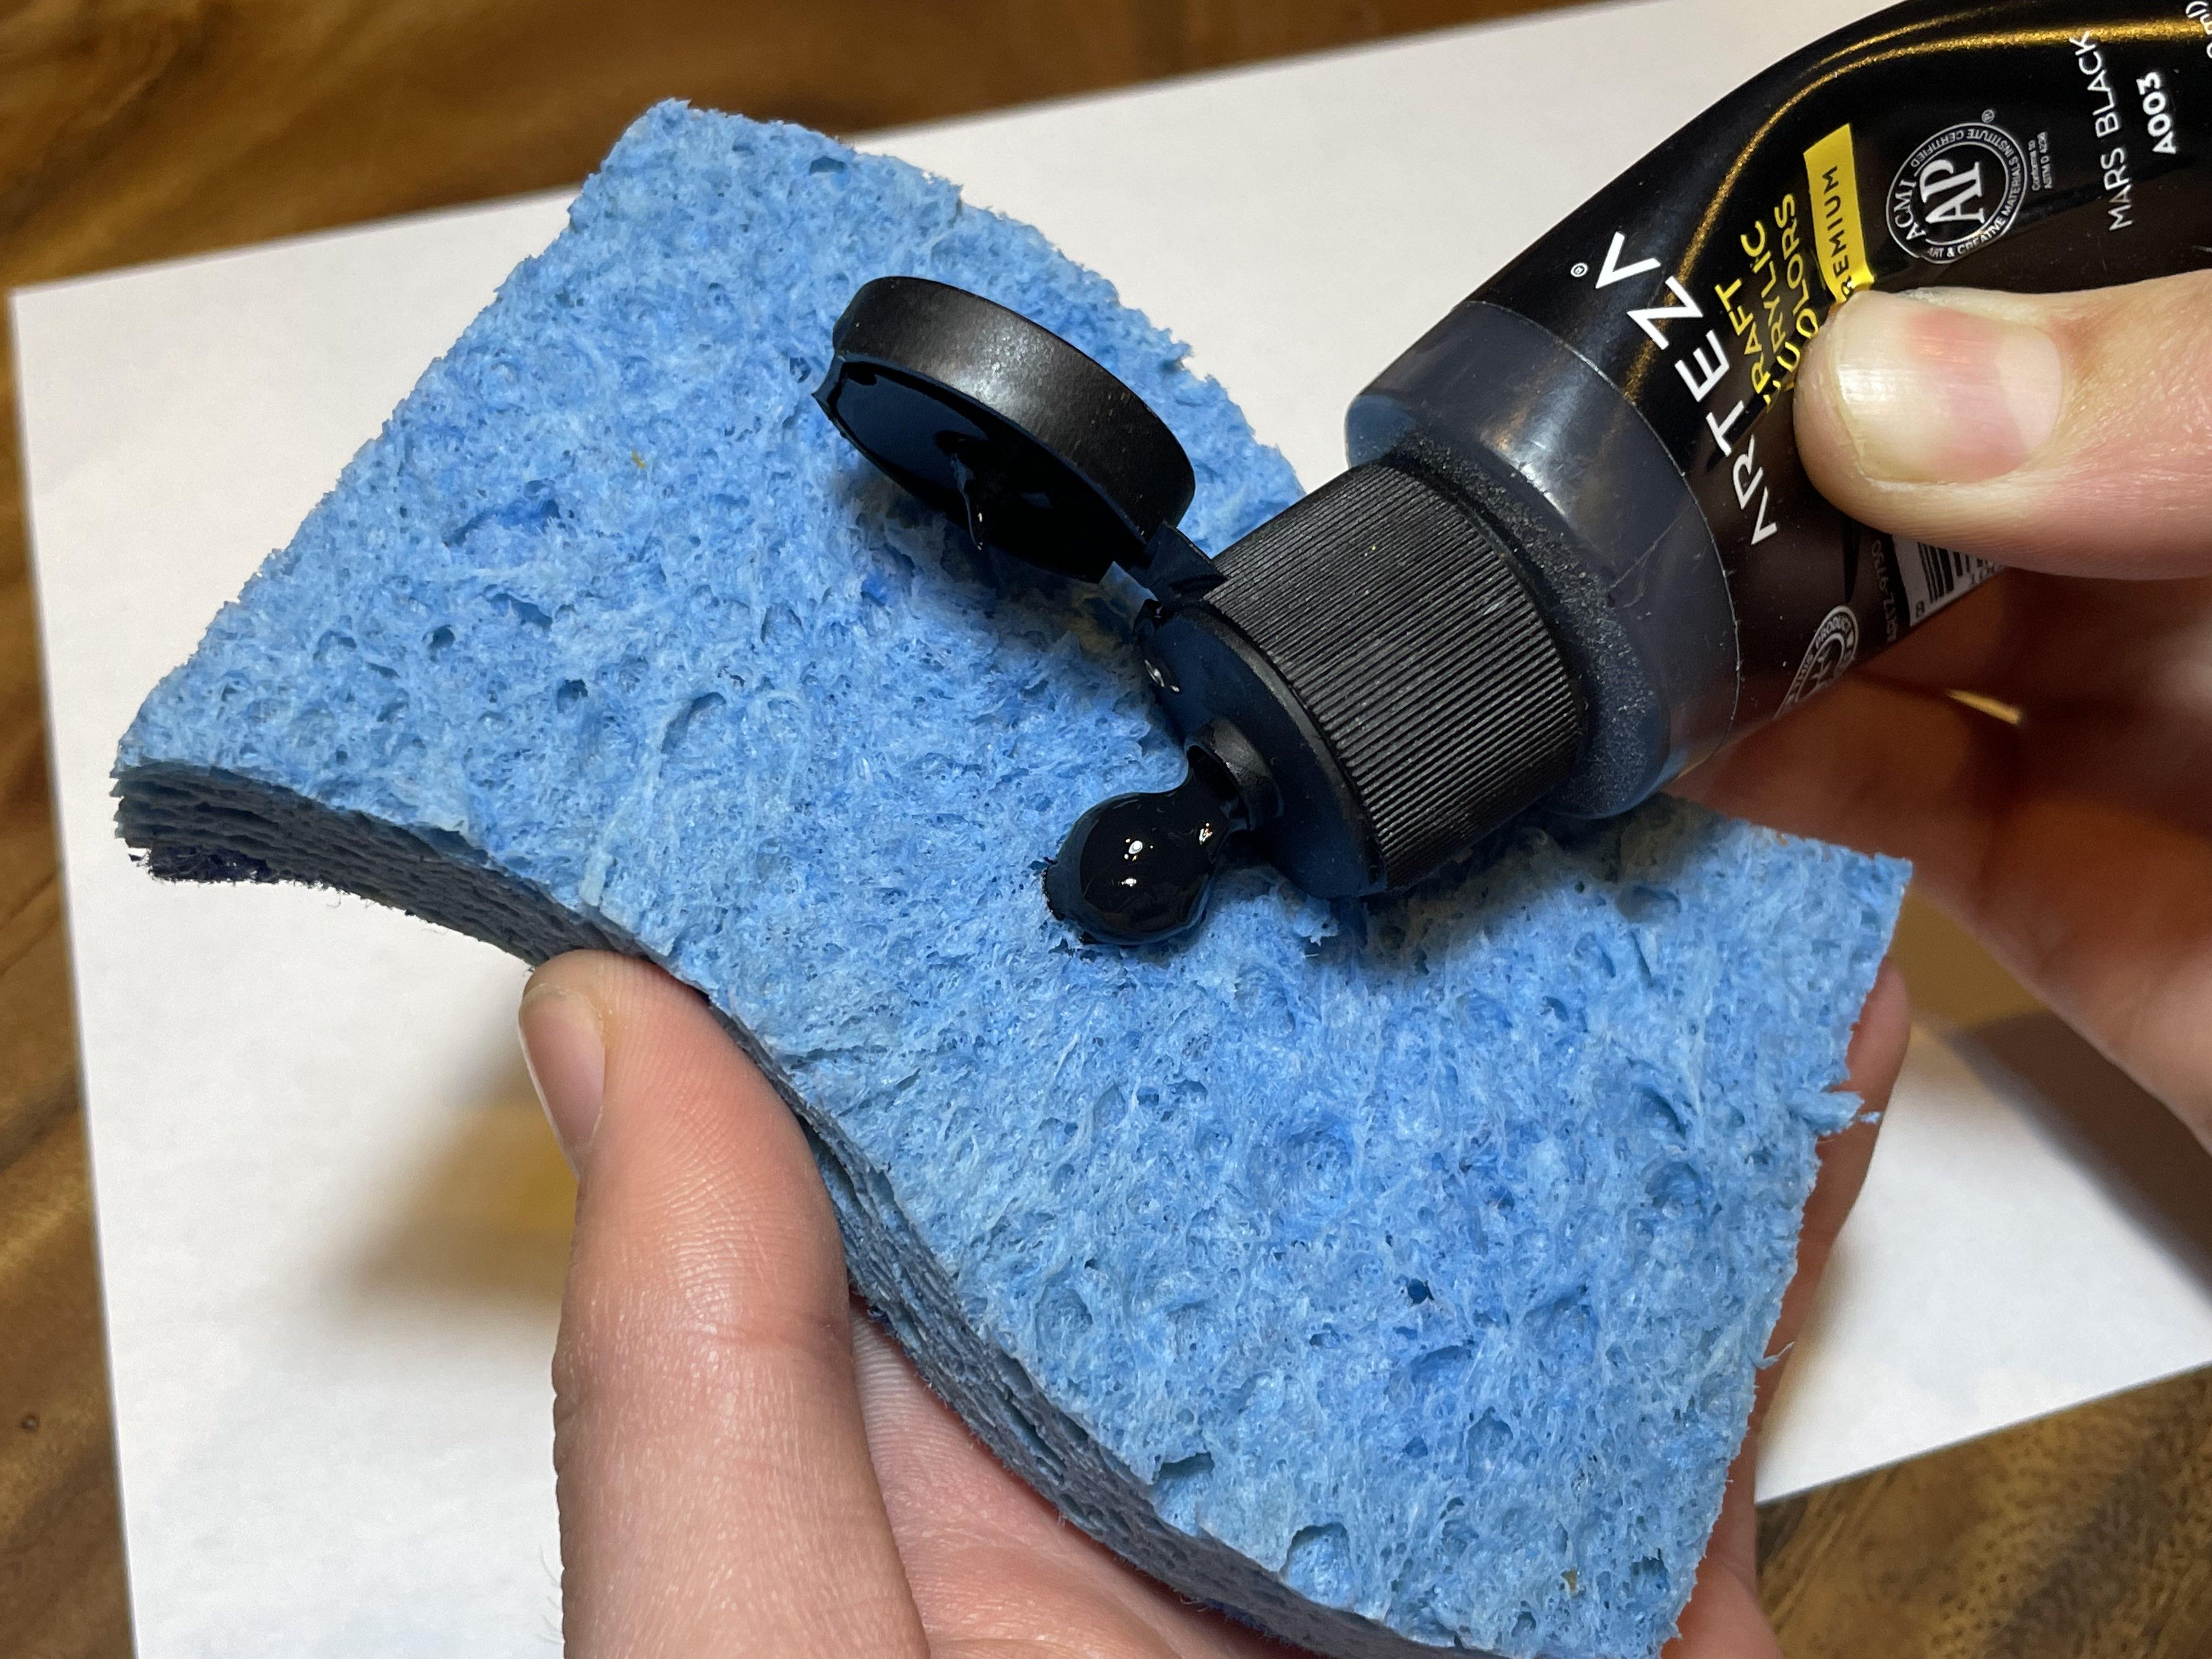
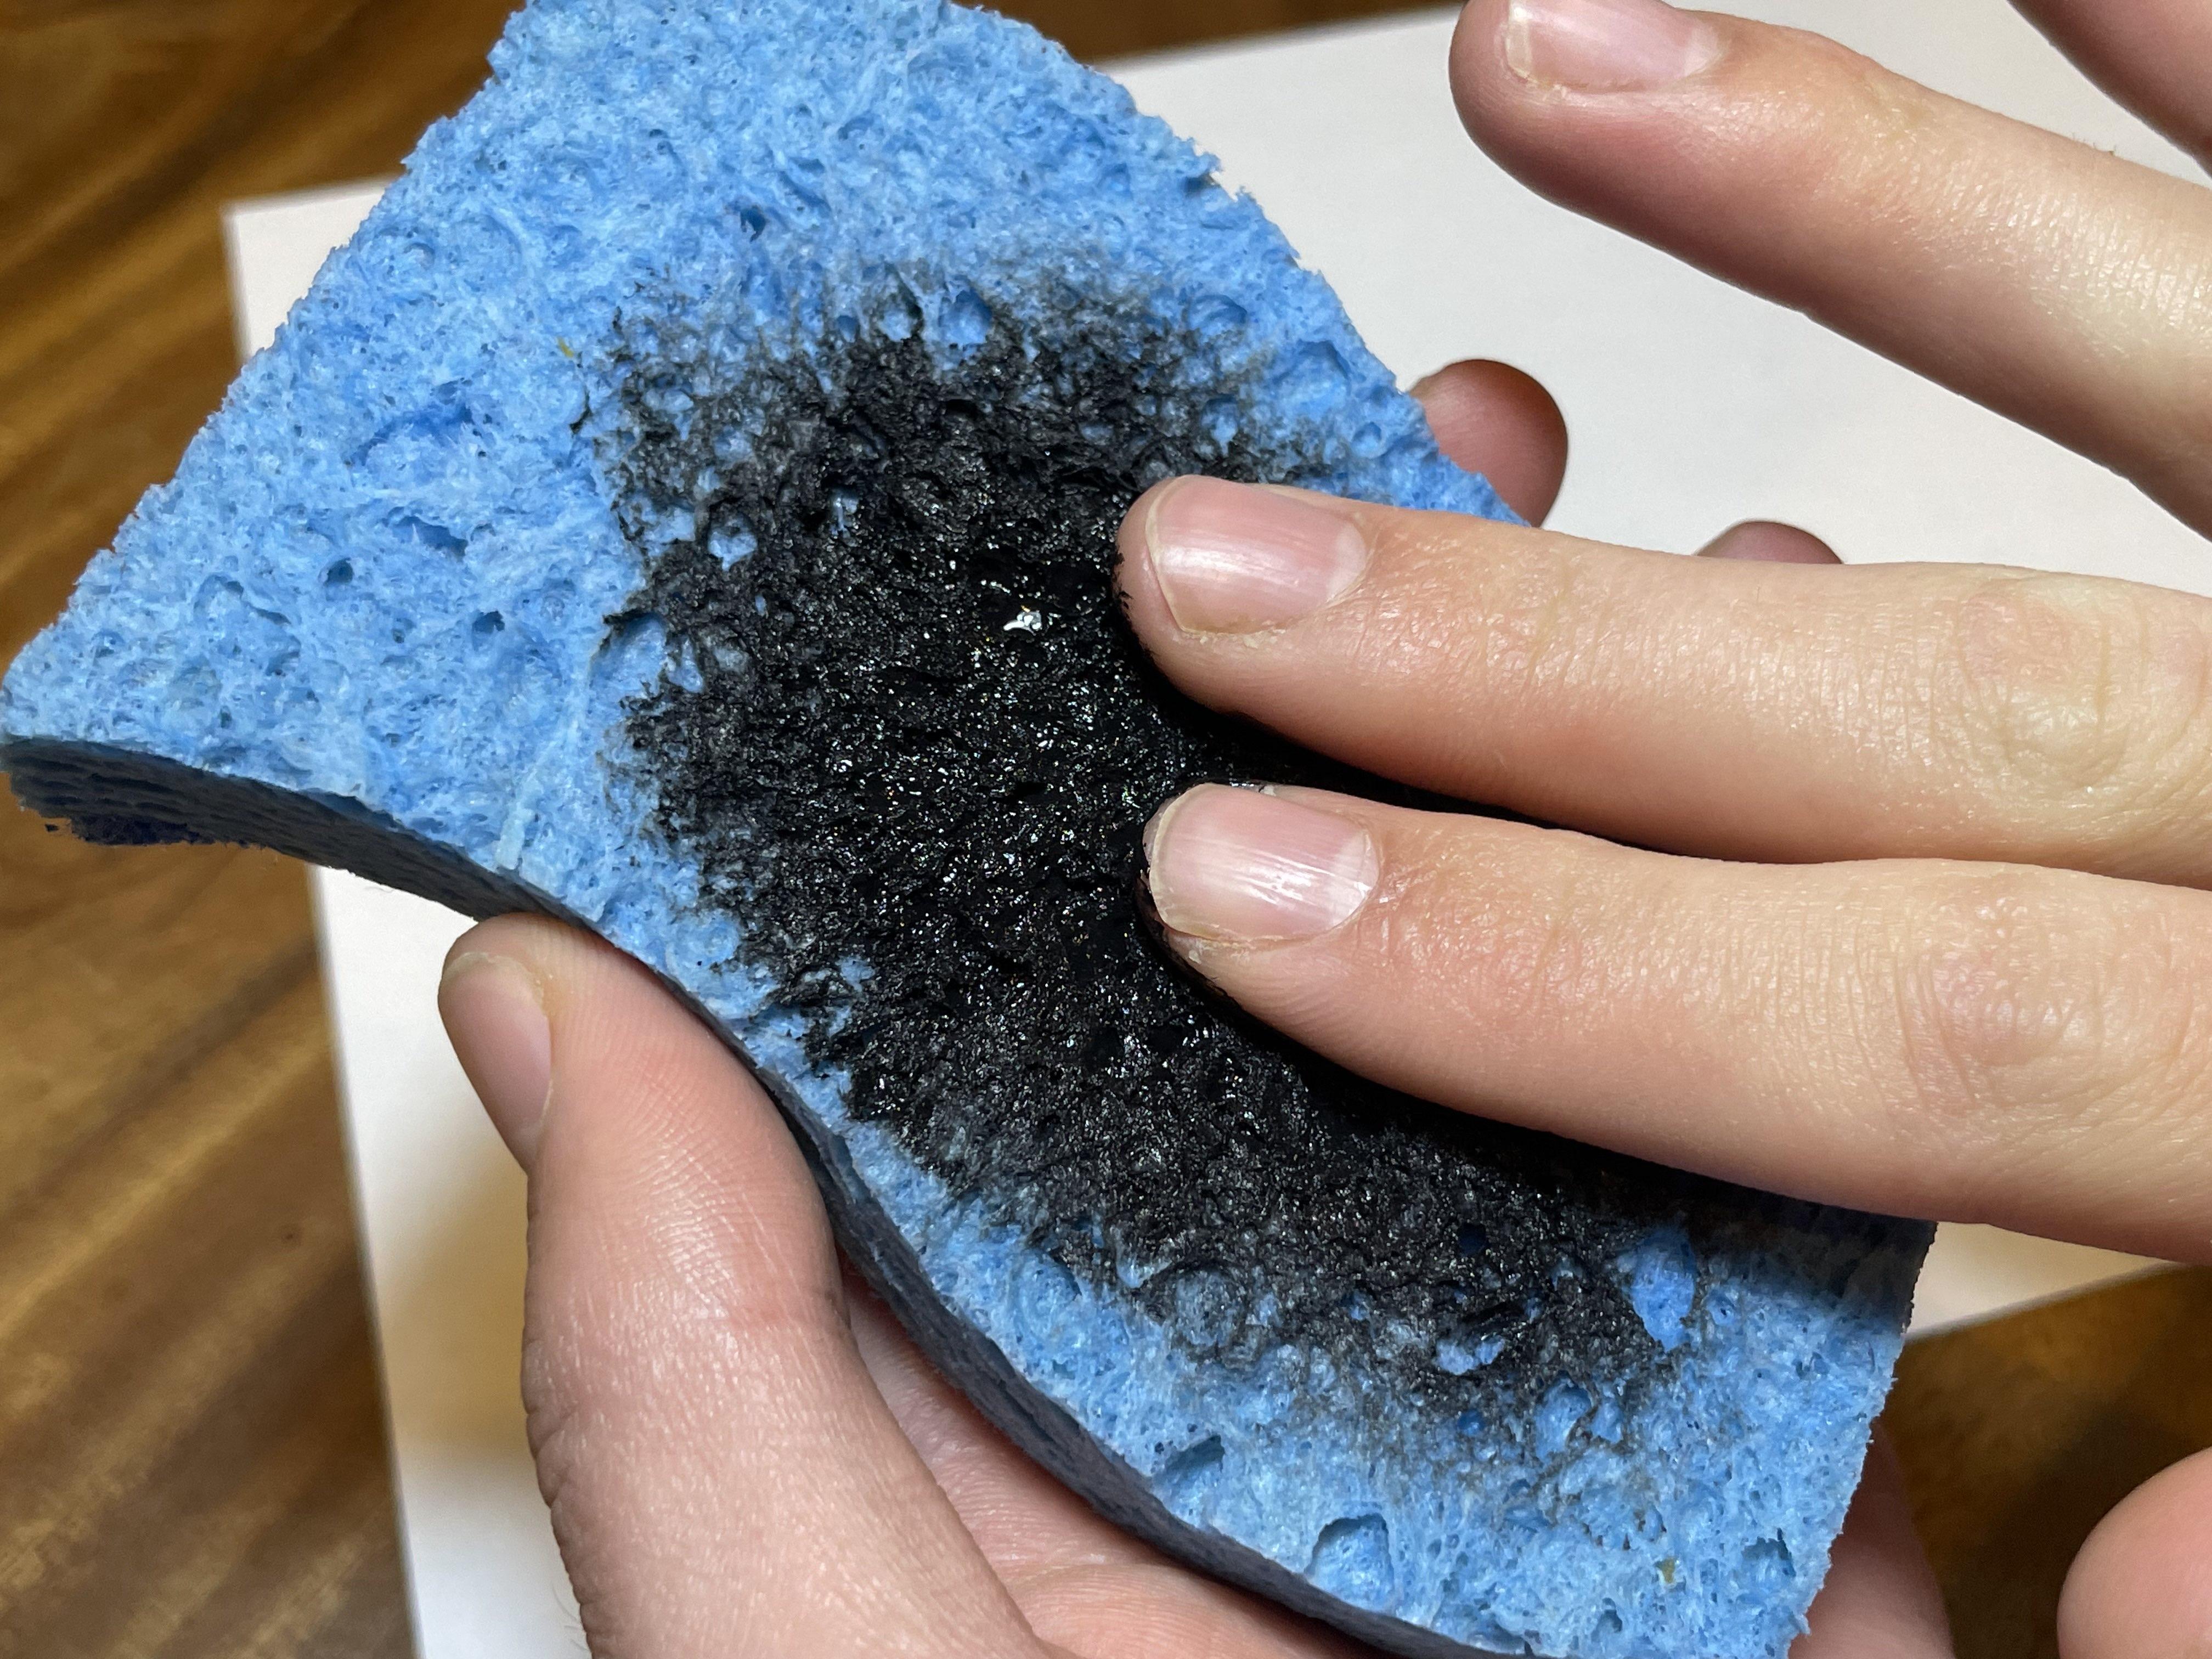
Squeeze a dollop of paint onto the soft side of your sponge, and spread it around with your finger.
Apply Paint to the Stamp
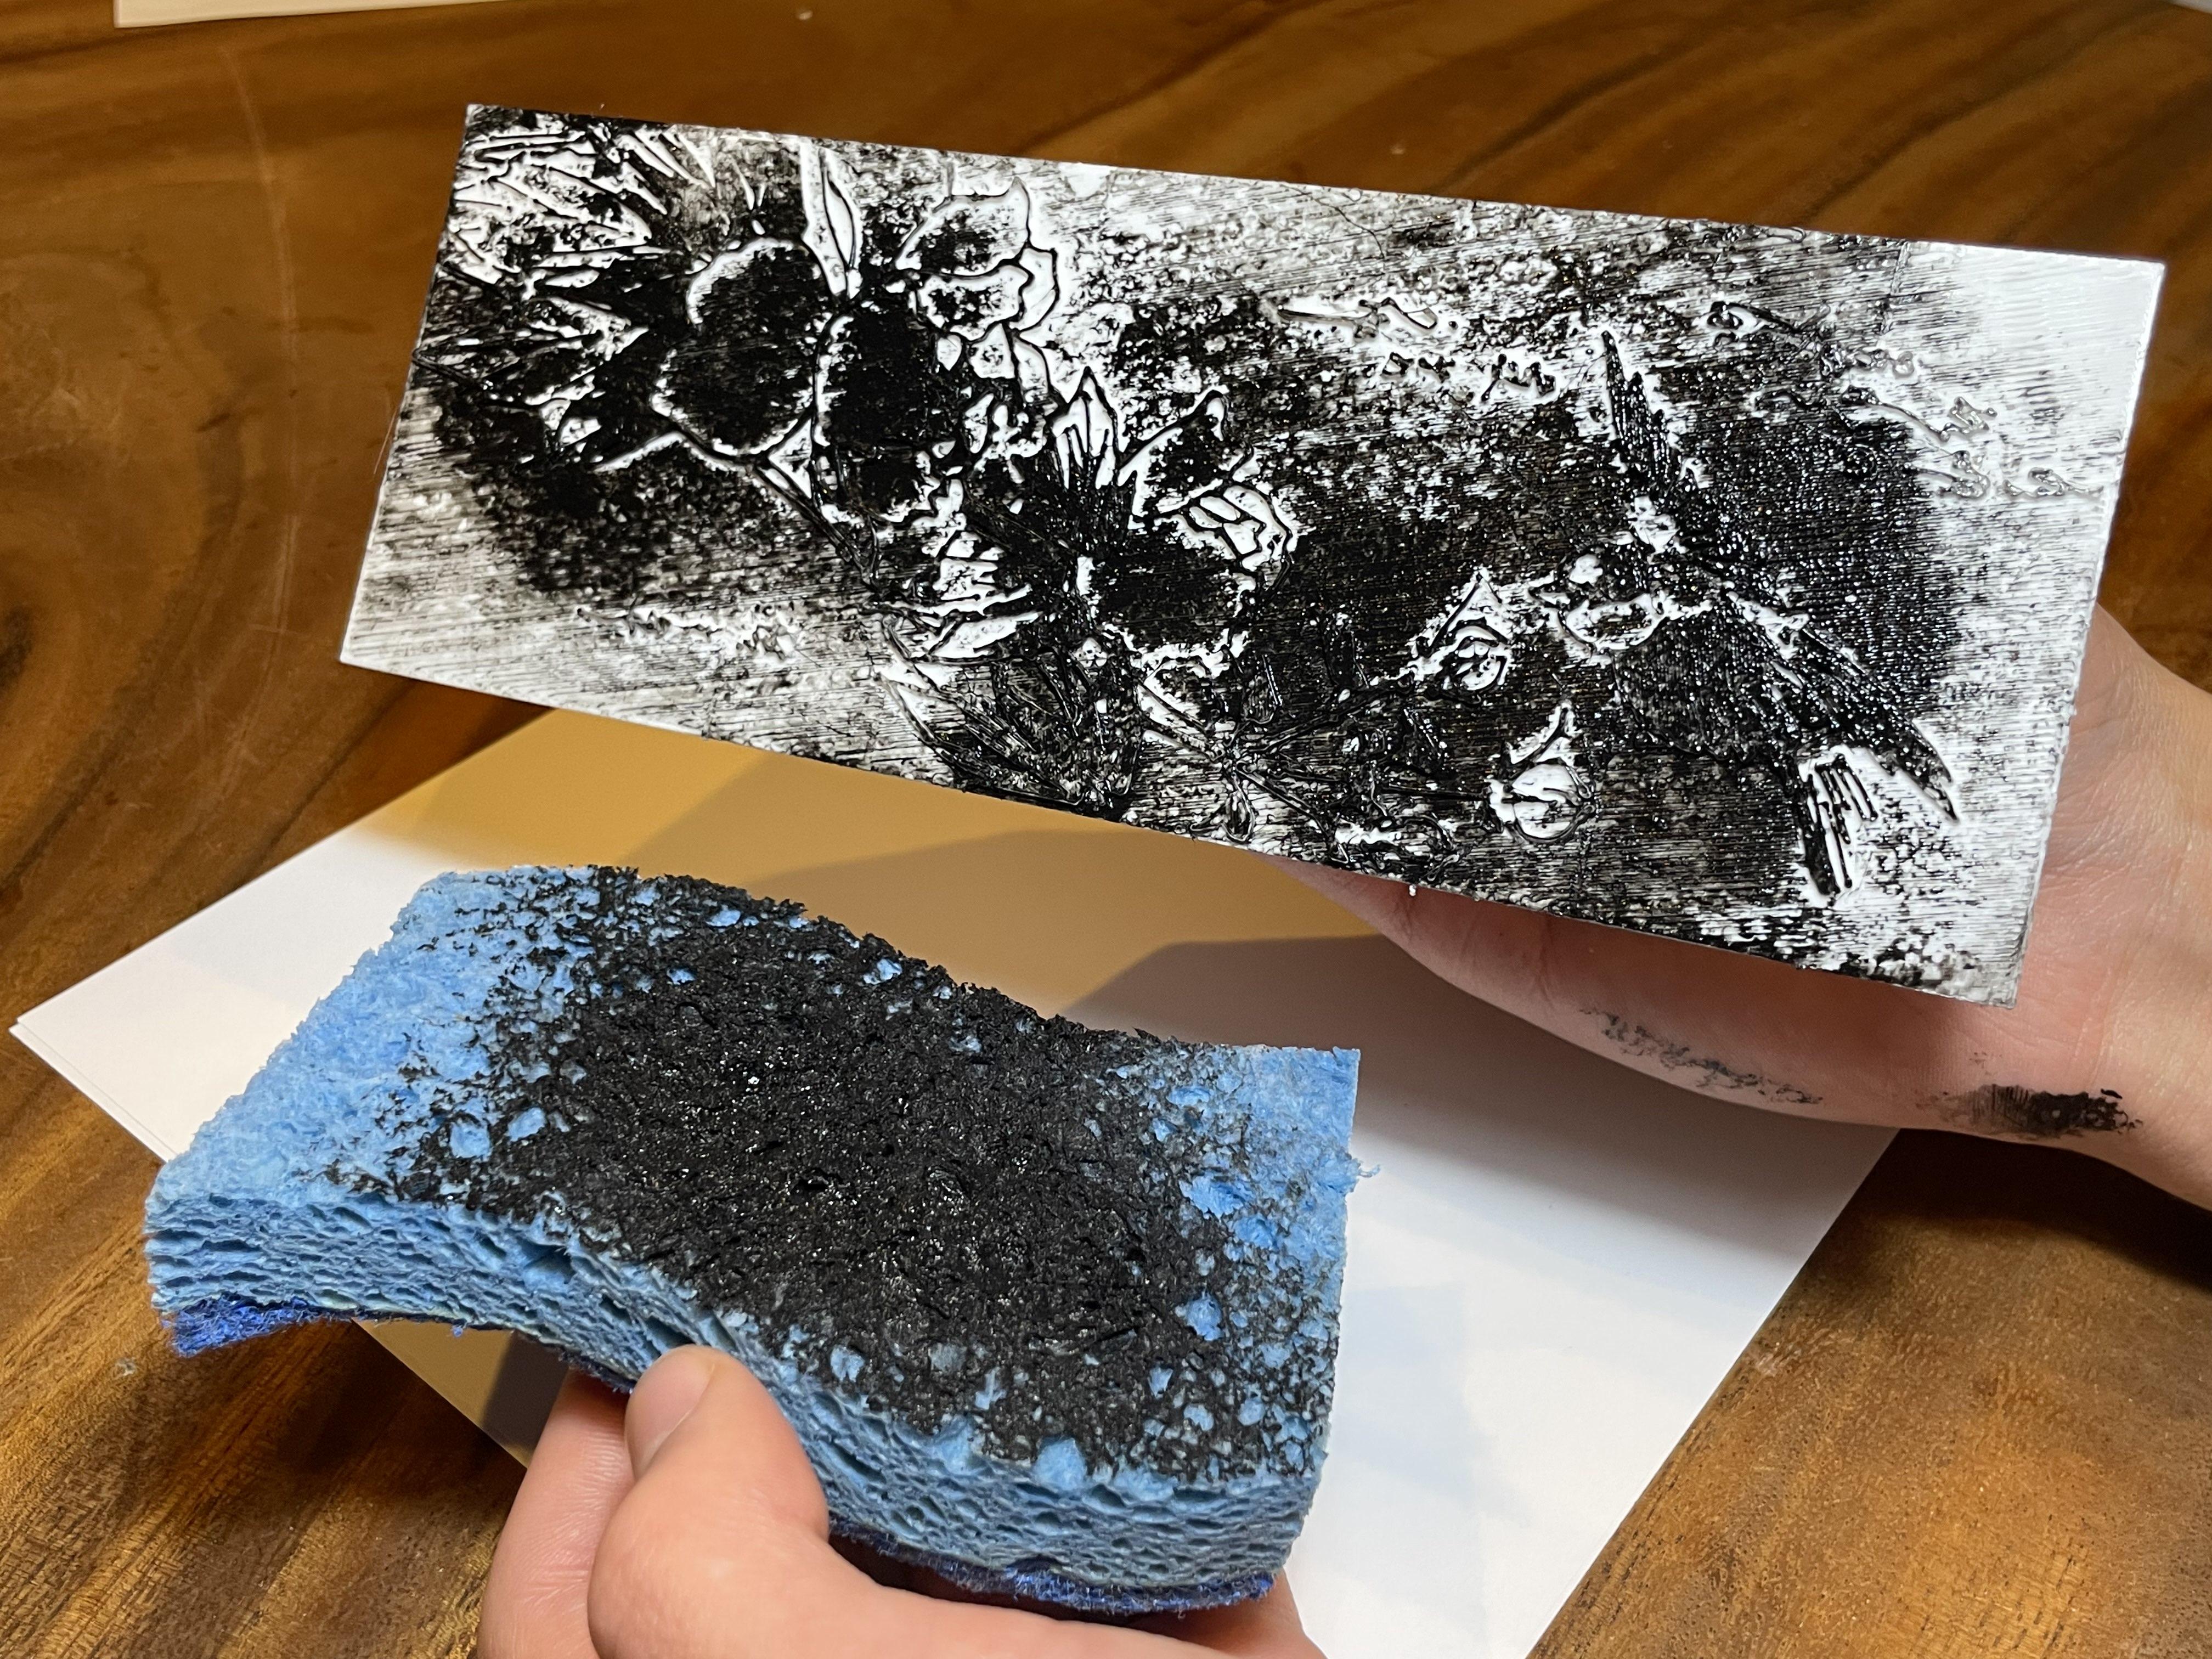
Holding it firmly by the handle, dab the stamp with the sponge until the details are well covered.
Make Your Mark
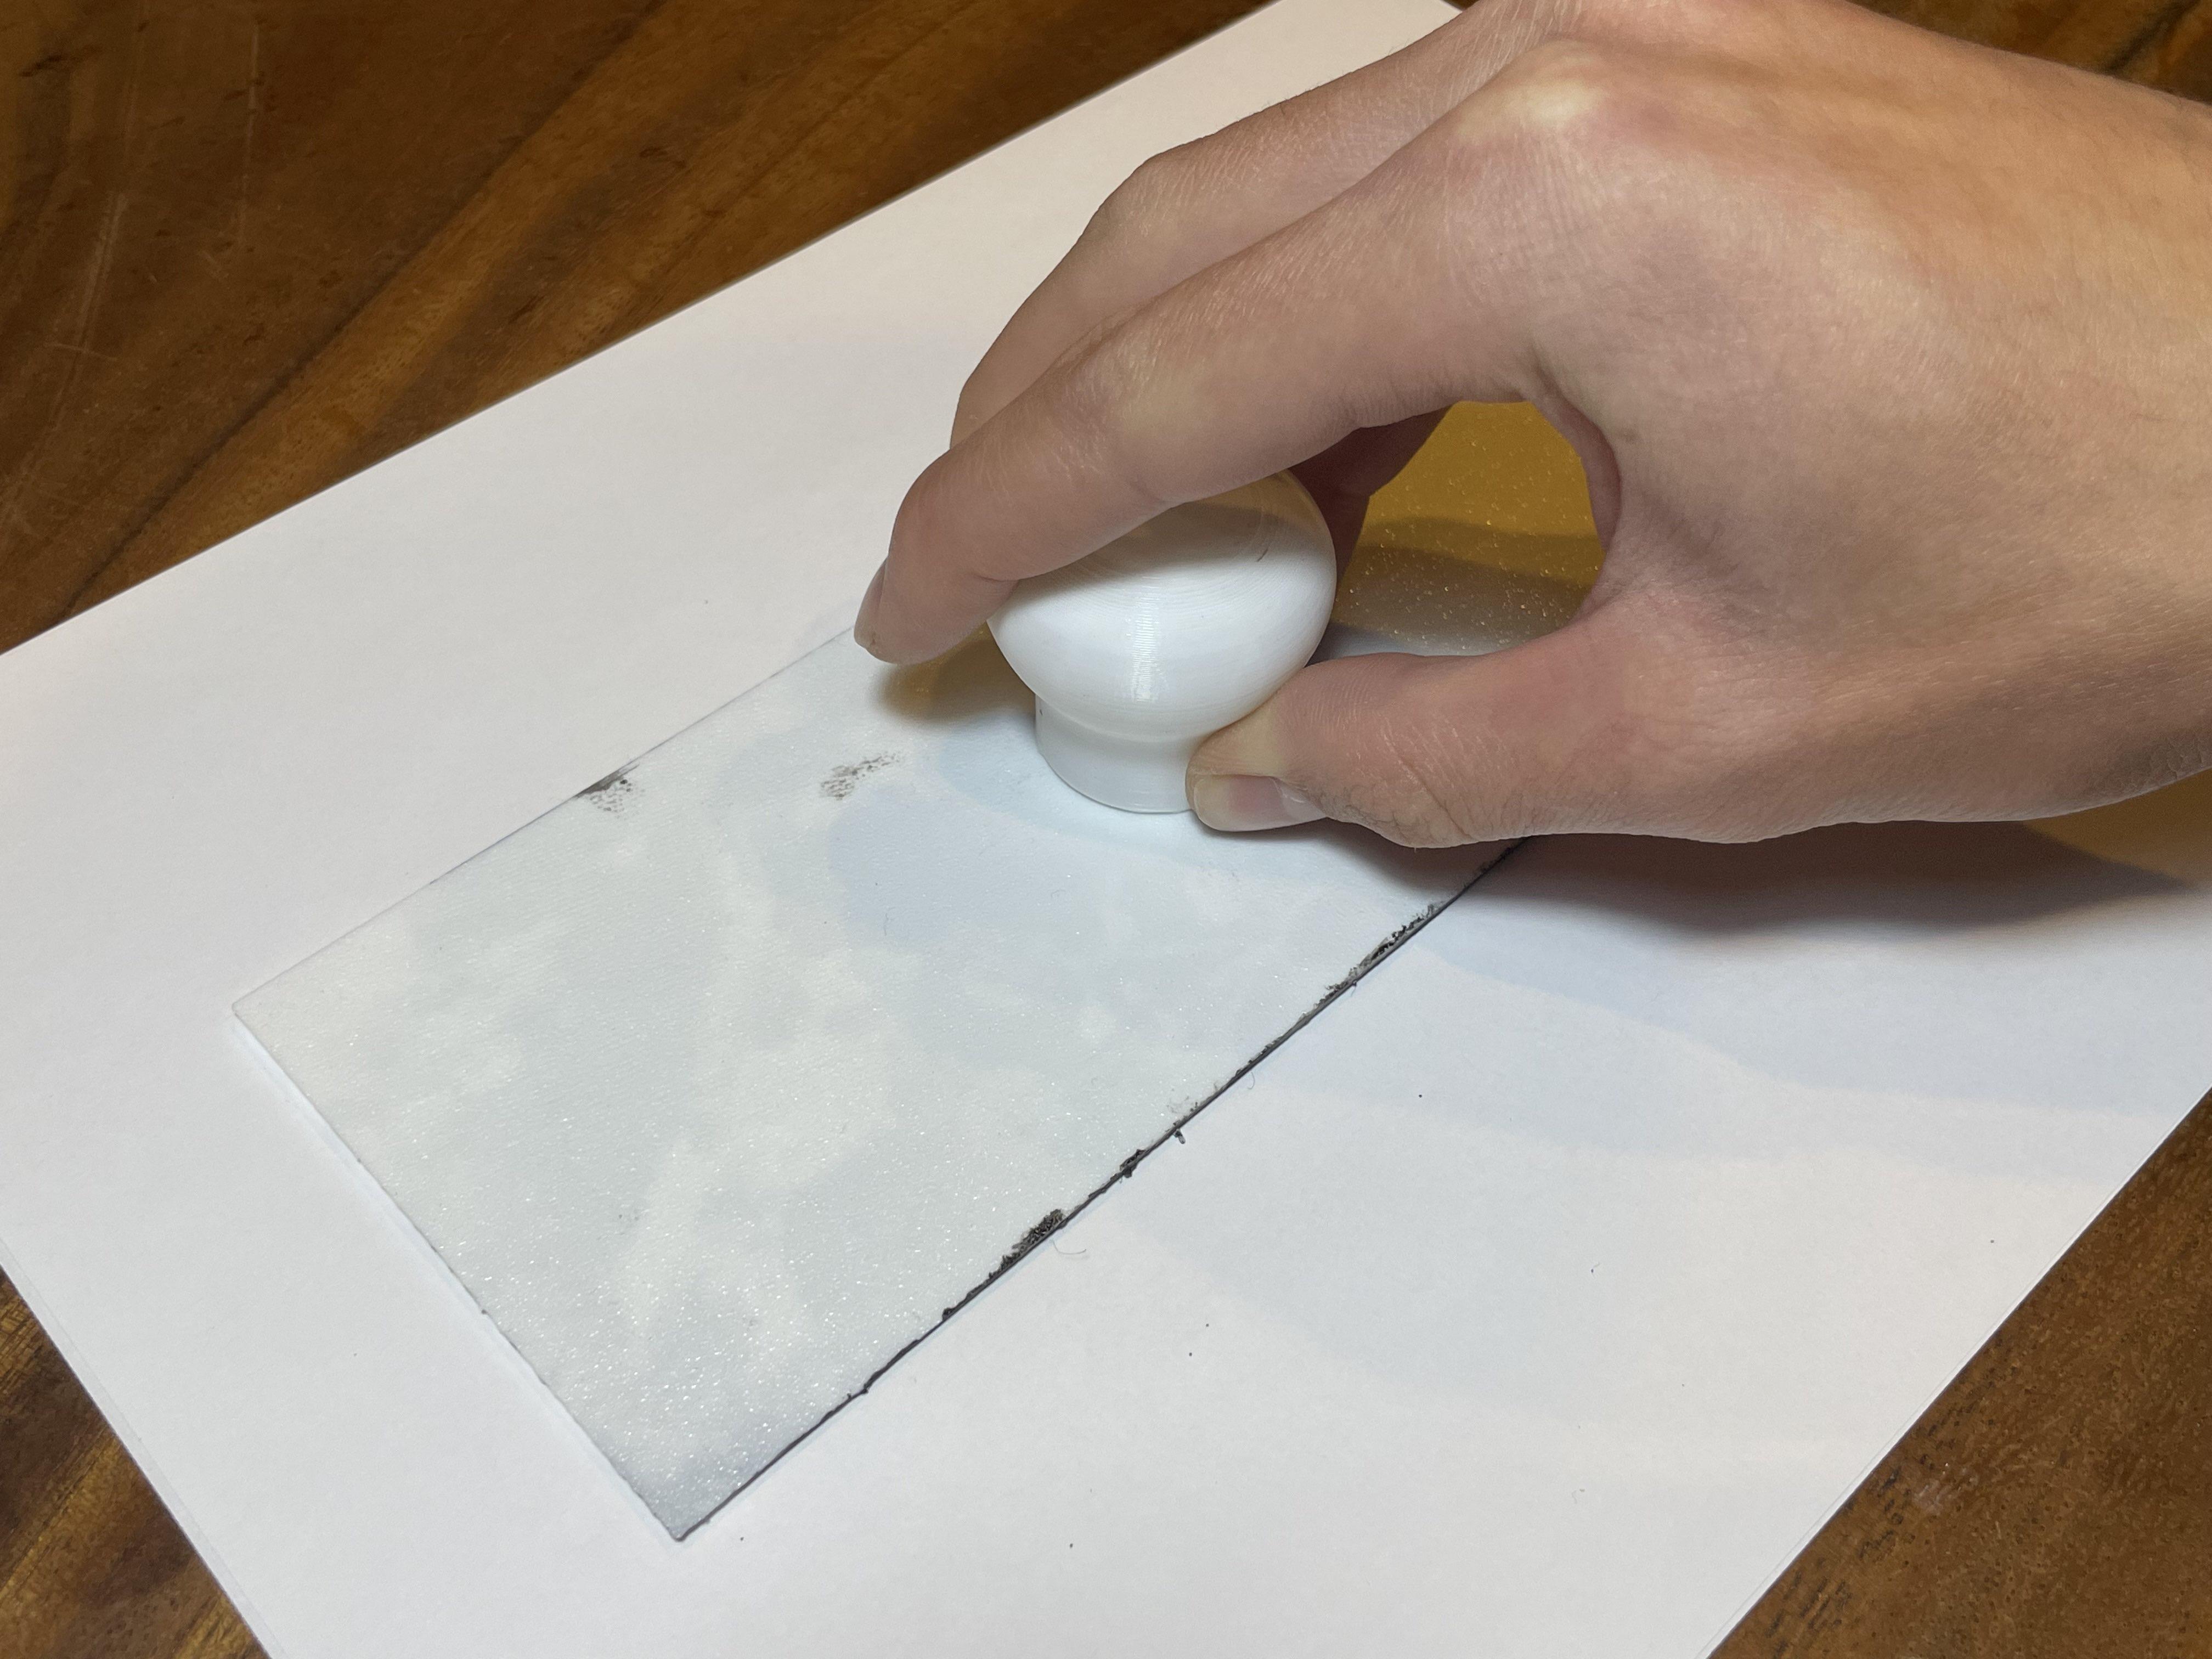
Line up the stamp, and press down with a firm and even pressure, making sure that all parts of the stamp face make contact with the surface. Remove the stamp slowly and carefully.
Add Your Other Colors
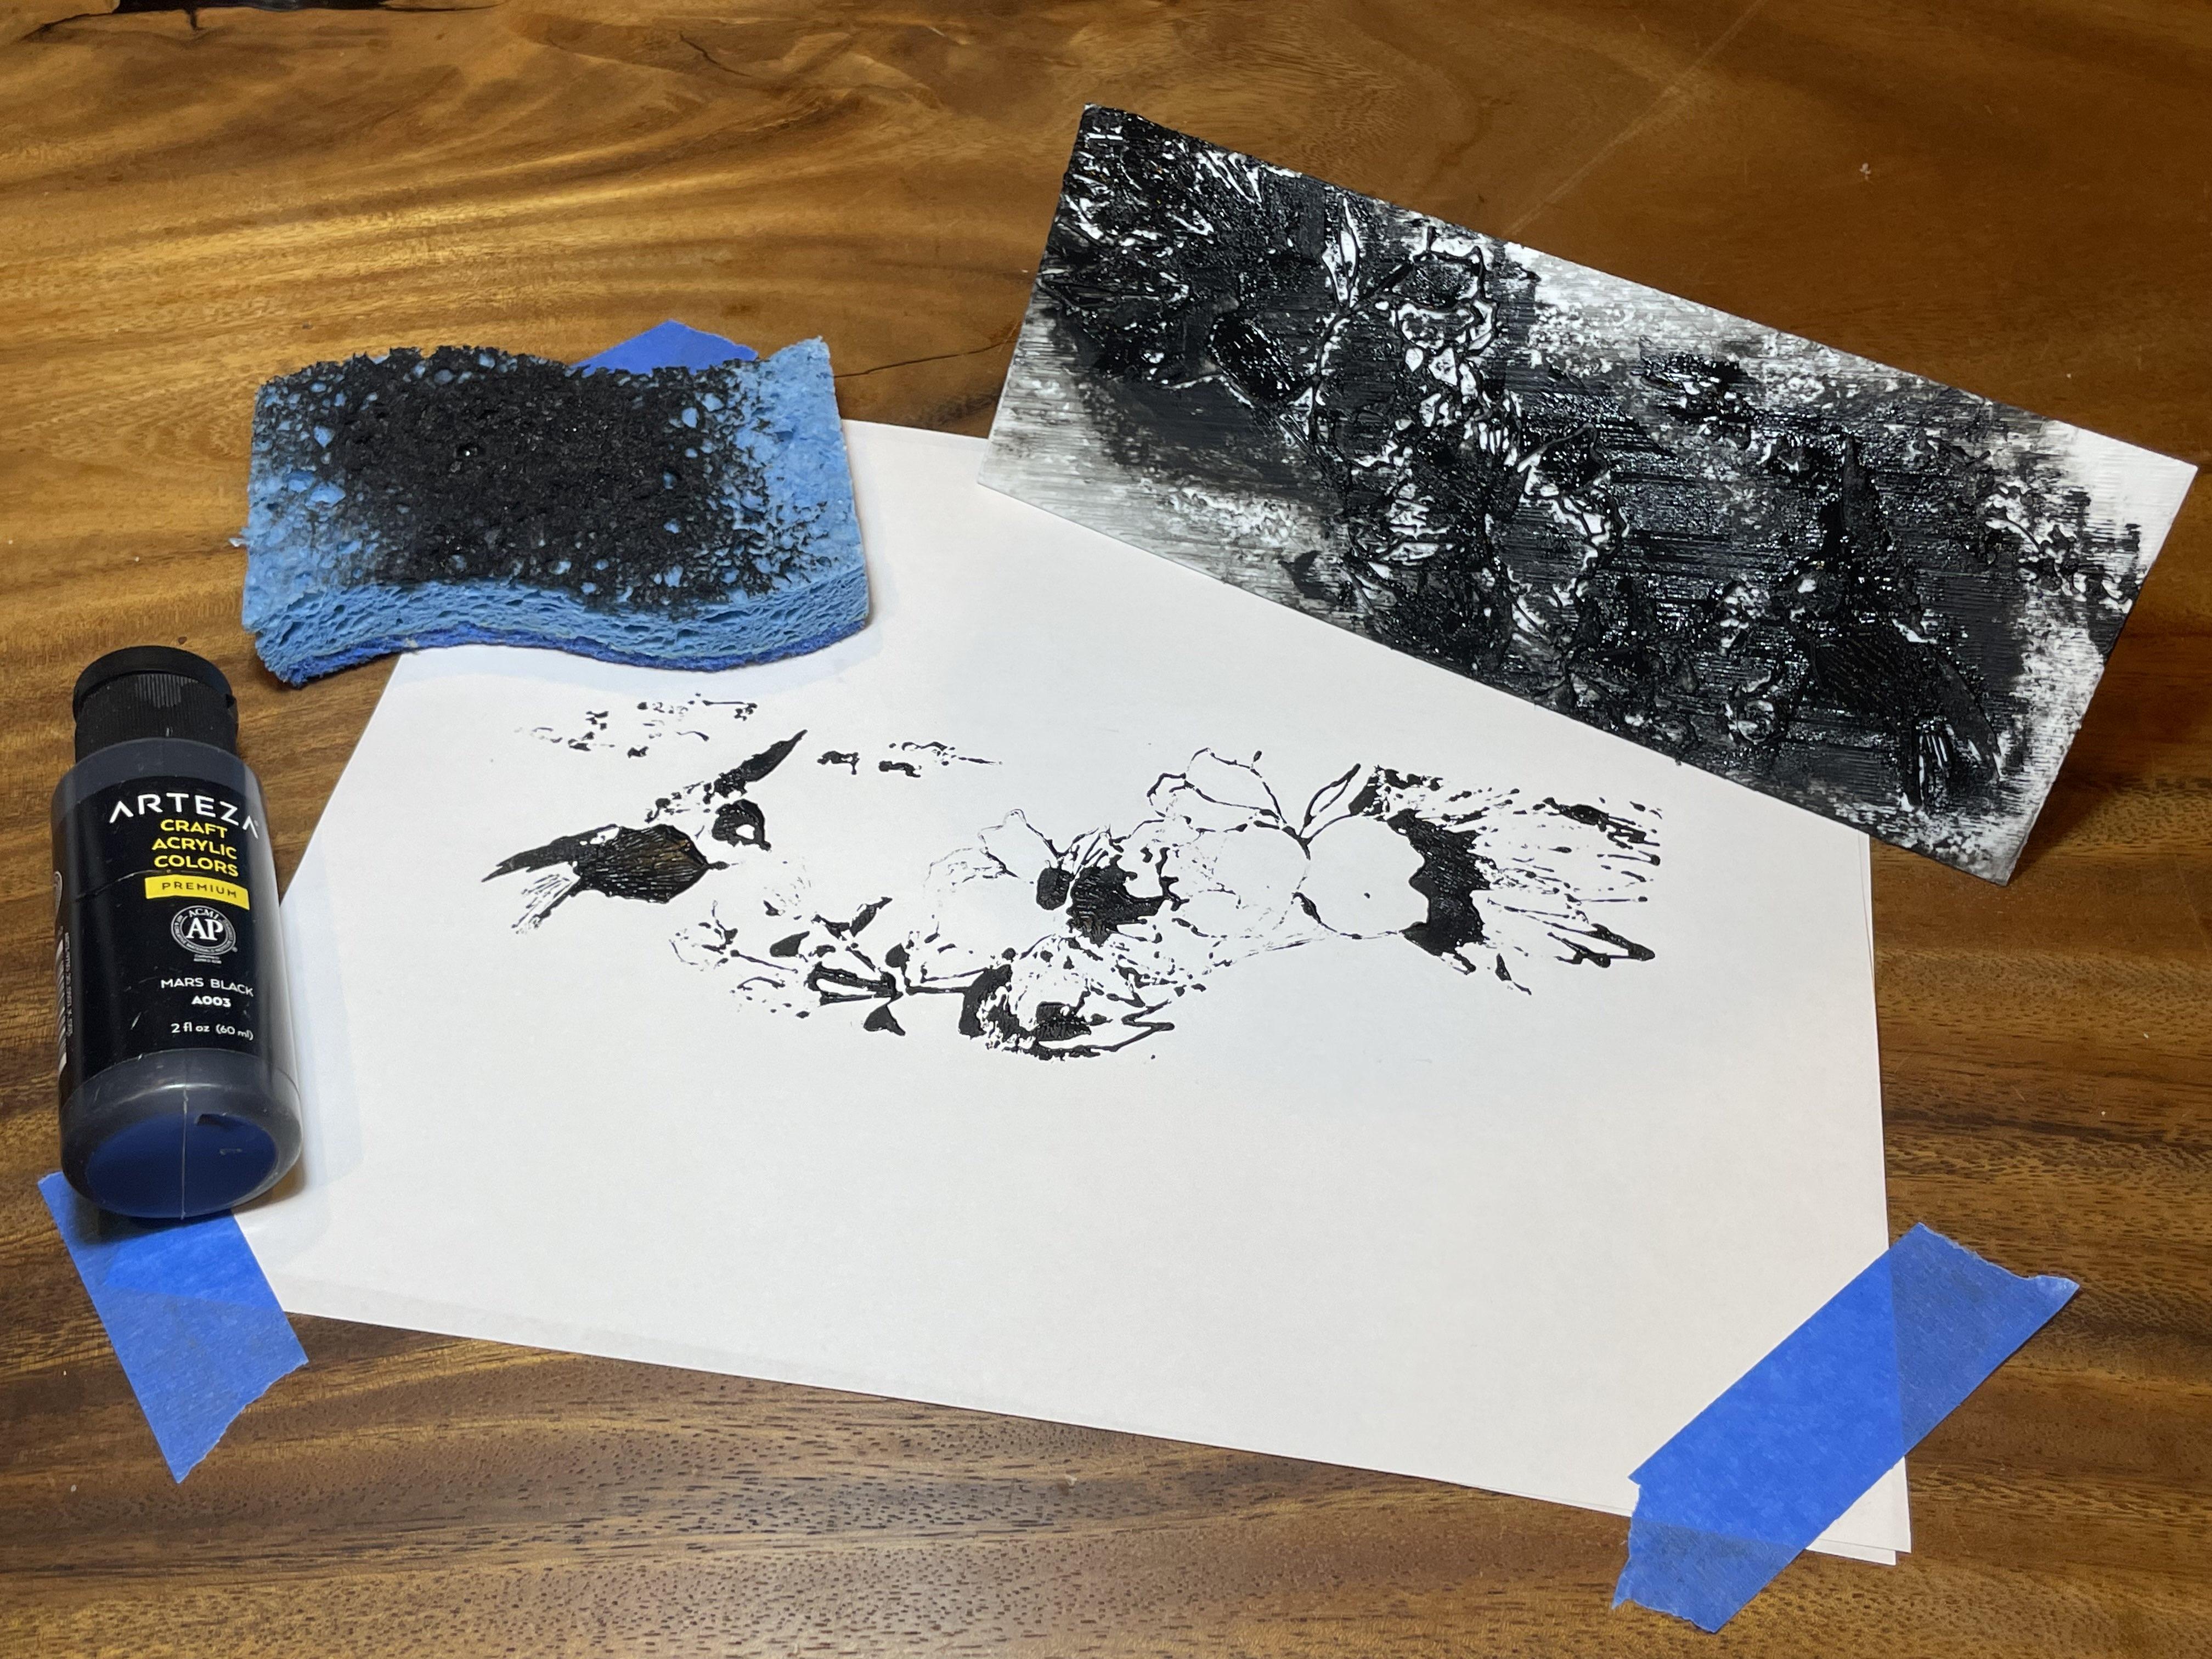
The first color is done, now time for the rest! Repeat steps 21-23 for each of your other colors.
Complete
.jpg)
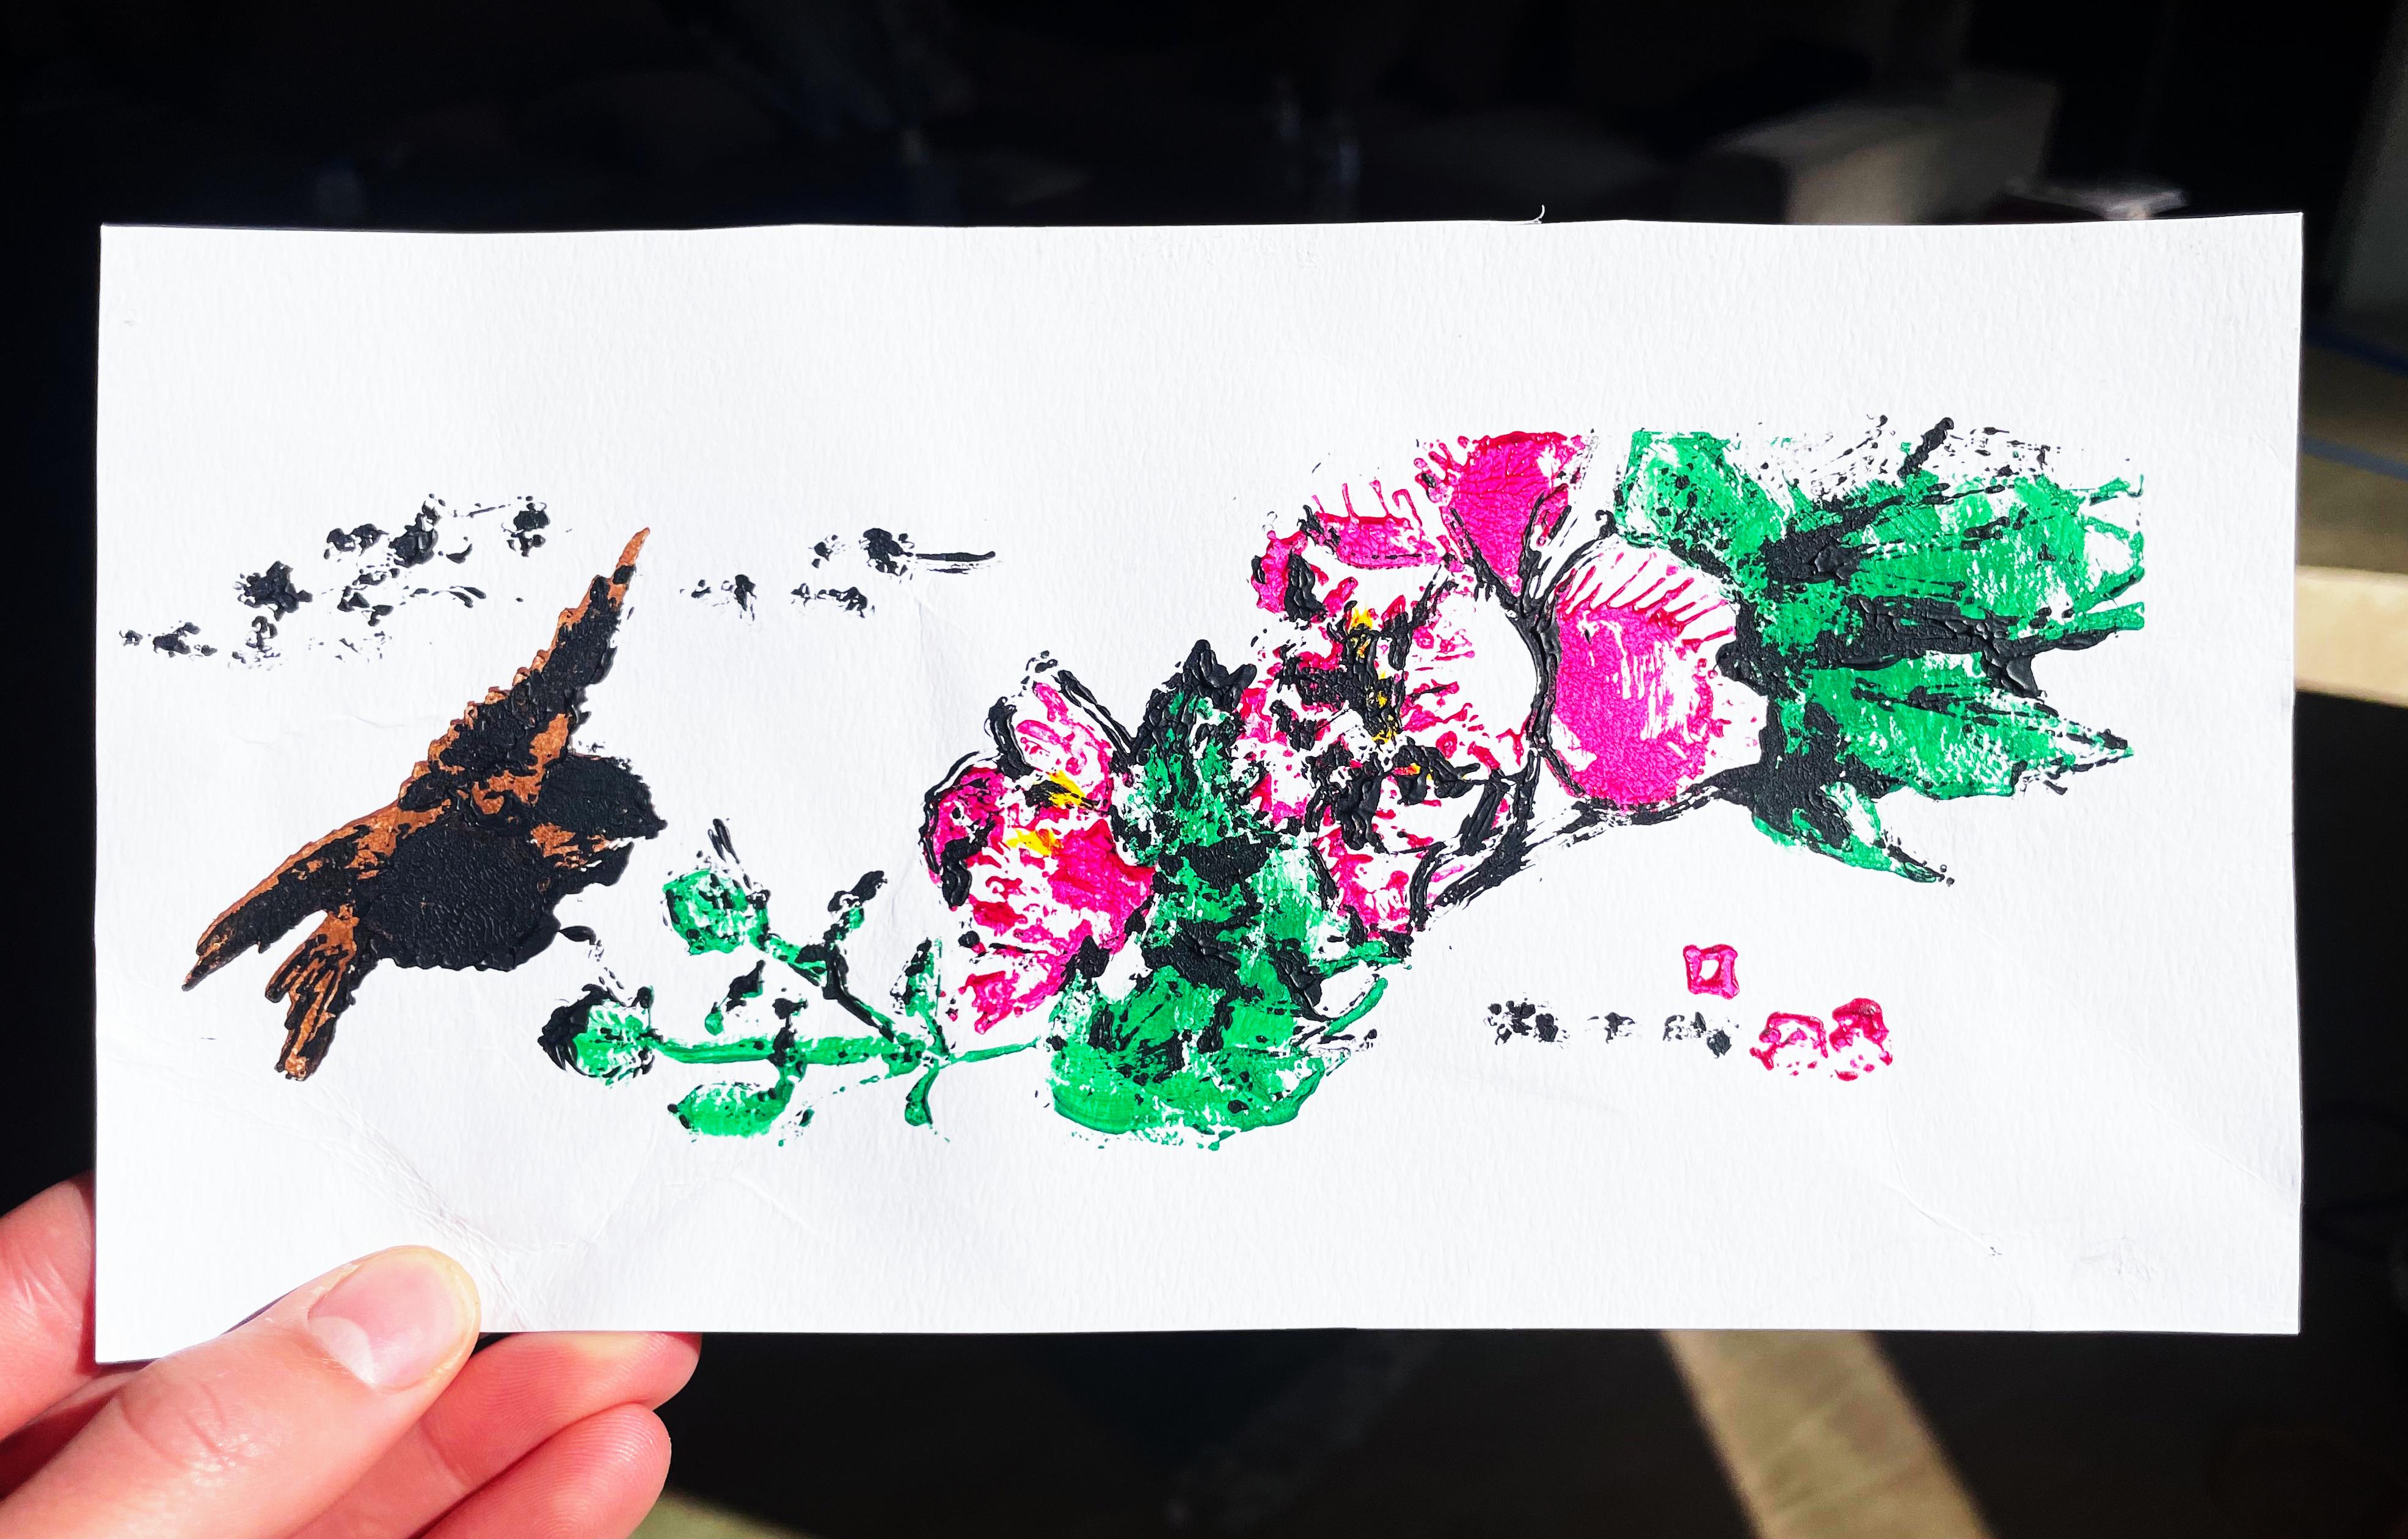
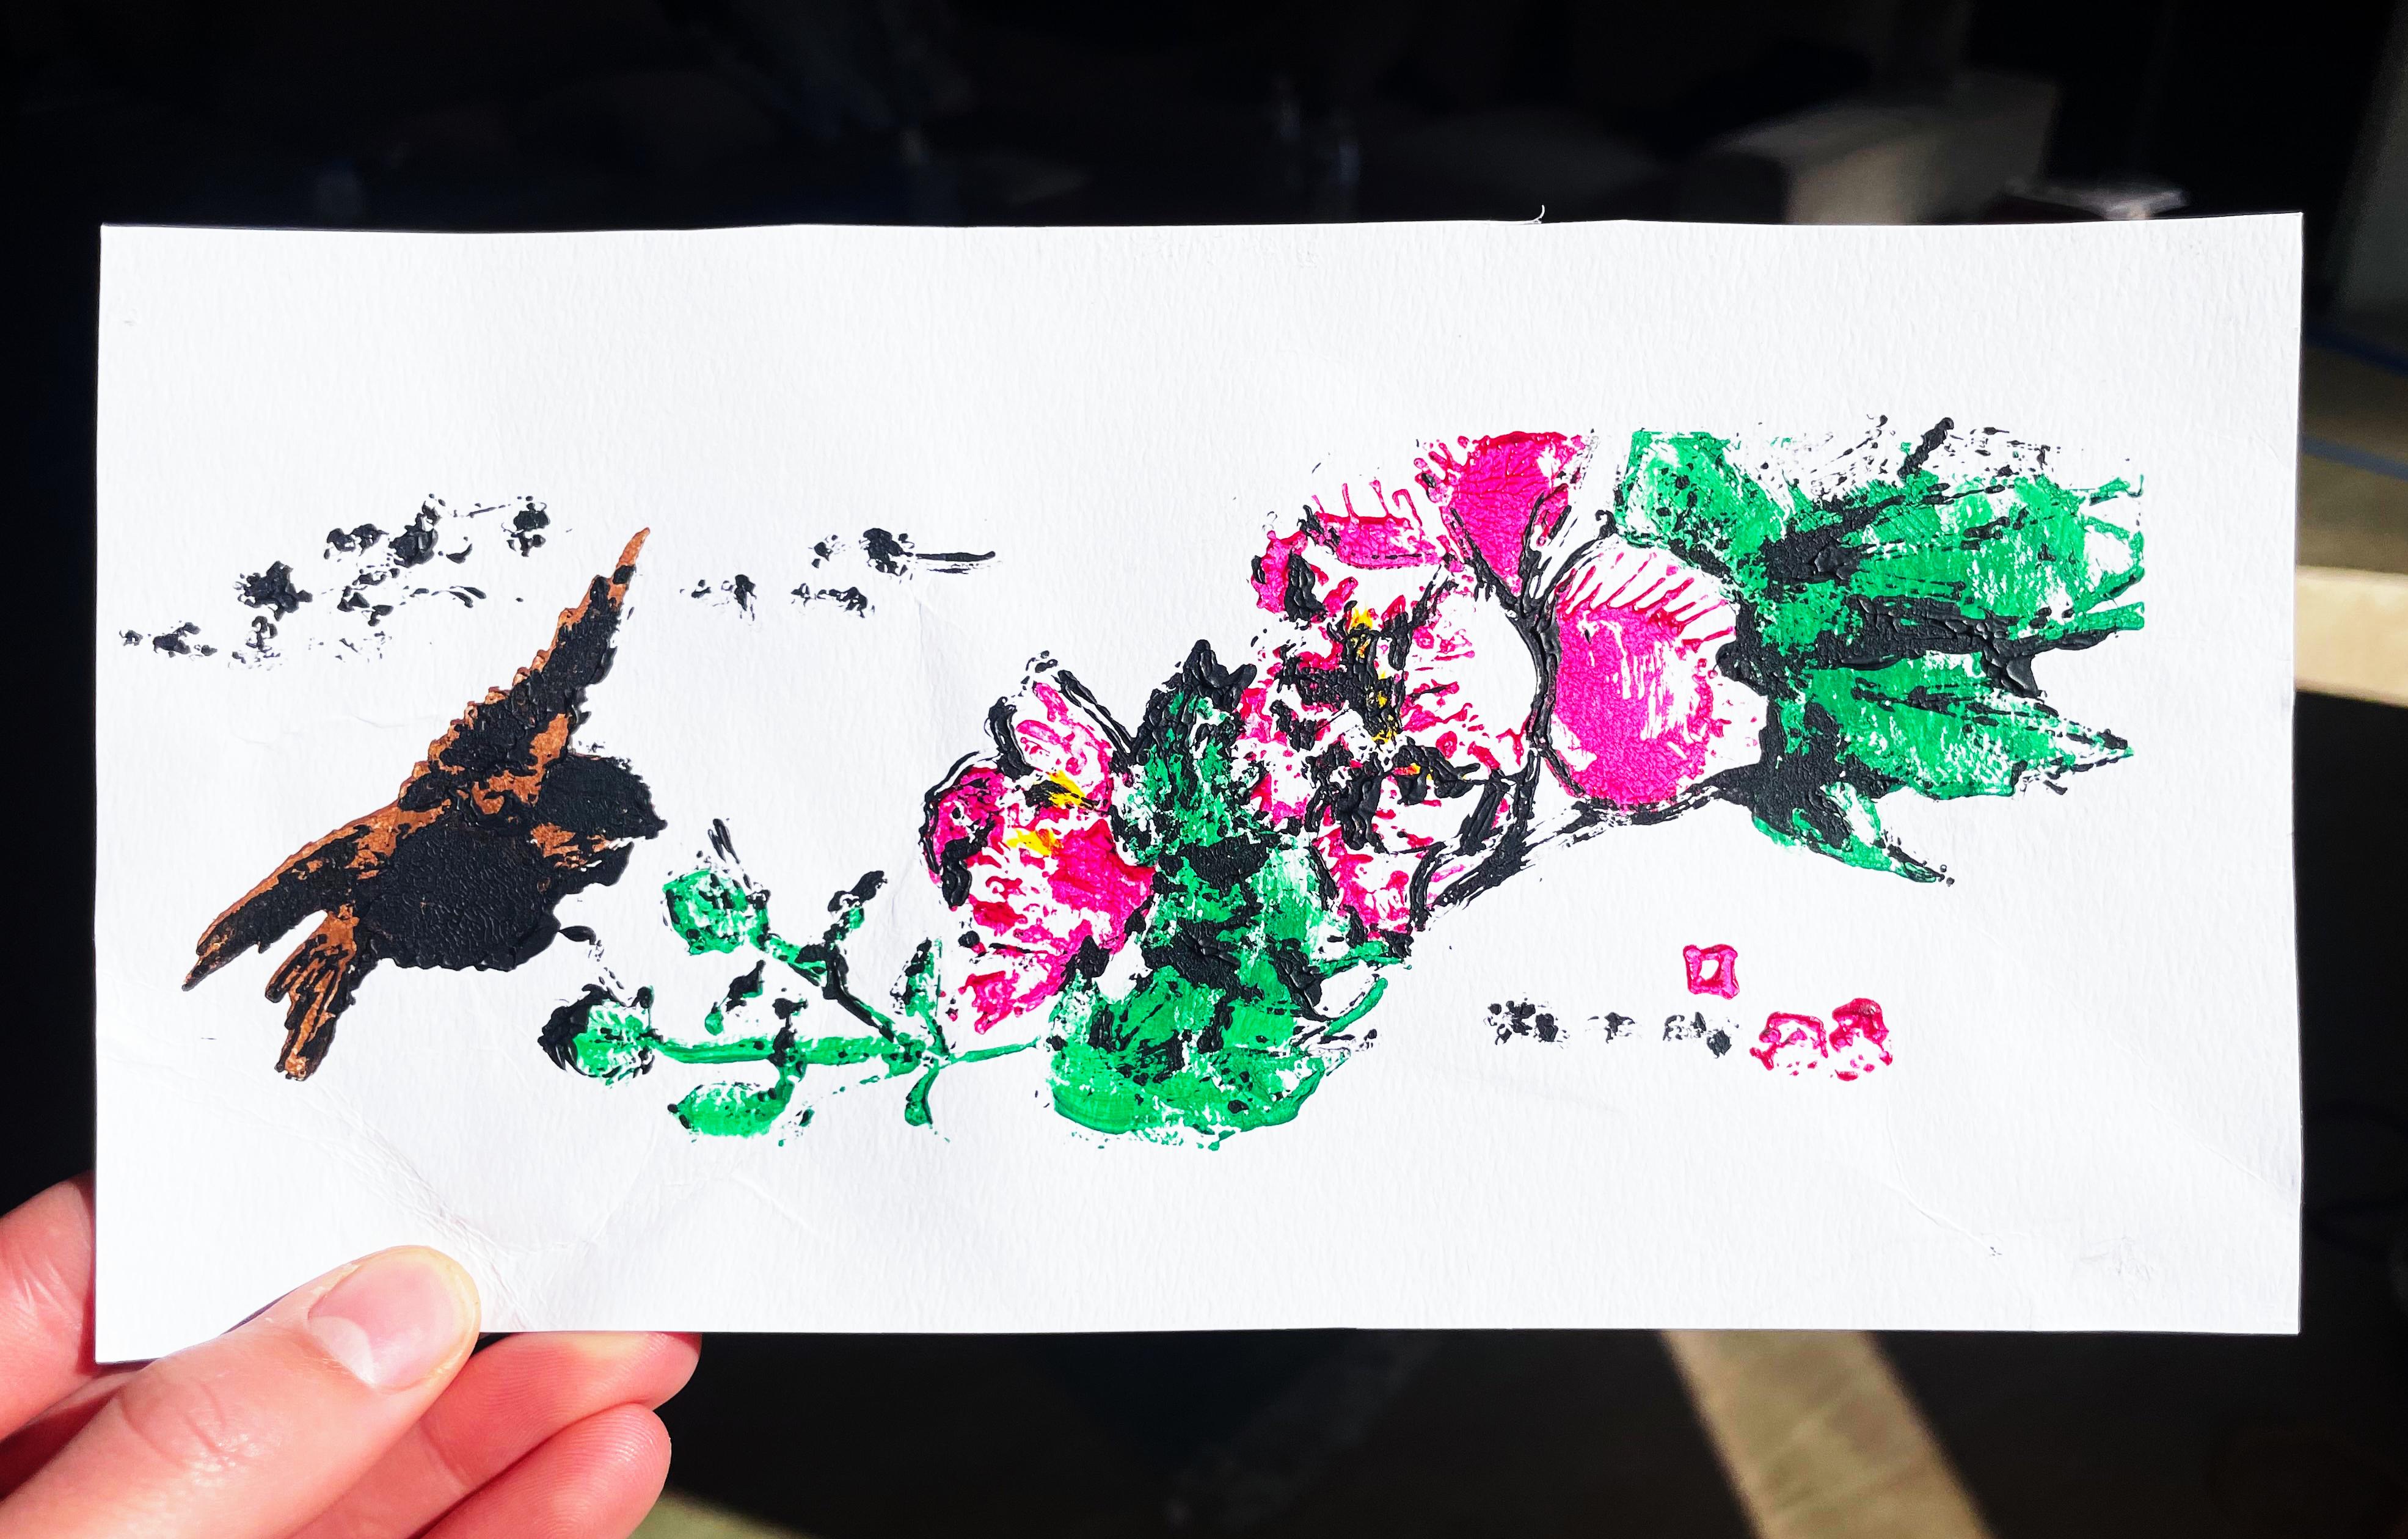
Congratulations, you have just made your first woodblock painting!!! Let the paint dry for at least 24 hours before removing the tape to prevent the paper warping. Add your signature if you like, or display your painting in a 3D-printed picture frame.
I love the way my replica of Hiroshige's Sparrow and Hibiscus turned out. Some of the Japanese characters got a bit distorted and some of the details of the Sparrow were lost, but I will go back in CAD and clean up the outline.
Thanks for Reading!!!
This was an awesome project for me to experiment with a more artistic application of 3D printing, refine my Photoshop skills, and practice writing Instructables. I think that this technique of merging modern technology with a historical art form has a lot of potential, and I'm excited to see what the community makes with it.
Thanks, and happy printing!