How to Make Your First Simple Led Blink Project in Raspberry Pi2
by VIVEK GR in Circuits > Raspberry Pi
6903 Views, 98 Favorites, 0 Comments
How to Make Your First Simple Led Blink Project in Raspberry Pi2
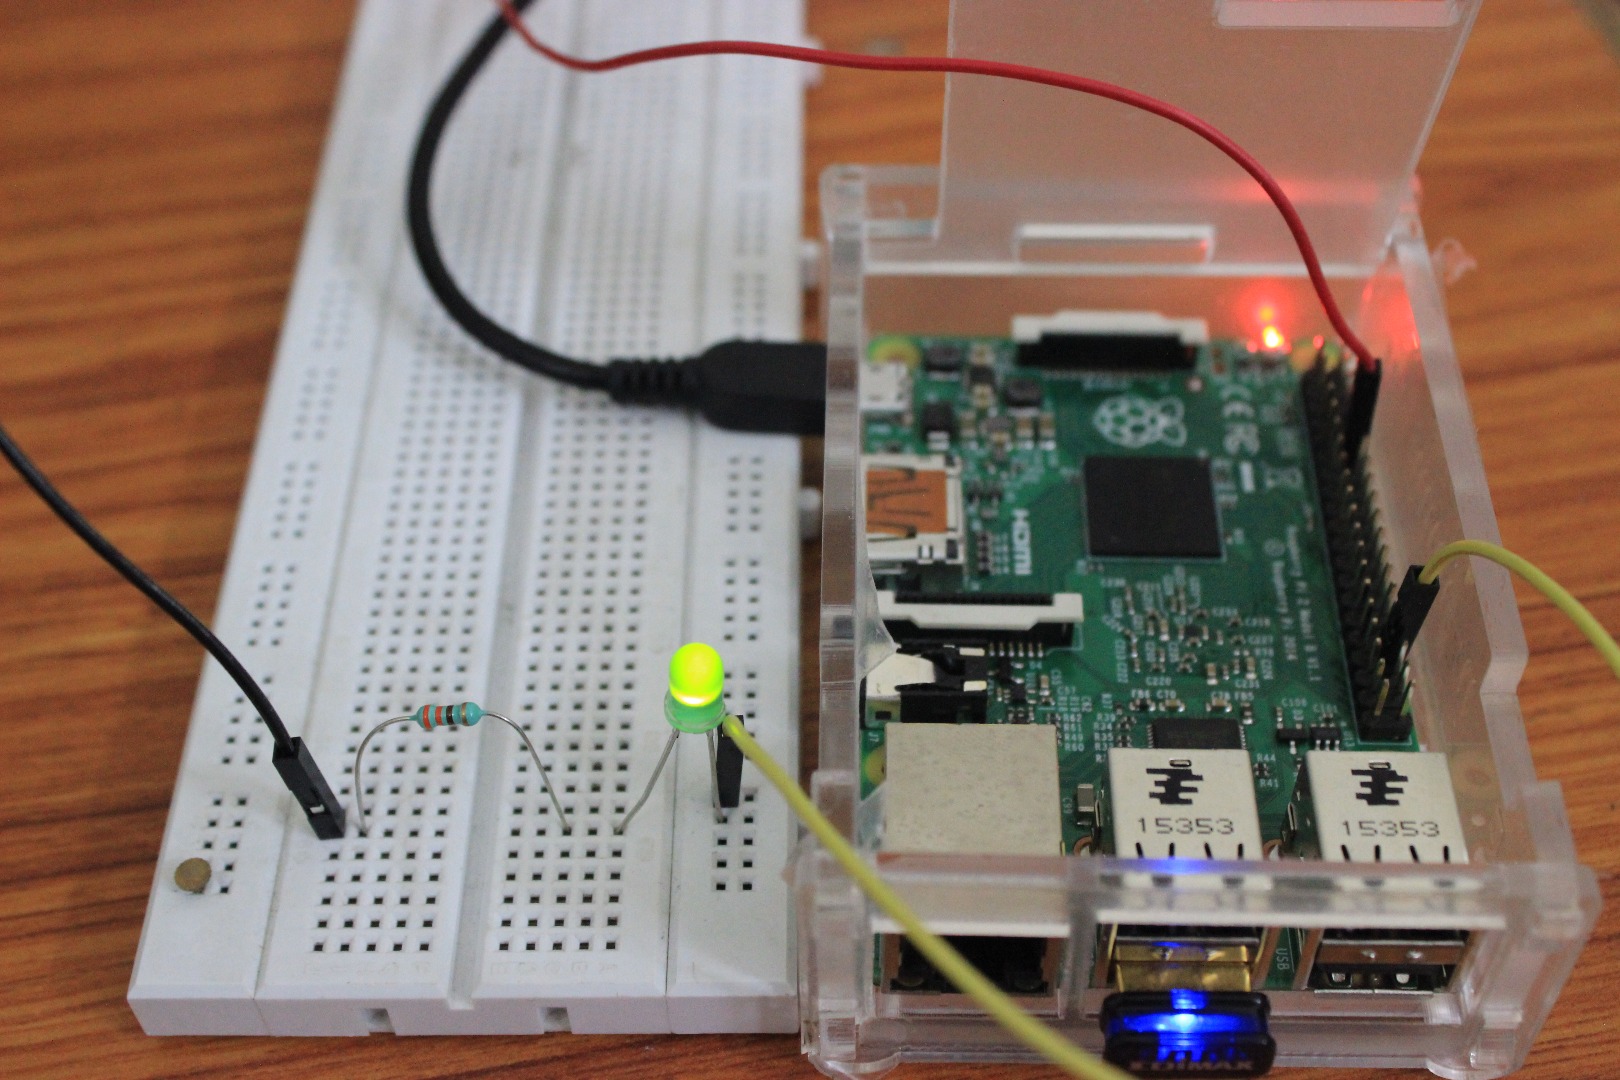
Congratulations to you, for getting yourself a Raspberry pi2. Your now super excited to get started and moving but you don't know anything where to start about .
The reason I am sharing this project is that, at initial stages where you are not familiar with either the hardware /software of your device , it is very difficult to get into it.
So with this simple led blink program, you will learn some basics on how a simple led hardware connection is made with raspberry pi2 and how to write a simple Led blink program in python:)
Sounds Awesome right??
Lets get started:)
Materials Required
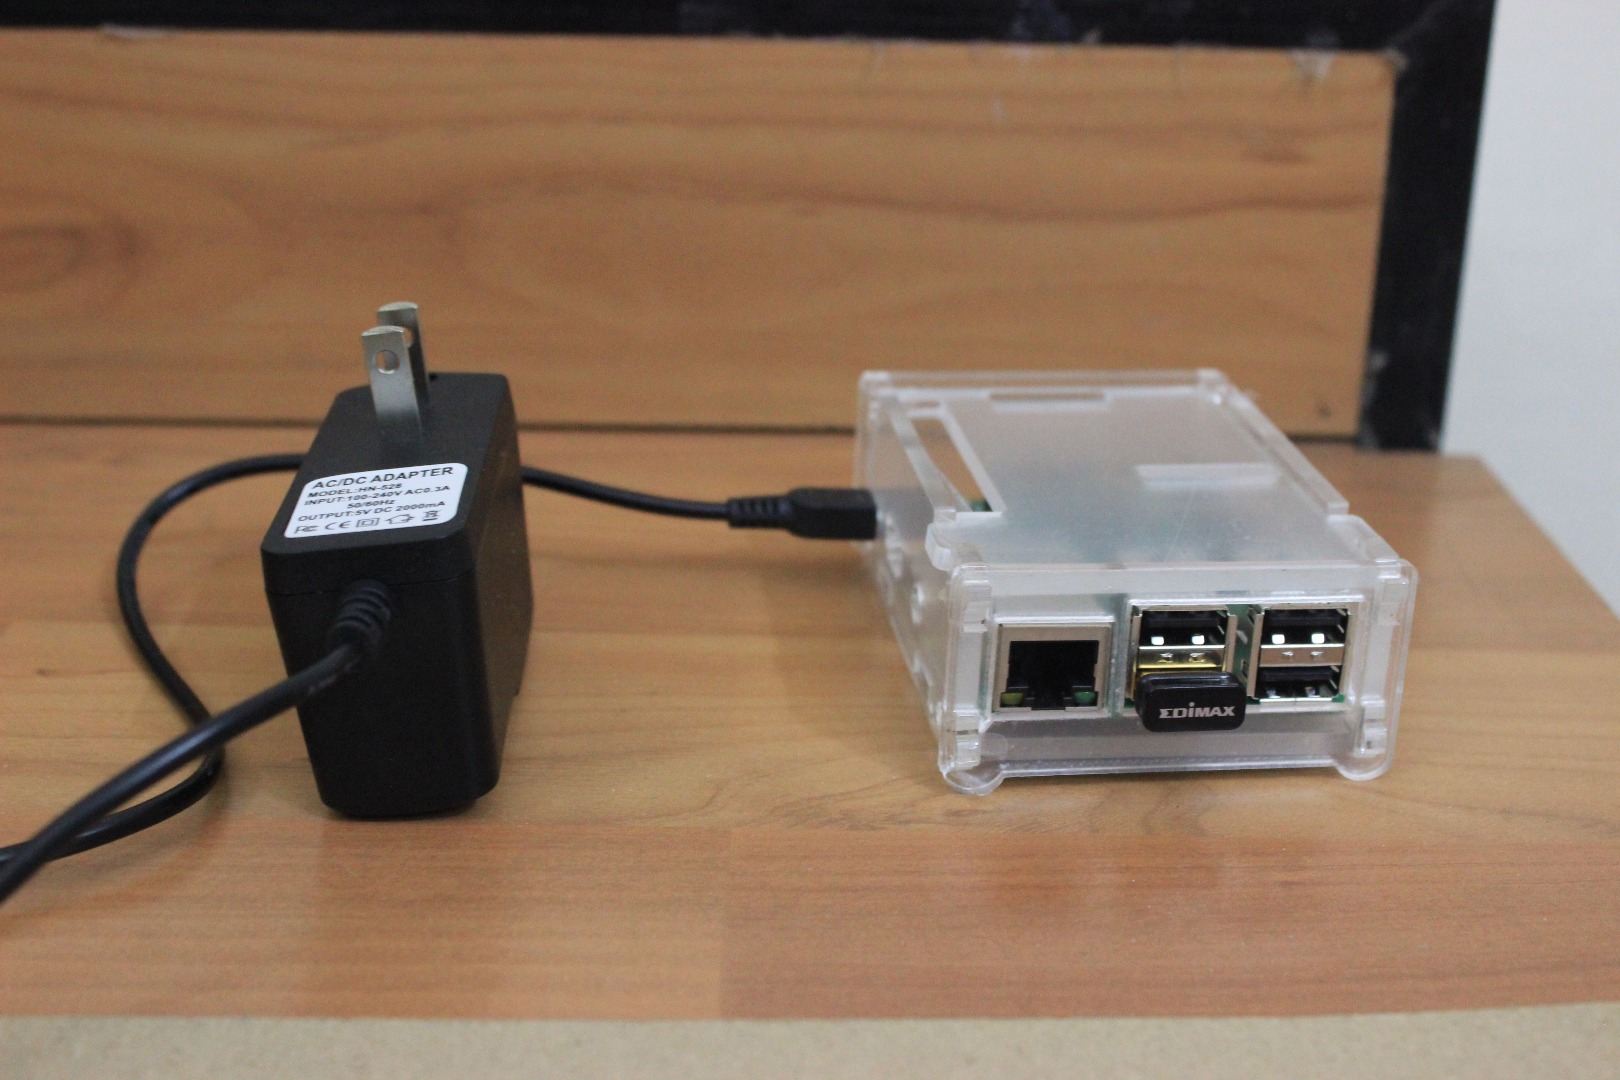
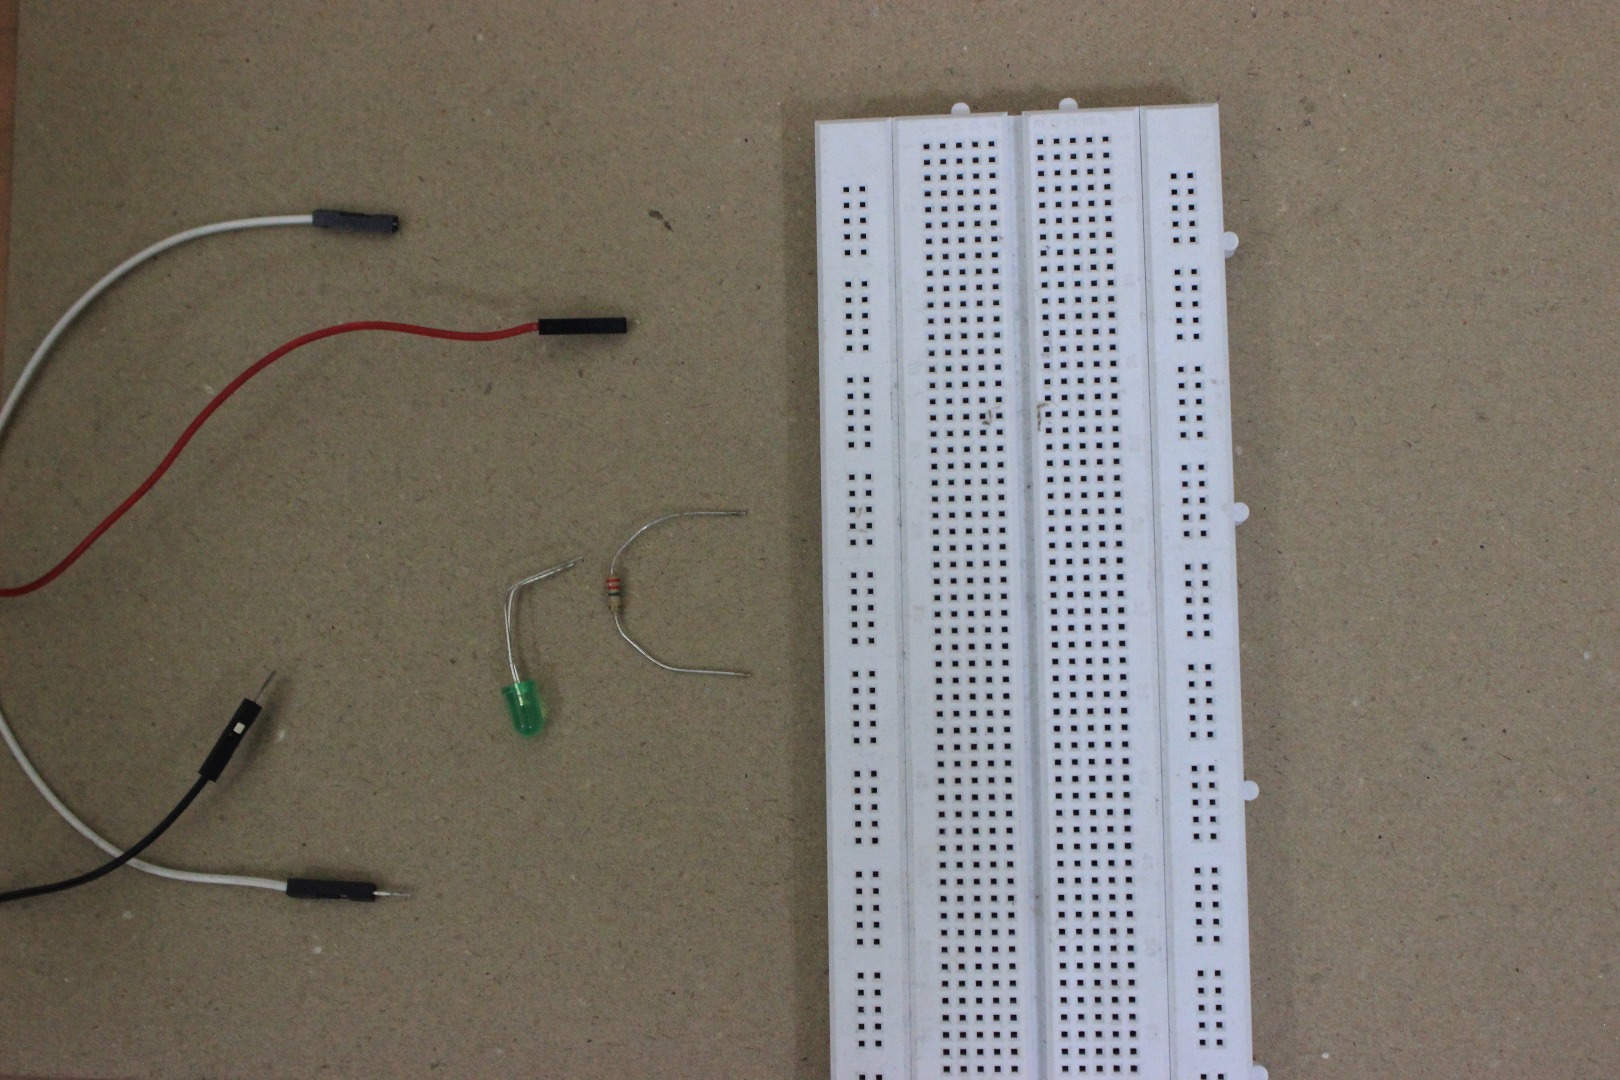
Hardware
1.Raspberry Pi2 with Raspbian OS installed
if you dont have one please refer below links on how to install it on your SD card https://www.raspberrypi.org/downloads/noobs/
https://www.raspberrypi.org/help/noobs-setup/
2. Power Adapter for Raspberry Pi
3.Breadboard
4.330 ohm resistor (Color Code :orange orange brown.)
5.Led (any color of your choice)
6. 2 Male to female connectors
7.Laptop
Software
Install a notepad editor called nano, just use your terminal and type the following command
sudo apt-get install nano
NOTE:
Ethernet cable is required if Raspberry pi 2 is used with laptop's display or an HDMI cable is required if used with an HDMI monitor.
If you Don't Know how to connect it with Laptop,then Refer to my instructable
https://www.instructables.com/id/How-to-Use-Raspberry-Pi2-With-a-Laptop-Display-Usi/
Hardware Connections & Basics
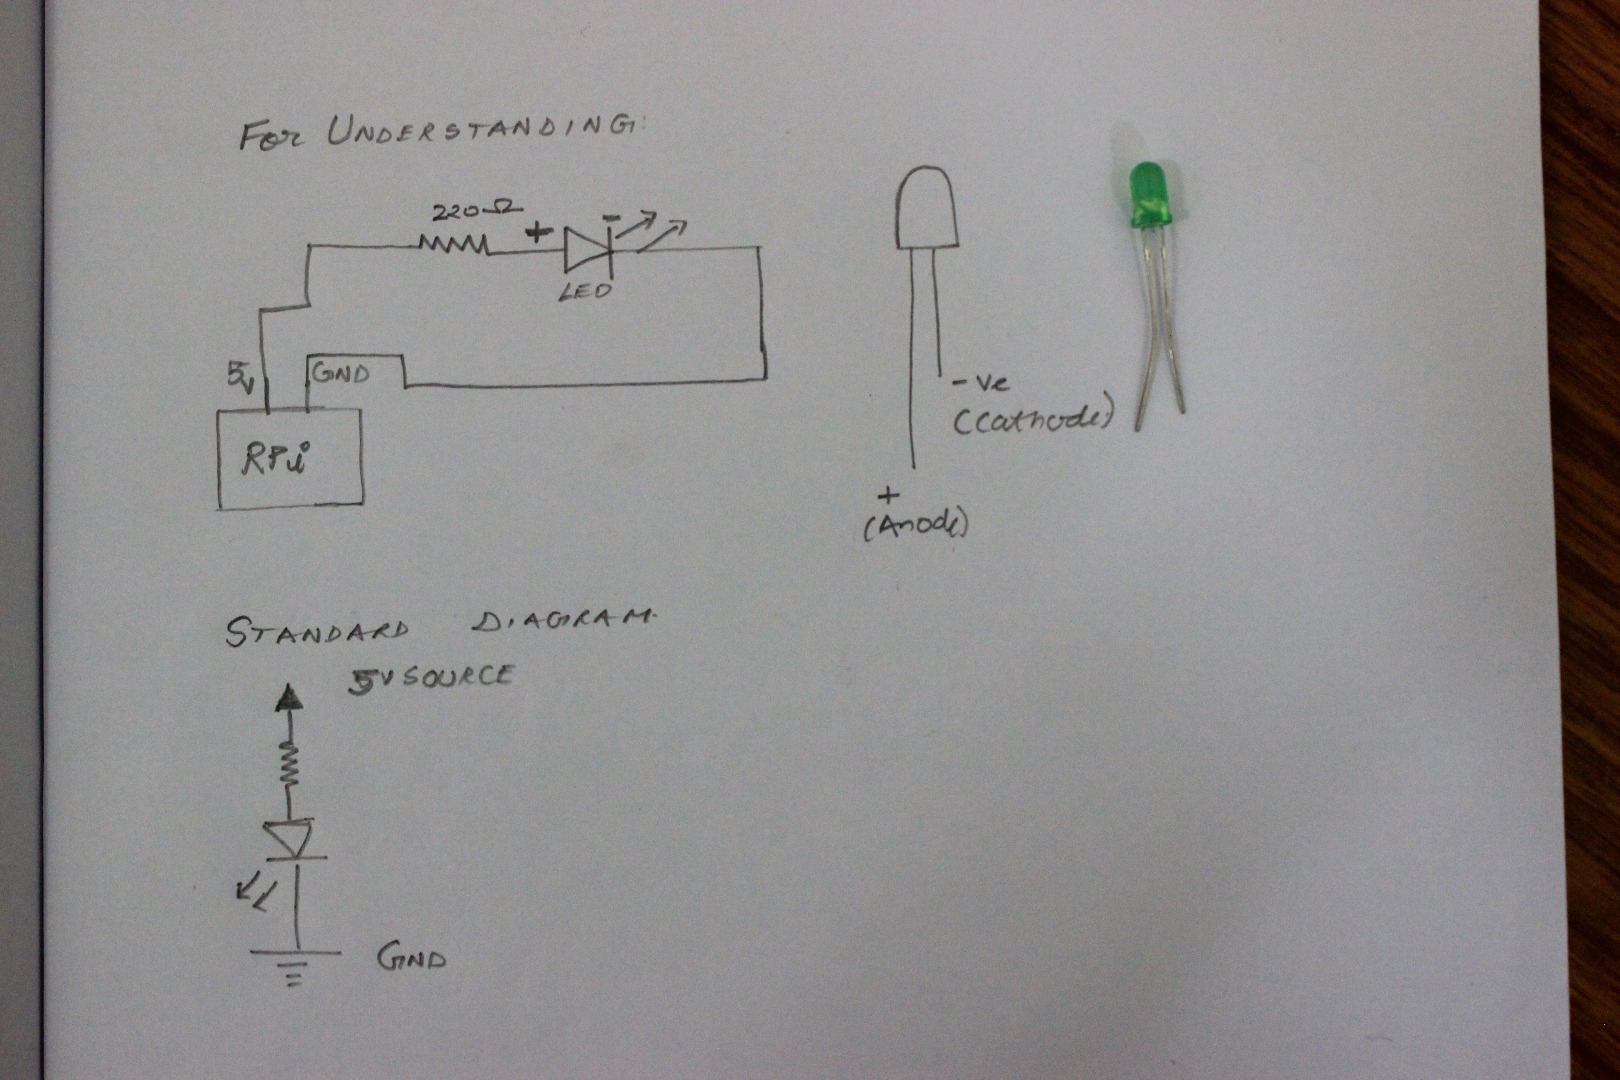
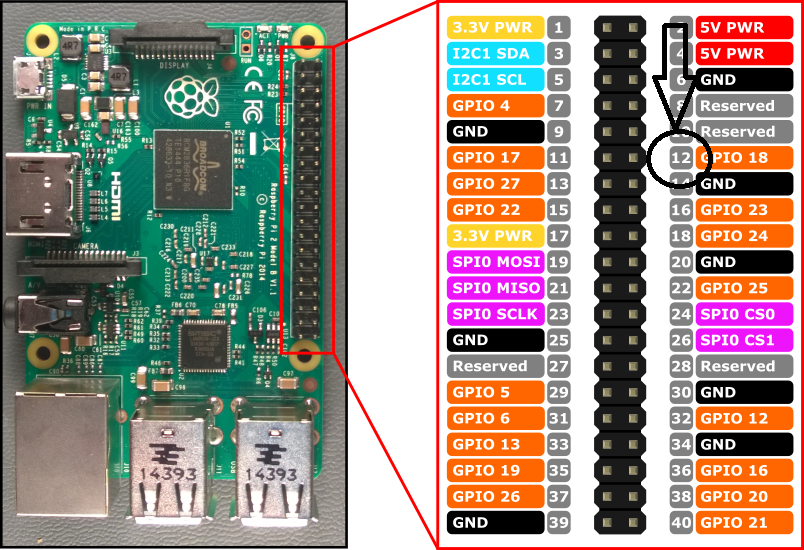
1. fix the resistors and Led as shown in the circuit diagram
2. This instructable assumes that the user has knowledge about the breadboard, if not just refer the link to understand it
https://learn.sparkfun.com/tutorials/how-to-use-a-...
https://www.instructables.com/id/Breadboard-Basics-for-Absolute-Begginers/
Let me explain you the detail on as to why we are selecting a particular resistance which should be connected in series with the Led:)
Its Simple first of all the Each Pin of raspberry pi can maximum put out 16 mA of currrent. So if we tend to draw more current than it supplies then it will damage the pins . So by using ohms law
we know that V=IR
V-Voltage
I=Current
R=Resistence
for our Led Project we have to have a 5V supply and from the Led's Datasheet, we come to know that led consumes about 20mA. ( Refer this link for Led's Datasheet
http://www1.futureelectronics.com/doc/EVERLIGHT%C2%A0/334-15__T1C1-4WYA.pdf)
V=5V, I=20mA
R=V/I=5/20*10^3=250Ohms. So roughly we use 330 Ohms Resistor to protect the pins of the raspberry pi and Led
Software Basic
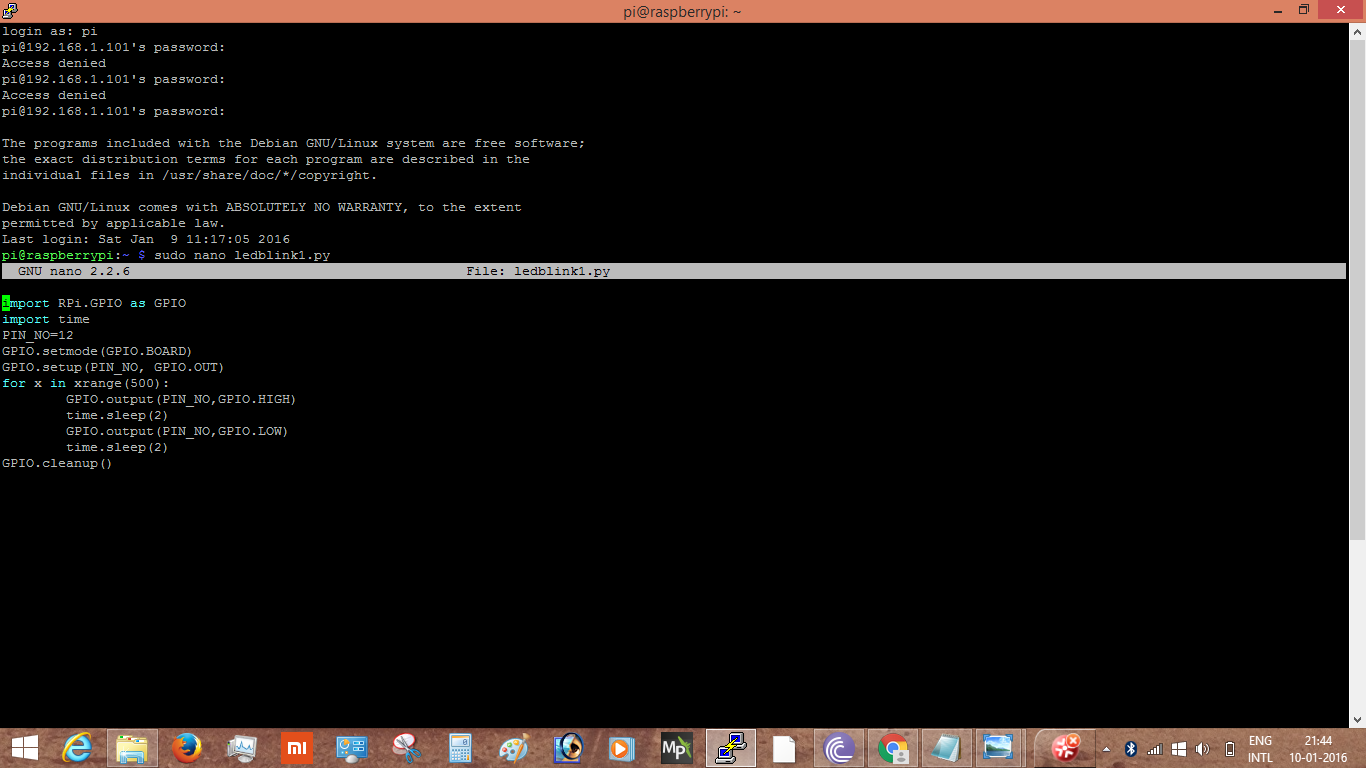
We are going to use Python language to code .
What is python is simple terms?
Python is a widely used general-purpose, high-level programming language.
Use?
Its design philosophy emphasizes code readability, and its syntax allows programmers to express concepts in fewer lines of code than would be possible in languages such as C++ or Java.
Now lets take a simple scenario where we have to build a system for the airport runway in which Led shoud blink every 2 Seconds:) Sounds interesting!
1. Open the nano editor with a new python script
sudo nano ledblink.py
2 . Understand the code and then copy and paste the code into your ledblink.py
****************CODE EXPLANATION******************************
import RPi.GPIO as GPIO # This imports a lib called RPI .GPIO which contains functions to access physical General purpose I/p or O/p pins of the raspberry pi
import time # This imports a lib called Time, contains functions to count/ delay
PIN_NO=12; # 12 Pin of raspberry pi as output
GPIO.setmode(GPIO.BOARD) # to use Raspberry Pi board pin numbers
GPIO.setup(PIN_NO, GPIO.OUT) # set up GPIO pins as output channel ( Led is Output)
for x in xrange(500): # Execute the follwing procedure for 500 times (LOOP)
GPIO.output(PIN_NO,GPIO.HIGH) # Making the Led to Glow -HIGH
time.sleep(2) # Delay of 2 seconds
GPIO.output(PIN_NO,GPIO.LOW ) #Making the Led to switch off -LOW
time.sleep(2) # Delay of 2 seconds
GPIO.cleanup() # RPi.GPIO provides a built-in function GPIO.cleanup() to clean up all the ports you’ve used.
******************************************END****************************
NOTE: GPIO.cleanup()
Be very clear what this does. It only affects any ports you have set in the current program. It resets any ports you have used in this program back to input mode. This prevents damage from, say, a situation where you have a port set HIGH as an output and you accidentally connect it to GND (LOW), which would short-circuit the port and possibly fry it. Inputs can handle either 0V (LOW) or 3.3V (HIGH), so it’s safer to leave ports as inputs.
After you have copied the code then press ctrl+O (for saving it) and then ctrl+x for Exit
Final Setup
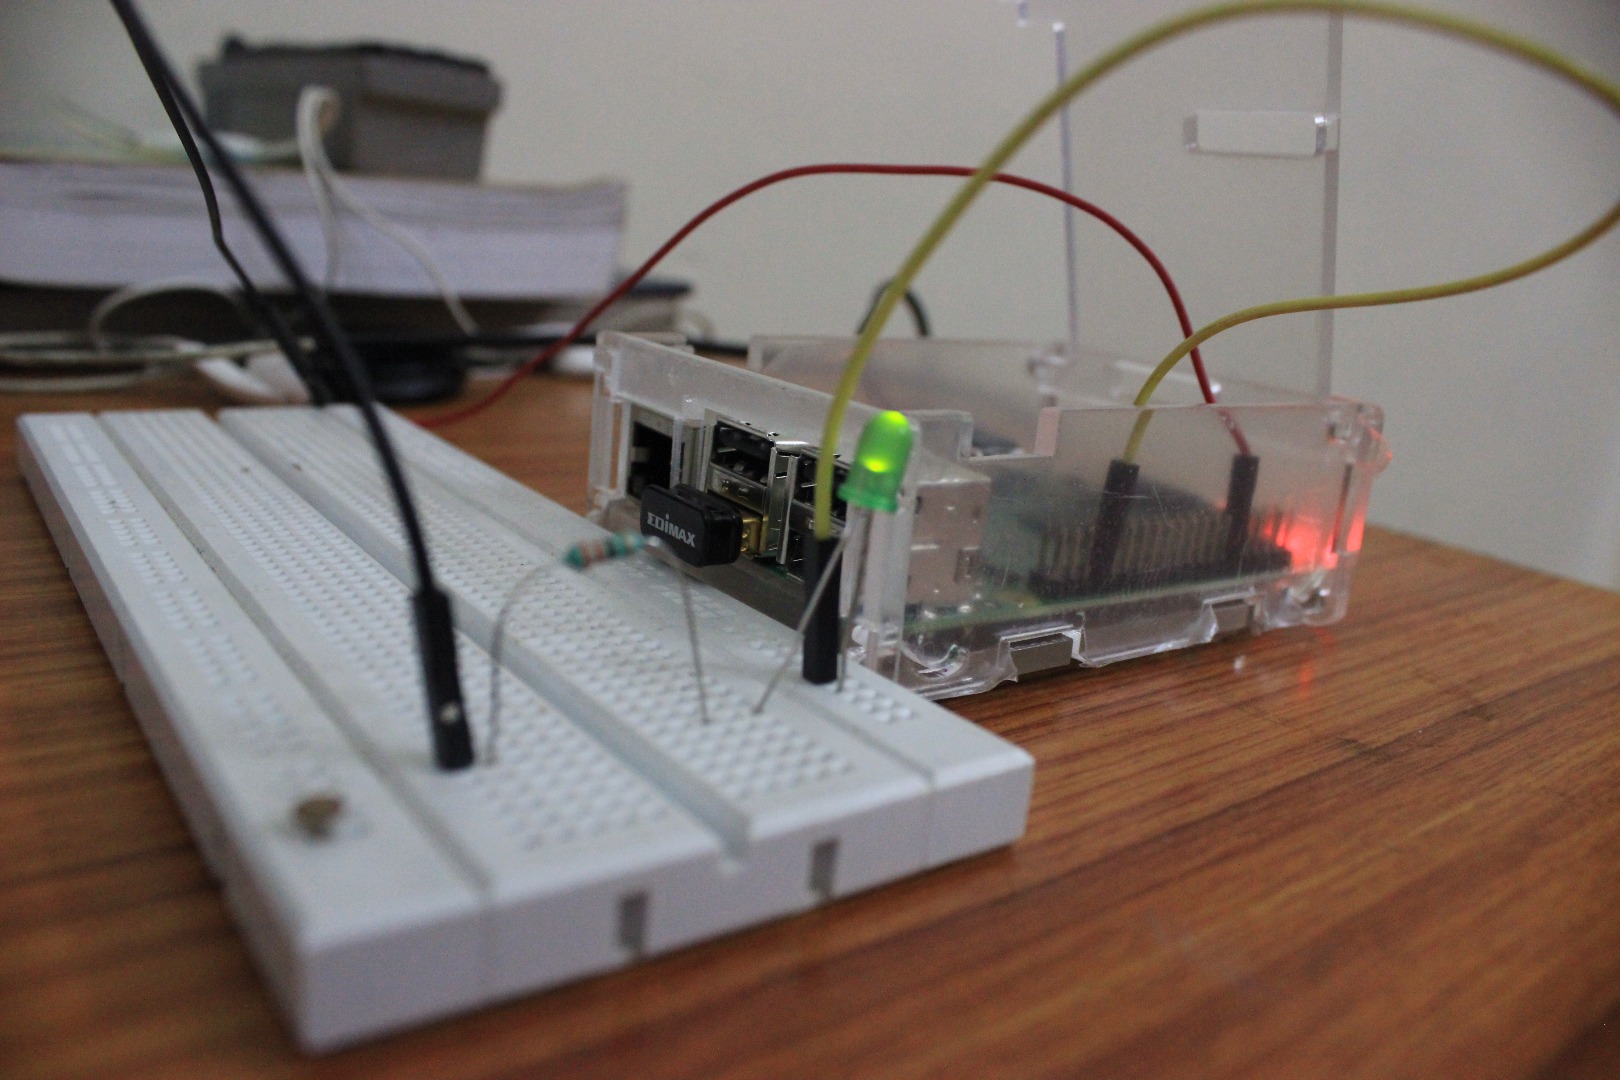
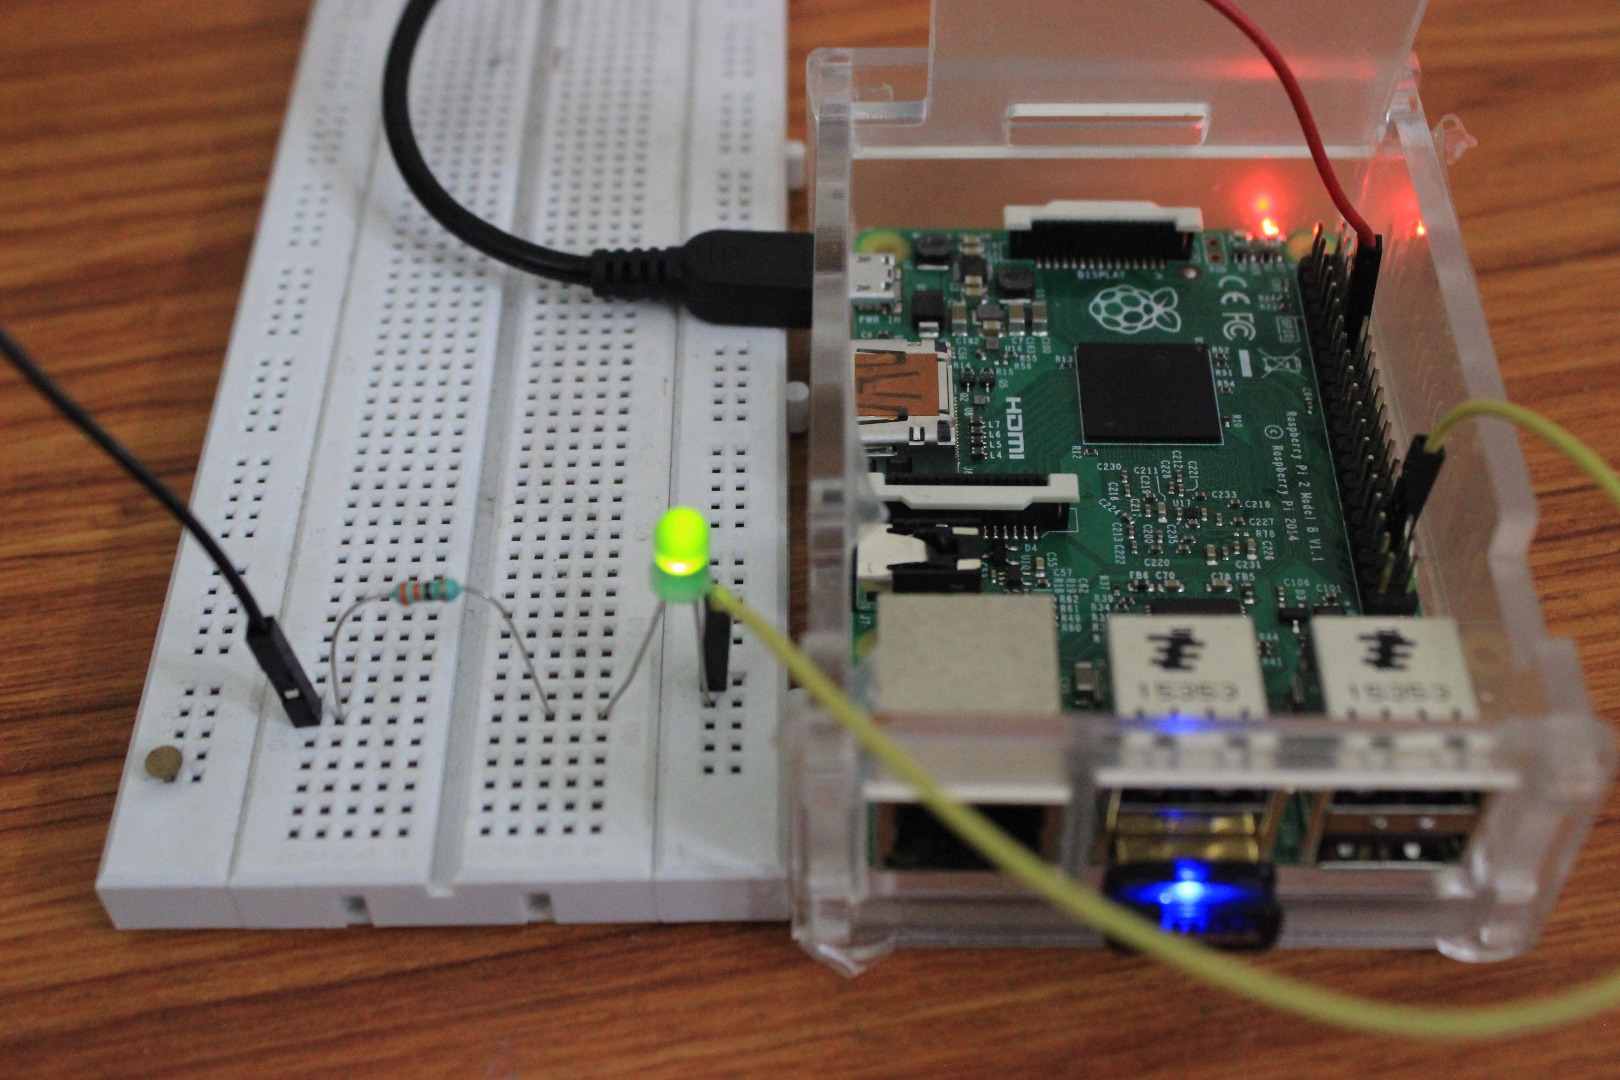
1. After you have saved the python script and exited ,now its time to make this file into an executable.
type in the following command
sudo chmod a+x ledblink.py
2. Now its time to run the command:)
type in the following
sudo python ledblink.py
Viola you should see your Led blinking once in every two seconds. Congratulations on your first project:)
If you have any questions feel free to post it :)
I would really appreciate it if you make it and give me feedback:)