How to Make Internet Switch
by Devki Nandan Dalveer in Circuits > Arduino
305 Views, 2 Favorites, 0 Comments
How to Make Internet Switch

Hey, hello 😊
I'm Devkinandan today I'm going to tell you about internet switch. In just simple way!
What is internet switch?
You already heard about the remote switch like your TV,AC etc that remote have their range . But if i say you can on your TV anywhere from world so 🤗 that's why I'm saying it as internet switch.
#Hardware (components)
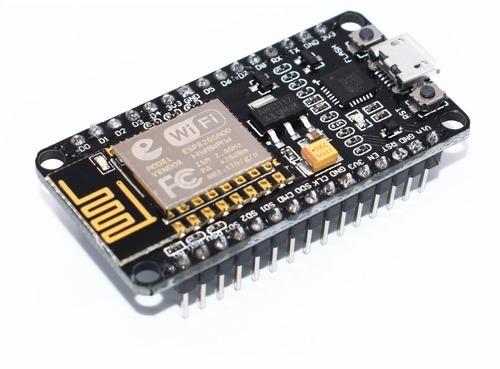
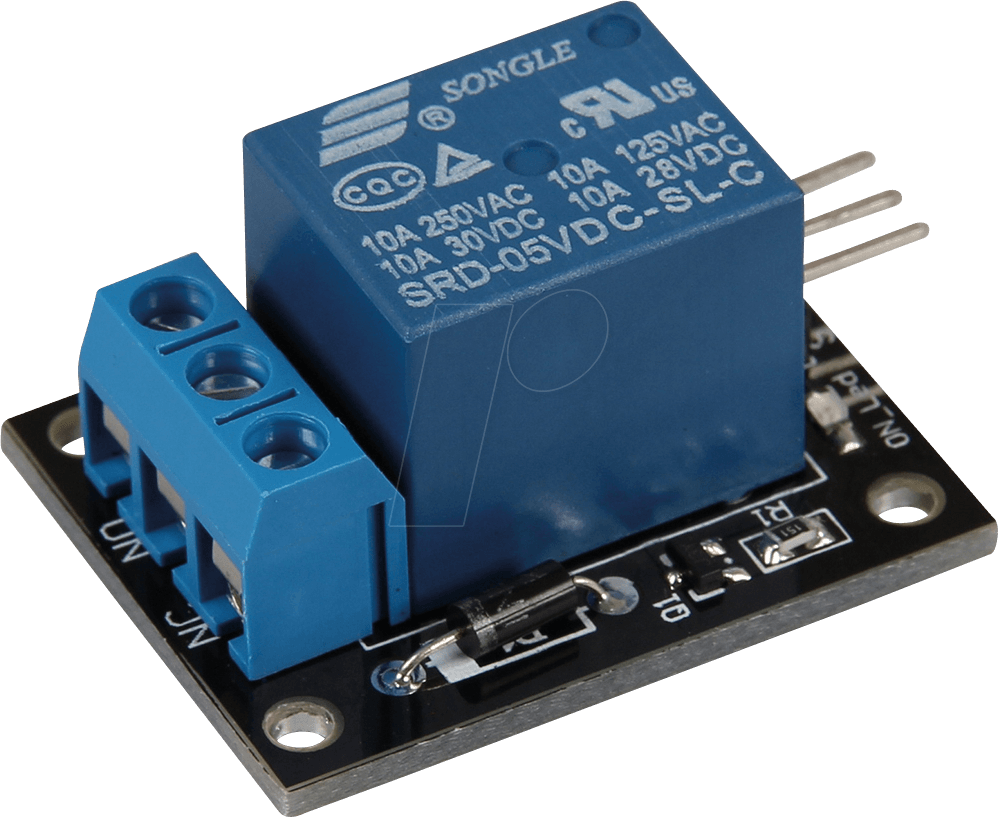


To make this project you need the following components!
Please visit for pic.
1) Nodemcu module.
2) relay module.
3)bulb.
4) wire.
5)blynk app.
😊Remember it's just a demonstration to make switch you can make any thing according to your need.👍
Please visit for pic.
1) Nodemcu module.
2) relay module.
3)bulb.
4) wire.
5)blynk app.
😊Remember it's just a demonstration to make switch you can make any thing according to your need.👍
# Working
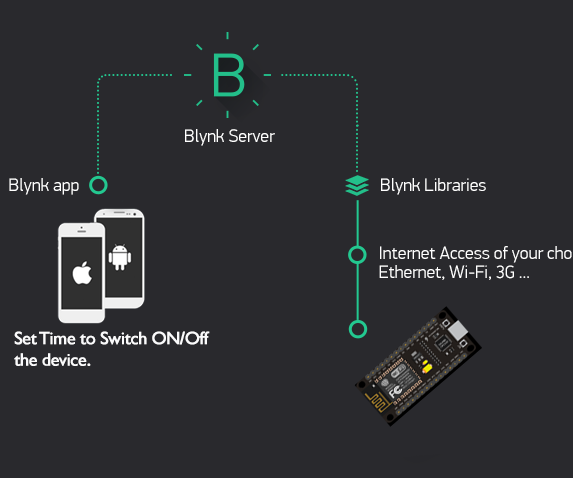
It's working depends upone three stages.
1) Blynk app = here you make button as per your need .when you switch button it's send signal to hardware through Blynk server then hardware performa task as per the signals .
2) Blynk server = it just a interphase between hardware and software.( Visit image also)
3) Hardware = it takes signals from Blynk app and perform their task as per the signals .for example suppose you have to switch on the bulb when you switch on the button from Blynk aap it will send high value (1) signals and when you switch off the button it will send low (0)value.
# Blynk App Setup
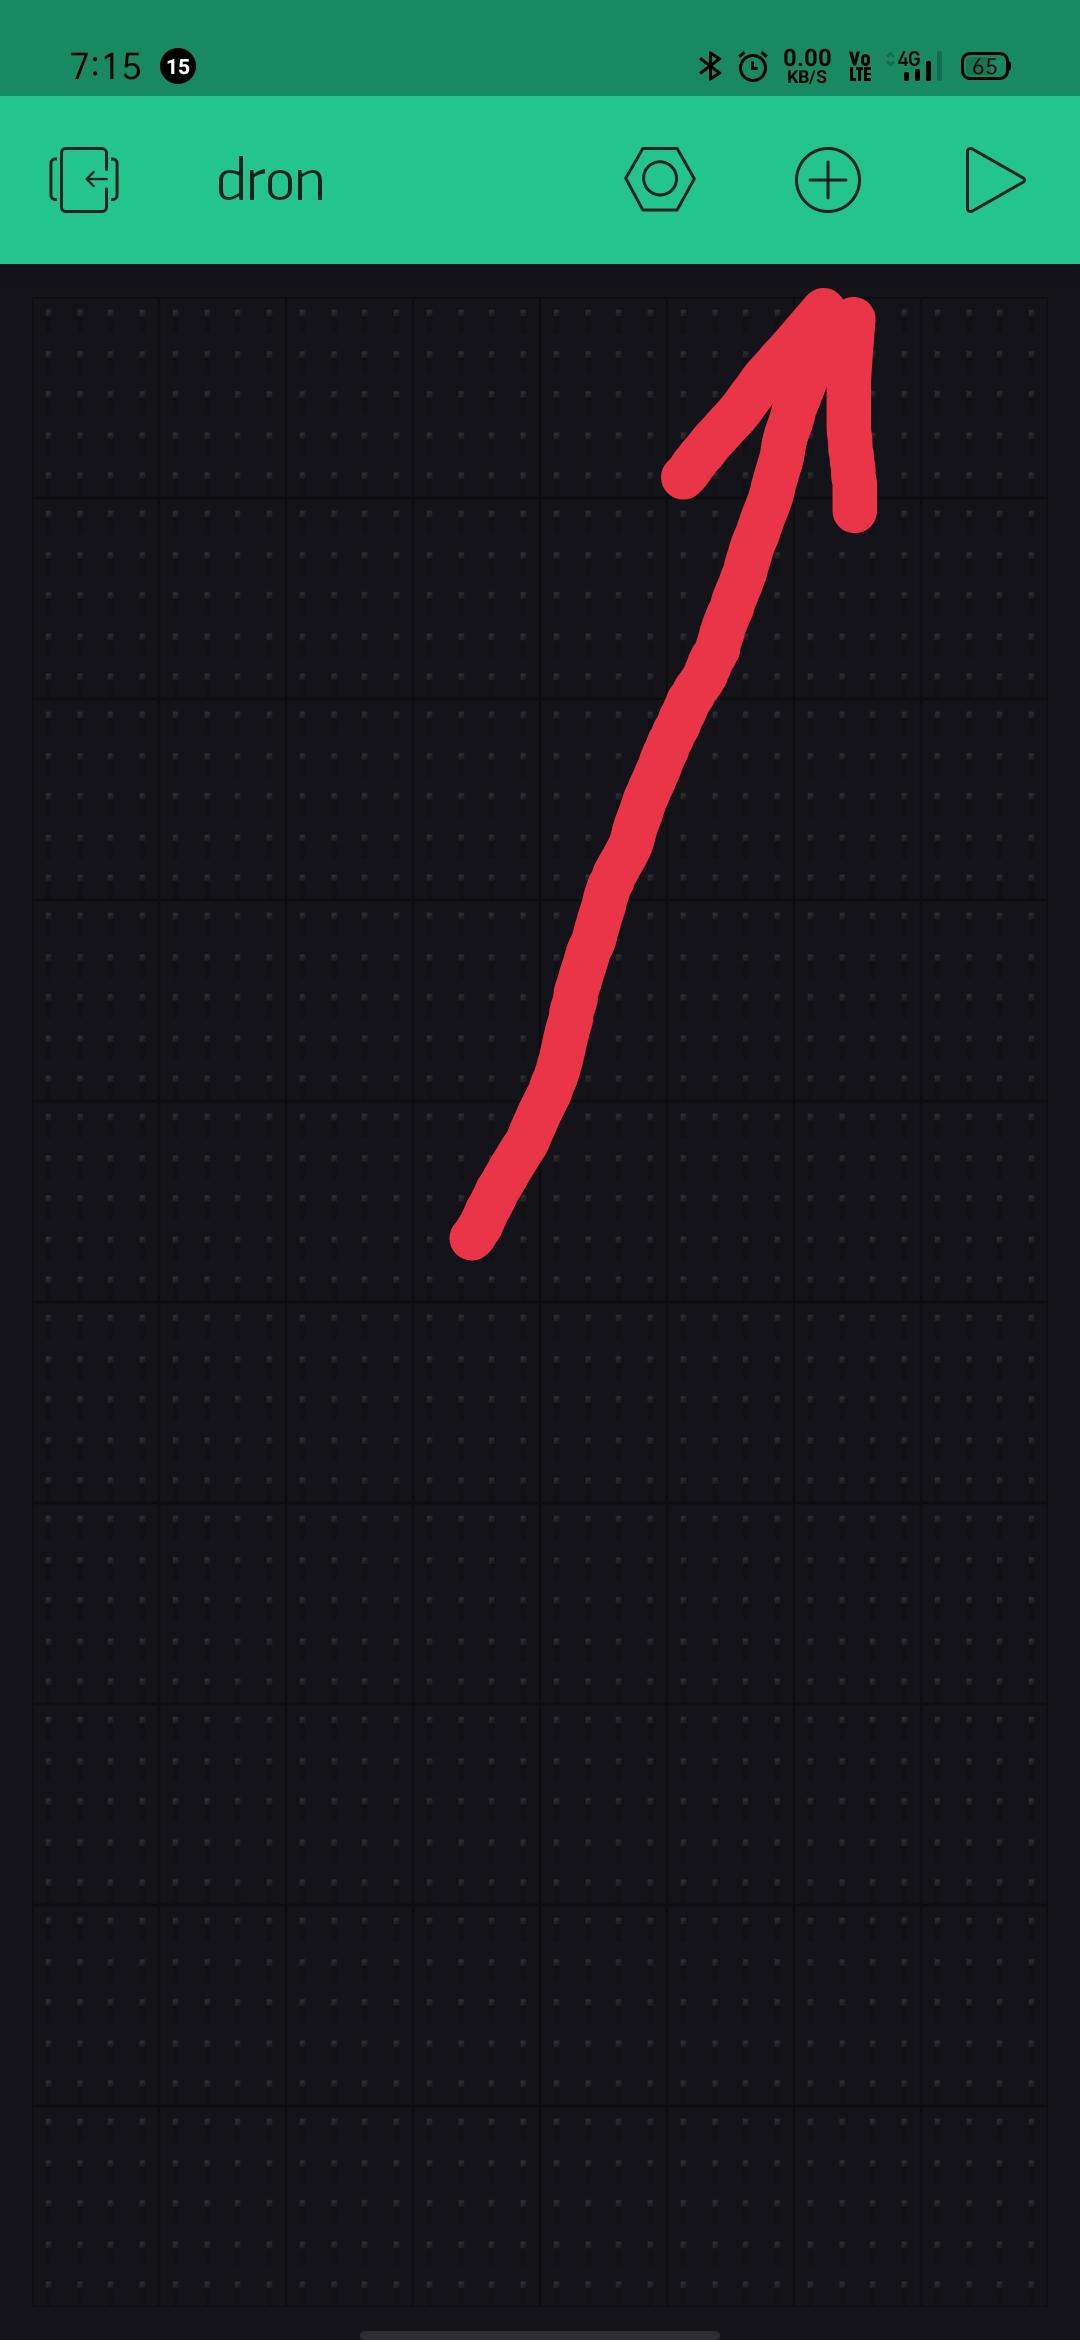
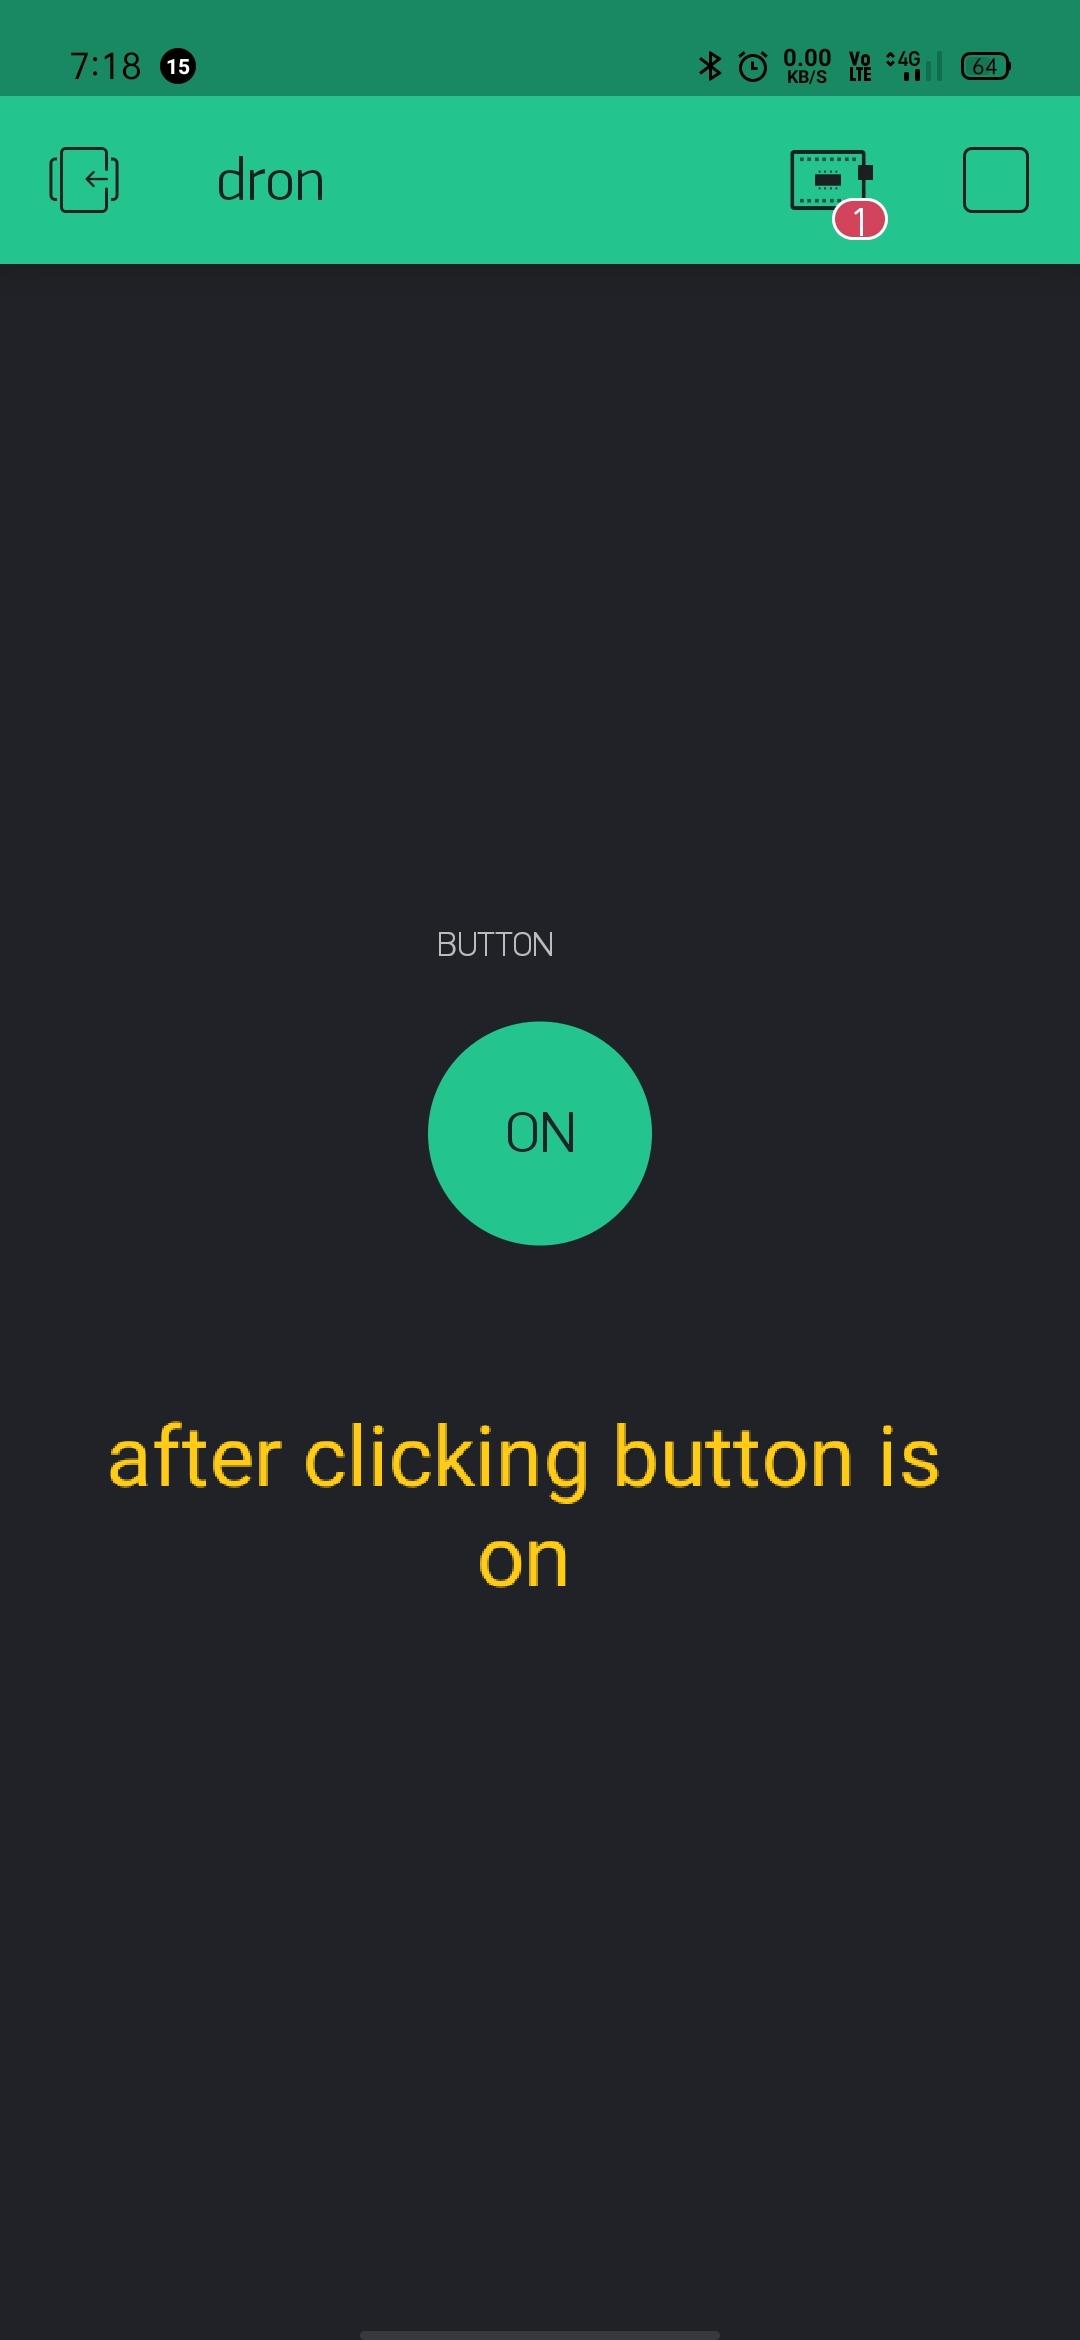
Let's go ahead ✌️
1) download the Blynk app from Google Play Store.
2) login with your email.
3) click on new project
4) select your board type.( I'm using nodemcu)
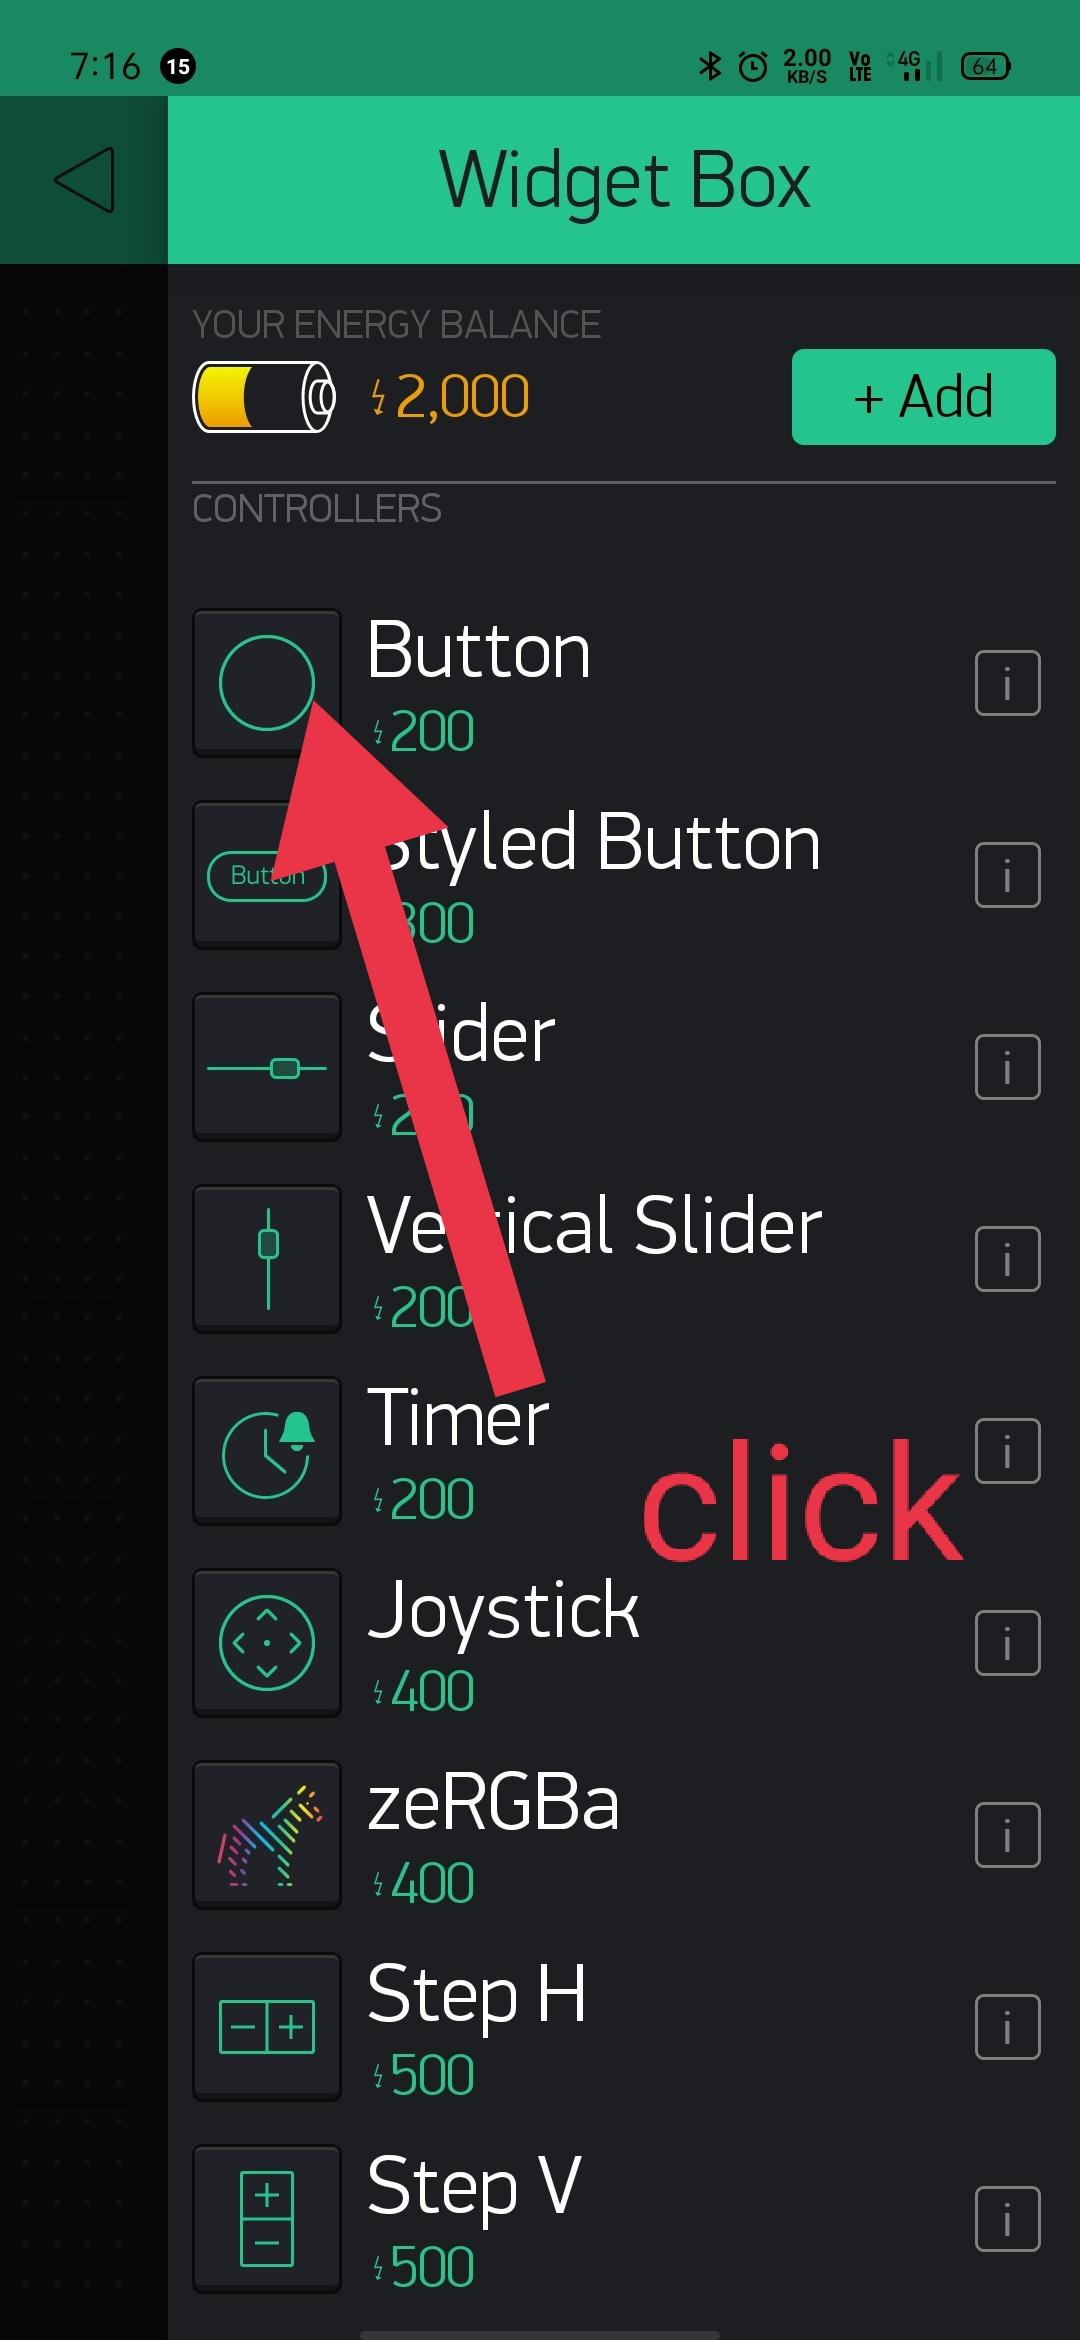
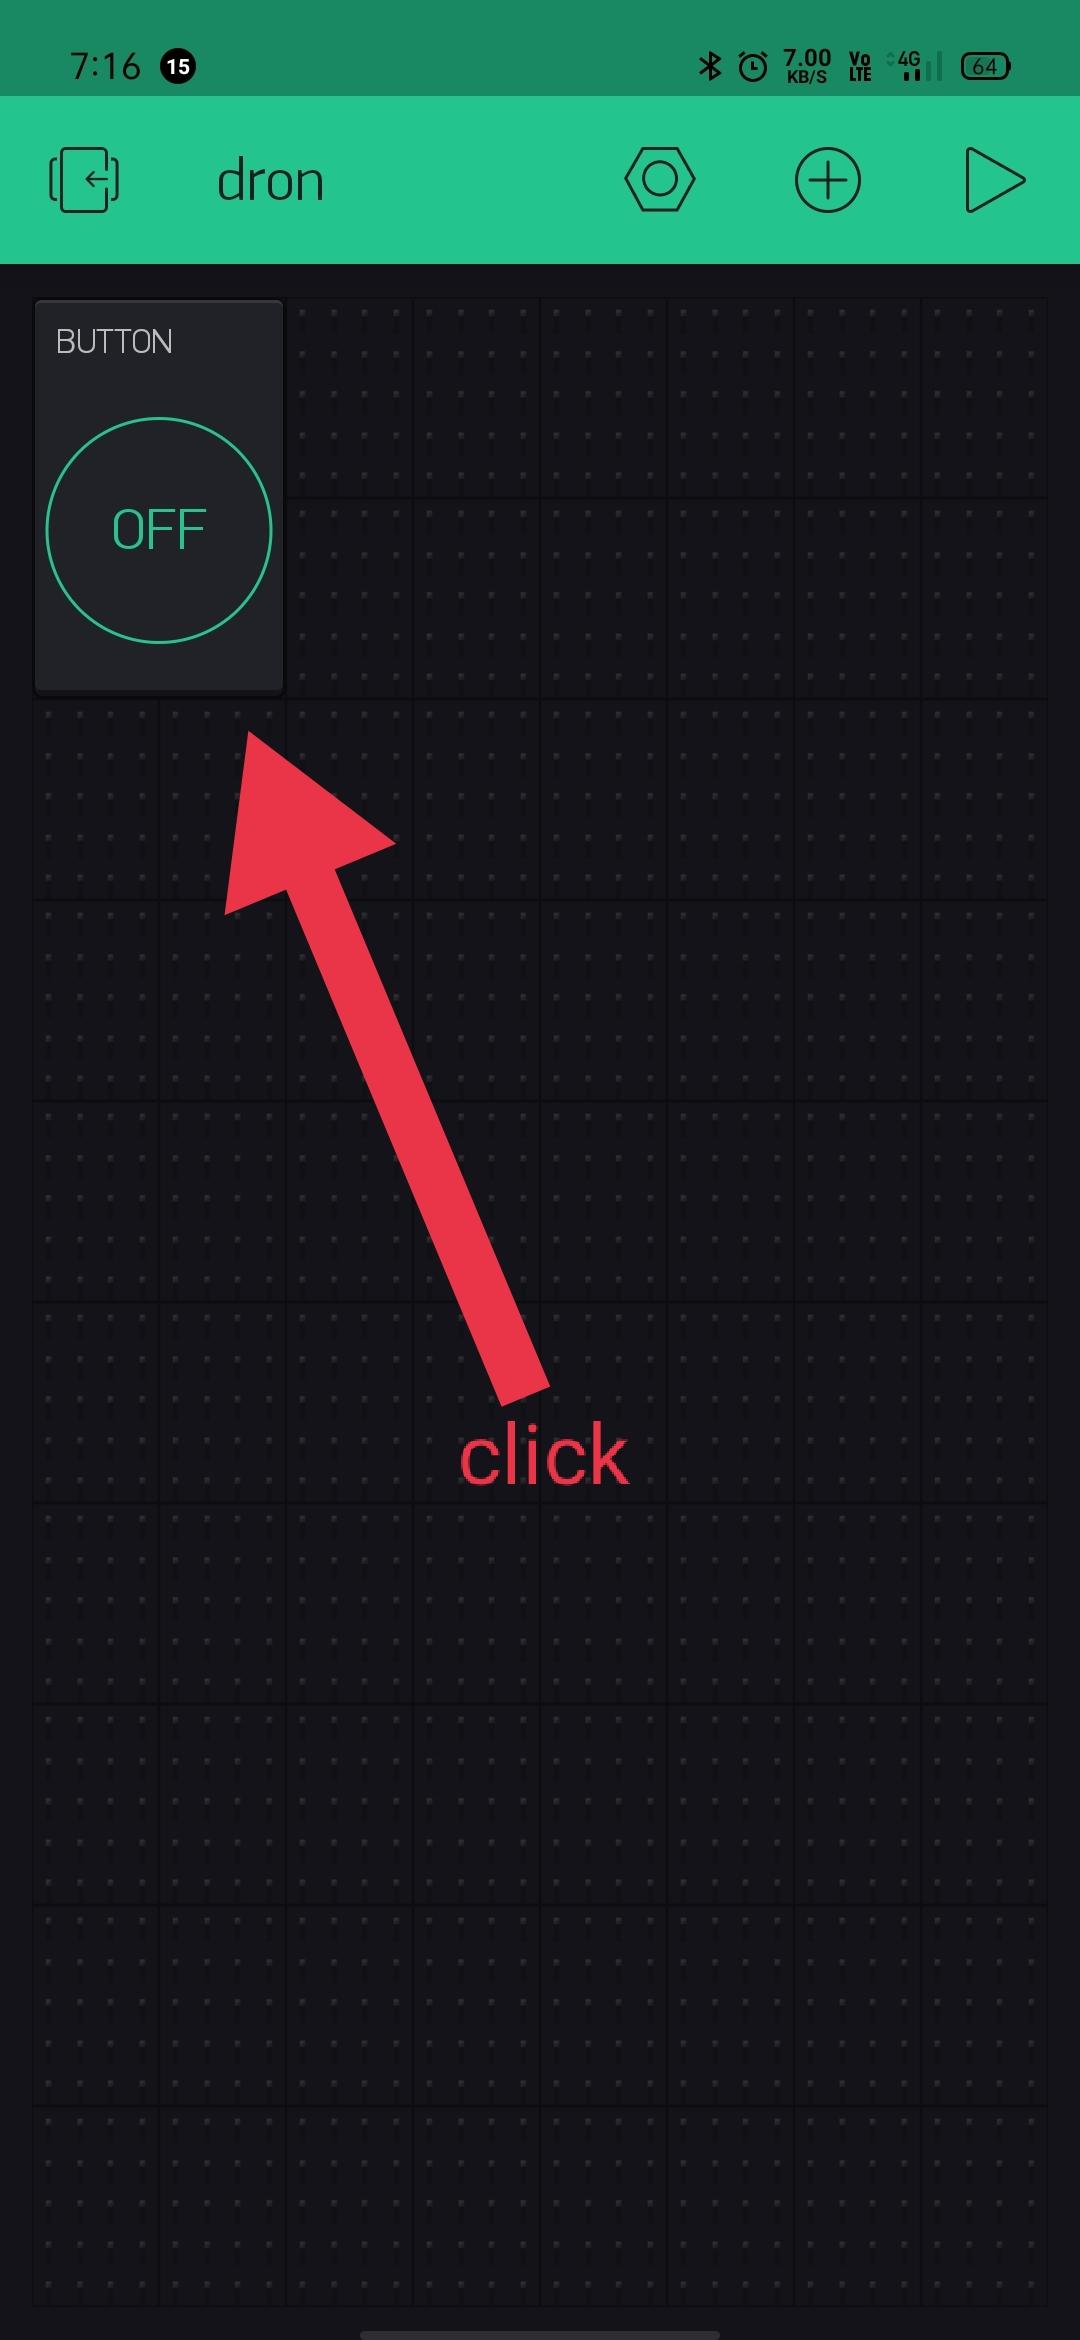
5) click on + button.
6) click on button .
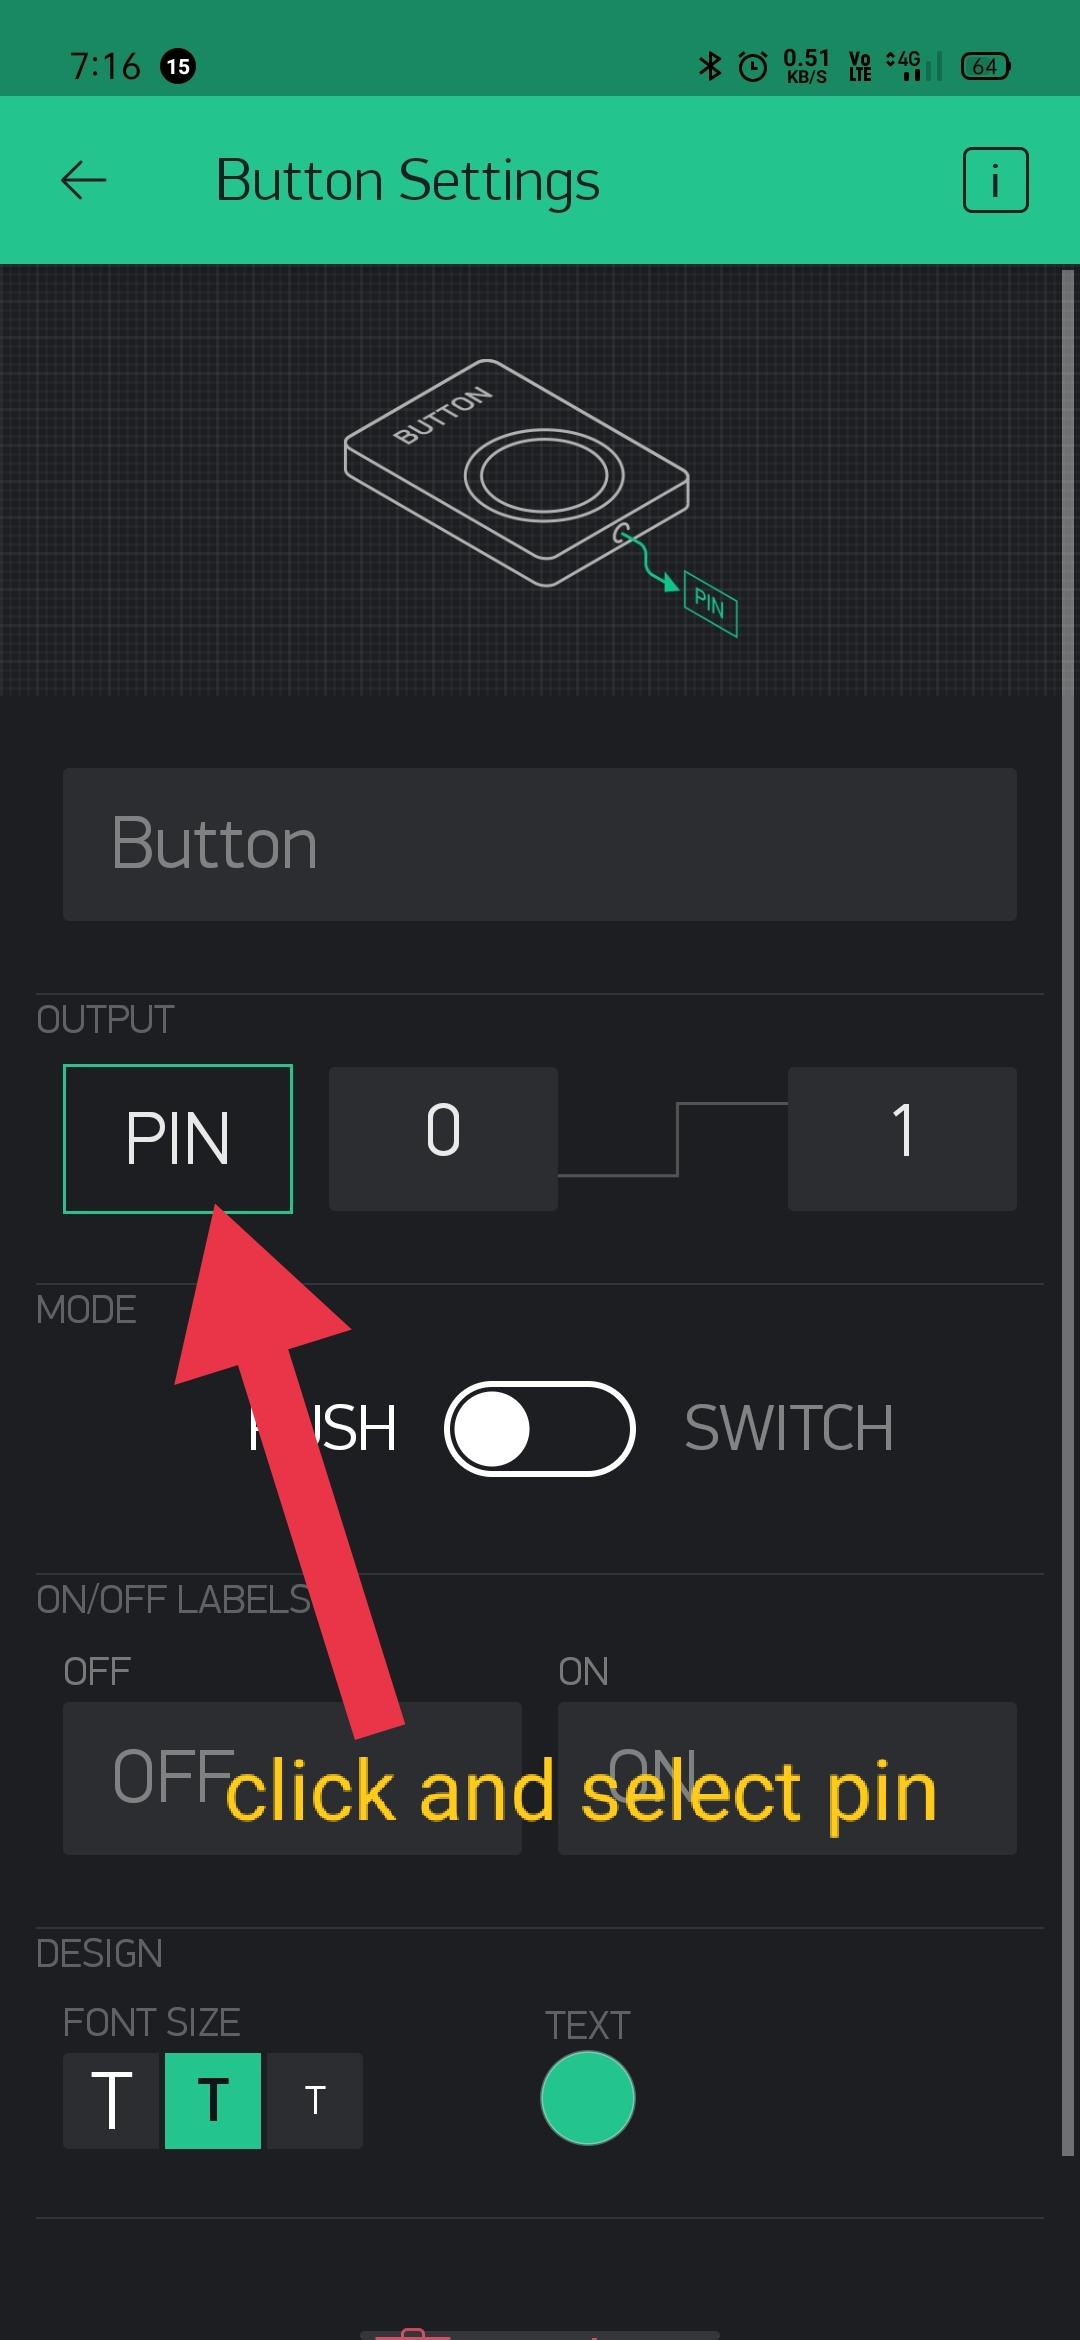
7) select pin.
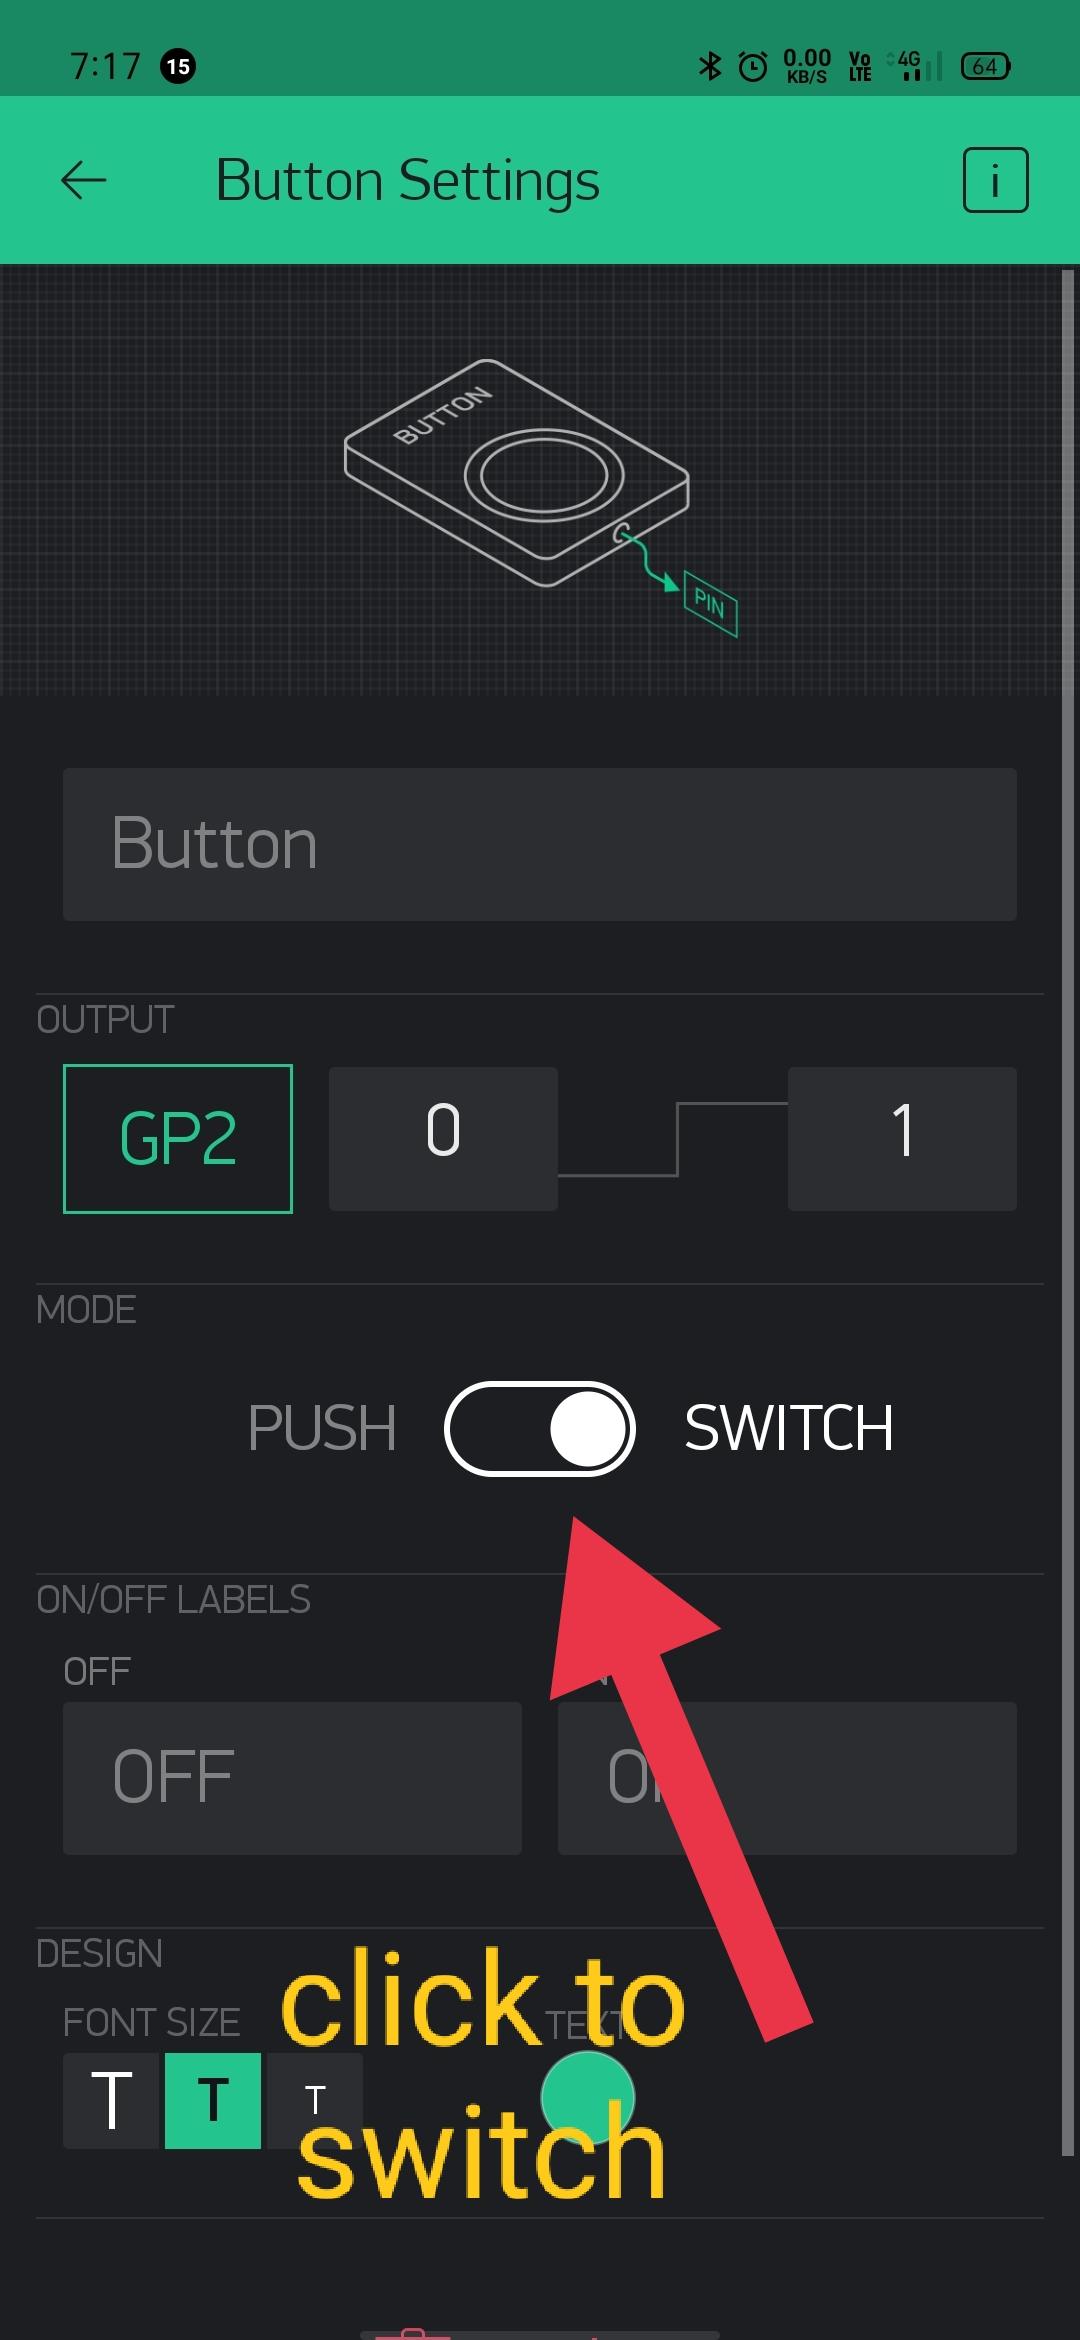
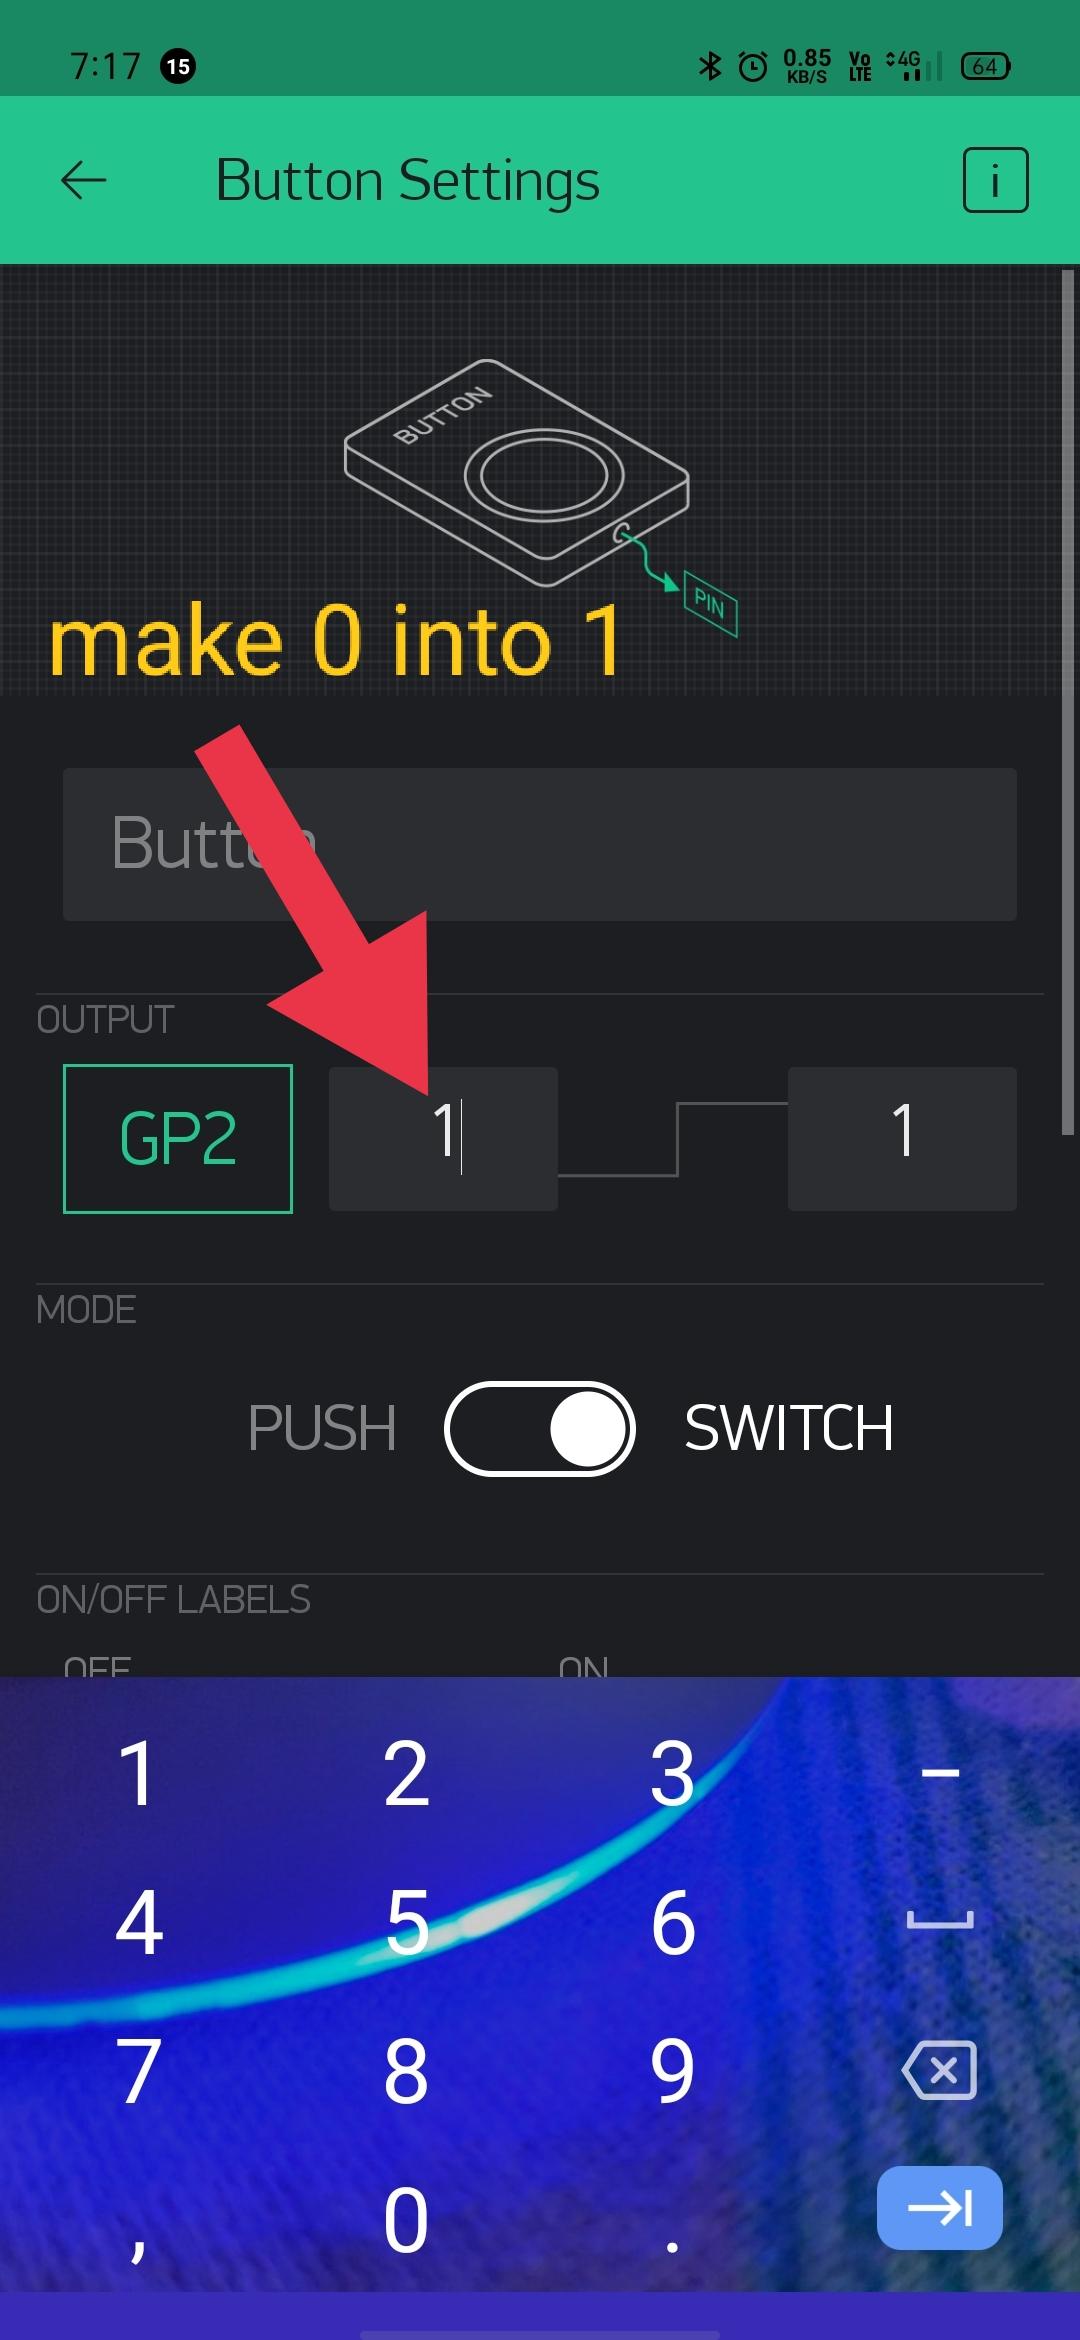
8)slide from push to switch.
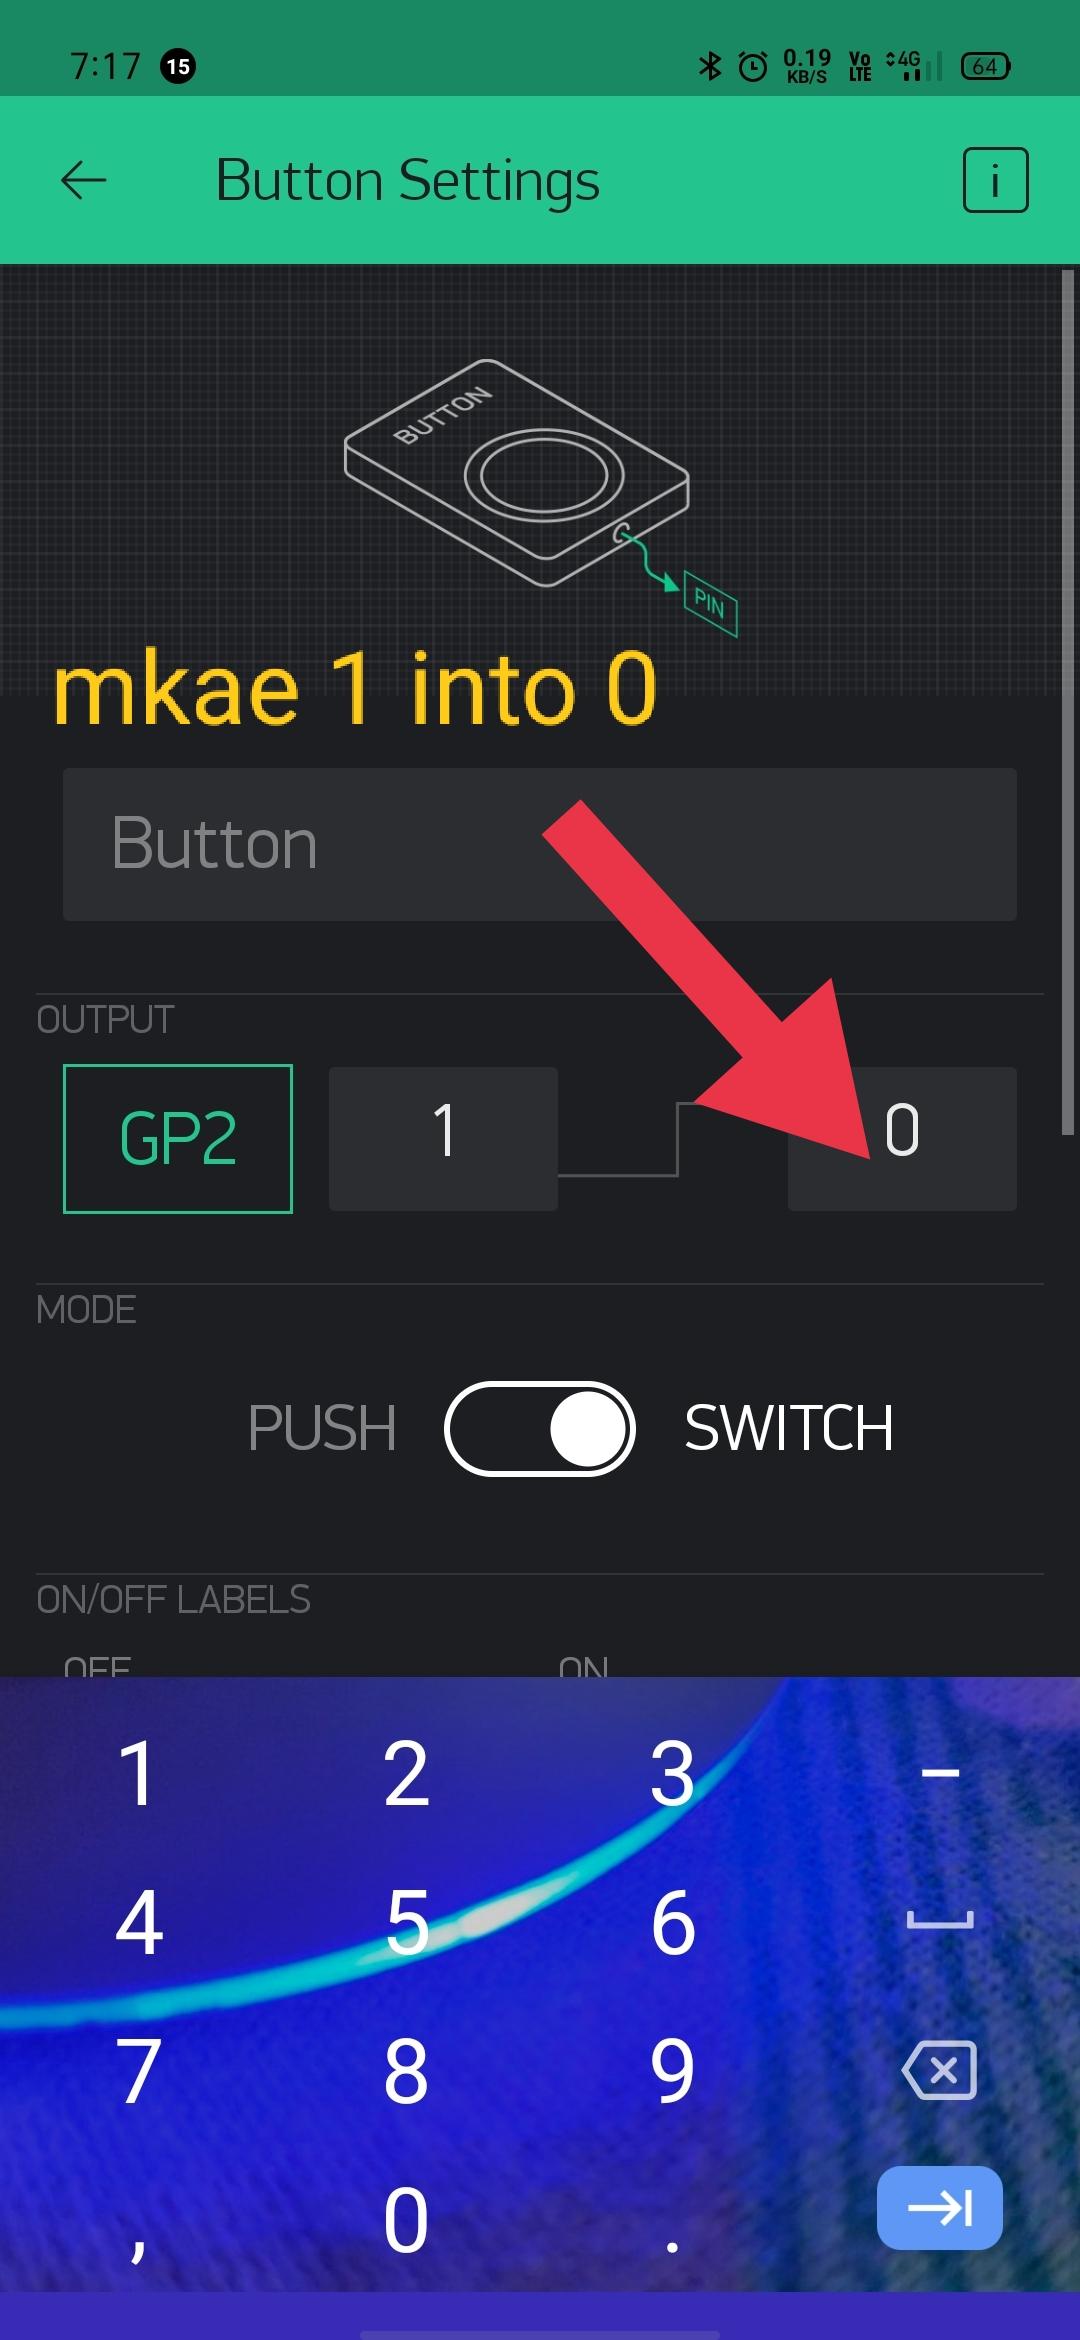
9) make 0 into 1.and 1into 0
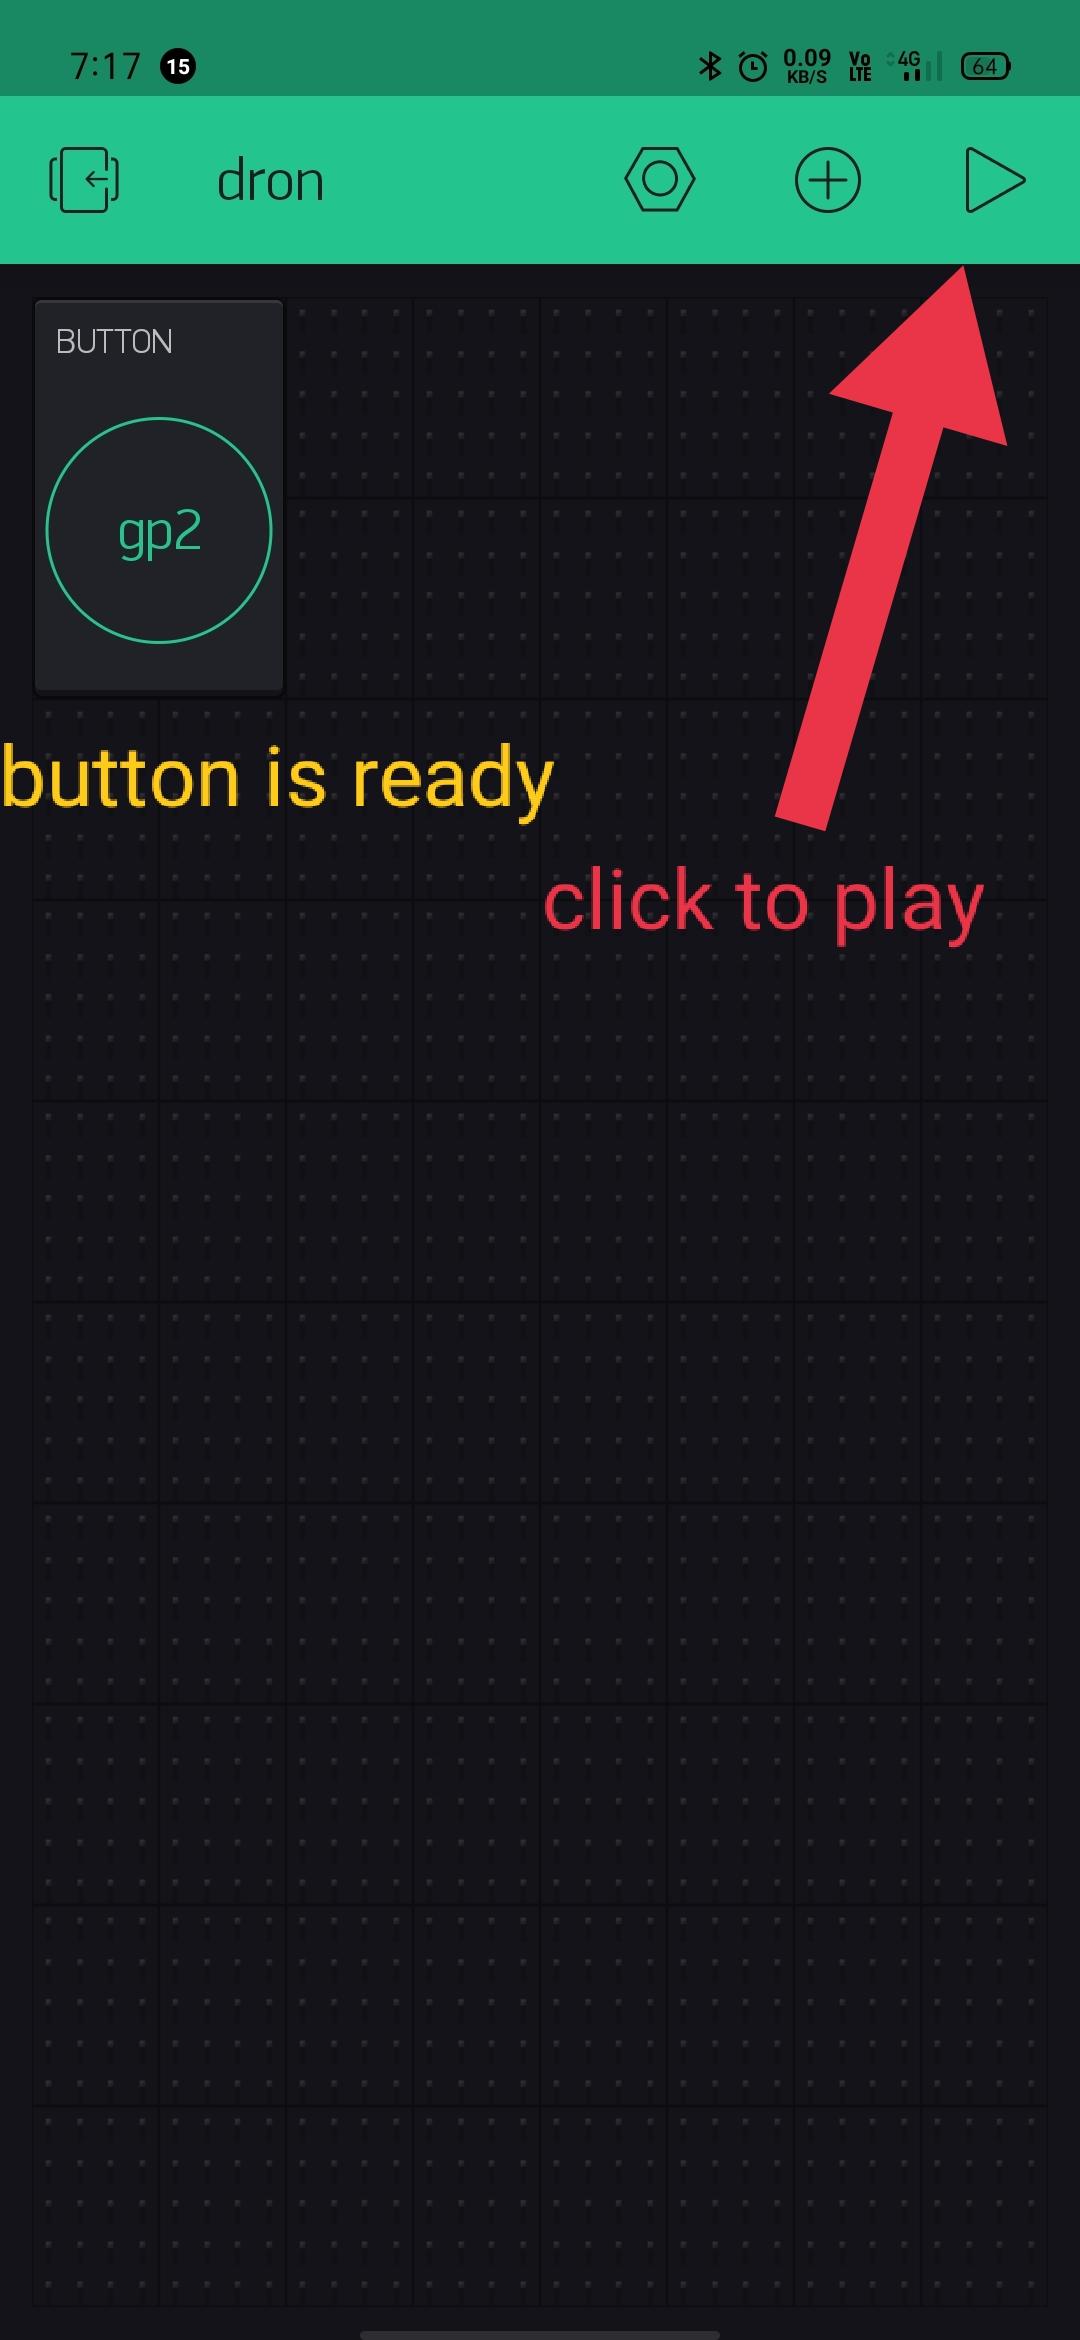
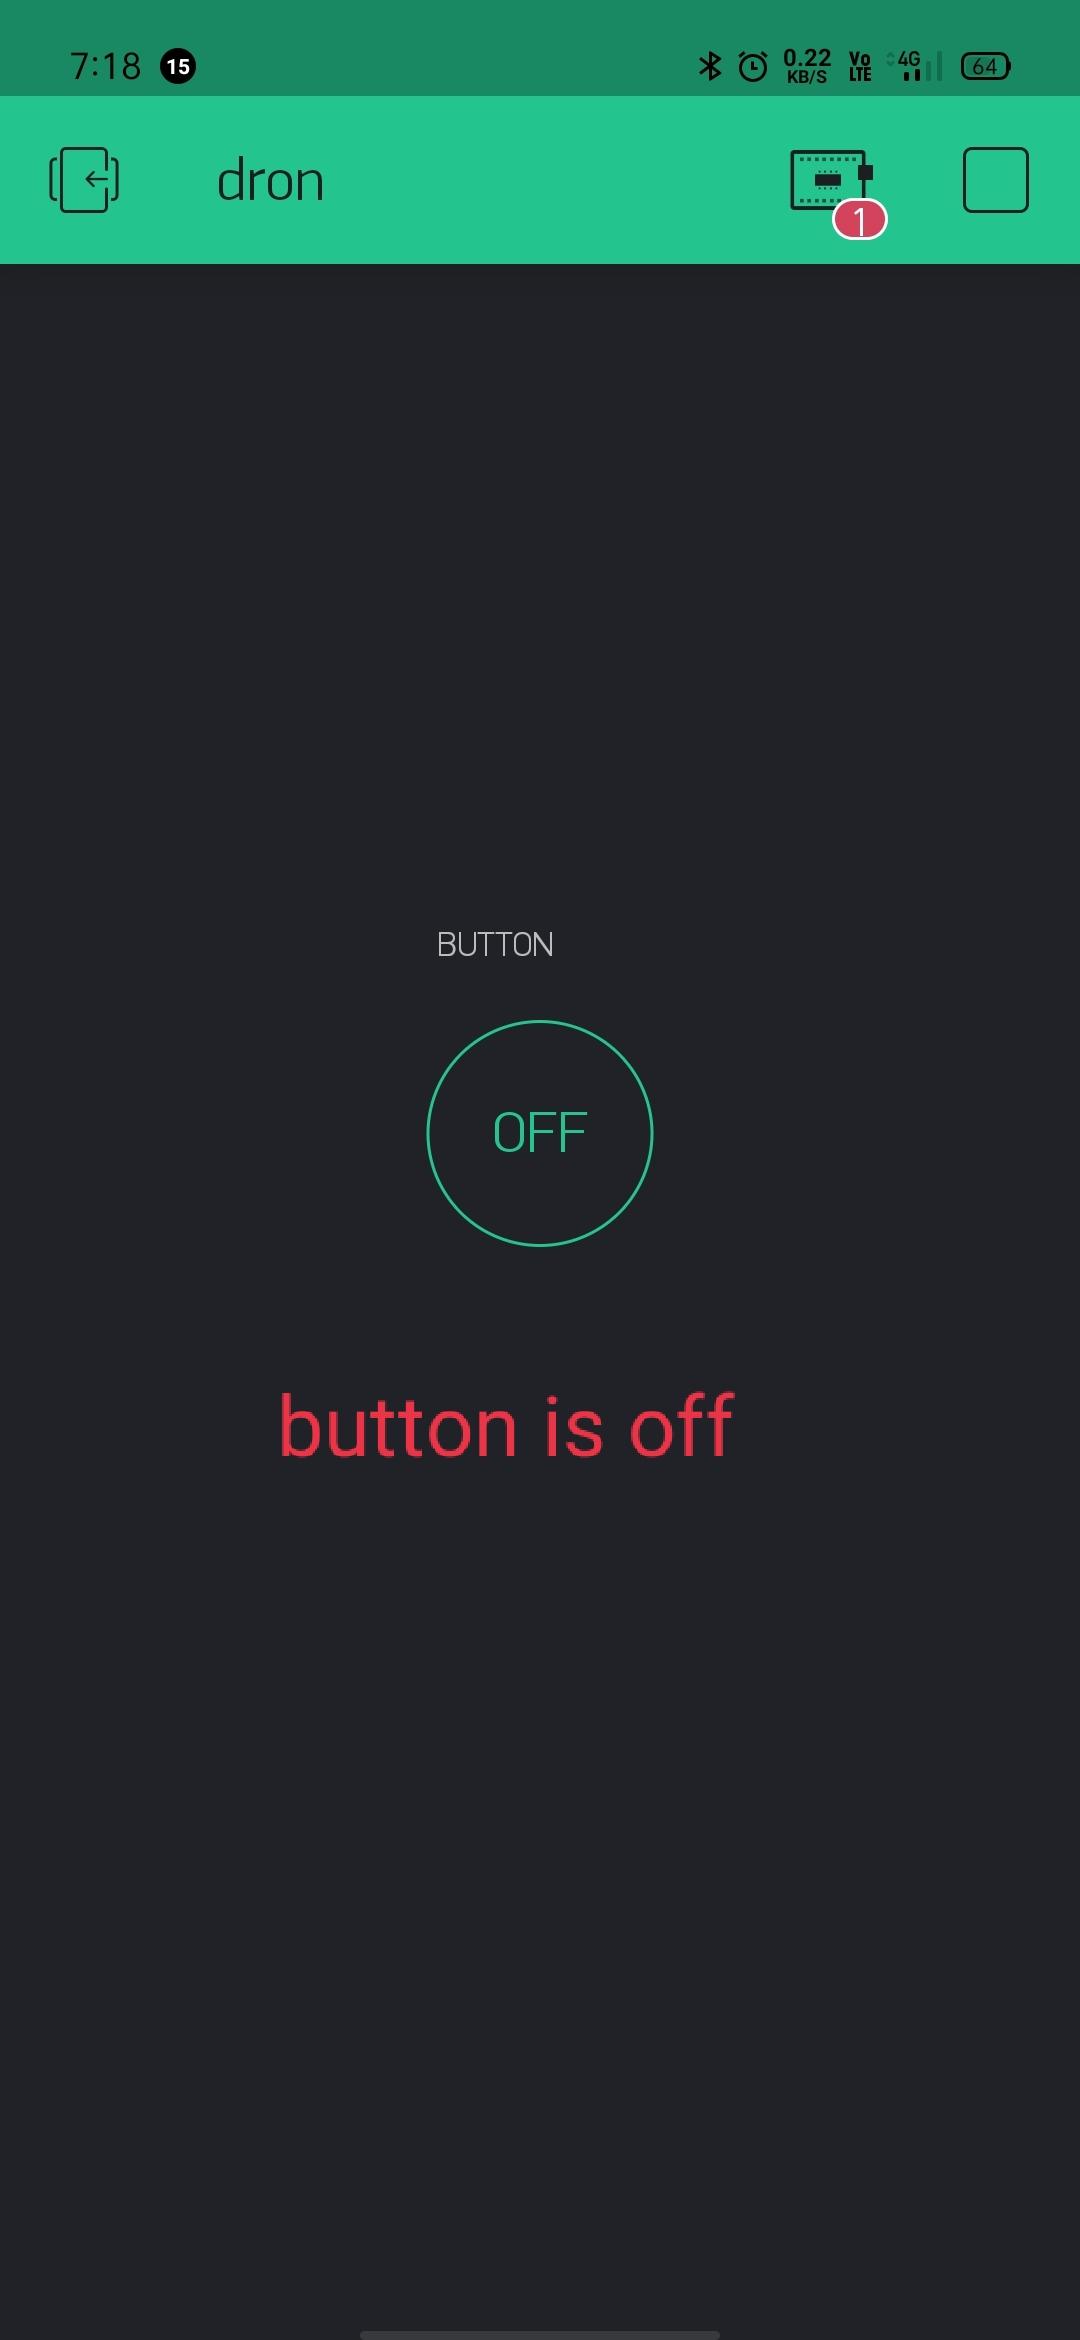
10) play.
1) download the Blynk app from Google Play Store.
2) login with your email.
3) click on new project
4) select your board type.( I'm using nodemcu)
5) click on + button.
6) click on button .
7) select pin.
8)slide from push to switch.
9) make 0 into 1.and 1into 0
10) play.
#Circuit Diagram.
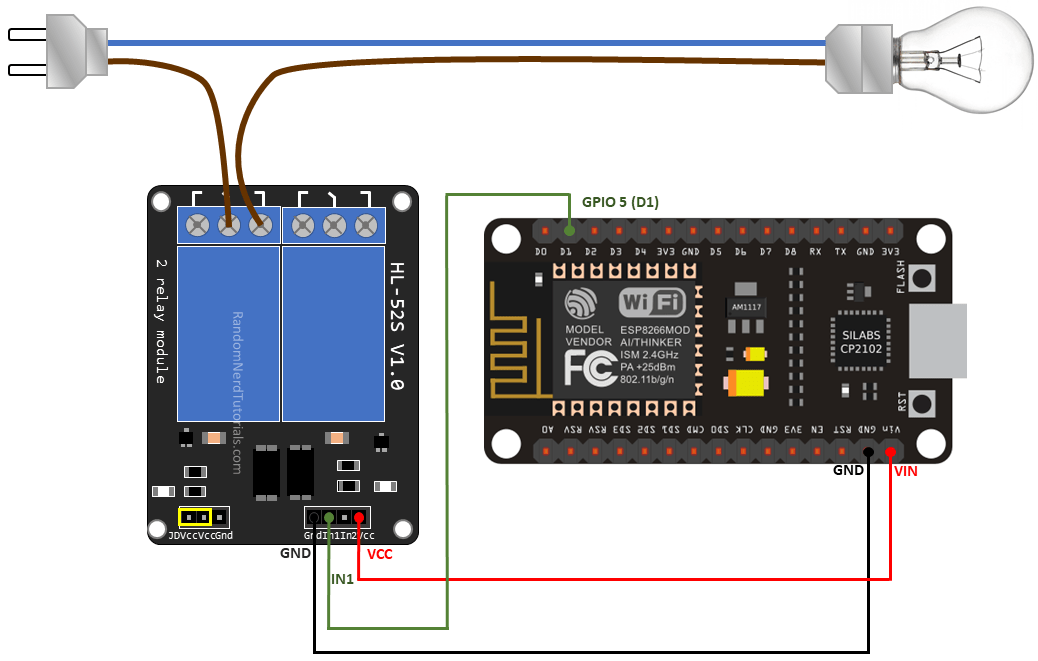
This circuit diagram is made with the help of simulator.
I always use simulator before working in real.
What is simulator?
Simulators are the software which provides virtual world to perform task like circuit designing ,pcb designing.
When we designs circuit in real world what happens due to wrong connection we can lose that hardware so that's why we use simulators.
# Code ( Arduino Ied)
#define BLYNK_PRINT Serial
#include //including library for ESP8266(NodeMCU).
#define //include blynk app library .( downlode it by link https://github.com/blynkk/blynk-library/releases/latest
Char auth[]=" "; //enter your authentication that you will get by Blynk app in your Gmail.
// or you should get directtly by Blynk app go to setting(nut icon).
char ssid[]=" "; //enter your wifi name(NodeMCU wifi name).
char pass[]=" "; //enter here your password.
void setup()
{
Serial.begin(9600);
pinMode(D1,OUTPUT);
Blynk.begin(auth ,ssid,pass); // here we can also specifies server.
//Blynk.begin(auth,ssid,pass,"blynk-cloud.com",8442);
//Blynk.begin(auth,ssid,pass,IPAddress(192,168,1,100),8442);
}
void loop()
{
Blynk.run();
}
# How to Cade Nodemcu
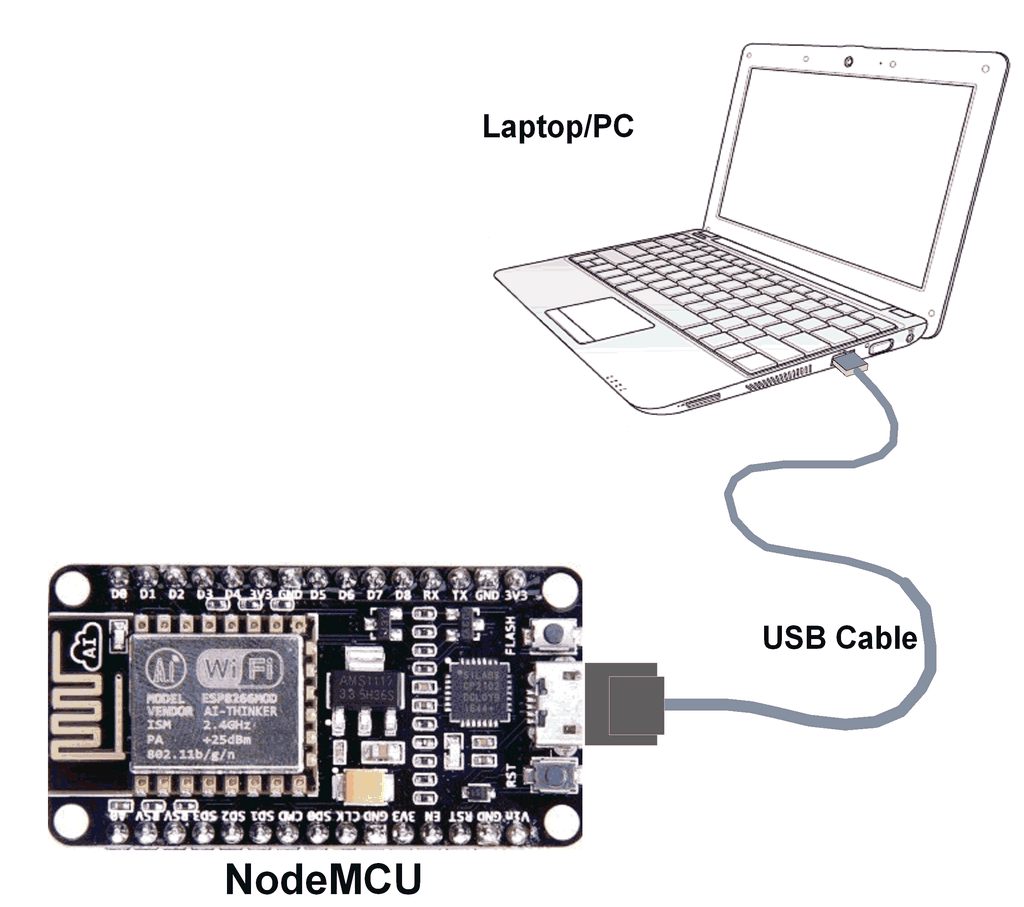
To code Nodemcu.
1) connect nodemcu with laptop.
2) copy the give code.
3) paste copied code in to Arduino ied.
4) then upload.
1) connect nodemcu with laptop.
2) copy the give code.
3) paste copied code in to Arduino ied.
4) then upload.