How to Make Instructables Robot
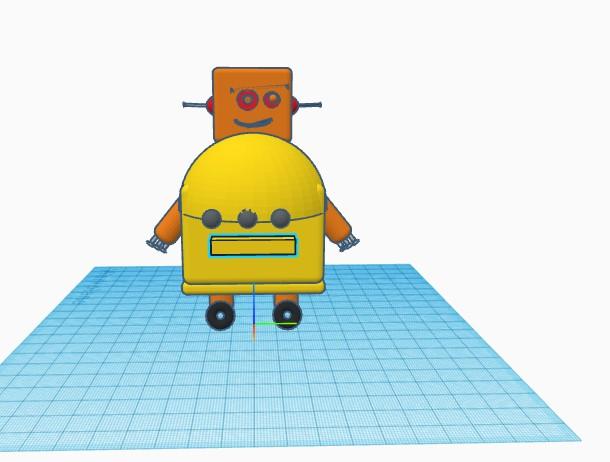
Hi readers, happy to see you here! In this instructables I will show you how to make instructables robot
It is a very proud project for me as iam building something for my favorite community.
This project makes use of Tinkercad codeblocks which I find very easy to use.
This project took quiet a while for me as I had to work on individual parts and get them working together.
Neverthless it was all worth it at the end as I was finally able to make this robot move.
Why you should make instructables robot?
Each individual part of this robot has different shape and size.
Trying to replicate this needs a good observing skill.
It enables a thinking ability which leads to improvments in the thinking function that ultimately effects positively in some areas of life
What does this Codeblock do?
This codeblock creates instructable robot from tip to toe and finally moves the entire robot away from screen.
Supplies
· Tinkercad
· Internet
· Some time of yours
These are the only supplies that is needed to build this project.
Making Head and Ears
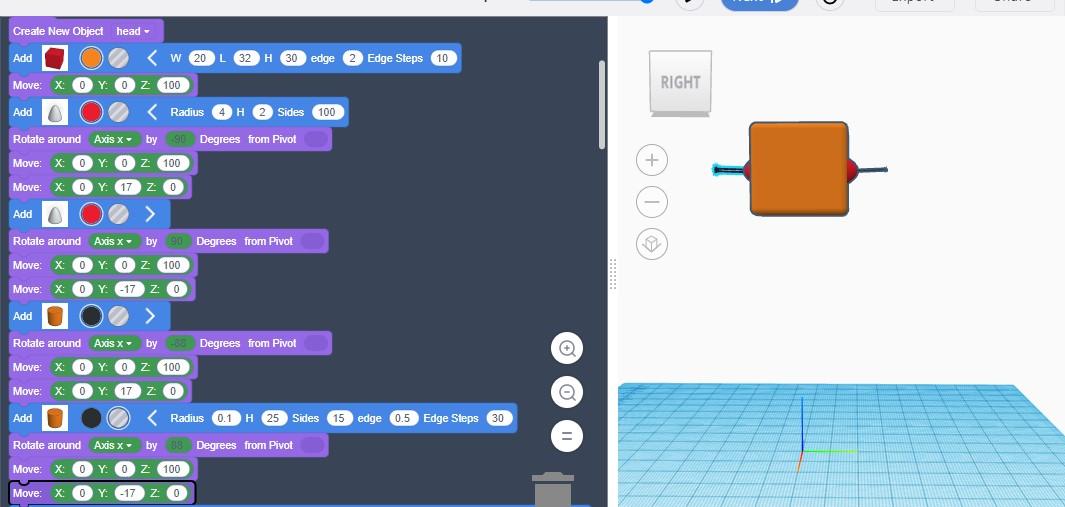
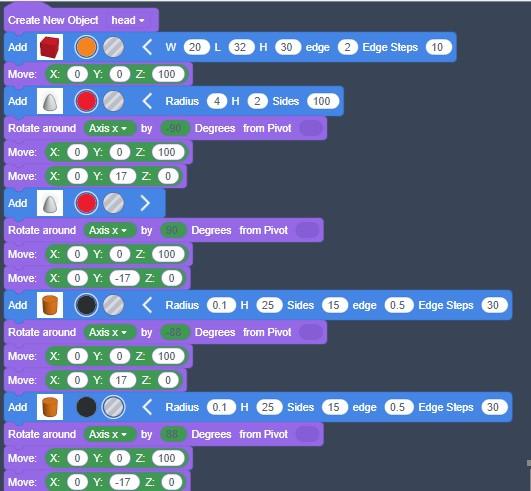
You can refer the code blocks that are shown in these steps
You can try to build this robot by following these code blocks.
To come up with this it took me lots of trial and errors as I had to first calculate the dimensions of the current instructables robot.
From the codeblocks used in head you can see that I made use of square that is hollow
For smoother sides I used edge dimension as 2
This square was later moved in the Z axis by distance of 100mm
Later I added paraboloid It was later rotated around x-axis by minus 90 degrees from the pivot like the square head block I moved this on the direction of Z Axis by a distance of 100 millimetre this complete one ear side of the robot.
For the other side I repeated same steps but the paraboloid was rotated around x axis by 9° and moved with 100 mm distance on Z axis
Now for the ear stick I used two cylinders both of radius 0.1 mm with 25 sides
first ear stick was rotate in x-axis by minus 88 degrees from pivot and was later moved on the direction of Z Axis by 100 mm and y Axis 17 mm
To make the second ear stick I rotated around x axis by 88 degrees and moveu up on the direction of Z Axis by 100 mm and Y Axis by minus 17 mm
This completes Head and ears part
Making the Face
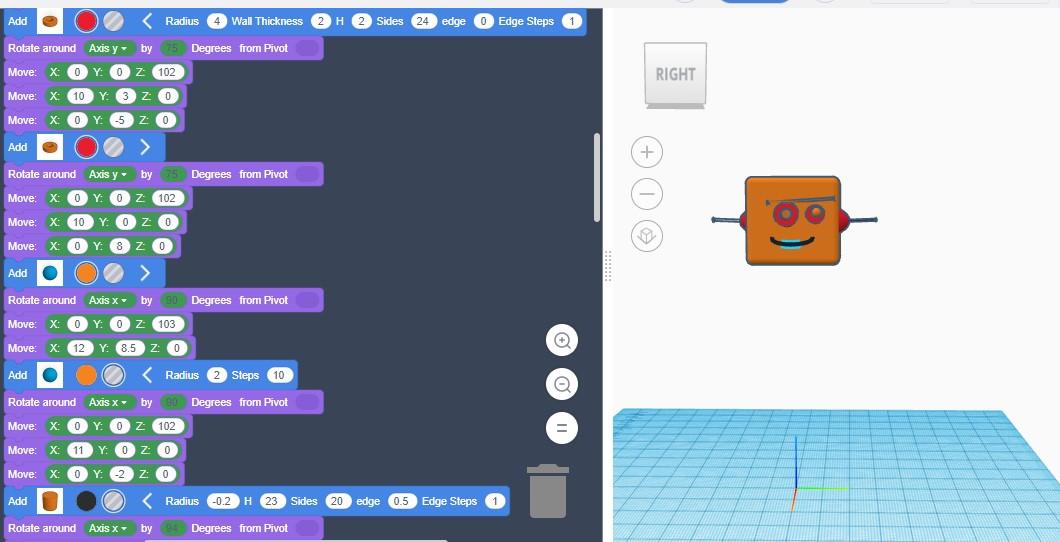
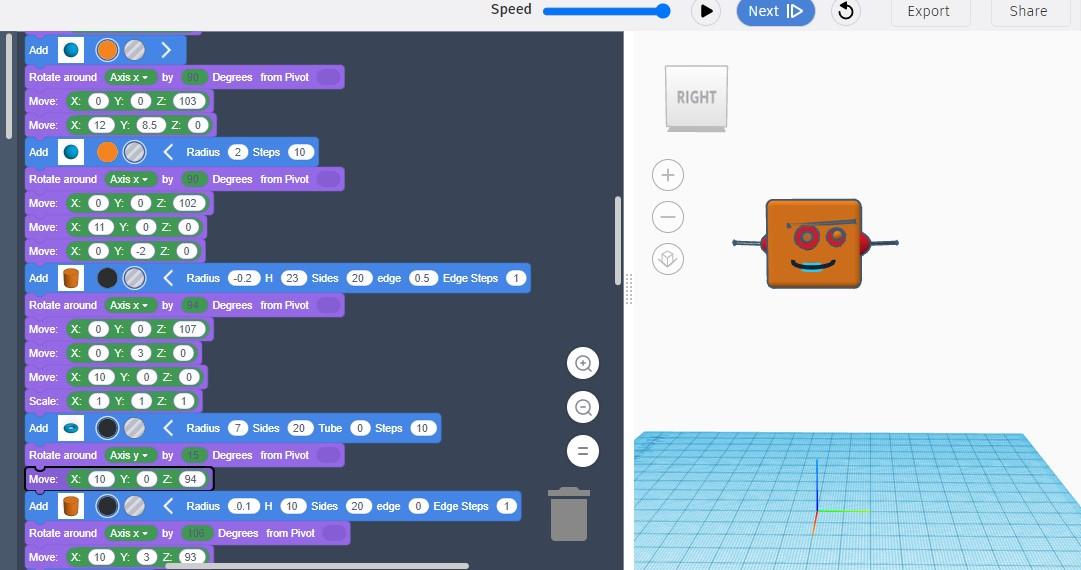
The robot has eyes with long eyebrows and a mouth.
I used the following codes to make those.
i have added image with the code steps and robot face that was being created.
The shapes that i used to make this were 2 torus that was added first later followed by 2 spheres
Then for eyebrows i added a cylinder horizontally
Mouth was made using torus then i finished the mouth using a piece of cylinder.
At the end of these codes you will have a face of robot.
Robot Stomach and Chest

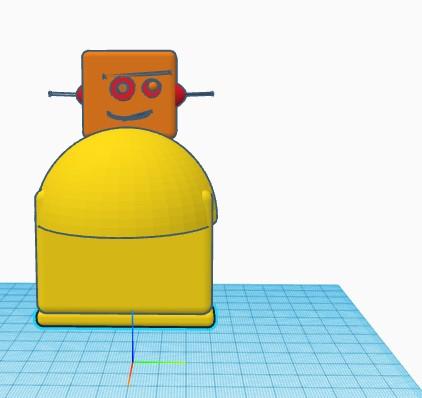
The body of robot is the main piece of highlight or i can say center of attraction!
Chest and Stomach part holds all other small parts together.
To code this i have used first a half sphere followed by adding box
For lower stomach where the legs will be attached i have used a box in the shape of rectangle
You can check for the same in the codeblock images on above steps
End result would be half completed robot
Hands and Legs
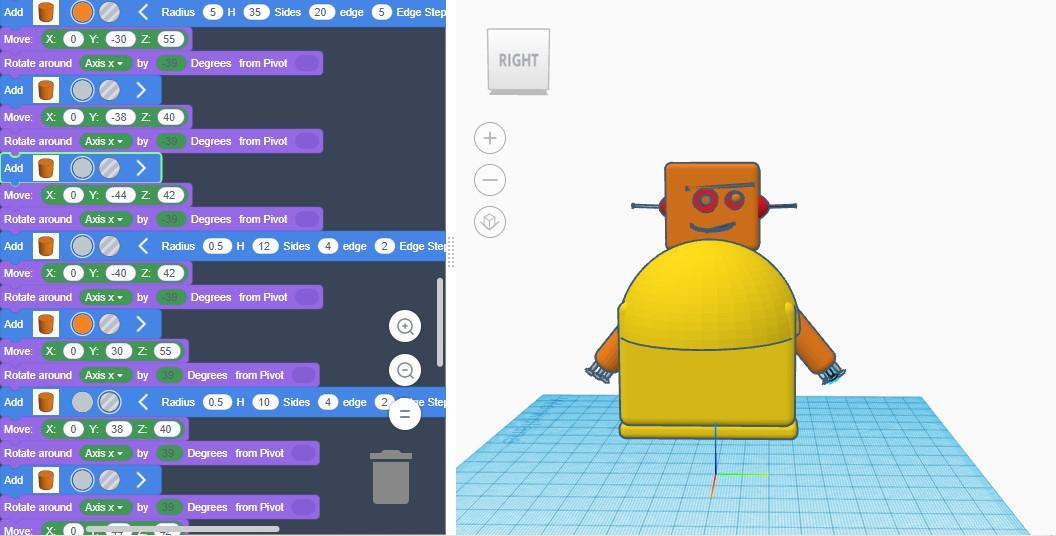
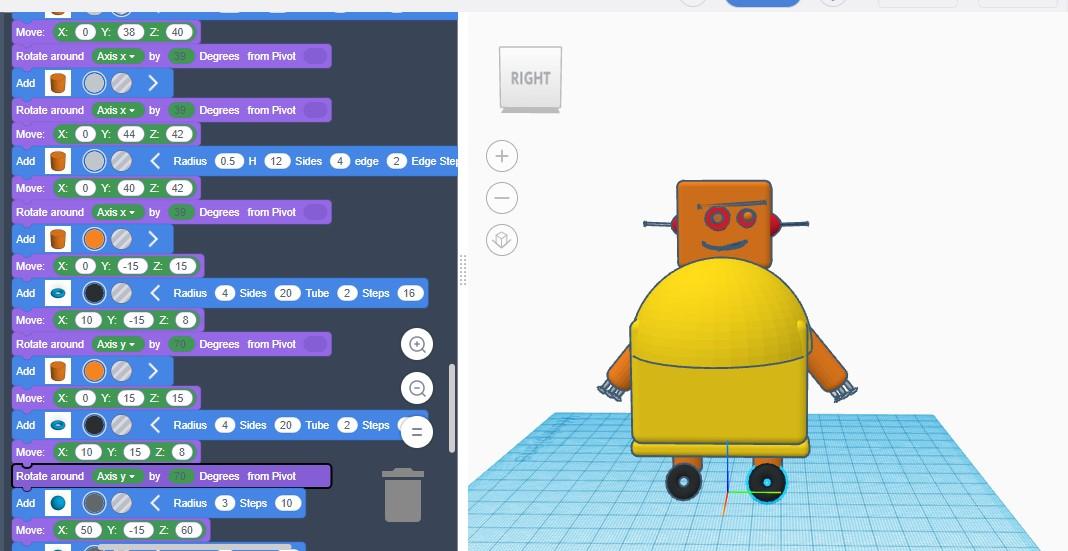
For hands and legs i will be using cylinders, The size vary for hands and legs
Hands have fingers so this robot should too!
For the fingers i will be adding small cylinders at the end of big cylinder
Repeat same step for other hands too following the dimensions as given in the codes
For the legs cylinder of a shorter length compared to arm is added
For the feet or wheeled robot feet i made use of Torus, Repeat same step for other leg too
Finishing
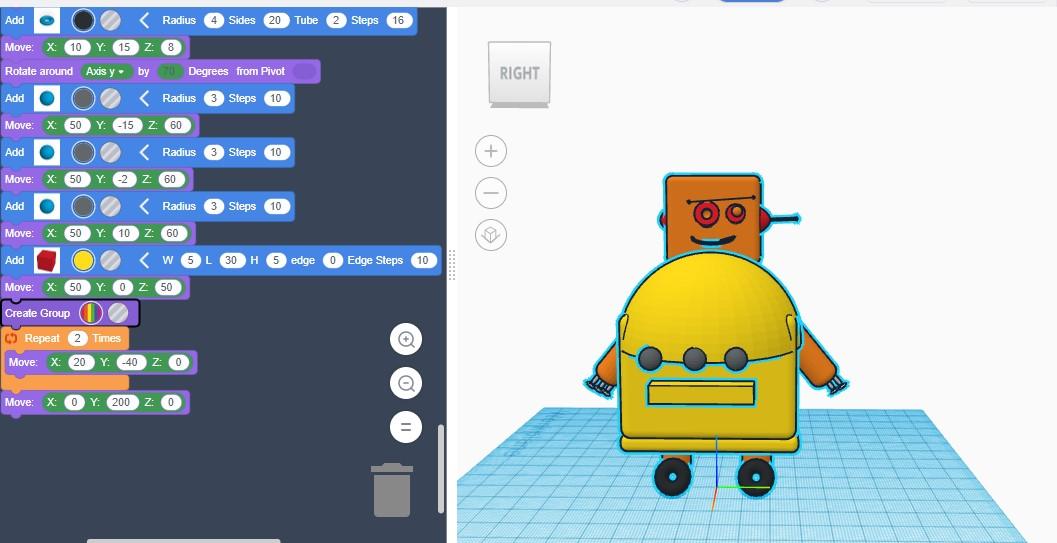
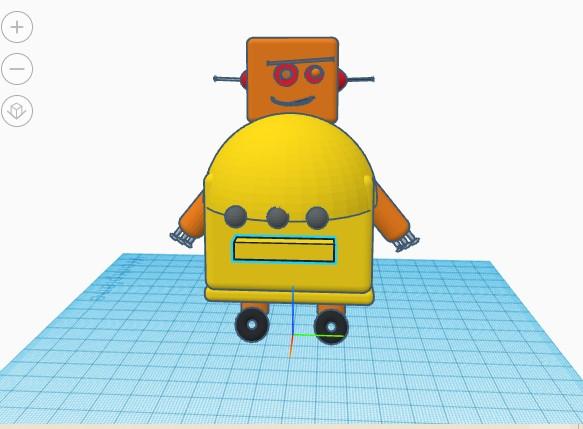

To finish this robot few buttons and a pouch in the stomach needs to be added
To make the buttons i used sphere, 3 same sized spheres were made and add to the stomach part
Pouch is made with the help of box that was stretched to make a rectangle
You can refer the dimensions used for this from the codes above
This completes the robot.
To make this robot move you can just use the code given in last image of this step
Robot Working
Watch this video that shows working of this robot.
If you are willing to make few edits and have fun you can tinker my design :)
Here is the link for it https://www.tinkercad.com/codeblocks/edit?doc=502A9l8gHDg
Any doubts drop in the comments :)
HAPPY TINKERING!