How to Make Effective Word in Photoshop
by gbpark1203 in Design > Software
477 Views, 1 Favorites, 0 Comments
How to Make Effective Word in Photoshop
Hello, In this tutorial I will be showing you the basic of Photoshop tools, how to make effective word in Photoshop.. This tutorial is for people who are new to Photoshop and want to know the basics of it.
I will be going over:
* Creating a New Layer
* Tools Layer
* Timeline tools.
You will need:
Computer Photoshop (I will be using Photoshop CC 2018)
free trial download ( official adobe site, you can download this link. but this on is trial version. )
Open Photoshop
1. Click the Photoshop Icon.
2. Open Photoshop.
Creating New Project
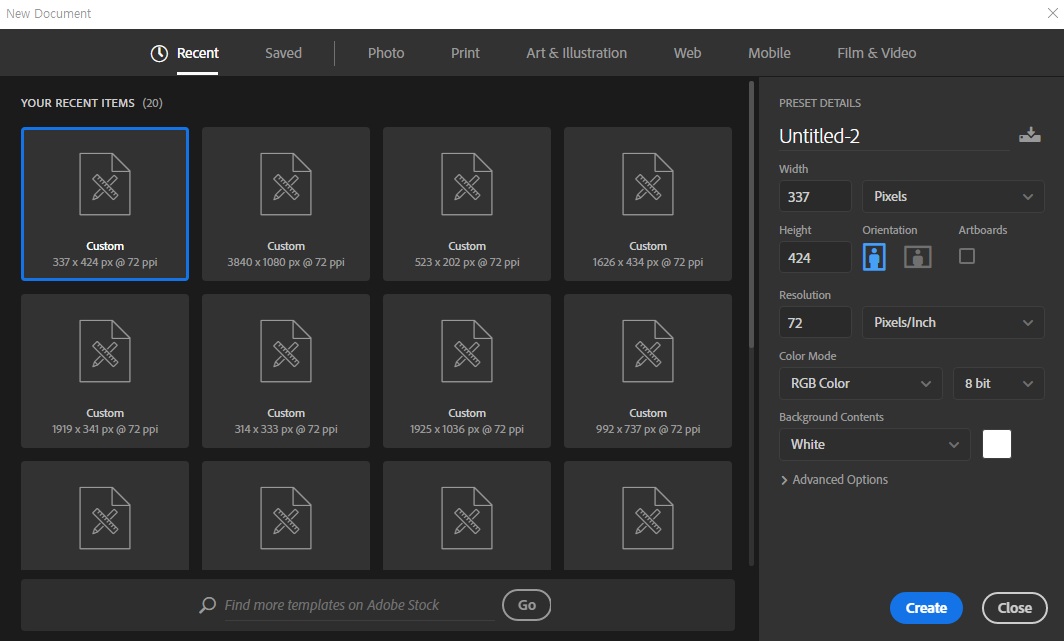
1. Go to 'File > New' or Press Ctrl/Cmd + N.
2. A window will now open which will have:
* Name - This is the name of your document.
* Width - This is the width of your document.
* Hight - This is the hight of your document
* Resolution - This is resolution of your document. 72 PPI is used for Web and 300 PPI is for Print.
PPI stand for 'PixelsPerInch'
* Color Mode - This is the colour type for your document. I suggest you leave it as RGB Color for now and keep it as 8 Bit
* Background Contents - This is what your background will be. I suggest you leave it as White.
* Advance Settings - This is for advance users. You can just leave it as it is.
3. Once you have selected the setting you want, click 'OK'.
Hear are some common document sizes:
* 720p - 1280x720 @ 72 PPI
* 1080p - 1920x1080 @ 72 PPI
* A4 - 595x842 @ 72 PPI OR 2480x3508 @ 300 PPI
* A3 - 842x1191 @ 72 PPI OR 3508x4962 @ 300 PPI
About Basic Tools
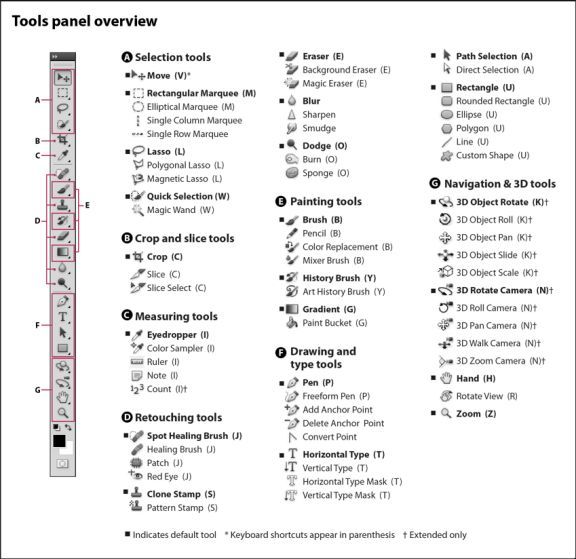
I will be going over the Basic Tools you will need to know to get started on Photoshop.
Move Tool:
This tool can be used to move items around
Marquee Tool:
This tool can be used to make selections. There are four different types which are:
Rectangular - This will make a Rectangular selection
Elliptical - This will make a Elliptical selection
SingleColumn - This will make a Column selection
SingleRow - This will make a Row selection
Lasso:
This tool can also be used to make selections. There are three different types which are:
Lasso - This can make free hand selection
PolygonalLasso - This will make selection with lines
MagneticLasso - This will make selection by shaping onto objects.
Quick Selection:
This tool can be used to make selection of objects by painting on them with an adjustable brush.
Crop:
This tool can be used to trim images.
Eraser:
This tool can be used to erase pixels of an image.
Brush Tool:
Paints a brush stroke.
Pencil Tool:
Paints are hard-edge stroke.
Gradient:
This tool can be used to make a straight-line, radial, angle, reflected, and diamond blends between colors.
Paint Bucket:
Fills similar coloured areas with the foreground color
Pen:
This tool can be used to create smooth-edged paths. You can use the Freeform Pen to create paths free-handed.
Type Tool:
This tools creates a text box which can be used to type text into.
Shape Tools:
These tools can be used to create shapes. There are six different types of shape tools which are:
Rectangle
Rounded
Rectangle
Ellipse
Polygon
Line
Custom Shape
Hand:
This tool can be used to move an image within the window.
Zoom:
Zoom in and out.
Type the Text
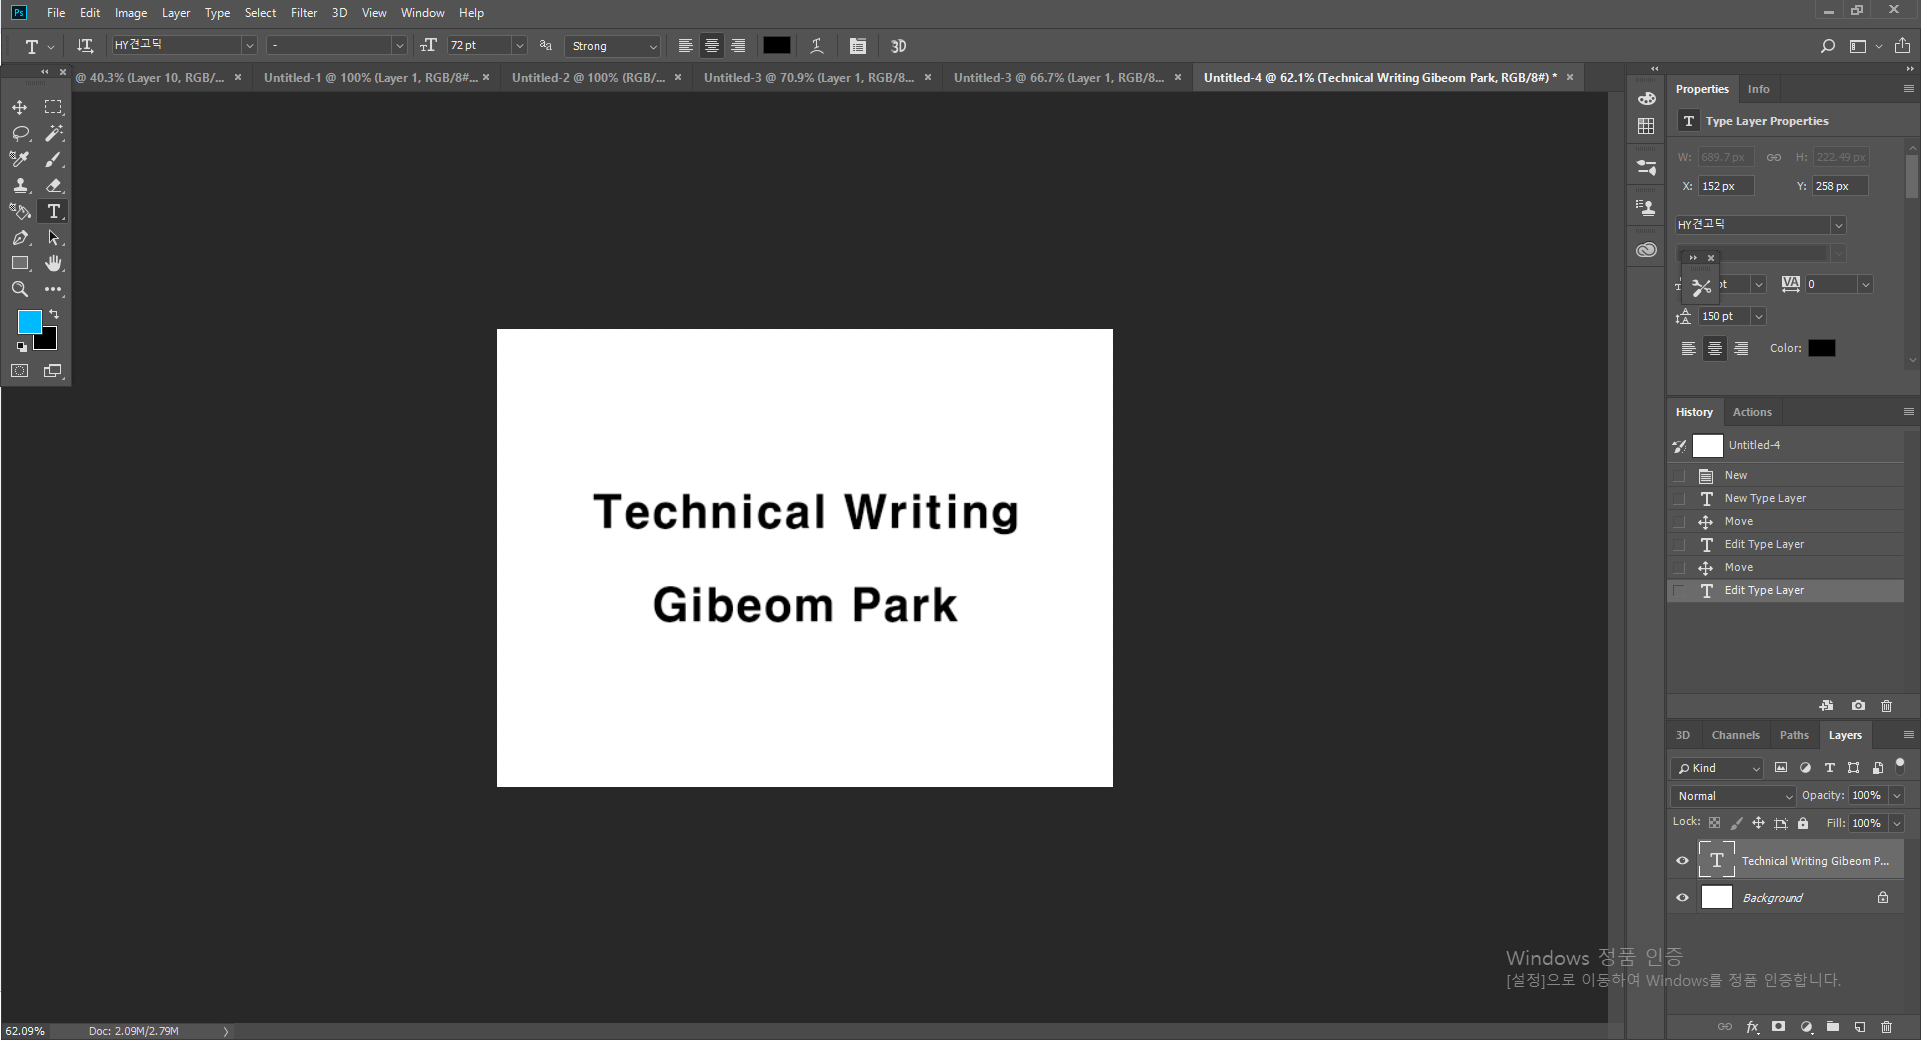
1. Type the Text. you can find that what is the Type tool. 'T' ( I type to my name)
Make a Smart Object
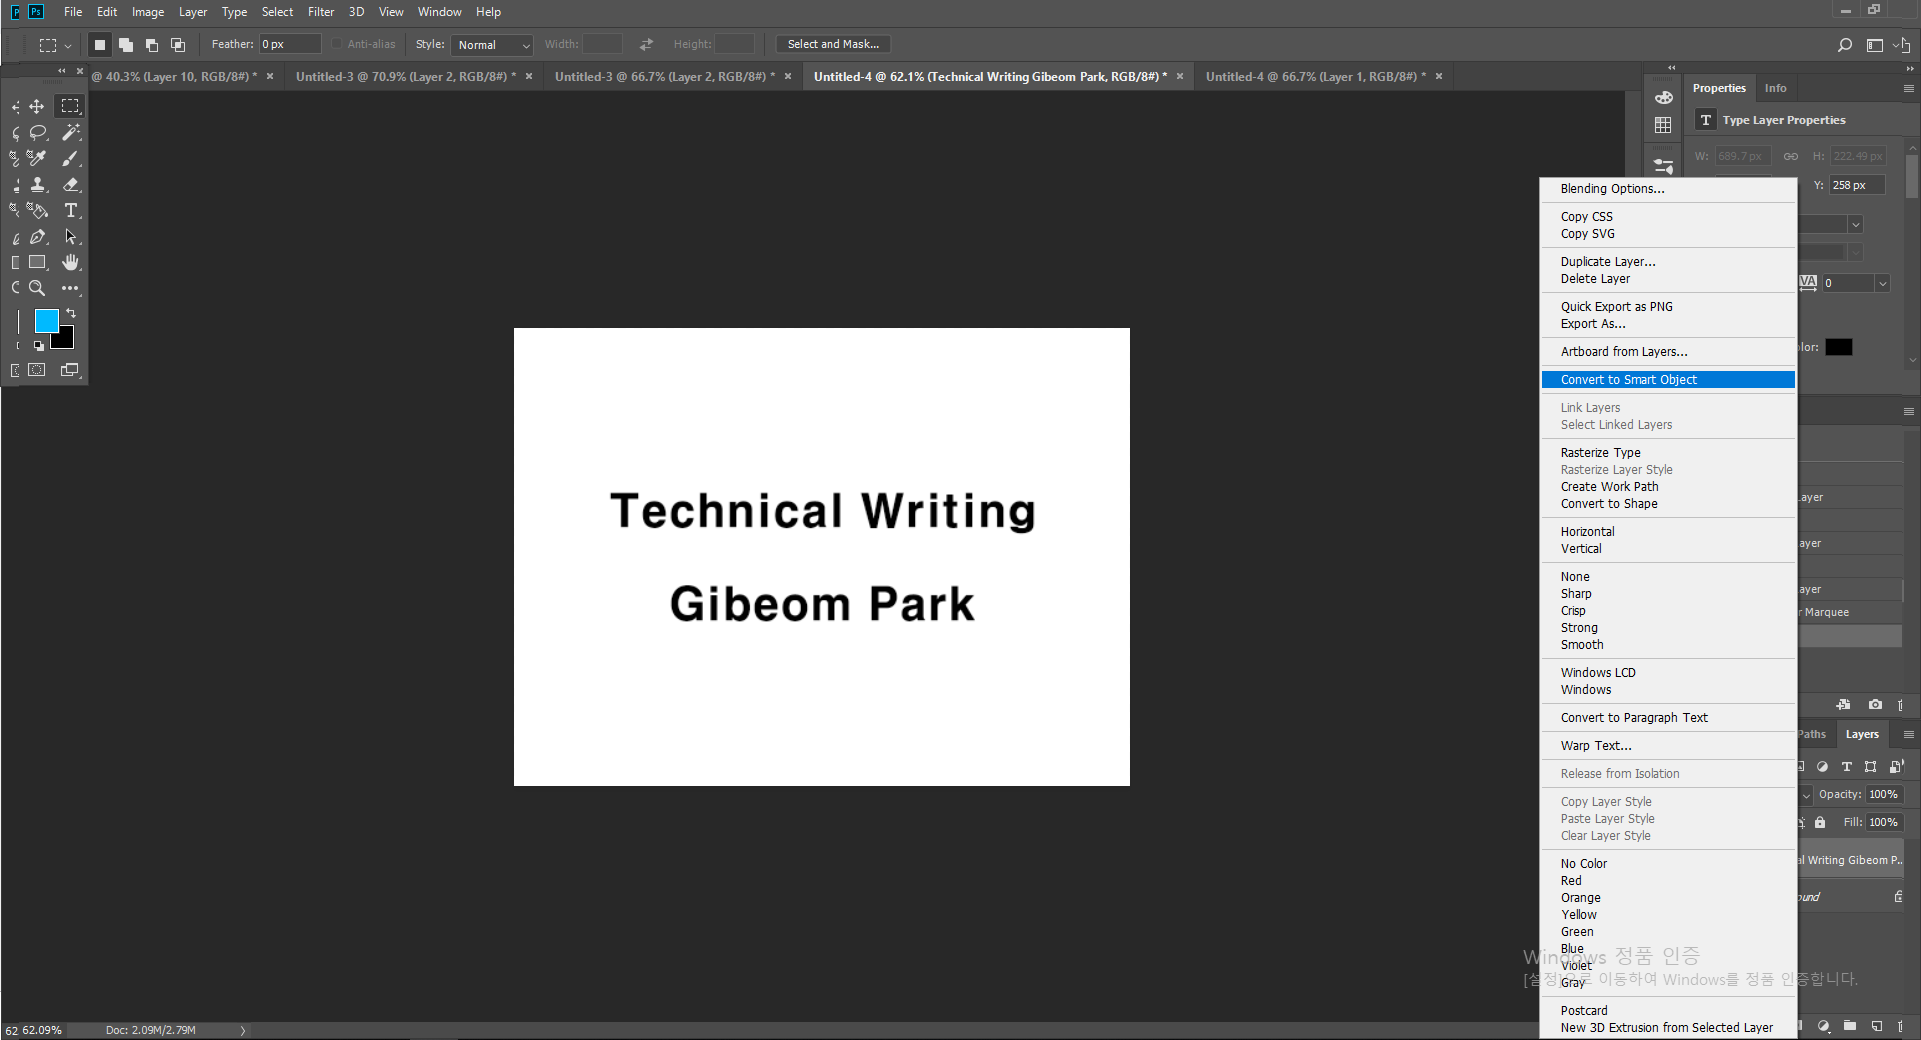
1. Right click to type layer.
2. Click the "Convert to Smart Object"
3. You can make type layer to Smart Object
Divide One Text Layer Into Several
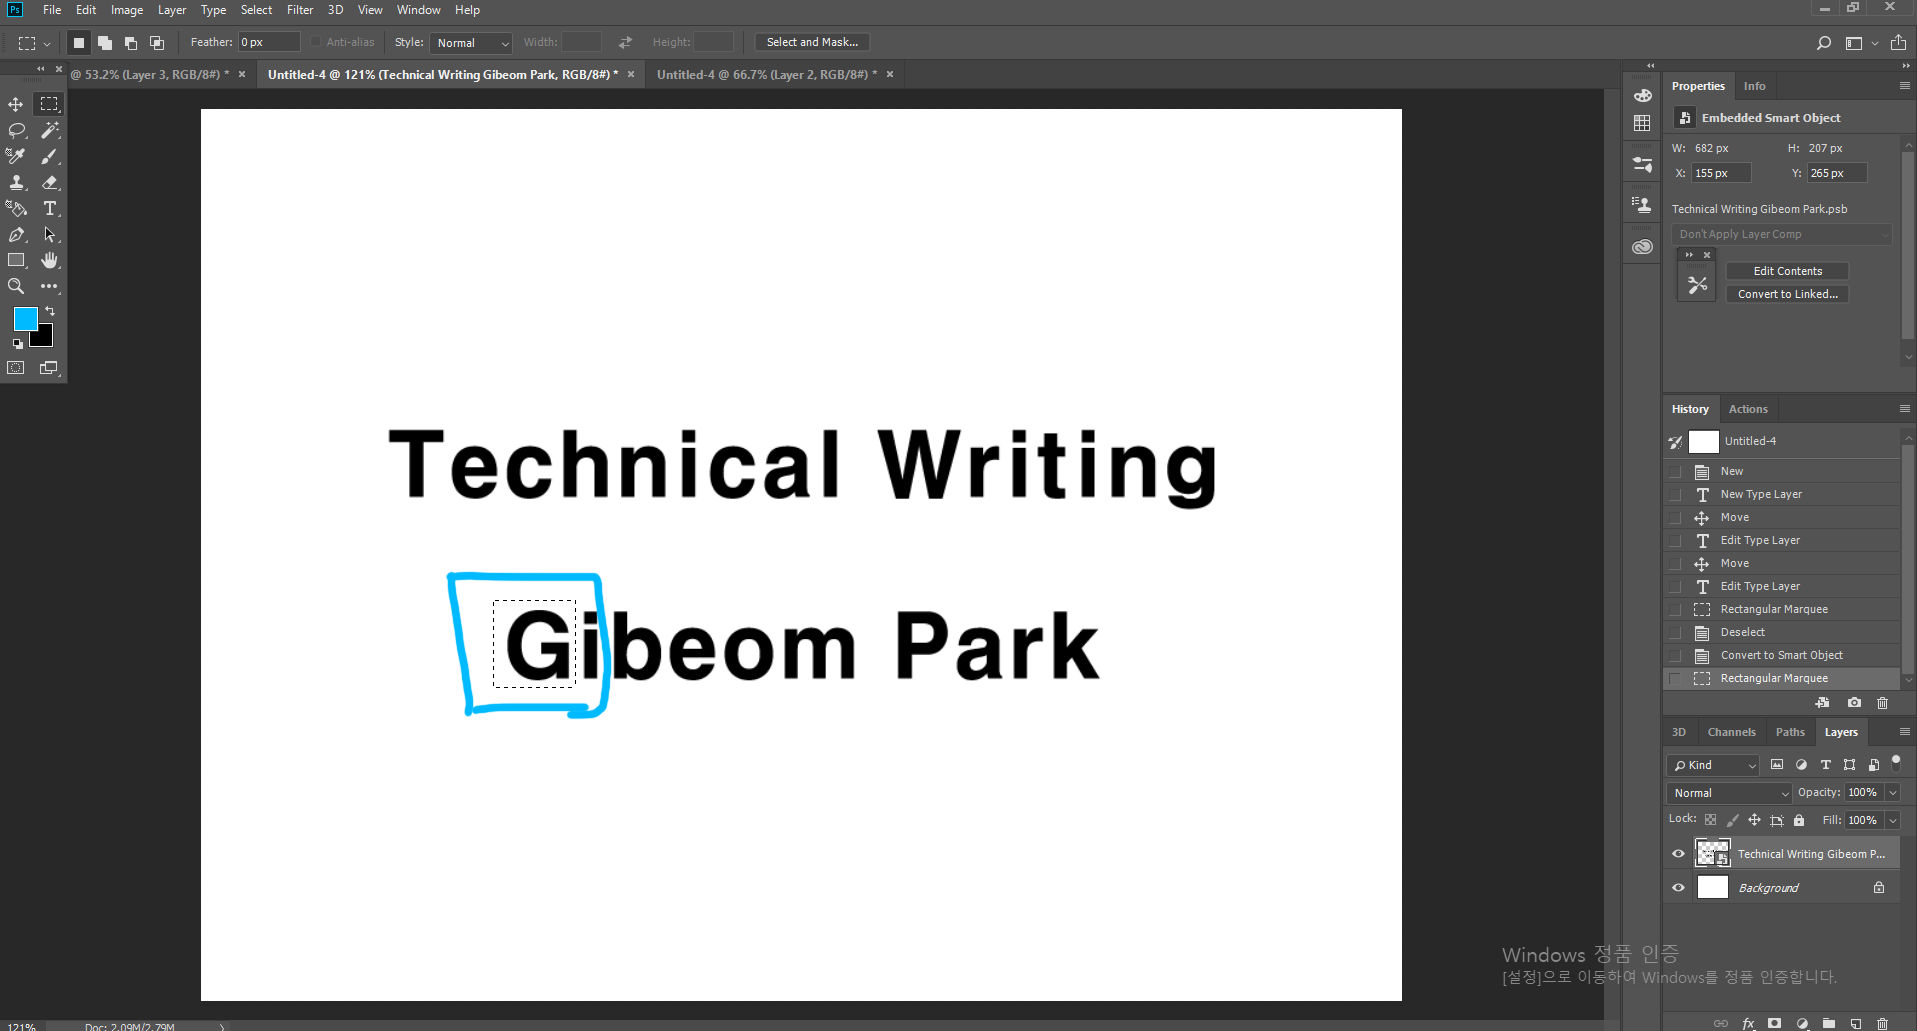
1. Using to "Rectangular Marquee Tool"
2. Separate them one by one as shown in the figure.
3. Press Control + J ( This key is make a new layer)
* It is made into the part I designate.
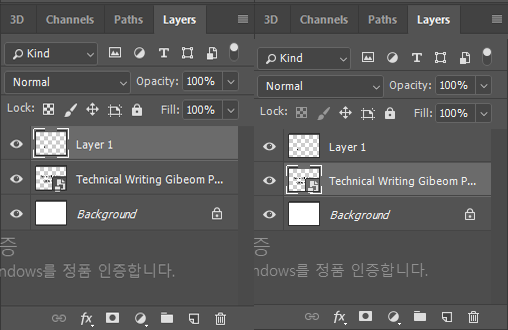
4. When you finish copying the layers, you'll see the layers tooland it'll be checked for layer1.
* After copying, you must click on the first type text. Like to Figure 2
5. Repeat this method, making as many letters as you want.
If you are not understand, you can watch this video.
Make a Timeline Tool
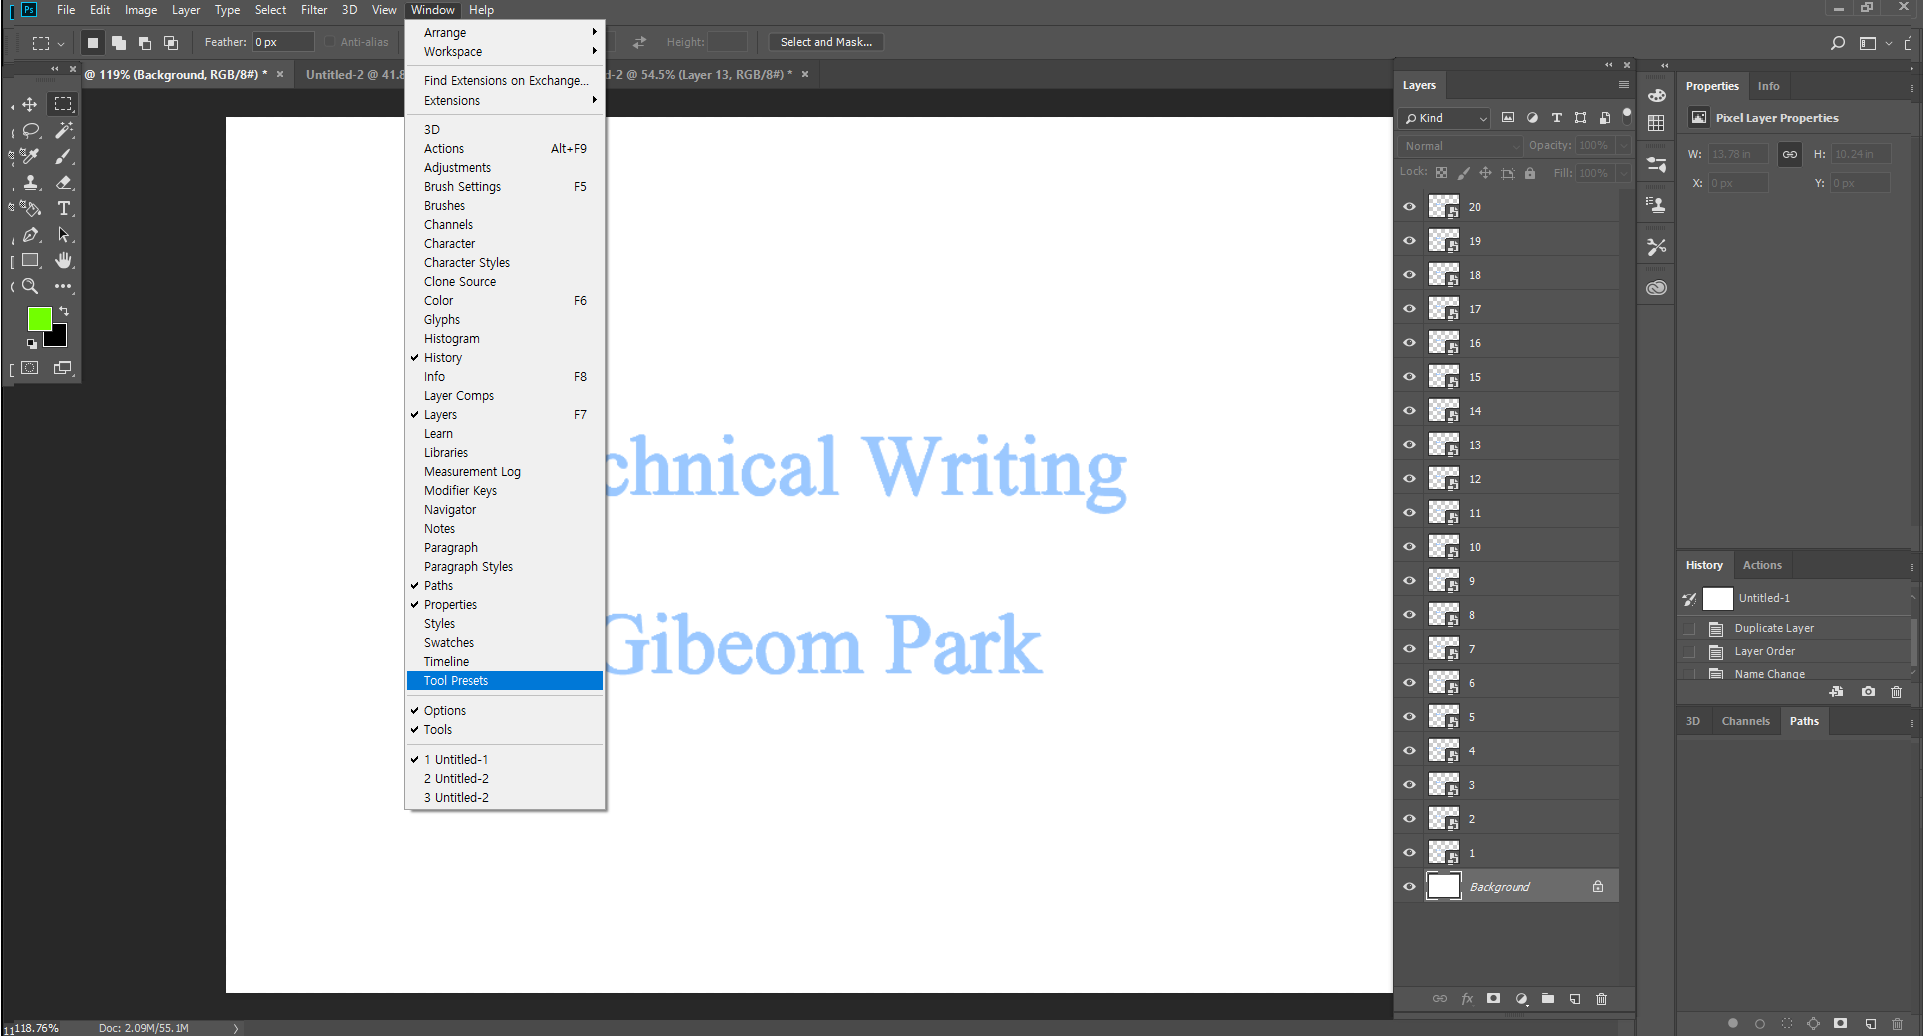
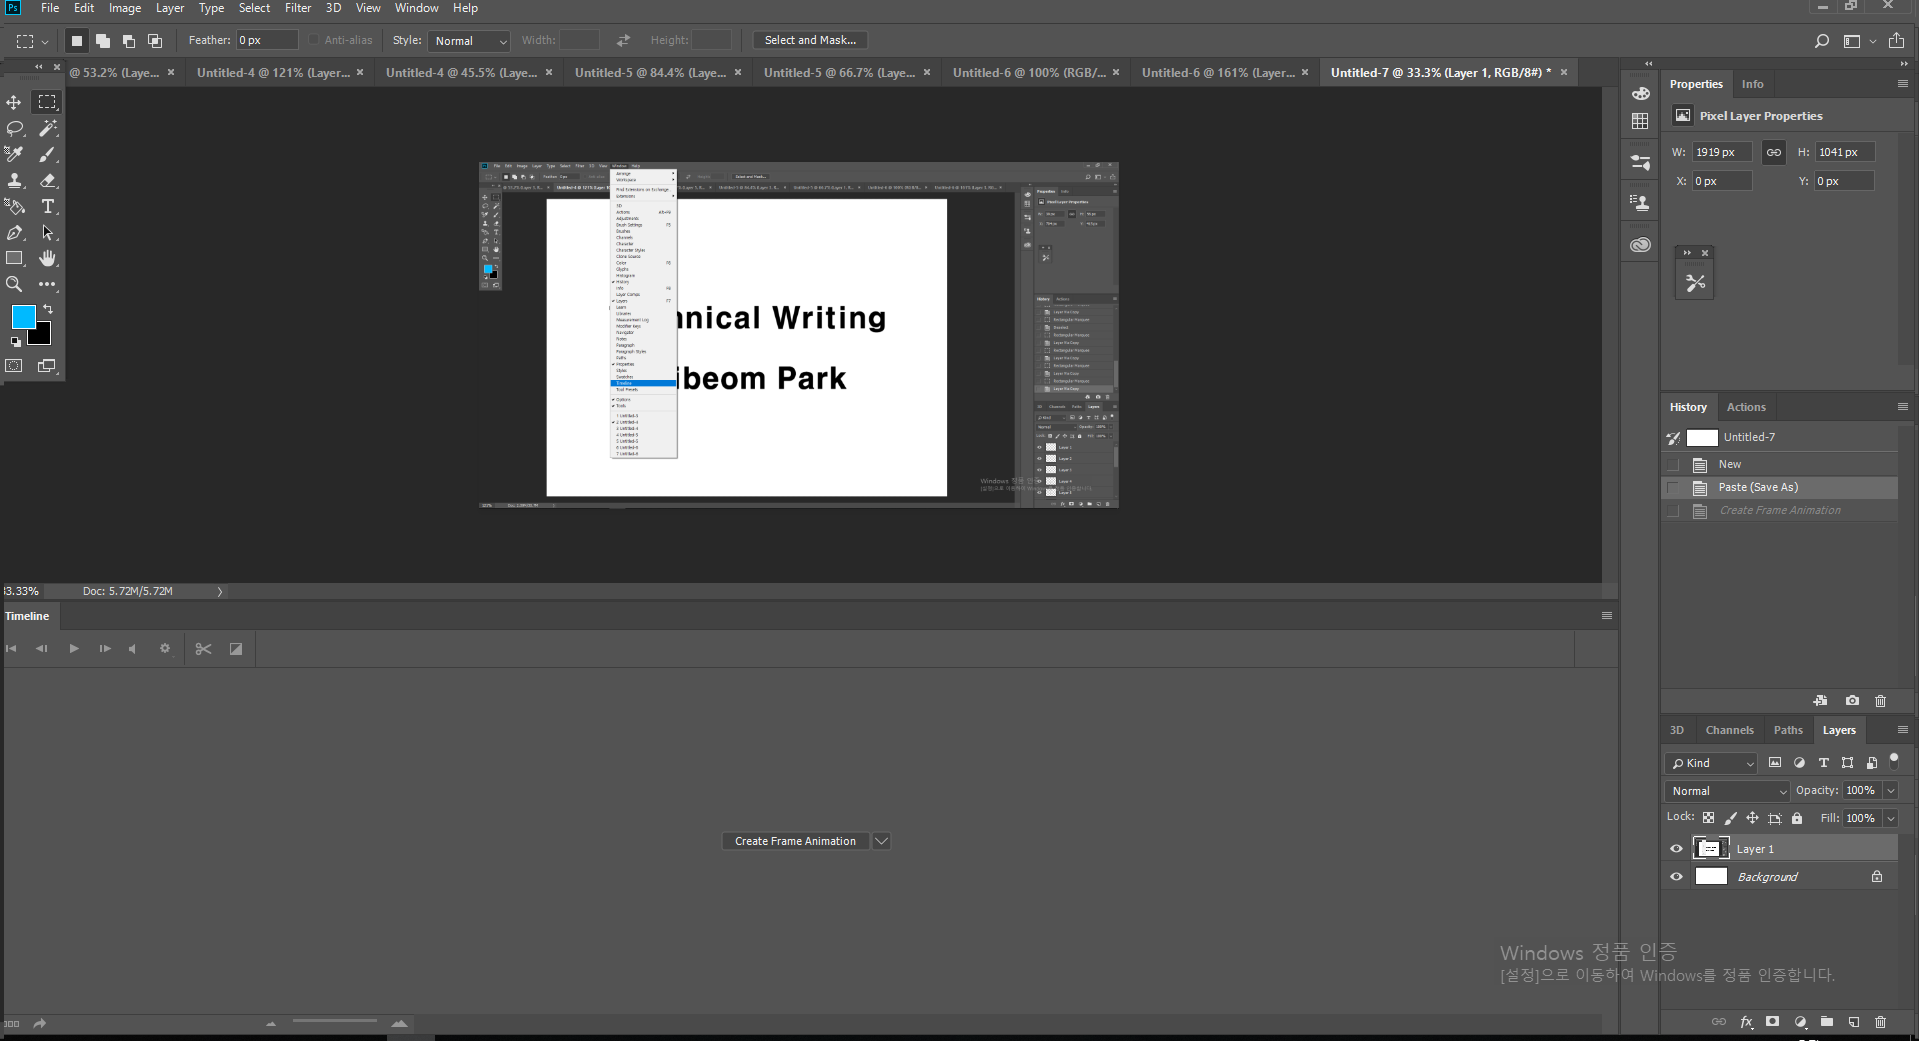
1. Click the 'Window' in top menu bar.
2. Click the 'Timeline'.
3. You can see the timeline tool.
4. Click the 'Create Frame Animaion'
Make a Animation


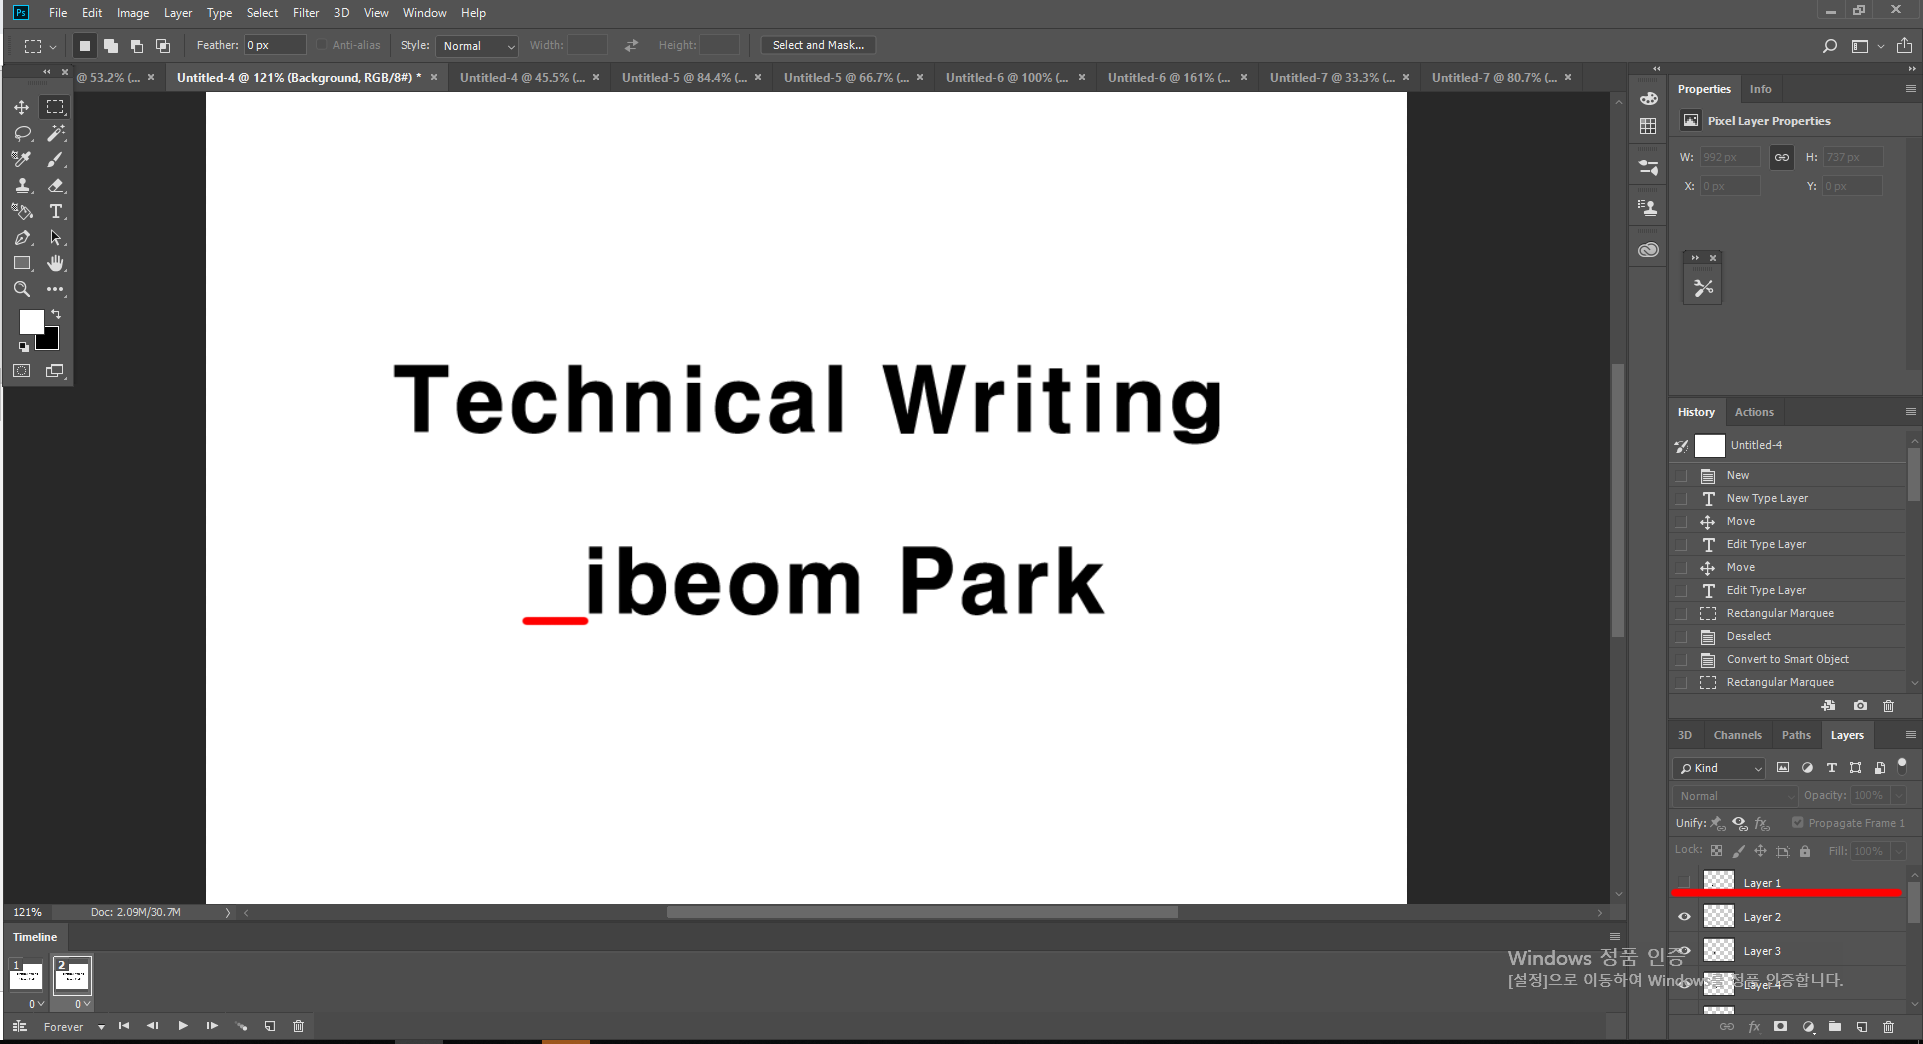
1. Click to 'Duplicate selectedframes'
2. You would have made another scene.
# Figure 2
3. Click on the eye shape in the layer menu to remove it. ( Turn Off eye shape )
(Instead, you should remove the eyes of the first letter layer.) # Figure 3
4. Click to 'Duplicate selectedframes' in timeline tool bar.
(If you click that you can take new animation scene.)
5. Click on the eye shape in the layer menu to remove it. ( Turn On eye shape )
6. This way, you can apply it to the letters you want to apply.
* As it may be difficult to understand, I filmed these methods in Videos.
Timer Set

1. You can select to time. ( You can select to Speed animation )
Save to Animation
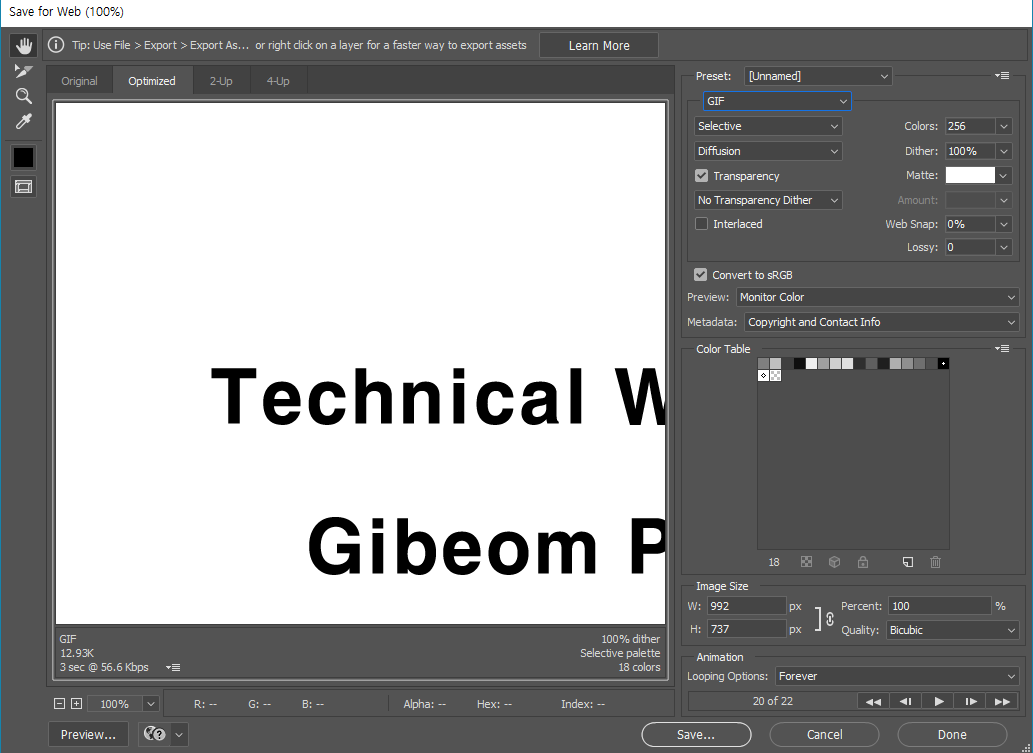
1. Press "Control + Alt + Shift + S"
2. You can show the figure 1 image.
3. Check to file type. ( Because The animation file only GIF )
Check Your Animation File
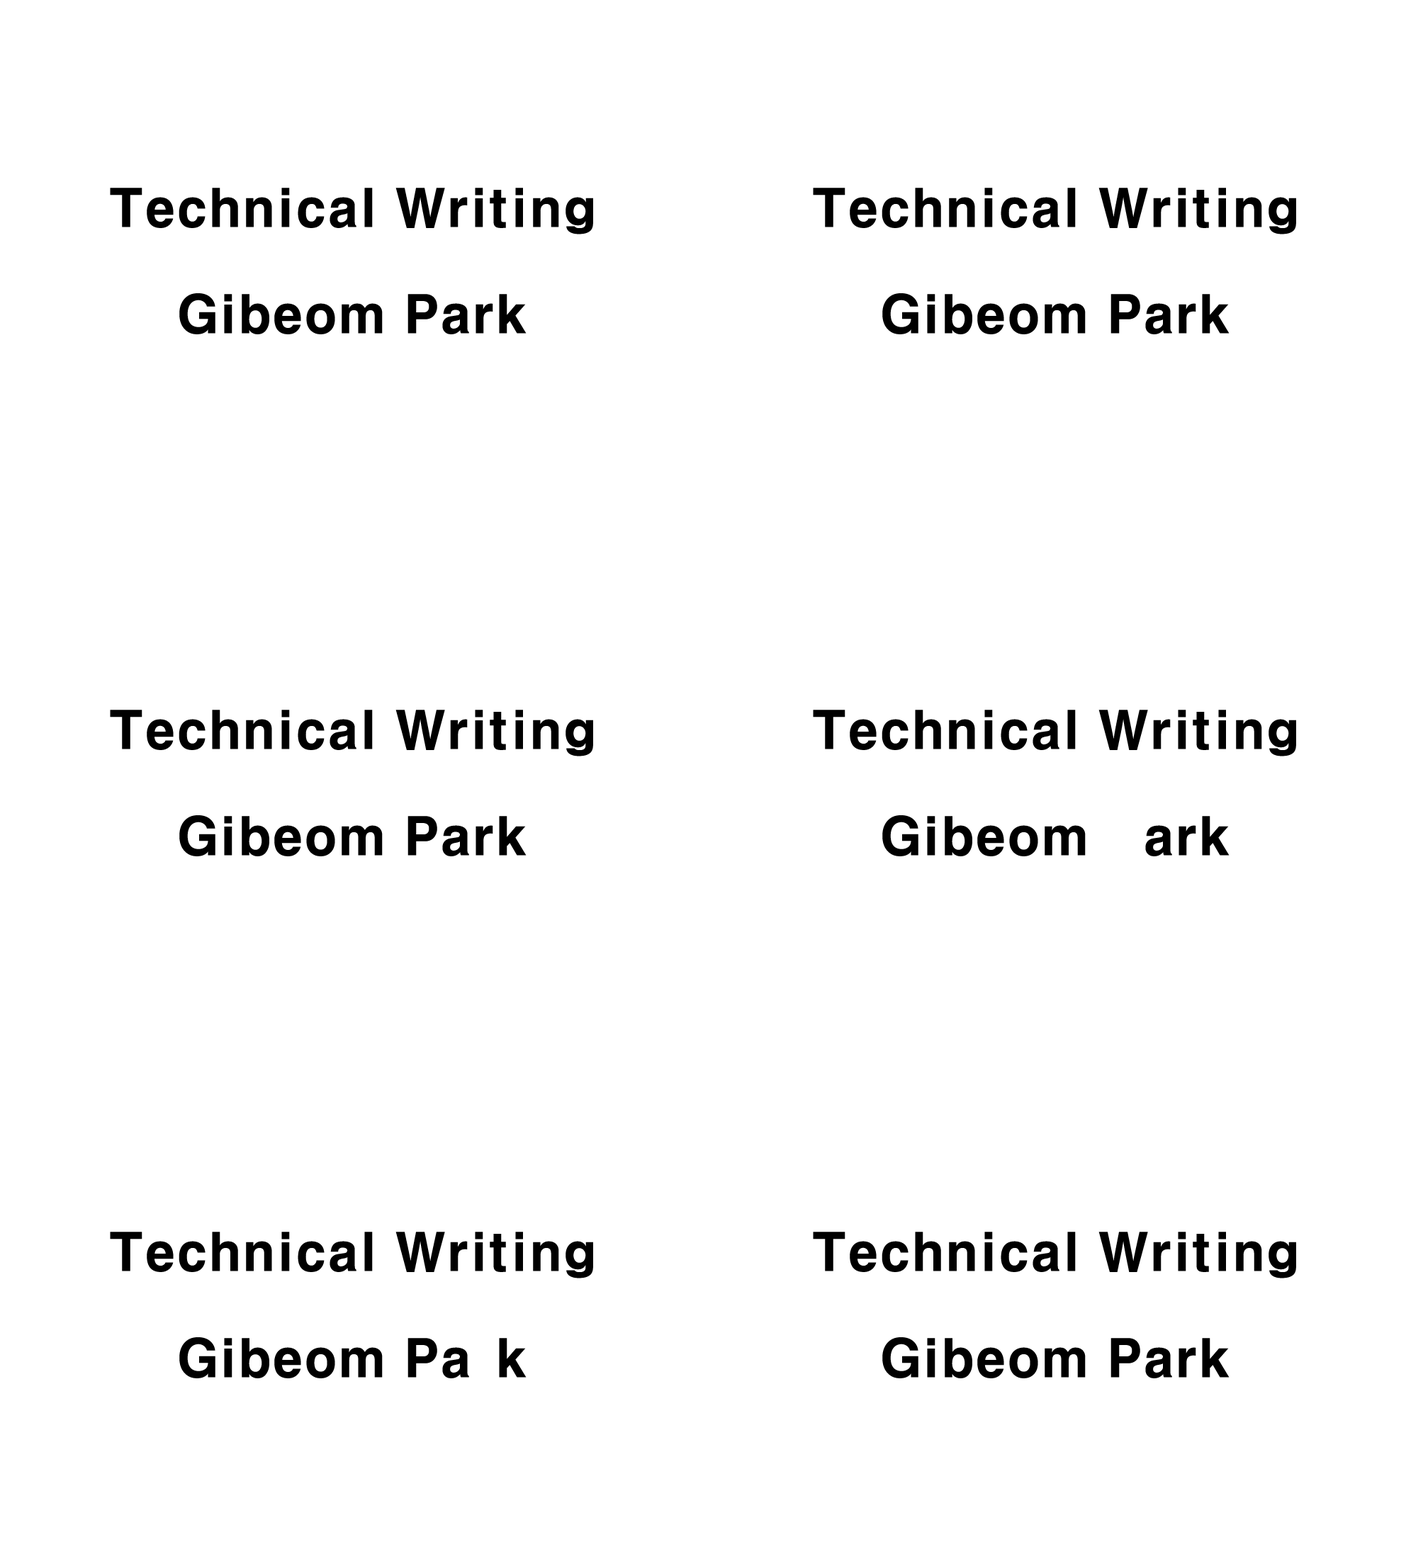
(This is a completed project.)
This page is not work to GIF. So, I uploaded in video. You can check.