How to Make Date and Time Logging | Liono Maker
by Liono Maker in Circuits > Arduino
1843 Views, 0 Favorites, 0 Comments
How to Make Date and Time Logging | Liono Maker
![2020-07-27 17_51_34-time and date logging.fzz - Fritzing - [Breadboard View].png](/proxy/?url=https://content.instructables.com/FCL/XWHF/KD92SM9Z/FCLXWHFKD92SM9Z.png&filename=2020-07-27 17_51_34-time and date logging.fzz - Fritzing - [Breadboard View].png)
Introduction:-
In this tutorial we will learn how to make Date and Time Logging with Arduino. For this purpose I am using DS3231 & Micro SD Card Modules.
The main module which is used for time & date logging is DS3231. DS3231 is an RTC(real time clock) module. The real-time clock can provide seconds, minutes, hours, day, date, month, and year information. The DS3231 can be powered with 3.3V or 5V and a CR2032 lithium button-cell battery powers the RTC when not connected to the Arduino. The DS3231 also has an inbuilt temperature sensor. The DS3231 uses I2C communication with the two bidirectional lines:
1_Serial clock (SCL)
2_Serial data (SDA)
NOTE:
If you are interesting to make data recorder or data Logger of a sensors and to record its data in a file. here are the following links:
1-Temperature and light intensity data logging
2-DHT11 data recorder with Arduino & micro SD Card
Facebook page:
https://www.facebook.com/LionoMaker/?modal=admin_t...
Data-Logger:
A data logger (also data-logger or data recorder) is an electronic device that records data over time with a built in instrument or sensor or via external instruments and sensors. They generally are small, battery powered, portable, and equipped with a microprocessor, internal memory for data storage, and sensors. Some data loggers interface with a personal computer, and use software to activate the data logger and view and analyze the collected data, while others have a local interface device (keypad, LCD) and can be used as a stand-alone device. In this project, I’m using SD-Card to store data with the help of Arduino.
DS3231:
The date and time of a sensor measurement or of a data record can be included when writing data to an SD card using a real-time clock (RTC) module, such as the DS3231. The real-time clock can provide seconds, minutes, hours, day, date, month, and year information. The DS3231 can be powered with 3.3V or 5V and a CR2032 lithium button-cell battery powers the RTC when not connected to the Arduino. The DS3231 also has an inbuilt temperature sensor. The DS3231 uses I2C communication with the two bidirectional lines: serial clock (SCL) and serial data (SDA).How to connect with Arduino for this connection diagram is available.
Micro SD-Card Module:
The module (Micro SD-Card Adapter) is a Micro SD card reader module, through the file system and the SPI interface driver, SCM system to complete the file read and write Micro SD-card. Arduino users can directly use the Arduino IDE comes with an SD-card library card to complete the initialization and read.
![2020-07-27 17_52_04-time and date logging.fzz_ - Fritzing - [Schematic View].png](/proxy/?url=https://content.instructables.com/FS4/37Q4/KD92SMBL/FS437Q4KD92SMBL.png&filename=2020-07-27 17_52_04-time and date logging.fzz_ - Fritzing - [Schematic View].png)
![2020-07-27 17_51_34-time and date logging.fzz - Fritzing - [Breadboard View].png](/proxy/?url=https://content.instructables.com/FLC/TZCV/KD92SMBI/FLCTZCVKD92SMBI.png&filename=2020-07-27 17_51_34-time and date logging.fzz - Fritzing - [Breadboard View].png)
![2020-07-27 17_52_21-time and date logging.fzz_ - Fritzing - [PCB View].png](/proxy/?url=https://content.instructables.com/FUD/EMLZ/KD92SMBR/FUDEMLZKD92SMBR.png&filename=2020-07-27 17_52_21-time and date logging.fzz_ - Fritzing - [PCB View].png)
Fritzing:-
In this tutorial I'm using Fritzing software to make schematics of my project.
firstly I need to open the Fritzing and then take DS3231,Arduino UNO and Micro SD Card. we need to connect them via jumper wires.
following are connecting strategies:-
DS3231 connections with Arduino UNO:
DS3231 ___ Arduino UNO
Gnd----------------------- Gnd
VCC-----------------------5volt
SDA-----------------------Pin A4
SCL -----------------------Pin A5
SD Card connections with Arduino UNO:-
SD Card ___ Arduino UNO
Gnd---------------------------------Gnd
VCC--------------------------------5volt
MISO--------------------------------pin12
MOSI--------------------------------pin11
SCK----------------------------------pin13
SCS----------------------------------pin 10
Proteus Simulations:-
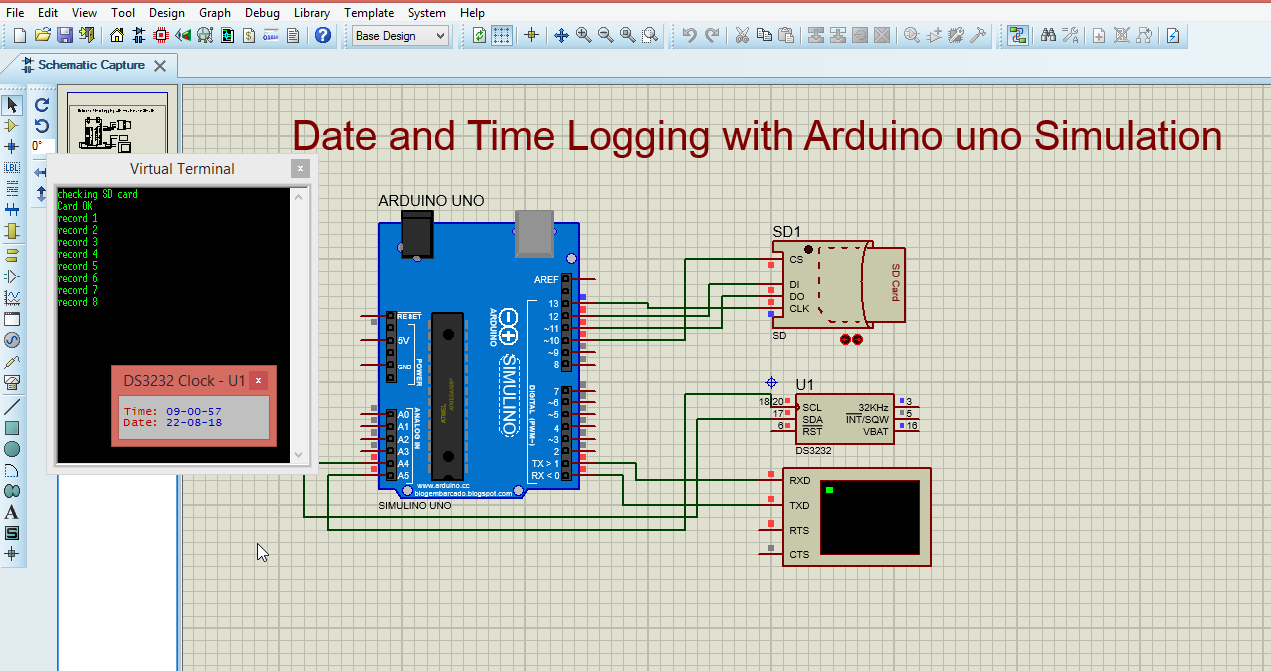
In this Project I used Proteus Software for Simulations.
Firstly, I need to open library to take components and devices. I taking DS3232 and SD card and virtual terminal for simulation purpose. Because we need Simulate time and date , during the simulation ds3232 clock window is opened in which time and date is running. we can set starting points of date and time in Arduino coding. In some projects push button are used to set date and time manually for this purpose we need to change Arduino coding accordingly.
I'm using Arduino UNO for this we need Hex file. Make Hex file of your Arduino coding (I'm providing code below) in Arduino IDE. then upload it in Arduino Properties.
I'm using SD card module. I'm providing SD Card file, upload it in your module(provided in following description). In Proteus left below corner there is a play button push it and simulations will start. when simulation started the two windows will be open, virtual terminal and ds3232 clock.
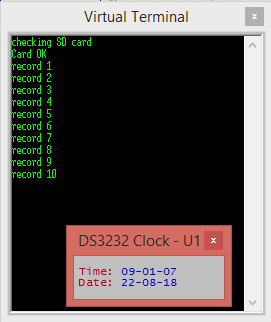
>>Virtual terminal is showing recorded data as;
SD Card OK
record1
record2
record3
recrod4
record5
>> the ds3232 clock window is showing time and date accordingly.
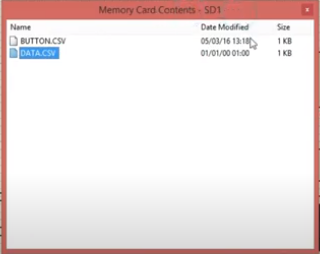
>> during simulations a file " Memory card contents" will open, this file contains data.csv data file. In this file we Time and date, month, day and year data. Every Delay(1000); this data will repeat and data will add it in file.
EXCEL Working:-
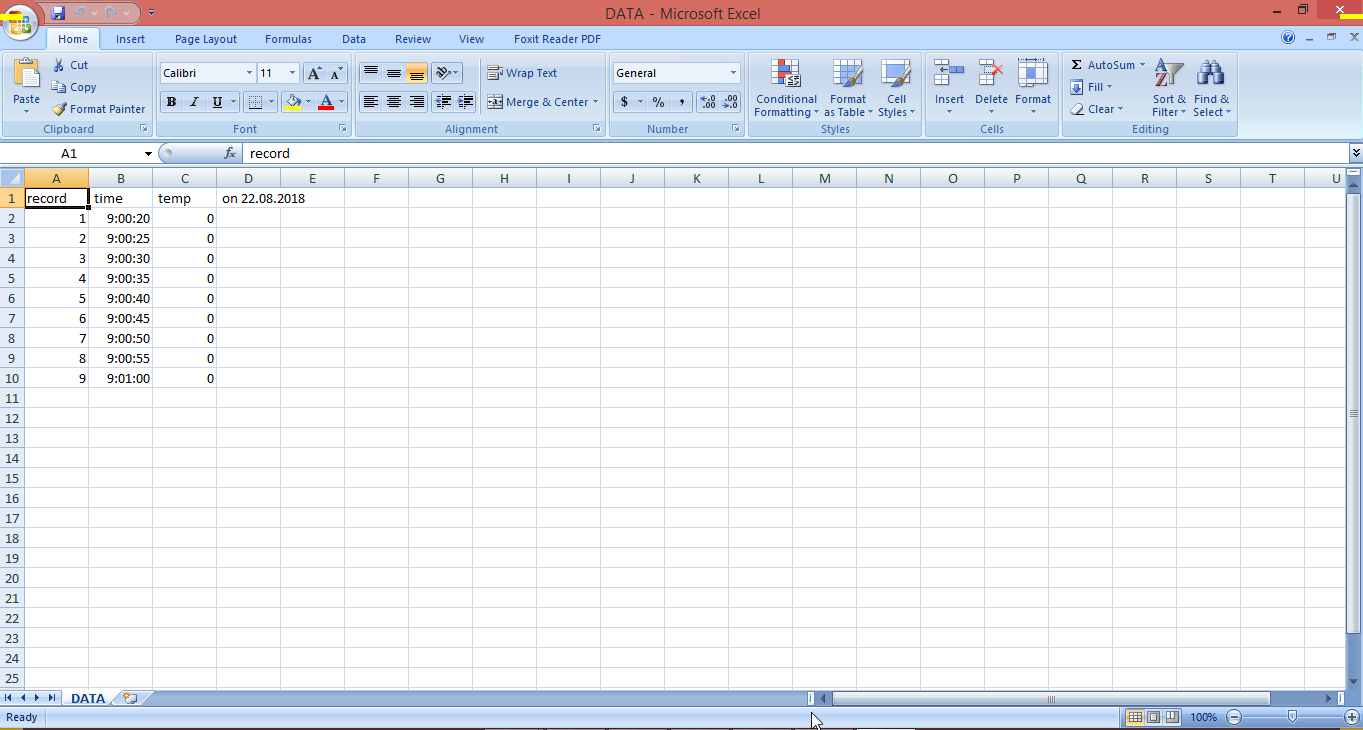
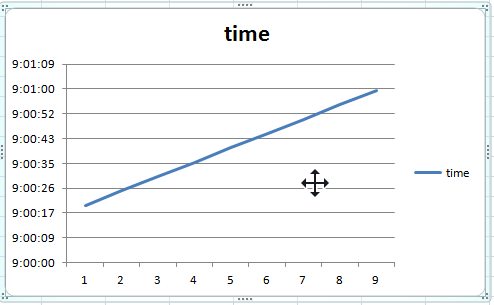
Open Excel and inject your data.csv file in it. data will shown in columns and take a line graph of time column.
Downloads
