How to Make Conics Using Tinkercad (Codeblocks)?
by Mehulagarwal in Teachers > 12
5301 Views, 13 Favorites, 0 Comments
How to Make Conics Using Tinkercad (Codeblocks)?
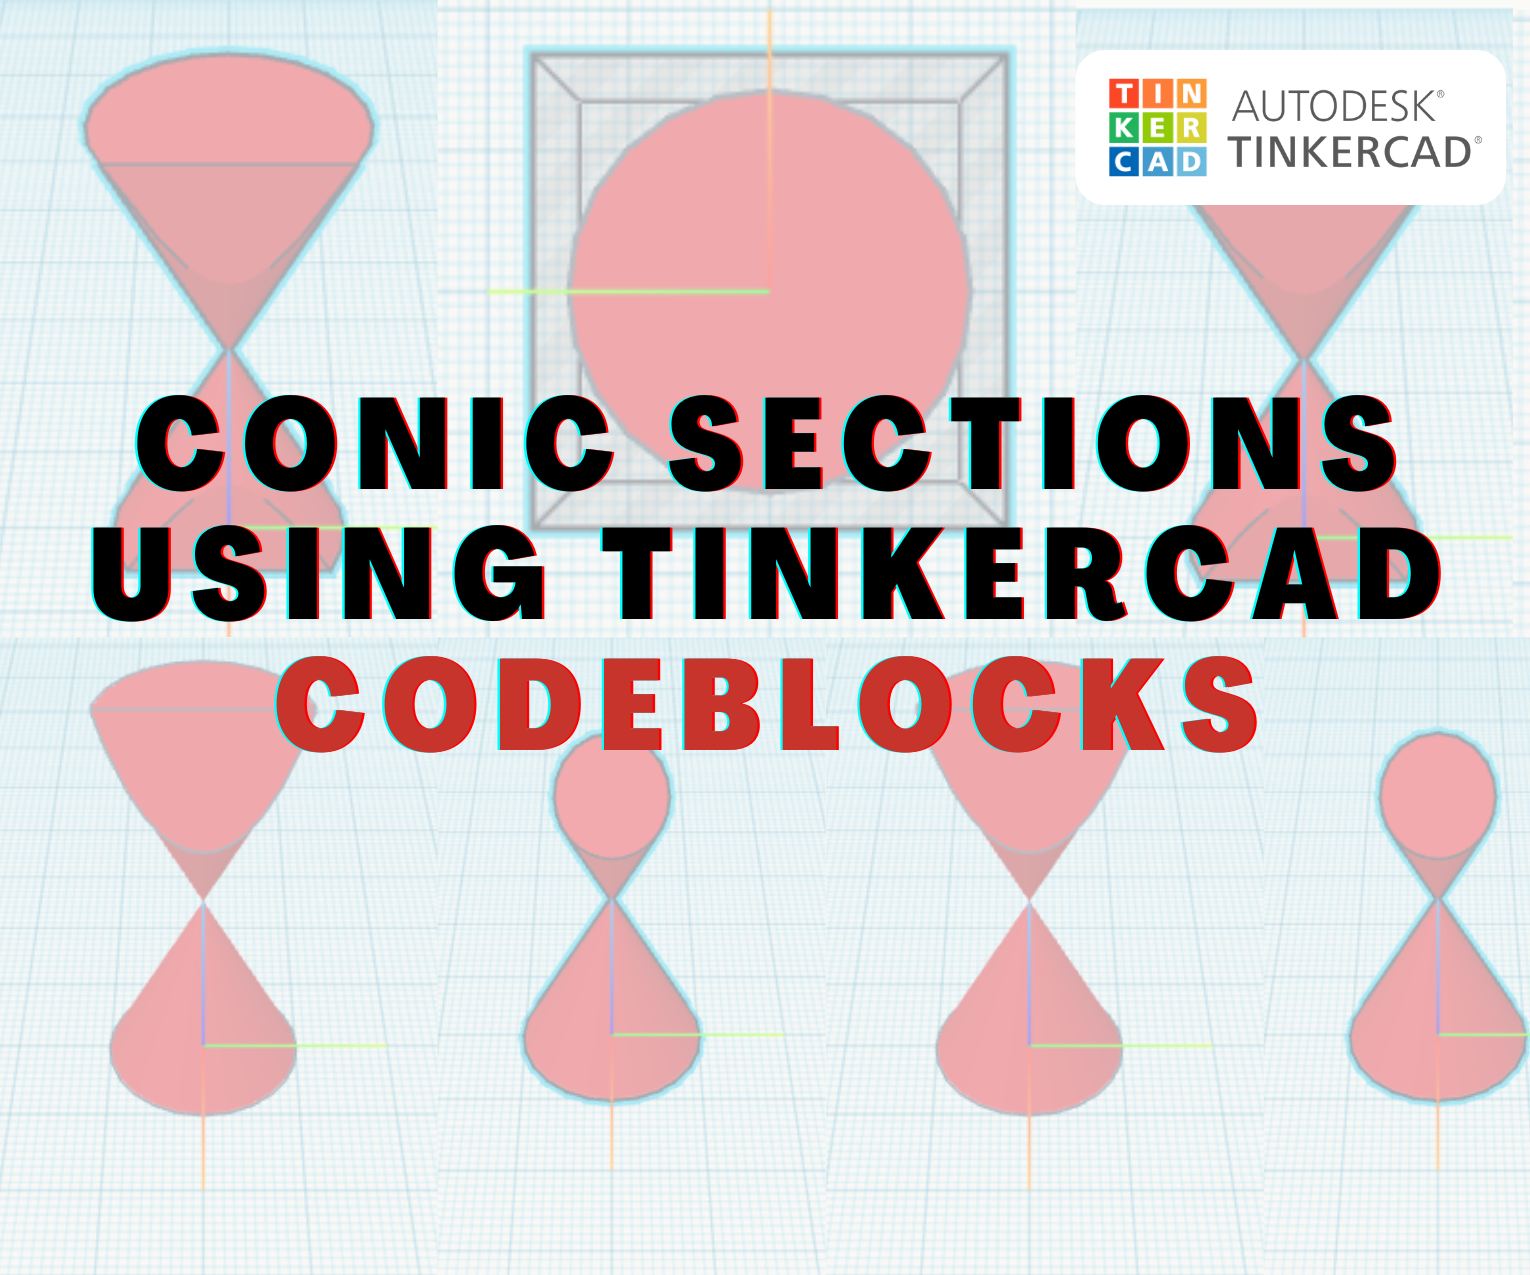
Conic sections play an important role in maths, especially in coordinate geometry. But the better we understand it, the easier it gets. To understand it better, we need to visualize it. So that's the reason today we are going to learn how to make a 3D model of Conics using Tinkercad code blocks.
If you are a teacher just like me, I hope this will help you and your students a lot!
So, for all the teachers and students out there, learning conics just got way easier. In this instructable, we are going to go through a step-by-step process of how to make a working model of conics. This can even be 3D printed and used for teaching purposes in classes.
So let's get going!
Supplies

- Tinkercad
- Computer with Internet
Understanding Conics
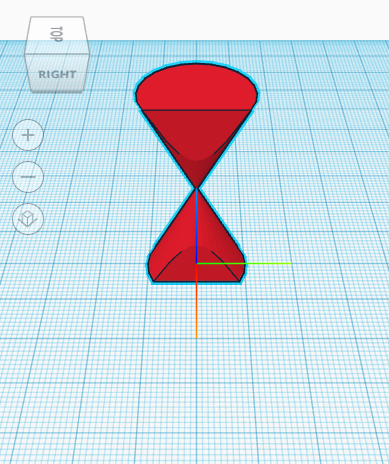
How do you define a conic section?
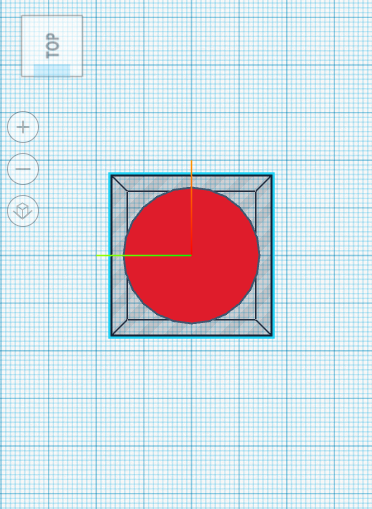
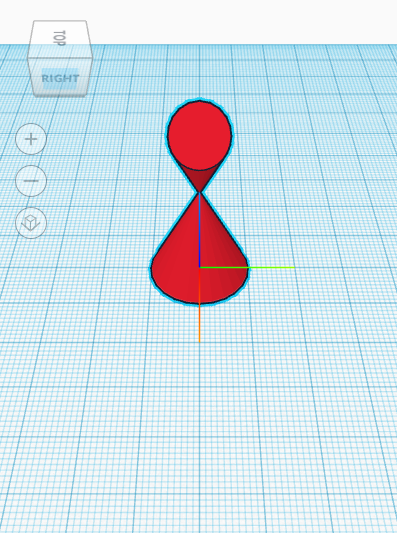
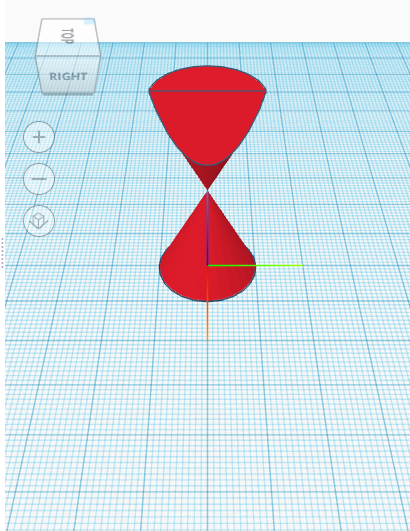
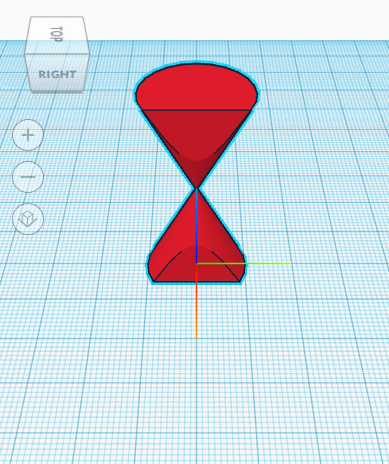
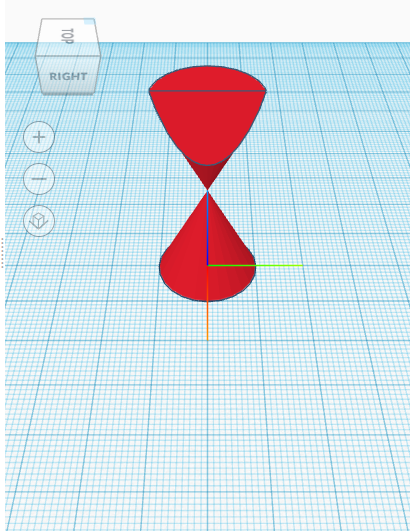
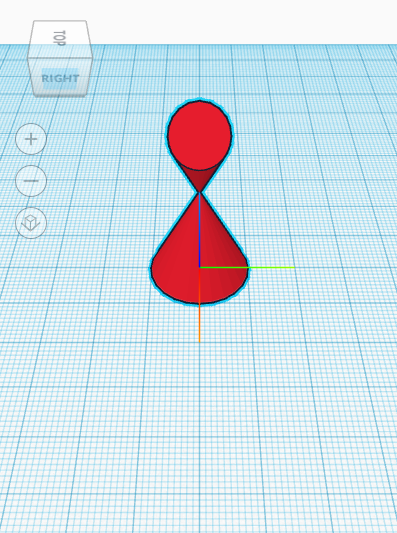
When a double right cone and a plane collide, a conic section is the resultant shape. Circles(Image 1), ellipses(Image 2), parabolas(Image 3), and hyperbolas(Image 4) are the four primary types of conic sections. Let's begin by using Tinkercad Codeblocks. With Tinkercad codeblocks, you can even understand how the conics are being formed.
Setting Up Tinkercad
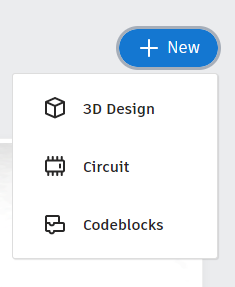
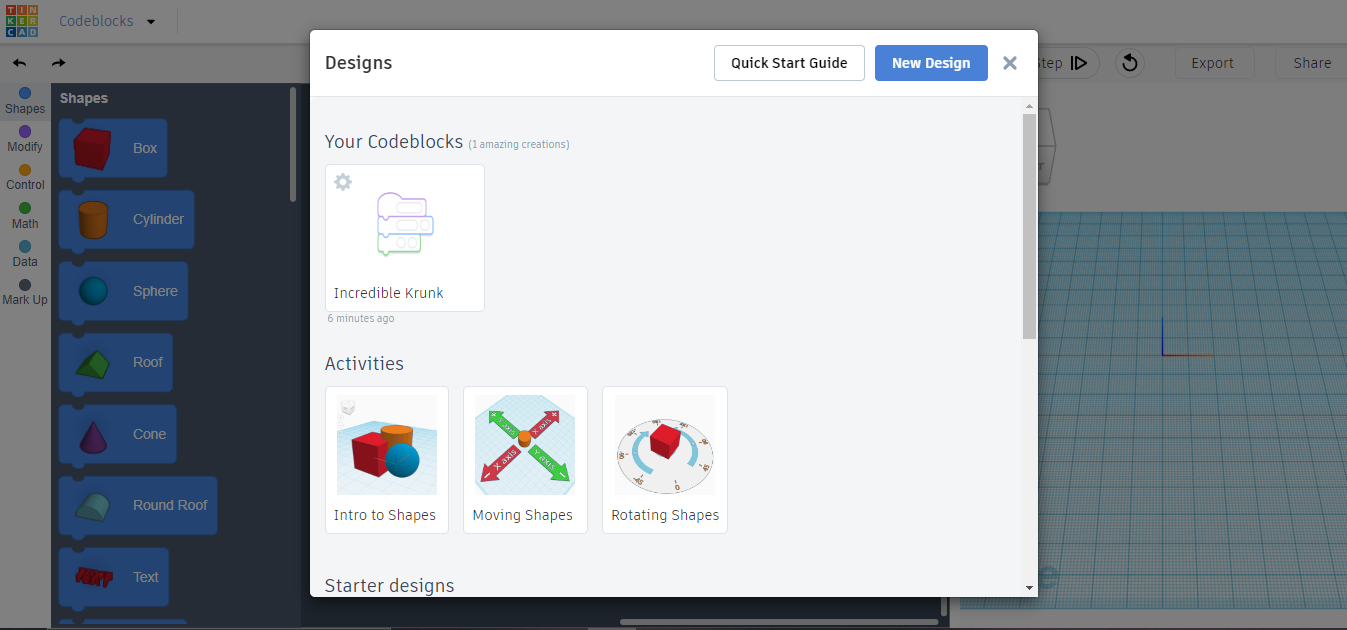
- Go to the Tinkercad dashboard and click on new.
- After selecting "New", click the "Codeblock" button.
- You should see a title to the right of the Codeblocks sign in the upper left corner; click on it to change it to whatever title you prefer; for the purposes of this project, I'll call my project The Conic Sections.
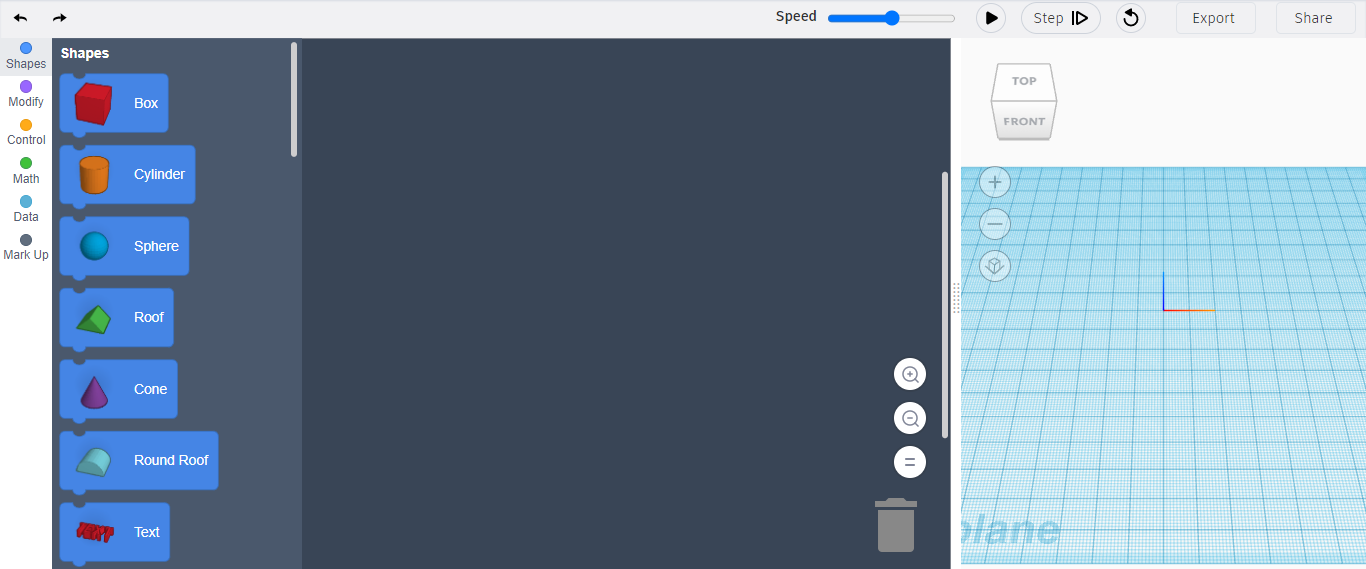
- After renaming Click on the New Design button in blue
Your project is now prepared and ought to resemble the picture above.
Creating the Double-right Cone
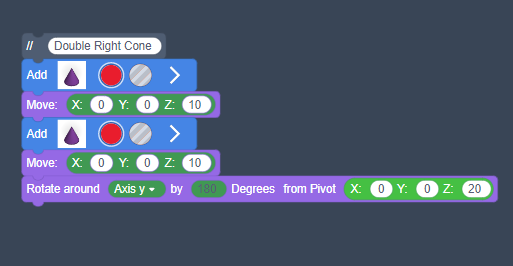
We will now create the double right cone, which will serve as the base of each conic section.
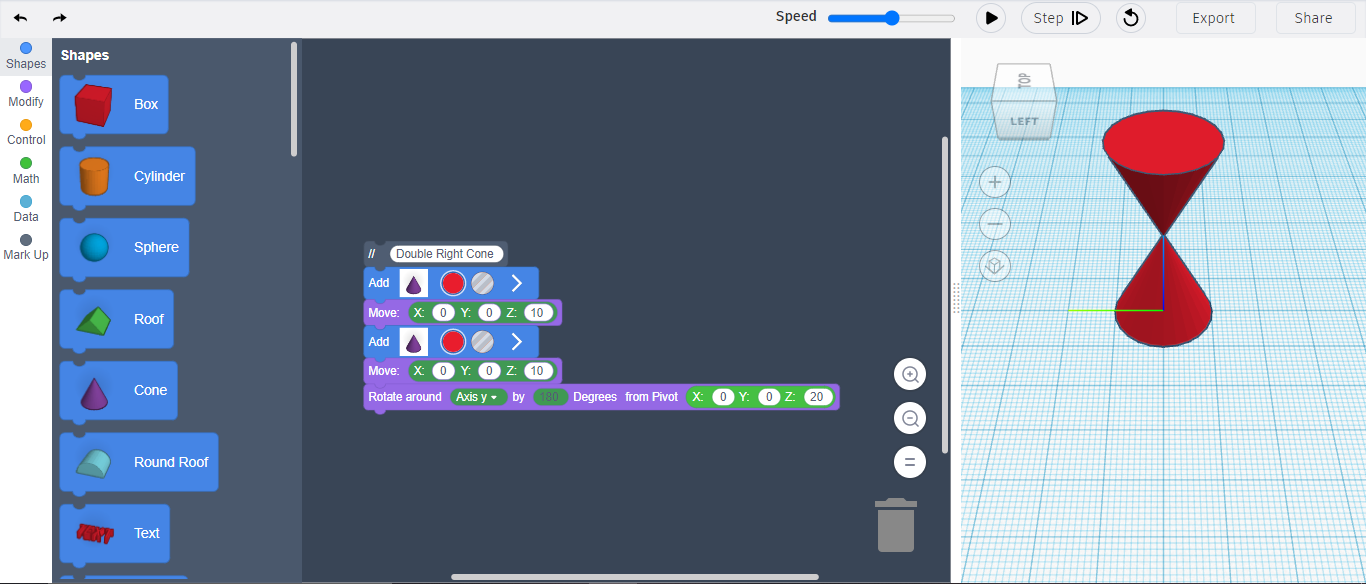
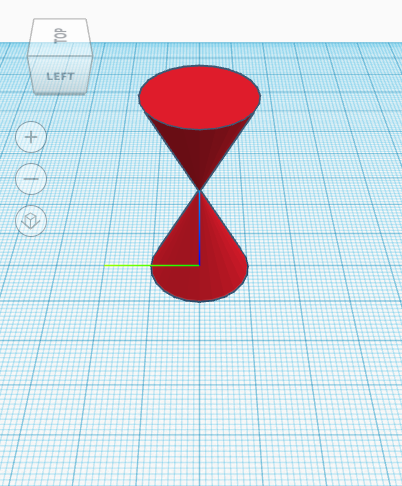
Drag a cone onto the workspace from the Shapes column. Then drag a move block under the cone by going to the Modify column. The cone can be lowered to the ground by changing the "z" to 10 instead. Steps 1-3 must be repeated one more time for the process to happen twice. Under the second move block, insert a rotate block from the Modify column. Adjust the rotate block so that it rotates 180 degrees around the axis-y. Insert an "X: Y: Z:" block from the Math column after the pivot on the rotate block, changing the "z" to 20.
Check to see if your code creates a double right cone by clicking the play button at the top (to the right of speed). Your screen should now appear as shown in the above picture.
Generating Circle
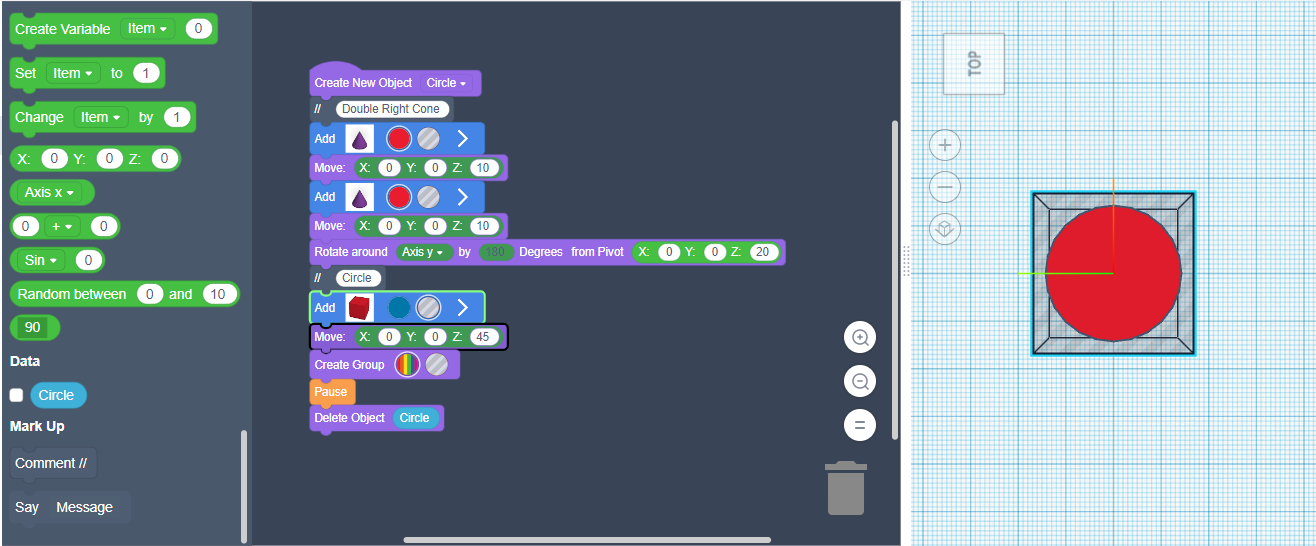
The first of the four conic sections, the circle, will be formed right away.
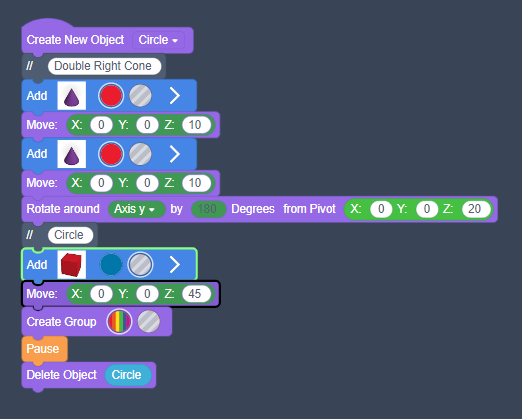
Drag a "Create New Object" block from the Modify column onto the workspace. Then, choose "Rename Variable" and give the object the name "Circle." Subsequent to the Create New Object Block, enter the code for the double right cone. To transform a box into a hole rather than a solid, drag a box from the Shapes column and then chose the gray circle with angled stripes. Change the "z" value to 45 by dragging a move block underneath the box. Drag a "Create Group" block beneath the moving block from the Modify column. Drag a "Pause" block below the "Create Group" block in the Control column. Drag a "Delete Object" block from the Modify column under the Pause block. Drag "Circle" from the Data column into the Delete Object box.
The code is stopped by the pause block until you press play. This is done to allow you to examine the conic section that the code generates. Once you have a grasp of it, you can press play to move on to the next one.
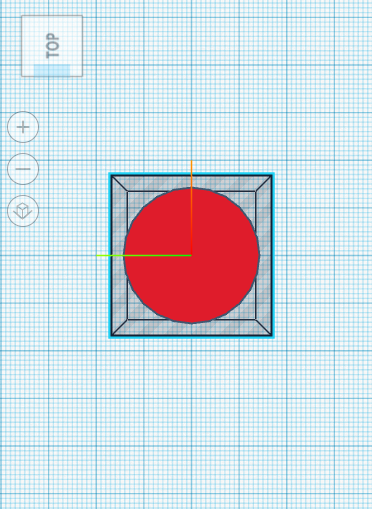
Check to see if your code creates a circle by clicking the play button at the top (to the right of speed) and switching to the top view of the workplane. Your screen should now appear as shown in the above picture.
We have now successfully completed creating our first conic!
Generating an Ellipse
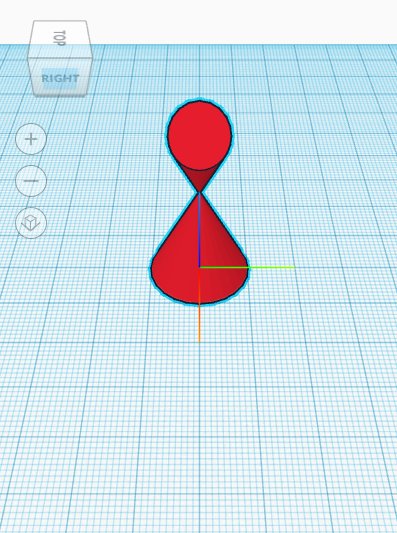
The second conic section that we will create right now is an ellipse.
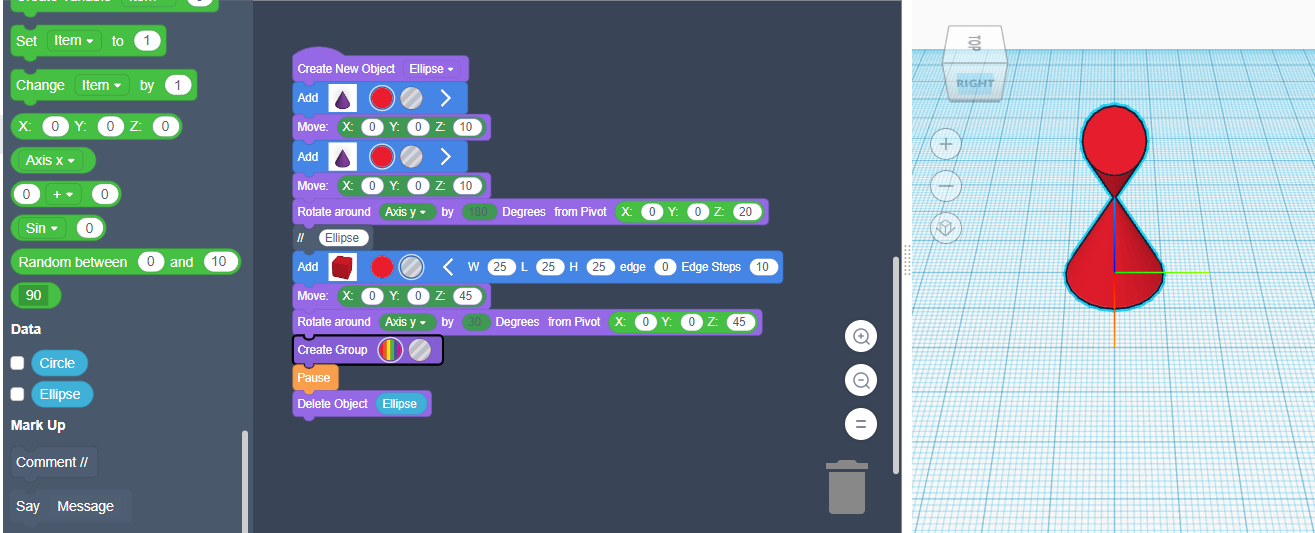
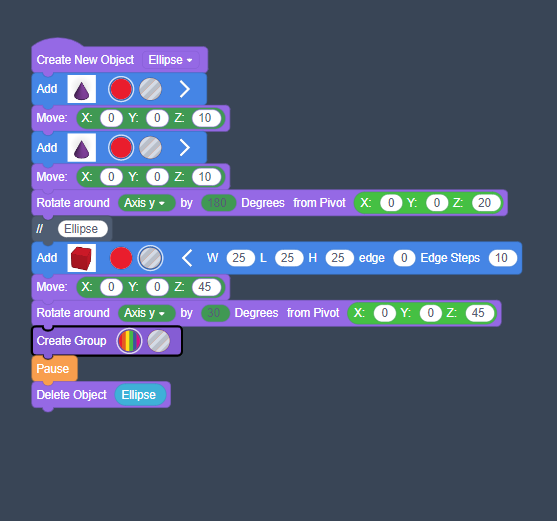
Then, give it the name "Ellipse" by creating a new object from the Modify column. Underneath it, enter the code for the double-right cone. Make a hole rather than a solid in a box by dragging it beneath the double right-cone code. To change the dimensions to 25x25x25, click the arrow on the right of the box block. Change the "z" to 45 by dragging a move block underneath it. Add a rotate block from the Modify column and set its rotation to 30 degrees around the axis-y. Make the "z" 45 by going to the Math column and adding an "X: Y: Z: " block into the space after Pivot. Place a "Create Group" block beneath the rotate block, followed by a "Pause" block. Drag an "Ellipse" block from the data column into the empty space after dragging a "Delete Object" block from the Modify column.
To see the code for the ellipse in action, press the play button once, then press it again when it reaches the circle. Next, check to see if your code creates an ellipse in the workplane's top right view. Your display ought to resemble the one shown above.
Generating a Parabola
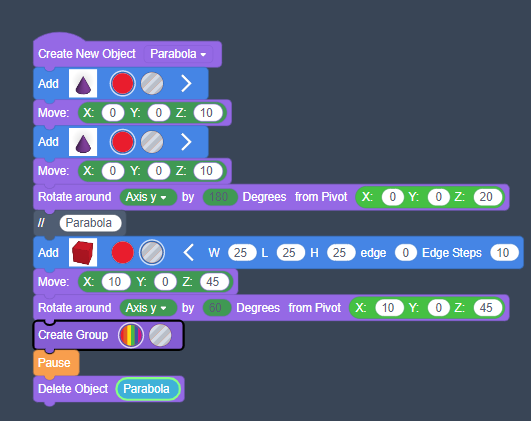
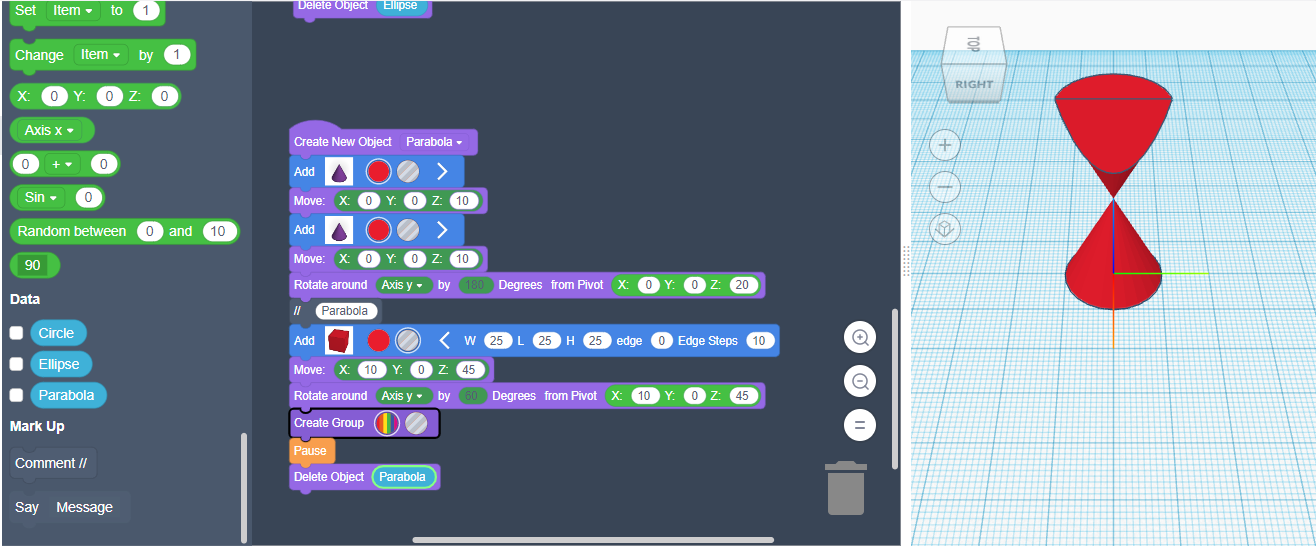
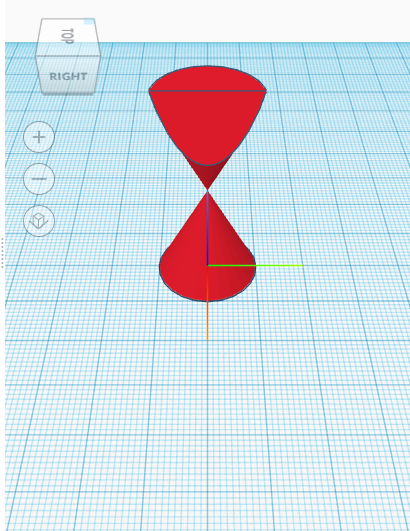
The third conic section, a parabola, is what we'll create next. This one is a little trickier to spot, but looking for a U-shaped curve can help.
Make a new object and give it the name "Parabola." Underneath it, enter the code for the double-right cone. To change the dimensions to 25x25x25, add a box underneath it, make it a hole, and click on the arrow to the right.
By dragging a move block underneath it, change the "x" and "z" to 10 and 45, respectively. A rotating block should be added and modified to rotate by 60 degrees around the axis-y. Make the "x" 10 and the "z" 45 by going to the Math column and inserting an "X: Y: Z:" block into the empty space after Pivot. Place a "Create Group" block beneath the rotate block, followed by a "Pause" block. Drag "Parabola" from the data column into the empty space after dragging a "Delete Object" block from the Modify column.
To see the parabola's code in action, press the play button once, then press it again whenever it pauses. Check to see if your code creates a parabola by switching to the right view of the workplane. Your screen should look like the image above.
Generating a Hyperbola
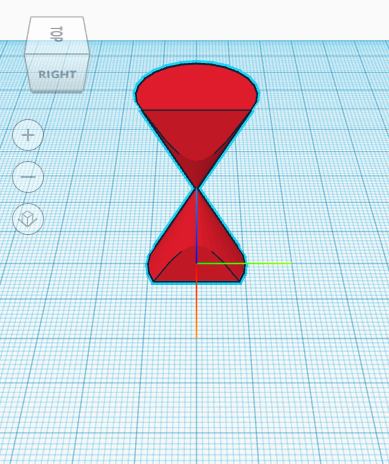
The final main conic section, a hyperbola, is what we'll create next. This one is also a little tricky to see, but it helps to look for two symmetric U-shaped curves near the intersection of the two cones.
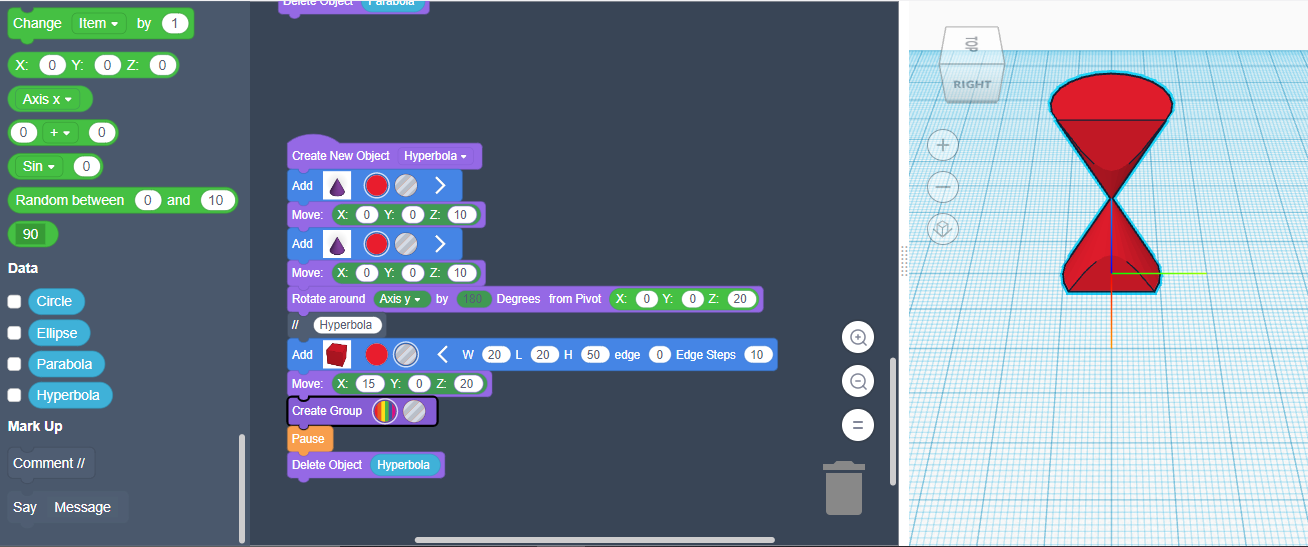
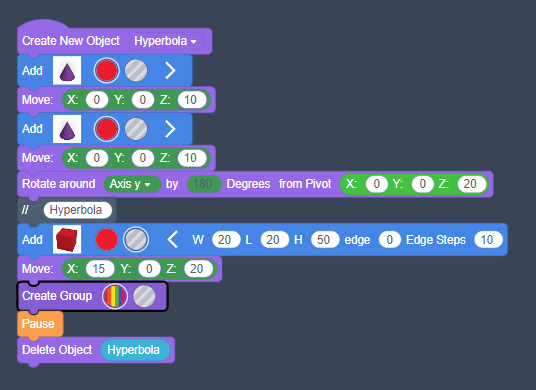
Make a new object and give it the name "Hyperbola." Underneath it, enter the code for the double-right cone. To change the dimensions to 20x20x50, add a box underneath it, make it a hole, and click on the arrow to the right. Change the "x" and "z" to 15 and 20 respectively by dragging a move block beneath them. Place a "Create Group" block beneath the moving block, followed by a "Pause" block. Drag "Hyperbola" from the data column into the empty space after dragging a "Delete Object" block from the Modify column.
To see the hyperbola's code in action, press the play button once, then press it again whenever it pauses. Once there, check to see if your code creates a hyperbola in the right view of the workplane. Your display ought to resemble the one shown above.
Woohoo! The four major conic sections are now complete!
Conclusion
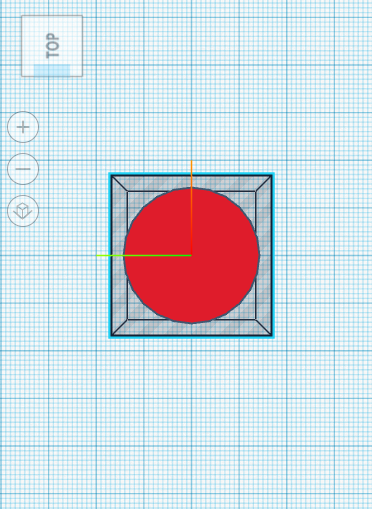
Now that we have completed making the 4 major conics, we have even visualized them and even understand how they are formed. This not only helps one learn them but even remember them forever. So if you have any questions or suggestions, please let me know in the comments. and I have even attached the file for the 3D version below, so feel free to download it for your class.
Woohoo! We just made our conics in less than 10 minutes. How cool is that? If you made a similar one, share your work with the community by clicking on the "I Made It!" button below. So that's it for tonight. I hope you enjoyed this instructable!