How to Make AI Pin | Real Life Jarvis
by Shahbaz Hashmi Ansari in Circuits > Wearables
1264 Views, 15 Favorites, 0 Comments
How to Make AI Pin | Real Life Jarvis
)

Greetings everyone, and welcome to my Instructables tutorial. Today, I'll guide you through the process of creating an AI Pin.
Project Overview:
This project is built using the Seeed Studio XIAO ESP32S3 Sense board. It connects with a Telegram bot to receive commands and interact with the user. Once a query is sent, the device captures an image and forwards it along with the question to the Gemini AI API. The response is then delivered back to the user directly on Telegram. This is a great project for students, as it combines IoT and AI concepts, making it perfect for hands-on learning and even as a college project.
From a technical perspective, the ESP32S3 Sense is configured to use its onboard camera for capturing images. It connects to Wi-Fi, communicates with Telegram servers, and handles secure HTTPS requests to Google’s Gemini API. Base64 encoding is used to transfer image data along with the text query. The code manages camera frames, parses API responses using ArduinoJson, and sends AI-generated replies to Telegram. This setup demonstrates practical integration of hardware, networking, and AI services in a compact IoT system.
Before beginning, a huge shoutout to JLCMC for sponsoring.
Now, let's get started with our project!
Supplies
.png)
.png)
.png)
Electronic Components Required:
- Seeed Studio XIAO ESP32S3 SENSE
- 3.7V LI-PO Battery (400 mAh)
- Slide Switch
- Cardboard / Acrylic Sheet / Sun Board, etc.
Additional Tools:
- Hot Glue
- Cutter
- Soldering Iron
Software:
- Arduino IDE
Arduino IDE Set-up + Telegram Bot

.png)
.png)
.png)
.png)
.png)
.png)
.png)
For Arduino IDE Setup Follow these steps:
- Open Arduino IDE on your computer.
- Go to File > Preferences.
- In the Additional Board Manager URLs field, paste this link:
- Then click OK.
- Next, go to Tools > Board > Board Manager.
- Search for ESP32, then click Install.
Now install the required library:
- Open Sketch > Include Library > Manage Libraries.
- Search for UniversalTelegramBot.h.
- Install it.
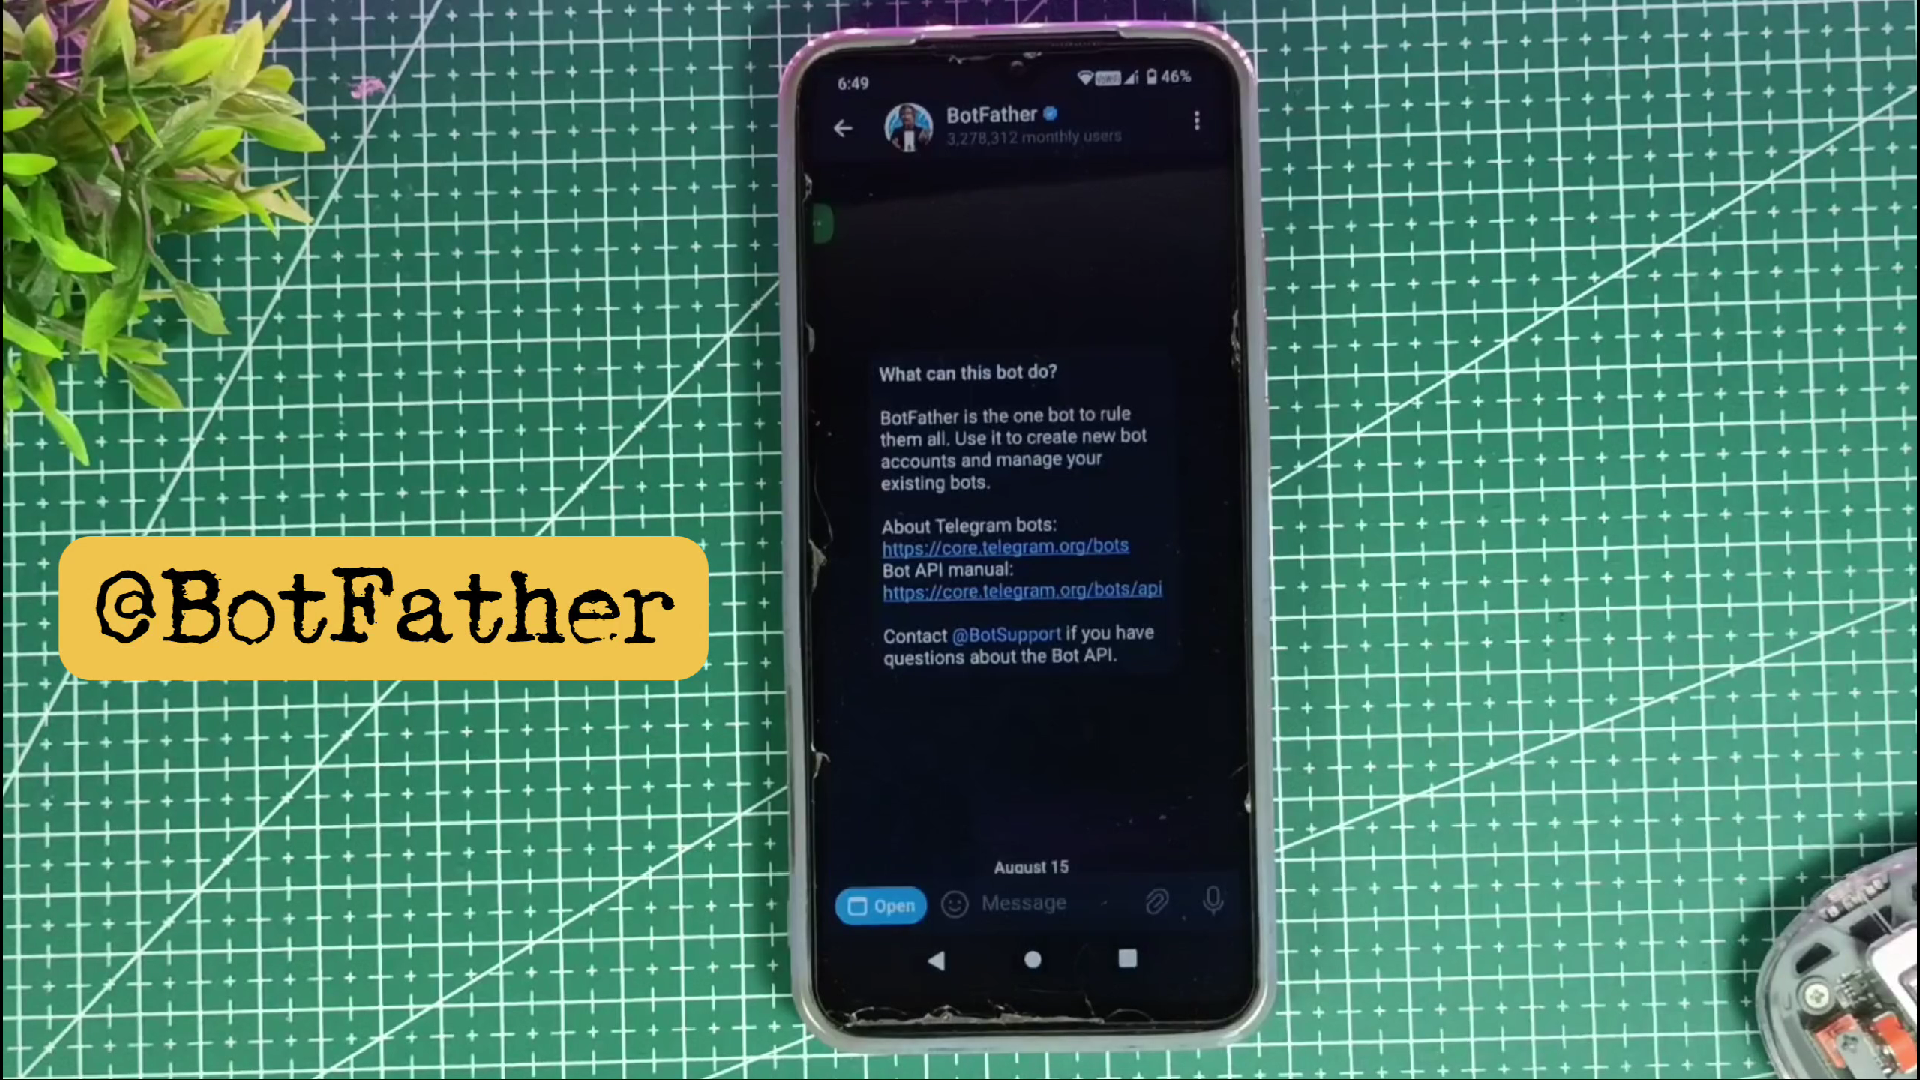
Create a Telegram Bot:
- Open the Telegram app on your phone.
- Search for @BotFather (the official Telegram bot creator).
- Start a chat and type /newbot.
- Give your bot a name and a unique username.
- BotFather will generate a token for your bot. (Copy and save this token; we will use it in the Arduino code.)
Part 1: Basic Coding
.png)
.png)
About this step:
we’ll write a code that allows our Telegram bot to take a command from the user and reply with a simple pre-set message
Code:
Connect the board to your computer using a USB-C cable. With the Arduino IDE open and your code ready, ensure you have selected the correct board and port by navigating to the Tools menu. Then, click the Upload button (the right-arrow icon) to begin compiling and flashing the sketch to the XIAO ESP32S3.
Breakdown:
1. Wi-Fi & Bot Credentials:
Replace these with your actual Wi-Fi name & password.
botToken → This is the unique key you got from BotFather on Telegram.
2. Checking Telegram Messages:
`bot.getUpdates(...)` → Checks if there are new messages.
`while (numNewMessages)` → Runs as long as there are new messages.
👉 If someone sends /ask, the bot replies:
and prints confirmation on the Serial Monitor.
Elevate Your Electronic Projects - JLCMC
.png)
.png)
.png)
JLCMC is your one-stop shop for all electronic manufacturing needs, offering an extensive catalog of nearly 600,000 SKUs that cover hardware, mechanical, electronic, and automation components. Their commitment to guaranteeing genuine products, rapid shipping (with most in-stock items dispatched within 24 hours), and competitive pricing truly sets them apart. In addition, their exceptional customer service ensures you always get exactly what you need to bring your projects to life.
They have everything you need for your next project:
- Custom Linear Guide Shafts: Precision-engineered for applications like 3D printing, CNC machines, and industrial automation.
- Aluminum Profiles: Versatile, durable framing solutions—perfect for machine enclosures, workstations, and custom assemblies.
To show their support for our community, JLCMC is offering an exclusive $70 discount coupon. This is the perfect opportunity to save on high-quality components for your next project. Don’t miss out—visit https://jlcmc.com/?from=RBL to explore their amazing range of products and grab your discount coupon today!
Part 2: AI Model
.png)
.png)
.png)
.png)
.png)
.png)
About this step:
We’ll upgrade that same code so the bot can use an AI model to reply with intelligent responses.
Follow these steps to create the Gemini API key:
- Open your browser and go to https://aistudio.google.com/
- Click the Create API key button. You can create a key in a new or existing Google Cloud project.
- The system will generate a new API key. Click the Copy button to save it. Paste the key into the designated placeholder in the code.
Code:
Copy and replace this code with your existing code in the Arduino IDE, and then click the Upload button.
Breakdown:
1. Gemini Credentials:
GEMINI_API_KEY comes from Google AI Studio (Gemini API).
2. Gemini API Function:
- Connects securely to Gemini’s API server.
- If connection fails → returns error.
Payload Creation:
- This is the JSON request Gemini expects.
- Sends the user’s message (userPrompt) to Gemini.
- Includes configs like thinkingBudget and googleSearch tool.
Send Request:
Sends an HTTPS POST request with the user’s query to Gemini API.
Image Capture
.png)
.png)
.png)
.png)
In this step, our goal is to capture an image when the bot receives a command, then convert it into Base64 format, and finally, send back the first 50 characters as confirmation.
Steps to enable the PSRAM:
Before uploading the code to your ESP32 board, you need to enable PSRAM (external memory).
- In the Arduino IDE, go to the Tools menu.
- Find the option “PSRAM”
- Set it to “Enabled”
✅ This ensures your ESP32 has enough memory to handle Image Capture & Gemini API responses.
Code:
Upload and Test the Code
- Connect your XIAO ESP32S3 board to your computer.
- Click the Upload button in the Arduino IDE to flash the code.
- Once uploaded, open the Serial Monitor (set baud rate to 115200).
- Watch the output to confirm that the XIAO ESP32S3 connects to Wi-Fi and starts the bot.
Final Match
.png)
Now it’s time to combine everything. This new code merges Step 4 and Step 5.
Here’s how it works: The bot first asks for a query. Once the user sends it, the XIAO ESP32S3 captures an image, converts it into Base64, and, along with the user query, sends it to the Gemini API. The API processes both inputs and returns a detailed reply.
Final Code:
Copy and paste this code in the Arduino IDE and upload it!
See the magic...
Wiring the Circuit - Making It Portable
.png)
.png)


To make our AI Pin portable, we’ll need a few additional components: a 3.7V Li-Po battery and a small switch. These will power the XIAO ESP32S3 Sense board.
Connect the Battery with a Switch
- Solder the negative terminal of the battery directly to the GND pin of the XIAO ESP32S3 Sense board.
- Take the positive terminal of the battery and connect it to one side of a switch.
- From the other side of the switch, connect a wire to the 3V3 (or VIN) pin on the board.
Default battery charging support
The XIAO ESP32S3 board includes a built-in power management chip for charging a connected lithium battery via its USB-C port.
Here is how the charging functionality works by default:
- Charging indicator: A red LED on the board serves as the charging indicator.
- Power and charging status:
- Board connected to USB without a battery: The red LED will turn on briefly and then turn off after about 30 seconds.
- Battery connected and charging via USB: The red LED will flash to indicate that the battery is currently charging.
- Battery fully charged: When the battery is full, the red LED will turn off.
Case for It

.png)
.png)
.png)
.png)
.png)
.png)
.png)
.png)
.png)
.png)
.png)
.png)
To construct the case, I will use cardboard, but you can use any material, such as acrylic sheet/sun board, etc., as per your requirement. The PDF file containing the cutout templates is attached below. Please refer to the accompanying images for guidance on assembling the case for this project.
Downloads
Working Video and Tutorial
)
.png)
.png)
.png)
Congratulations! You’ve successfully built your own AI Pin. A demonstration video of this project can be viewed here: Watch Now
Thank you for your interest in this project. If you have any questions or suggestions for future projects, please leave a comment, and I will do my best to assist you.
For business or promotional inquiries, please contact me via email at Email.
I will continue to update this instructable with new information. Don’t forget to follow me for updates on new projects and subscribe to my YouTube channel (YouTube: roboattic Lab) for more content. Thank you for your support.