How to Make a Brochure in Microsoft Word for a Mac
by engl295 in Circuits > Microsoft
223339 Views, 6 Favorites, 0 Comments
How to Make a Brochure in Microsoft Word for a Mac
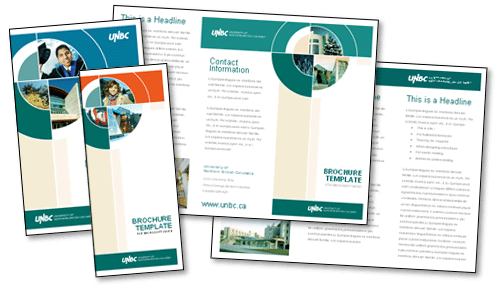
The following instructions are about how to make a quality brochure in Microsoft Word
Opening the Brochure Layout
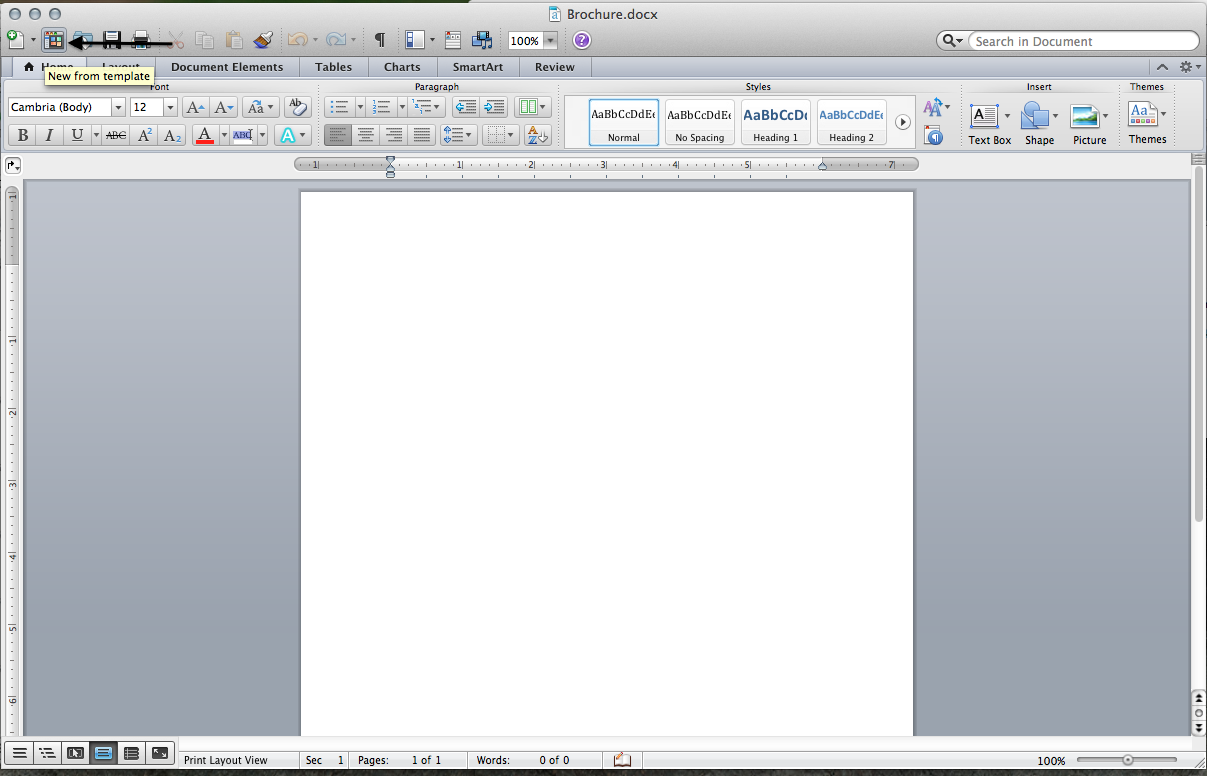
On your Mac go to the dock, and find the icon Microsoft Word. If the icon is not in the dock, go to Finder. From Finder, go to Applications. Microsoft Word should be under Applications. Open Microsoft Word.
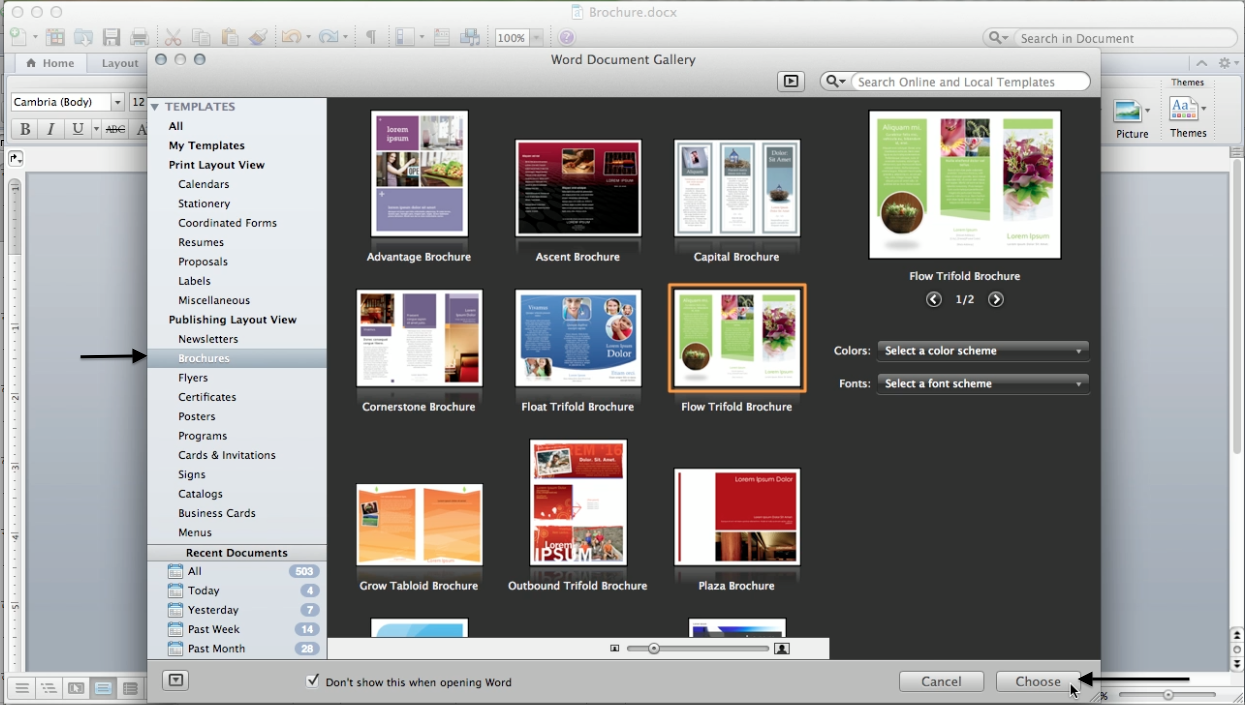
When Word opens look for the icon in the top left hand corner that resembles a miniature screen on a Mac. When you hover over it, a box should pop up that says “New From Template”. Click this box. When it opens choose the link under “ Publishing Layout View” in the left hand column called “Brochures”. Then choose the Brochure layout you like best by clicking the image you want once and then click “choose” in the low right hand corner.
When Word opens look for the icon in the top left hand corner that resembles a miniature screen on a Mac. When you hover over it, a box should pop up that says “New From Template”. Click this box. When it opens choose the link under “ Publishing Layout View” in the left hand column called “Brochures”. Then choose the Brochure layout you like best by clicking the image you want once and then click “choose” in the low right hand corner.
Choosing a Theme
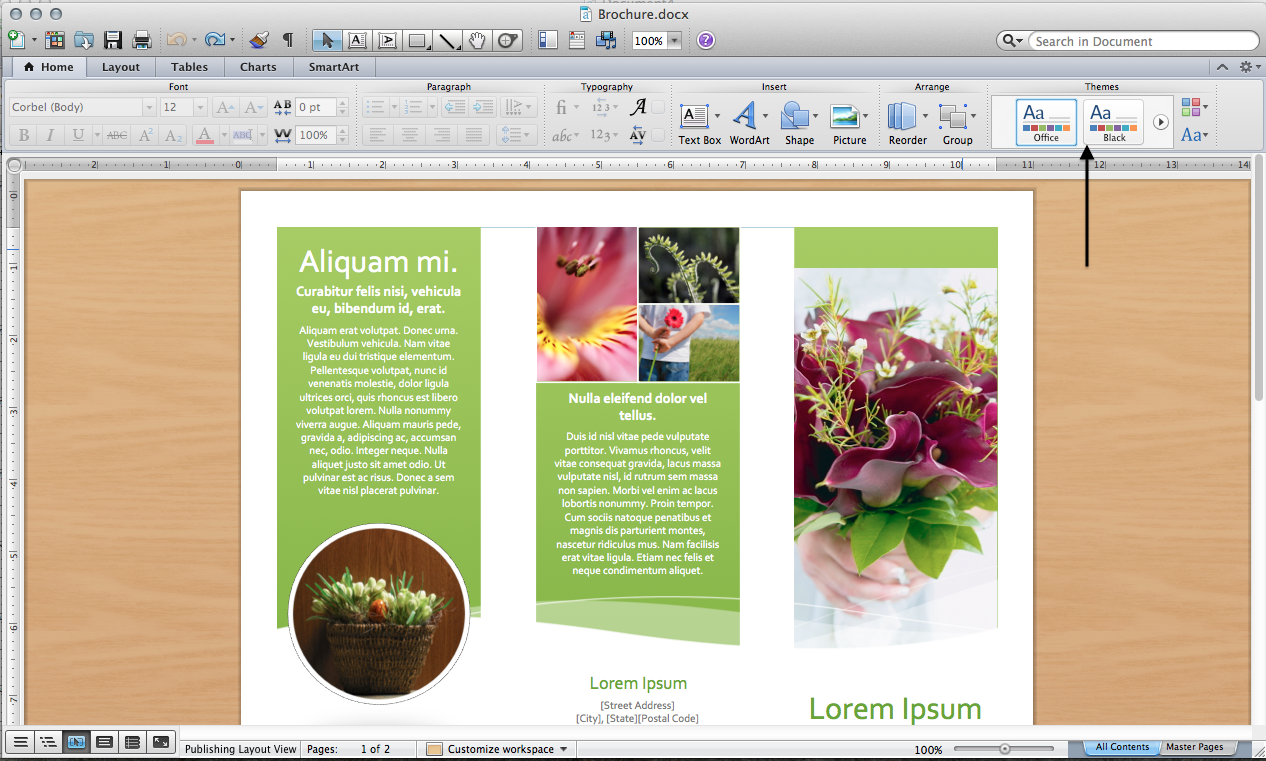
Once the document open look in the upper right hand corner for the box titled “Themes”. Once you find the box you will see that there are options under “Themes” that you can scroll through by pushing the arrows located on the side of the options. By clicking on the “Theme” you choose, it will display on the brochure.
Editing Text Boxes
When it comes to editing text boxes there are only three important steps you need to know
Changing the Size of a Text Box
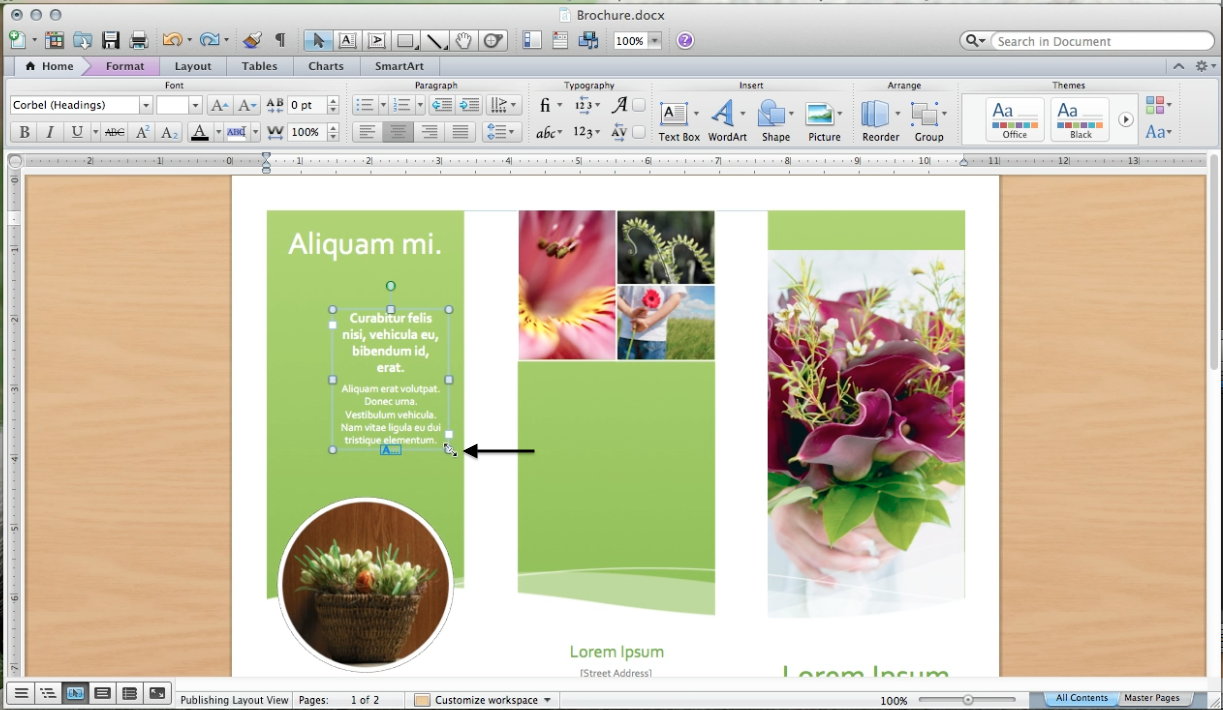
To change the size of a text box, first make sure the box is selected by clicking on it. Then click one of the corners and drag. You will know you are doing this correctly if the cursor turns into a two-sided arrow.
Changing the Position of a Text Box
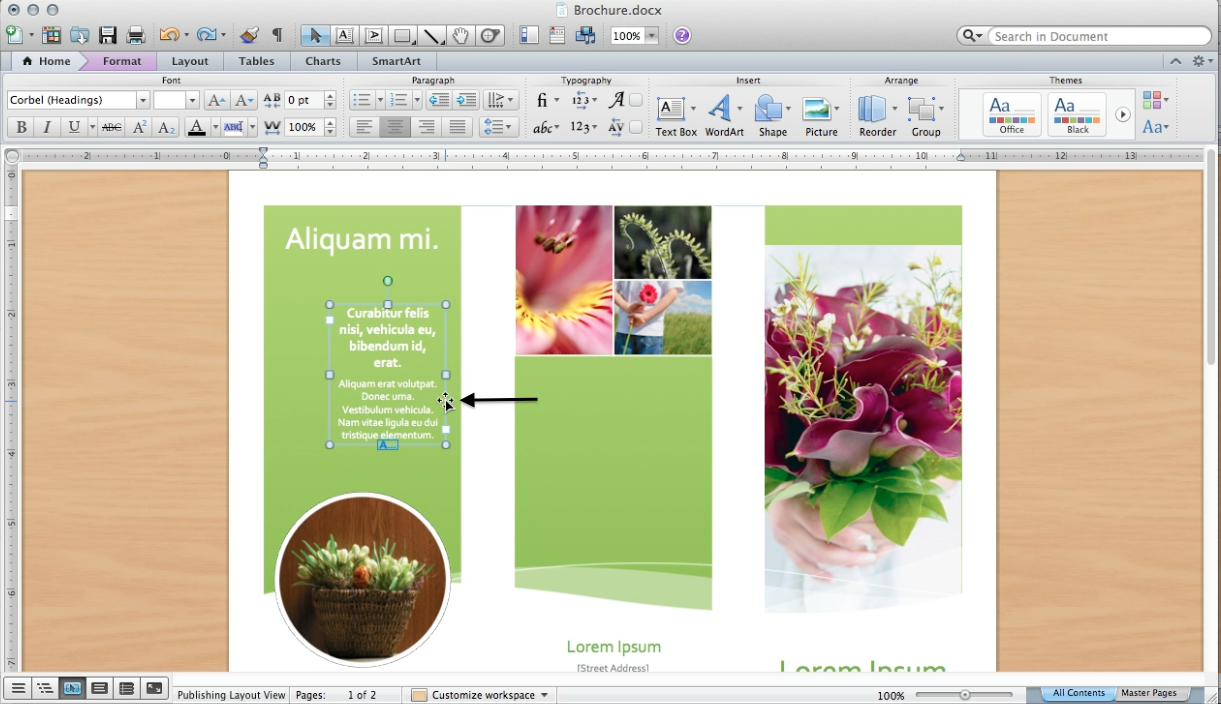
To change the position of a text box, first make sure the box is selected by clicking on it. Then hover over the outside of the box until a four-sided arrow appears. Once that appears, then click and drag the box anywhere you want.
Adding a Border to a Text Box
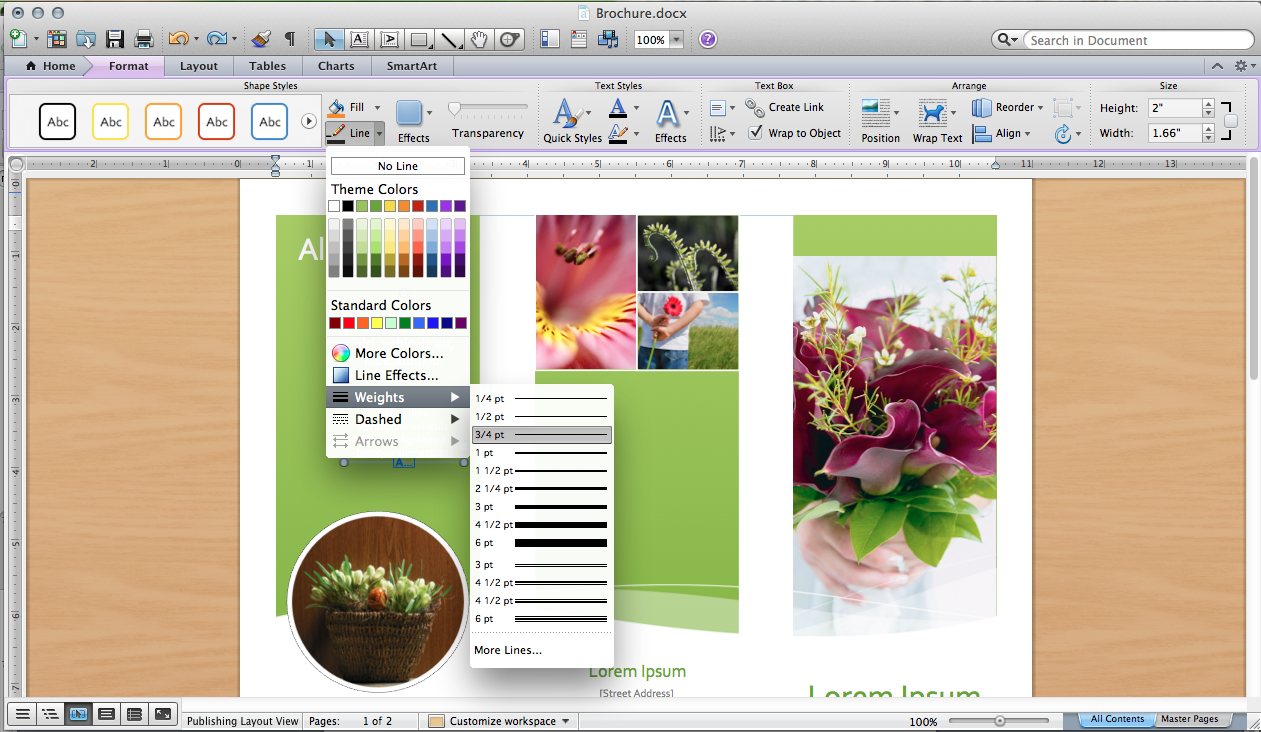
To add a border to the text box, first make sure the box is selected by clicking on it. Then go to the “Format Picture” tab at the top of the screen (this tab should be in purple). After this, click the arrow next to the “Line” button, which is located in the center of the screen. Once on this arrow screen you can pick the color you want and the weight (thickness of the line) you want. To pick the color, simply choose which color you want from the ones provided. To pick the weight of the border, or thickness, go down to the “Weights” option. Once at this option, click on it and you should be taken to another box. From this box, you should be able to choose the weight, or thickness, of the border.
Editing Picture Boxes
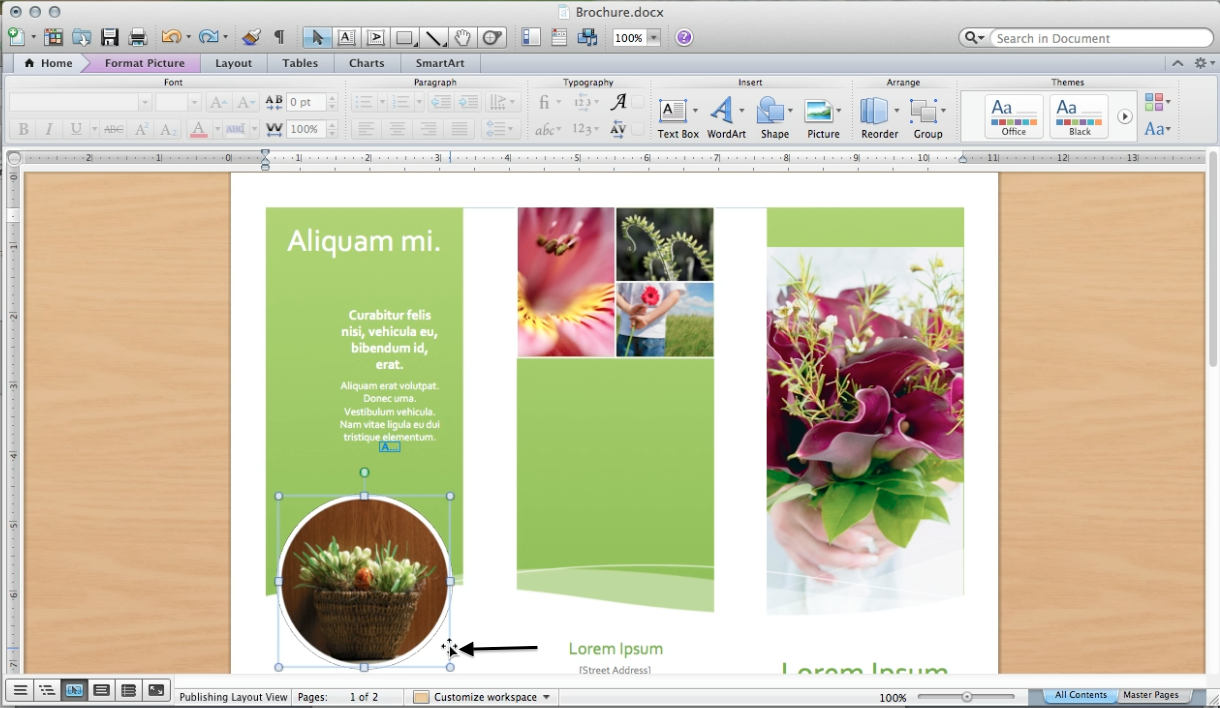
Editing pictures is similar to editing text boxes, except for a few minor details
Changing the Size of a Picture
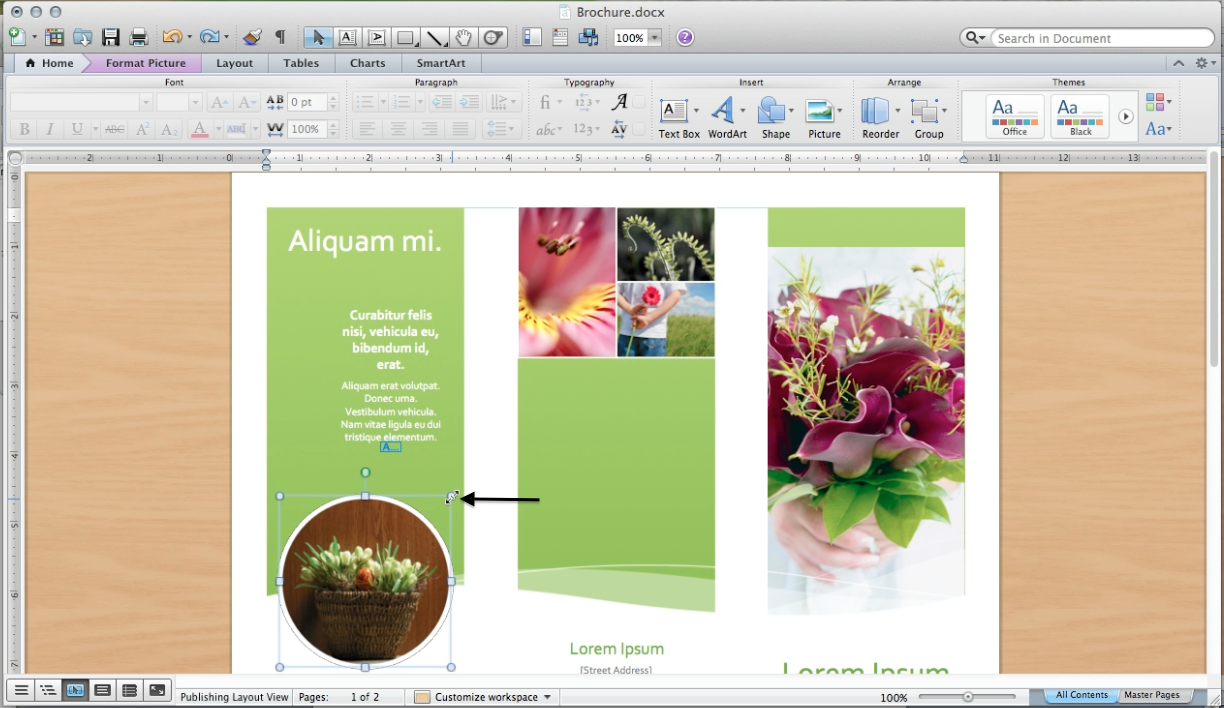
To change the size of a picture, first make sure the picture is selected by clicking on it. Then click one of the corners and drag. You will know you are doing this correctly when the cursor turns into a two-sided arrow.
Changing the Position of a Picture
To change the position of a picture, first make sure the picture is selected by clicking on it. Then hover over the outside of the picture until a four-sided arrow appears. Once that appears, then click and drag the picture anywhere you want.
Adding a Border to a Picture
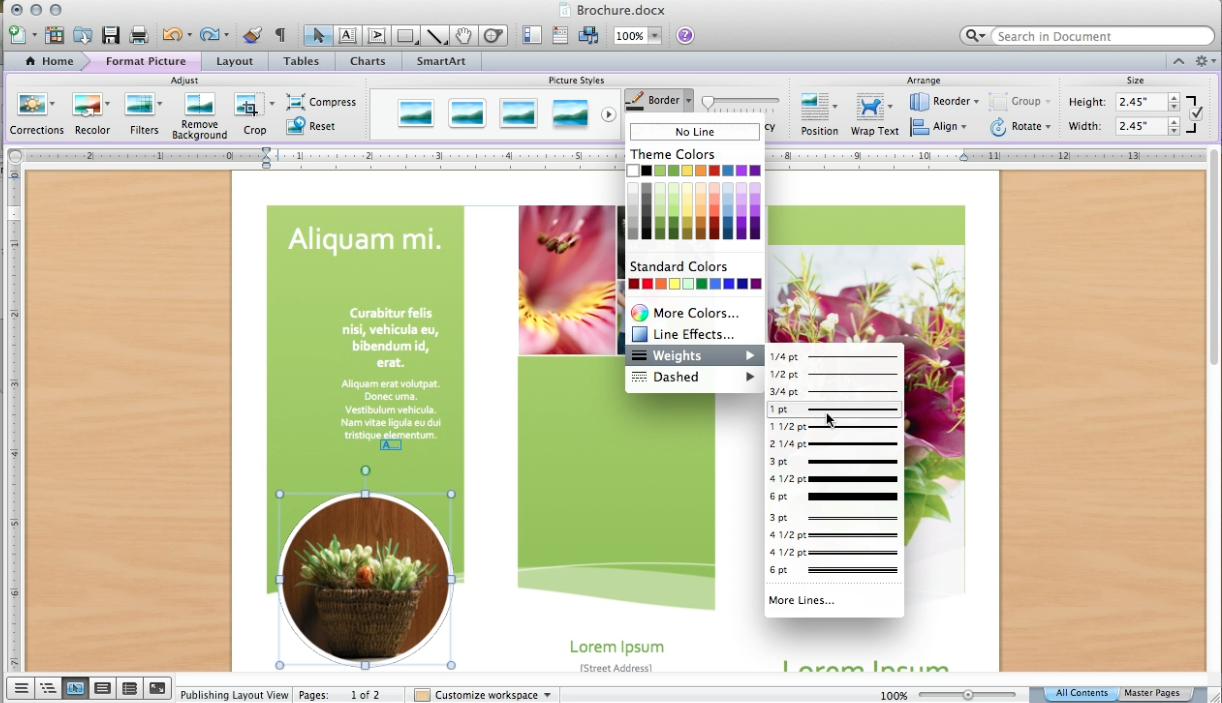
To add a border to the picture, first make sure the picture is selected by clicking on it. Then go to the “Format Picture” tab at the top of the screen (this tab should be in purple). After this, click the arrow next to the “Border” button. Once on this arrow screen you can pick the color you want and the weight (thickness of the line) you want. To pick the color, simply choose which color you want from the ones provided. To pick the weight of the border, or thickness, go down to the “Weights” option. Once at this option, click on it and you should be taken to another box. From this box, you should be able to choose the weight, or thickness, of the border.
Editing Picture Boxes - Corrections
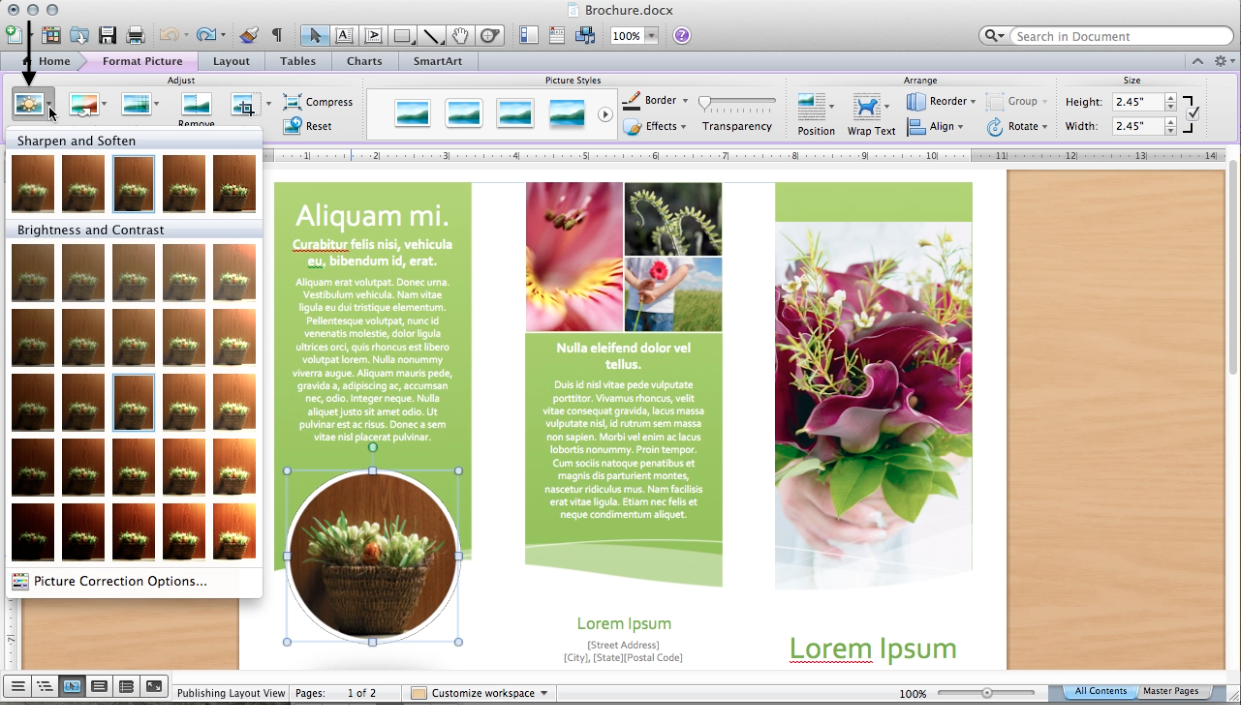
Adjusting the Sharpness/Softness - makes a picture more defined or blurry
All you have to do to adjust this sharpness or softness is make sure the picture is selected, then go up to the “Format Picture” tab. Once you are under this tab, click the arrow next to the “Corrections” button. After this, go under the “Sharpen and Soften” heading. Under this heading, you can select the sharpness or softness you want.
All you have to do to adjust this sharpness or softness is make sure the picture is selected, then go up to the “Format Picture” tab. Once you are under this tab, click the arrow next to the “Corrections” button. After this, go under the “Sharpen and Soften” heading. Under this heading, you can select the sharpness or softness you want.
Editing Picture Boxes - Recoloring
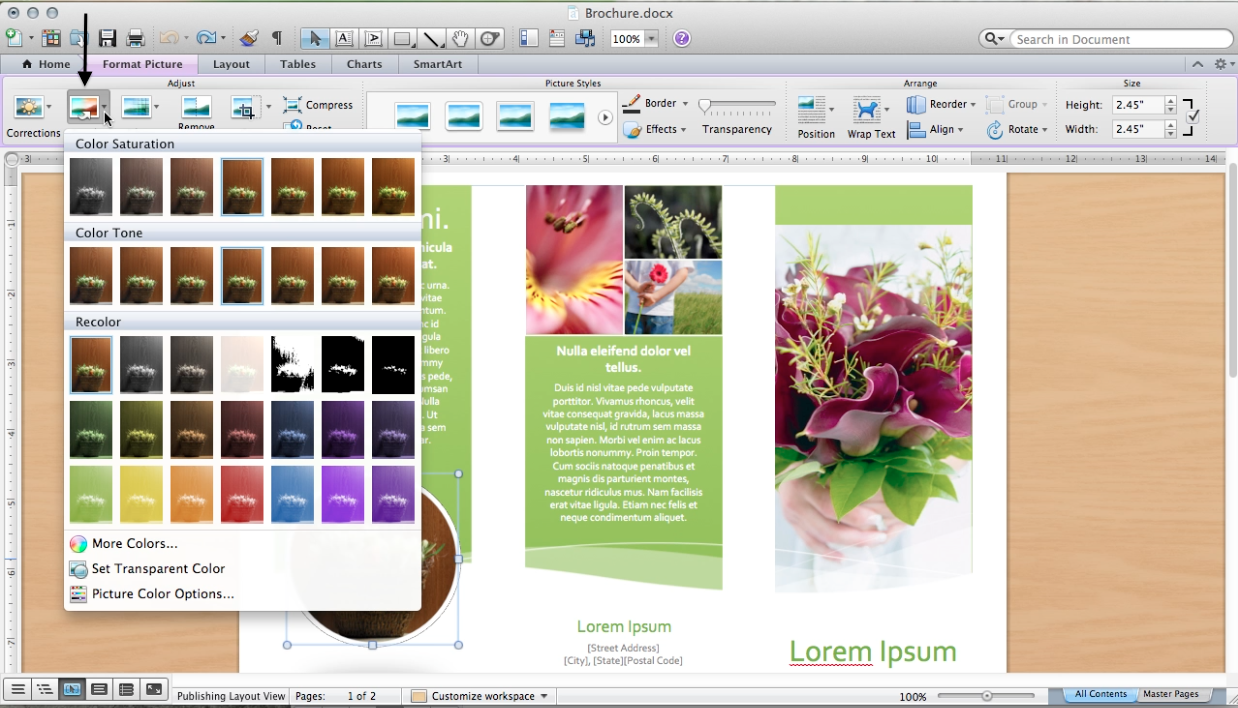
Recoloring a picture can change the color saturation, color tone, or change the picture color entirely.
Color Saturation – changes the brightness of the background colors in your picture
All you have to do to change the color saturation of your picture is make sure the picture is selected by clicking on it, then go up to the “Format Picture” tab. Once you are under this tab, click the arrow next to the “Recolor” button. After this, go under the “Color Saturation” heading. Under this heading, you can select the saturation you want for your picture.
Color Tone – changes the intensity of the colors and adds more light to your picture
All you have to do to change the color tone is make sure the picture is selected by clicking on it, then go up to the “Format Picture” tab. Once you are under this tab, click the arrow next to the “Recolor” button. After this, go under the “Color Tone” heading. Under this heading, you can select the intensity of your color tone.
Recolor – adds a color filter to your picture
All you have to do to add a color filter is make sure the picture is selected by clicking on it, then go up to the “Format Picture” tab. Once you are under this tab, click the arrow next to the “Recolor” button. After this, go under the “Recolor” heading. Under this heading, you can select the color filter you want on your picture.
Editing Picture Boxes - Filters
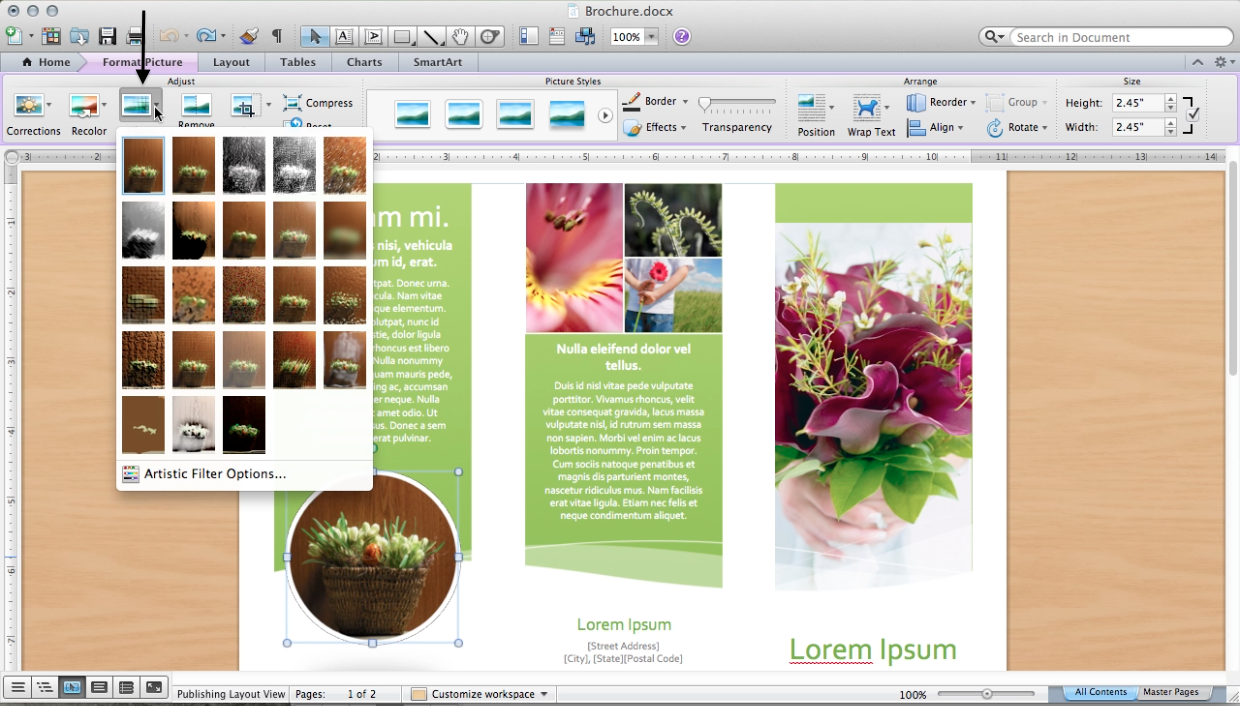
Adding a Filter - puts an artistic effect on your picture
All you have to do to add a filter to your picture is make sure the picture is selected by clicking on it, then go up to the “Format Picture” tab. Once you are under this tab, click the arrow next to the “Filters” button. Under this button, you can select the filter you want for your picture.
All you have to do to add a filter to your picture is make sure the picture is selected by clicking on it, then go up to the “Format Picture” tab. Once you are under this tab, click the arrow next to the “Filters” button. Under this button, you can select the filter you want for your picture.
Editing Picture Boxes - Removing Background
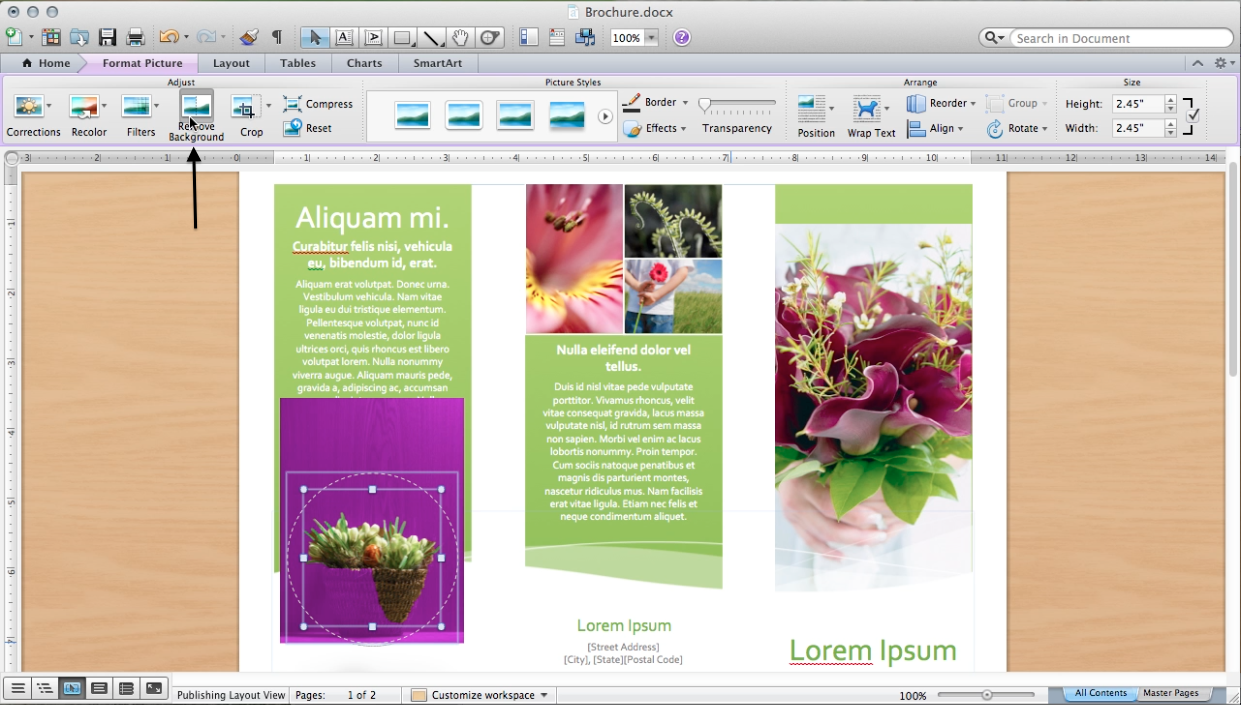
Removing a background - this eliminates the unwanted negative space around your picture
All you have to do to remove a picture background is make sure the picture is selected by clicking on it, then go up to the “Format Picture” tab. Once you are under this tab, click the “Remove Background” button”. To remove the unwanted background pictures just move the circle and square around the areas that you want to include. Then click out of the image to see the result
All you have to do to remove a picture background is make sure the picture is selected by clicking on it, then go up to the “Format Picture” tab. Once you are under this tab, click the “Remove Background” button”. To remove the unwanted background pictures just move the circle and square around the areas that you want to include. Then click out of the image to see the result
Saving
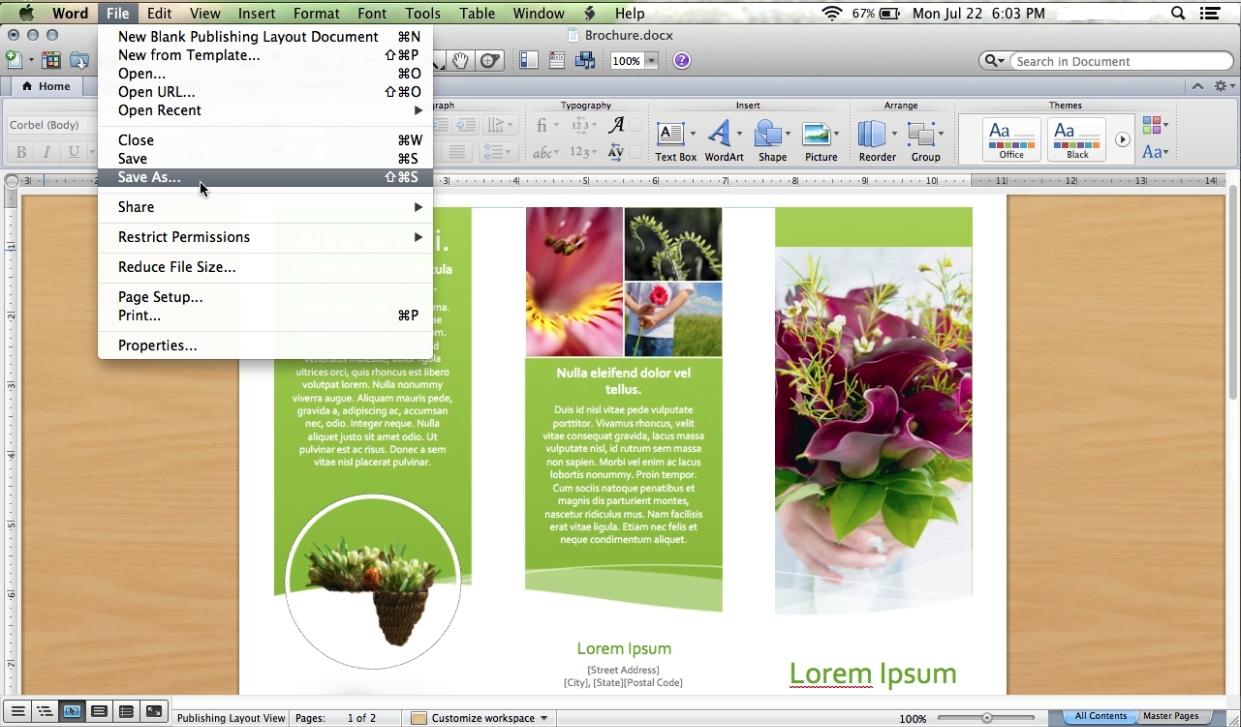
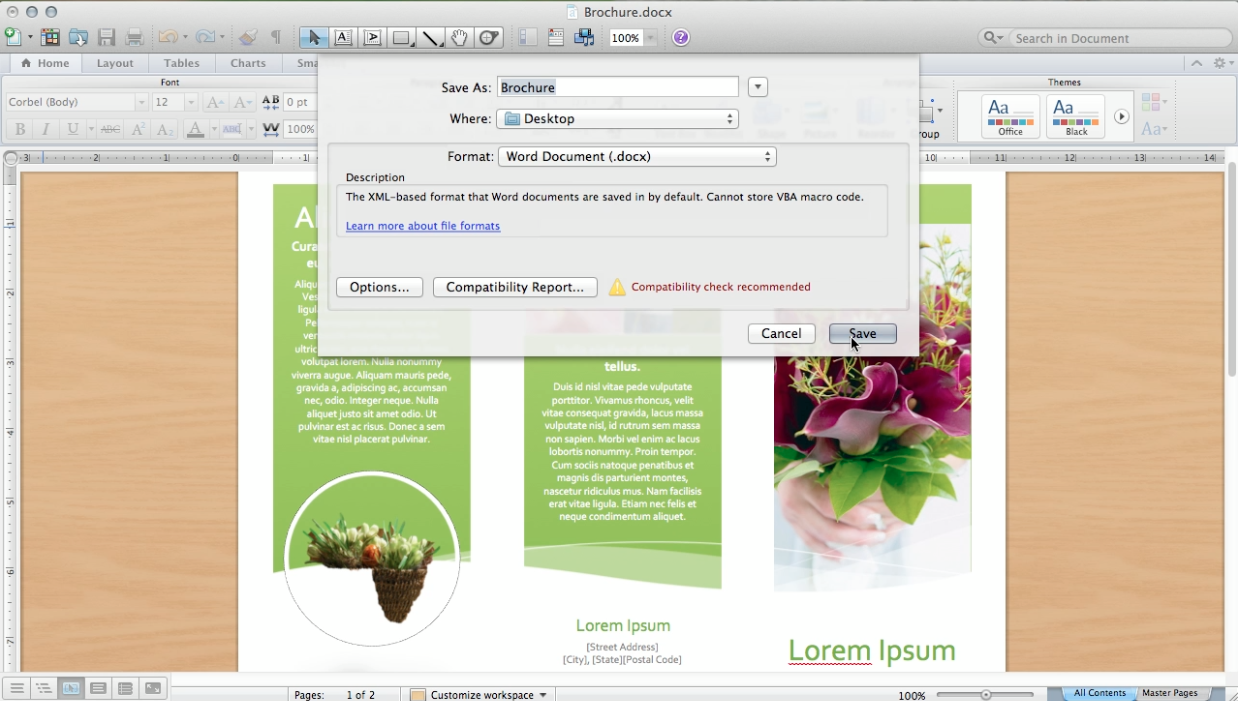
To save, just go up to the top left corner and click “File”. Once under this, go down to the “Save As” option. Once under this, name your document and pick the save location. This saves a final draft in the location of your choosing.
Printing
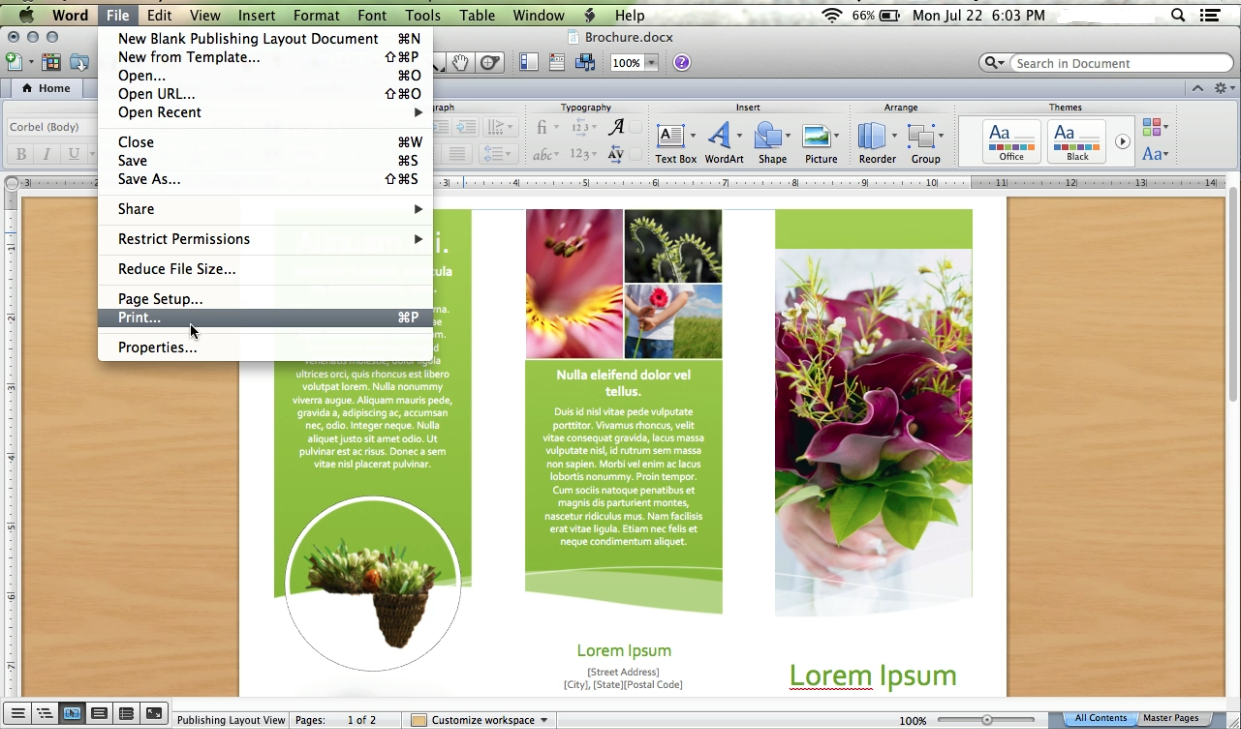
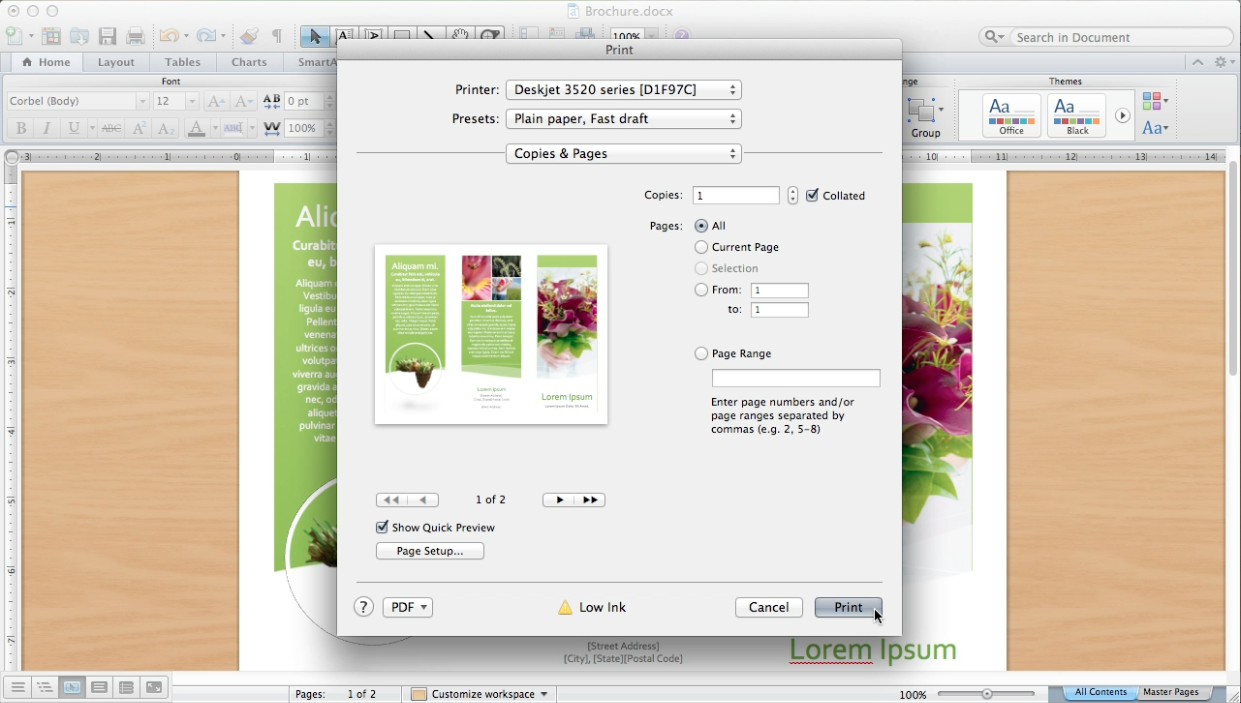
Once you have saved, you will probably want to print a copy of your brochure. To print, go to the top left hand corner and click “File”. Once under file, go down to the “Print” option. Just press print in the bottom right hand corner and you should be good to go!