How to Laser Mark Photos on 304 Stainless Steel?
by thunderlaser-nolan in Workshop > Metalworking
25 Views, 0 Favorites, 0 Comments
How to Laser Mark Photos on 304 Stainless Steel?

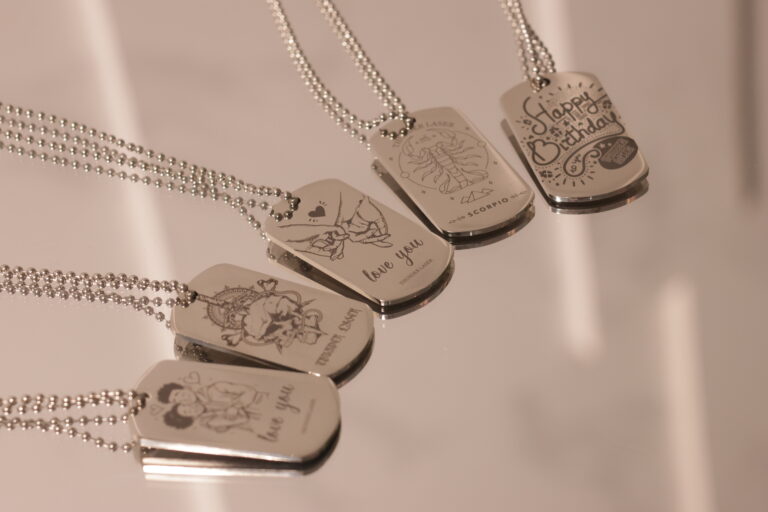
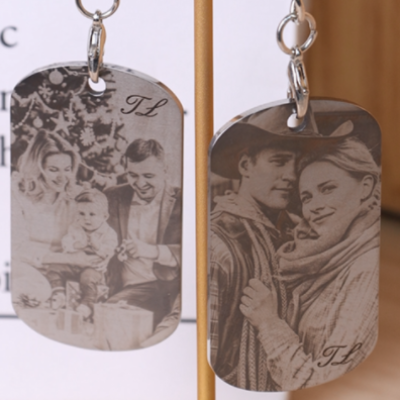
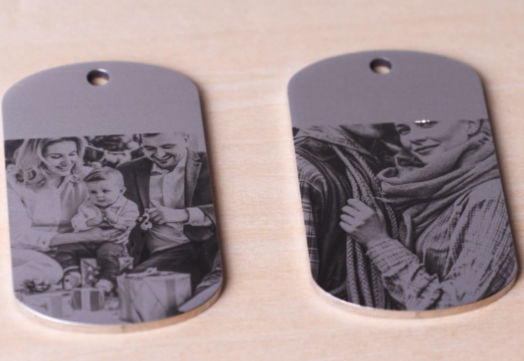
Marking a photo onto 304 stainless steel is one of the most impressive applications of a fiber laser. From personalized gifts to commemorative plaques, metal photo engraving offers a permanent, high-contrast finish that feels premium and lasts a lifetime.
In this tutorial, you’ll learn exactly how to prepare your photo, adjust the image for laser marking, set up your stainless steel sheet, and run a clean, detailed marking job—perfect for beginners and hobbyists who want professional results.
Supplies
Machine Used
Aurora Lite
Material Needed
304 Stainless Steel Tag
Settings
- Laser Marking
- Speed:100mm/s
- Power:10%
- KHz: 50
- Lines per Inch: 1544.00
- Number of Passes: 1
File: https://www.thunderlaser.com/download/club/Aurora-Lite-Stainless-steel-keychain.lbrn2
Place the Material on the Laser Bed
Lay your 304 stainless steel sheet flat on the laser bed. Make sure it is clean, fingerprint-free, and secured so it won’t shift during marking.
Tip:
To keep your sheet perfectly in place, you can use a CO₂ laser to cut a simple wooden frame that holds the metal tightly. If you don’t want to make a frame, just place a wooden board underneath your stainless steel sheet—this protects the laser bed in case the marking outline is slightly off, preventing accidental hits on the worktable.
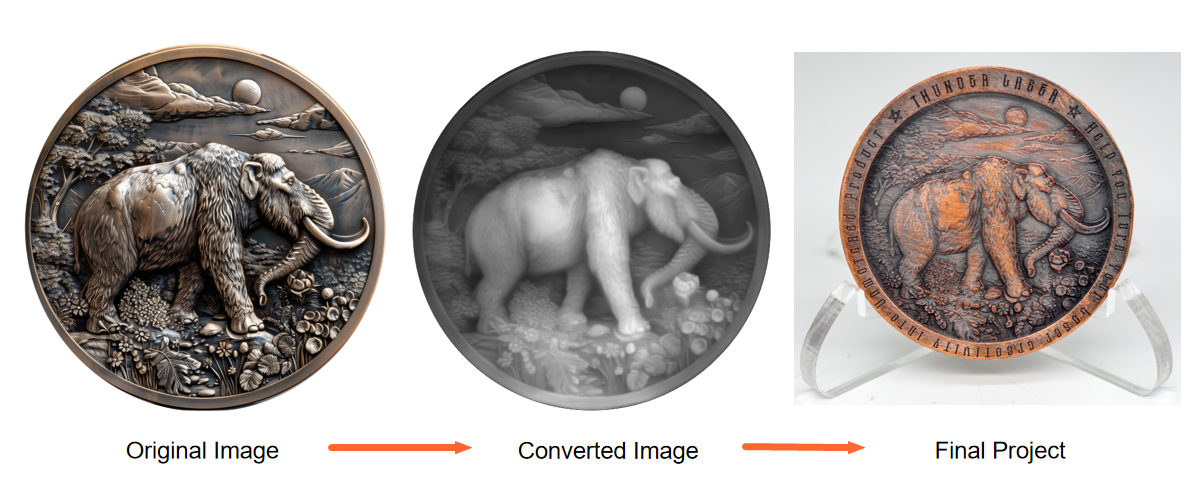
Prepare Your Photo for Laser Marking
Before opening your laser software, start by processing the photo. Convert it to grayscale, then adjust the curves, levels, contrast, and sharpness (You can do it with PR) to create an image with strong contrast and clear details. A well-processed image means a well-marked result.
Import the Photo Into Your Laser Software
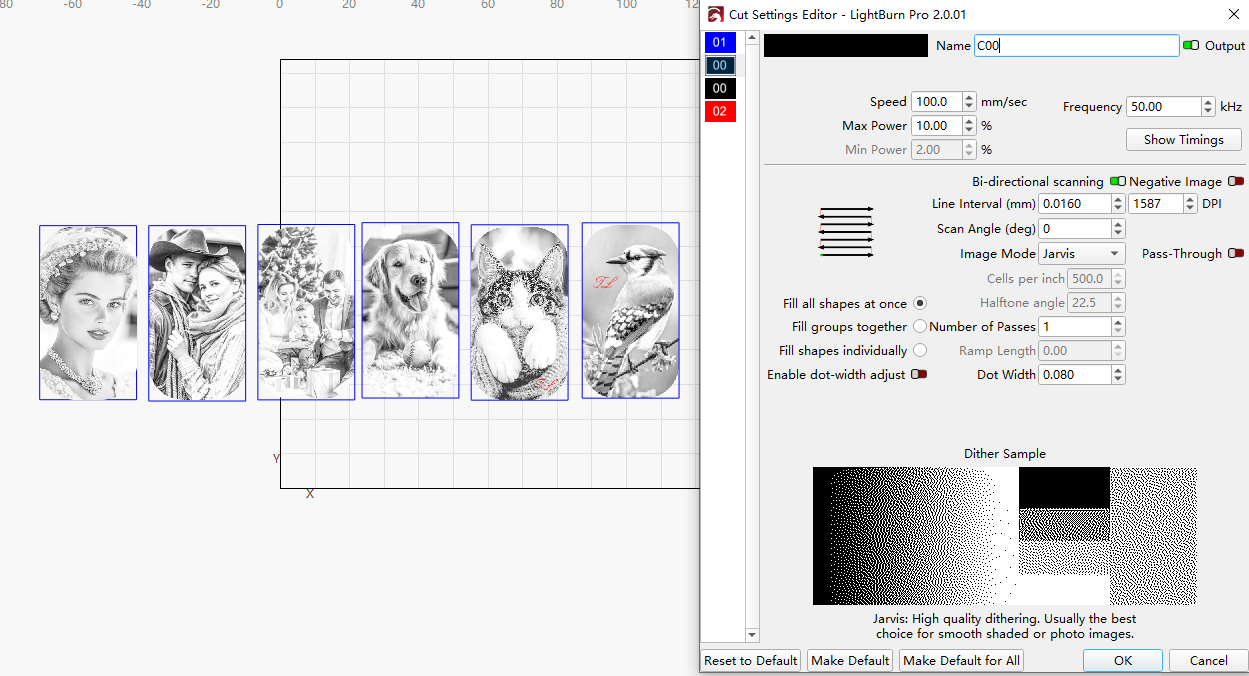
Open your preferred laser software. Import your processed photo and position it on the canvas. Adjust the size and placement according to your sheet. Double-check your marking parameters—especially speed, power, frequency, and line interval—to ensure clarity and fine details. For the best results, you can refer to our recommended parameters and adjust them as needed to match your material and design requirements.
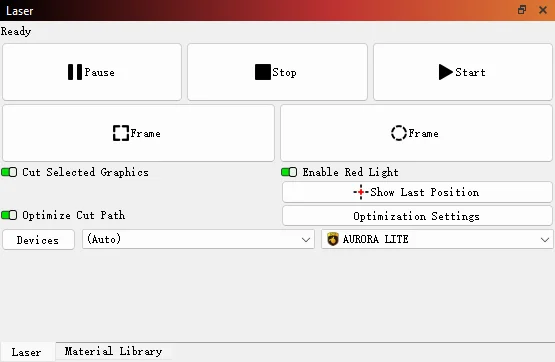
Frame the Design and Start Laser Marking
Run a framing/outline preview to confirm the marking area matches the sheet’s position. Make any necessary adjustments before starting the job. Once everything is adjusted, simply hit ‘Start’ to begin laser marking the brass belt buckle with the Aurora Lite.
Monitor the Laser Marking Process
Keeping an eye on the machine allows you to spot unusual conditions—such as error alarms, smoke build-up, or unexpected pauses—before they become problems.
While observing, remember that the laser beam is extremely powerful. Even with the protective lid closed, avoid staring directly at the marking spot for too long. A quick glance to check progress is fine, but prolonged gazing should be avoided for safety reasons.
Complete the Laser Marking
Once marking is complete, let the stainless steel sheet cool down for a moment before handling it. Then, your metal photo piece is now ready to display or gift.