How to Laser Engrave a Wooden Planet Puzzel
by thunderlaser-nolan in Workshop > Laser Cutting
48 Views, 0 Favorites, 0 Comments
How to Laser Engrave a Wooden Planet Puzzel

There’s something magical about holding a miniature version of the universe in your hands. A wooden planet puzzle doesn’t just challenge your problem-solving skills—it also turns into a beautiful decorative piece once complete. Whether you’re a fan of astronomy, a DIY enthusiast, or just looking for a meaningful project to try, laser cutting a planet puzzle from wood is both fun and rewarding.
In this guide, I’ll walk you through how I made a wooden planet puzzle with my laser machine, sharing each step along the way. By the end, you’ll have a finished piece that’s as satisfying to build as it is to display.
Supplies
Machine Used
- Thunder Bolt 30W
Material Needed
- 3mm Plywood
Software Used
Lasermaker
Settings
Engraving
- Speed:1000mm/s
- Max Power:45%
- Min Power:45%
- DPI:350
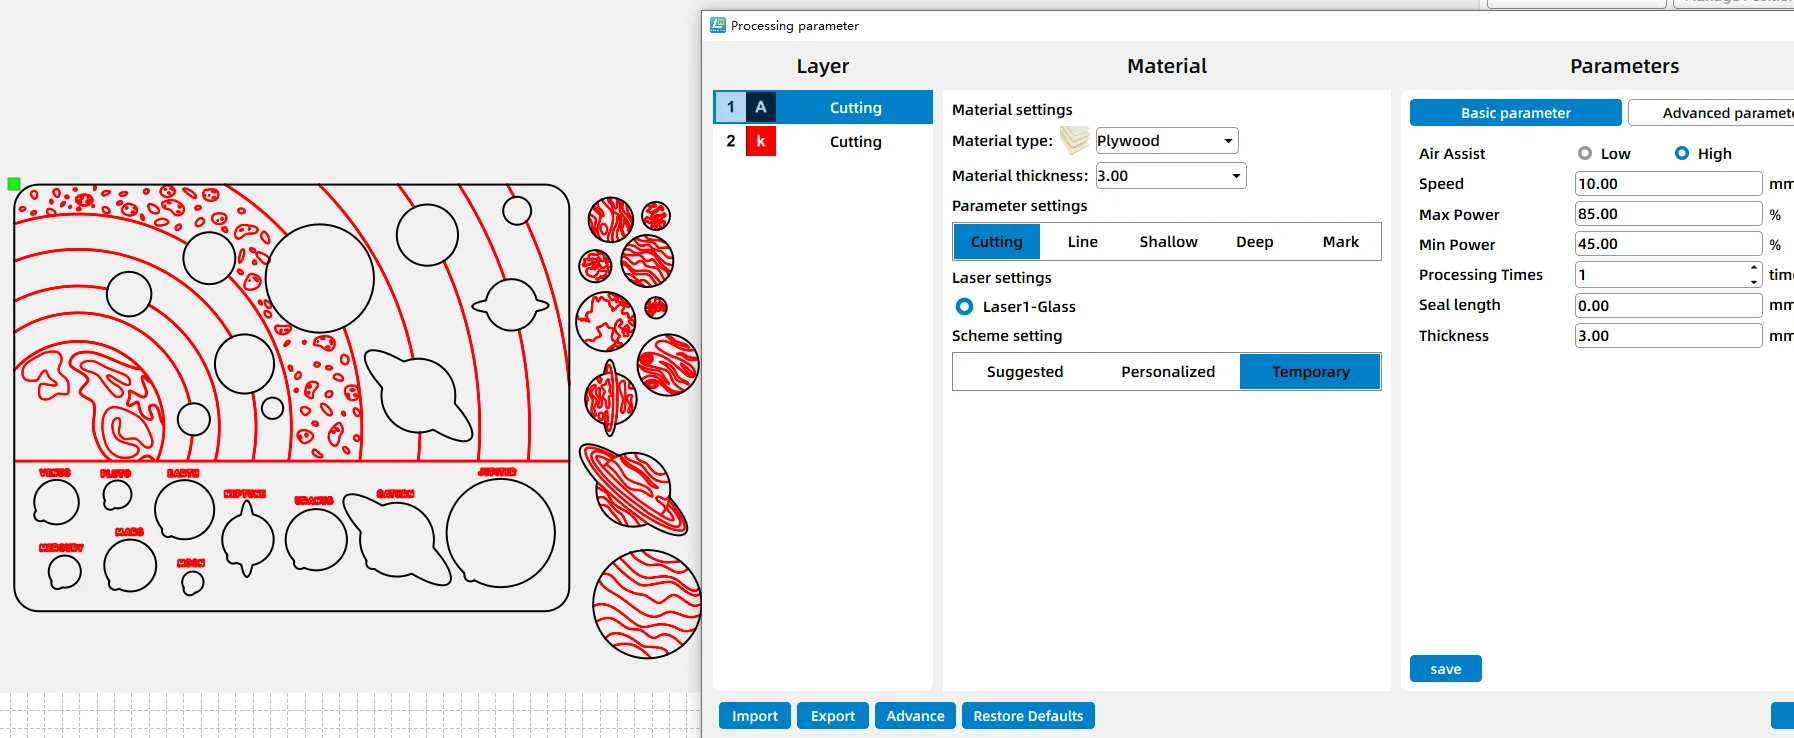
Cutting
- Speed:10mm/s
- Max Power:85%
- Min Power:45%
Place Your Materials for Laser Engraving
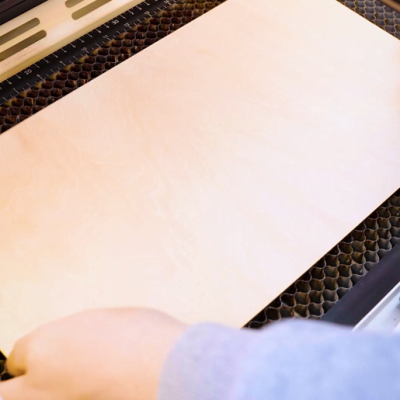
Start with a flat, clean sheet of wood. Before placing it on the laser bed, make sure the surface is free of dust or warping. A warped sheet can cause uneven cuts, so if needed, secure the corners with pins or magnets. Once the sheet is ready, lay it flat on the work table.
Open the Calender Design and Check the Settings
Open your preferred laser software (I used Lasermaker) and load the puzzle design file. Adjust the size and positioning so it matches the area of your wood sheet. Double-check dimensions, as even a small mismatch can make the puzzle pieces too loose or too tight.
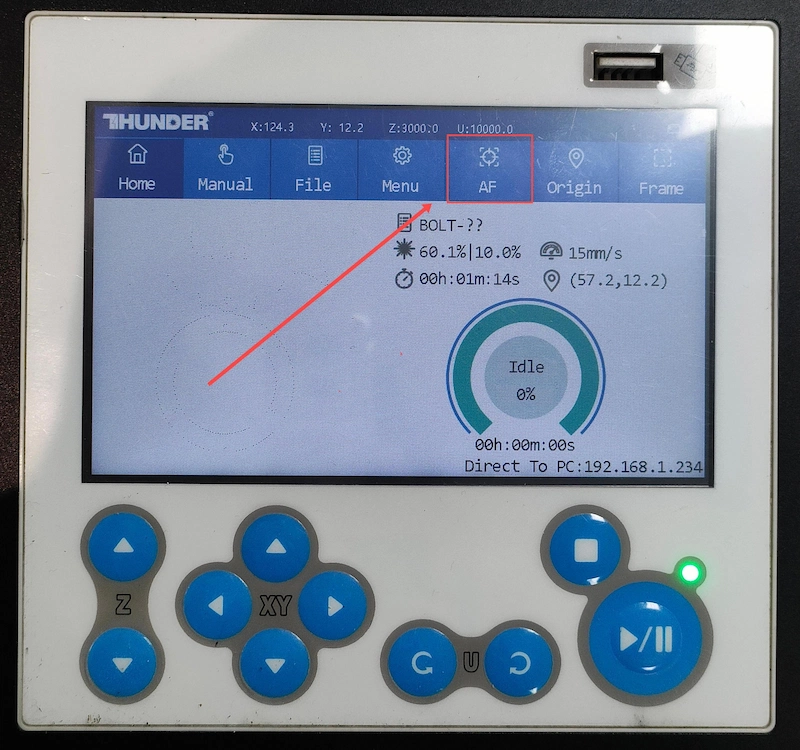
Focus Your Laser Machine
Proper focusing is essential for achieving crisp engravings and smooth cuts. If your machine supports auto focus, a single click will set the correct distance for flat wooden boards. If you prefer manual focus, use the focus stick to adjust the laser head until it just touches the surface of the wood at a perfect vertical angle. Spending an extra moment on accurate focusing will pay off with professional-looking results.
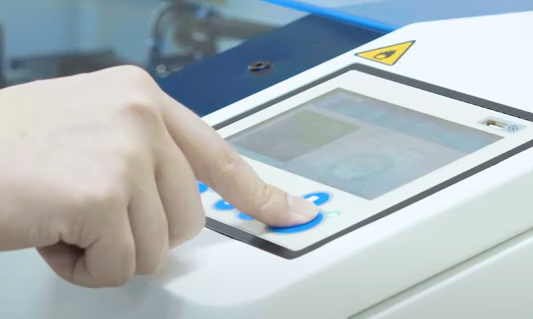
Frame the Design and Start Laser Engraving
Before hitting start, I framed the design to make sure the cutting area matched the wood sheet. The red-light outline gave me confidence that everything was aligned. Once satisfied, I clicked Start, and the laser began cutting the planet puzzle pieces with smooth precision.
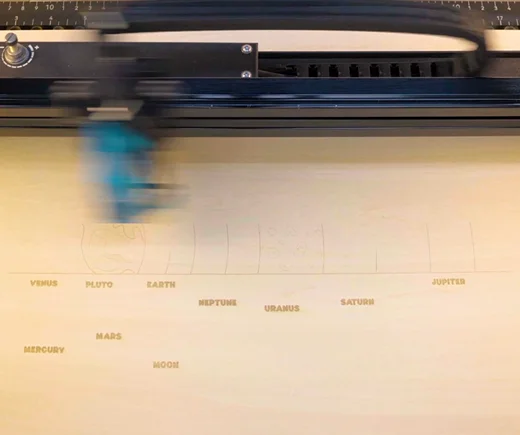
Monitor the Laser Engraving Process
Stay near the machine while it’s running and watch the cutting and engraving progress. Keep an eye out for excessive smoke, small flame-ups, or any movement of the material that could affect the outcome. Make sure your workspace is well-ventilated, and rely on air assist if available to achieve cleaner edges on the wood.
Complete the Laser Task
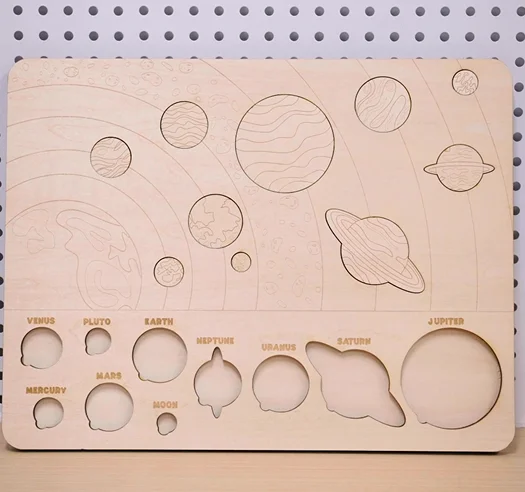
Your laser-engraved wooden planet puzzle is now complete and ready to display. The natural wood grain gave the planets a warm, organic look, making the finished piece both playful and decorative.