Cast on Knitting

This instructable is a lesson in my free Knitting Class. To enroll, click here!
When you're first learning how to knit, your stitches will most likely be irregular. It will take time to get comfortable holding the yarn and needles together. The only way to get consistent stitches is with practice, so this class's first scarf project is an opportunity to do just that.
But first we have to get the yarn on the needles to start out. That process is called casting on. There are many methods for casting on, but for now we'll just try one, called the long tail cast on, which creates a nice stretchy edge. Grab your size 10 straight needles and chunky yarn (light colors are easier to see) and let's get stitching.
To keep up with what I'm working on, follow me on YouTube, Instagram, Twitter, Pinterest, and subscribe to my newsletter. As an Amazon Associate I earn from qualifying purchases you make using my affiliate links.
Center-pull Ball


Remove the wrapper from your yarn and inspect the ball, also called a skein (rhymes with "rain"). Instead of picking up the tail at the exterior, dig into the center and pinch some loops. Pull this yarn out of the ball and unravel it to find the yarn end.

As you knit, the yarn will easily unwind from the center of the ball while the whole ball stays put. It's certainly not wrong to use the exterior tail, but the ball of yarn will bounce around on your lap, the floor, or inside your bag as you go, picking up dirt and tangles on the way.
Long Tail Yarn Grasp

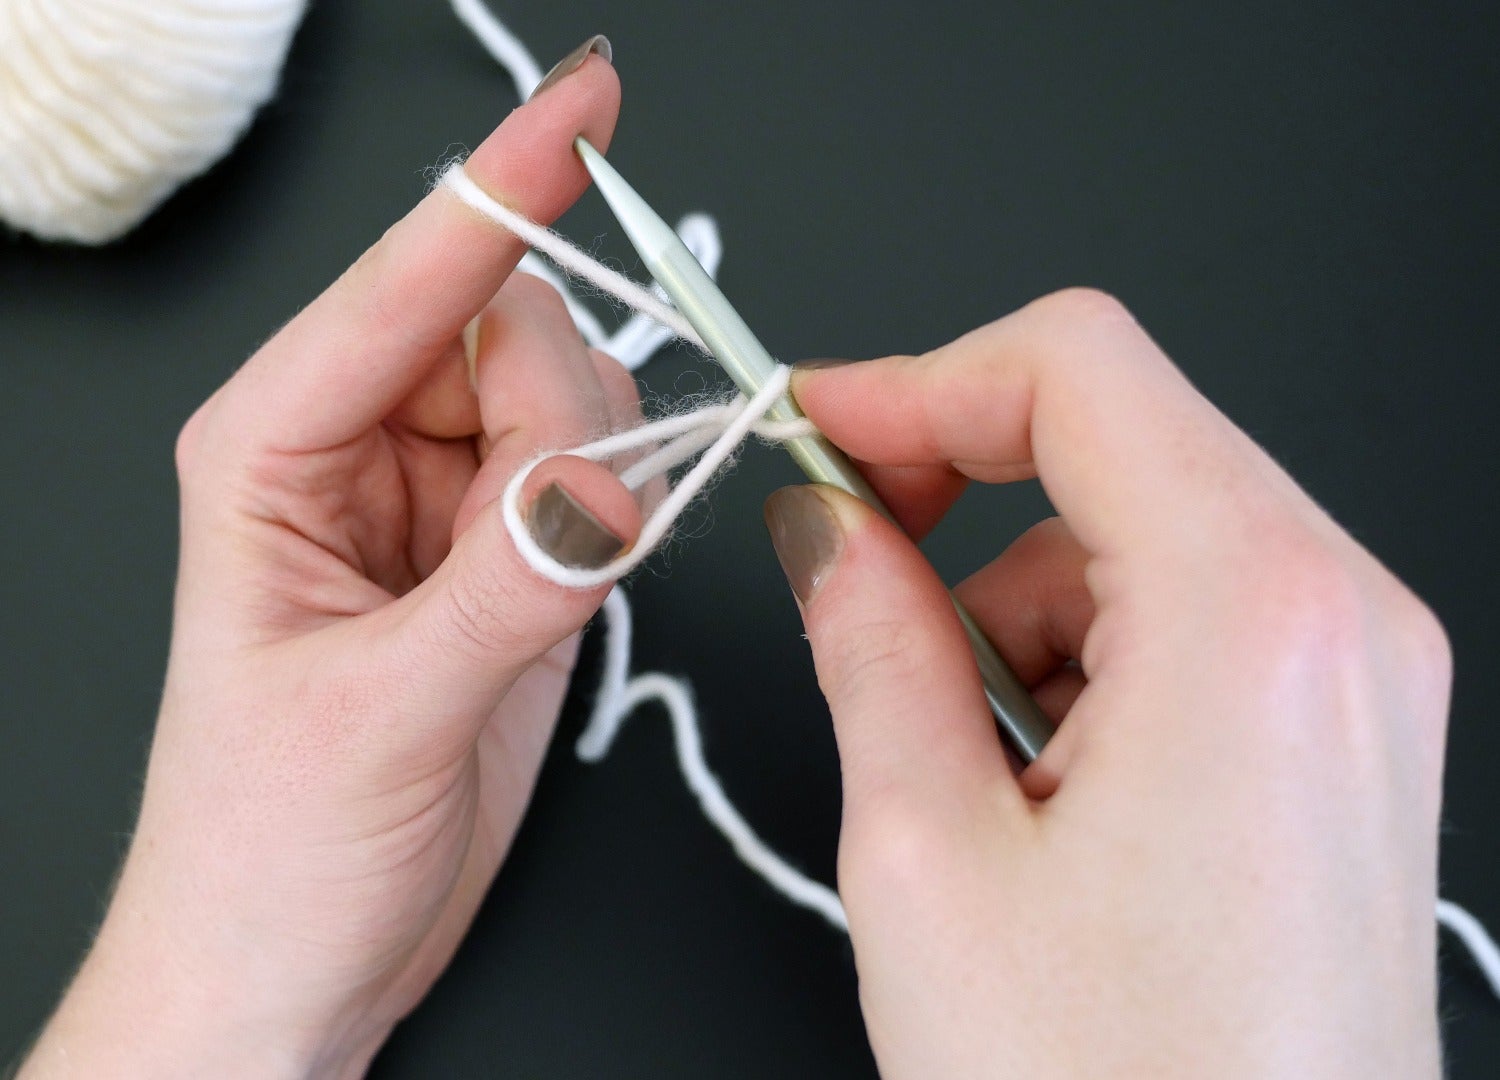
To get ready for the long tail cast on, pull a length of yarn from the ball about the length of your arm span (the "long tail"). On your non-dominant hand, thread the yarn from the ball through your fingers as shown: from the ball to between your pinky and ring fingers, around the back of your index finger and thumb and over your palm.

Pinch the two tails with your last three fingers while spreading your thumb and index finger apart slightly to create a taut loop of yarn around them.
Long Tail Cast On


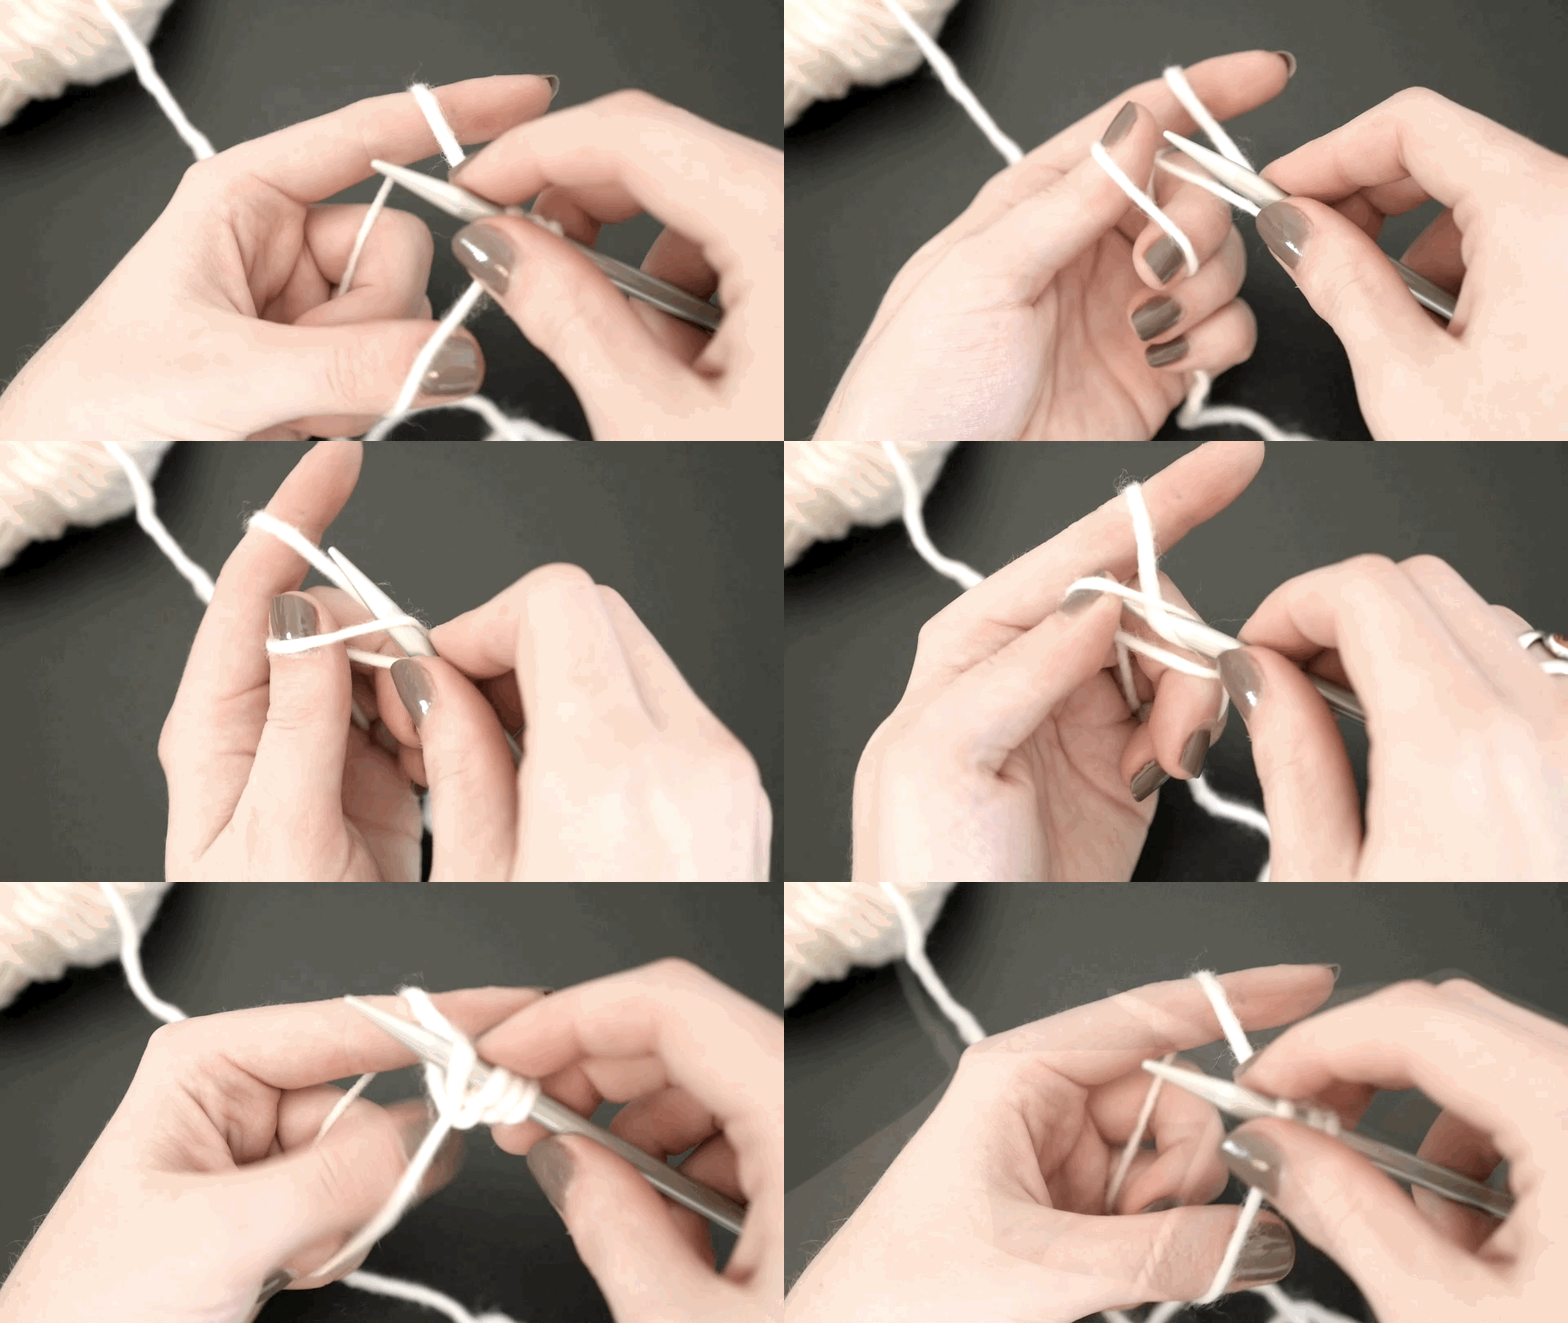
Pick up a needle with your right hand and bring it under the loop you made between thumb and index finger. Use your right index finger to pinch the yarn to the needle and lift it slightly, then rotate your needle counterclockwise towards your thumb, bringing the point to touch your thumb just below the yarn wrapped around it.


Scoop up the thumb yarn while rotating the right needle clockwise, and bring the point to your index finger just above its yarn.


Rotate your needle counterclockwise again, returning through the thumb loop and then release the loop from your thumb. Pull the yarn tight and readjust yarn hold.

You did it! Now repeat, starting the second stitch by rotating your needle counterclockwise towards the palm side of your thumb. Bring the needle point to touch your thumb just below where the yarn is wrapped, and scoop up that yarn while rotating clockwise to grab the index finger's strand and pull it back through the thumb loop.
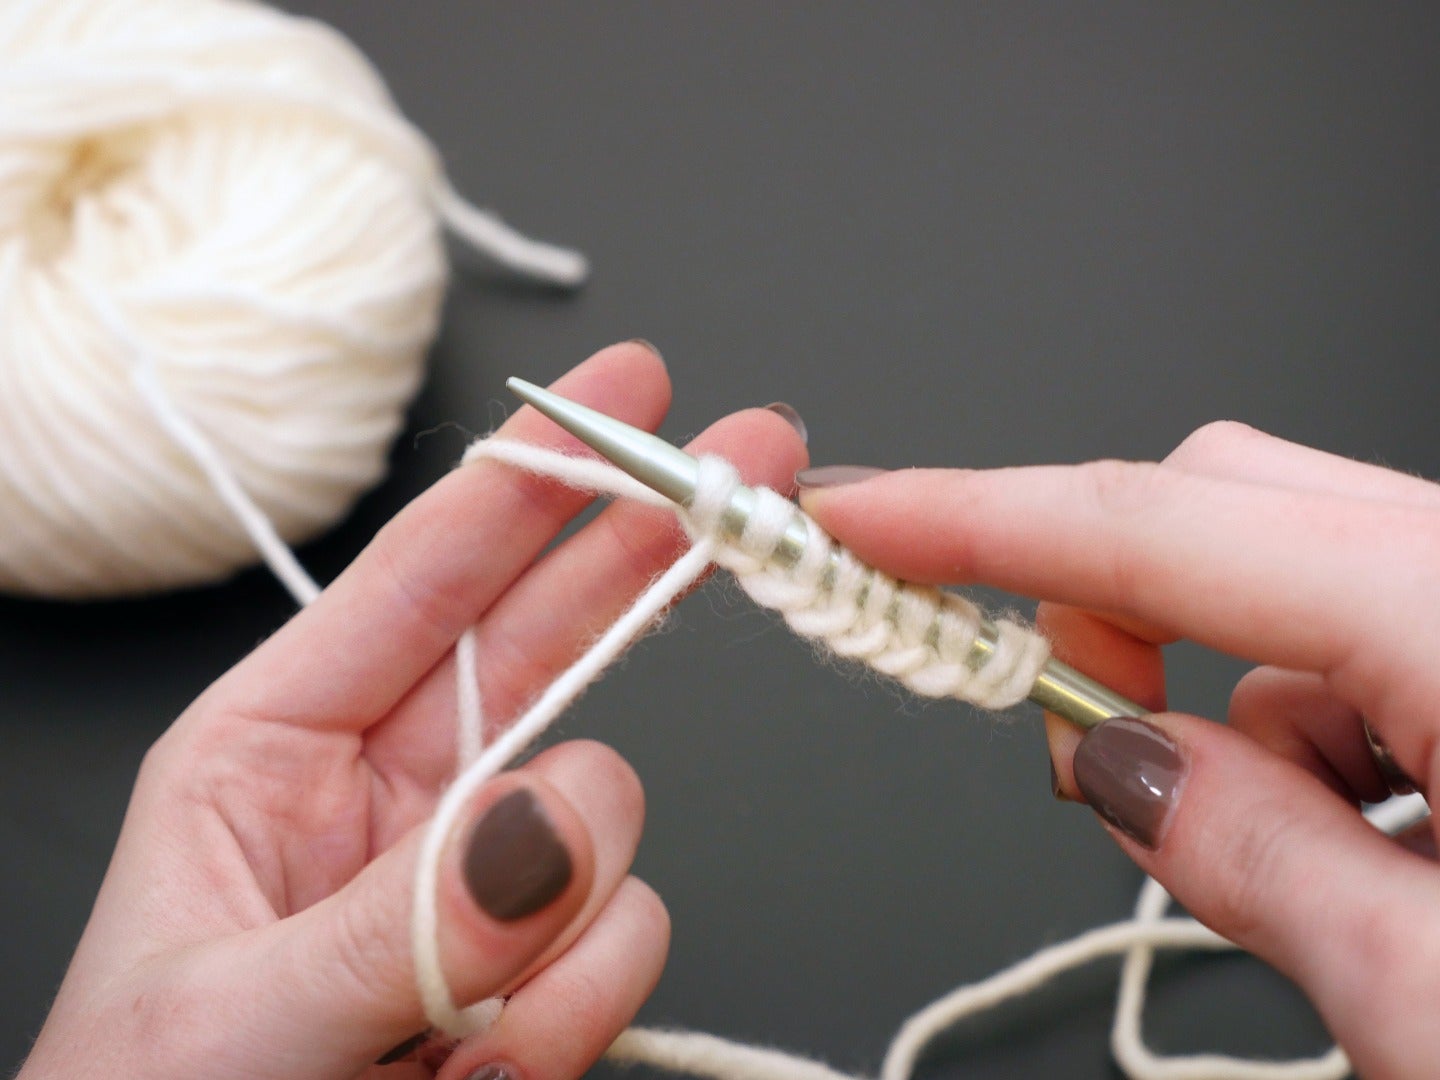
Now add more stitches until you have 25 total on your right needle. But how do you count the stitches? Use your index finger to tap or push each loop of yarn to help you keep track. Each loop over the needle is a stitch, so you can count them like the rungs on a ladder.
Are you struggling with this method? I know it's a lot to keep track of, especially if you're new to fiber crafts. If you're frustrated with the long tail cast on, skip to the next step for a simpler method you can use for the first two projects, then come back to the long tail cast on for the last two projects in the class.


A Simpler Cast On

If you just can't seem to get the long tail cast on after several attempts, don't beat yourself up-- it's hard! Especially as the very first thing you do with knitting needles. There's a simpler cast on you can use for the first two projects-- the reverse loop cast on. It's edge isn't as stretchy as the long tail, but it'll get you going and that's the most important thing at this point!


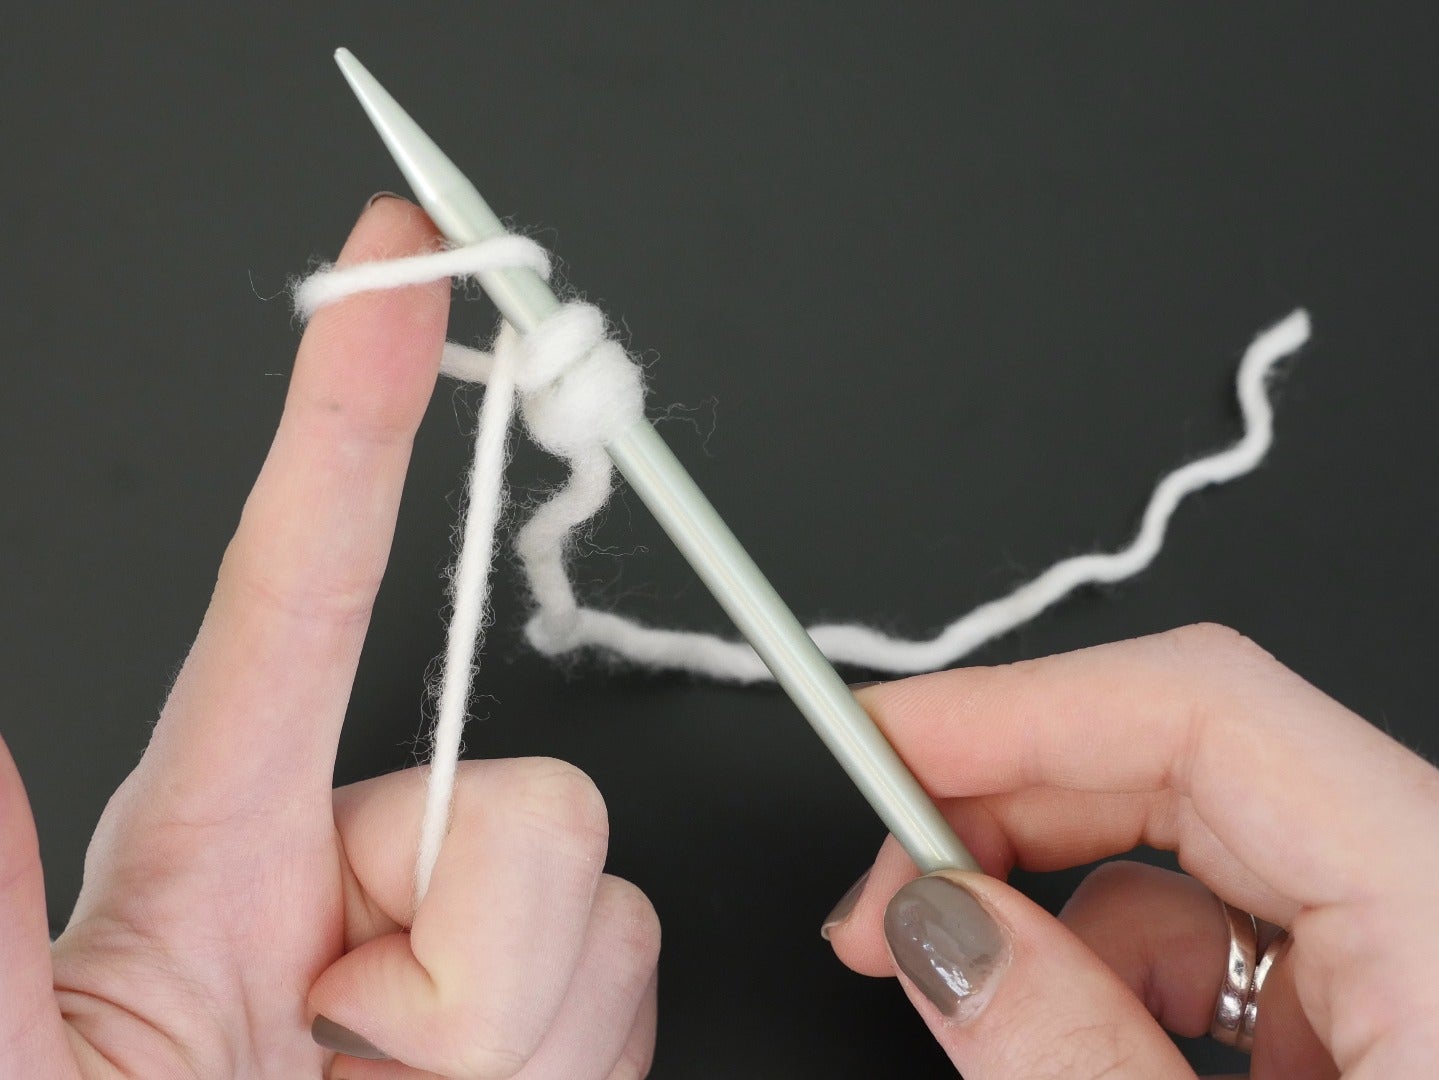
Make an overhand tie 12in (30cm) from the yarn end, and tighten it around a knitting needle in your right hand. make a twist in the working yarn and insert the needle through the loop. Tighten the loop and repeat until you have 25 stitches! Try to keep the overall tension fairly loose-- one of the drawbacks of this cast on is it tends to be a bit tight, making it harder to knit the next row.


To make this a little faster, you can wrap the yarn around your index finger as shown, then pick up a loop by scooping under the strand crossing your index finger with the needle and pulling it up and off of your finger.
You Did It!
Congratulations! You only have to do this once at the beginning of a project, and casting on is harder than actual knitting. Give yourself a pat on the back, snap a photo of your first row, and take a short break. How's your posture? Now that you've got the stitches on the needle, let's get to knitting the rest of the scarf!