Tutorial to Use Easy Driver to Drive Stepper Motor by Using Three Buttons
by mybotic in Circuits > Electronics
30056 Views, 55 Favorites, 0 Comments
Tutorial to Use Easy Driver to Drive Stepper Motor by Using Three Buttons
Introduction
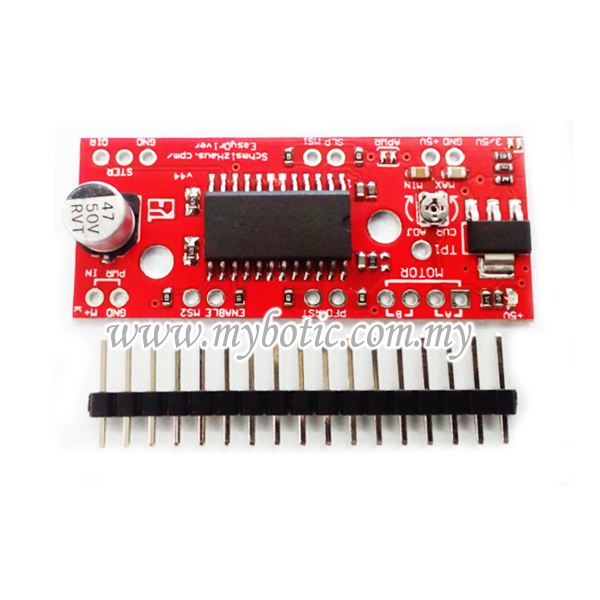
The EasyDriver is an easy to use stepper motor driver. The EasyDriver able to drive the stepper motor up to 30V. The EasyDriver has an on board voltage regulator for the digital interface that can be set to 5V or 3.3V. Just connect a 4-wire from stepper motor and a microcontroller and you’ve got precision motor control! EasyDriver drives bi-polar motors I.e. 4,6, or 8 wire stepper motors.This EasyDriver provides much more flexibility and control over your stepper motor, when compared to older versions. The microstep select (MS1 and MS2) pins of the A3967SLBT are jumper out allowing adjustments to the microstepping resolution. The sleep and enable pins are also jumper out for further control.
Features
- A3967 Microstepping Driver
- MS1 and MS2 pins jumper out to change microstepping resolution to full, half, quarter and eighth steps (defaults to eighth)
- Compatible with 4, 6, and 8 wire stepper motors of any voltage up to 30V
- Adjustable current control from 150mA/phase to 700mA/phase
- Power supply range for stepper motor from 6V to 30V. The higher the voltage, the higher the torque at high speeds
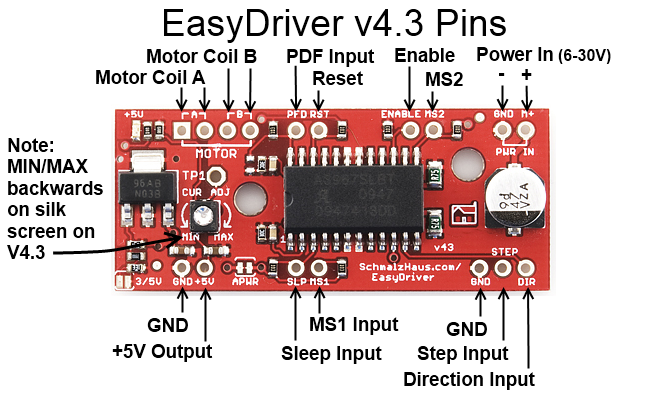
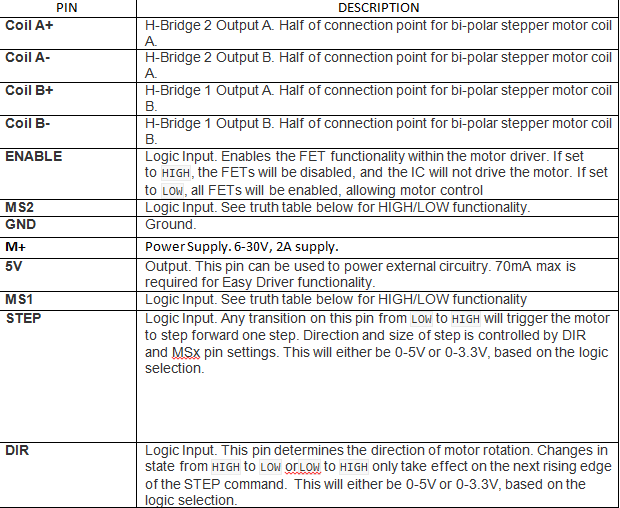
Pin Definition
Sample Hardware Connection
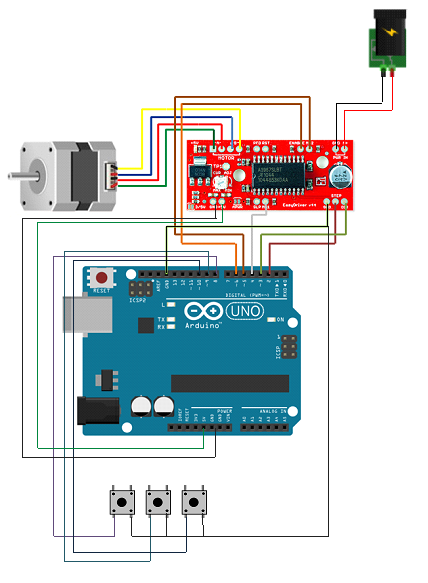
- Here are the pin connections from Arduino Uno to Easy Driver :
D2 -- STEP
D3 --DIR
D4 -- MS1
D5 -- MS2
D6 -- ENABLE
- and here are the pin connection from Stepper Motor to Easy Driver :
Green Wire -- A+
Red Wire -- A-
Blue Wire -- B+
Yellow Wire -- B-
- For push button, just connect one of the button's pin to arduino's pin (D8, D9 or D10 refer to the picture) and the other button's pin connect to the ground.
- To power up Easy Driver, the GND and +5v from Easy Driver are connected to the Arduino Uno's GND and +5v power pin.
- The Motor Power Supply will be connected to the M+ and GND of the Easy Driver. Make sure to connect the battery's polarity is correct, positive to the M+ and negative to the GND.
NOTE : After completing the connection, make sure you will have the same thing as shown in the picture above.
Sample Source Cord
To get the result, please download the sample source code which is attached below and upload it into your Arduino. In this example, the Arduino UNO is being used.
Downloads
Procedure
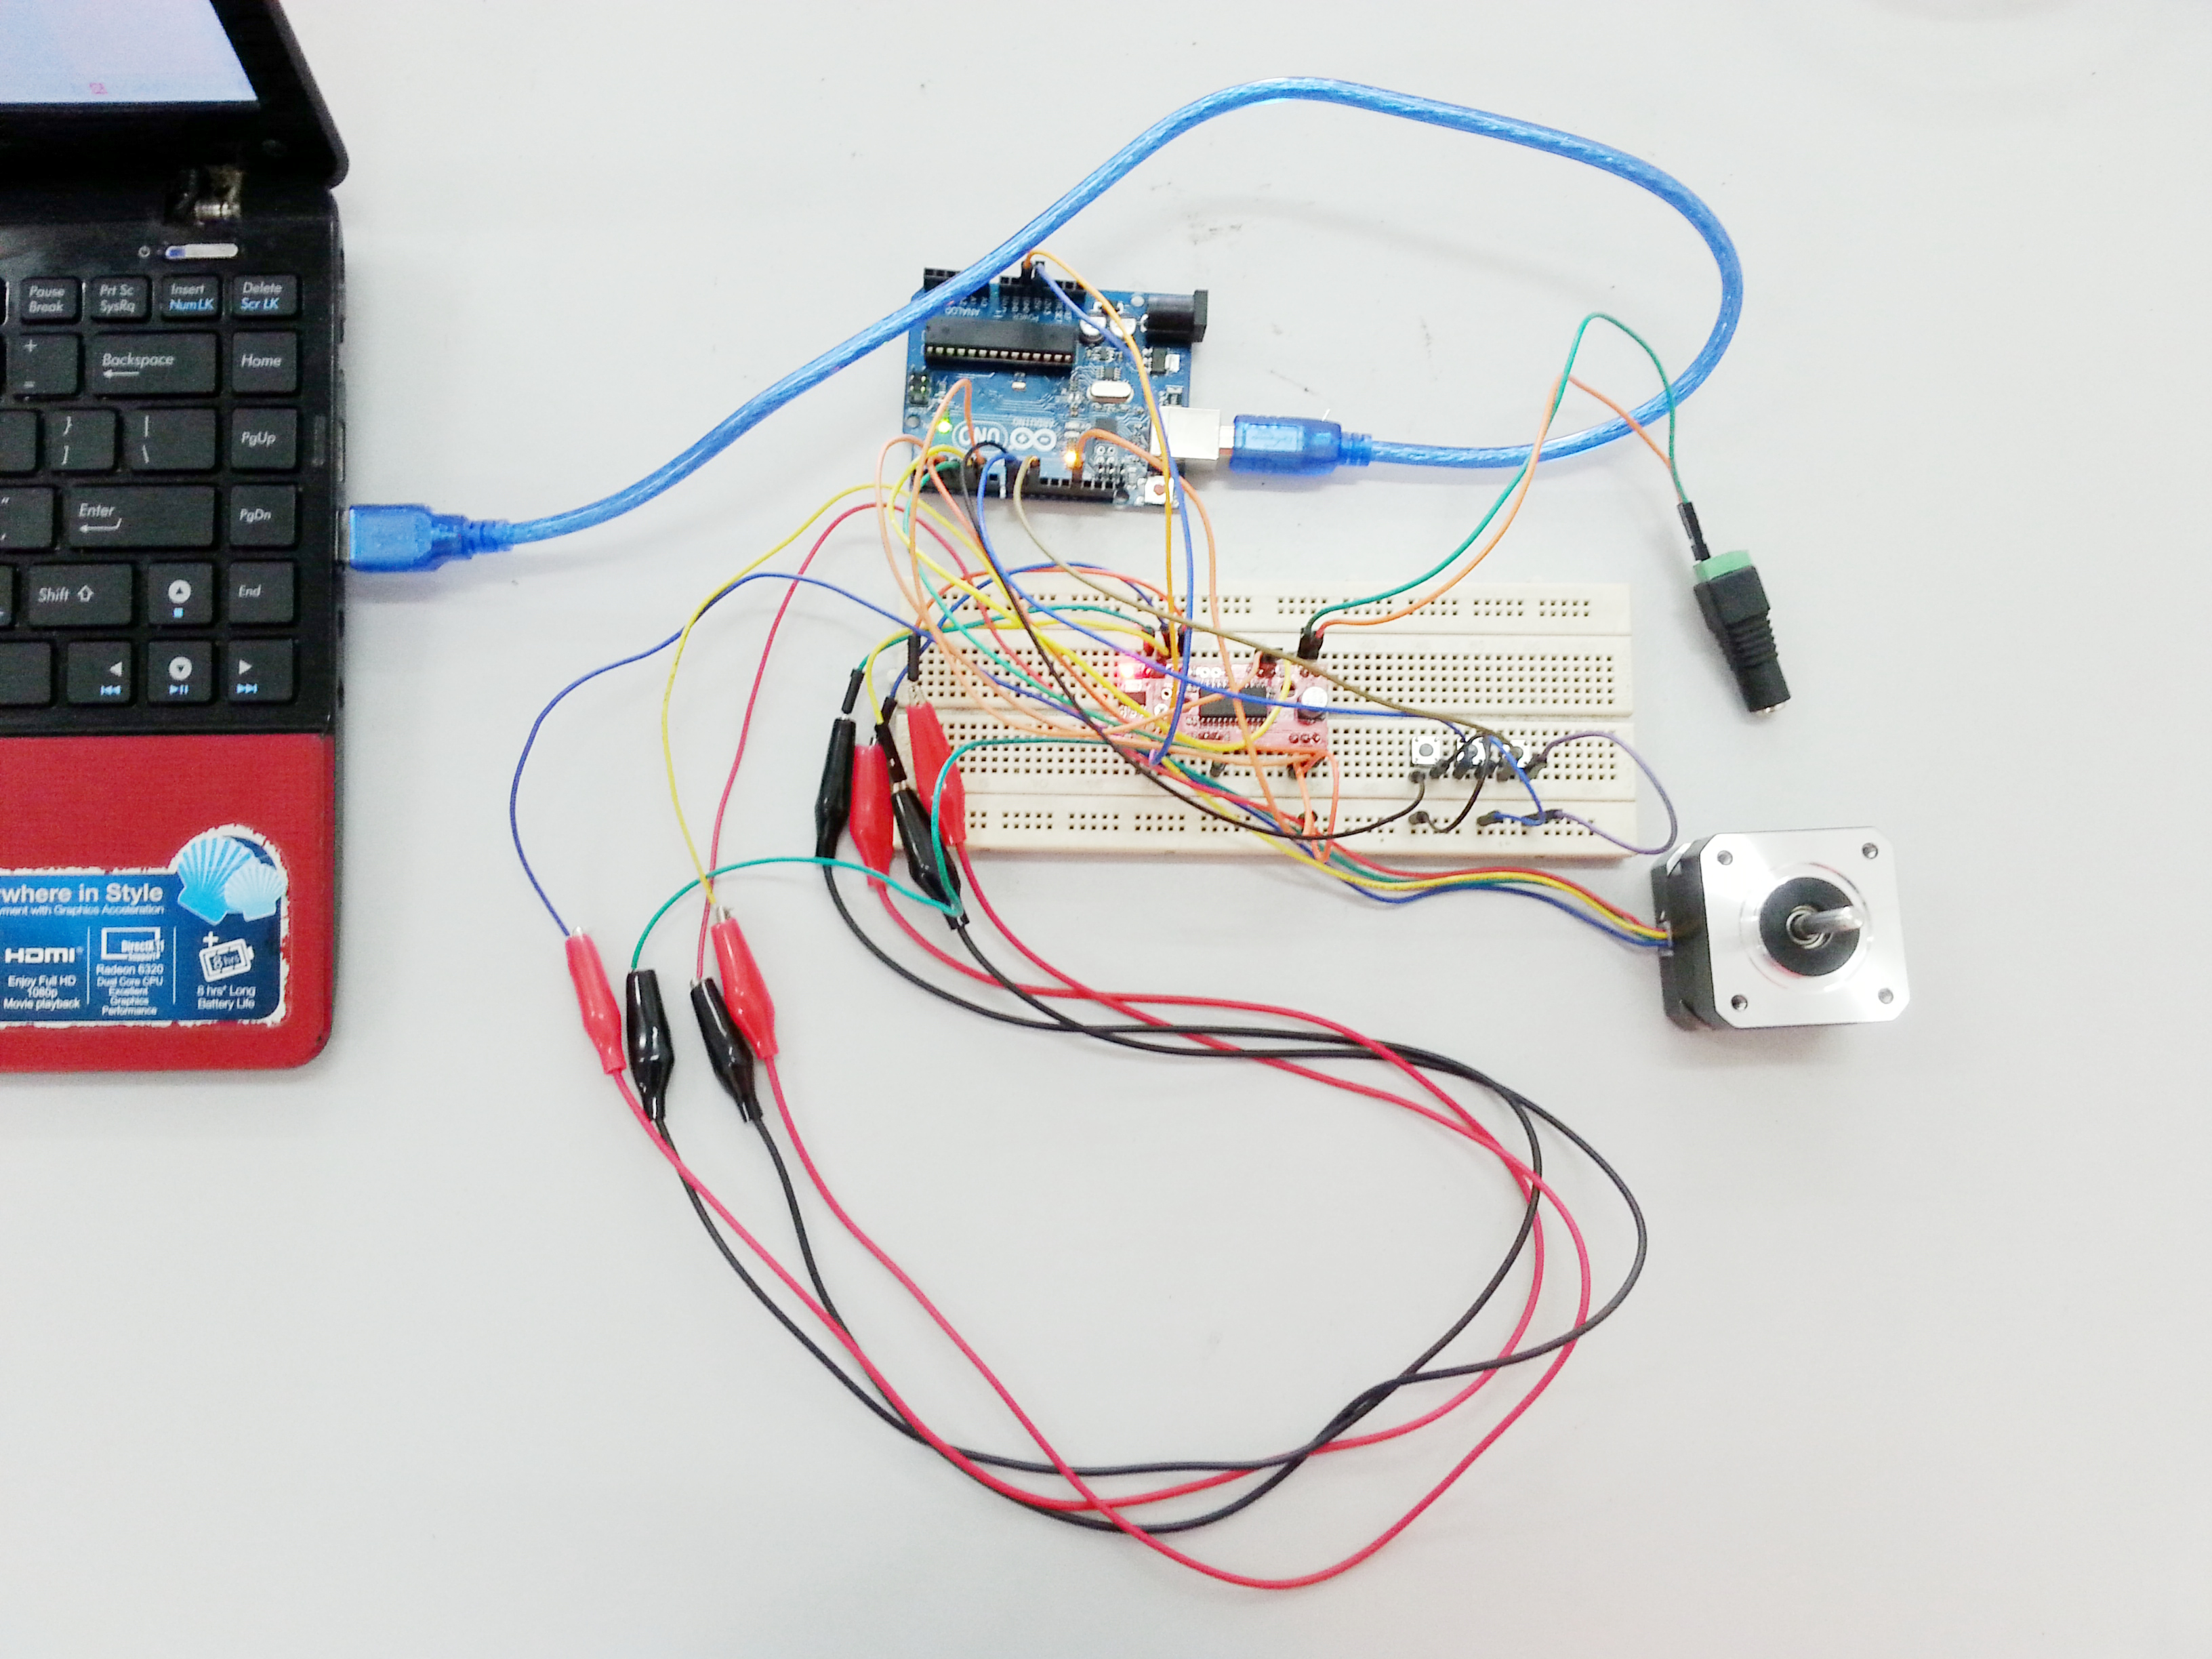
1. Prepare the items below before you start to do connection:
- Arduino Uno board and USB wire
- CNC A3967 Easy Driver A3967SLBT Stepping
- 42 Step Stepper Motor
- Jumper Wire
- Crocodile Wire Clips
- Breadboard
- Power Adapter 9V (Power Up Stepper motor)
2. Make sure the connection is correct. (Refer to step 2)
3. Next, download the sample source code in step 3 and upload it into your arduino uno board via USB 2.0 type A male to Type B male cable.
4. Connect to power supply and try to press the button (button 1 to 3) to see how the stepper motor will do.
Video
The video shows the result for this tutorial.