How to Install WordPress?

You have chosen your domain name and your hosting company (and they may well be one and the same). The next part of your journey in "getting started with your blog" is to install Wordpress. It may be that you have decided to have your blog hosted on a "blogging platform", like Blogger.com or Wordpress.com. If you are happy to go down that road, great. I have a blog on both these platforms and they serve their purpose well. But for the majority of users involved in web marketing, or trying to get an online presence for their business - whatever it is - you will be installing Wordpress on your own domain.
To be sure, much of the difficulty of installing Wordpress has been eliminated by the Fantastico installer - a utility that is available on most hosting accounts. With Fantastico, all you need to do is answer a few prompts such as what directory to install Wordpress in and boom! - you're done. Although I heartily recommend using it, and you may want to get on with your web marketing, I think a user should go through the manual install process at least once, to get familiar with how Wordpress operates behind the scenes. Let us look at the process of installing Wordpress manually:
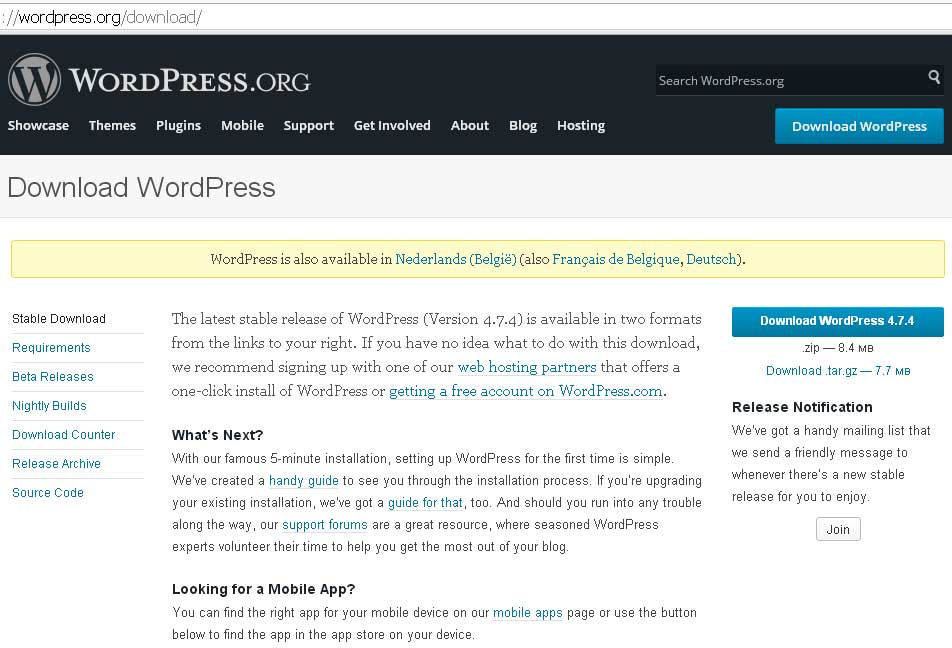
1. Open www.wordpress.org in a browser. From there, click on the blue bar that says "download Wordpress x.xx" - it will show the latest version. Right now, it is 4.7.4.. Save this to your desktop or somewhere else convenient, and extract all files from the zip archive into a folder called "wp".

Using an FTP client, connect to your domain - the hosting company will have given you the correct username and password when you signed up. Once connected, look for the "www" folder (also named "public_html". Open this folder on the server (in the "remote" window in your FTP client) and in the "local" window, open the "wp" folder that you extracted the Wordpress files into. Copy everything from "wp" into "www" and close your FTP client.

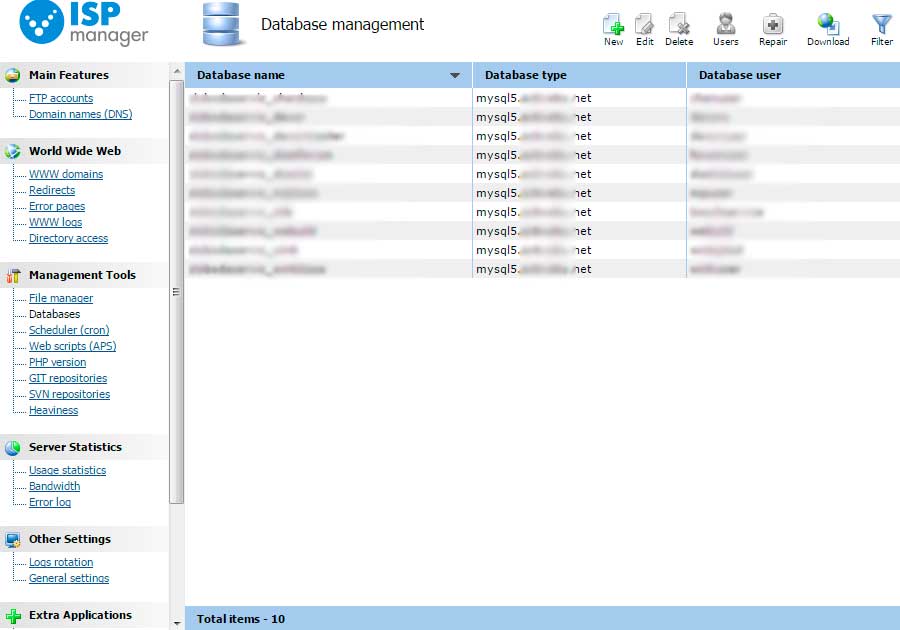
Log in to your domain's Cpanel by entering www.yourdomainname.com/cpanel. Enter your username and password and scroll down until you see "MySQL databases". Click on this and it will prompt for the name of your database. Use something short like "wp", because it appends your username to it. Click "create database", go back and scroll down to "Add new user". Choose a username for your database - you can use your Cpanel username and password if you wish, or a completely different one. After creating the user account, click "go back" and scroll down to "Add user to database". Select the username and the database as above - not that your panel username is now stuck on the front of it. Click "add" and "all privileges" on the next screen. Then close the window - you're done with setting up the database.

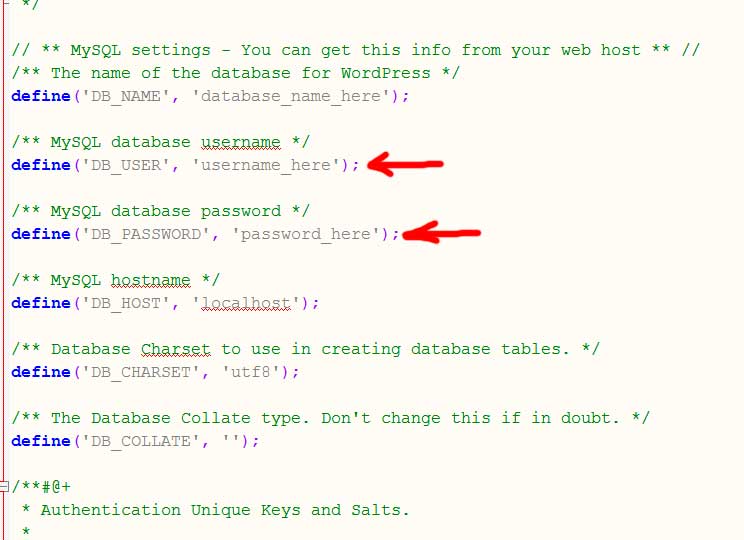
In your FTP client, right-click on the "wp-config-sample.php" file in the "www" folder. You need to change 3 things here - the "MySQL database name", the "MySQL database username" and the "MySQL database password". Just replace what's inside the single quotes with your own details, close the file and save it as "wp-config.php".
In your browser, open the address www.yourdomainname.com/wp-admin/install.php. If you get an error message here, it usually indicates that one of the names in wp-config.php is wrong. If all is well, you will then be prompted for the blog name and your email. Pick a name that contains all or part of your keyword, enter your email address and click on "Install Wordpress". Take note of the admin username and password on the next screen, and log in with those details.
You are now in the "back office" of your blog or website. This is where you add content, set up new pages and change the appearance. To see what your site looks like, click "visit site" on the top left corner. You have done it - you have installed Wordpress!