How to Install Puppy Linux to a USB Key- in Depth Explanation for Windows Users
by vigerpersinger in Circuits > Linux
26939 Views, 12 Favorites, 0 Comments
How to Install Puppy Linux to a USB Key- in Depth Explanation for Windows Users
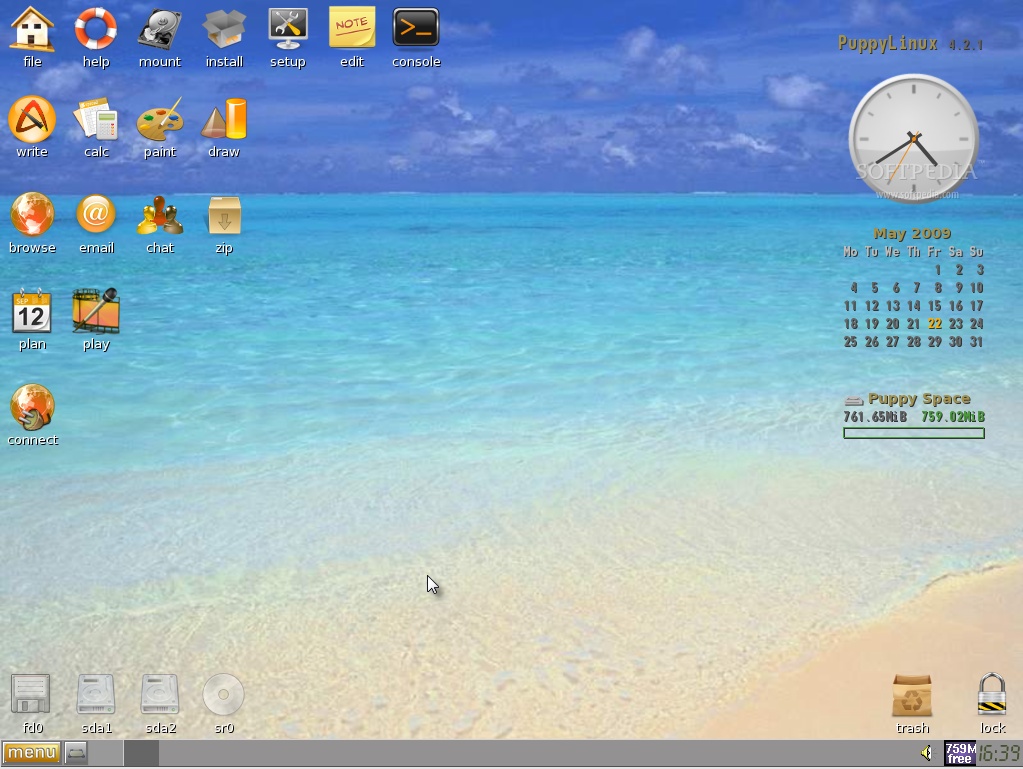
Whether you want a light OS to use on unfamiliar PCs, or just want to experience a Linux distro, Puppy is a good choice for a flash drive based system.
ISO Recorder
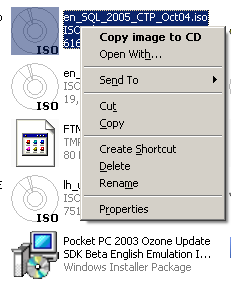
First, you need to burn Puppy's live CD. If you're using Windows XP and don't have advanced CD creation tools, I recommend downloading ISORecorder.
Once you've installed it, you will find a new option "Burn CD Image" in your right-click context menu.
Once you've installed it, you will find a new option "Burn CD Image" in your right-click context menu.
Burn CD
Download the puppy .iso and follow ISORecorder's steps in burning a CD Image. Note that ISORecorder for WinXP SP2 cannot image to DVDs, you must use a burnable CD.
Change Boot Sequence
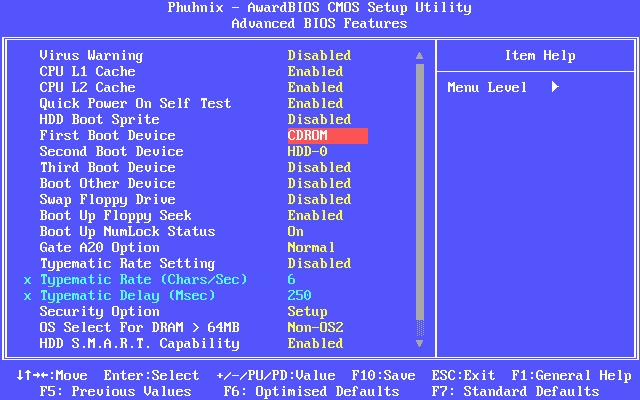
Reboot Into Linux
Your PC will now load Puppy's live CD; it will prompt you to define your mouse, keyboard, and video settings. These menus are fairly self explanatory, just follow them and you should be fine.
Universal Installer
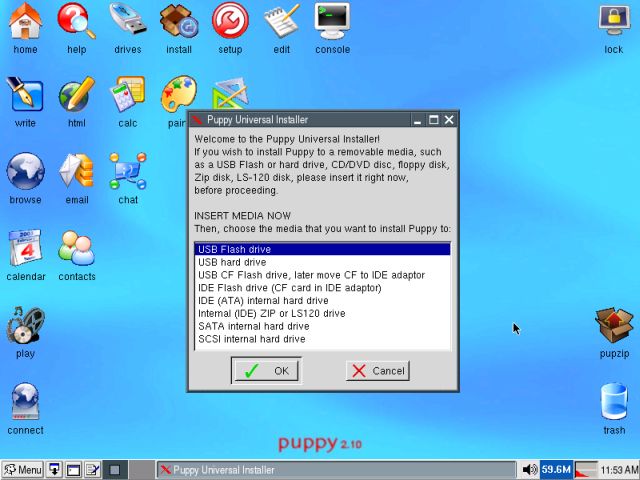
In the main menu, navigate to Setup>Puppy Universal Installer.
The installer will take you through the steps of installation. When prompted to choose how to install [partition, etc], pick the first option [install to present partition].
The installer will take you through the steps of installation. When prompted to choose how to install [partition, etc], pick the first option [install to present partition].
Partition
It will likely prompt you to use GParted to partition the drive. Gparted will load on its own- go to Device>Disk Label, then you will be able to format your drive [choose FAT16, as recommended].
End Linux Session
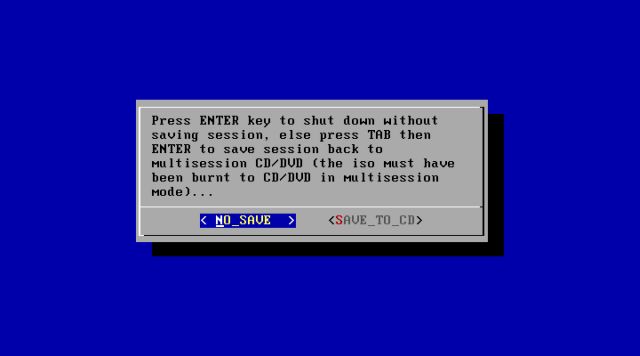
When Puppy has completed installing to the drive, the CD will likely pop out and you'll be prompted to save your session- choose no.
Reboot & Change Boot Sequence Back
Reboot your computer and enter setup again. Re-instate the HDD as first priority in boot sequence. Then enter Hard Drive Boot Sequence to choose the USB as first priority within your available drives.
USB Key Complete
You should now boot into Puppy automatically upon restart.
There's no need to enter setup each time you wish to switch to Windows; simply reboot without the USB key plugged in, and the system will default to Windows.
There's no need to enter setup each time you wish to switch to Windows; simply reboot without the USB key plugged in, and the system will default to Windows.
Resources & Tips

Note that some pen tablets aren't recognized right off the bat- you may want to favor a standard mouse for the setup. If your mouse doesn't work, F12 will pop up the main menu, and ALT + hotkey will allow you to navigate menus.
ISO recorder can be found here: http://isorecorder.alexfeinman.com/isorecorder.htm
The Linux distro can be found here: http://puppylinux.org/main/index.php?file=Overview%20and%20Getting%20Started.htm
ISO recorder can be found here: http://isorecorder.alexfeinman.com/isorecorder.htm
The Linux distro can be found here: http://puppylinux.org/main/index.php?file=Overview%20and%20Getting%20Started.htm