How to Import and Process Data Recorded With IMU/GPS Data Application (using Android System)
by maddyhicks in Circuits > Sensors
4810 Views, 1 Favorites, 0 Comments
How to Import and Process Data Recorded With IMU/GPS Data Application (using Android System)

This tutorial covers how to import and process data recorded with the 'Sensorsteam IMU+GPS' application developed by Axel Lorenz. If you need help with recording and saving data with this app, click here to read my previous post.
Connect Phone/tablet to Computer for Data Processing.
Connect phone to computer through the micro usb – usb cable provided with the phone. These cables can also be found at most stores or online. Once the phone is connected to the computer find the phone on the hard drive and access the files. Usually the files are saved in a folder titledn'MySensorStreams' either on the phone storage or the local SD card.
Note: File locations may differ according to operating systems. It also may differ if you are saving files to phone storage instead of a SD card location.
Import Data File Into Microsoft Excel.
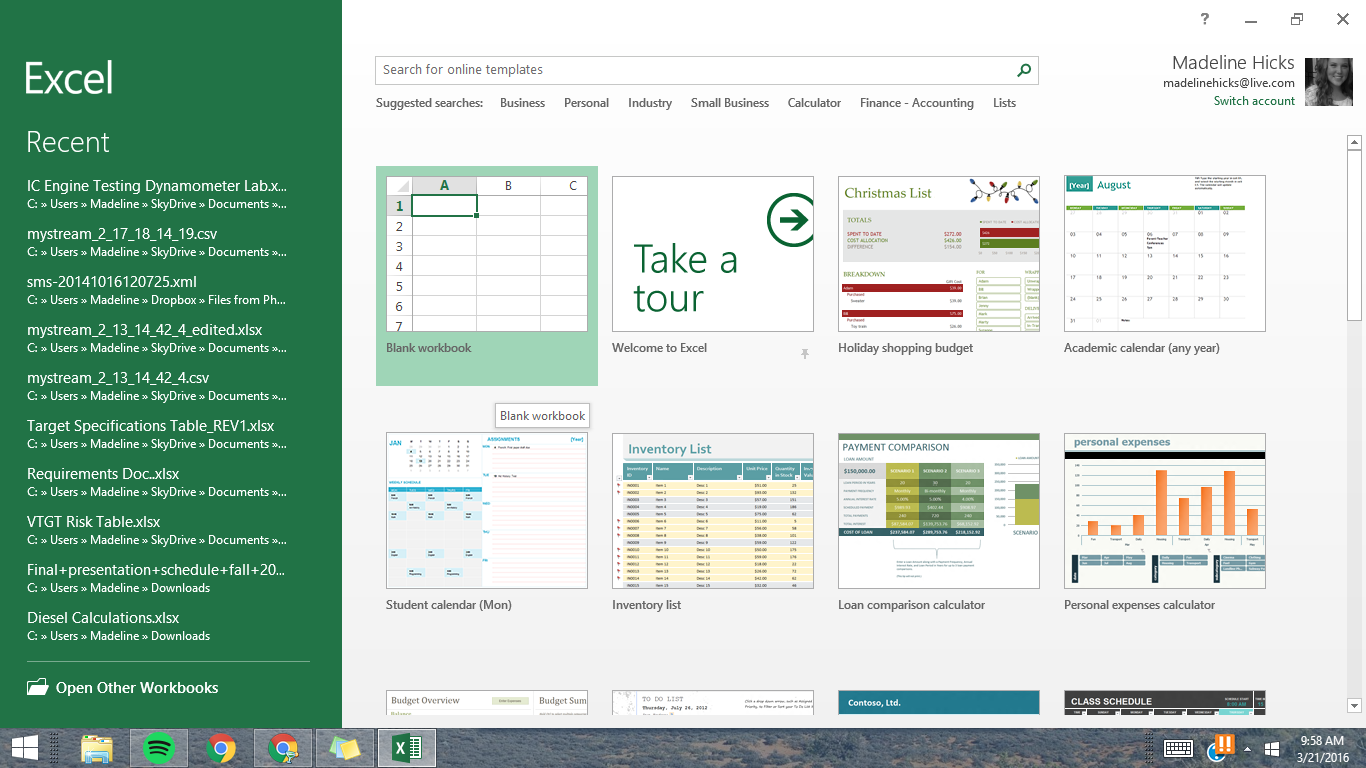
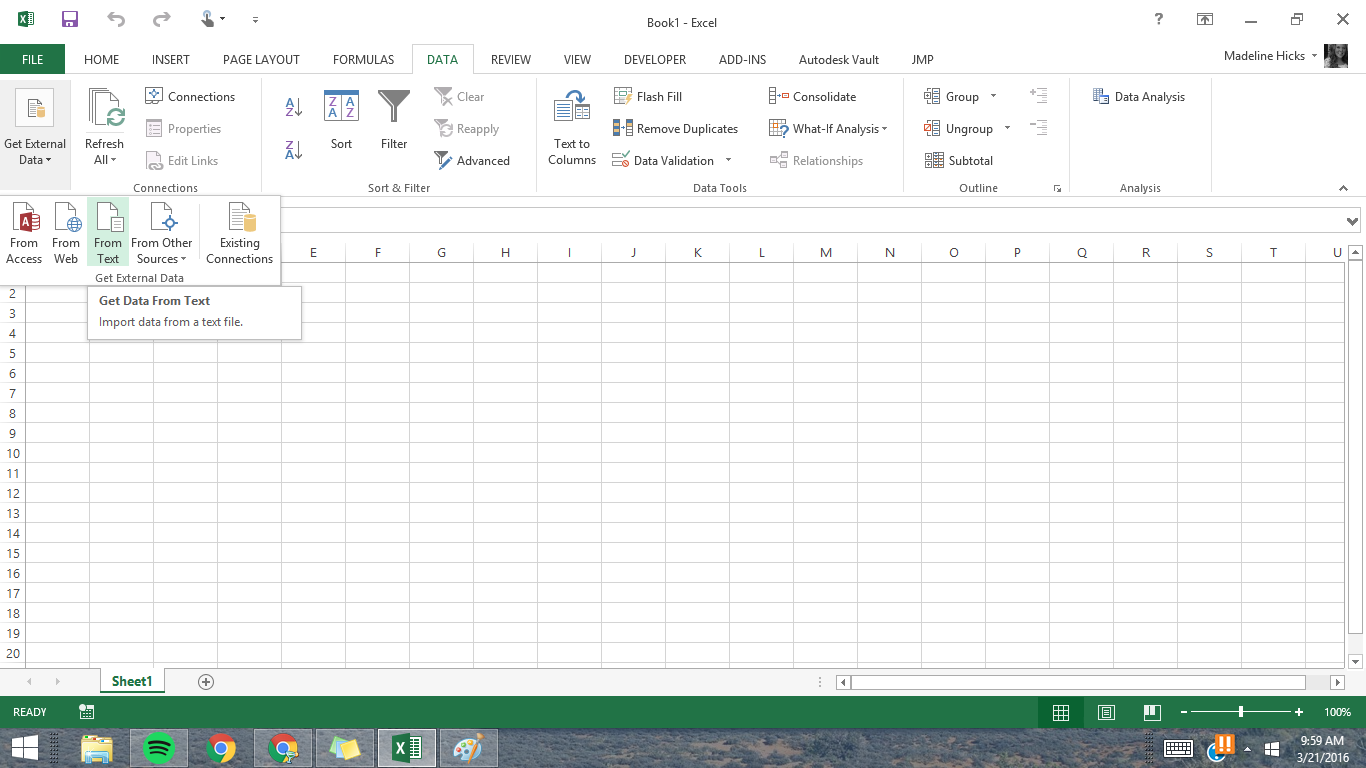
Open Microsoft Excel on your computer and select ‘Blank Workbook’. Under data tab on toolbar select ‘Get External Data – From Text’. Find data file and select ‘Open’.
Sort Data.
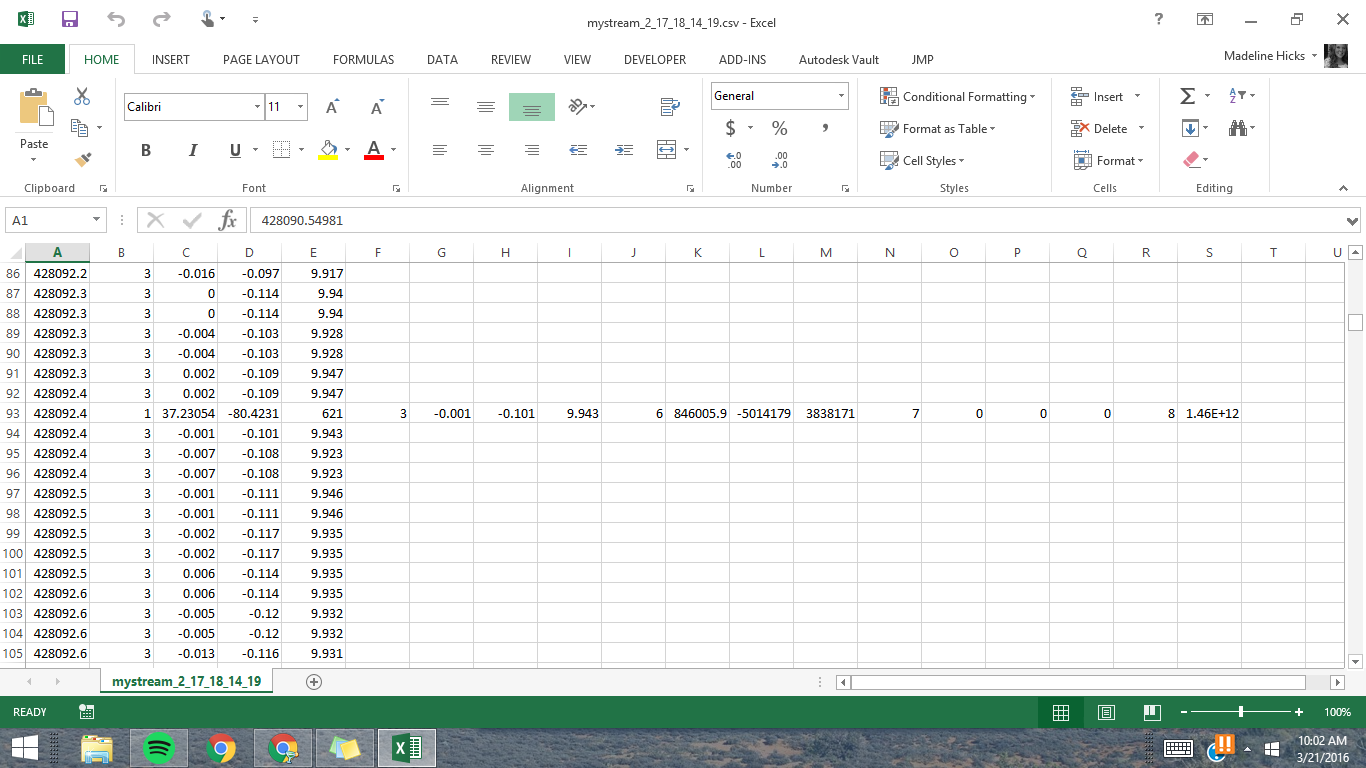
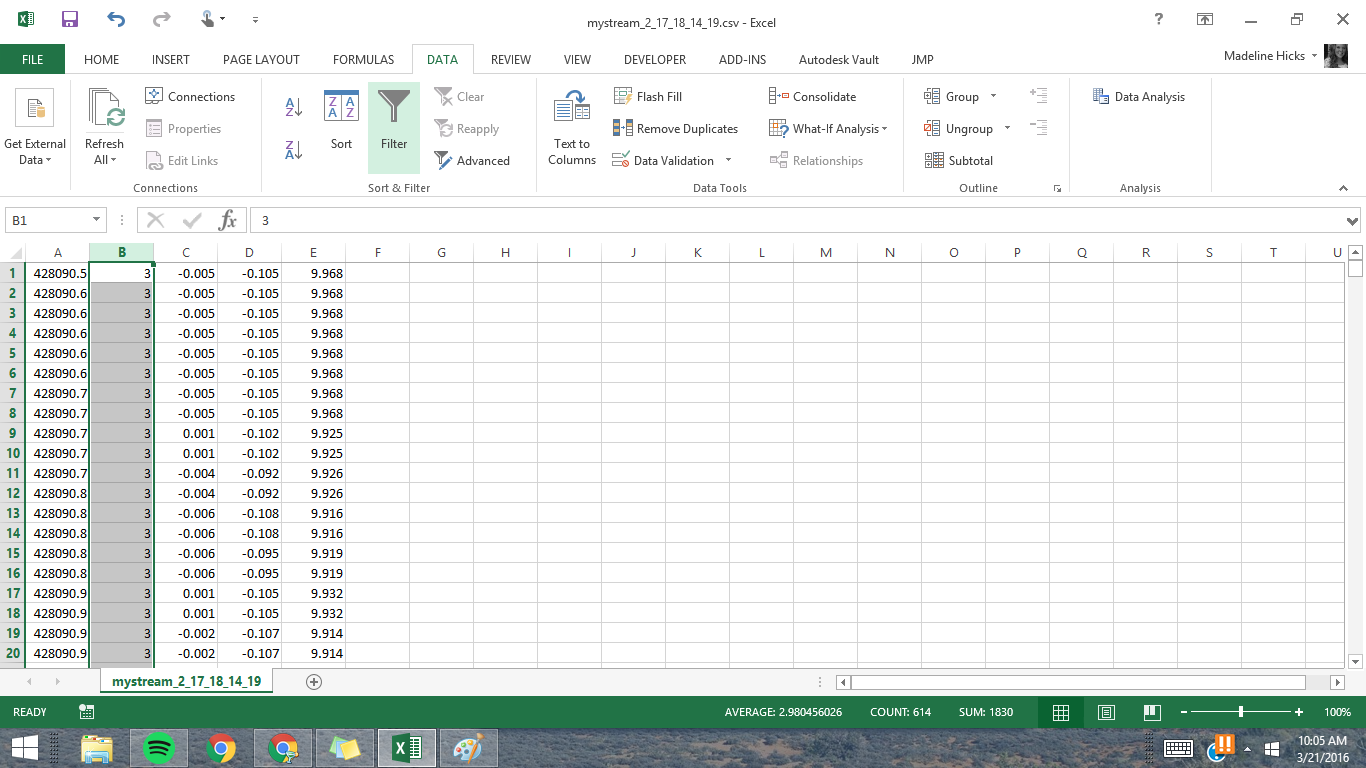
Once the data is imported you will notice that there are no labels on the columns to identify the data that was imported. Each type of data is identified by a different number and the number of rows and columns will differ according to how many sensors you chose to record. Additionally, the sensors have different sample rates, meaning there will be more data points for certain sensors. An example is shown in the images above. In the example, the accelerometer data is identified by the set of data with the number '3' beside it and the GPS data is identified by the number '1'. As you can see in the example, the accelerometer data has a far faster sampling rate than the GPS data, resulting in a much larger amount of data.
Getting the data sorted to create the graphs can be tricky. Here's how I did it.
- Filter out the columns of data with smaller sampling rates by selecting ‘Filter’ under the ‘Data’ tab. Once you select filter, arrows will appear on the first row of each column. These arrows allow you to filter the data in each column. I filtered out by selecting only the number 1.
- Cut and paste the filtered data into a new sheet to separate it from the other types of data.
- Move data with matching identifying numbers over to align with remaining data.
Essentially what you are doing is sorting through the data so each sensor you used will end up with it's own sheet. Putting the different data types into separate sheets within the worksheet simplify the process of creating graphs to analyze the data.
Select Data to Create Plots.
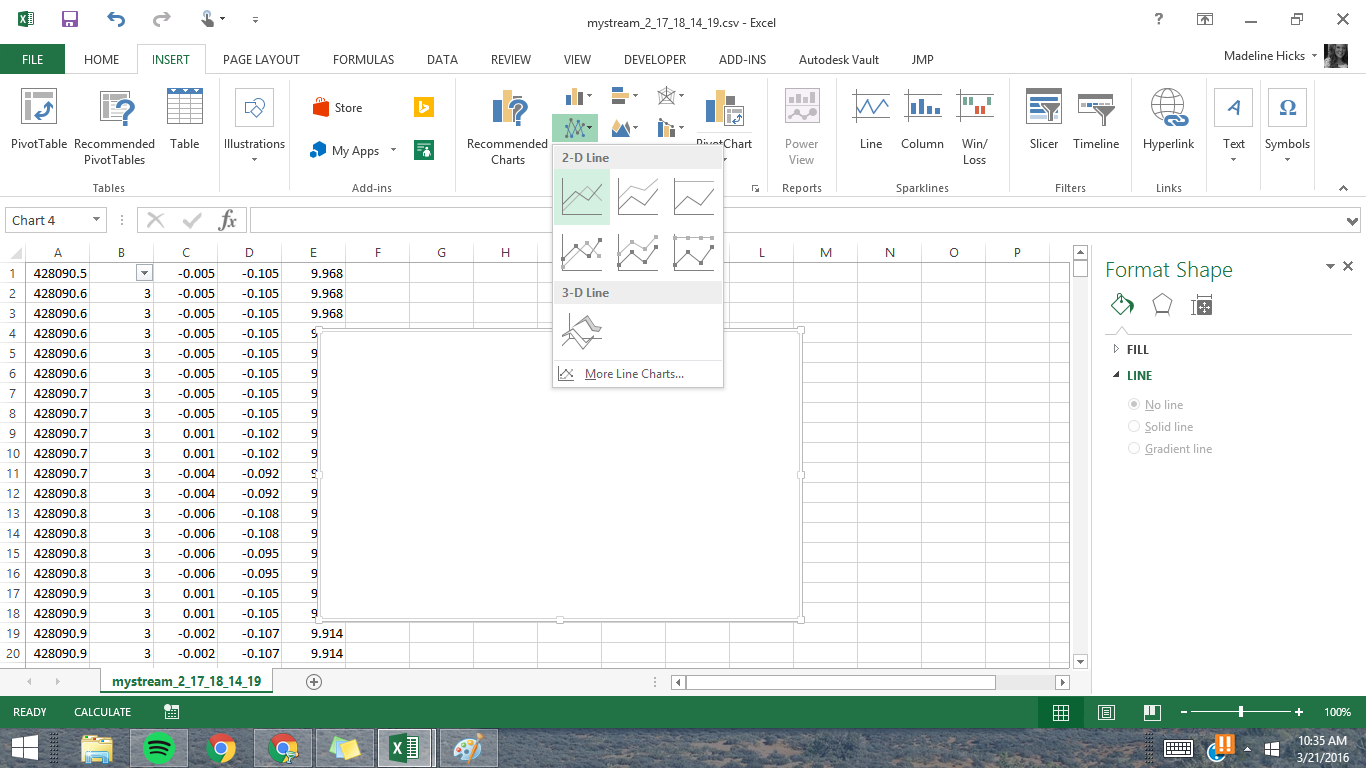
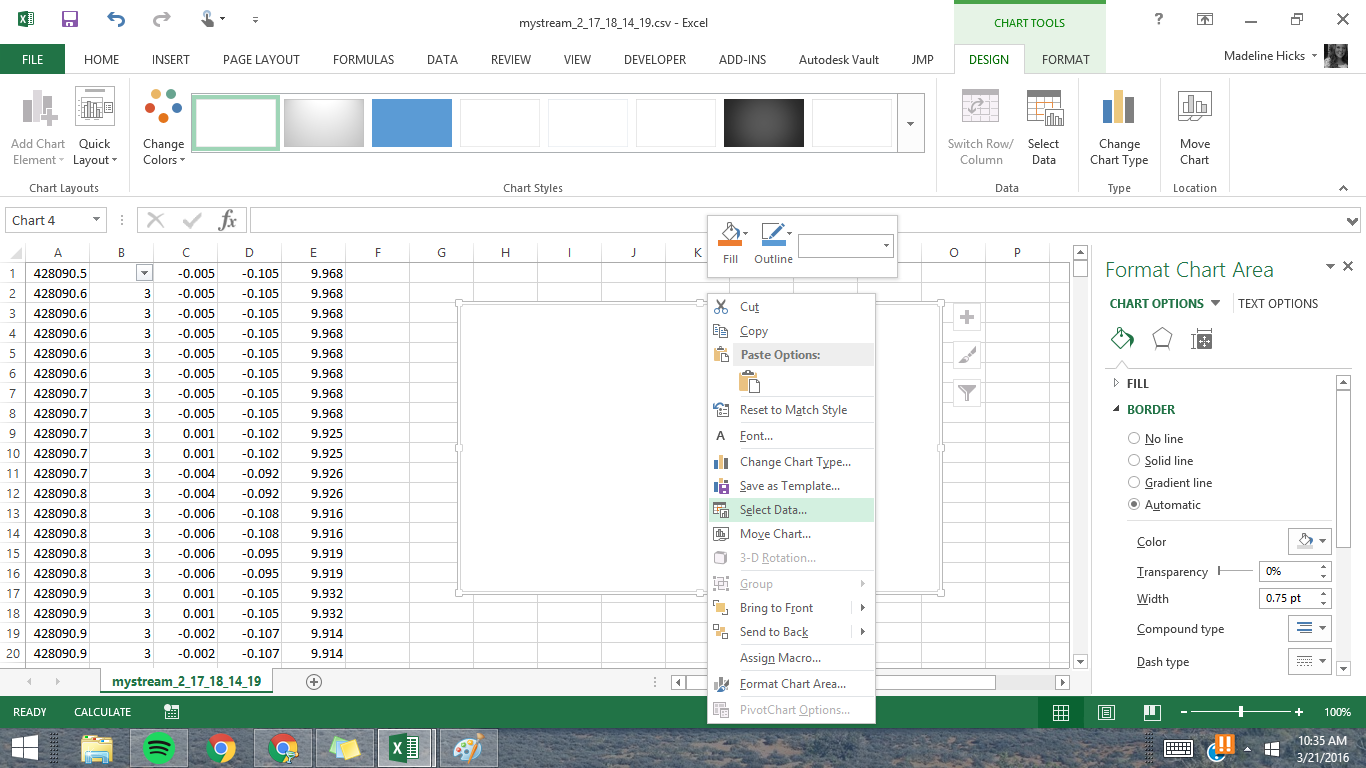
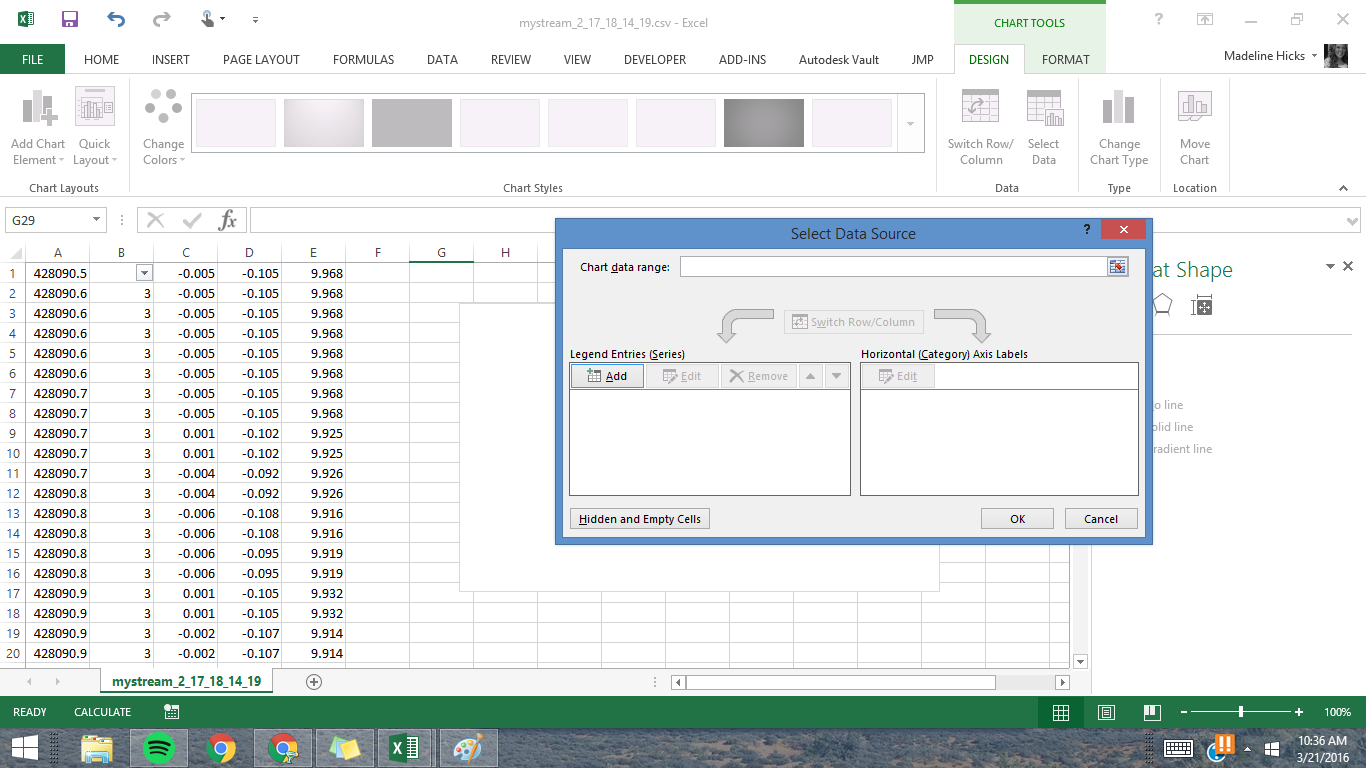
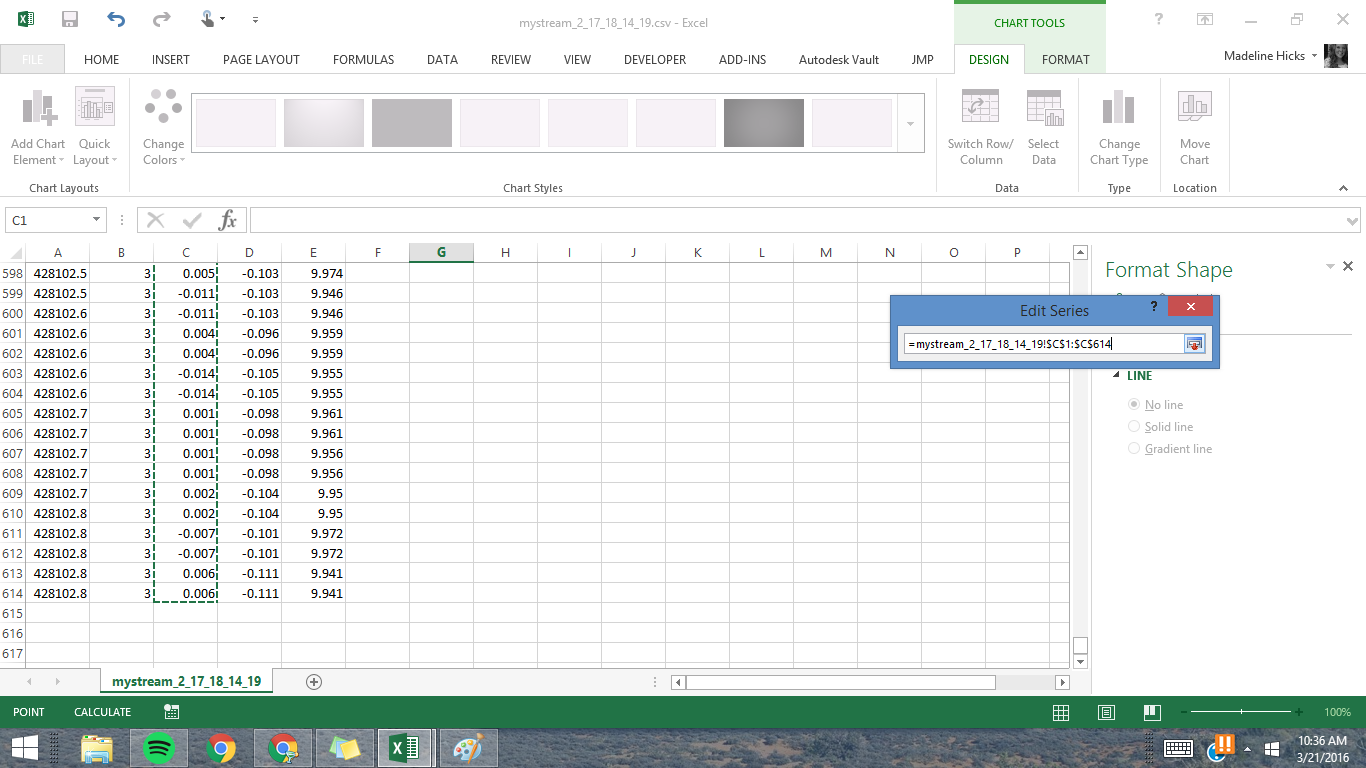
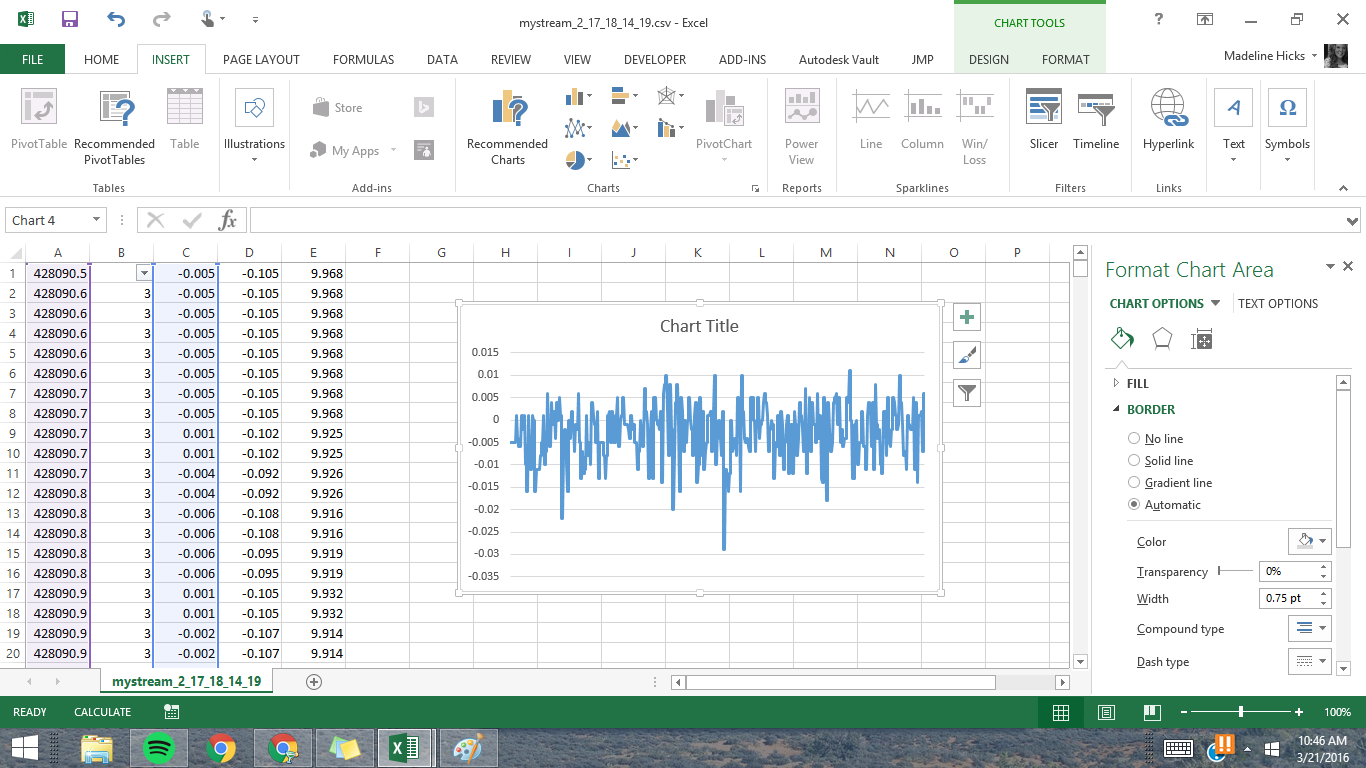
You can choose the graphs according to what you are trying to analyze. I will only cover the basic plot here, but there are many options as to the types of graphs you can create. In this example, we will plot the x-axis accelerometer data.
First, under the 'Insert' tab on the toolbar select a 2-D line plot. Once the blank plot appears, right click anywhere on the blank area and click 'Select Data'. A separate window will now appear to allow you to select the data you will be plotting. Click Add Series and select the data points in the column containing the x-axis data (column C in this example). Once you are finished click 'OK' and return to the Select Data Source window to edit the Horizontal axis data. To do this select 'Edit' under the 'Horizontal (Category) Axis Labels' section and drag to select the column containing the time stamp data (shown here as column A).
Once you have selected the appropriate data columns, click 'OK' and the graph will be generated.
You may need to do some editing with the axis or labels to get your graph to appear as desired.
I hope this has been helpful. Good luck with your data collection and processing!