How to Fold an Origami Parrot

A miniature and cute figure of a parrot will decorate your origami collection. This origami is not nearly as hard to fold as it looks. If you want to see my youtube video on how to make this same model, just click How To Fold an Origami Parrot to see a tutorial that is slightly easier to follow.


- Take a sheet of origami paper 15x15 cm.
- Fold in half along one of the two diagonals, carefully crease the fold, and unfold.
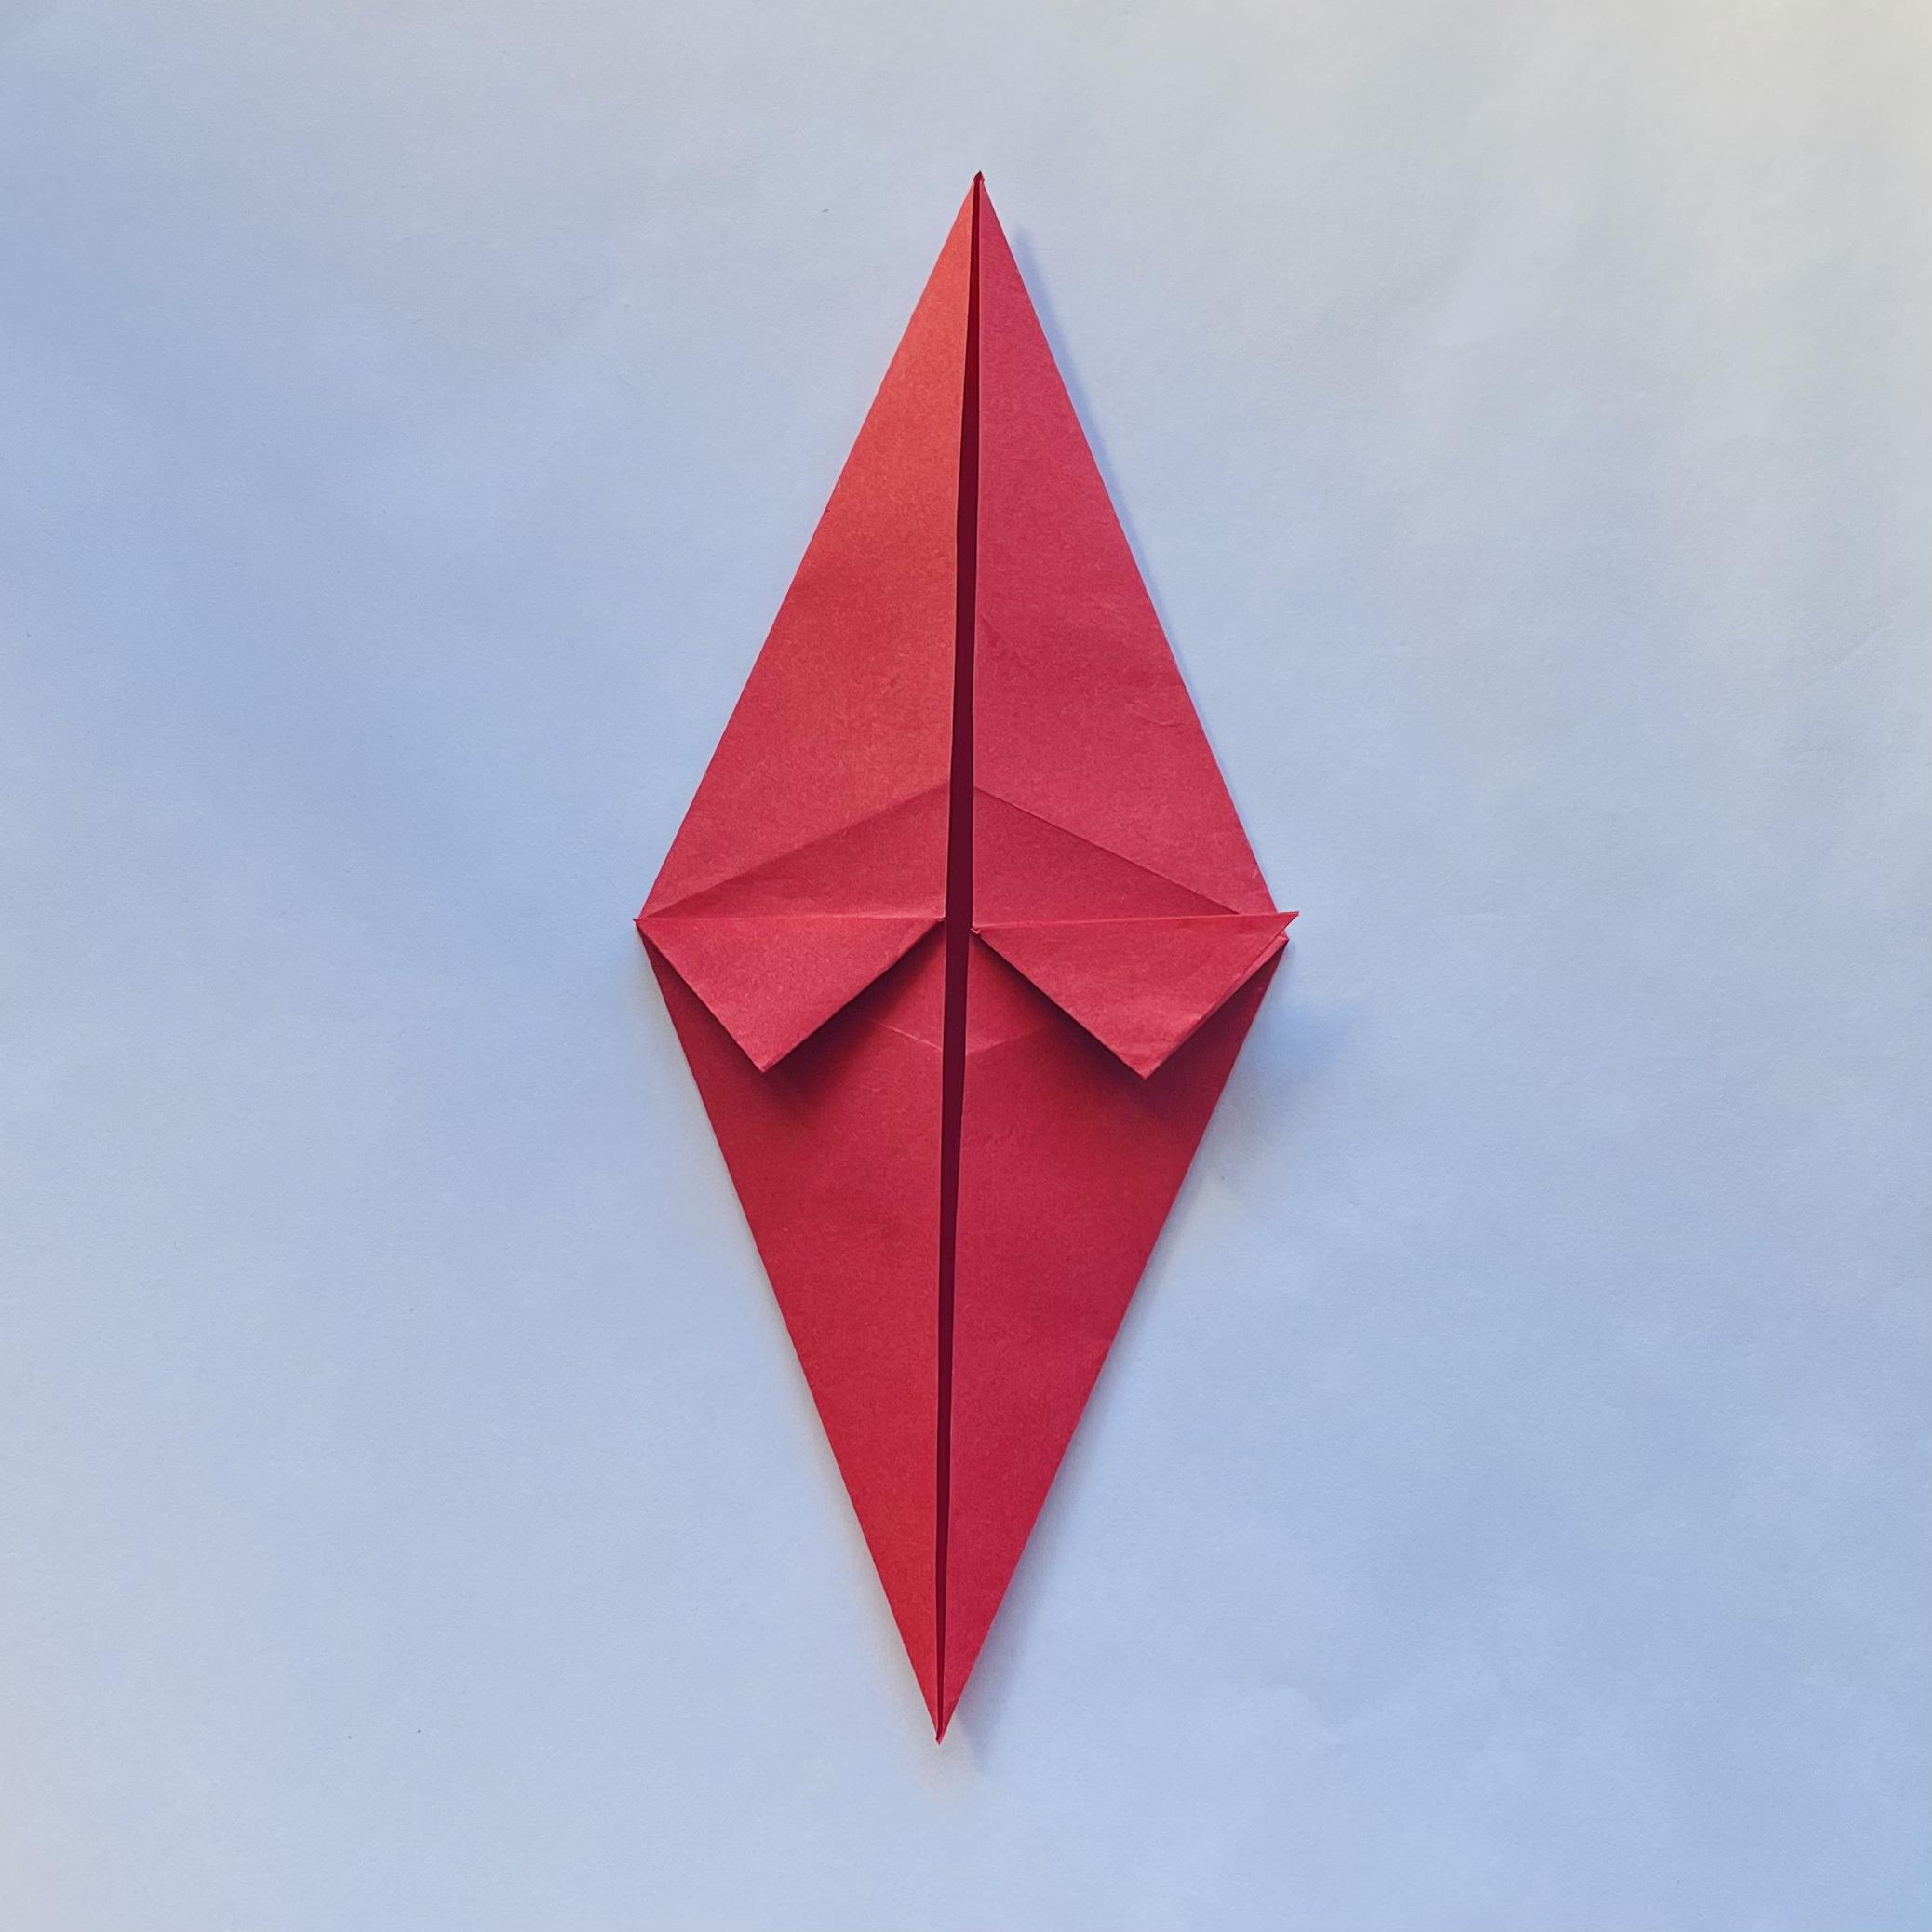
- Alternately fold the bottom sides with the side corners to the center line so that they join on it.
- Crease the folds, then unfold.


Now, fold the side corners inward as well, but this time with the top sides of the paper.


Carefully follow the instructions in the photo and fold the paper along the indicated folds.


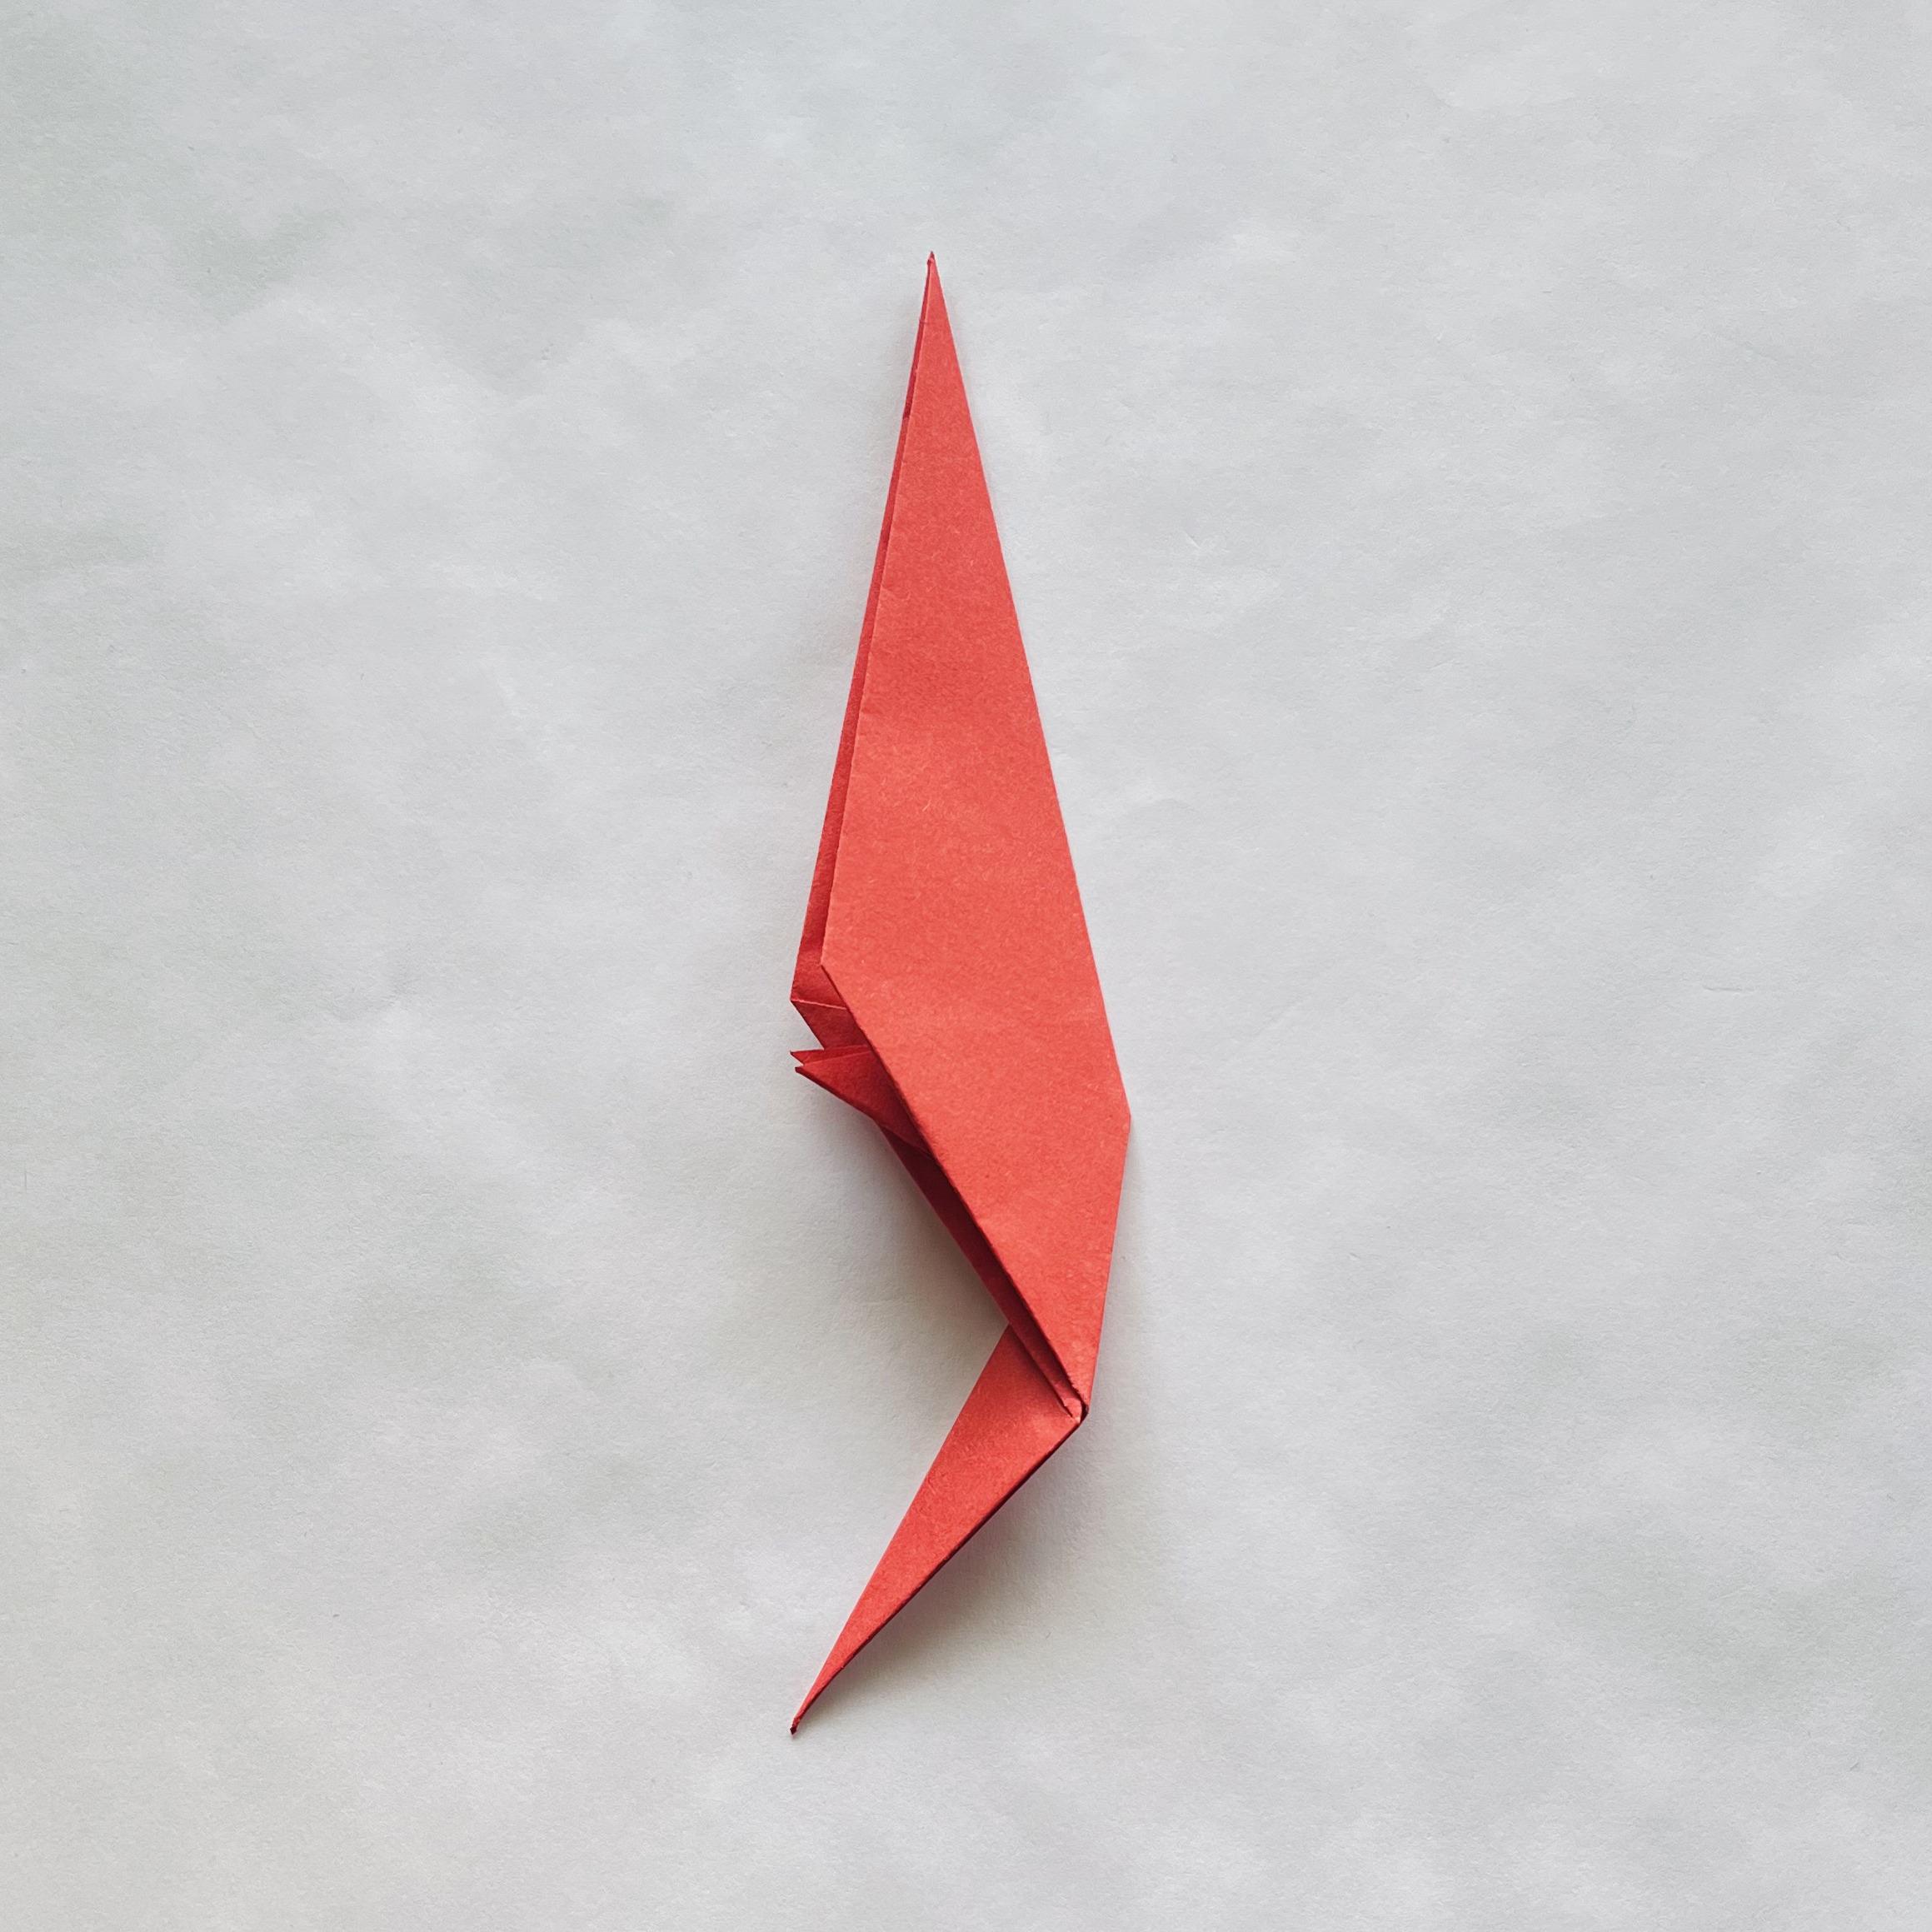
- Fold the paper symmetrically on the other side.
- Bend the two tails in the central part down and bend the corners of these tails to the sides, as shown in the photo.
- Fold the edges of the bottom half of the shape inward.


- Fold the shape in half, as if closing a book.
- Fold the bottom corner back along the dotted line so that it peeks out from behind the figure.

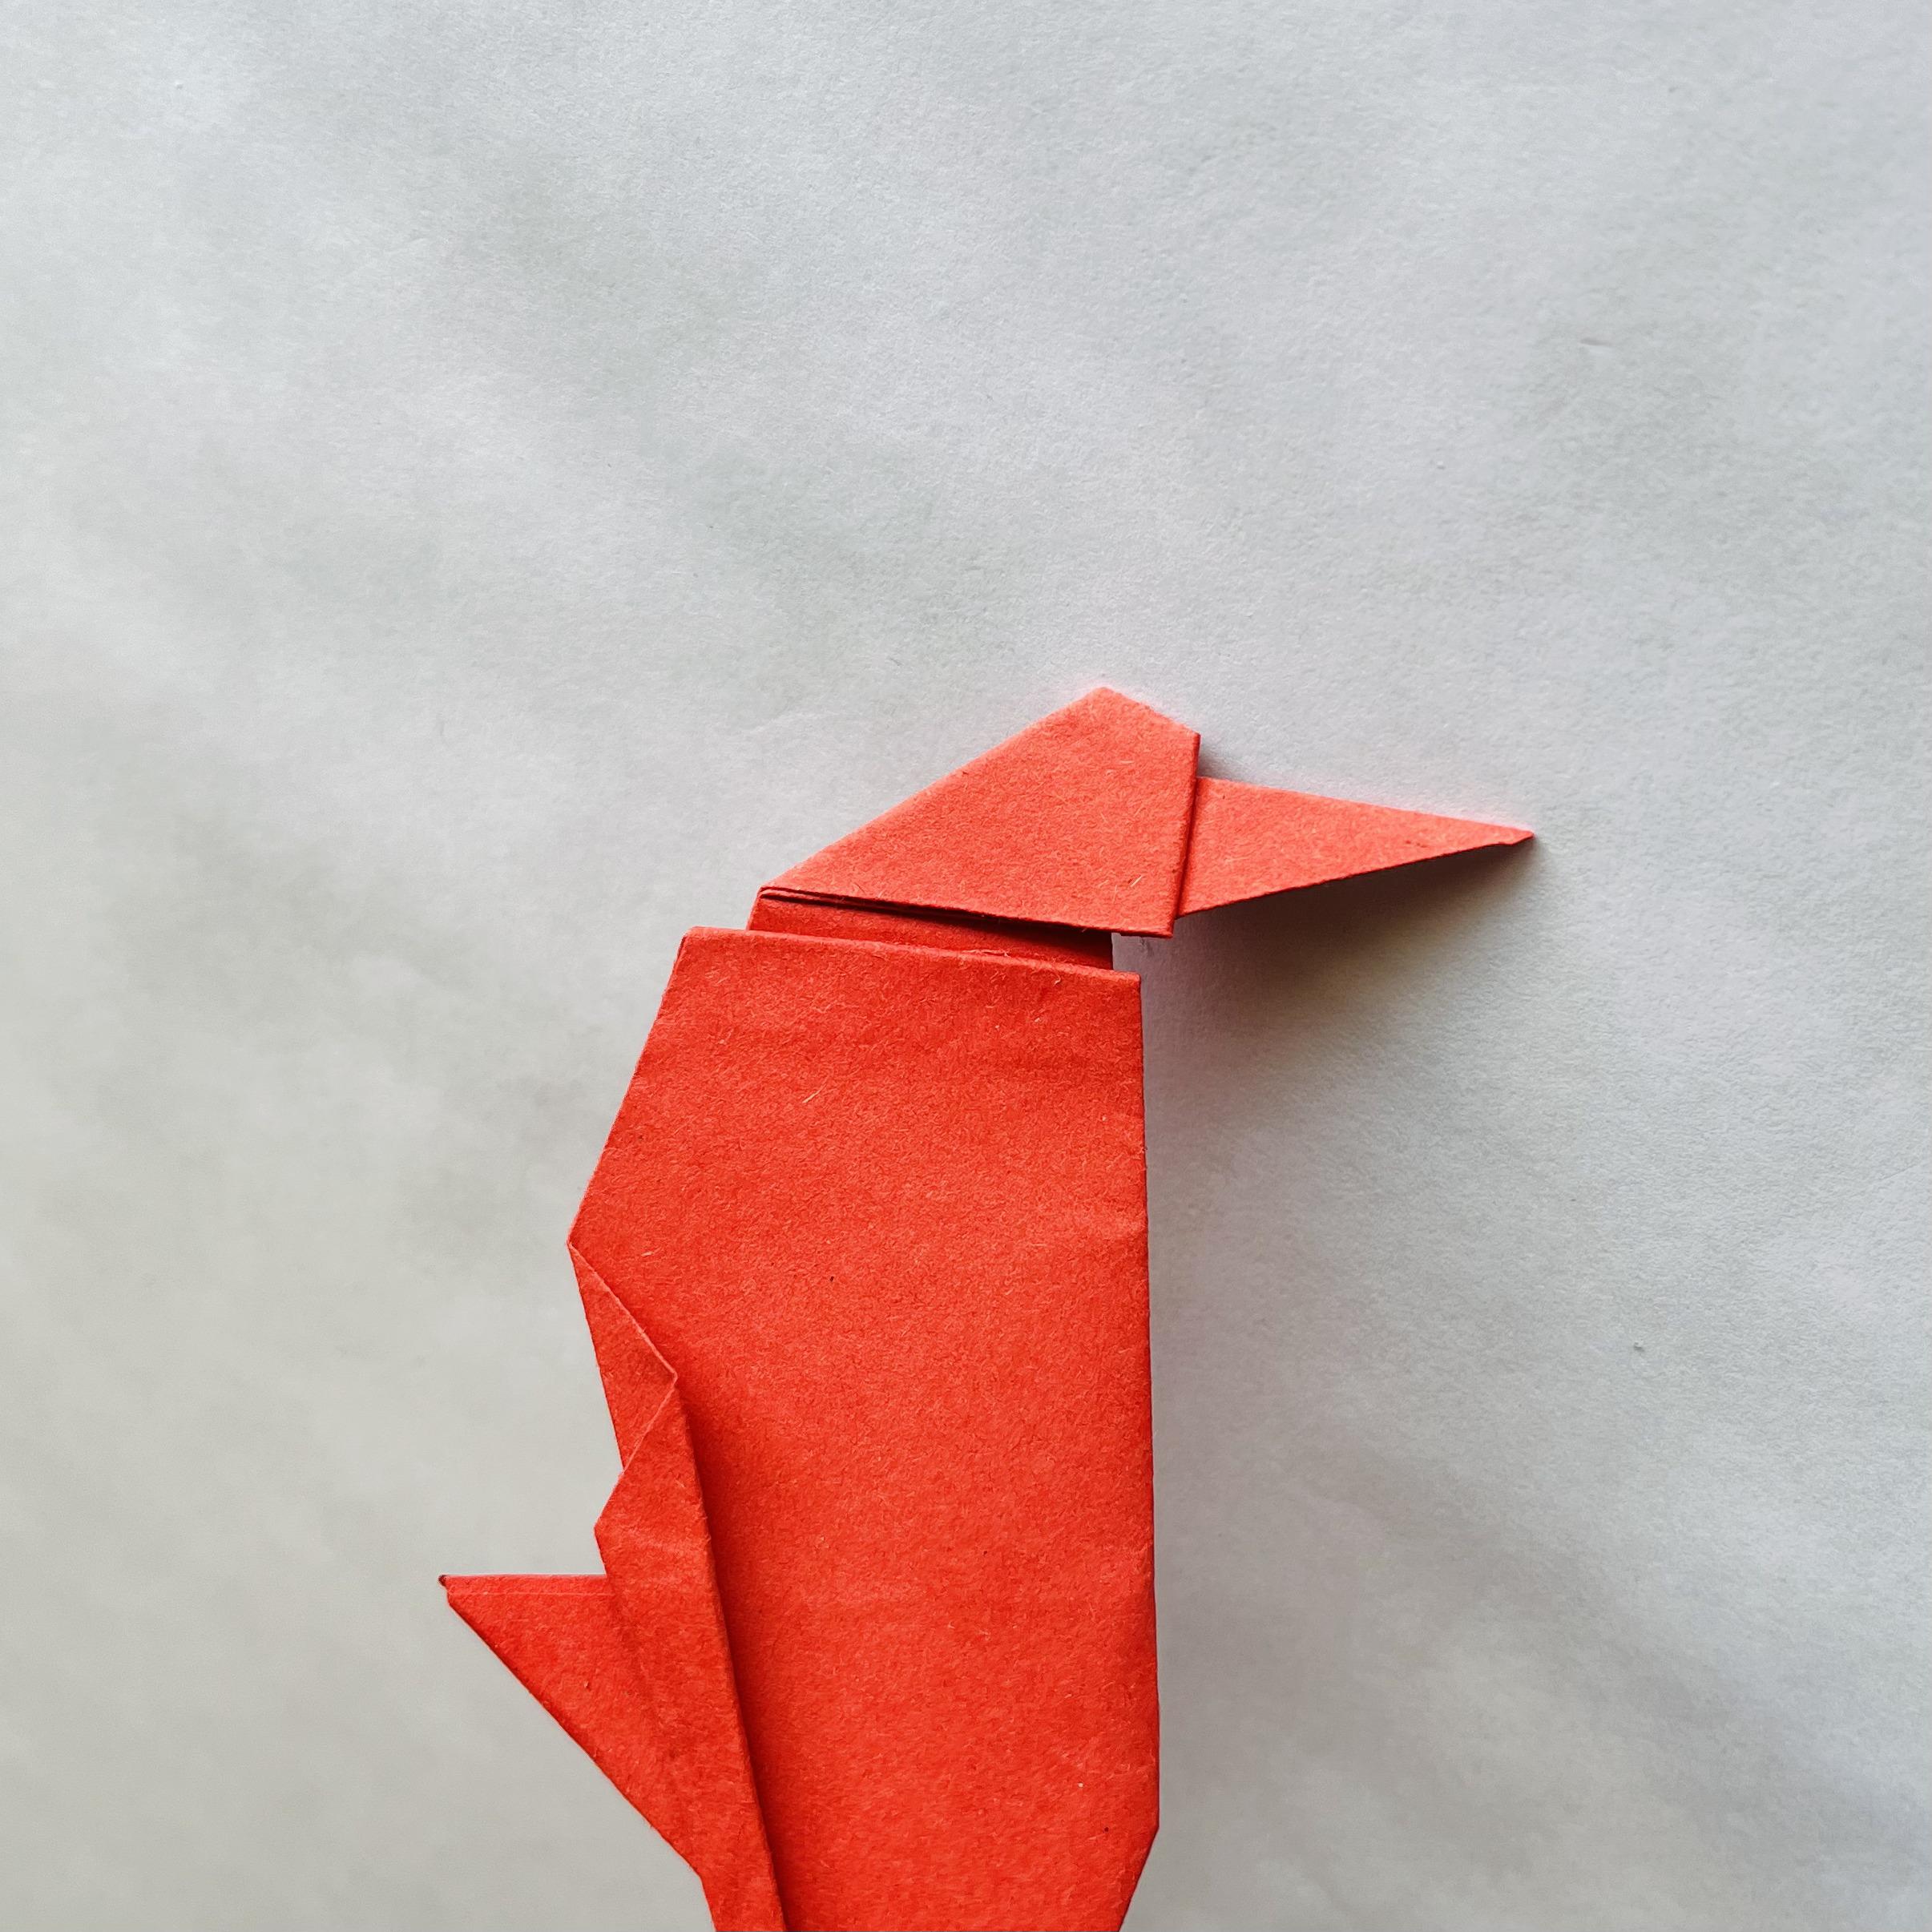
Now, you need to mark a small bend. Bend the top corner back.


Turn the figure over and bend it back, stepping back 1-2 mm from the edge to create a bend.


Turn the paper over. In the middle part, fold the edge of the paper outward.


Next, fold the paper at the bottom of the figure, focusing on the dotted line.

All you have left to do is create the parrot's head. Start by folding the top corner to the right.


Bend the same corner back, step back about 1 mm, and bend it back.
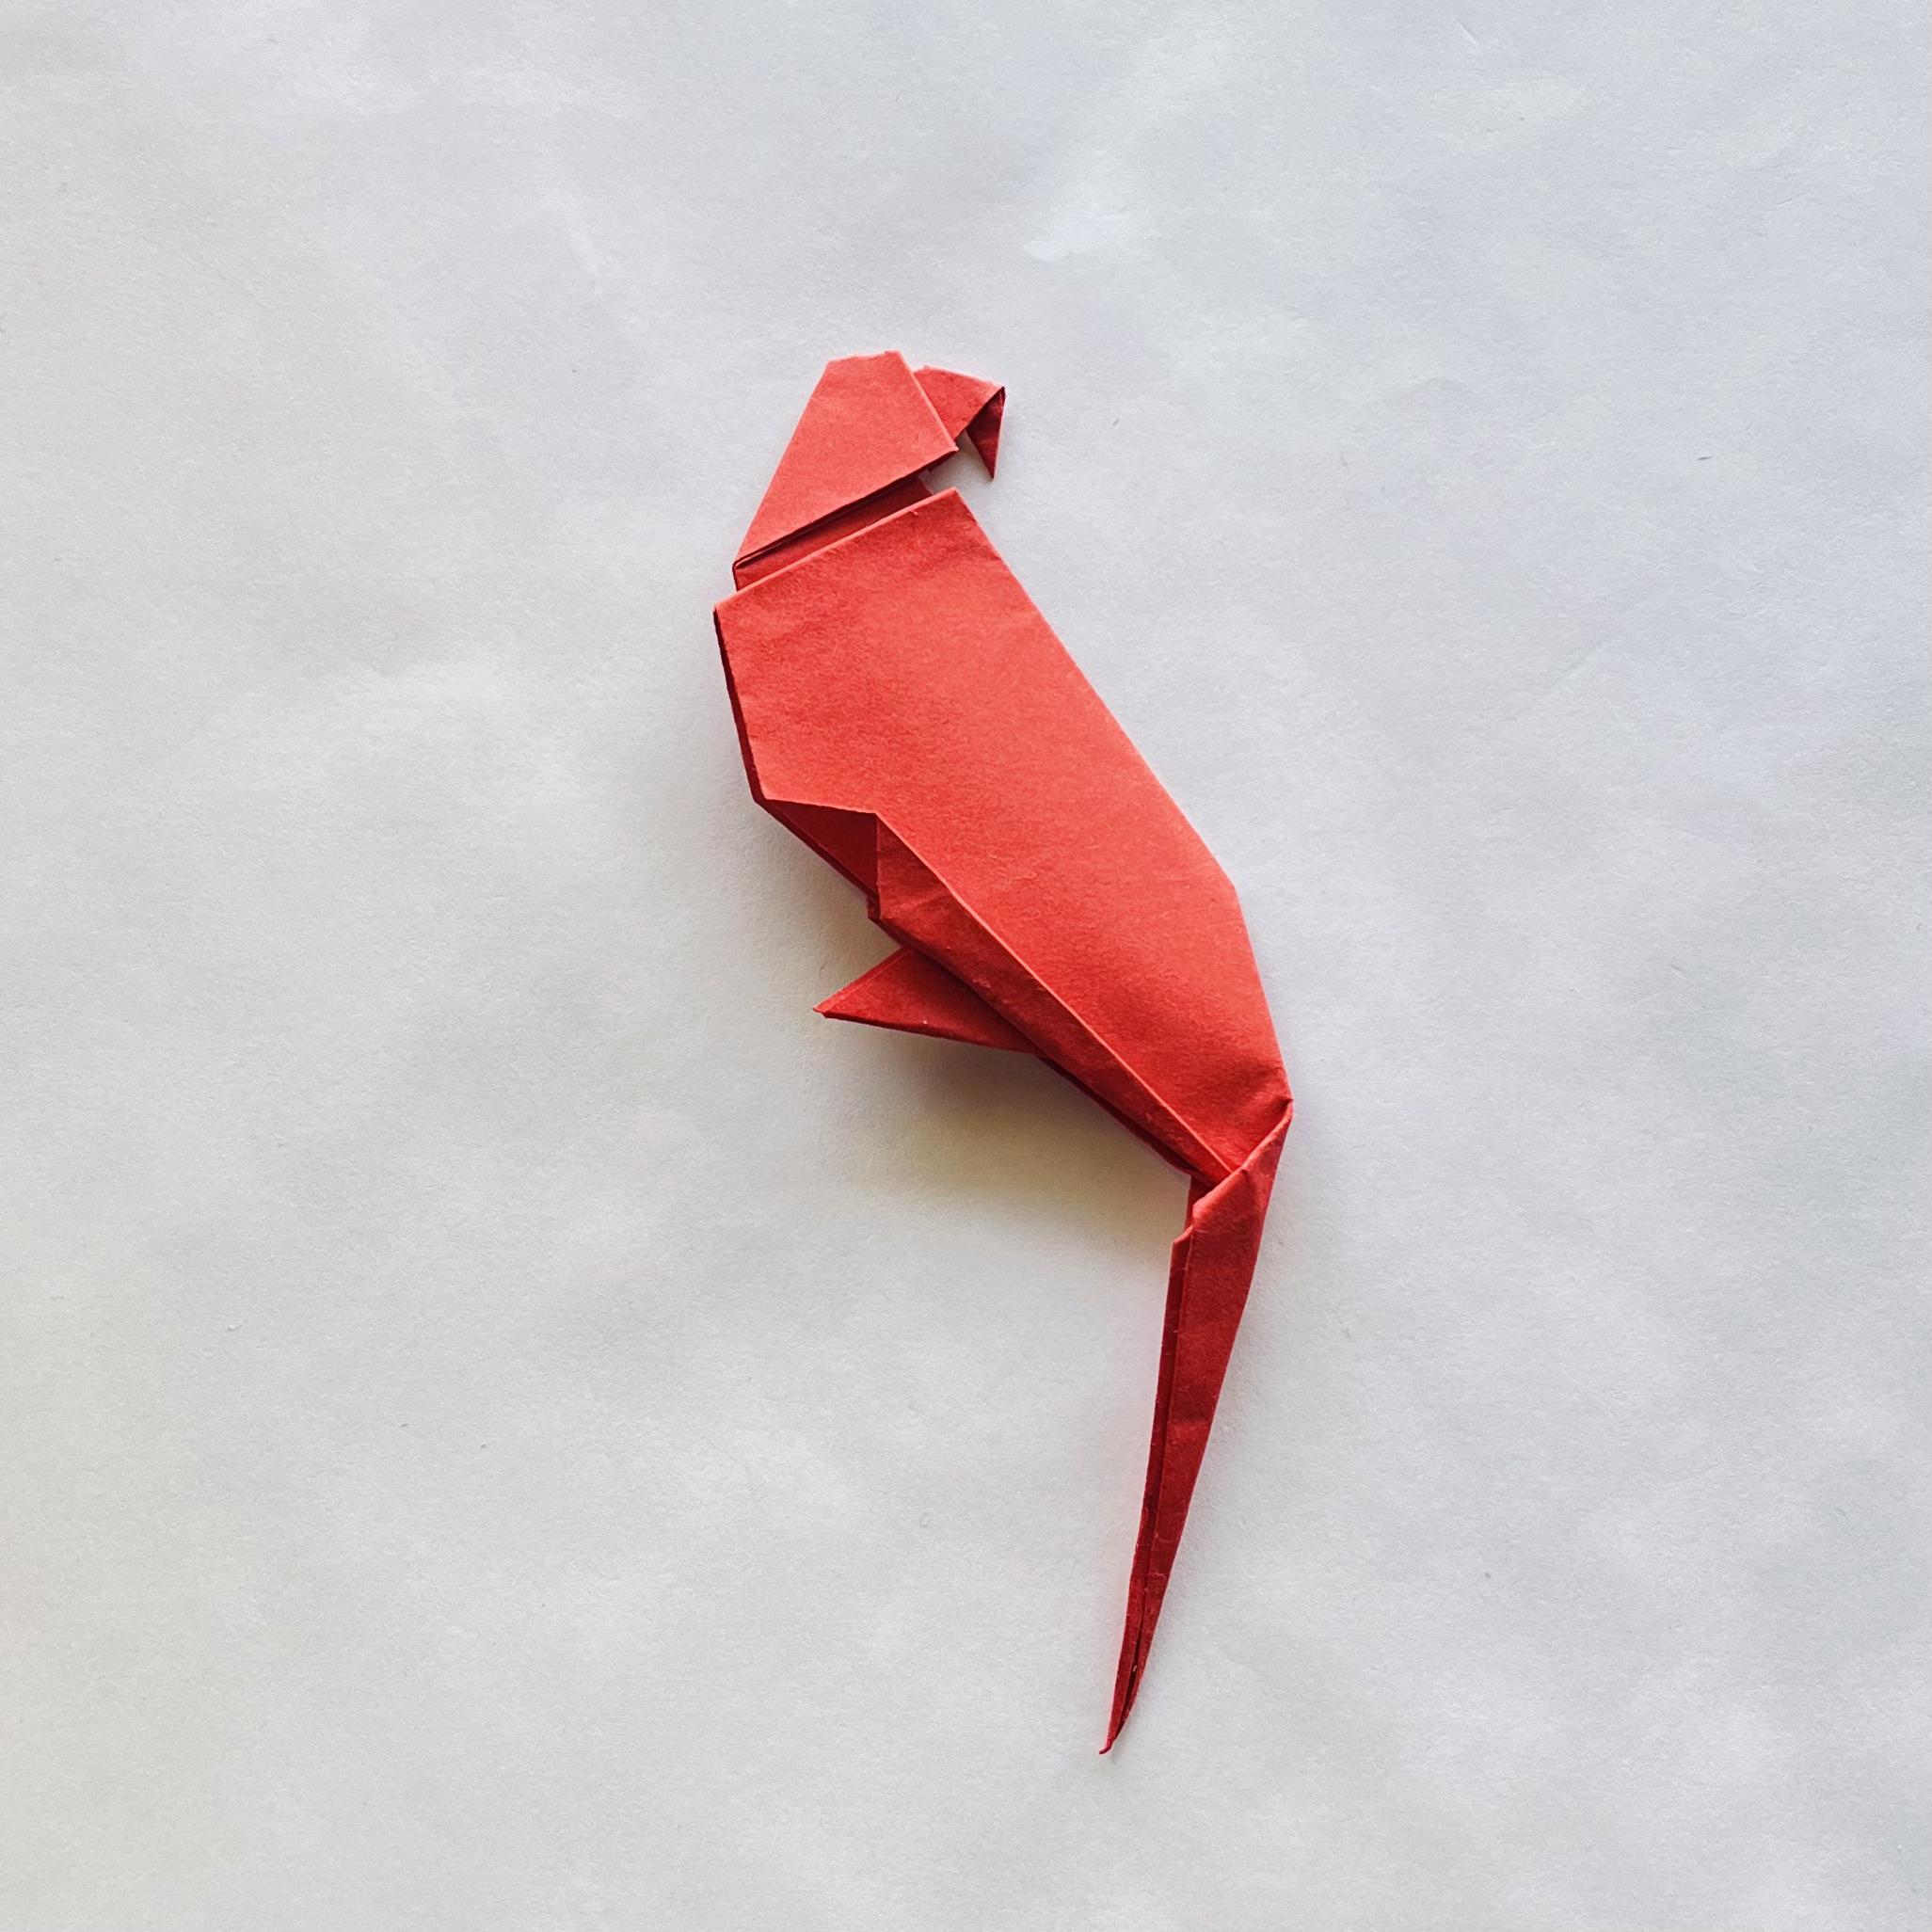

Now, let’s create the beak: bend the tip of the corner back and down, as shown in the photo.

Final touch: add an eye made of white paper and draw a pupil on it.