How to Extract in Photoshop CS2
by HenryH22 in Craft > Digital Graphics
4308 Views, 2 Favorites, 0 Comments
How to Extract in Photoshop CS2
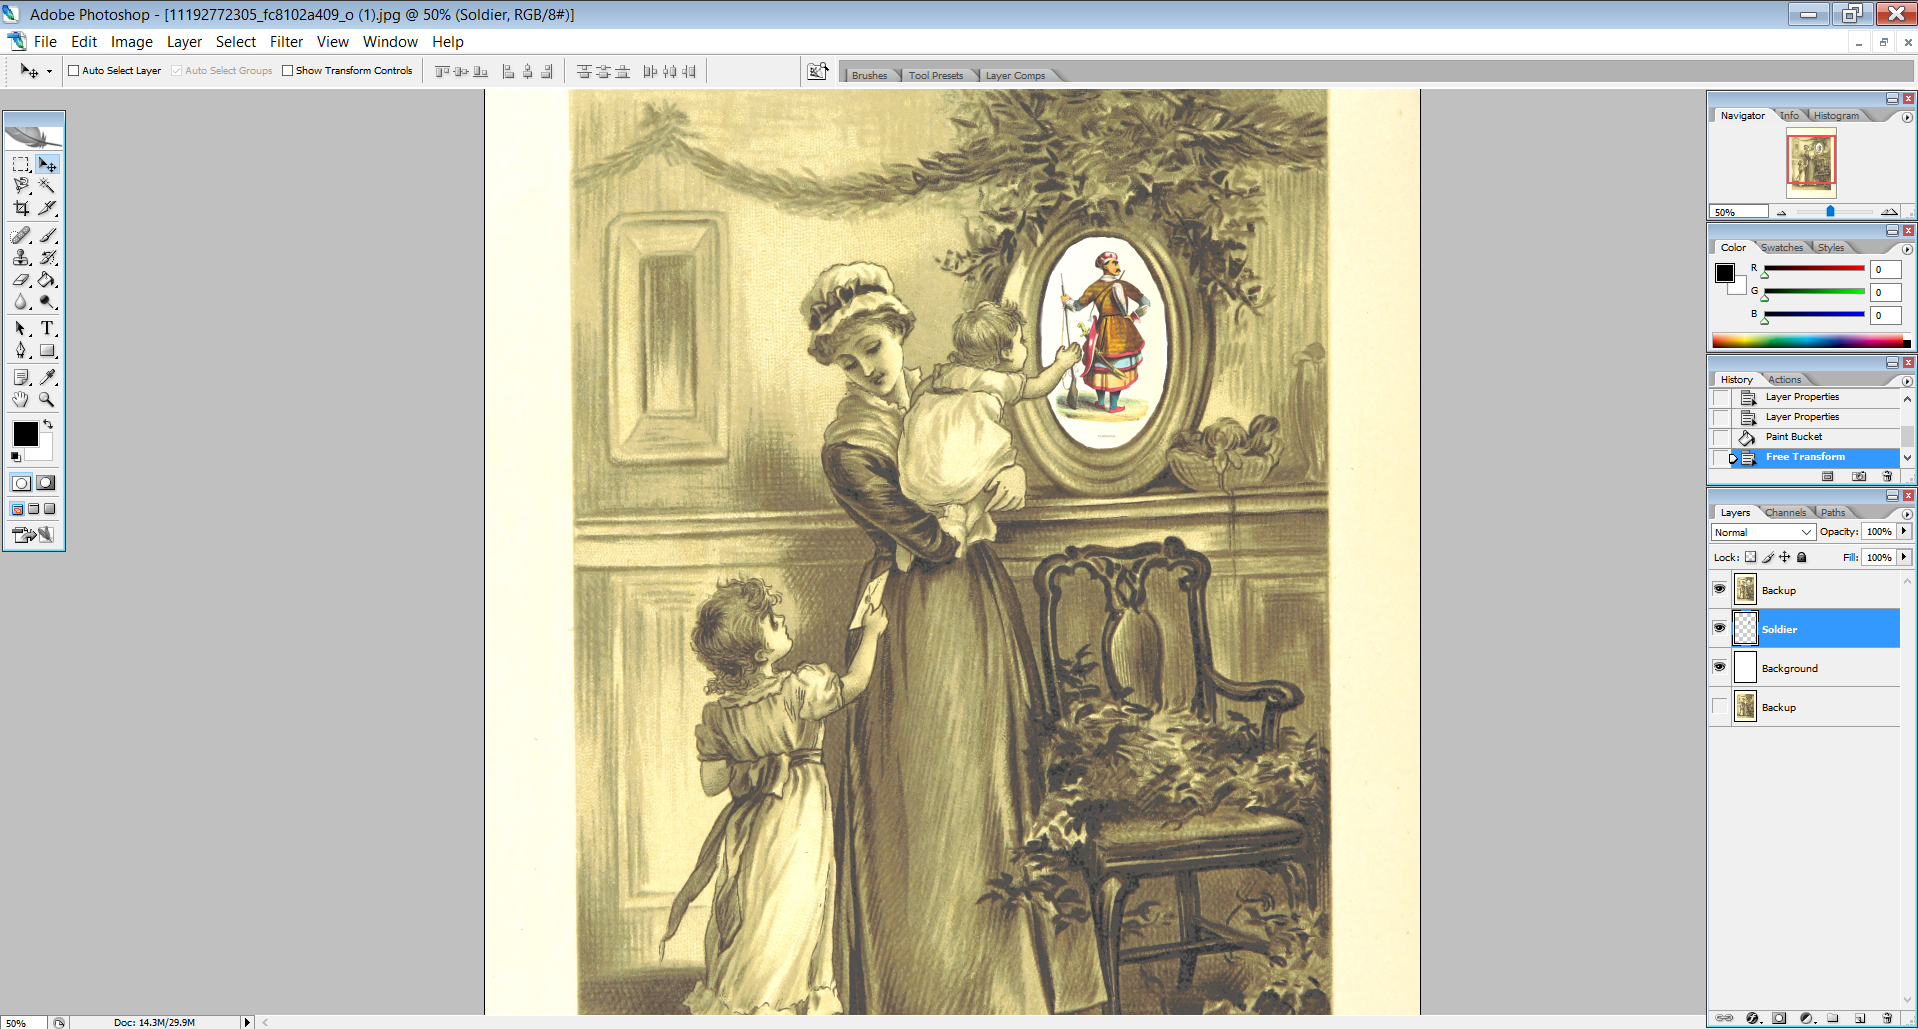
Extraction is the process in Photoshop of removing a feature of an image and placing it into its own layer. Extraction can be used to modify the contents of an image in such a way that the final product looks extremely realistic.
This guide will go through the process of extraction, step by step, with an example.
Obtain Photoshop CS2
Extraction is a feature of older Photoshop versions. However, Photoshop can be very expensive, and as such is difficult for many people to obtain. Luckily, Adobe has made Photoshop CS2 available, legally, for free via their website.
The process of downloading and registering Photoshop CS2 from Adobe is out of scope for this guide, but this guide tells all there is to know about how to do so.
Choose What to Extract
.jpg)
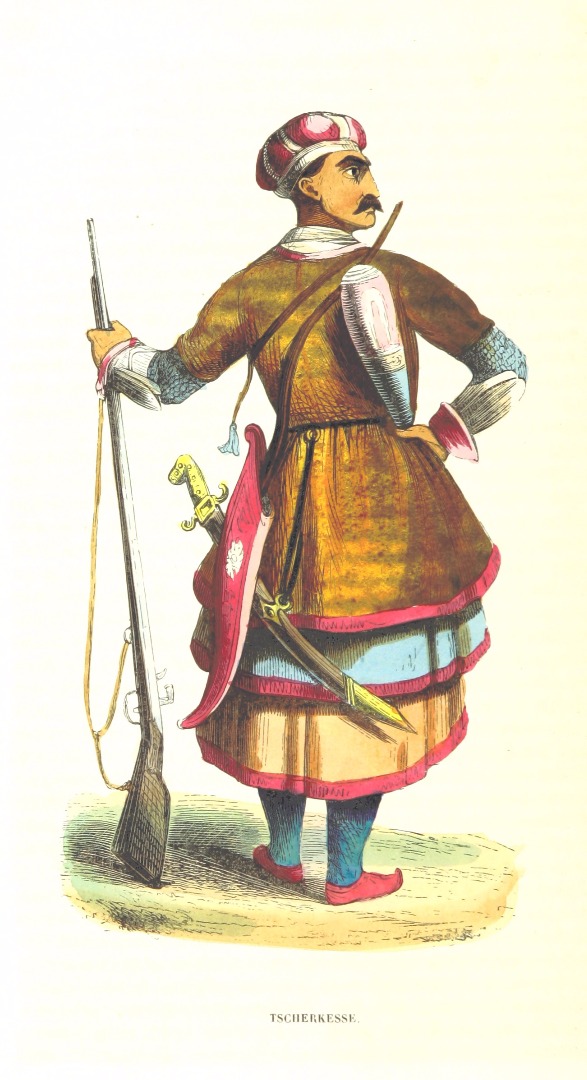
The next step in extraction an image is choosing what you're going to extract.
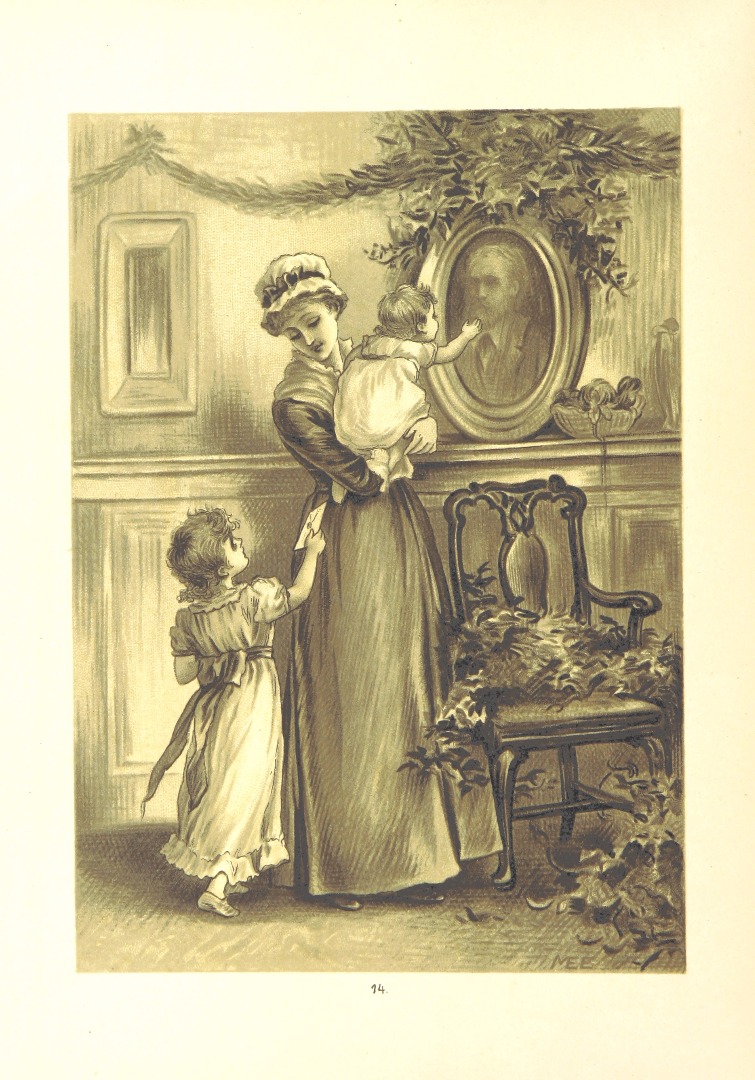
Copyright needs to be taken into account when choosing an image, so this guide will use the above black-and-white public-domain image taken from The British Library.
This guide will go through the process of extracting the man in the portrait, and swapping his portrait for the colored image of a soldier.
Backup Your Image
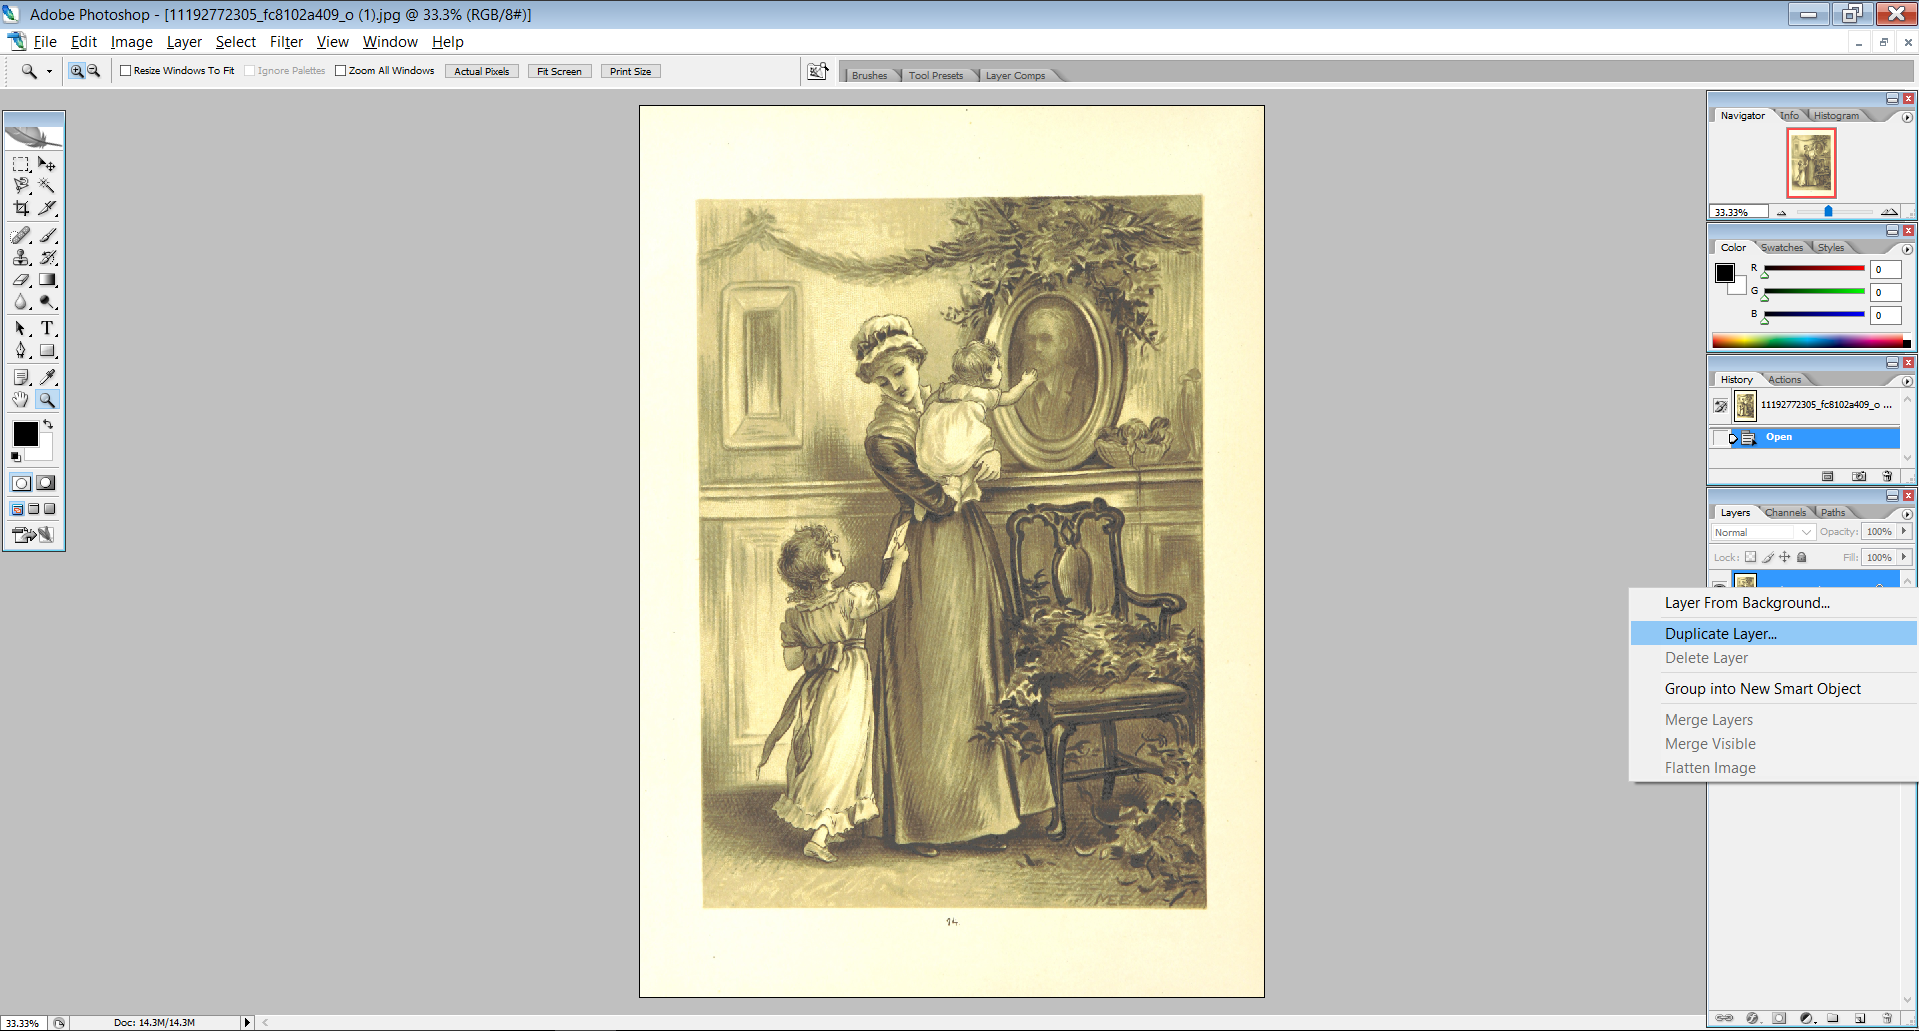
Next, create a duplicate of your layer and hide it by clicking the eye icon.
After extraction is complete, a part of the original image will be lost. By making a backup, nothing is lost in the even a mistake is made during the extraction process. Instead of needing to reopen the original file, the backup layer can be used to extract.
Begin the Extraction Process
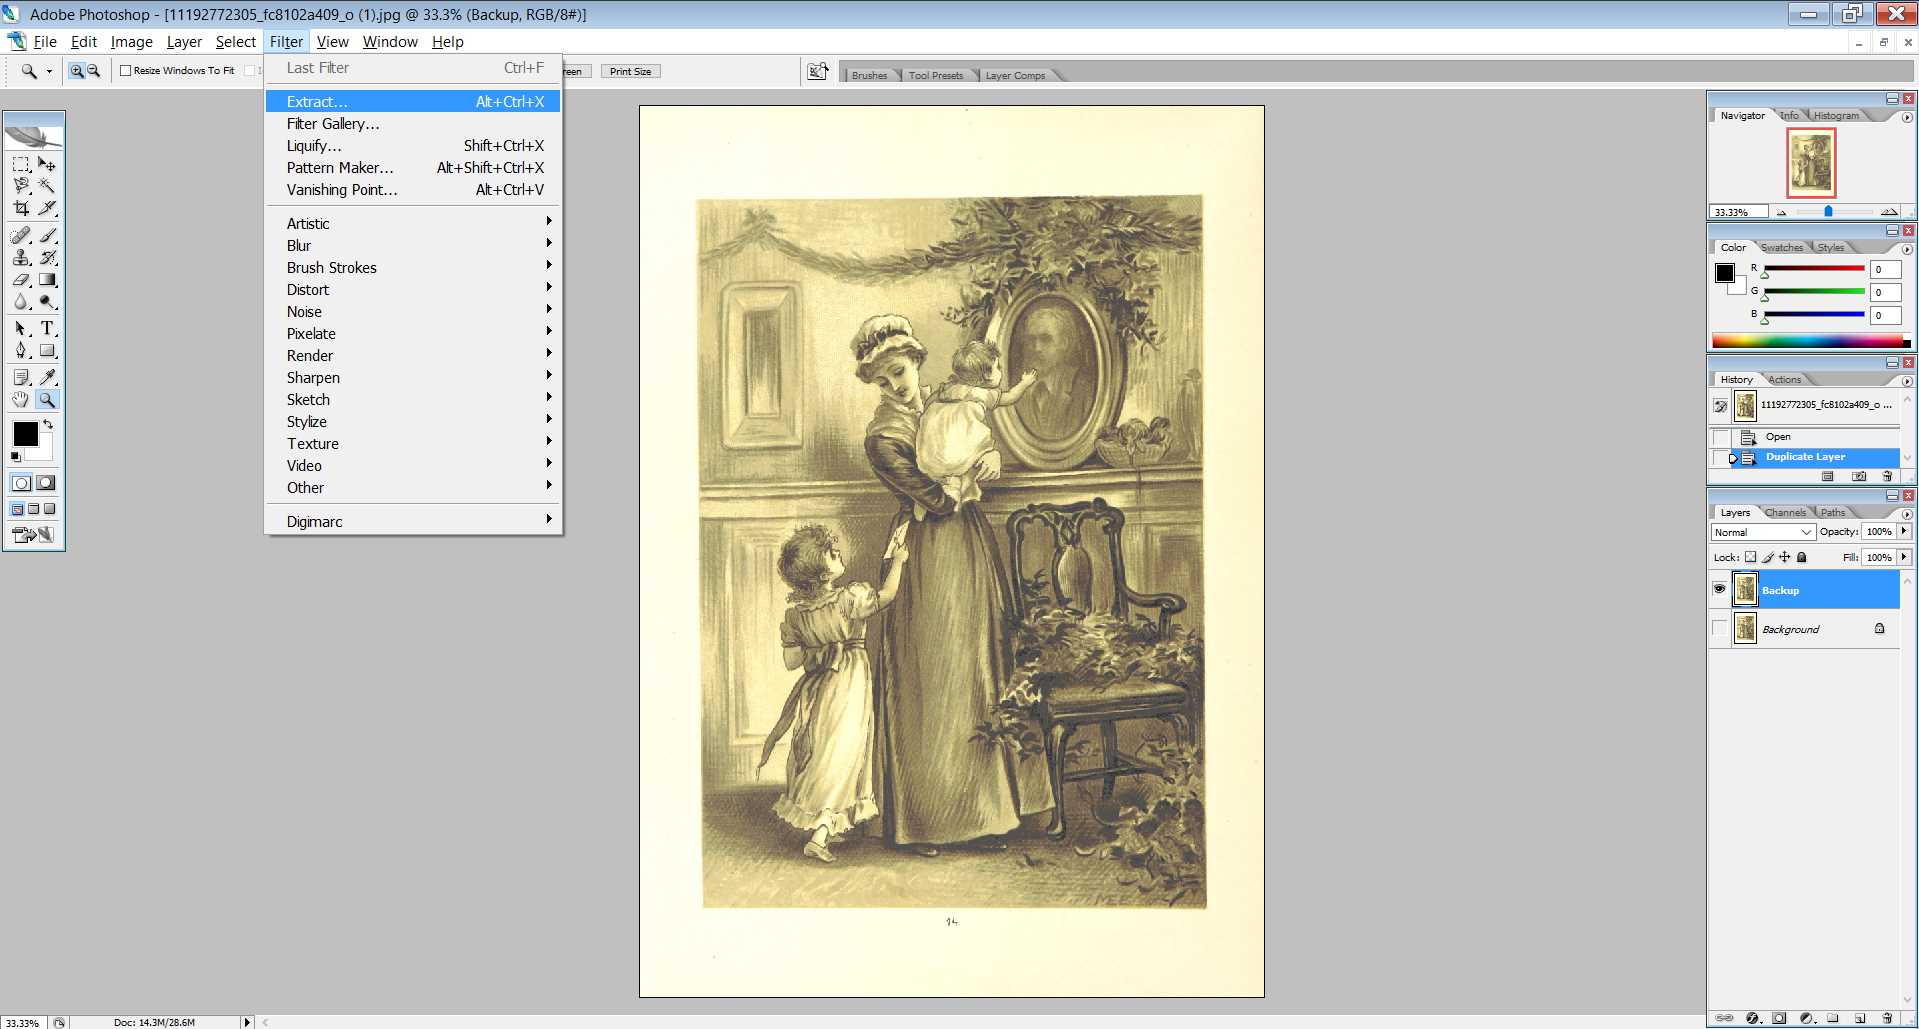
Next, begin the extraction process by hovering the cursor over the Filter menu near the top of the screen, and selecting Extract from the drop-down menu. Note that your layer needs to be selected for the Extract option to be selectable.
Enable Smart Highlighting and Change Brush Size
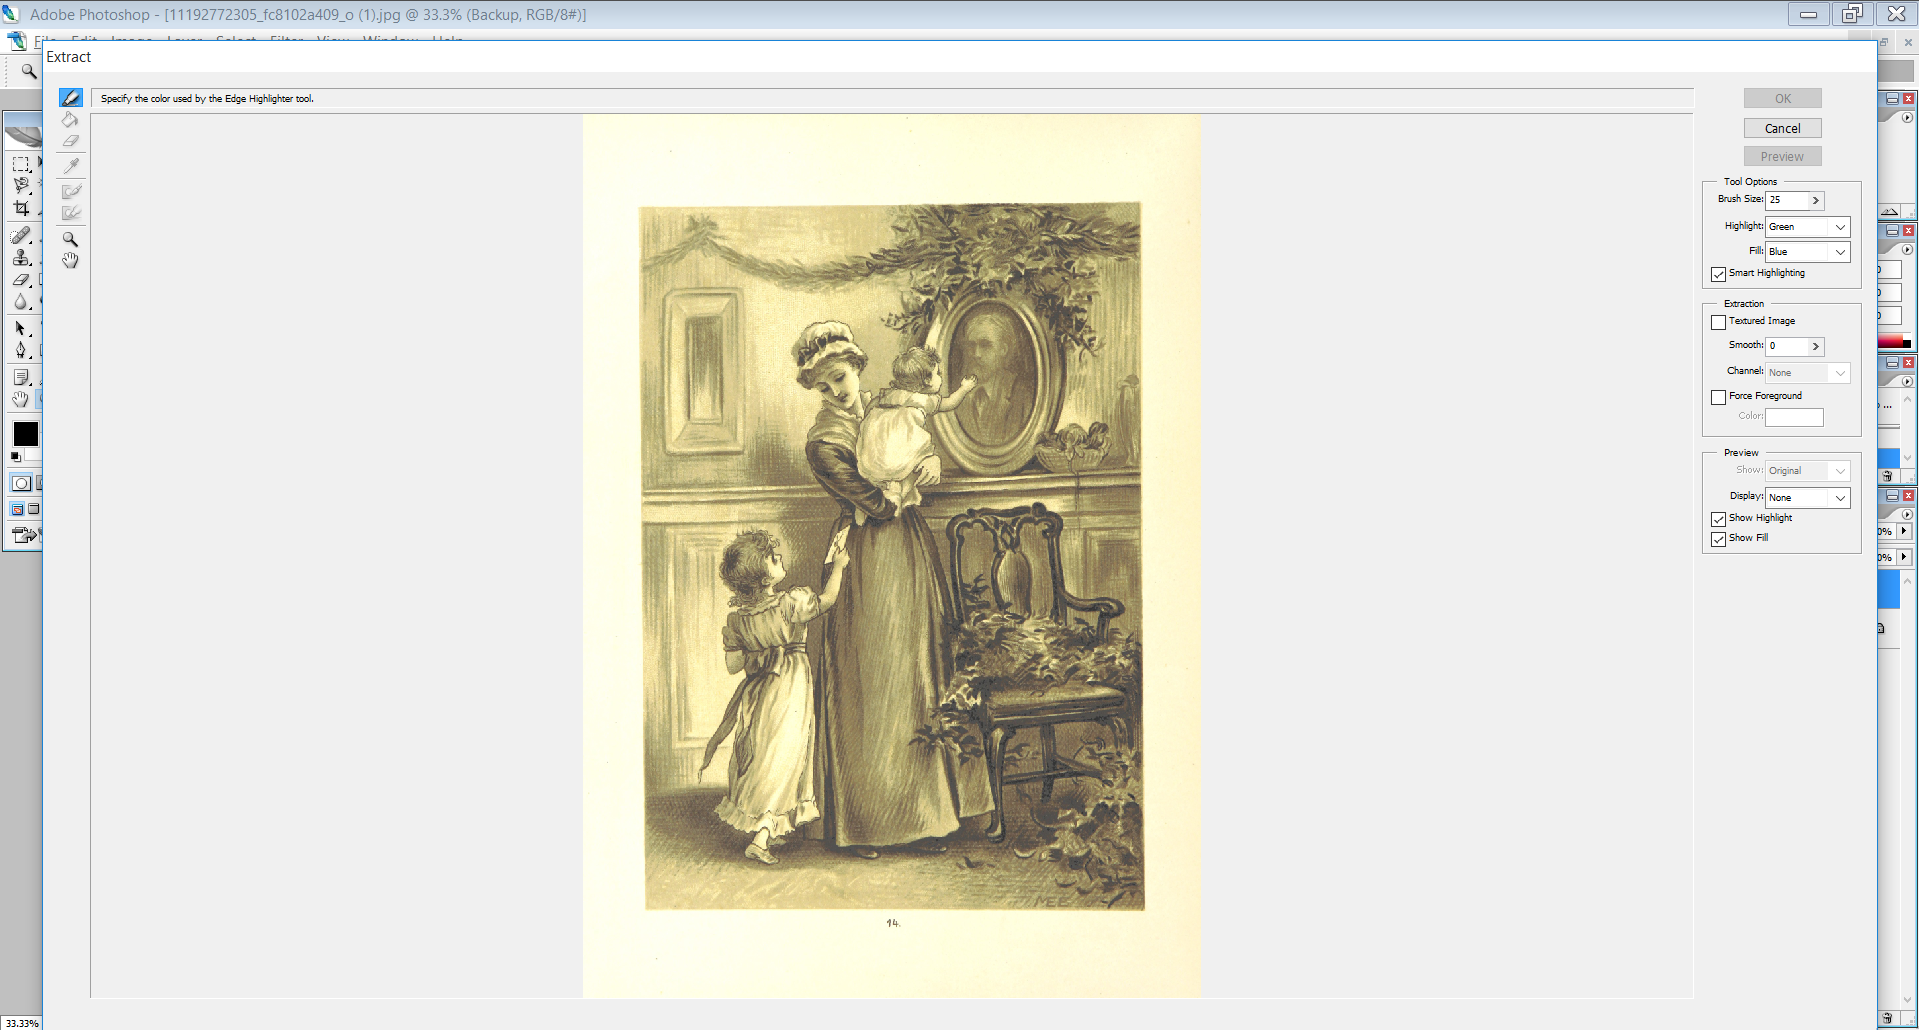
Photoshop has some default values that should be changed before extraction begins. These are Smart Highlighting and Brush Size.
Smart Highlighting is the powerful part of extraction - it allows Photoshop to try and trace the outline of what it "sees" in the image. Check the box next to "Smart Highlighting" to turn it on.
Brush Size is much more subjective. It will depend highly on the size of the image being extracted. For most images, sizes ranging from 10 - 30 are acceptable. A brush size that is either too large or too small will make it difficult to select the correct areas in the image, so discretion must be used when selecting a brush size. It can be changed at any time, though, so don't feel pressured to make the perfect size choice right away - it's OK to go back and change brush size.
Select the Edge Highlighter Tool and Begin Extracting
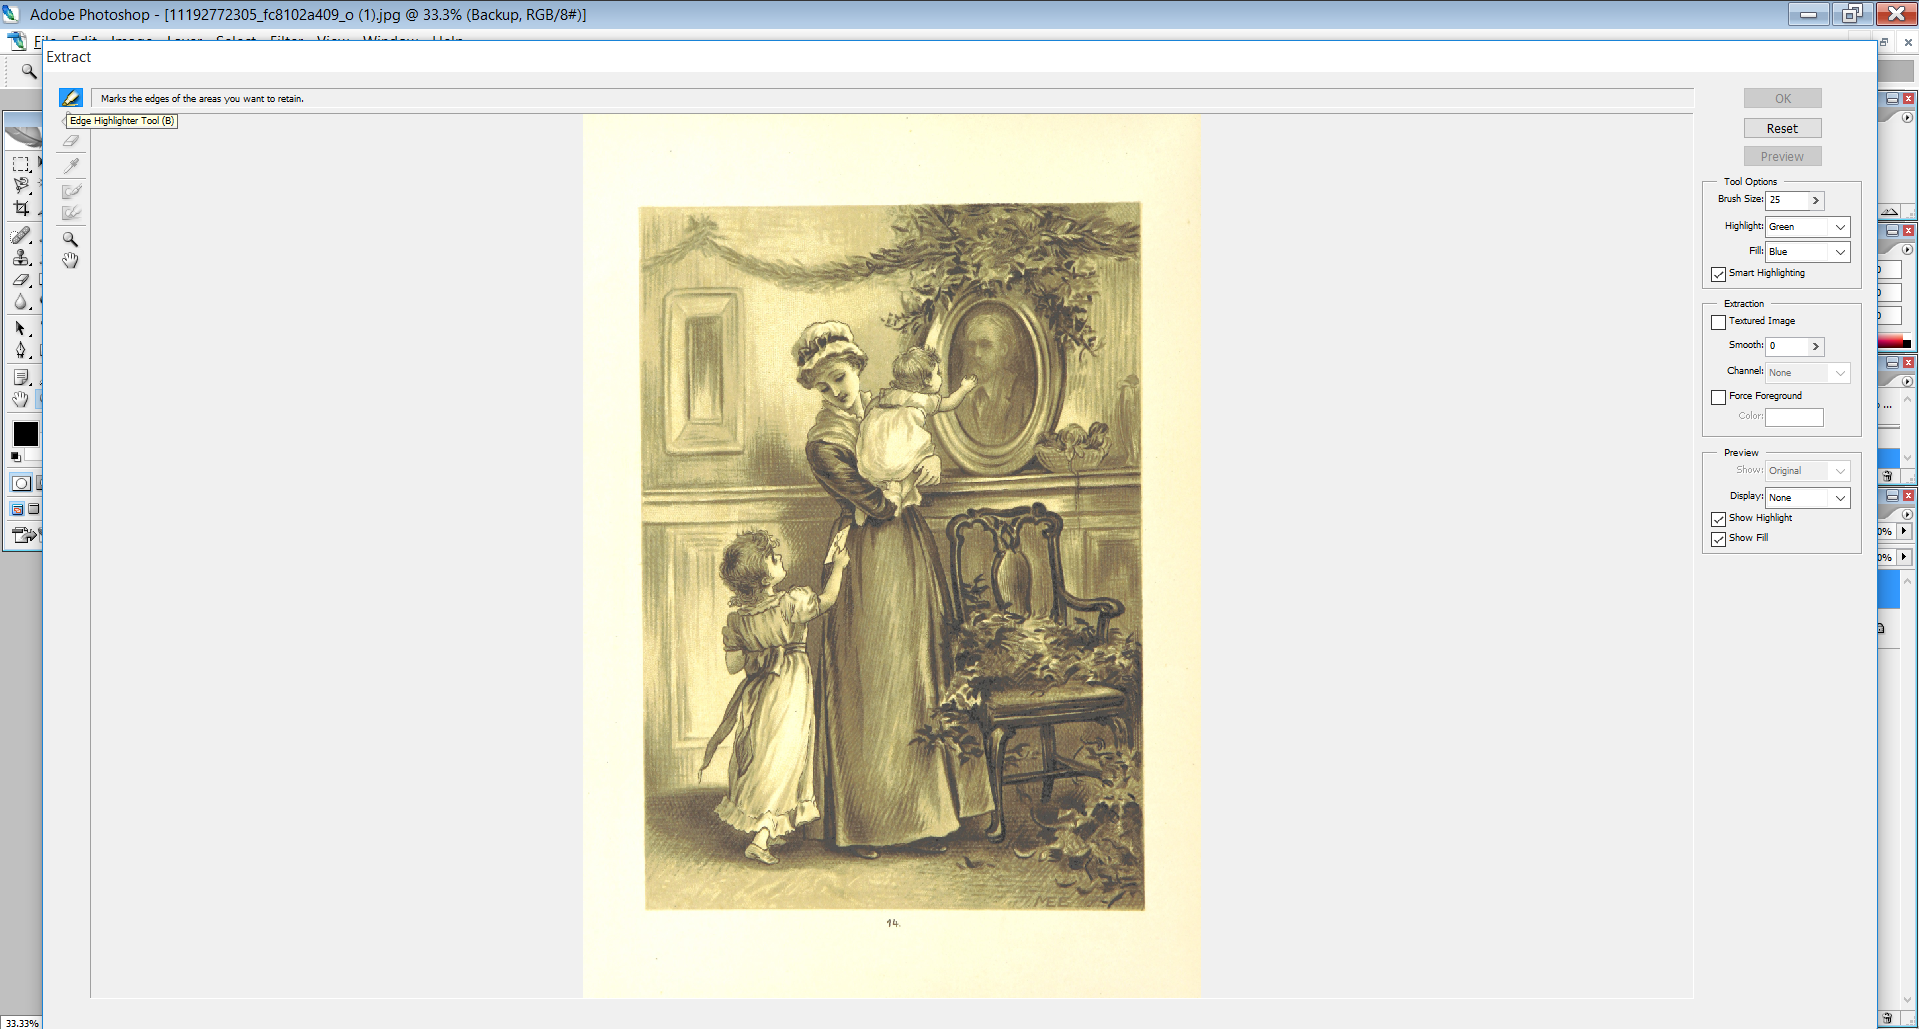
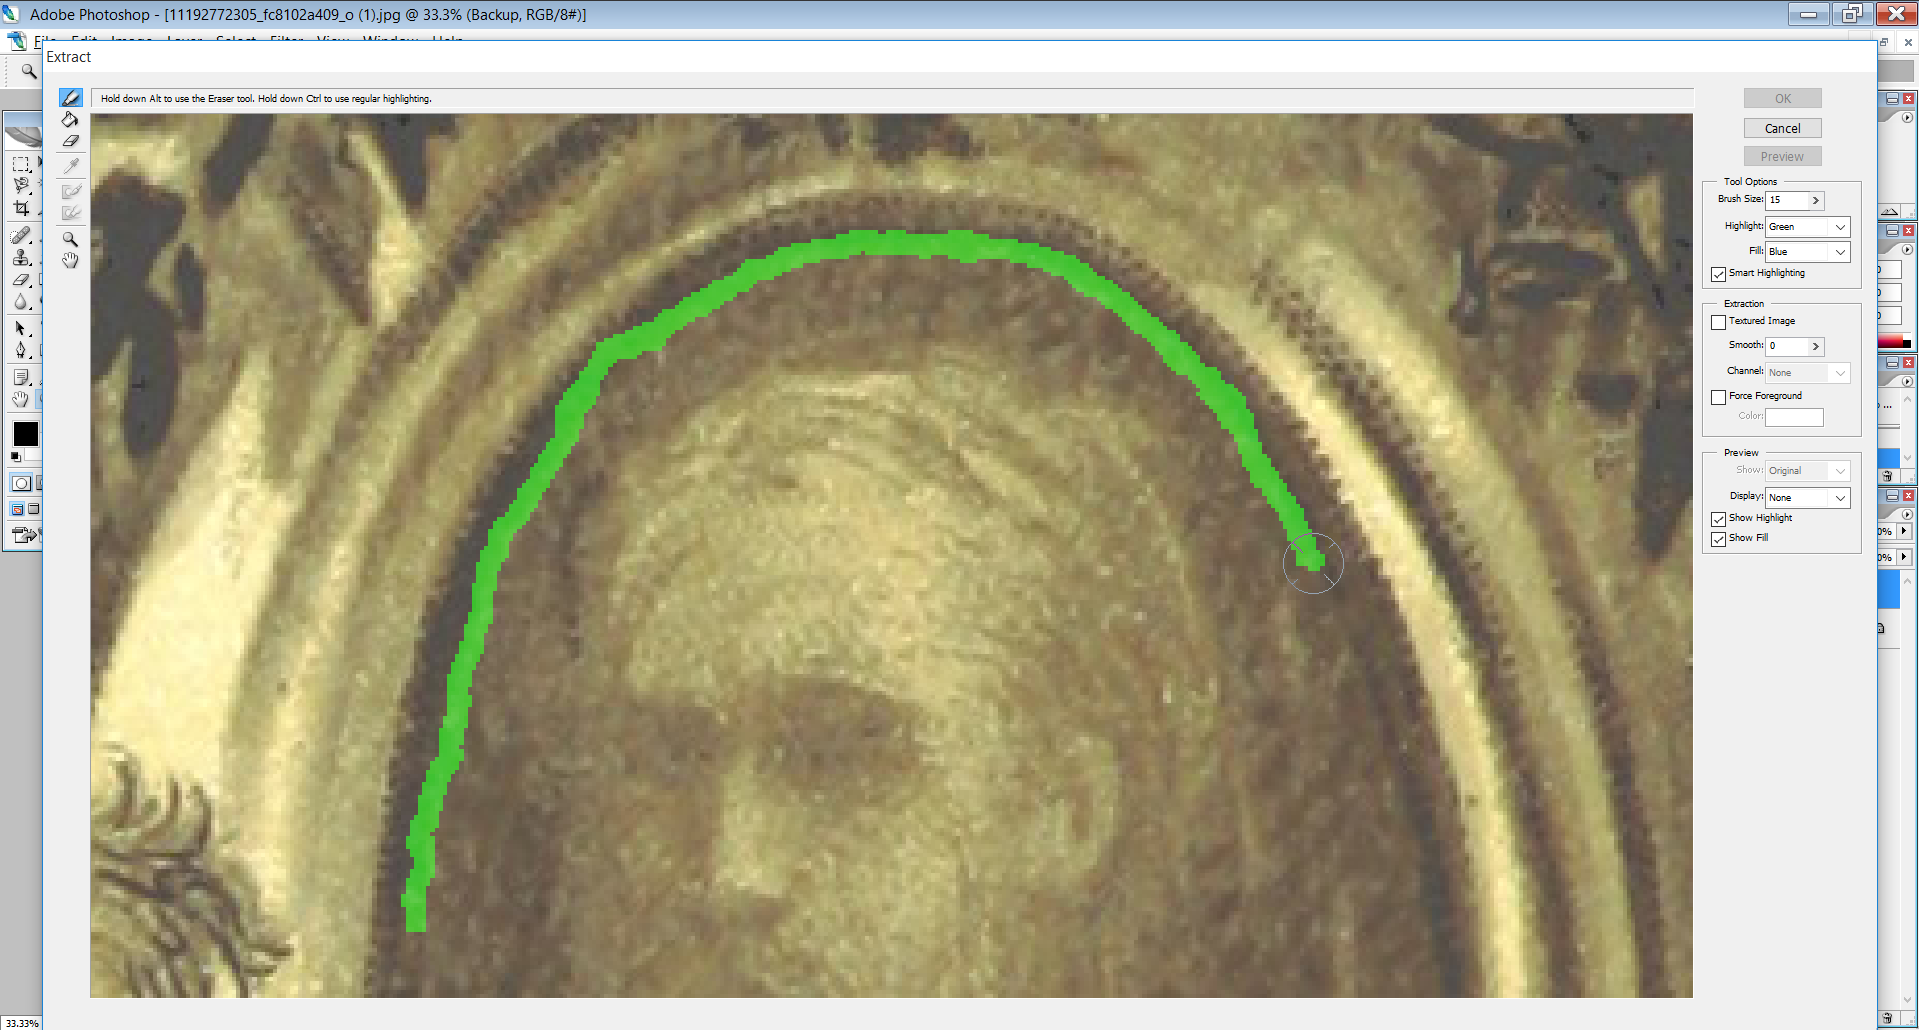
The tool used to extract is the Edge Highlighter Tool. This is used to define the boundary of what is going to be extracted by drawing on the image using the tool.
Verify that it is selected by ensuring the background of the icon is colored blue, then begin outlining what is going to be extracted on the image (see image 2 for an example).
Use the Zoom Tool to get a closer look at what is being extracted.
Refine Your Edge Hightlight Using the Eraser Tool
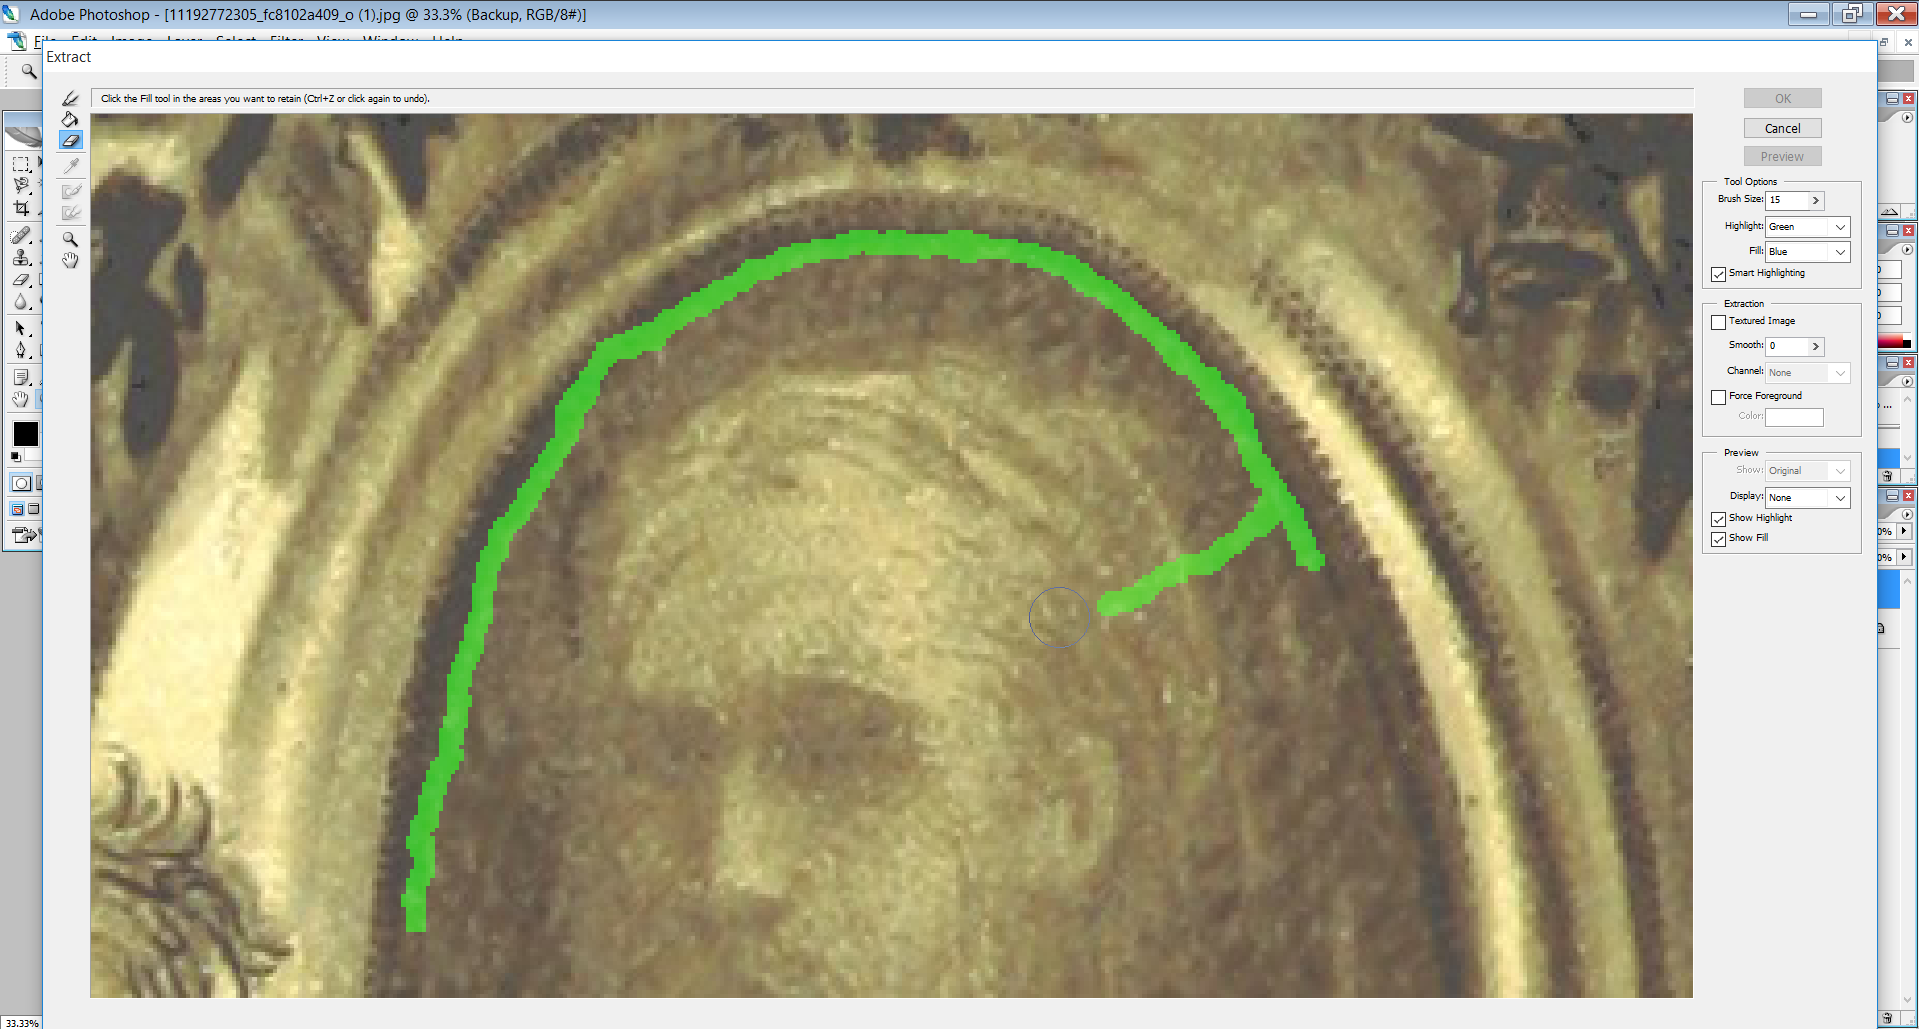
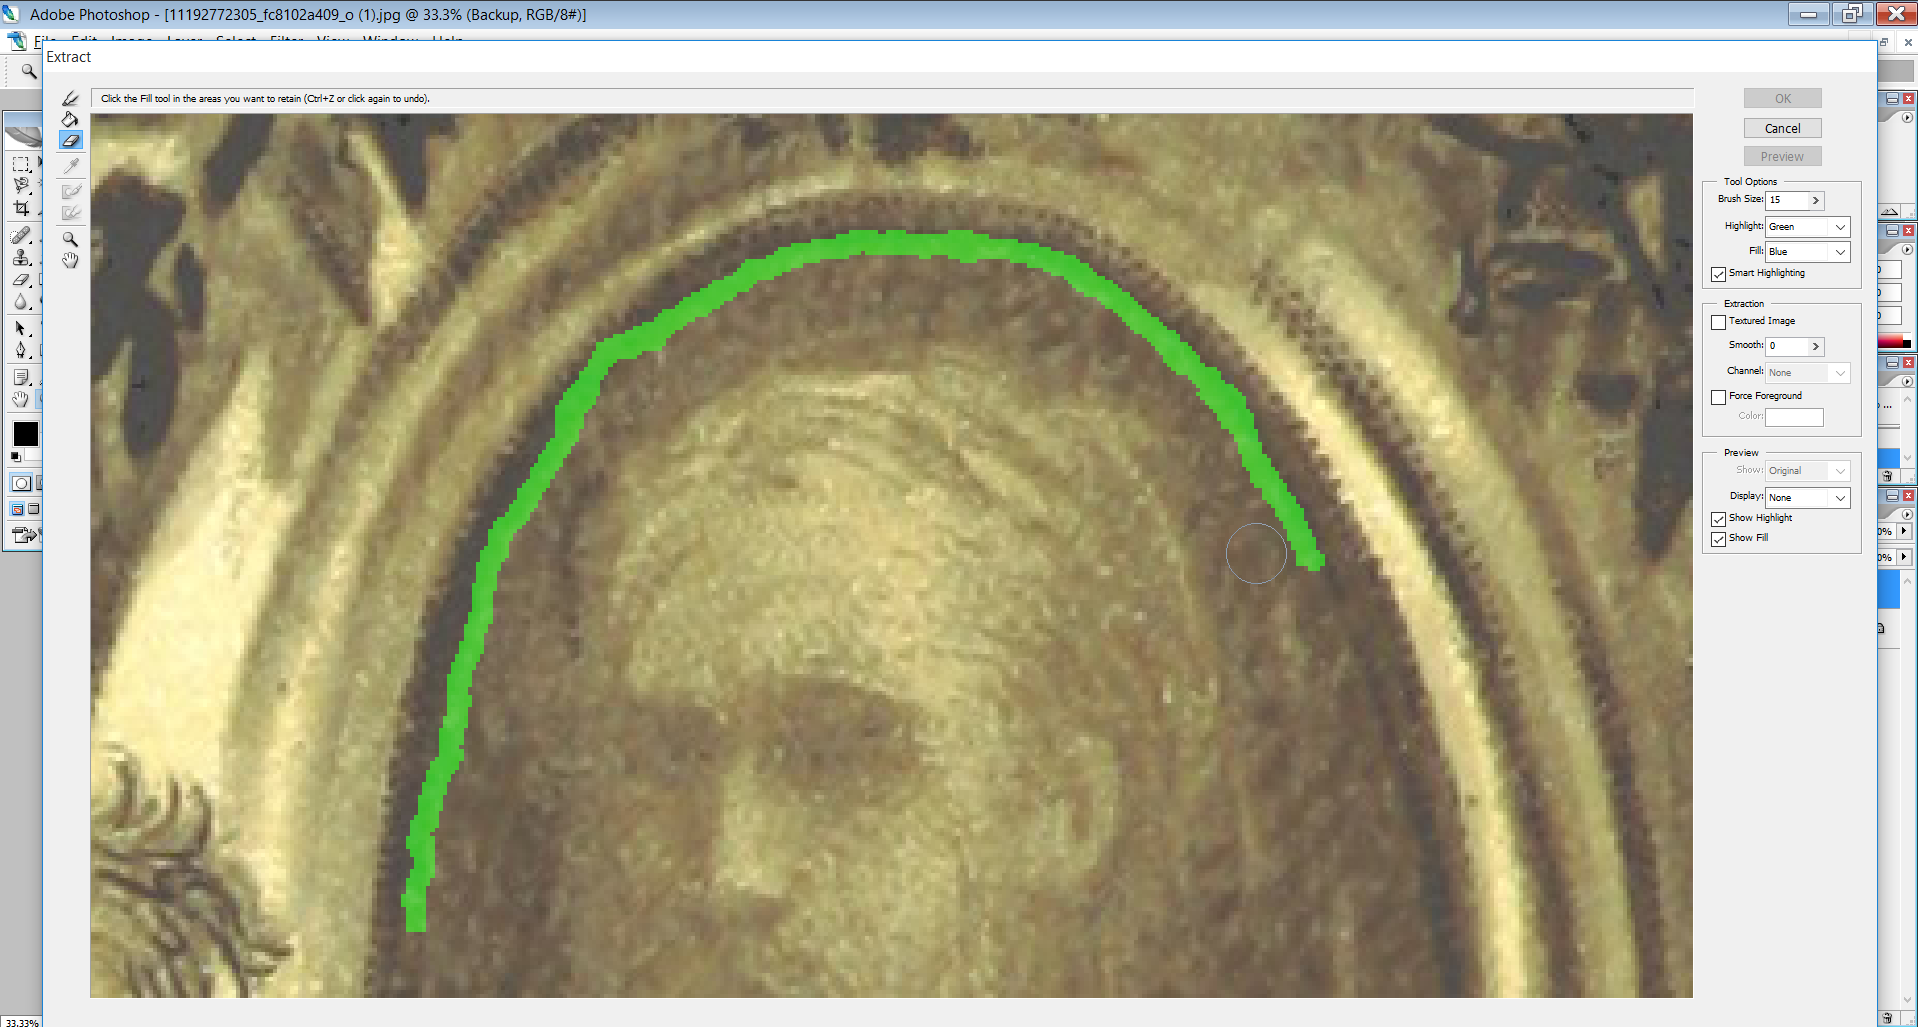
To undo any mistakes in the process of drawing the edge highlight, simply use the Eraser Tool to erase the green highlight, then use the Edge Highlighter Tool to redraw (see the images for this step for an example use of the Eraser Tool).
Complete the Edge Highlight
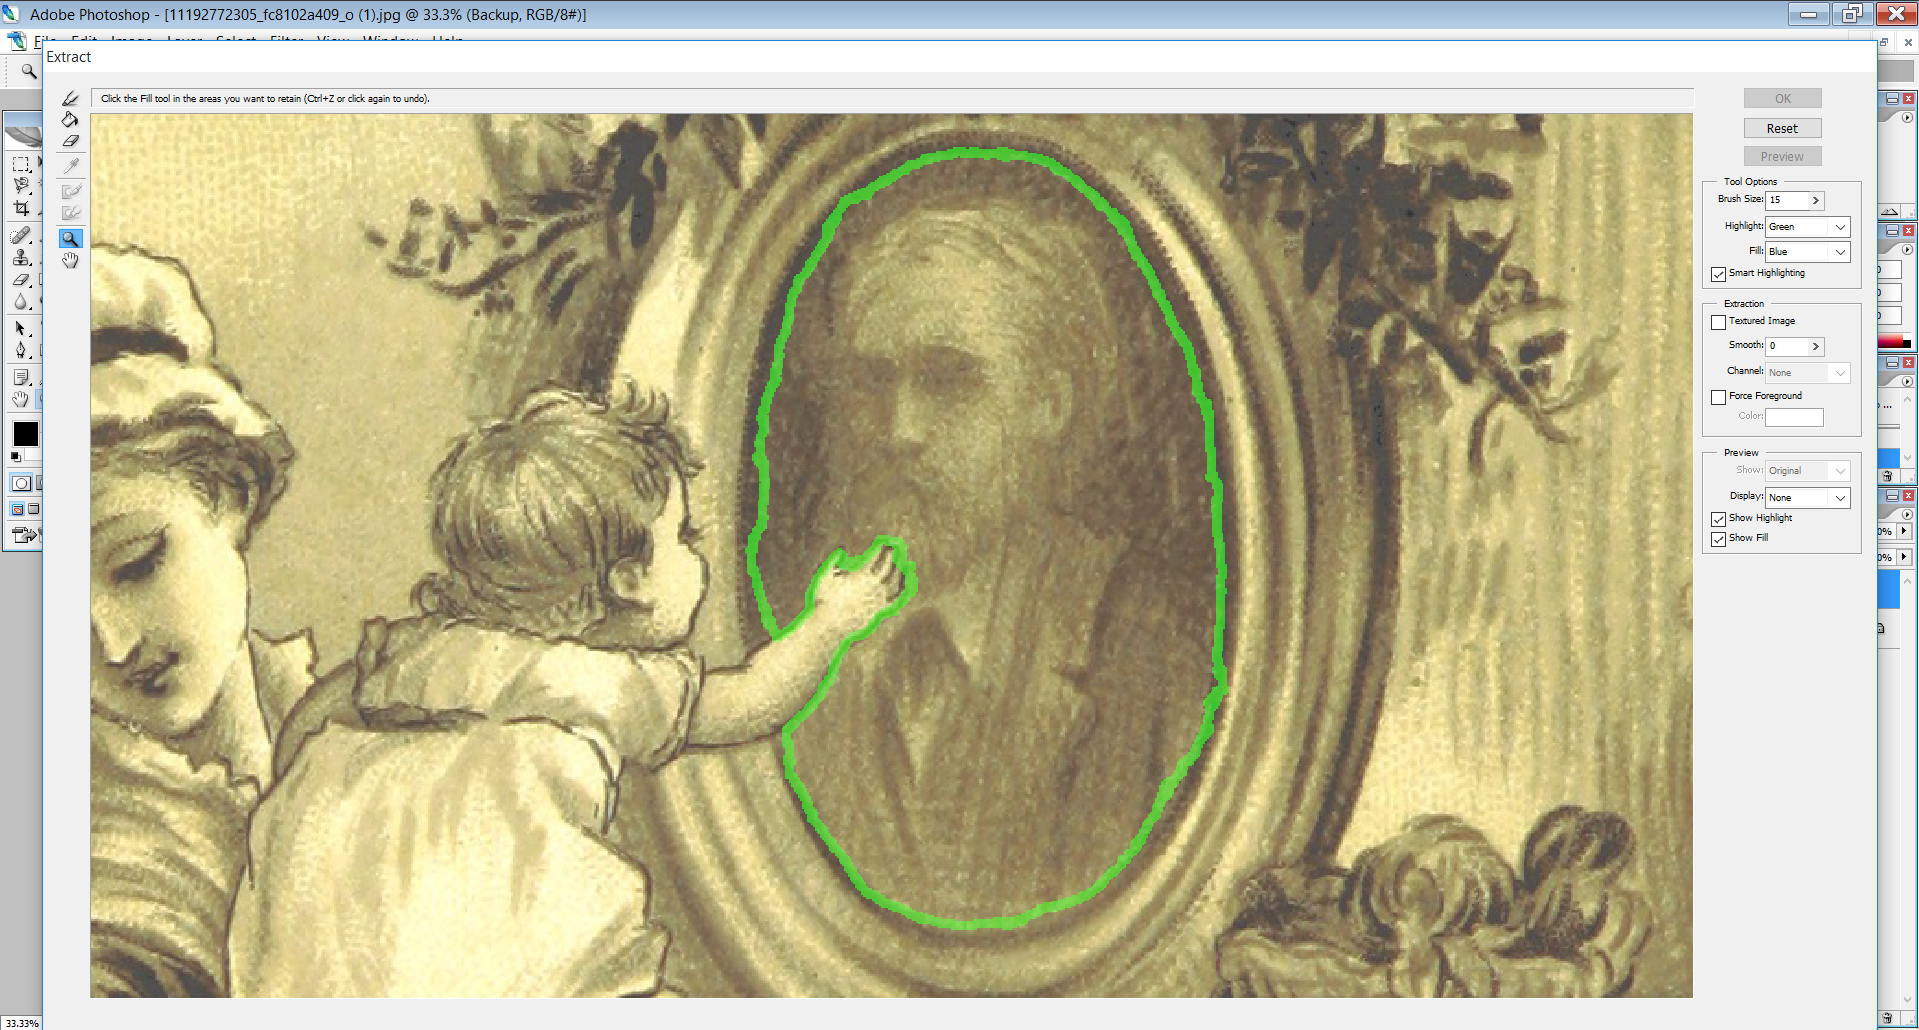
To complete the Edge Highlight, the Edge Highlight needs to form a closed loop - that is, it needs to be a continuous unbroken line.
Change the Brush Size and use the Eraser Tool to make the green outline as close as possible to the outline of what is being extracted.
See the image for this step for an example of a completed Edge Highlight.
Use the Fill Tool
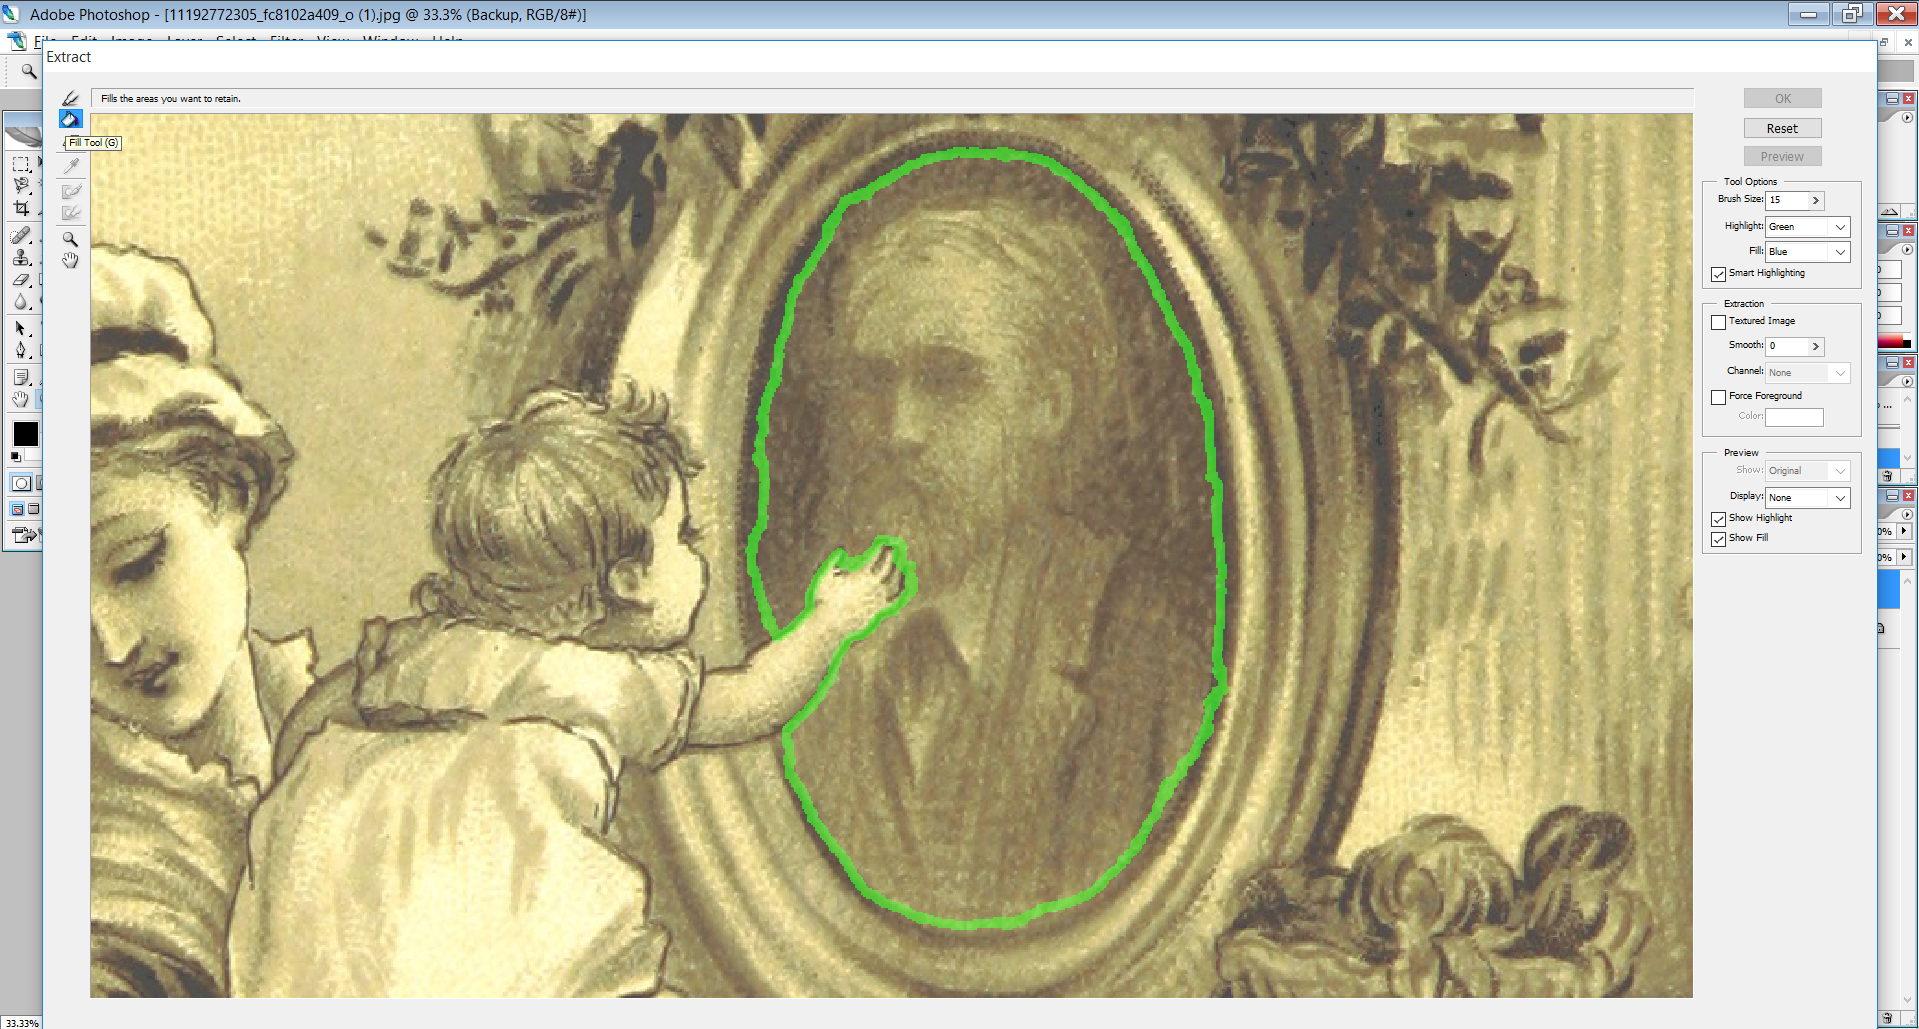
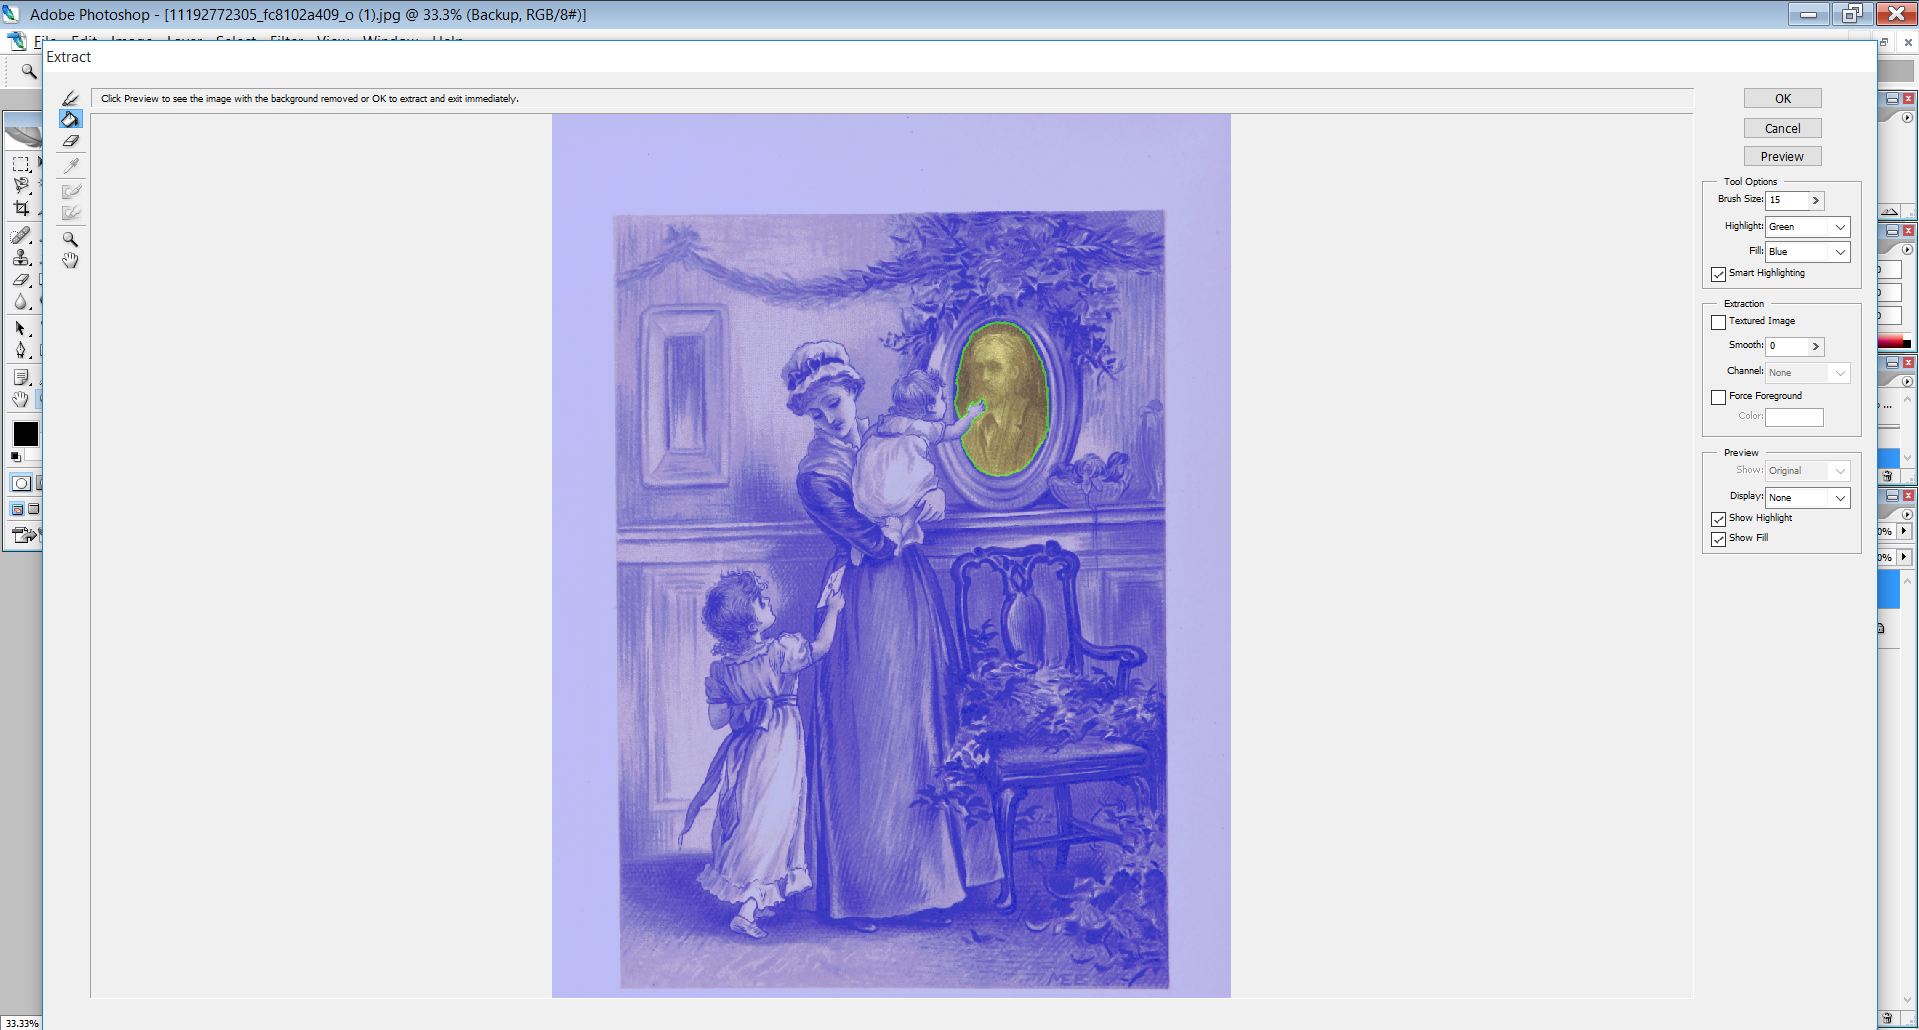
The next step in the extraction process is to use the Fill Tool (see the first image for this step) to select what areas will be kept. It is important to note that what is filled with the Fill Tool is what is kept.
Anything that is not selected with the Fill Tool will not be extracted, and will be deleted from that layer in Photoshop (this is why it is recommended to create a backup layer before beginning).
Simply select the Fill Tool on the left and click the area you want to keep in the image.
Since, in the example, the portrait is being removed to replace it with something else, what is being kept is the rest of the image and not the portrait itself (see the second image for this step).
Preview the Extraction to Touch It Up
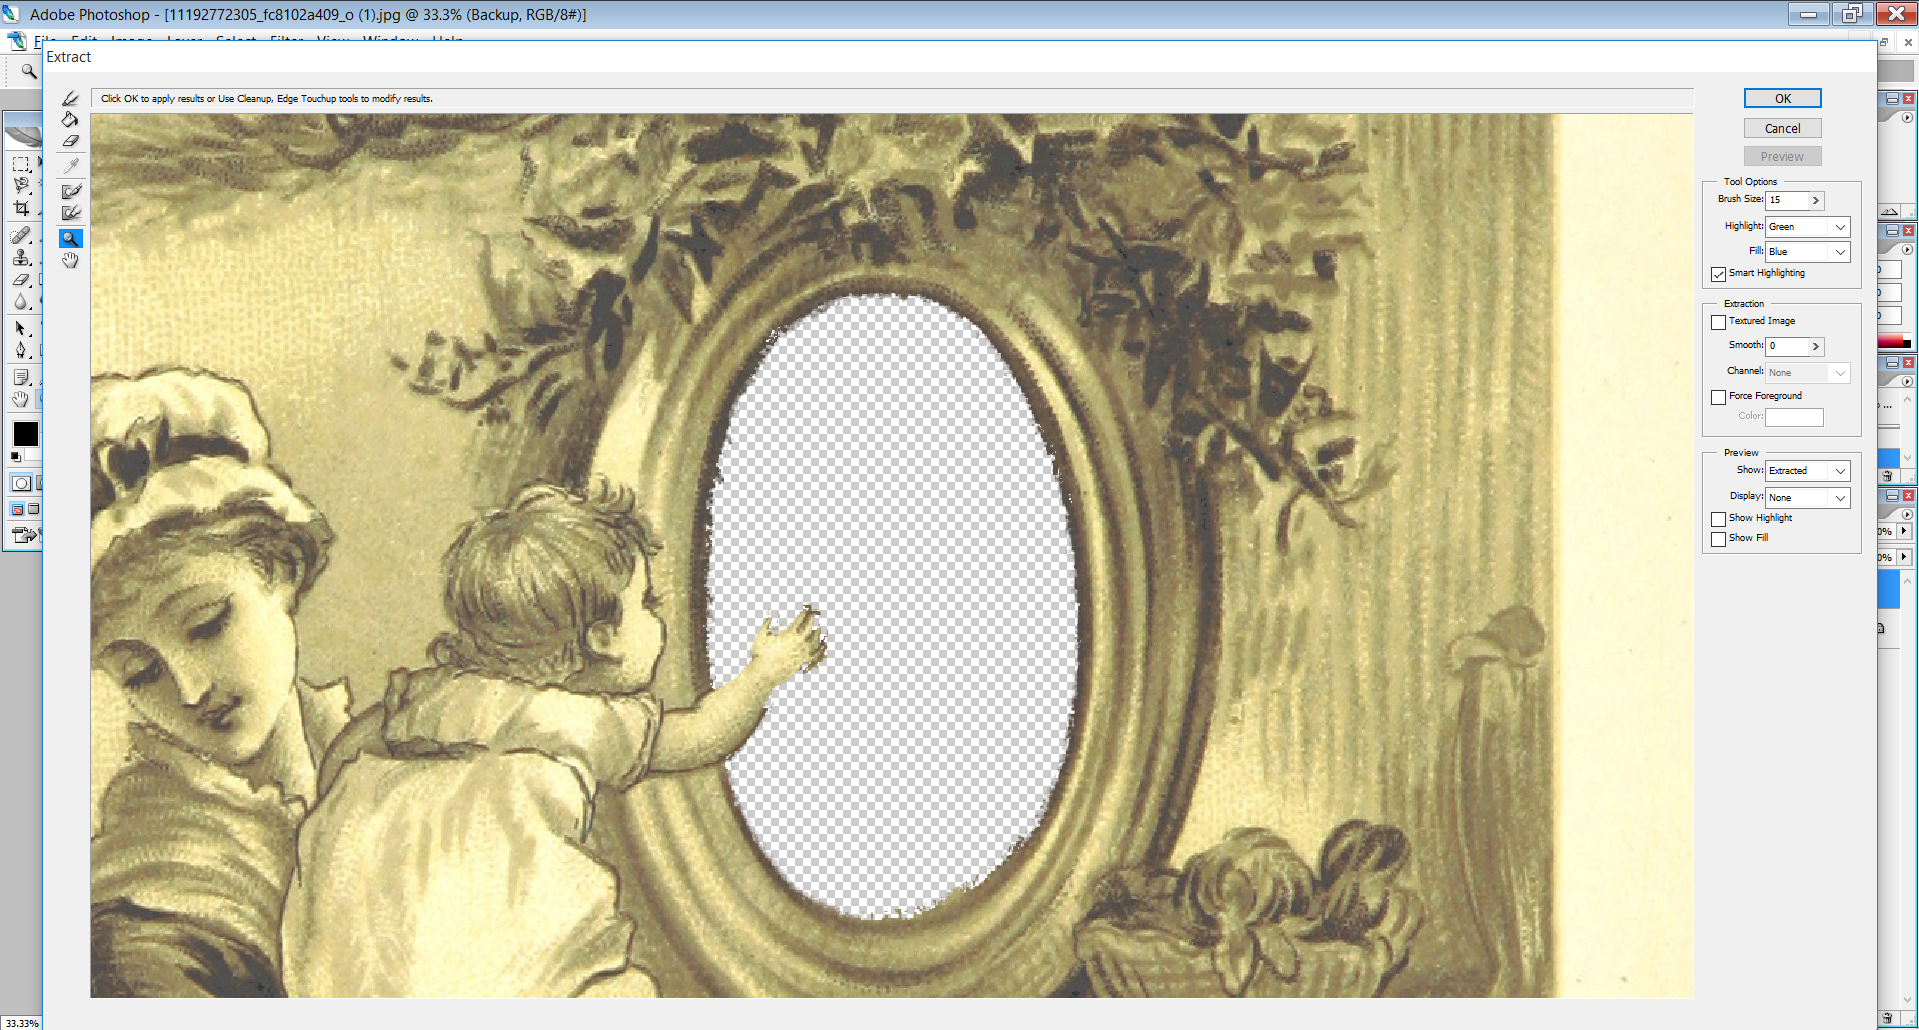
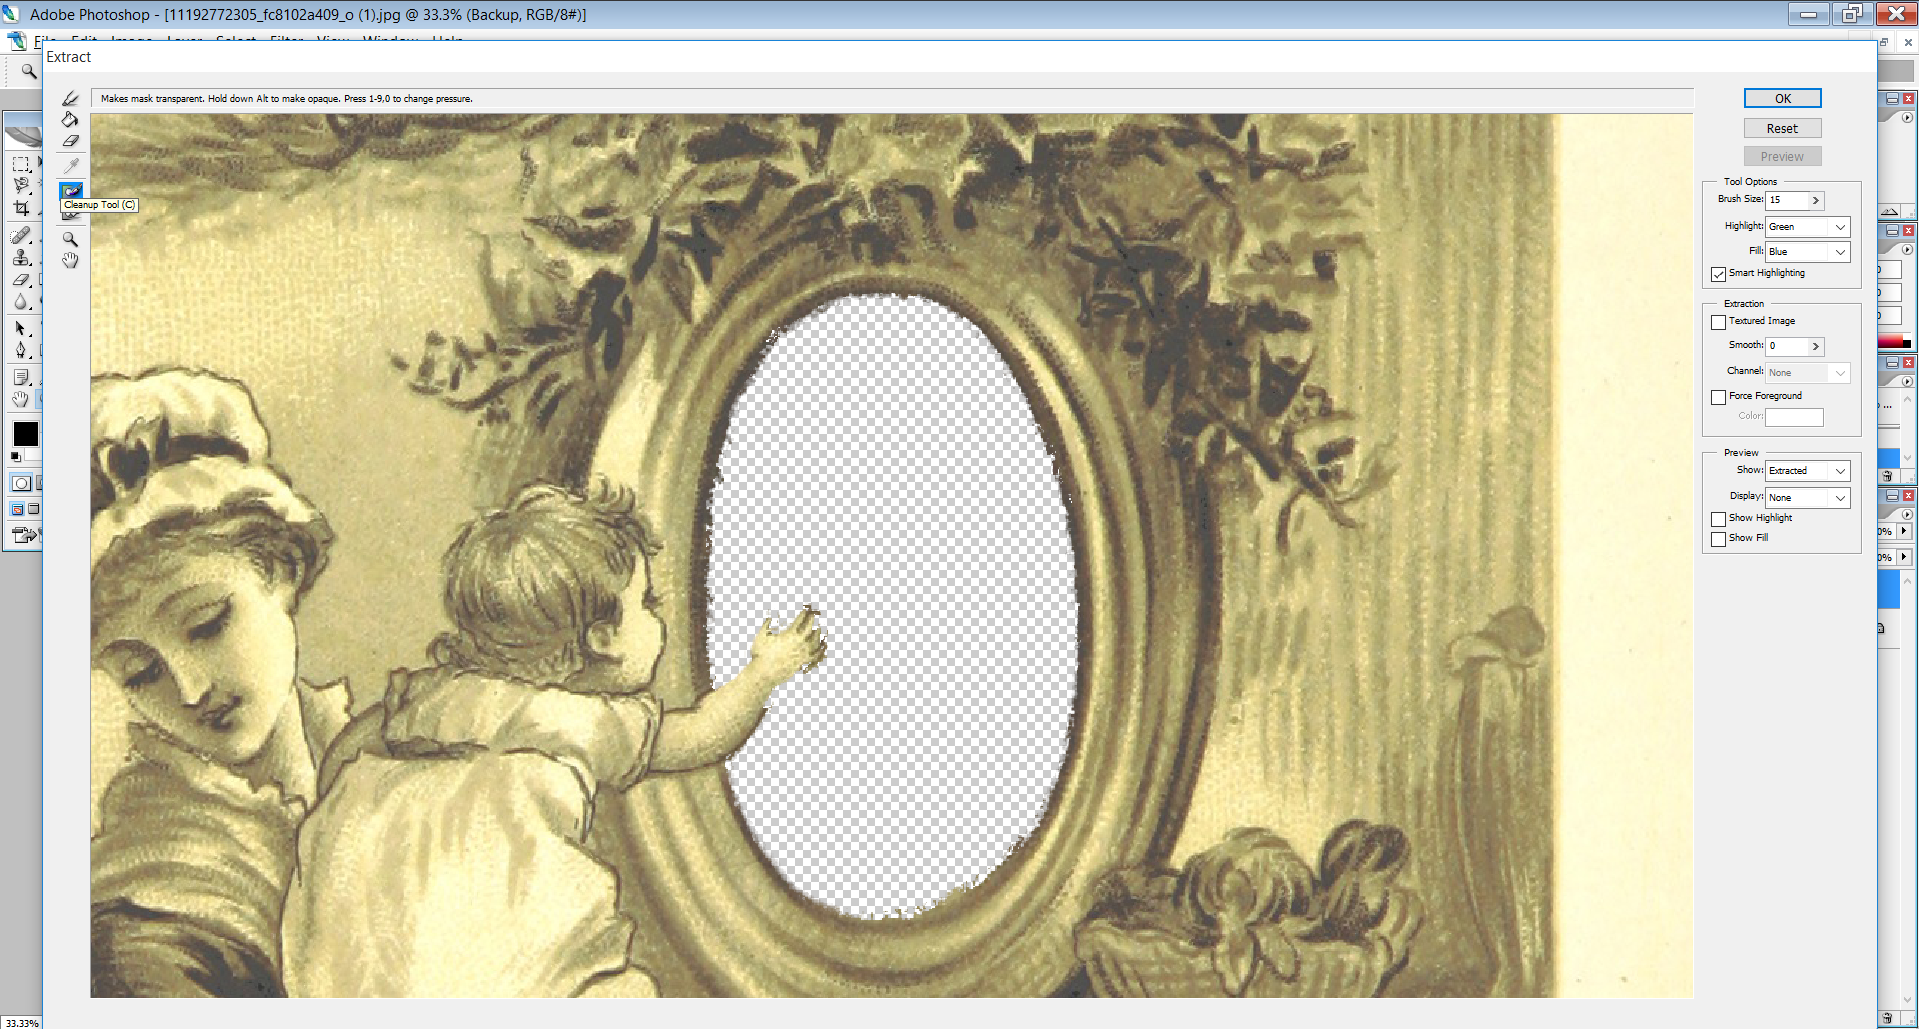
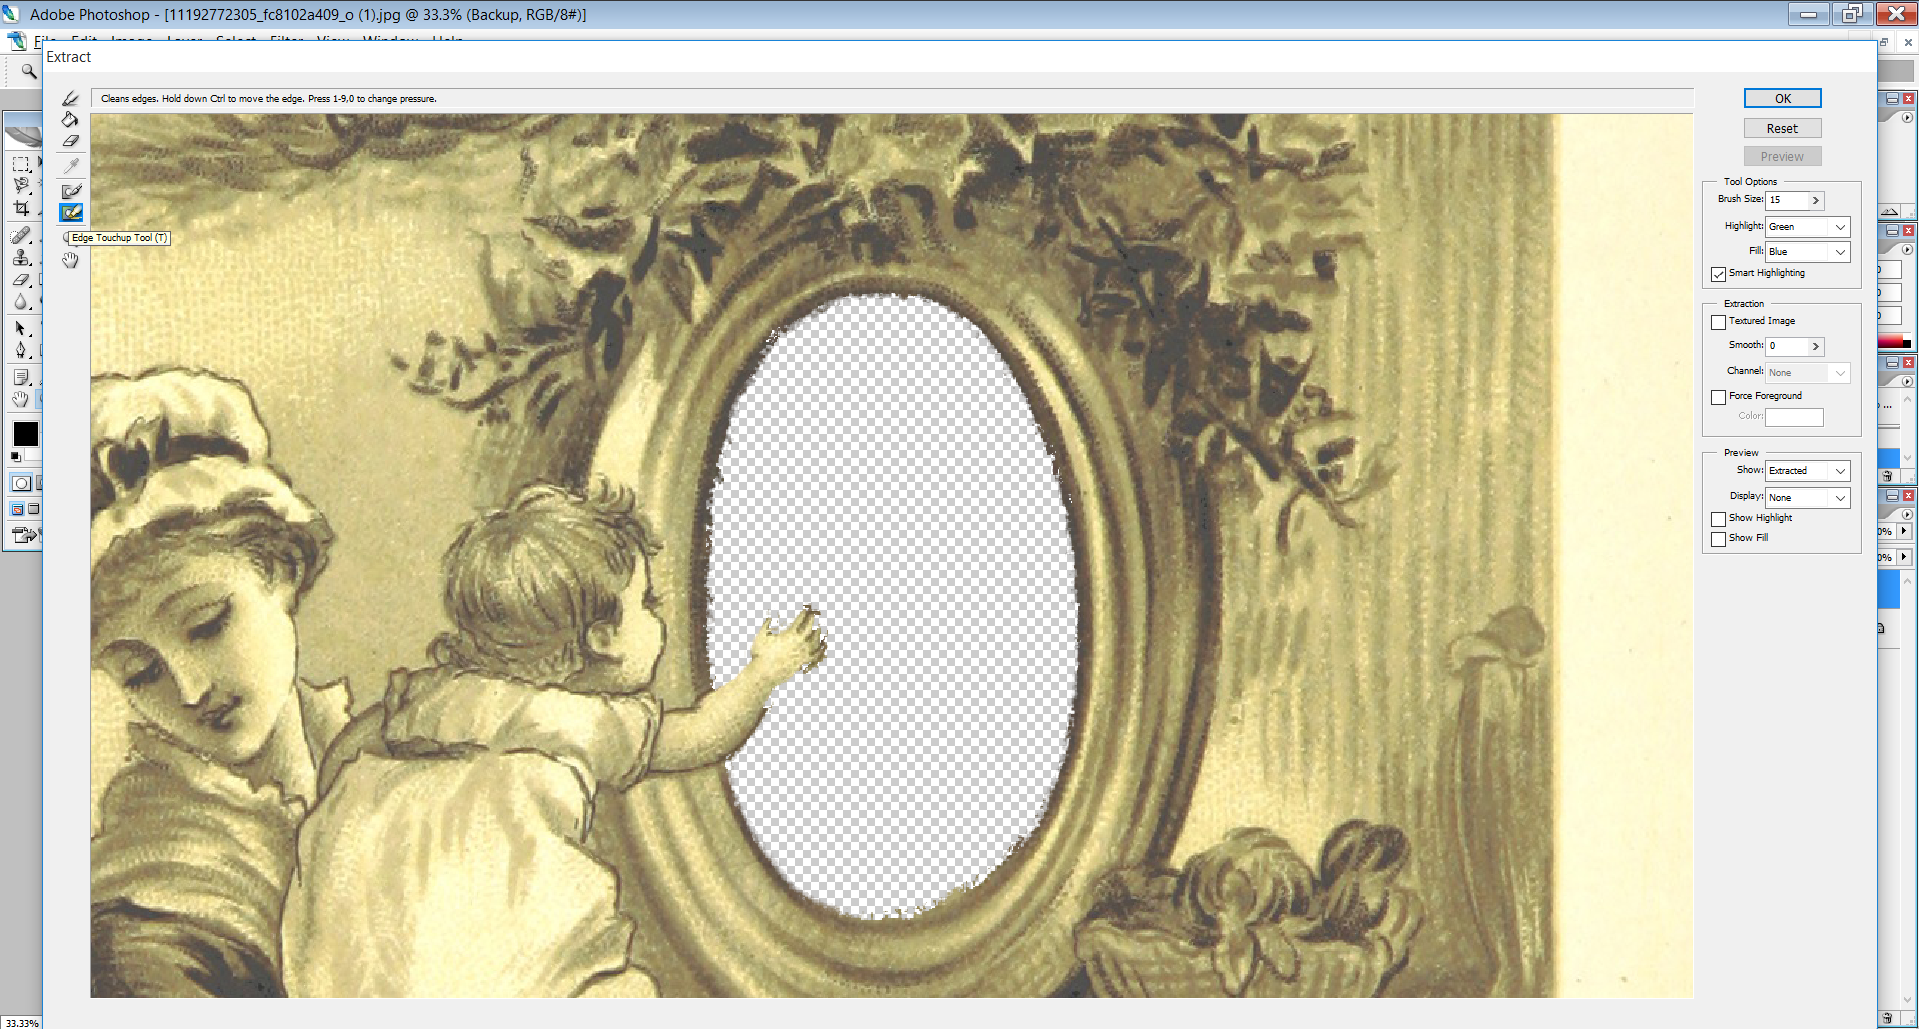
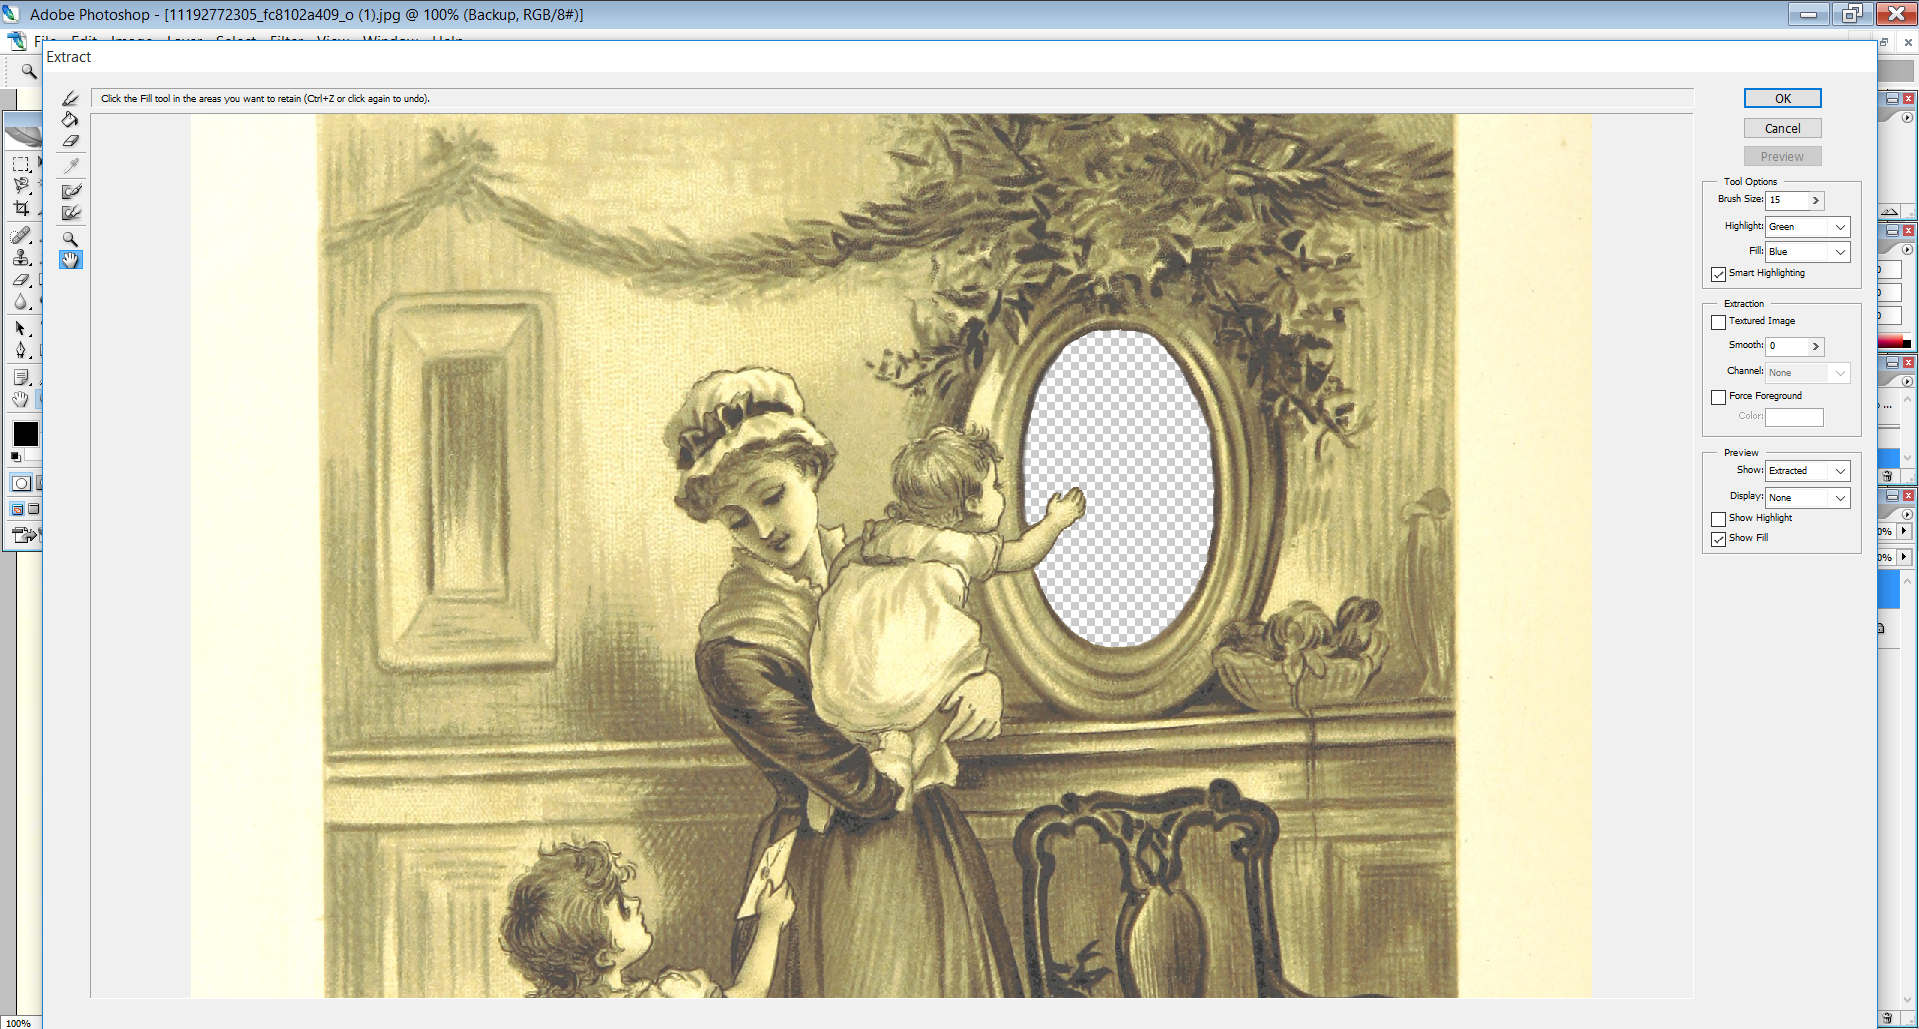
Once the kept area has been filled, click "Preview" (see the first image for this step) to generate a preview of what will be extracted. It may not be exactly what is needed - this is where touching up the preview comes in.
The preview may look similar to the first image of this step. Notice that the edges of the portrait are jagged and broken. This would not create a realistic look if another image were to be placed in the hole extraction just created.
As such, Photoshop has two tools available for use fixing these edges.
The first tool is the Cleanup Tool (see second image). This tool functions as an eraser, getting rid of anything it passes over.
The second, more powerful, tool is the Edge Touchup Tool (see third image). This tool uses complex algorithms to try and predict what is supposed to be sharpened and what is supposed to be erased. Unfortunately, the CS2 version of this tool is not the most reliable, and occasionally it will erase things that should have been kept, or keep things that should have been erased. It's finicky, and sometimes getting the edges to look correct is a bit of a back-and-forth process of using the Edge Touchup Tool, undoing what was just done, and trying again.
Use the Edge Touchup Tool and the Cleanup Tool to sharpen the edges of the extraction area until it looks similar to the fourth image.
When the preview looks correct, click OK.
Extraction Complete: Edit the Image
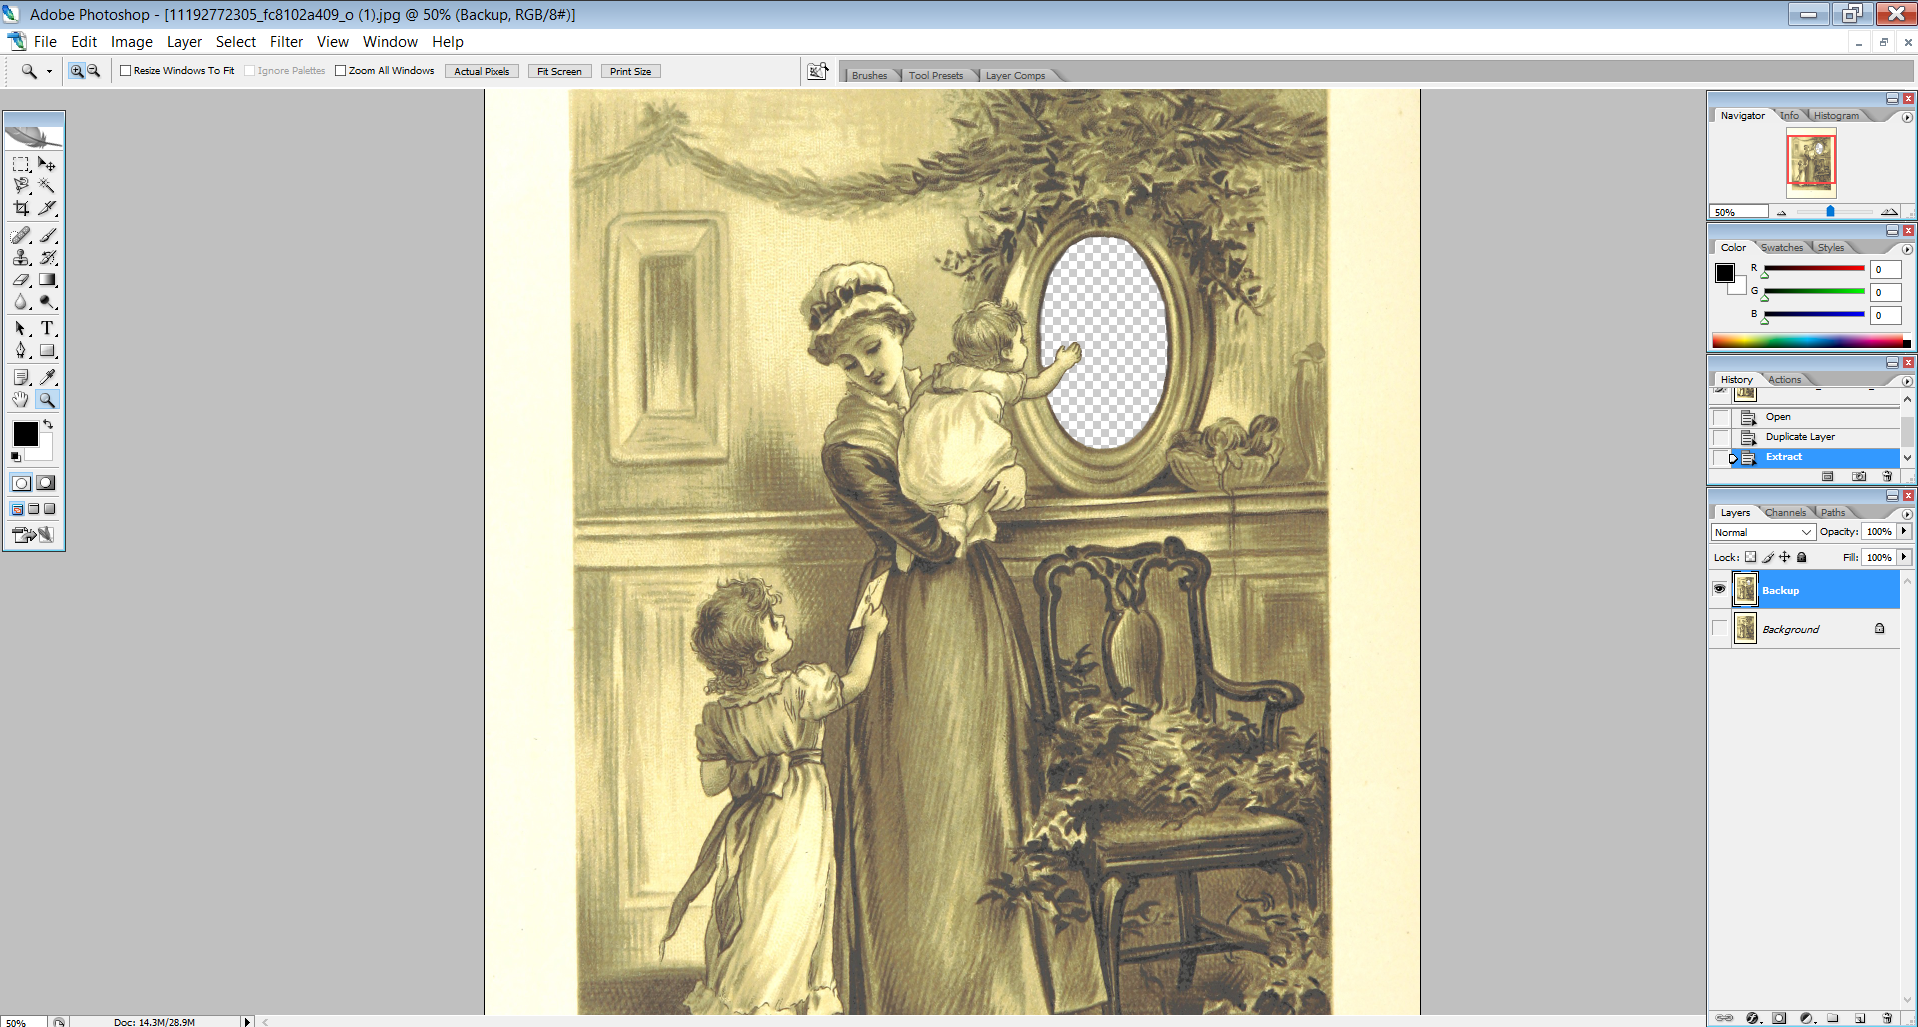

Done! The resulting image is extracted (see first image of step) and can easily be modified using any of Photoshop's other tools.
The second image shows the completed example, using the extracted image, of the soldier inside the portrait of where the man used to be in the original image.