How to Extend NVR Signal (IP Cam Repeater, Network Switch and WiFi Router/Repeater)
by projectvolt in Circuits > Wireless
73576 Views, 20 Favorites, 0 Comments
How to Extend NVR Signal (IP Cam Repeater, Network Switch and WiFi Router/Repeater)
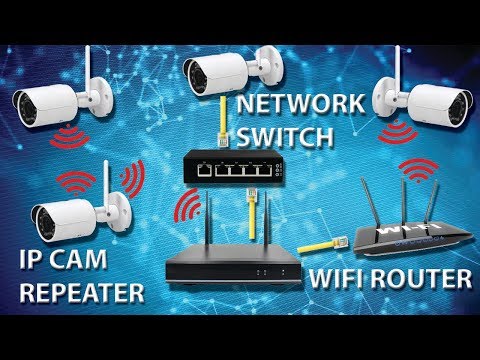)
In this instructable we will be showing you how to extend your NVR signal, by using:
1. The Built-in Repeater function in the IP Camera, or
2. A Network Switch, or
3. A WiFi Router.
Establish Connection Between NVR and IP Camera
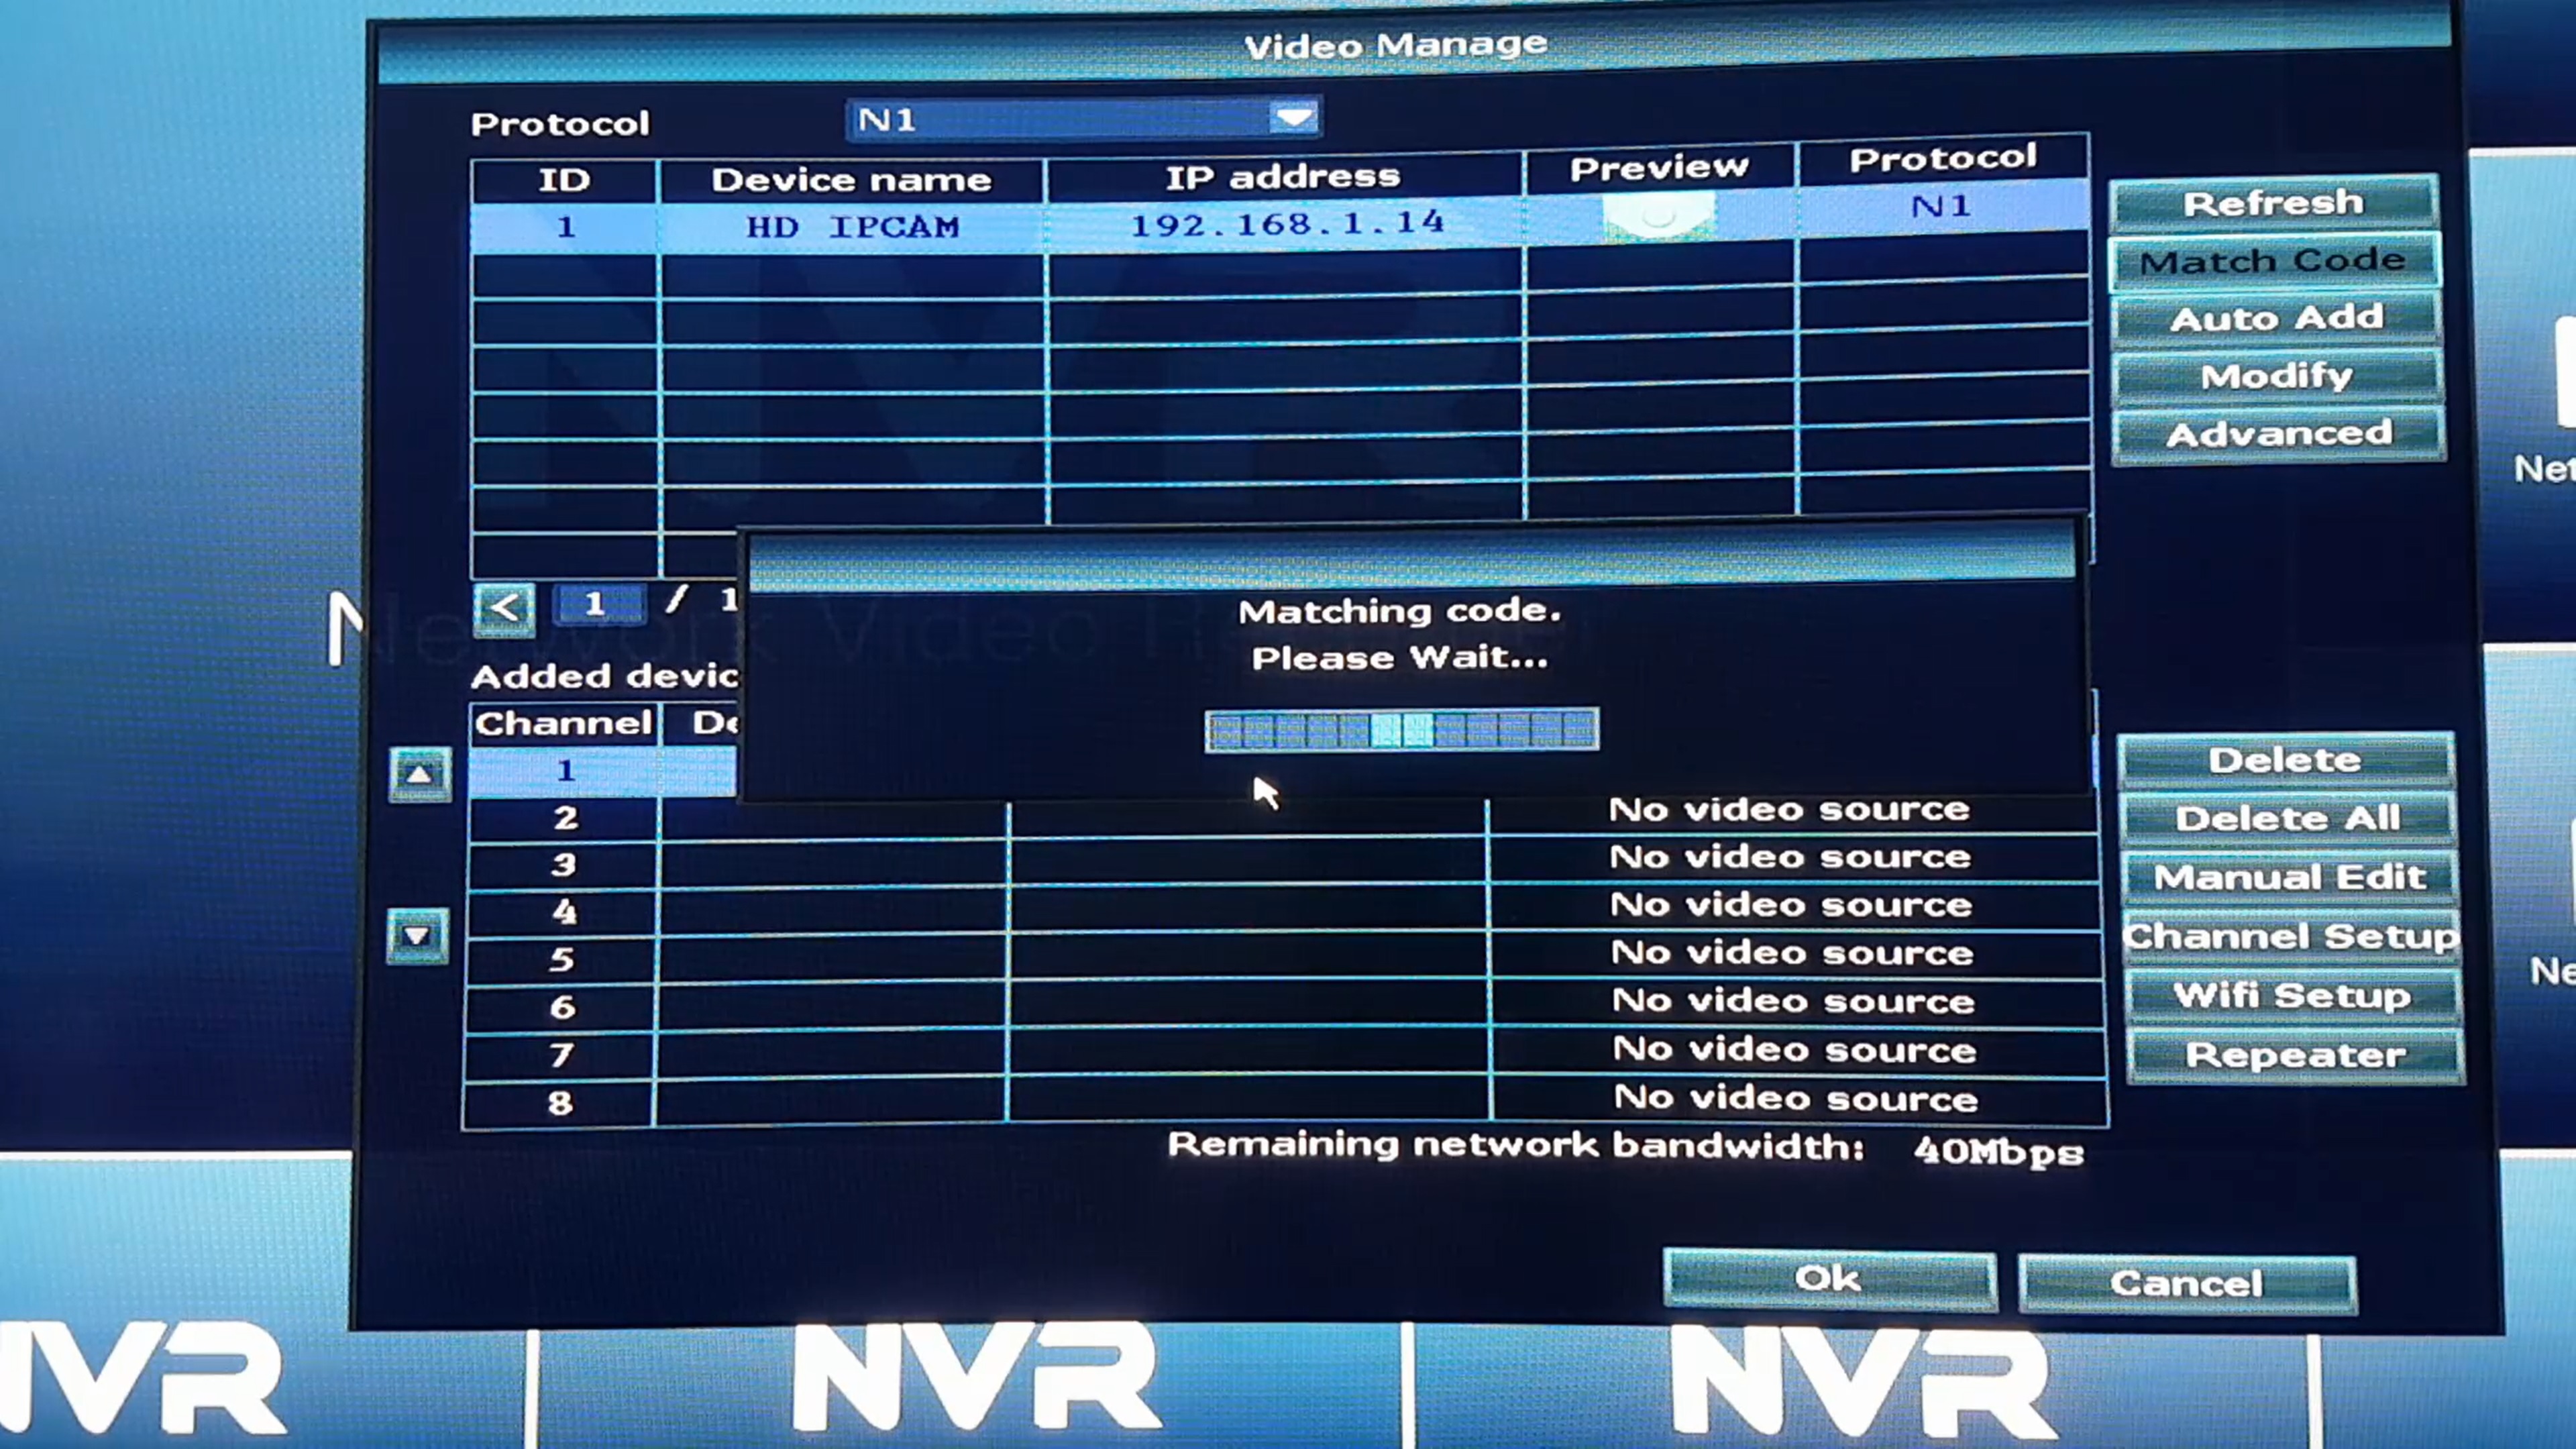
First of all we need to get the IP Cameras connected to the NVR using the ethernet cable, if they havent been connected already.
- Connect the IP Camera with the NVR using an ethernet Cable
- Power ON both the IP Camera and the NVR
- Go to VIDEO MANAGE on the NVR
- Click on REFRESH to scan for IP Cameras
- After an IP Camera is detected, press MATCH CODE for it to be saved to the NVR
- Repeat this process (1 - 5) with the other cameras you want to connect
IP Camera Repeater
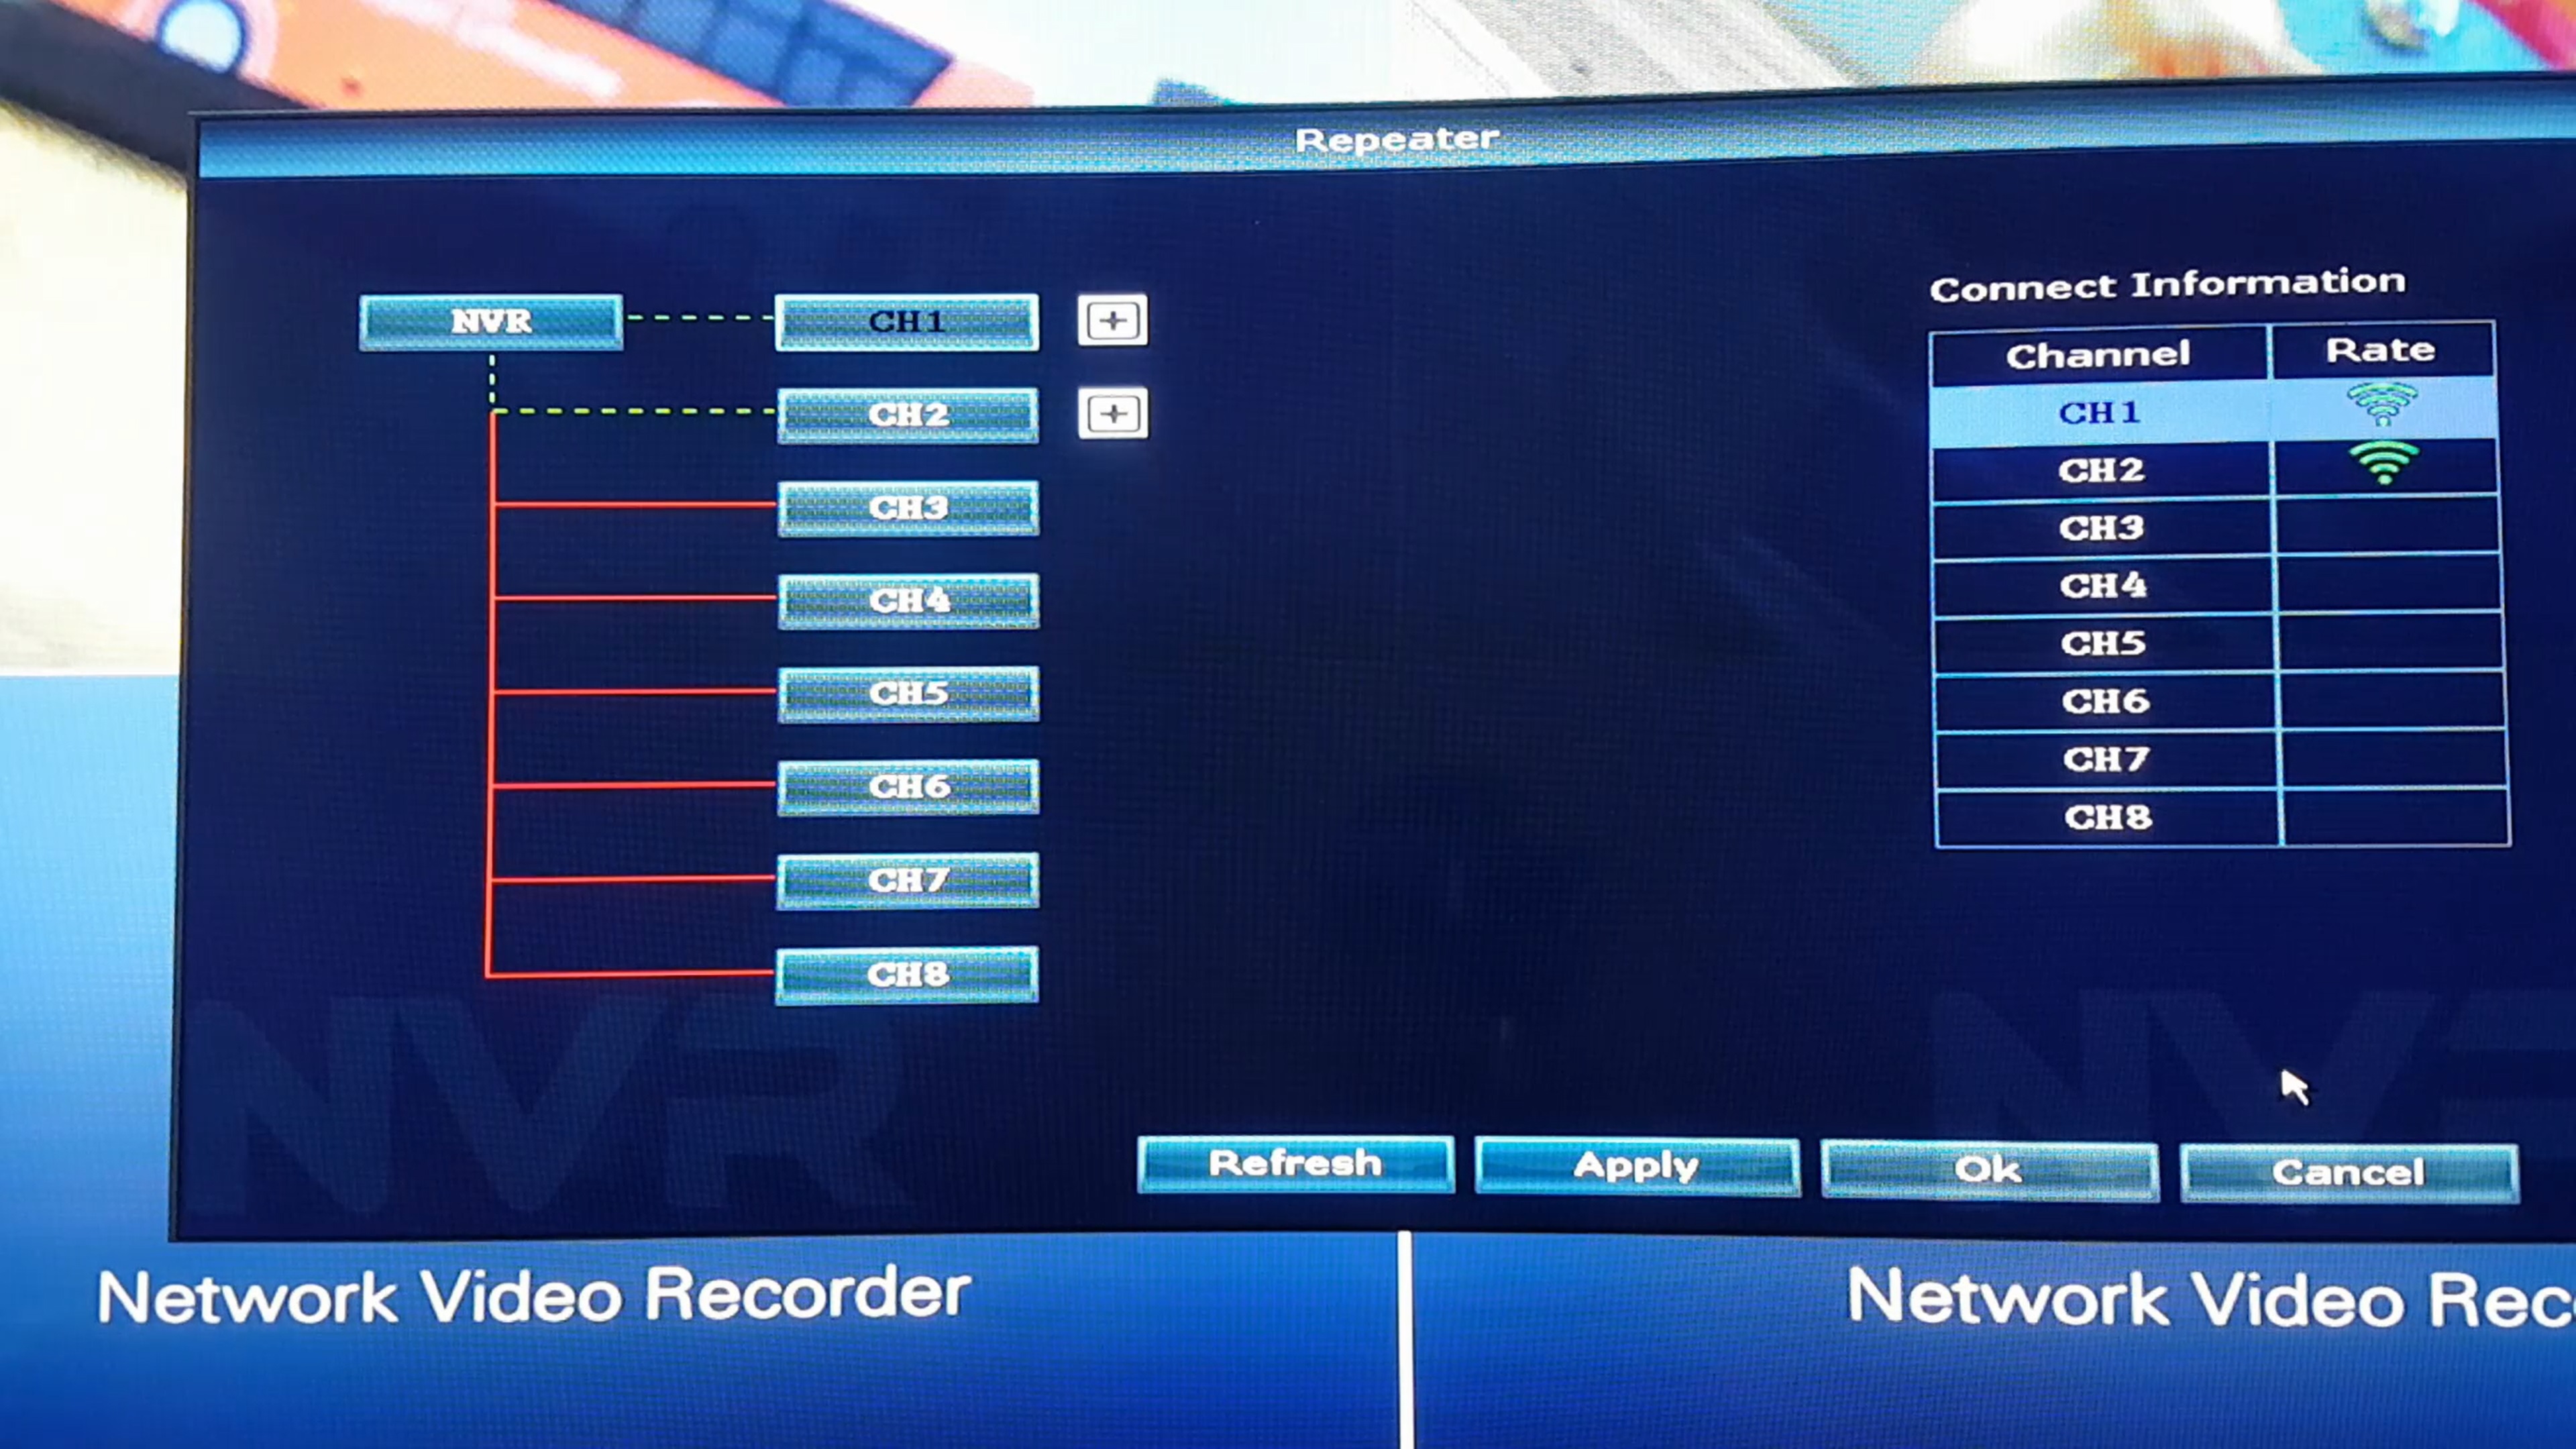
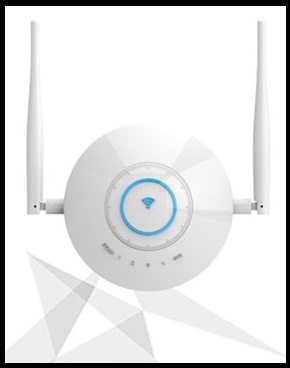
The First Method of extending the NVR signal is using the built-in Repeater feature of the IP Camera. There are also separate Repeaters (picture of such a repeater attached) built specifically for extending NVR signal, and the method to set them up is the same as setting up the IP Cam Repeater.
We have two IP cameras installed, and we will use one of the cameras as a repeater for which the other IP camera can connect to. A maximum of 3 cameras can be connected in series through the IP Cam Repeater function.
- Go to VIDEO MANAGE
- Click on REPEATER
- Click on the Plus Button next to the Camera (this will be the Repeater Camera)
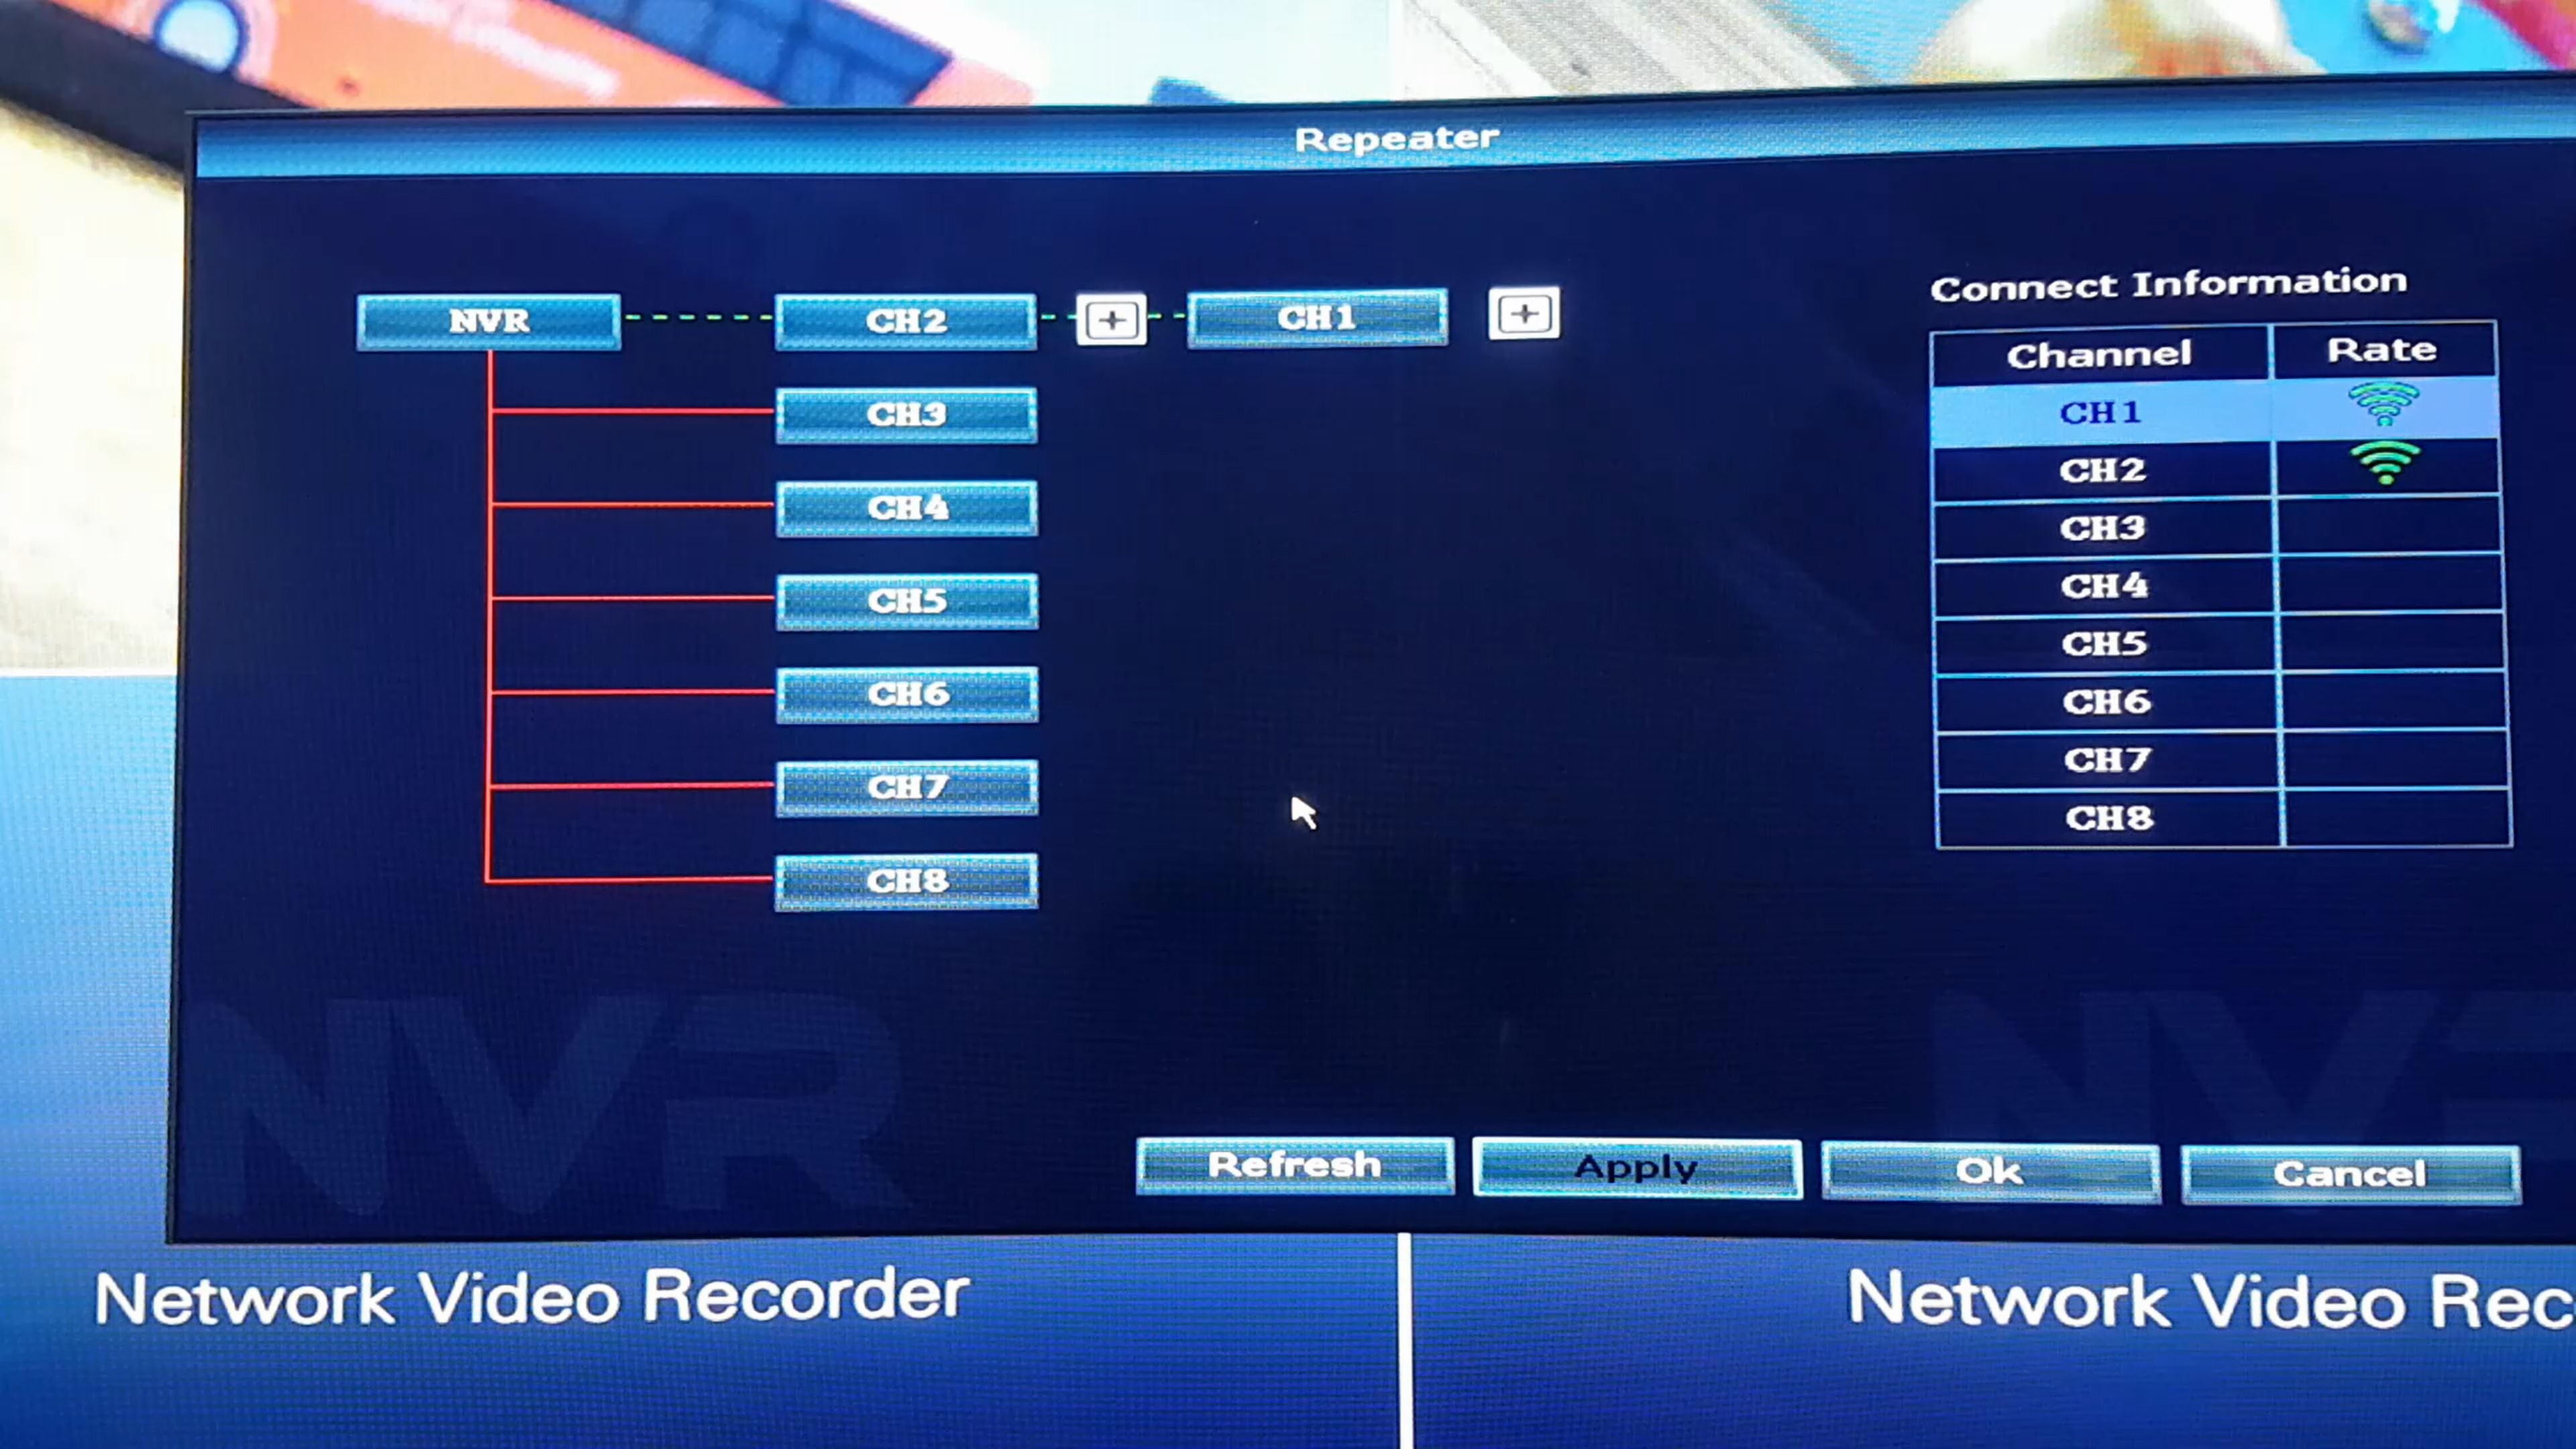
- From the drop down list click on the Camera you want to connect to the Repeater Camera
- Once you select the Client IP Cam, the table will correct itself.
- Click on Apply (which will send the command to the IP Cameras to connect themselves accordingly)
Both IP Cameras are now successfully connected in series.
Network Switch
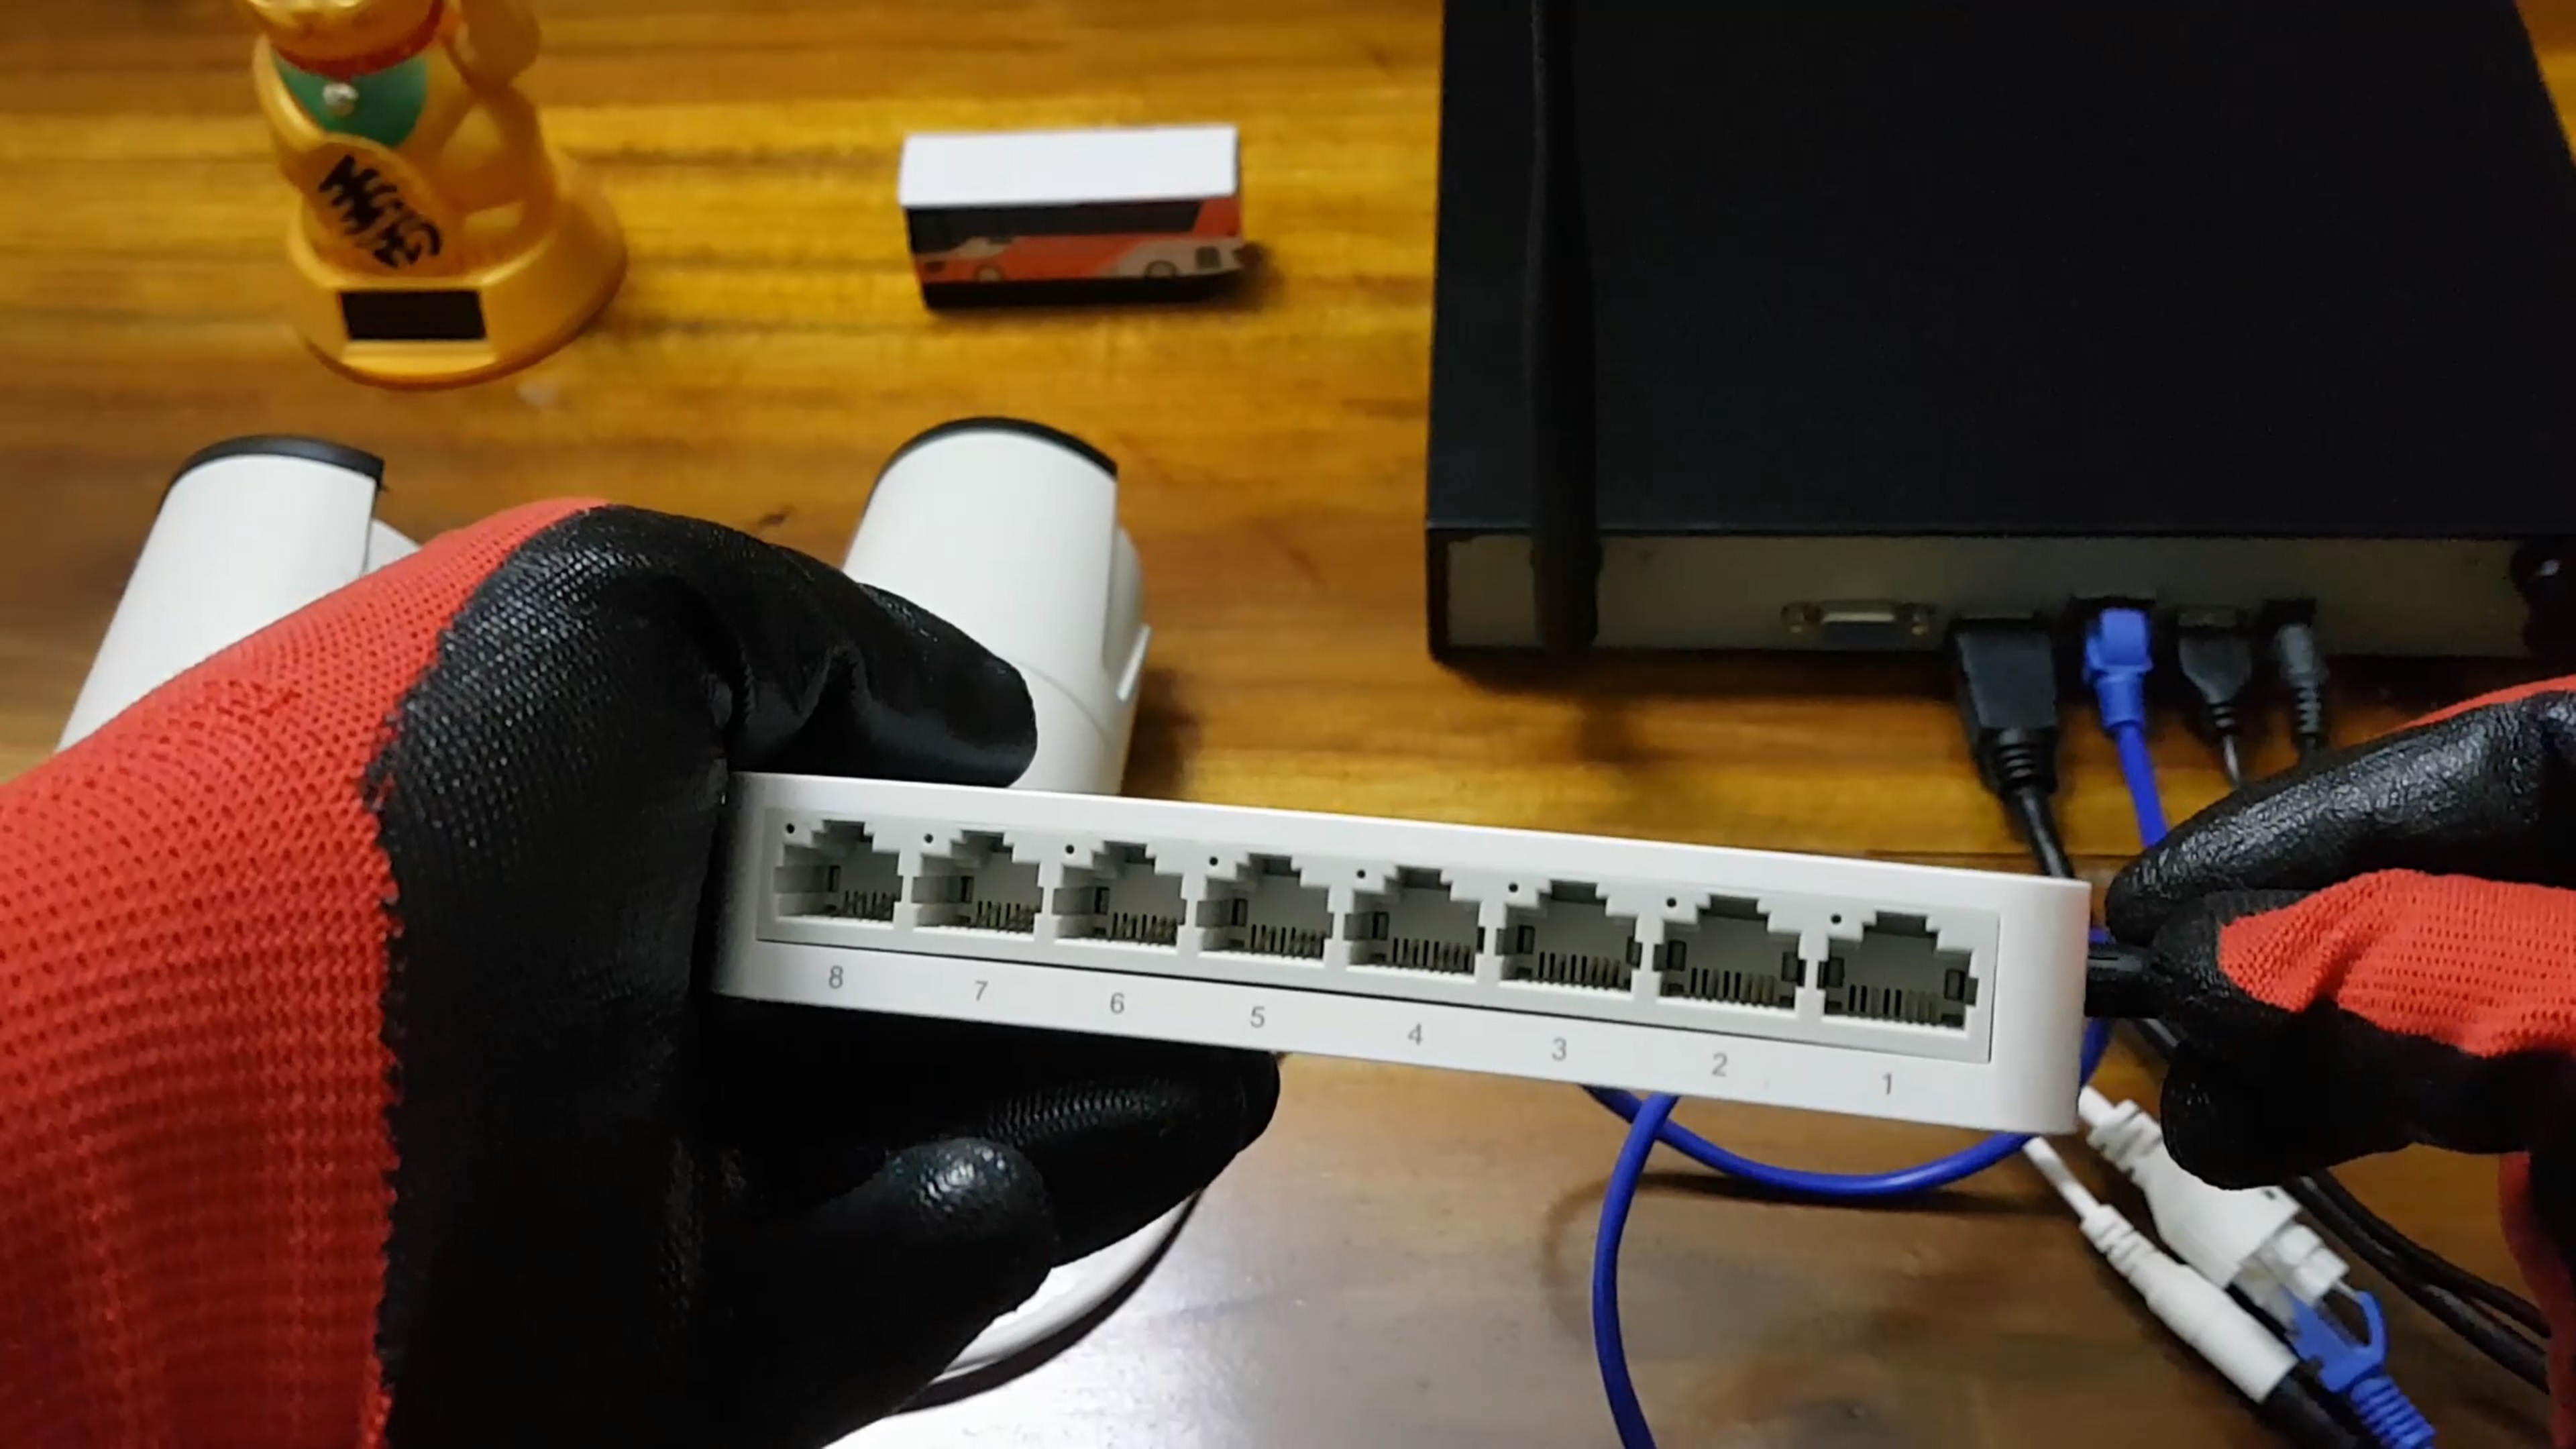
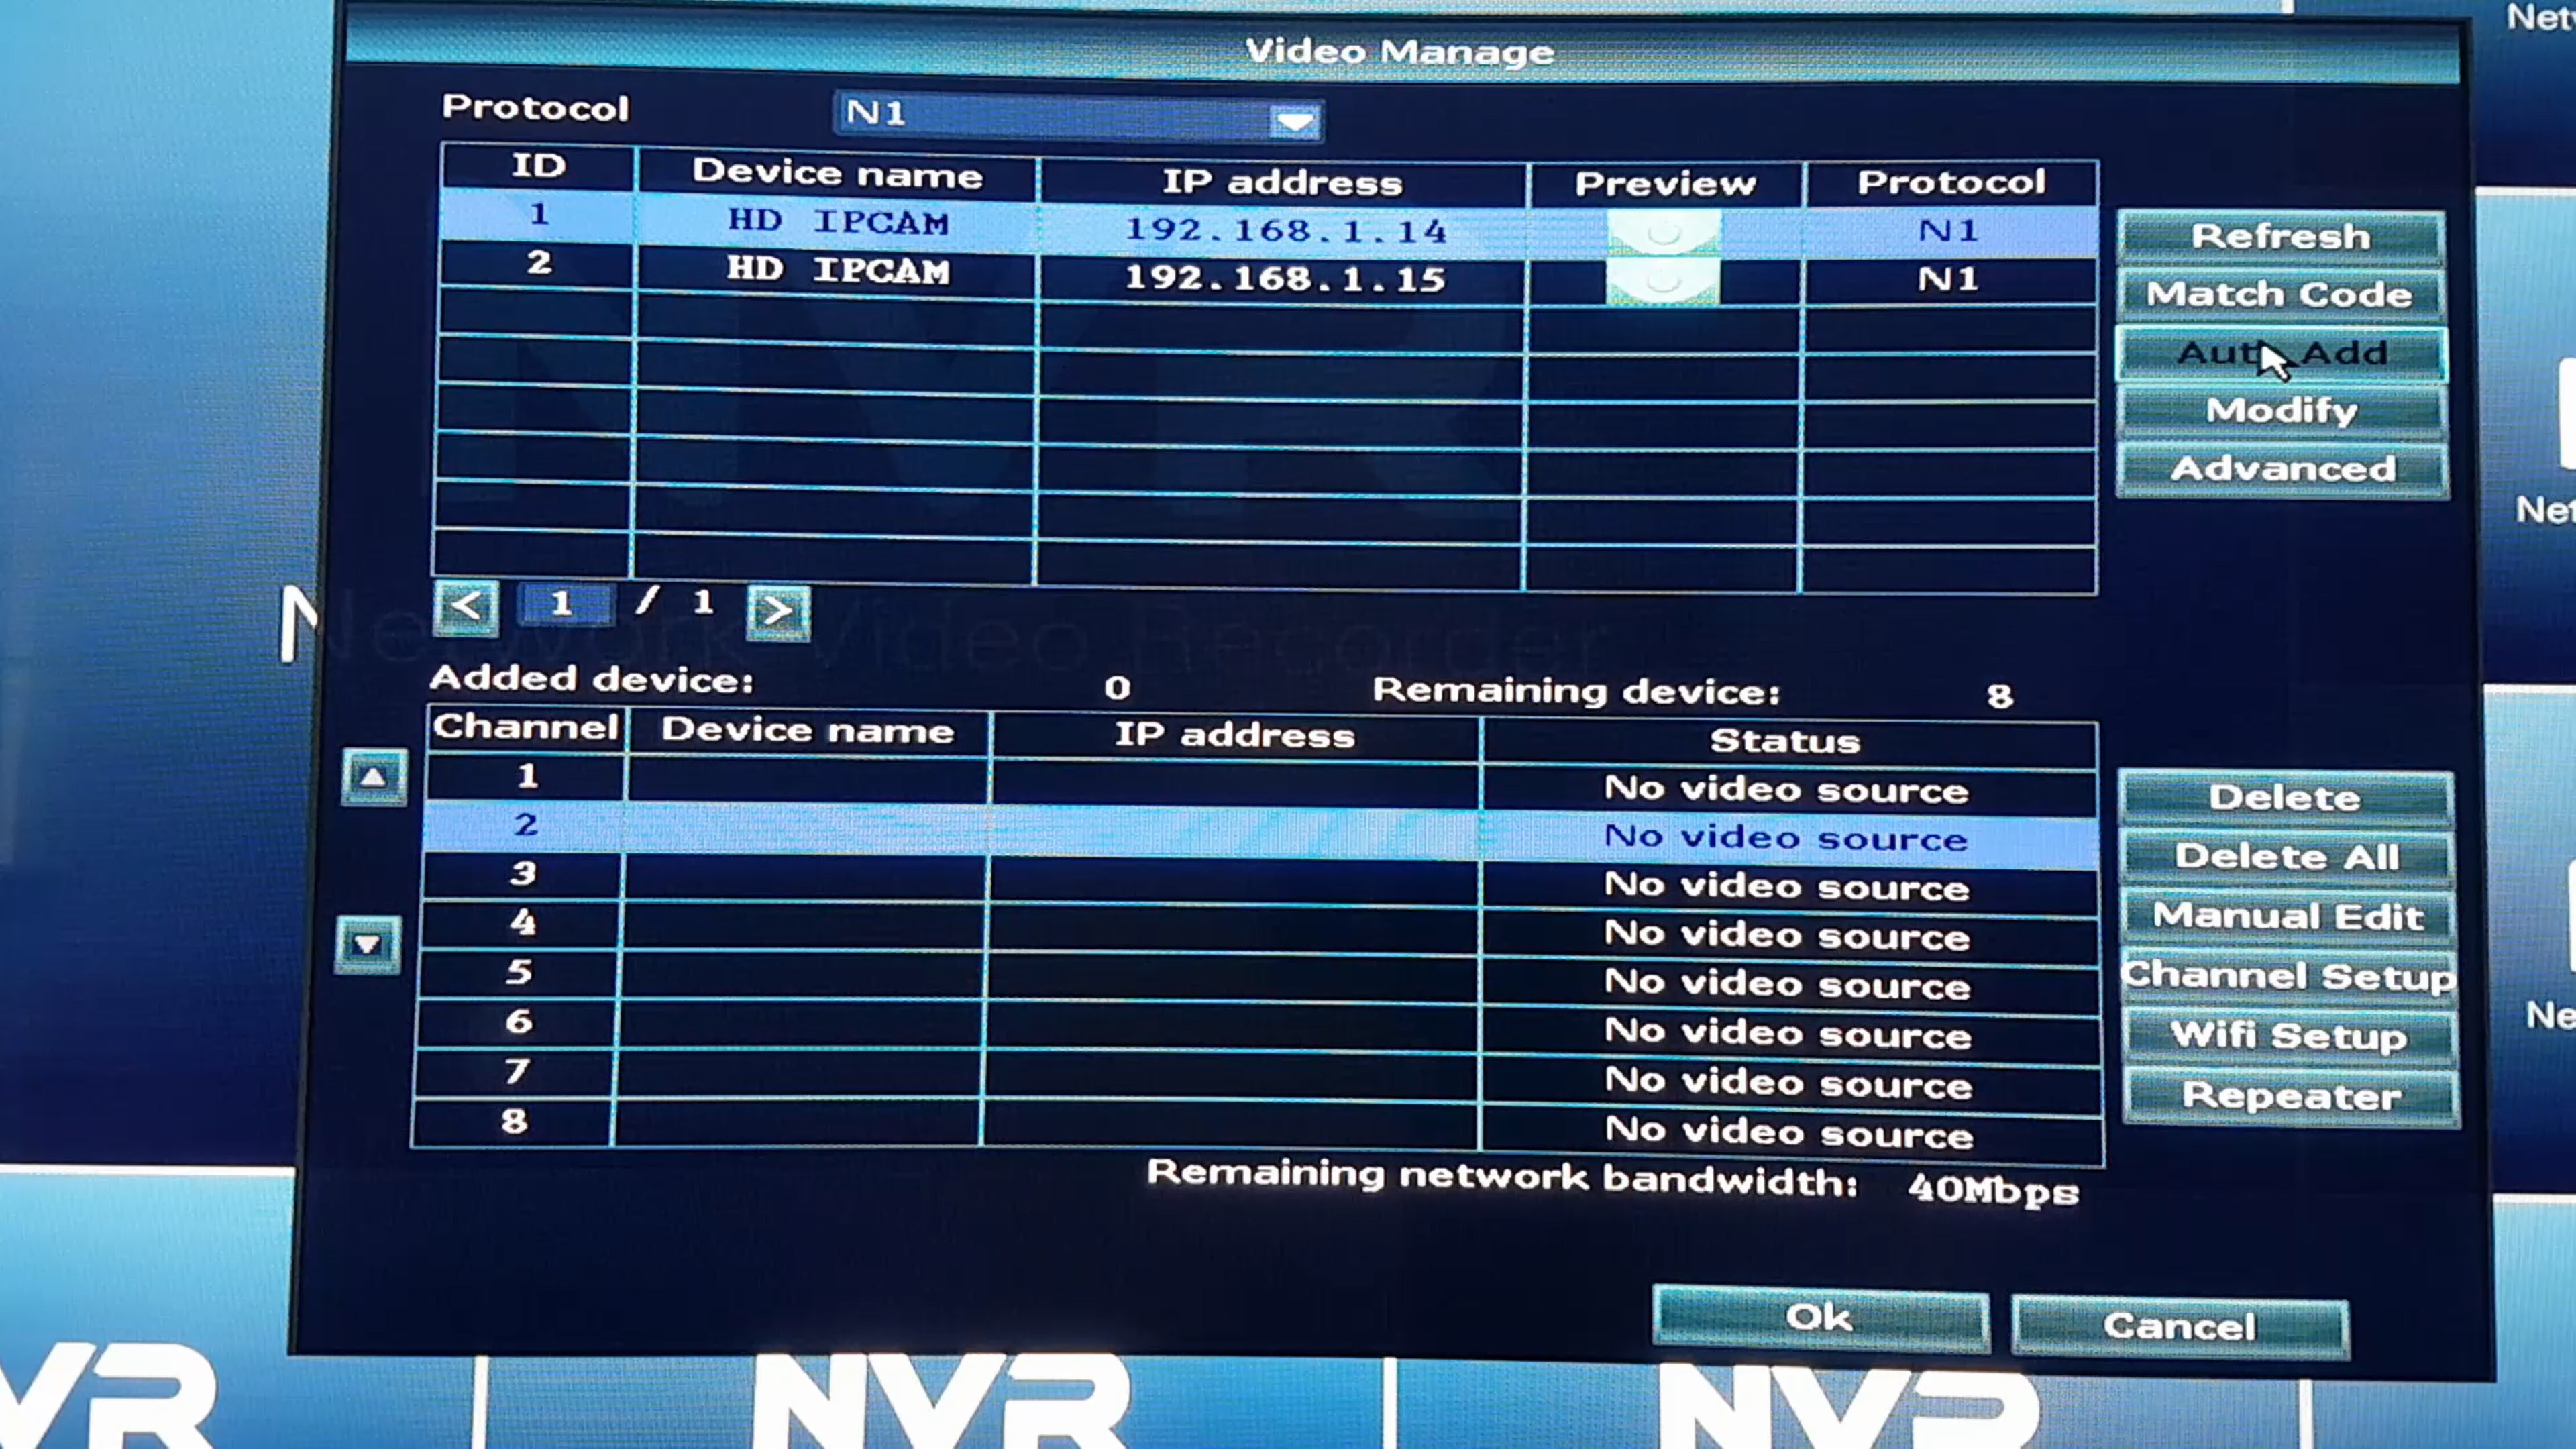
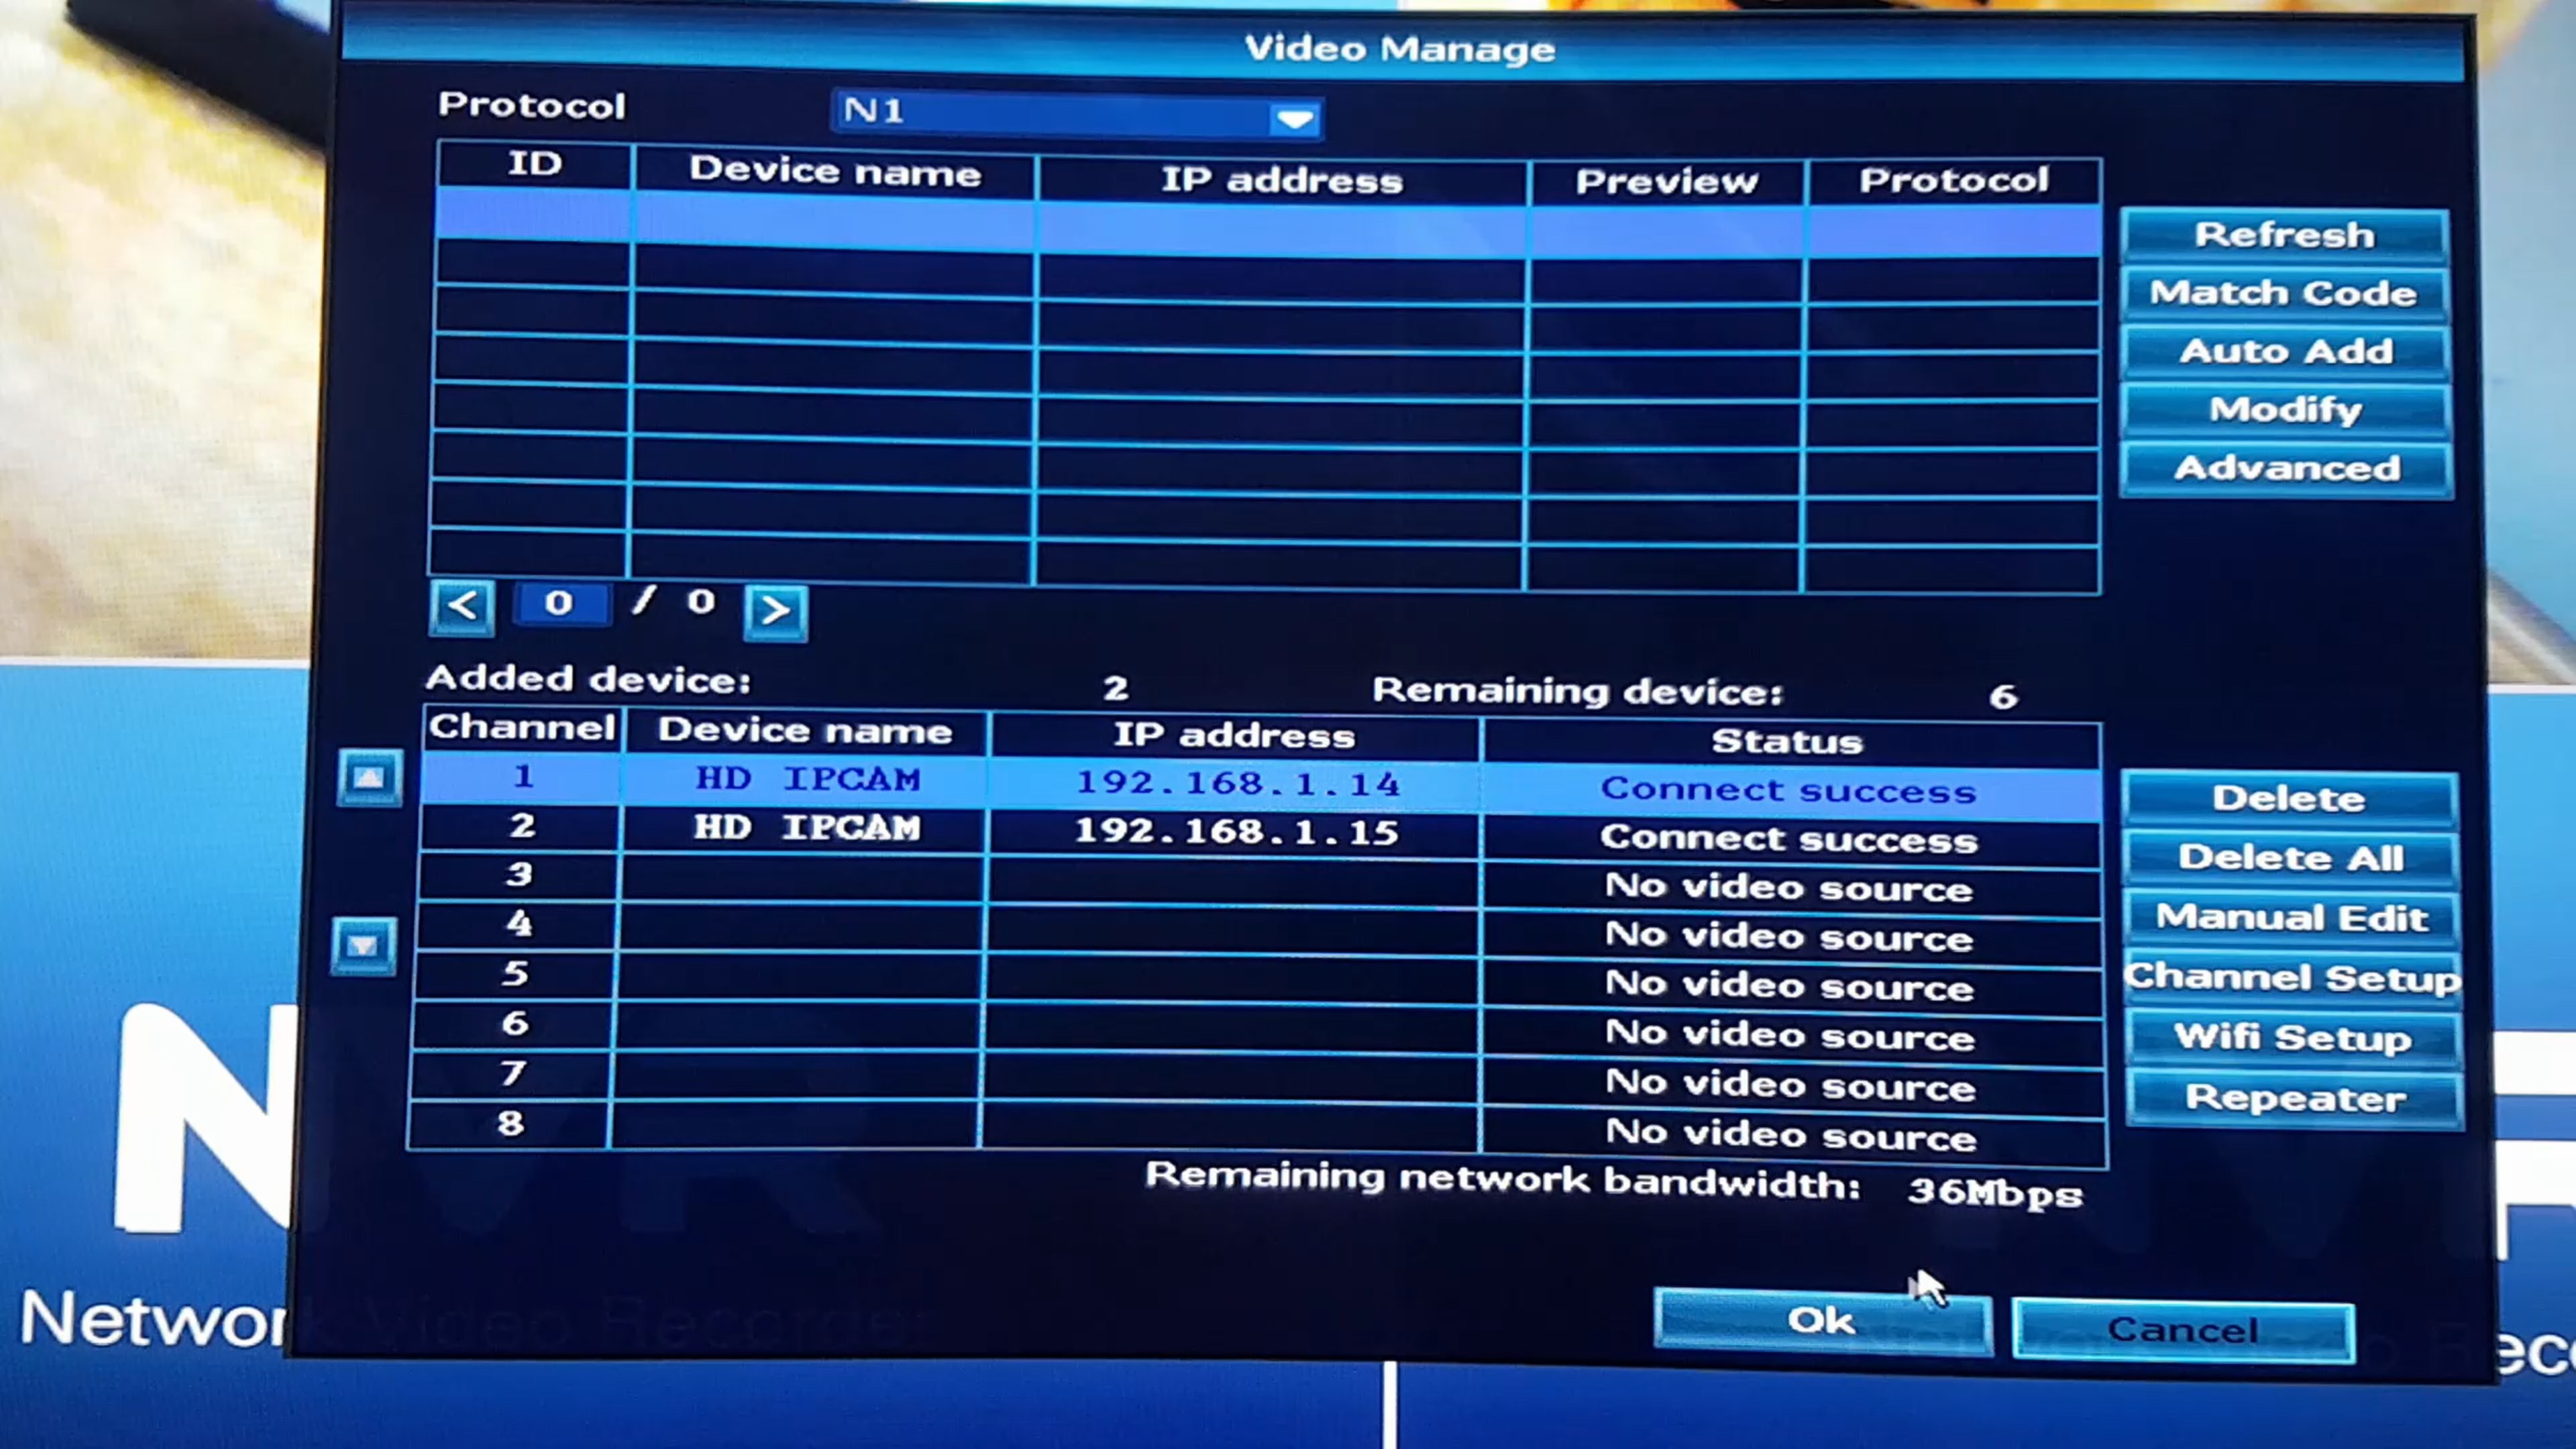
The Second Method is using a Network Switch.
- Power on the switch and connect the devices to its Ethernet ports. Most ethernet switches connect to a modem from port 8. If you are not using a modem, connect the NVR to port 8. The other devices can be connected to the remaining ports.
- Remove the WiFi antennas of the IP Cameras so that it communicates with the NVR solely through the Ethernet connection.
- Go to VIDEO MANAGE
- Press Refresh (all the properly connected IP Cameras which are supported by the NVR will show up on the list).
- After scanning is complete, press AUTO ADD for those IP Cameras to be saved.
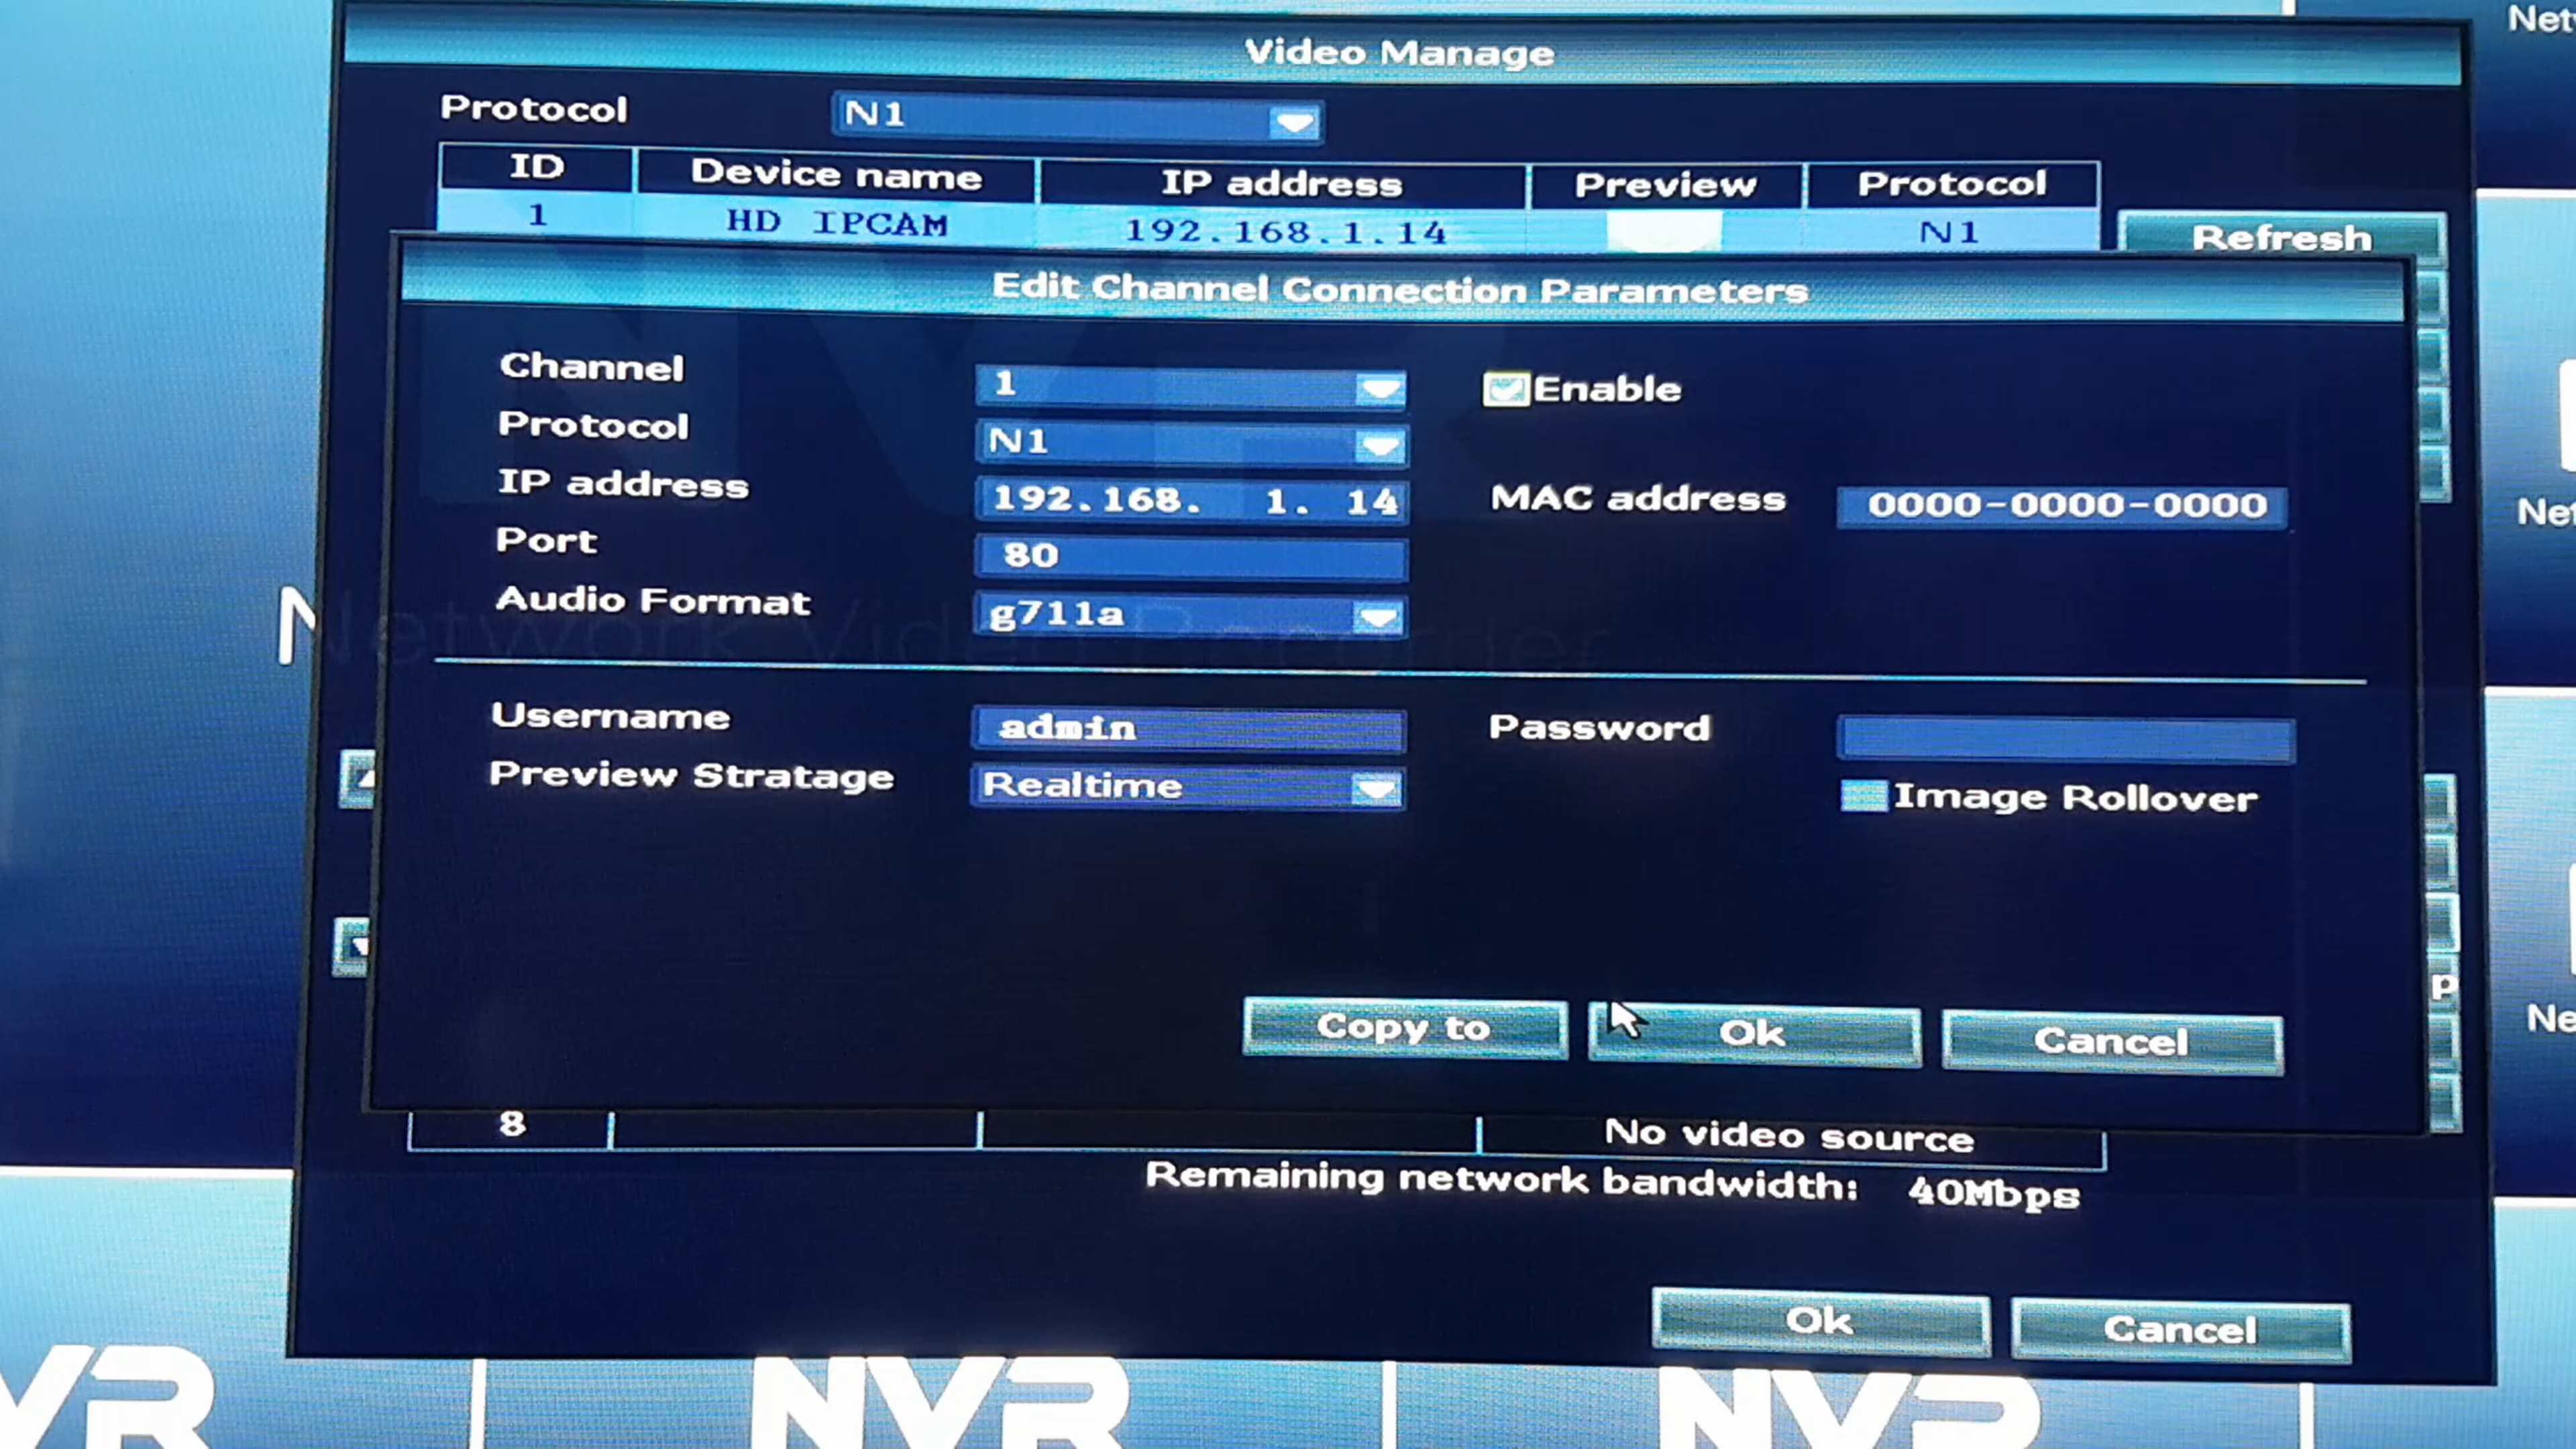
- You could also manually add them if you know the IP Addresses of the IP Cameras. Press on MANUAL EDIT, and input the IP Address of the IP Camera. You will also need to input the password if you have secured it with one, if not, leave it blank. Remember to press Enable before saving the Camera.
The Camera will disconnect if the Ethernet cable is unplugged, since it has been set to communicate solely on the Ethernet.
WiFi Router
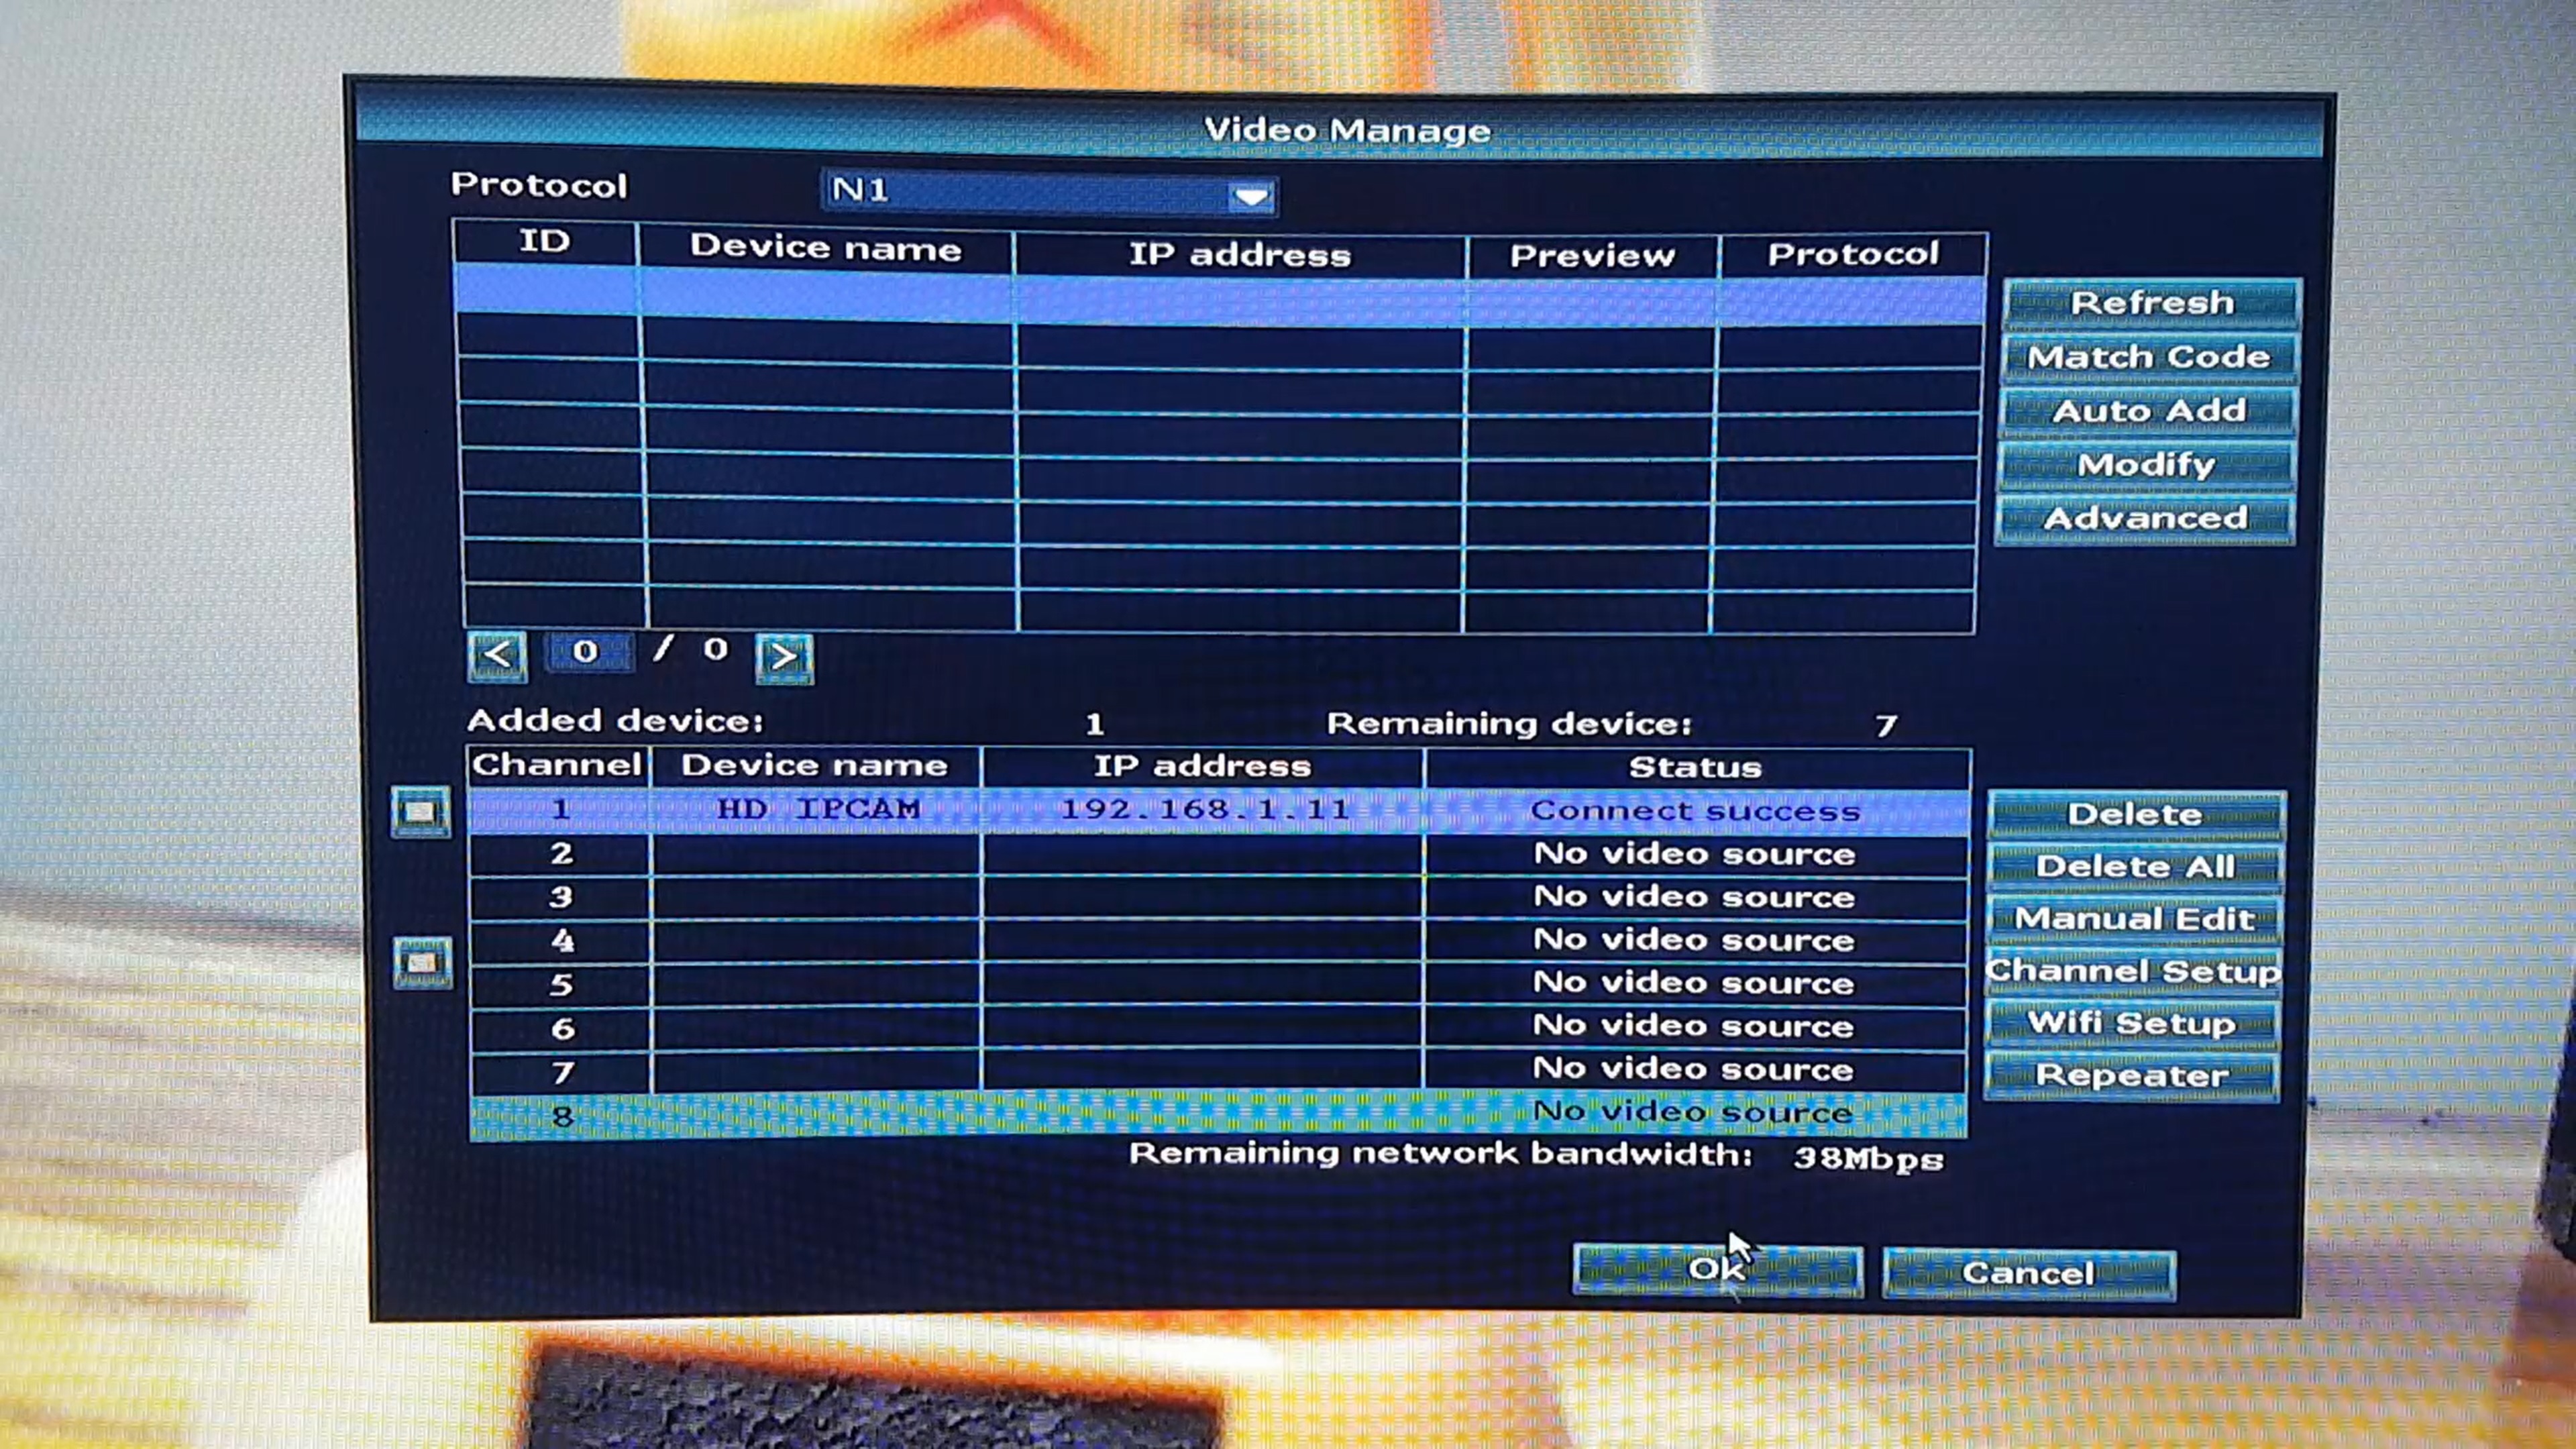
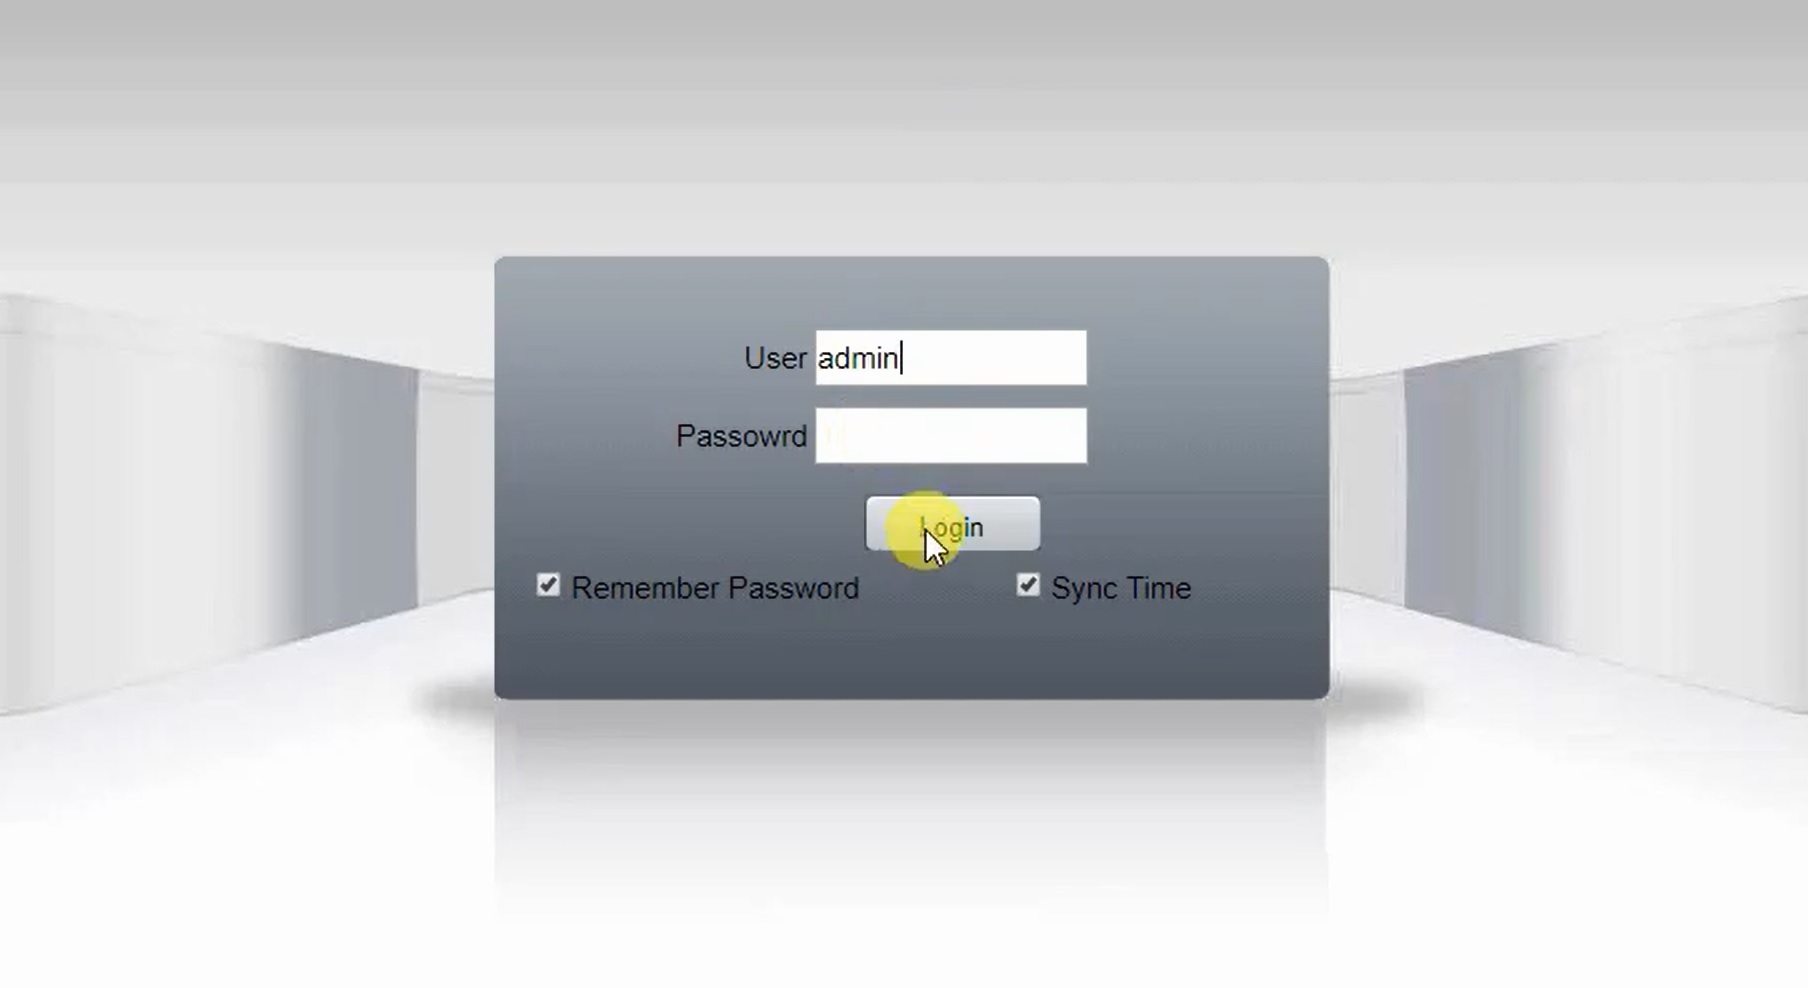
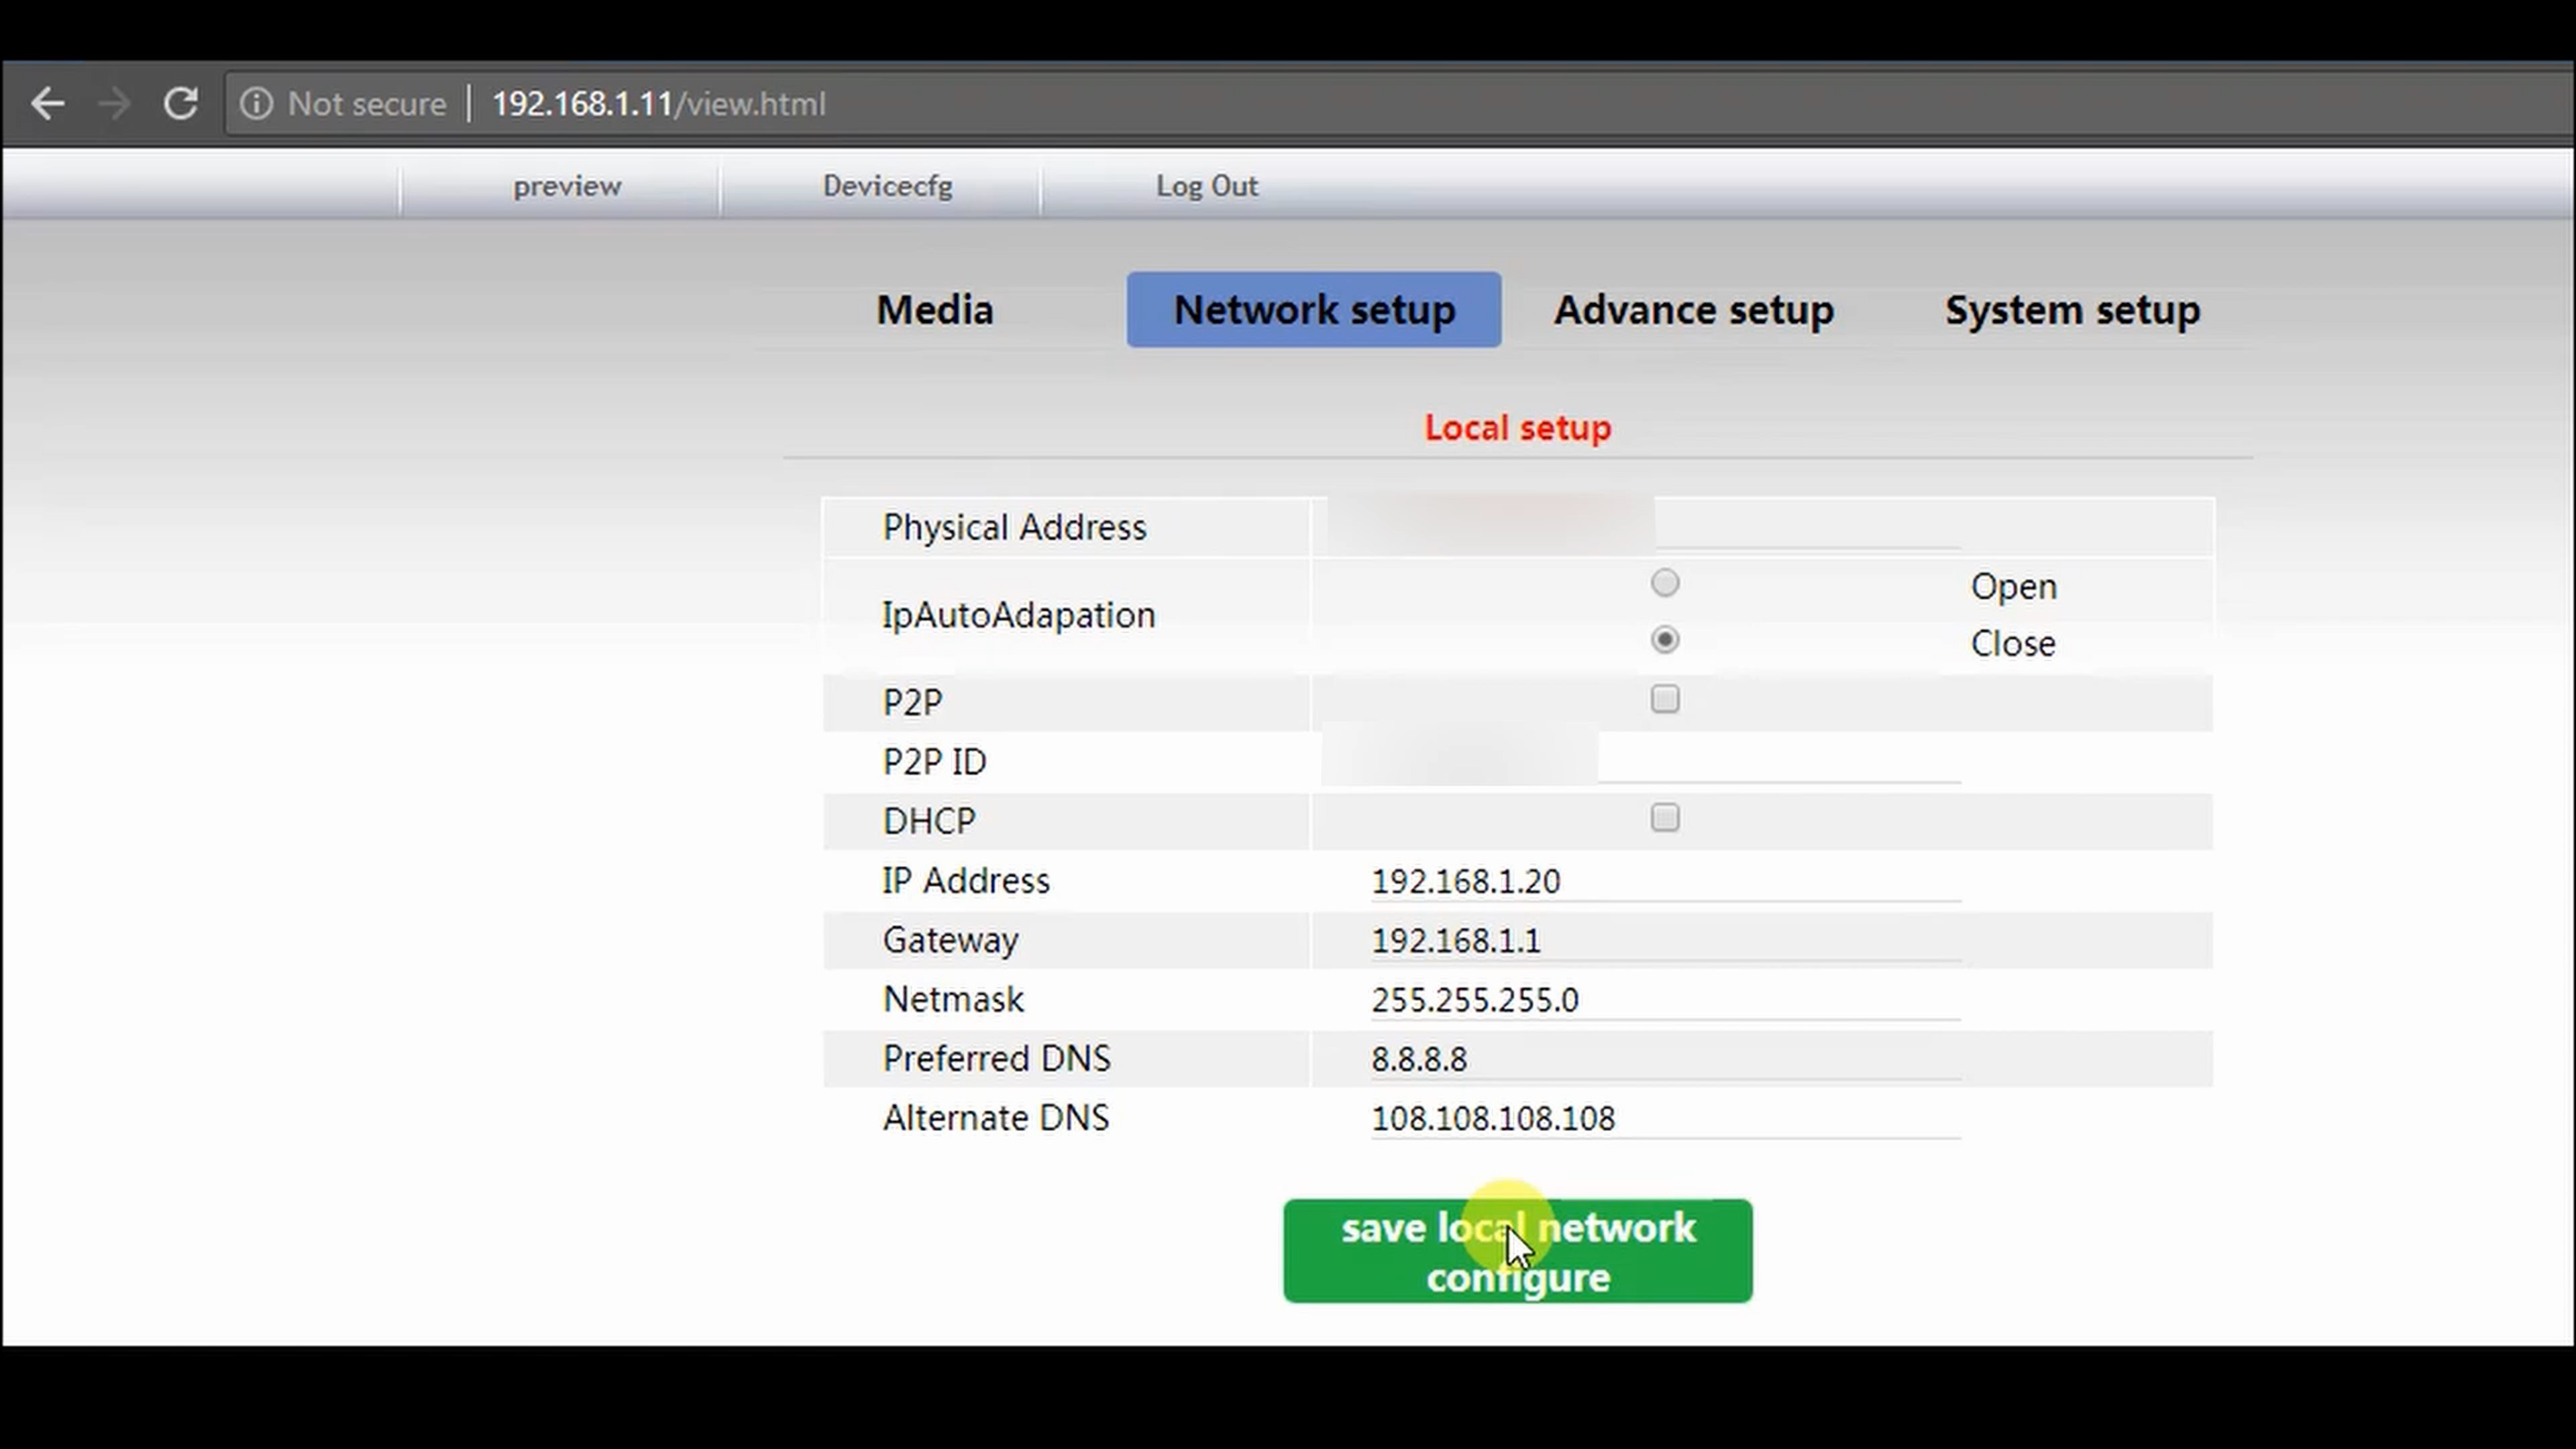
The Third Method is using a WiFi Router. You would need a WiFi router with atleast 3 Ethernet Ports or else a network switch which can be connected to the WiFi Router. You also need a PC connected to the same network of the NVR in order to change the settings of the IP Camera.
If you are using a Network Switch, connect the WiFi router to port 8 (of the network switch), and all other devices to the other ports.
- Perform the same procedure as Step 3: Network Switch (of this instructable), in order to connect the IP Camera with the NVR.
- Note down the IP Address assigned to the IP Camera by the NVR.
- Enter the IP Camera Address in the web browser to access the web interface.
- Enter the username and password (Default is usually Username: admin, Password: ).
- Enable the adobe flash player, to get the feed from the IP Camera.
Change the IP Address of the Camera
- Click on Device Config >> Network Setup >> Local Setup
- Change the IP Address of the camera and keep DHCP turned off so that the IP Address does not change.
- Save the settings
- Enter the new IP Address into the browser, since the previous IP Address is not valid anymore.
Change the Password of the Camera
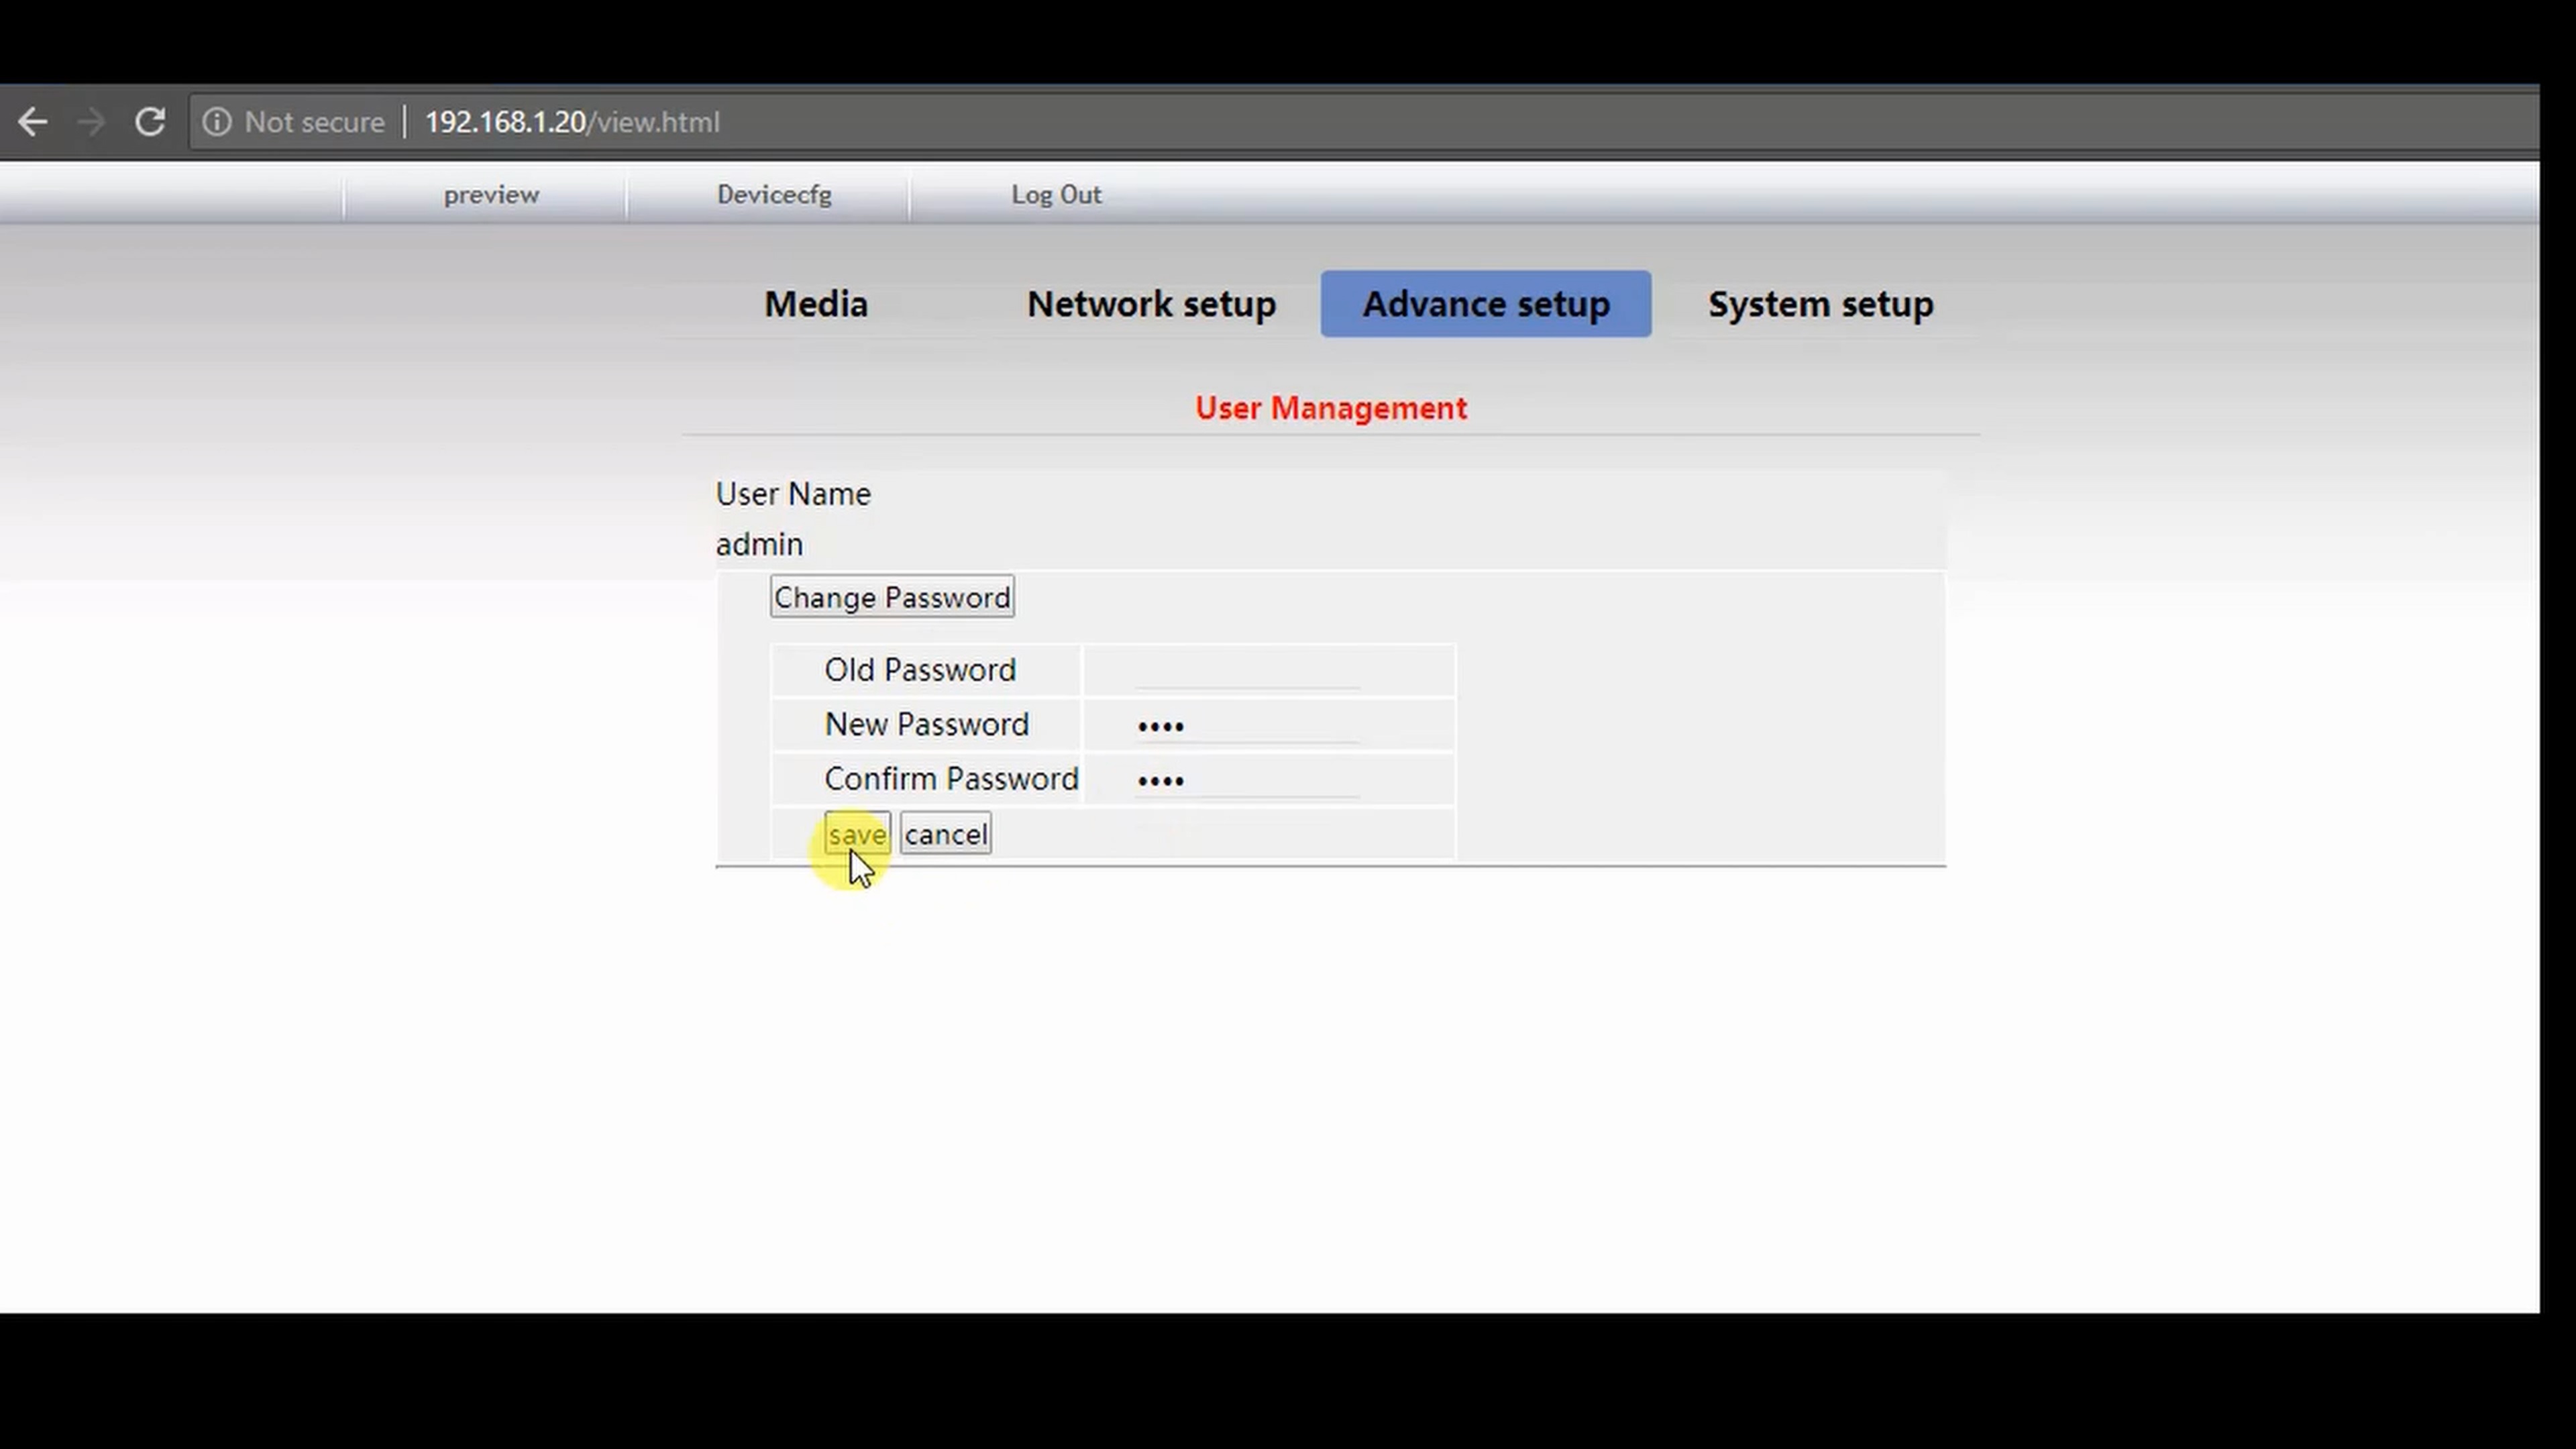
- Click Device Config >> Advance Setup >> User Management
- Change the Password as it is highly recommended that you add a password to your IP Camera.
- Login with your new password
Change the WiFi Settings
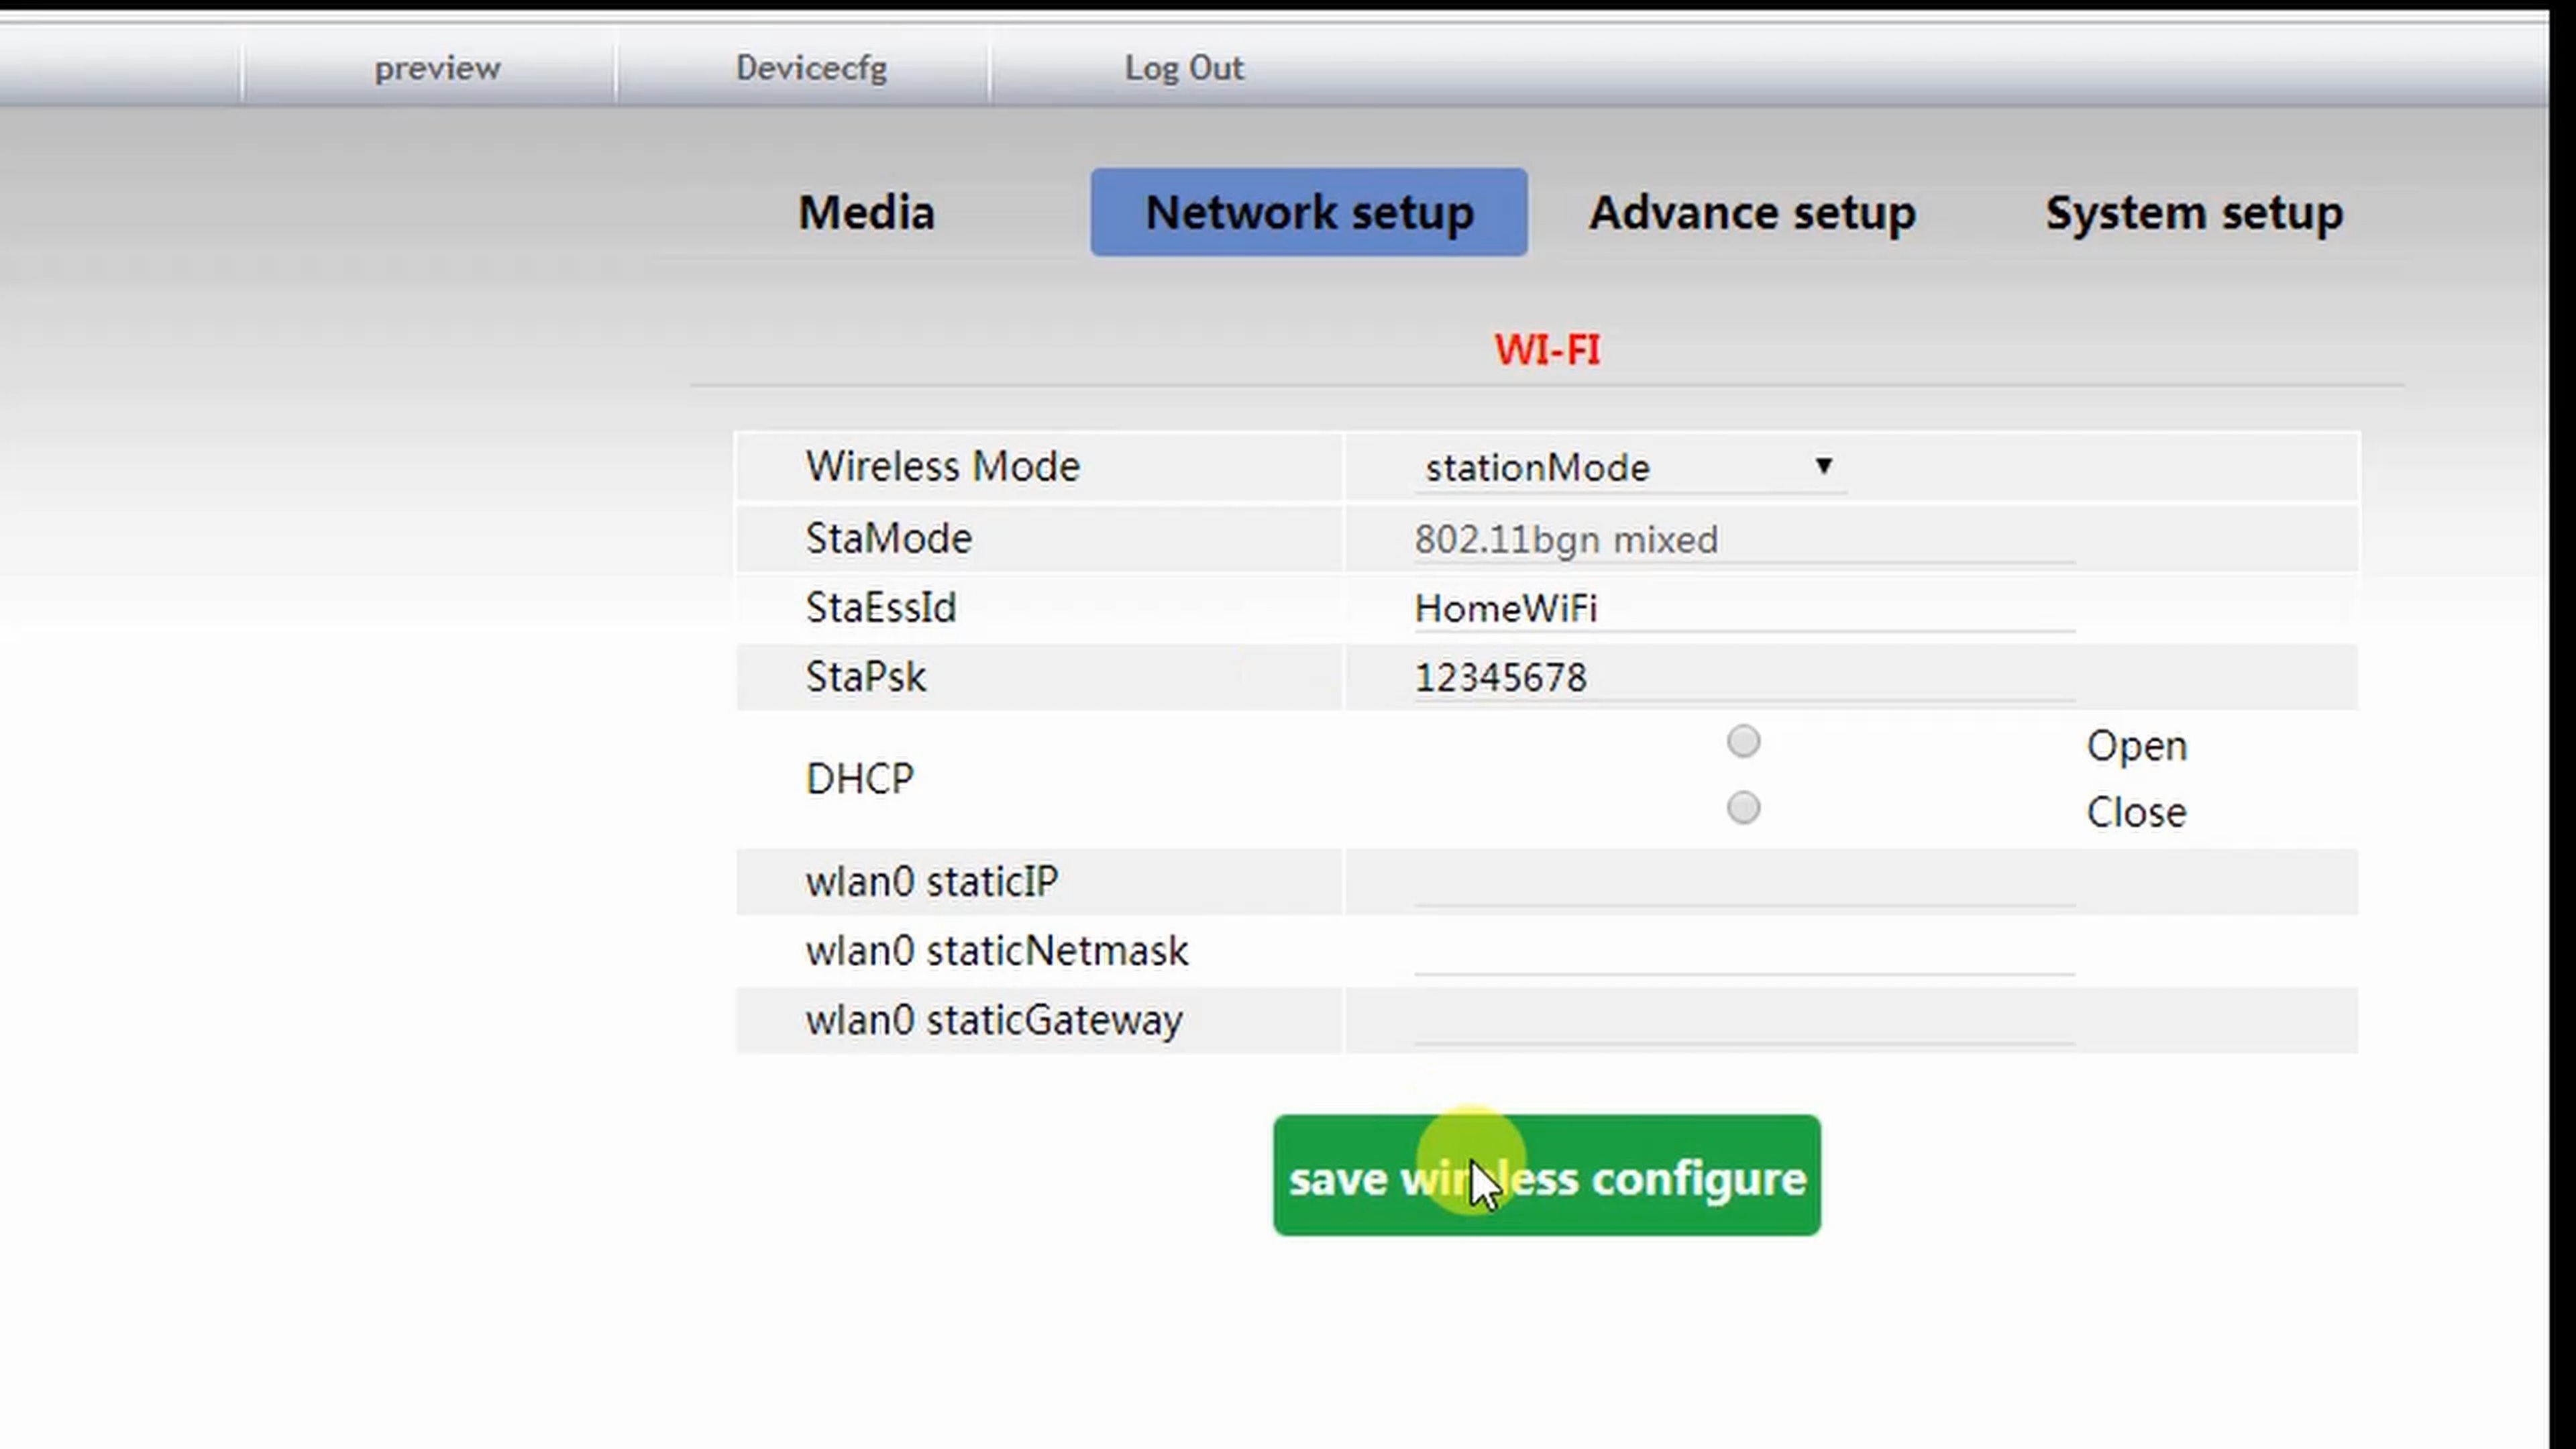
- Click on Device Config >> Network Setup >> Wi-Fi
- Enter your WiFi details (StaEssID - WiFi Name, StaPsk - WiFi Password)
- Click Save
Change the NVR Settings
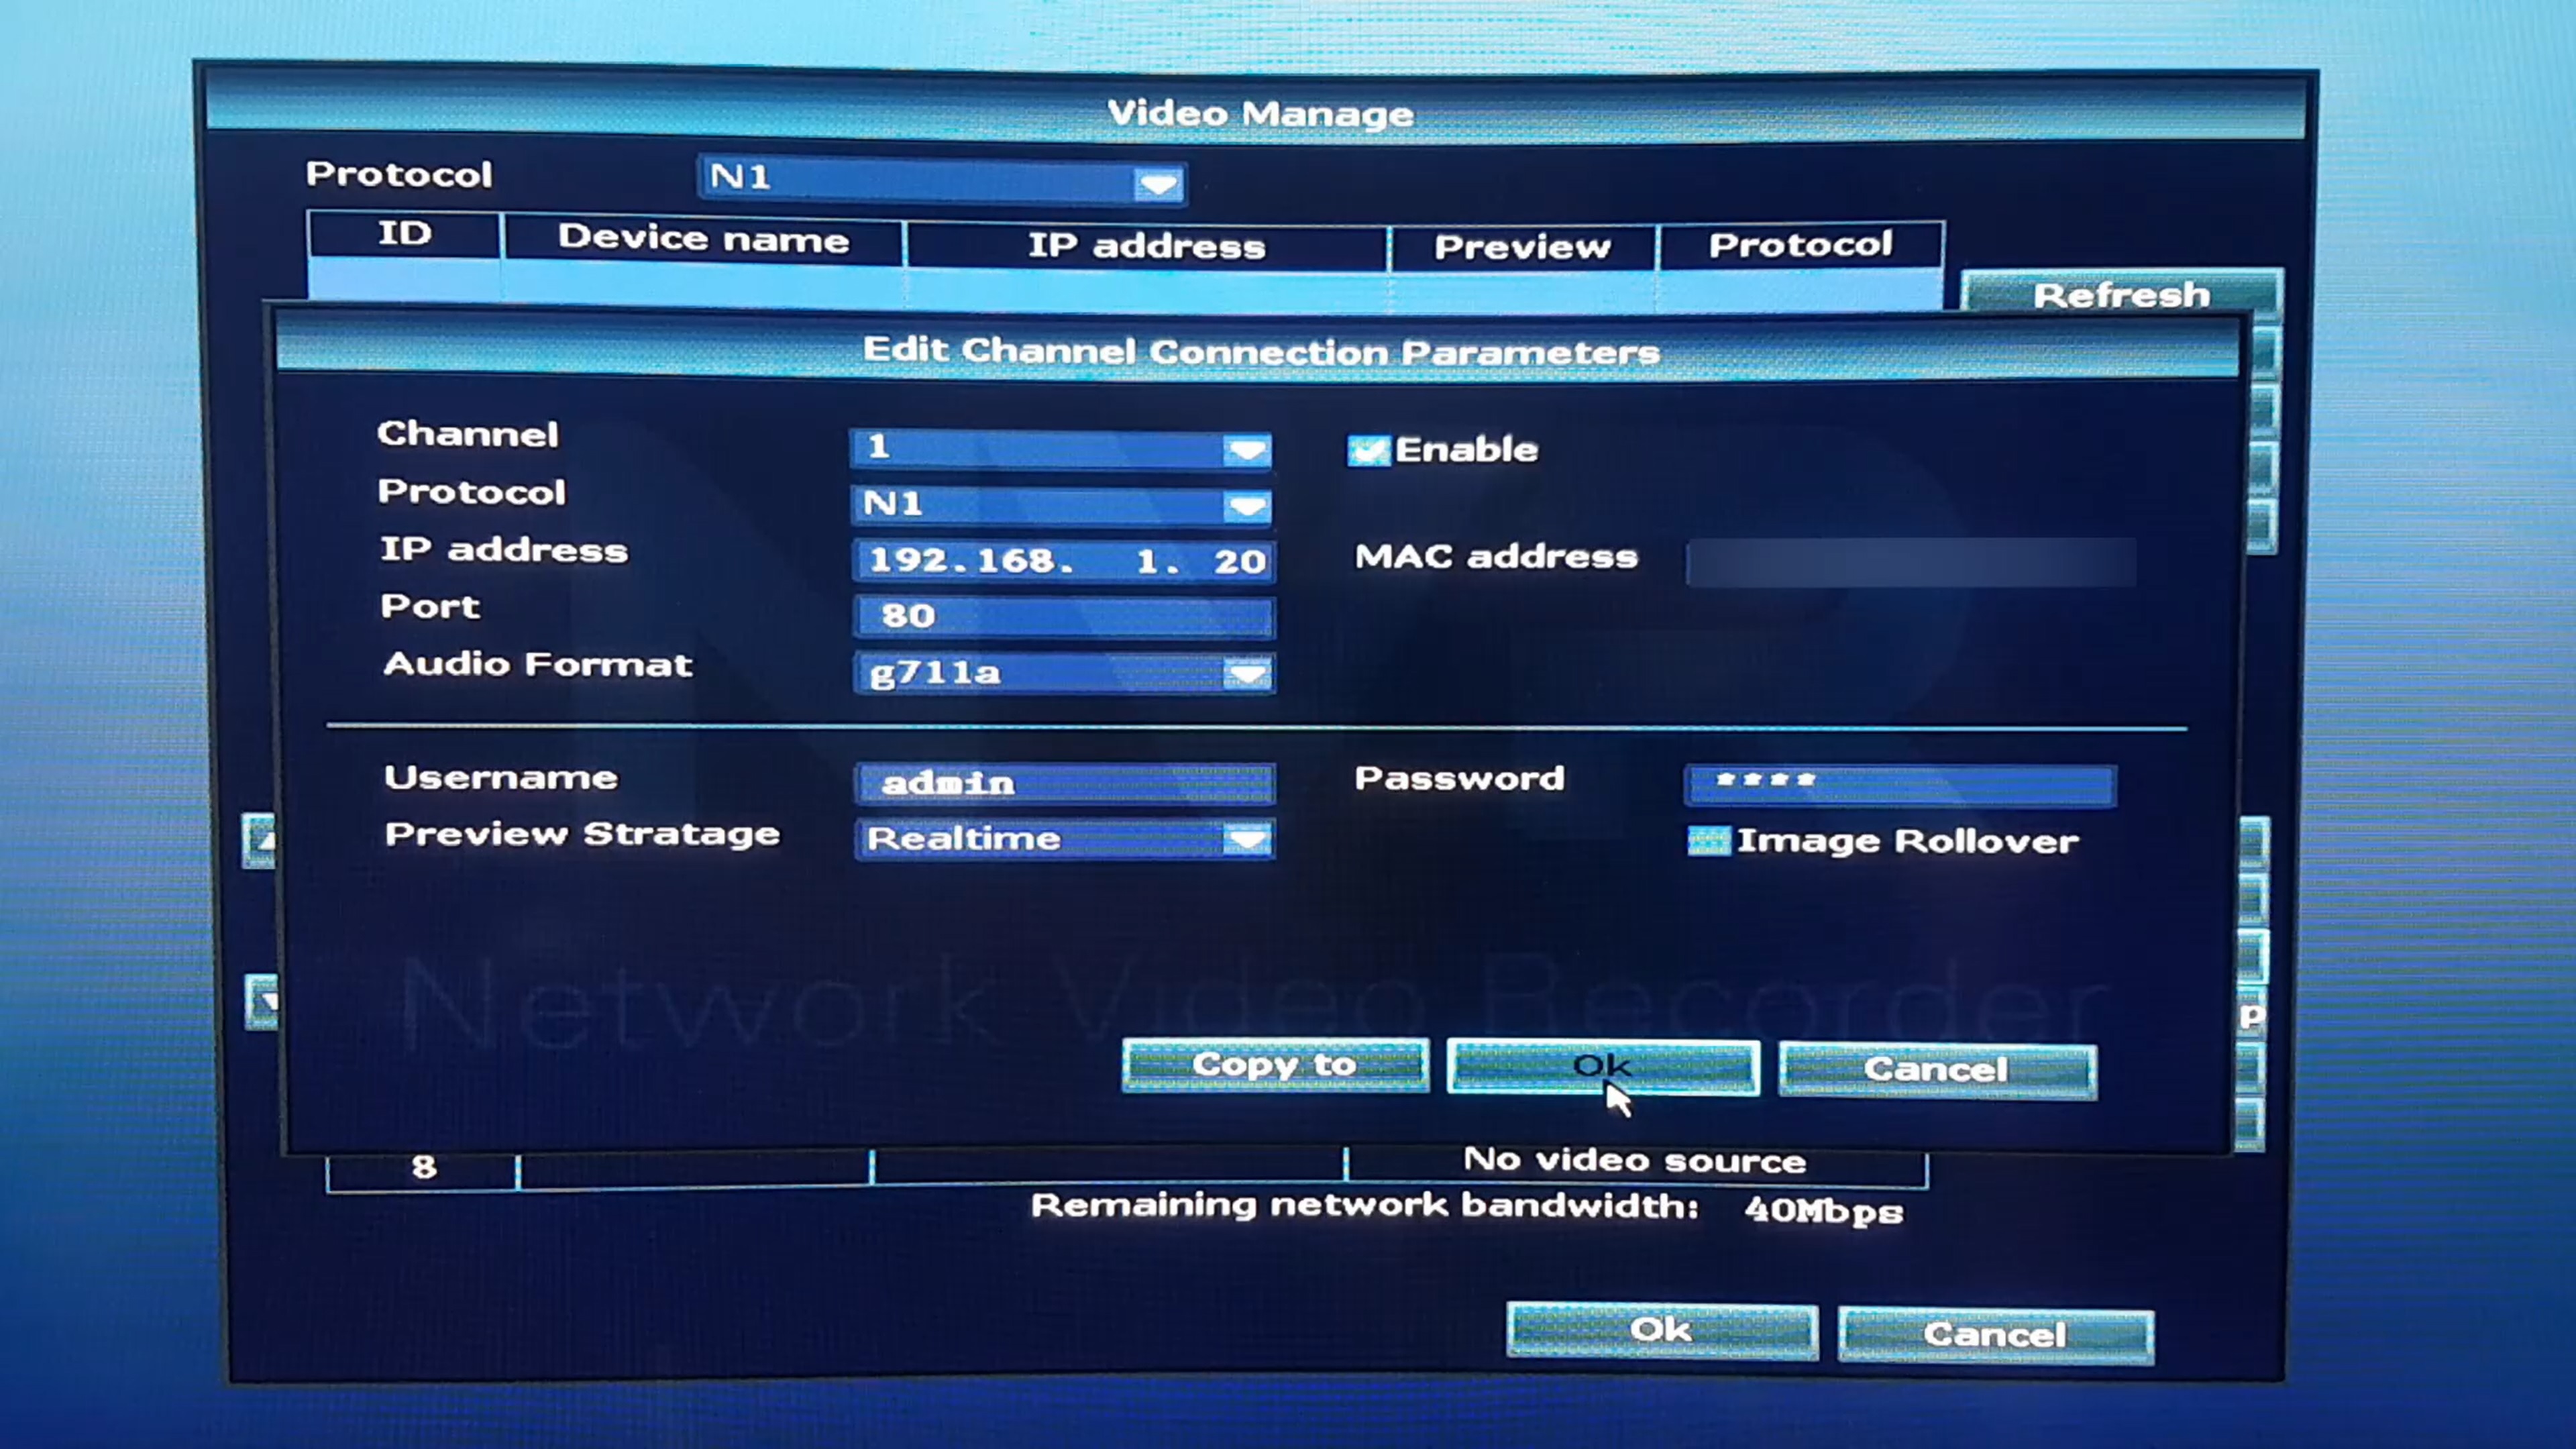
- If you changed the IP Address or the password of the Camera, you need to change it accordingly in the NVR by clicking on the desired IP Camera and pressing MANUAL EDIT.
- Change the IP Address and Password according to what you set before in the IP Camera web interface.
- Click Save, and if the settings are correct, the camera will connect successfully.
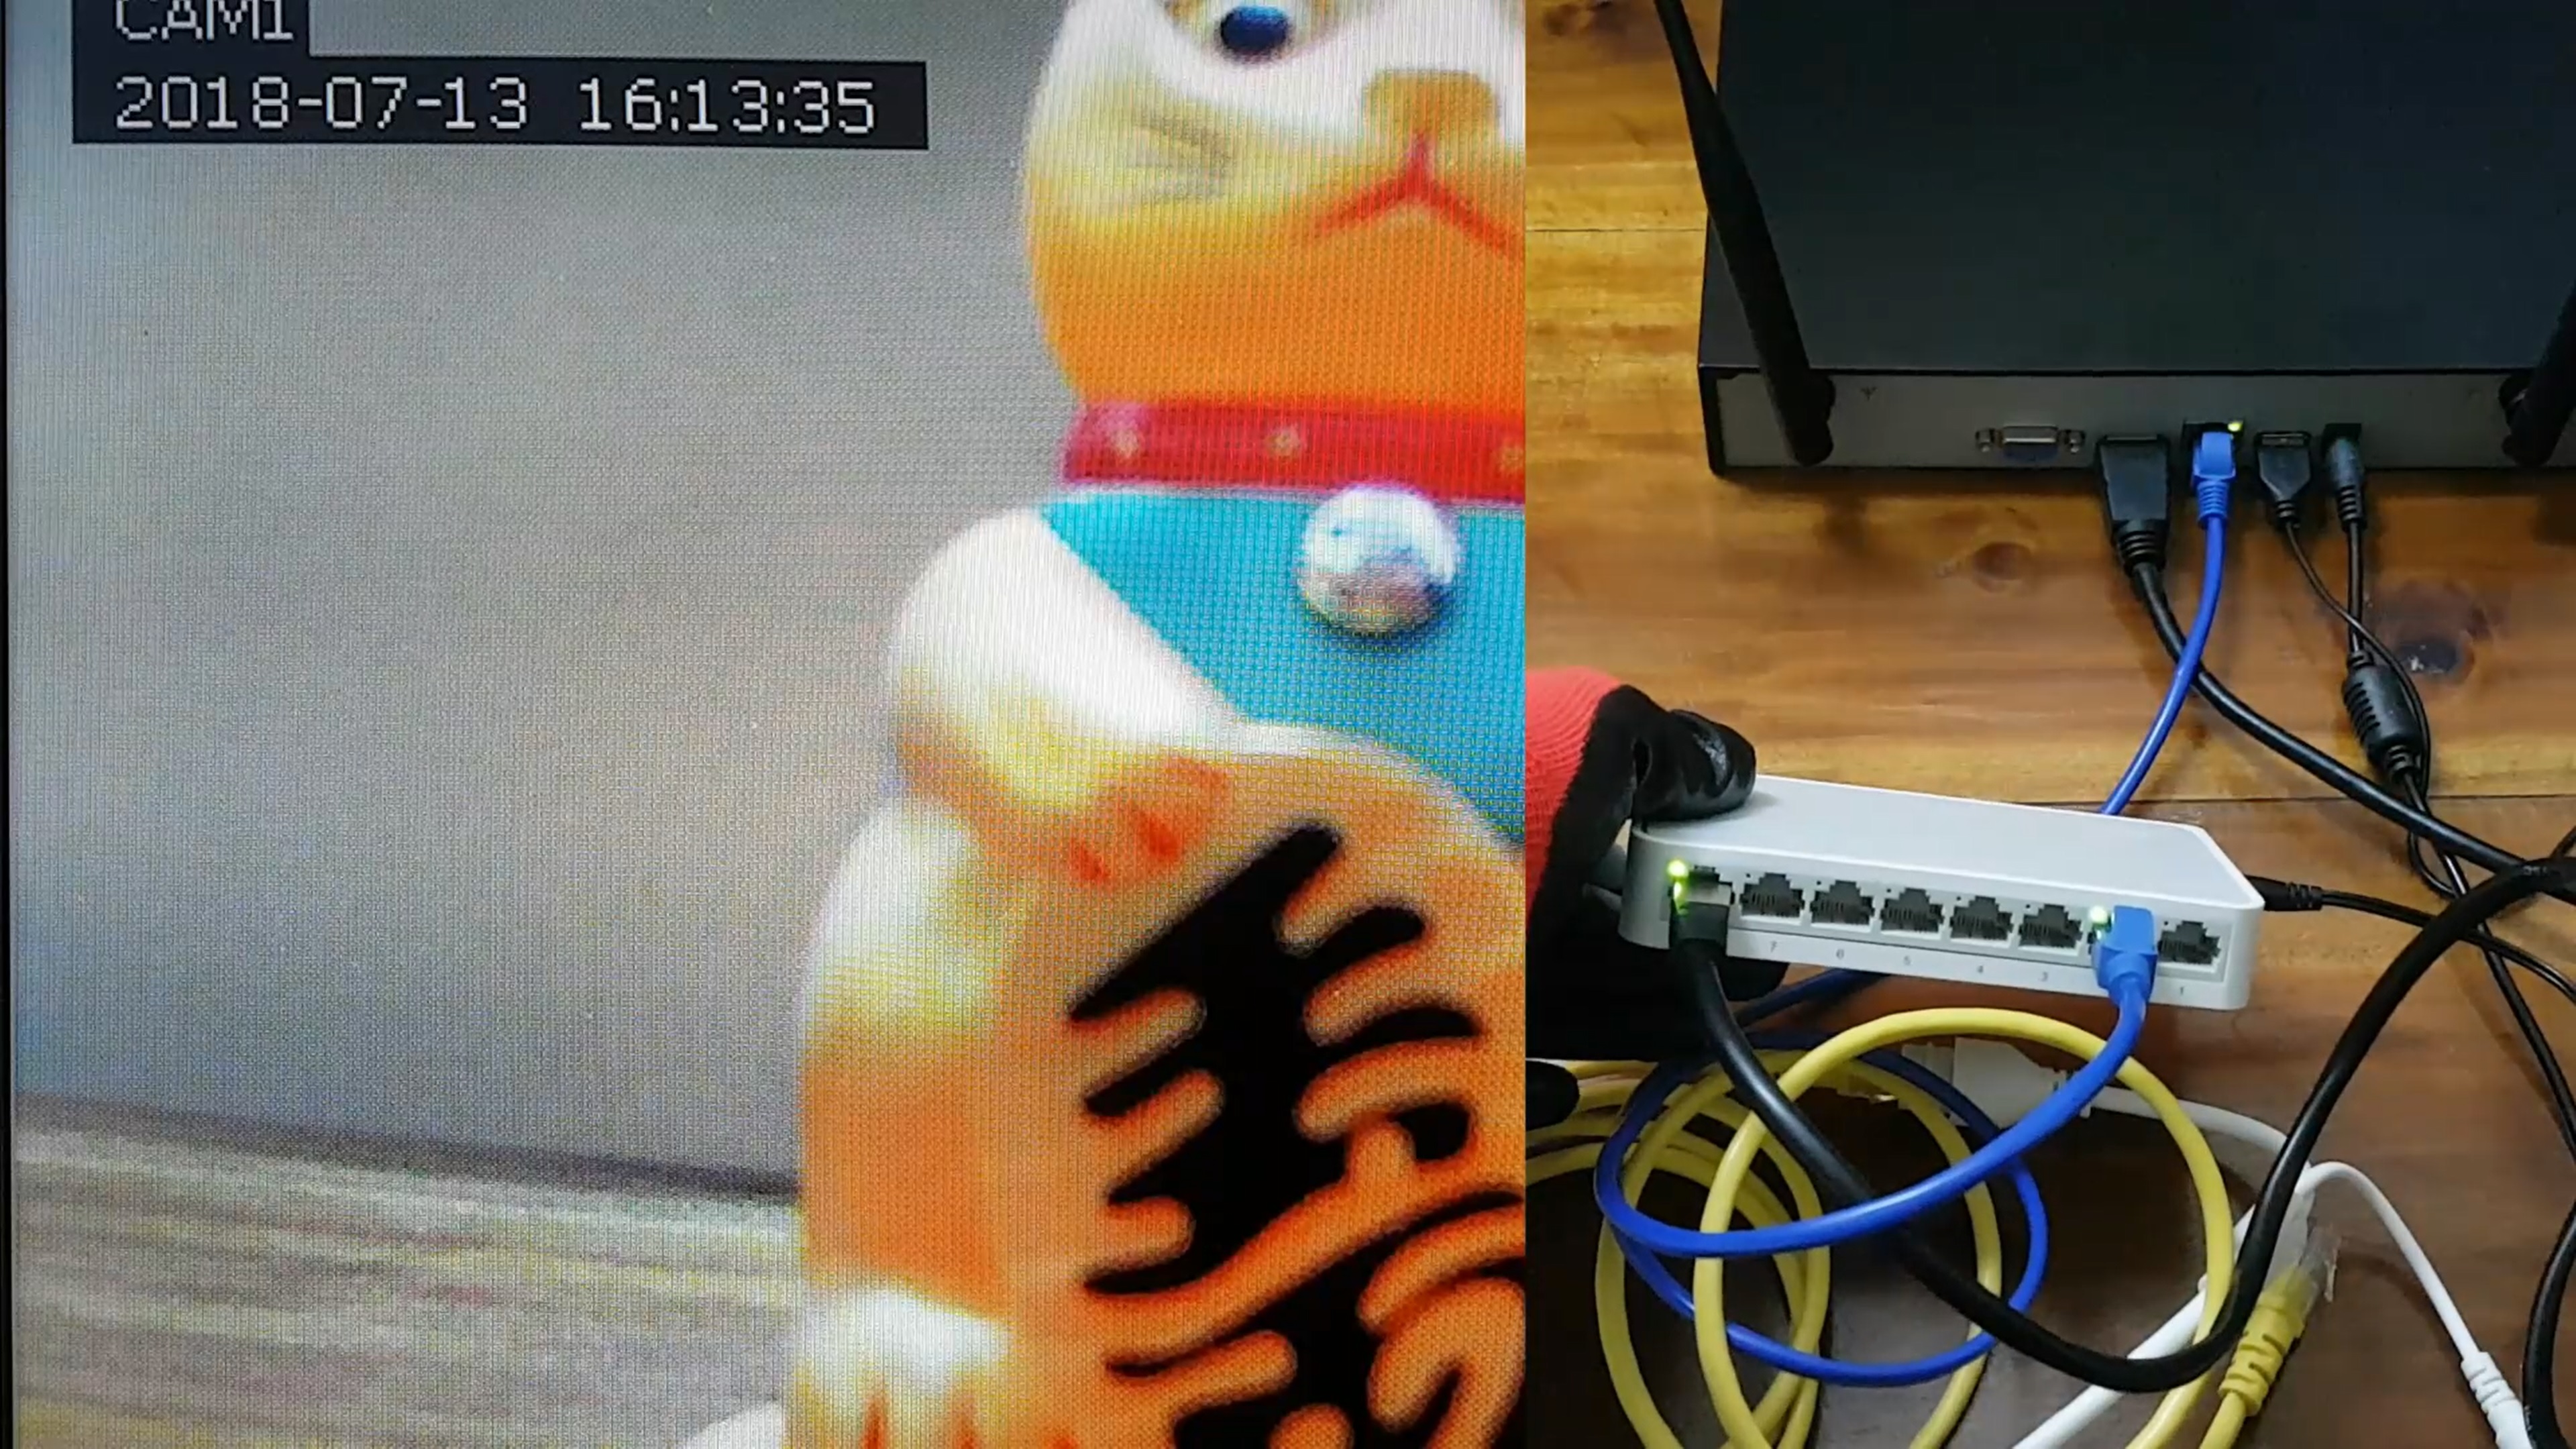
After unplugging the Ethernet cable from the IP Camera, the feed will stop temporarily and startup connection via the WiFi Router. It can be seen on the network switch as the NVR is communicating with the WiFi router for the Camera feed as the WiFi Router is connected to the IP Camera.
Restart Device
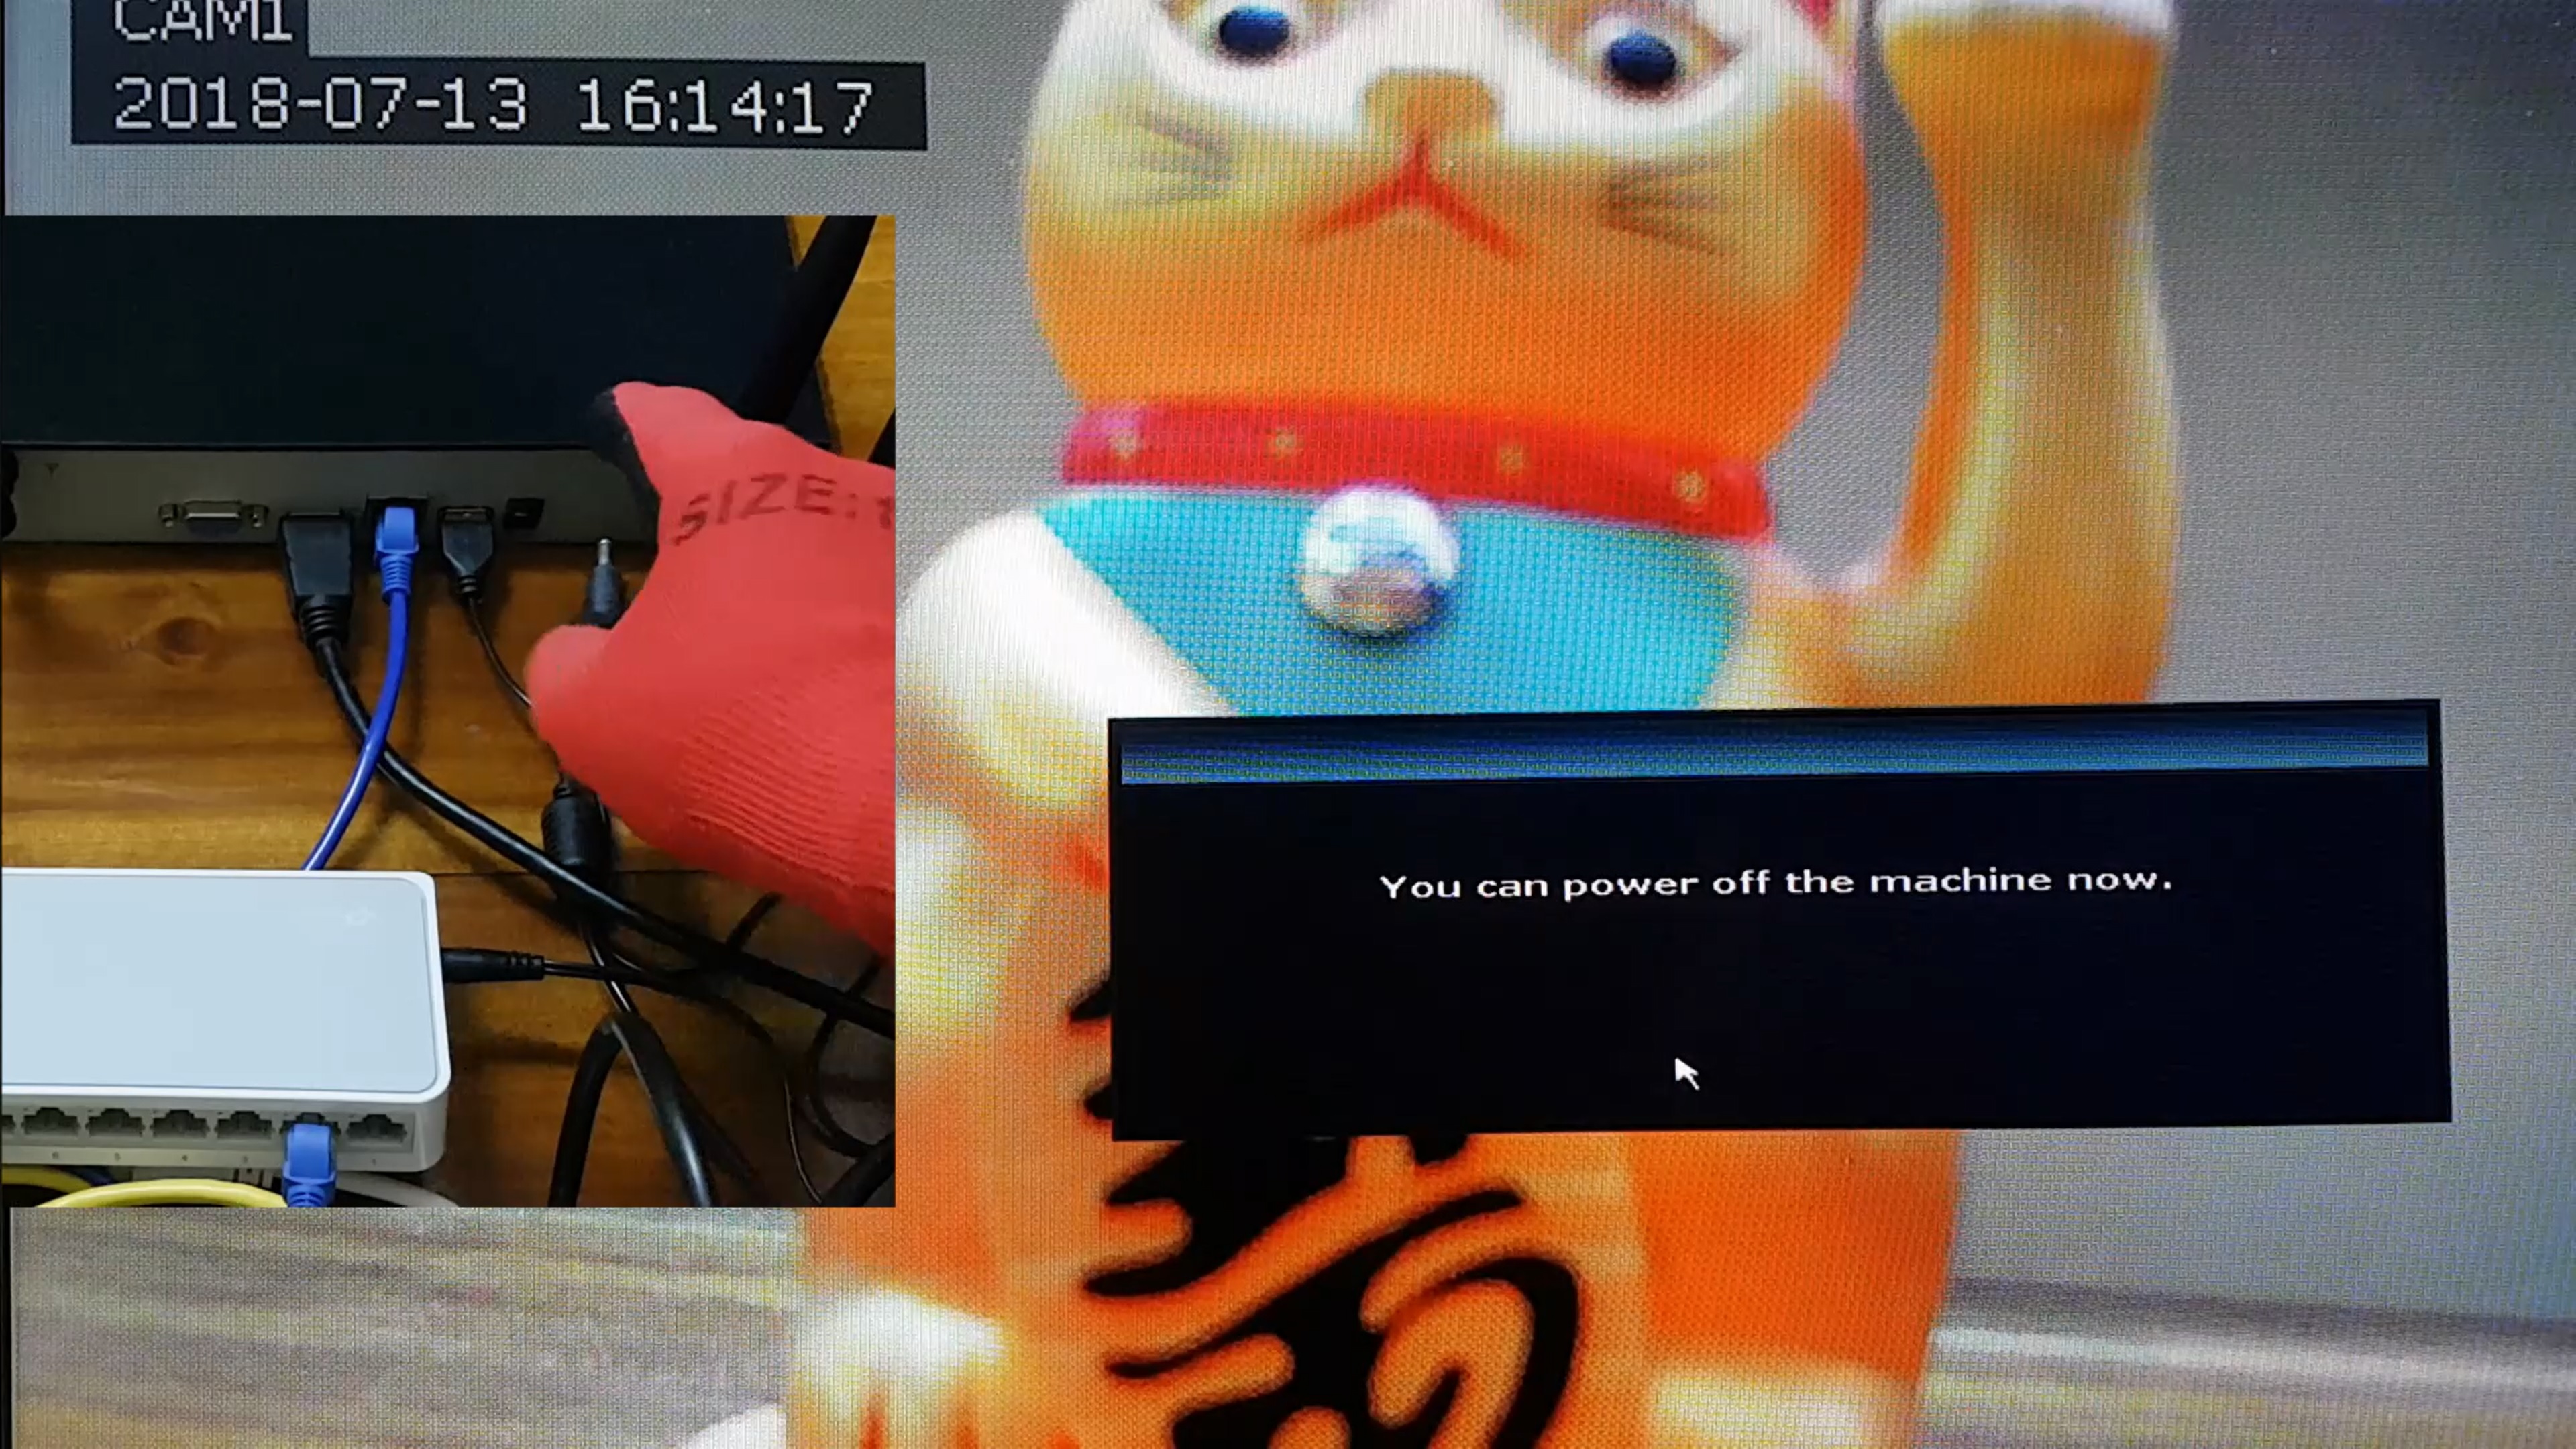
Restart the system to ensure that the devices connect properly even after a power loss.
After Boot-up if the IP Cameras connect successfully, then all the settings have been correctly performed.