How to Edit the Background of Photos on Photopea
by kemccormack in Design > Photography
15772 Views, 1 Favorites, 0 Comments
How to Edit the Background of Photos on Photopea
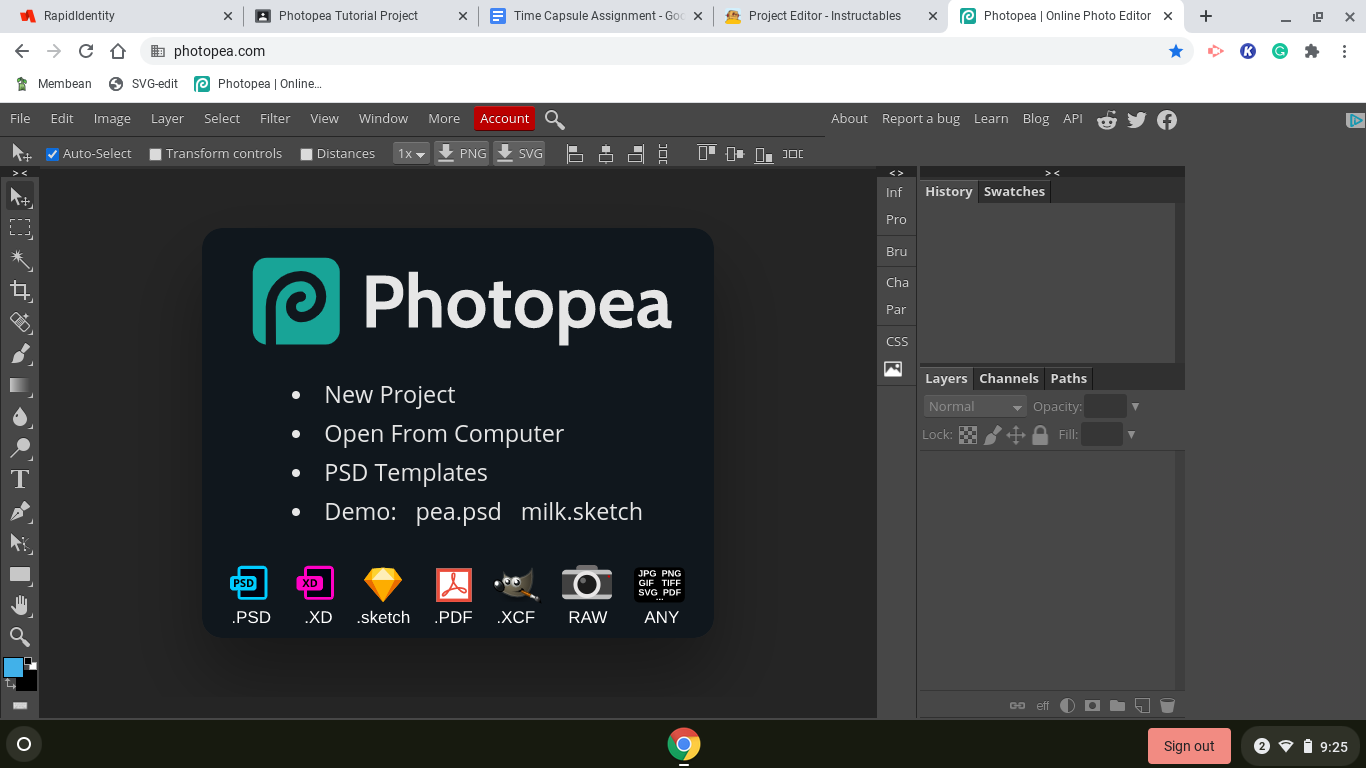
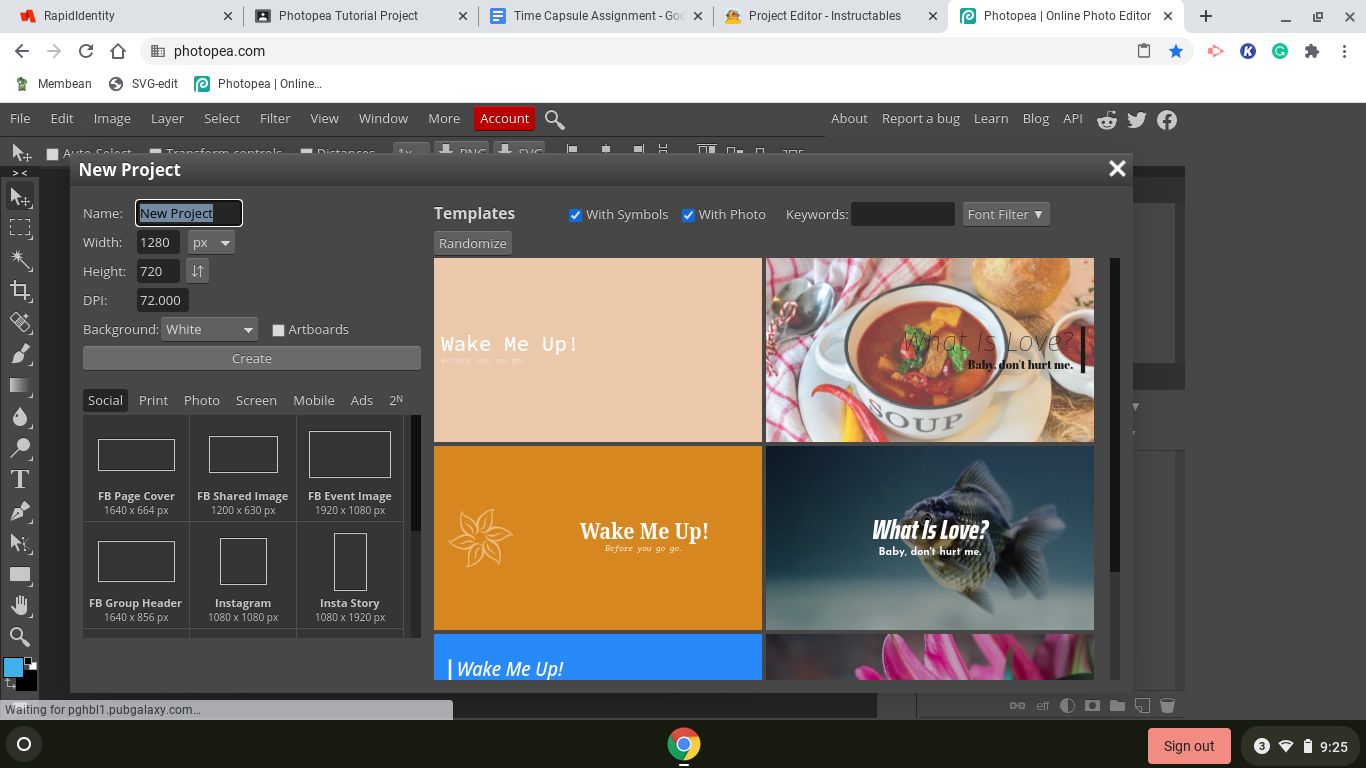
1. Open the Program and Select Facebook Page Cover then select create and you are ready to start!
Upload the Photo You Want to Use
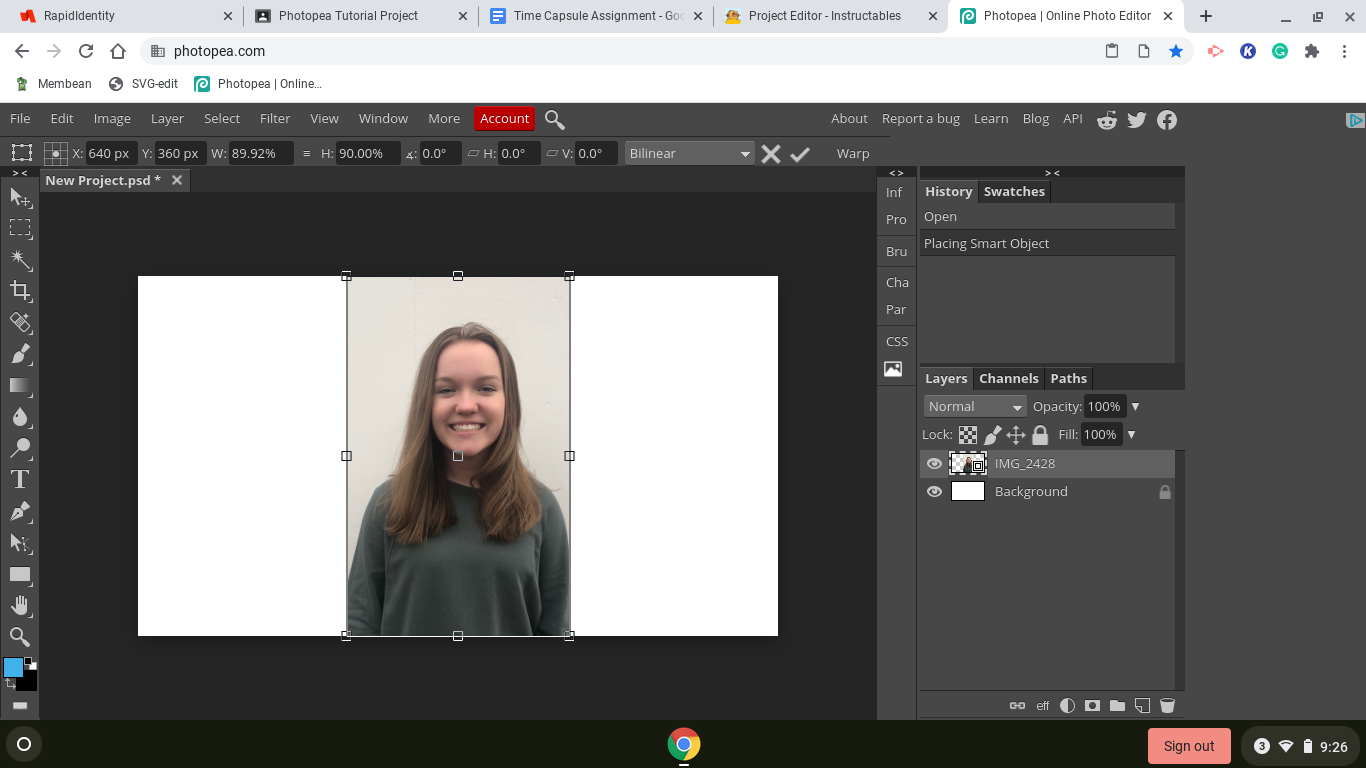
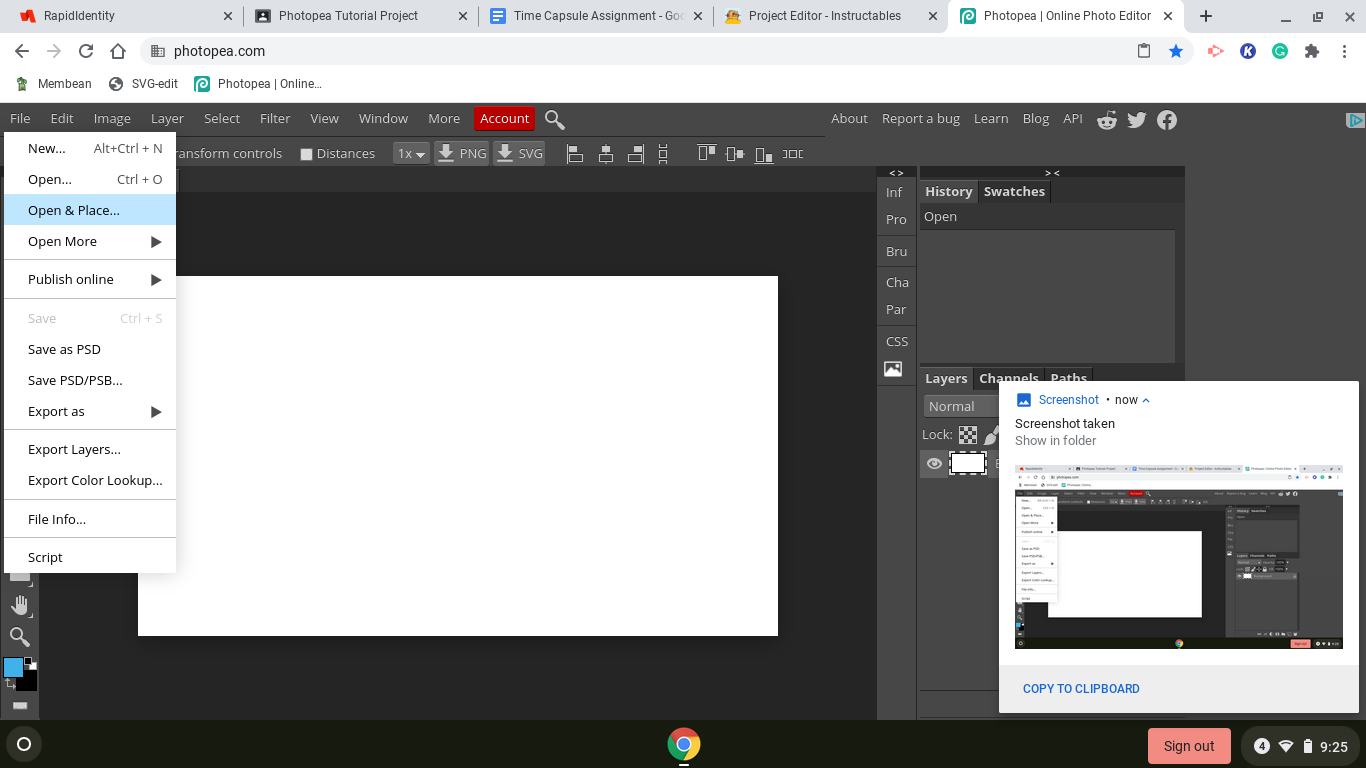
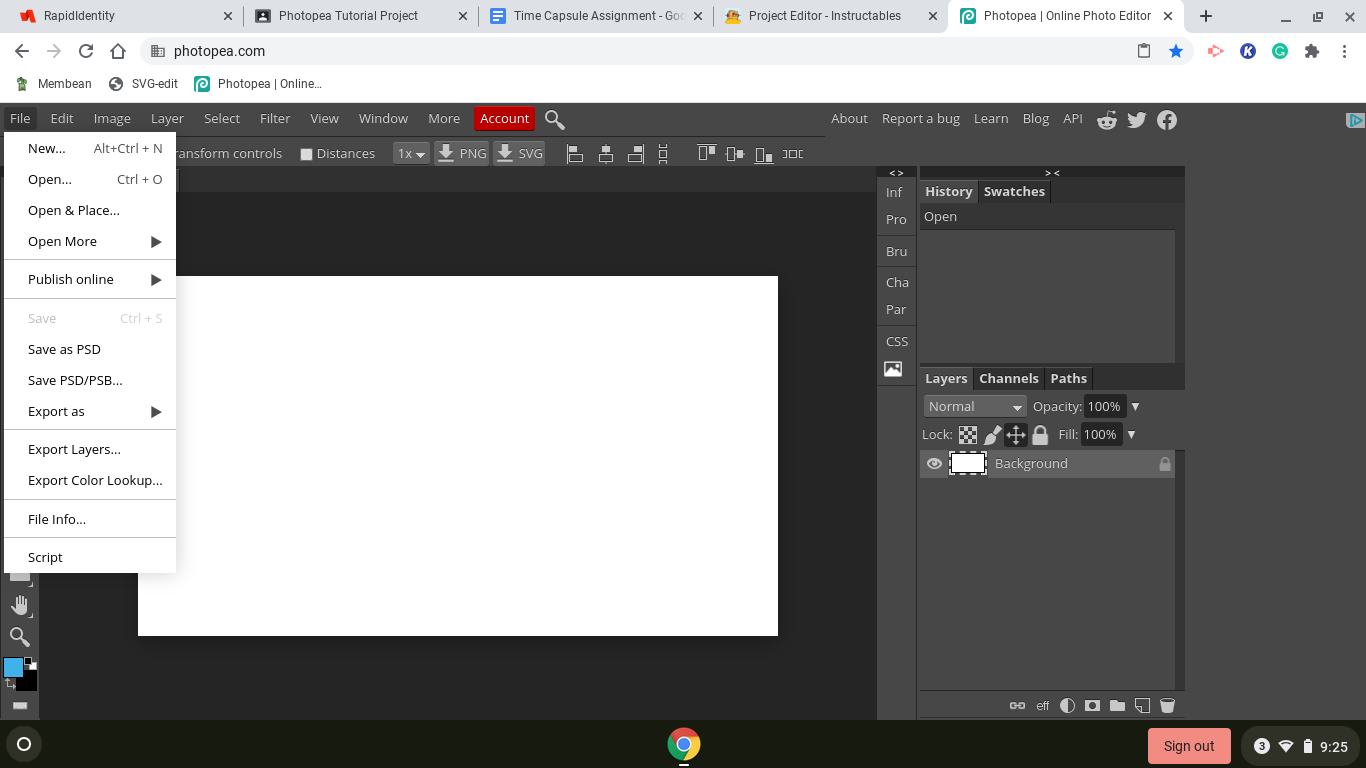
2. Select and upload the photo that you want to edit the background of. I just used a photo of me that has a plain white background to make it easier to see the difference
Cut Out Background of Photo
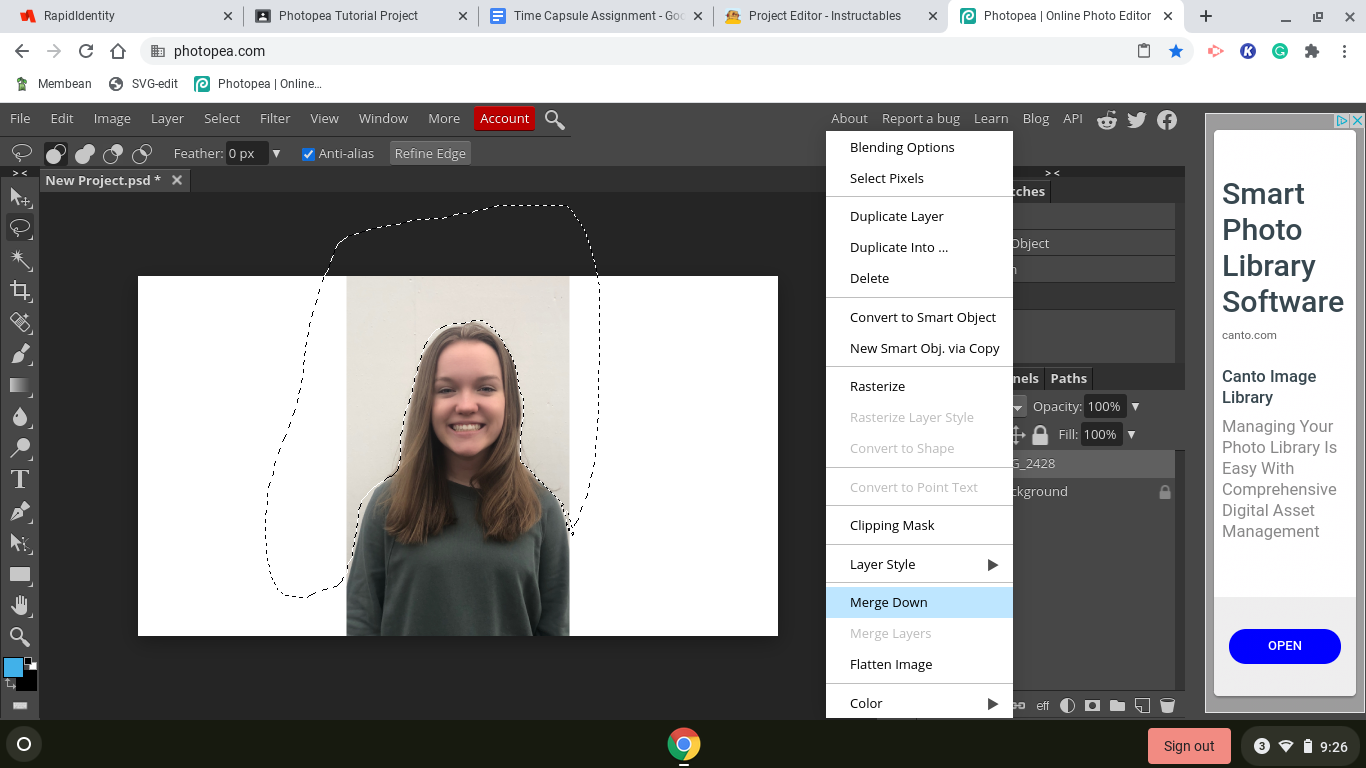
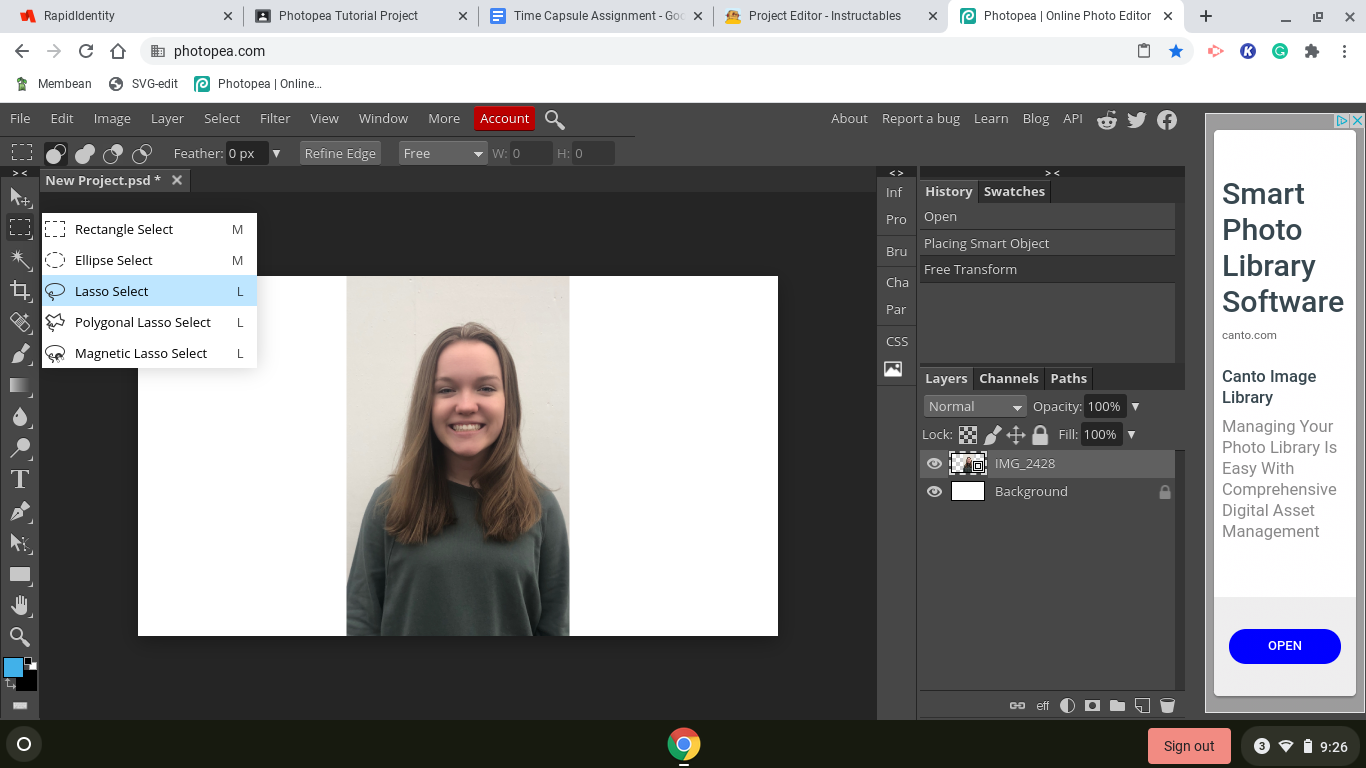
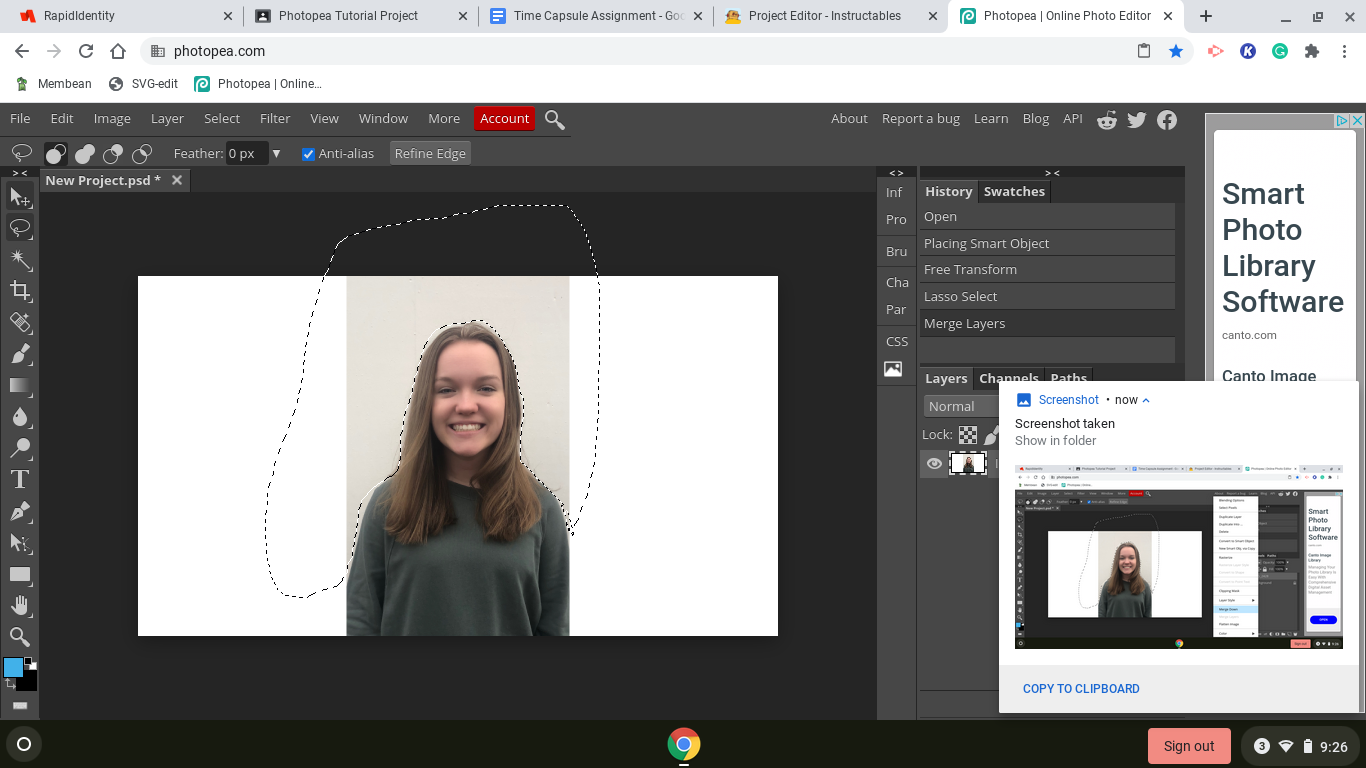
3. You want to use the lasso select tool to cut out around the section of the photo you want to stay and select the whole section you want to change.
Adjust Hue/Saturation Levels
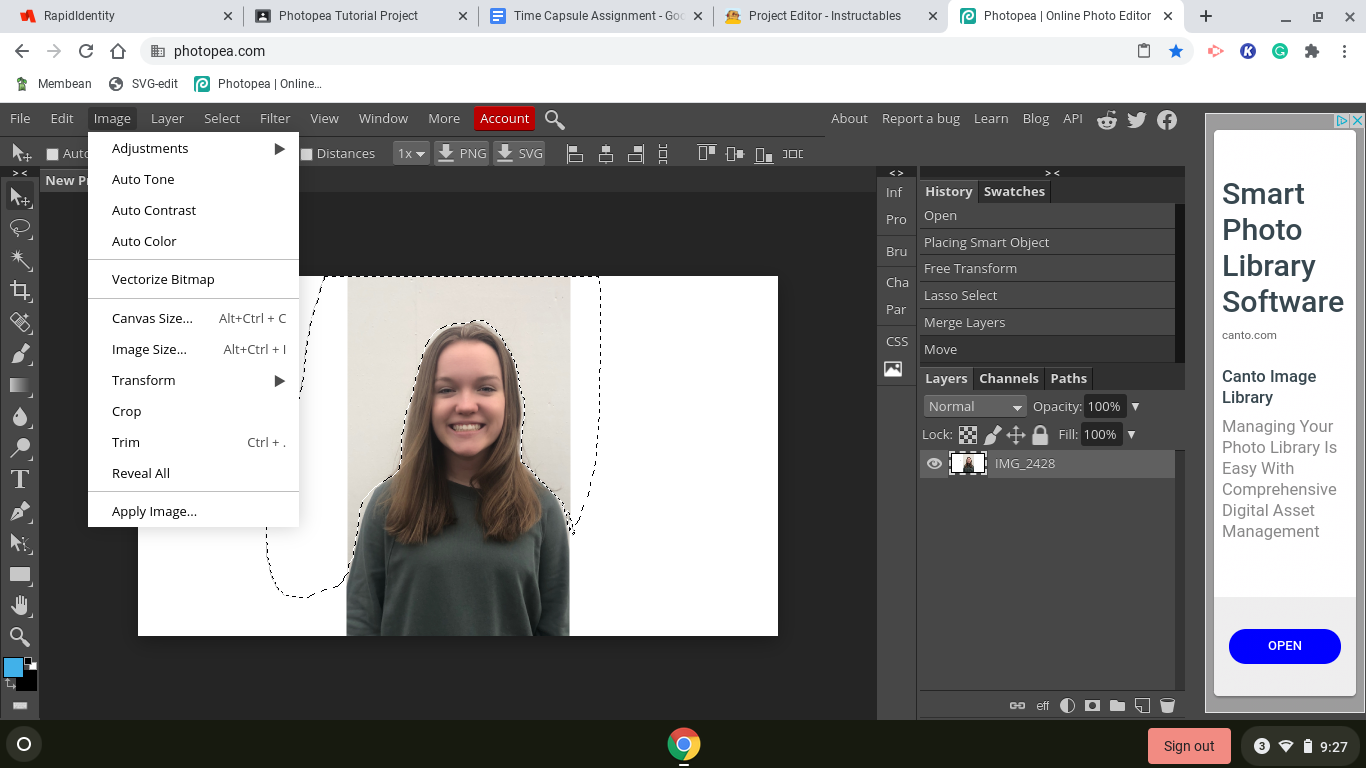
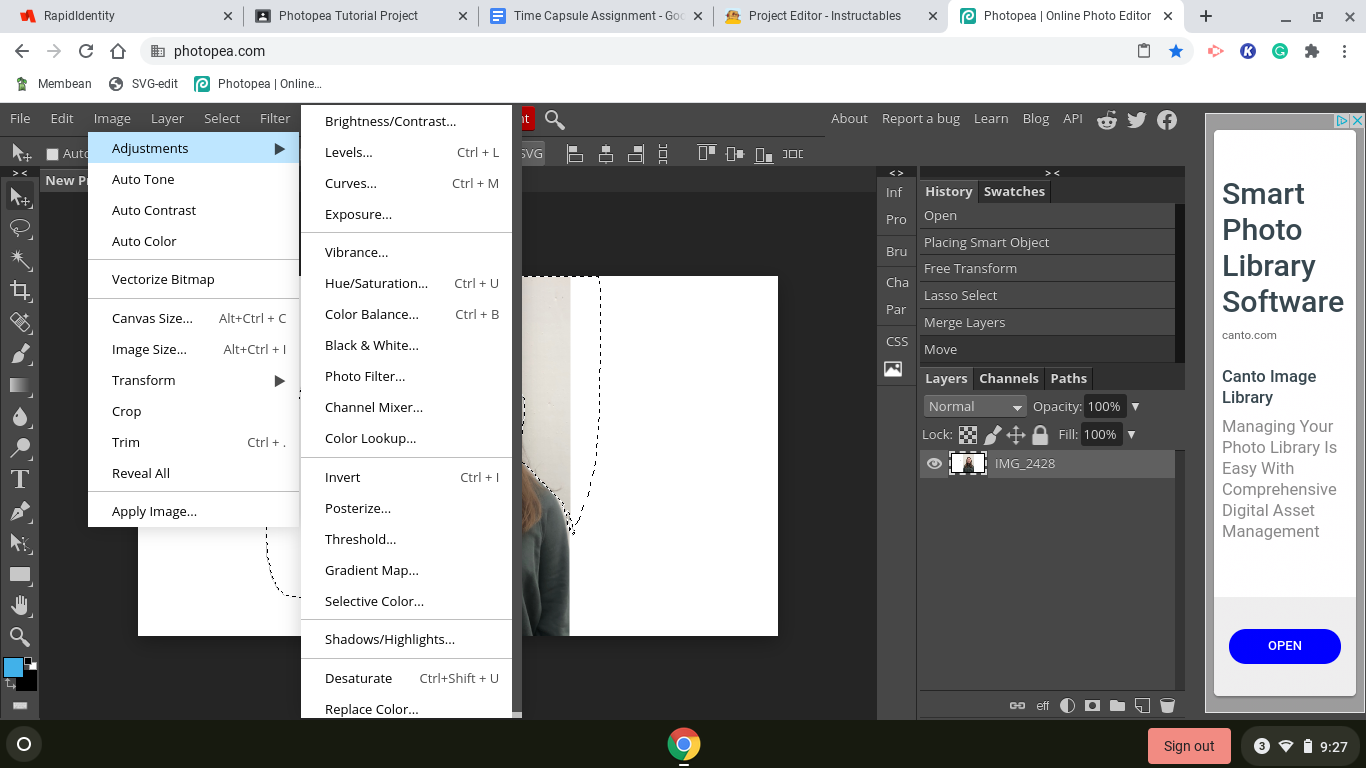
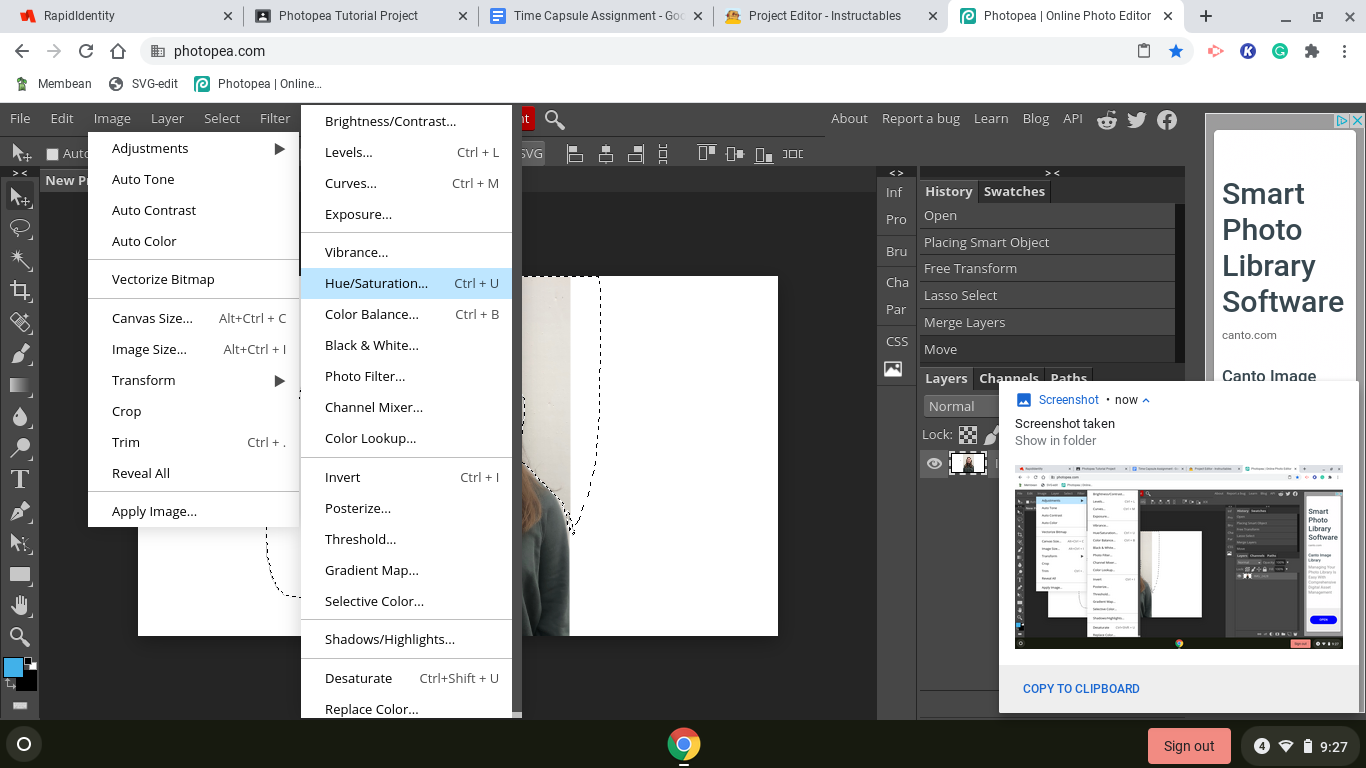
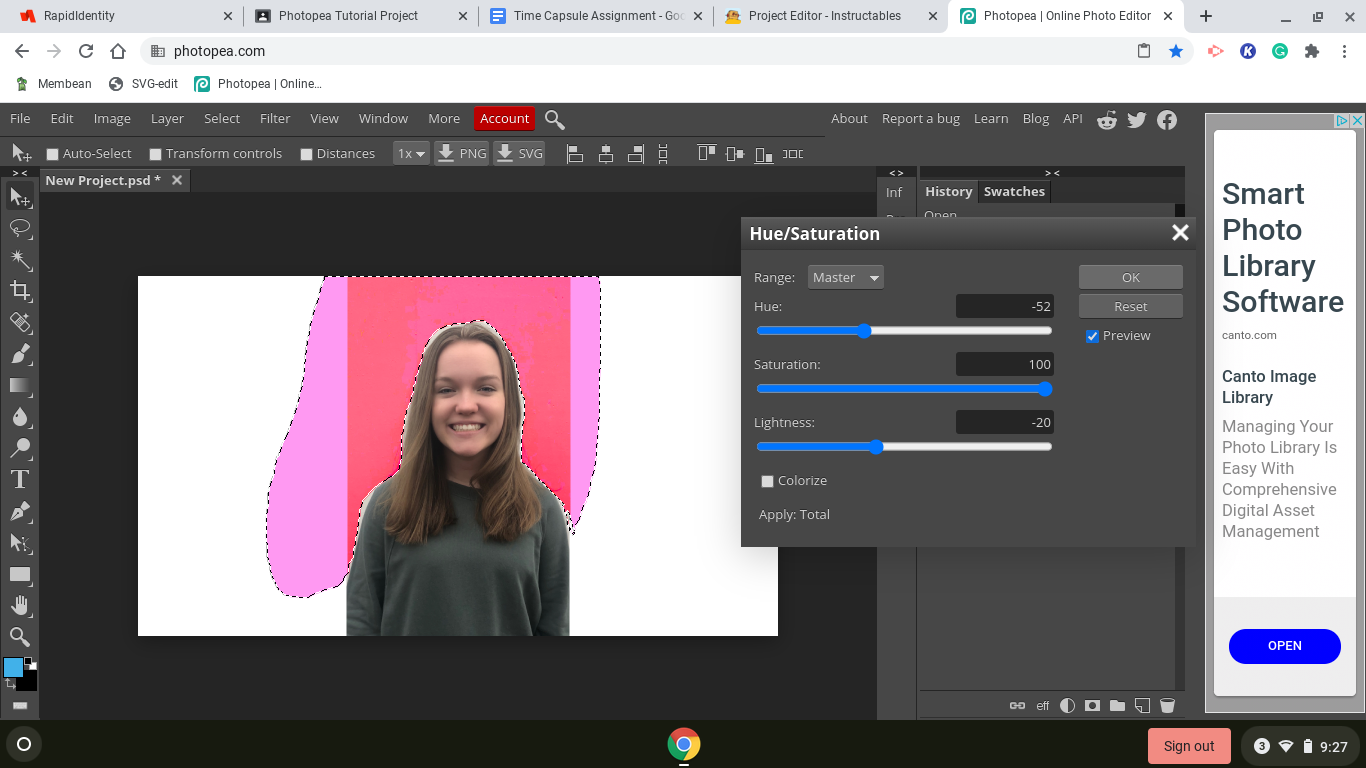
4. While you still have the background selected, you want to go to the Image section on the top of the screen and move your mouse down to where it says Adjustments and then scroll over to Hue and Saturation and adjust the levels. I adjusted mine to Hue -52, Saturation 100, and Lightness -20.
Adjust the Pixelation
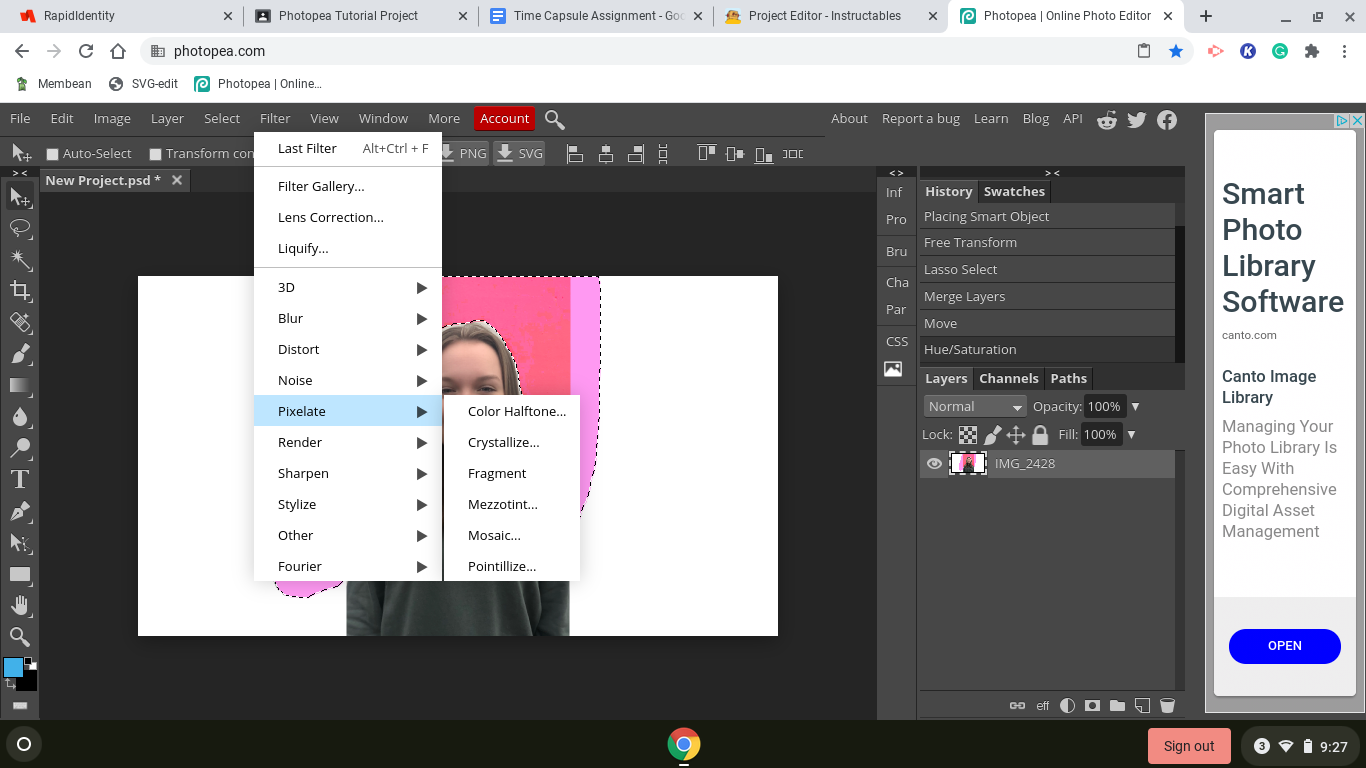
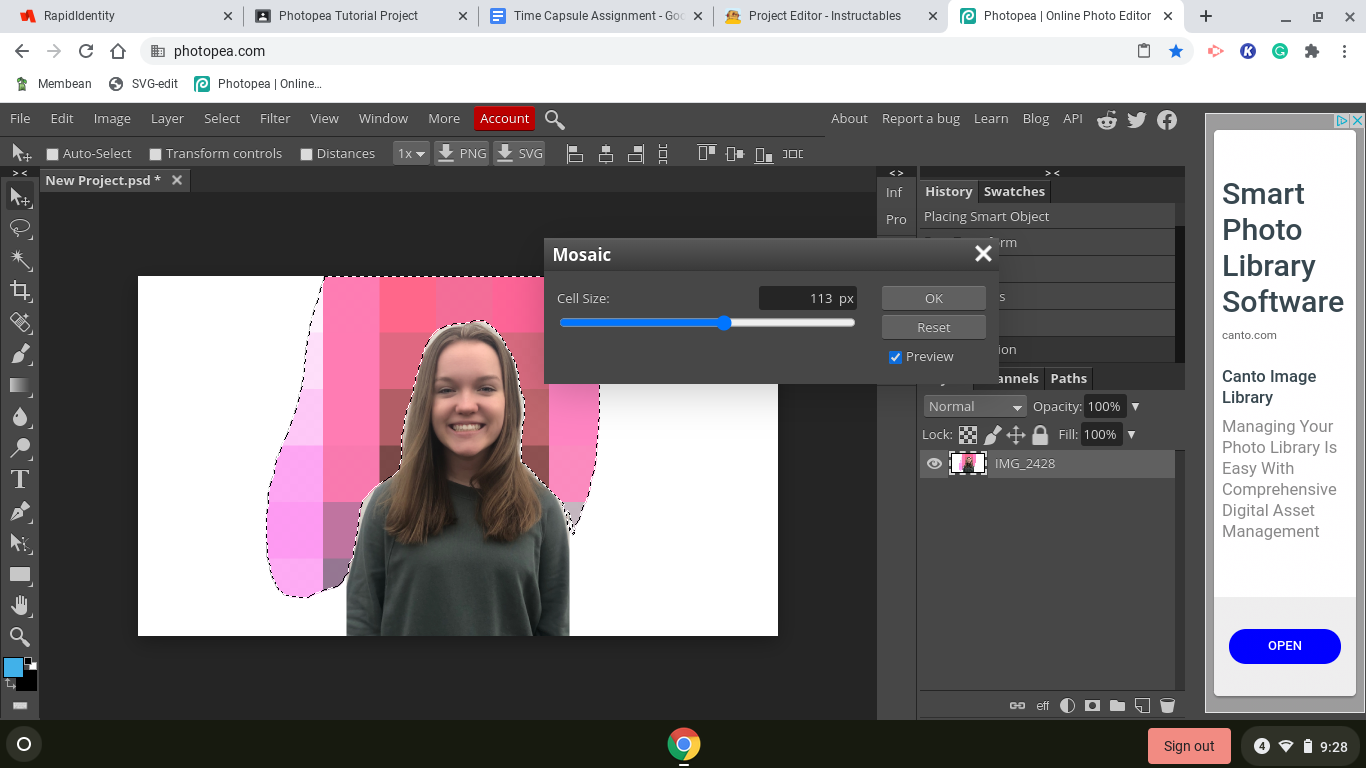
5. Go to filter on the top of the screen and select it. Then select Pixelate and Mosaic. I adjusted the mosaic pixel amount to 113px
Crop and Download
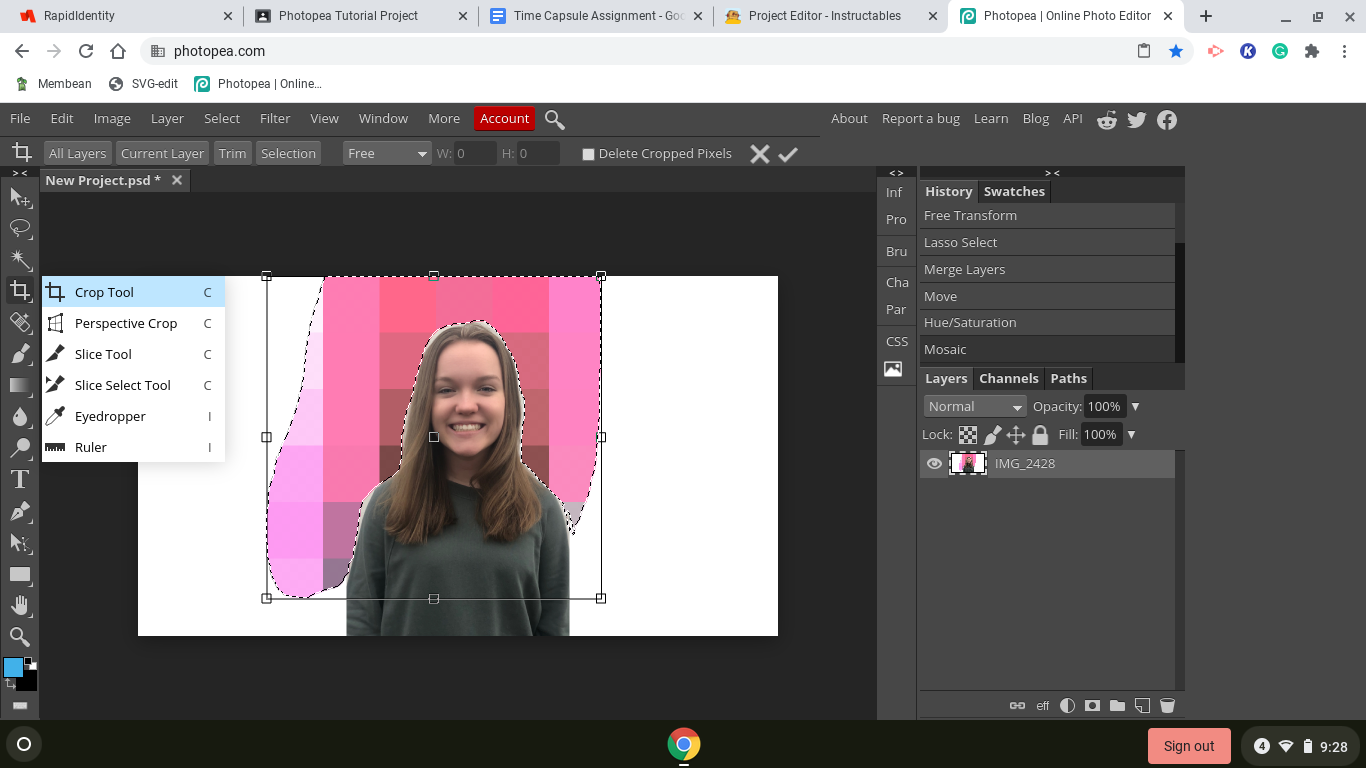
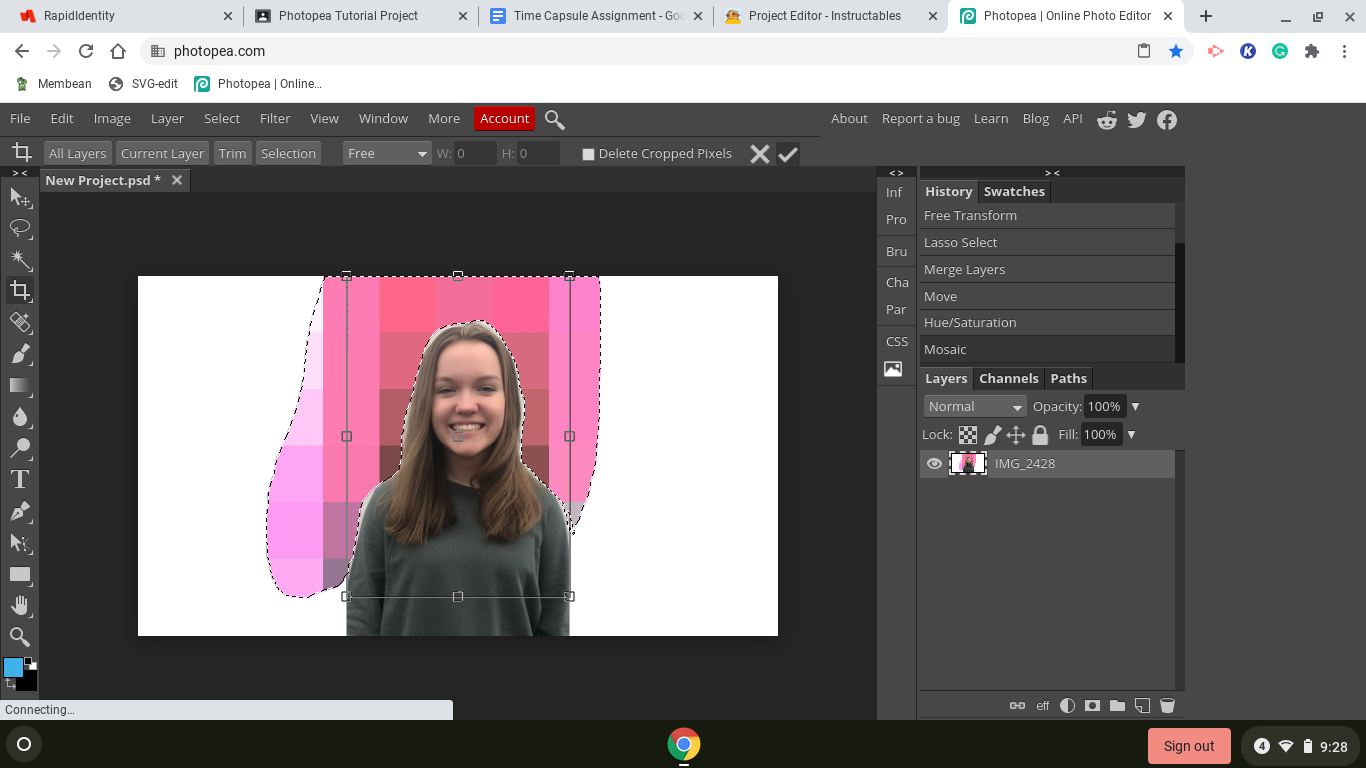
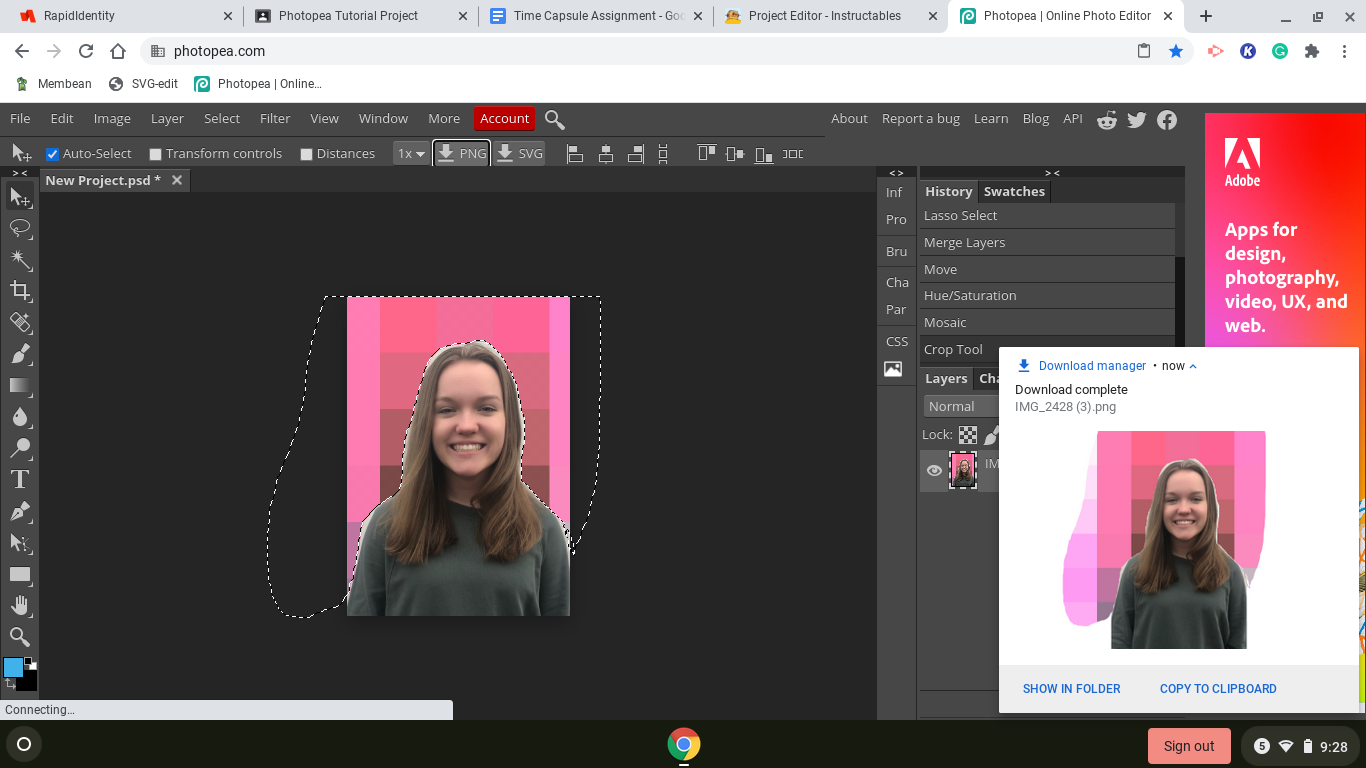
6. If you wish to crop your photo as I did then you can go to the crop tool on the sidebar and adjust to the levels you want and when finished click the checkmark on the top of the screen. After that, you will click back onto the regular mouse on the side which is the first option on the sidebar, and then click PNG and download your photo to upload wherever you want!