How to Edit a Video Using Adobe Premiere Pro on a Mac
by JacindaA in Design > Video Editing
1110 Views, 0 Favorites, 0 Comments
How to Edit a Video Using Adobe Premiere Pro on a Mac
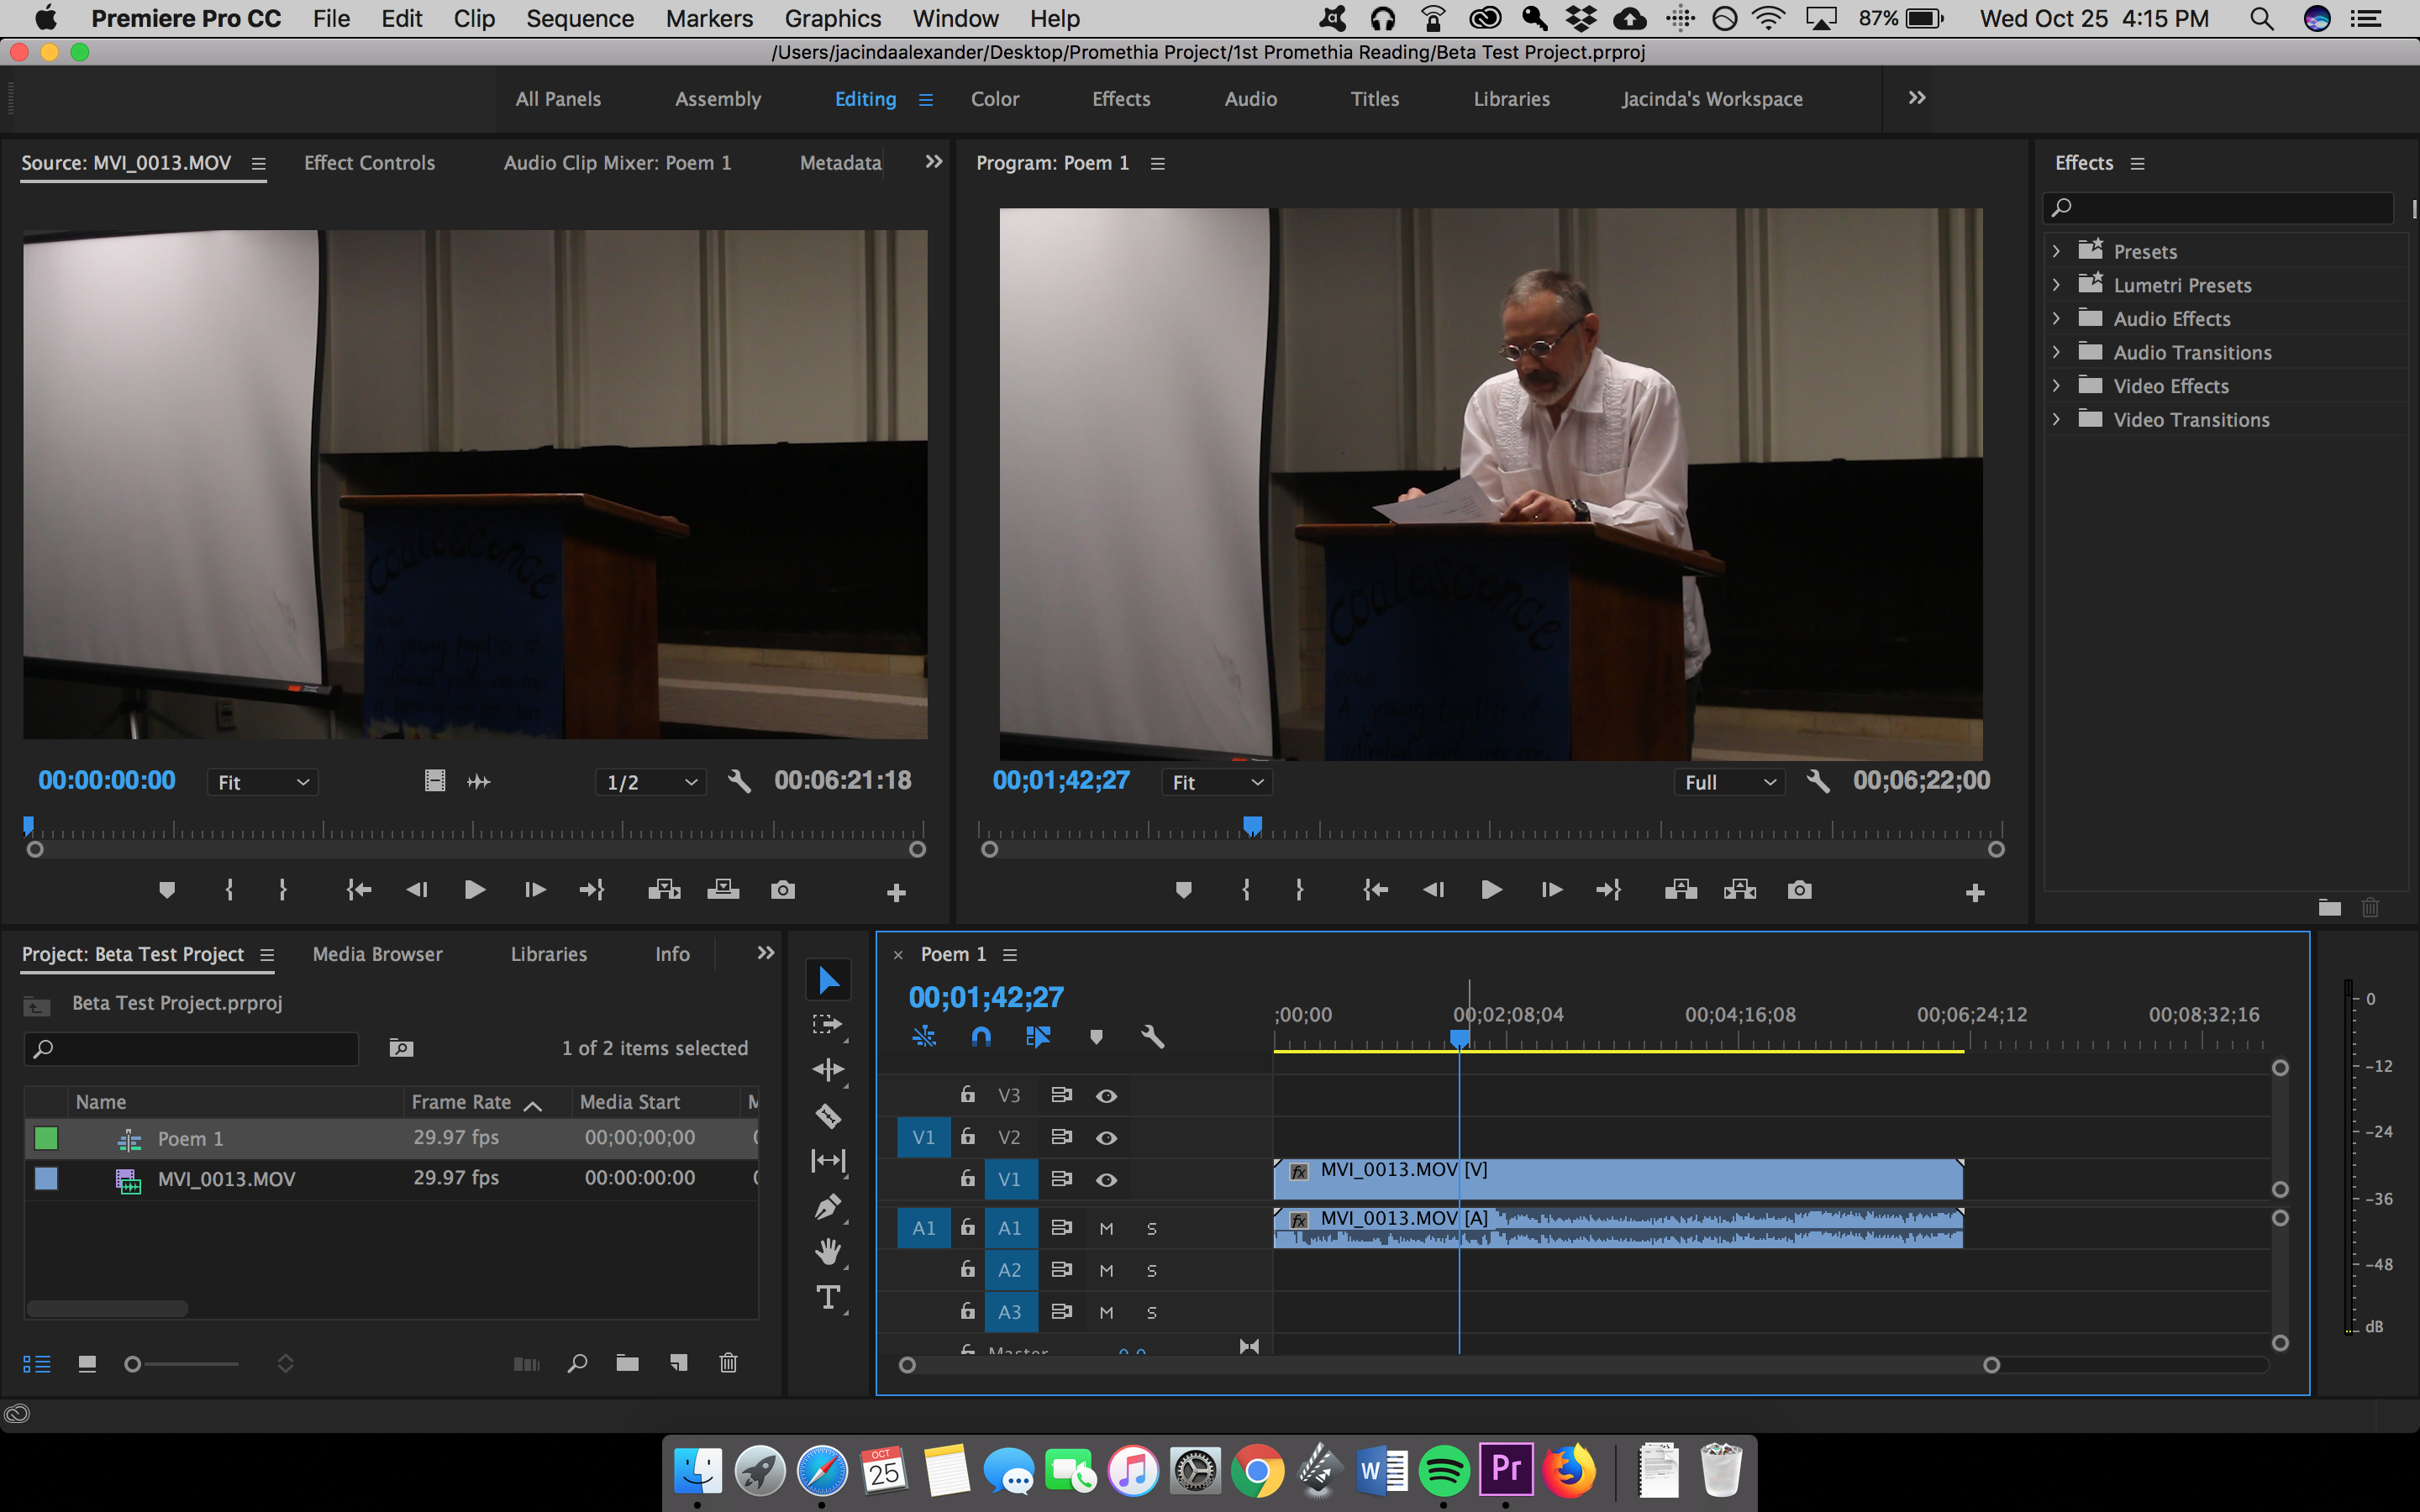
Intro: Want to learn how to edit a video with an easy to use yet professional software? Look no further than Adobe Premiere Pro. With it, you can create a simple slideshow or a complex show film and everything in between. Learn about the basics in order to explore the other technical aspects of it and expand your creative side.
What do you need?
A computer
Adobe Premiere Pro
Storage device (SD card, flash drive, hard drive)
Disclaimer: If you don't have the program downloaded, just go to the website www.adobe.com and download the software. There's a 14-day free trial. If you want to keep it software, you can get a photography subscription or a full Creative Adobe Cloud subscription. Be aware of the different prices for students/teachers or regular buyers.
Creating the Project
1. Turn on your computer
2. Load the Adobe Premiere Pro program
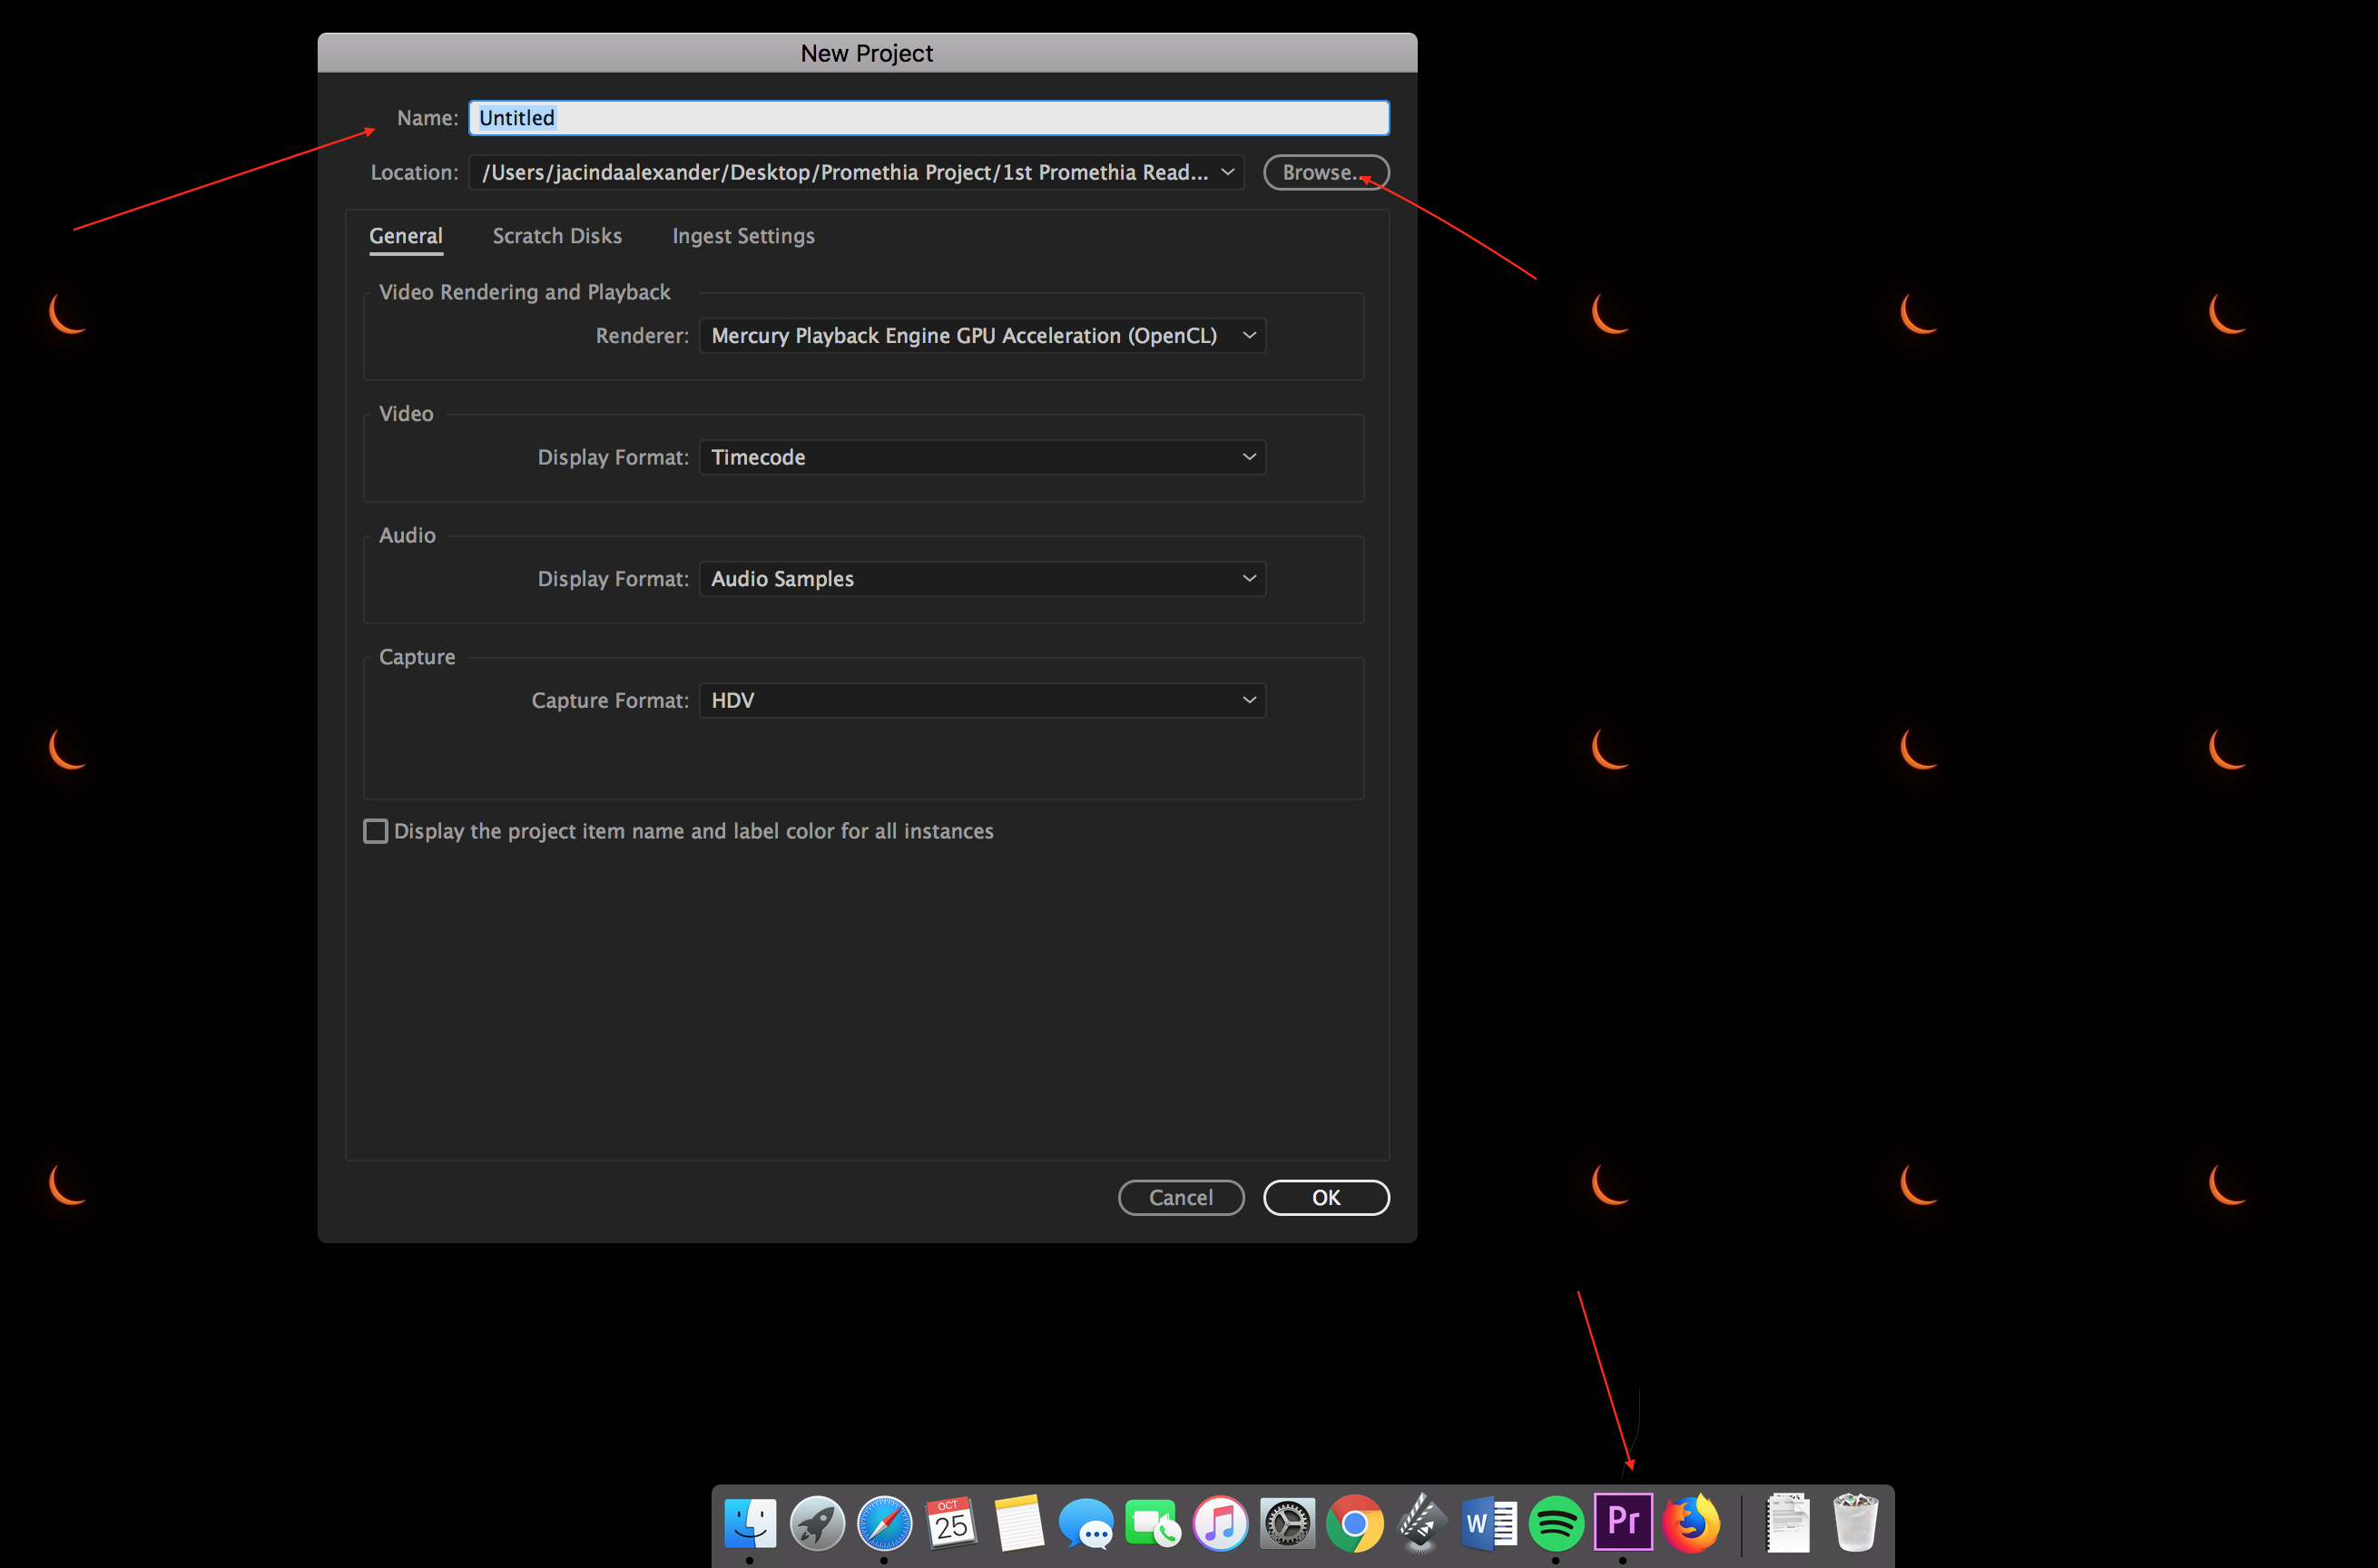
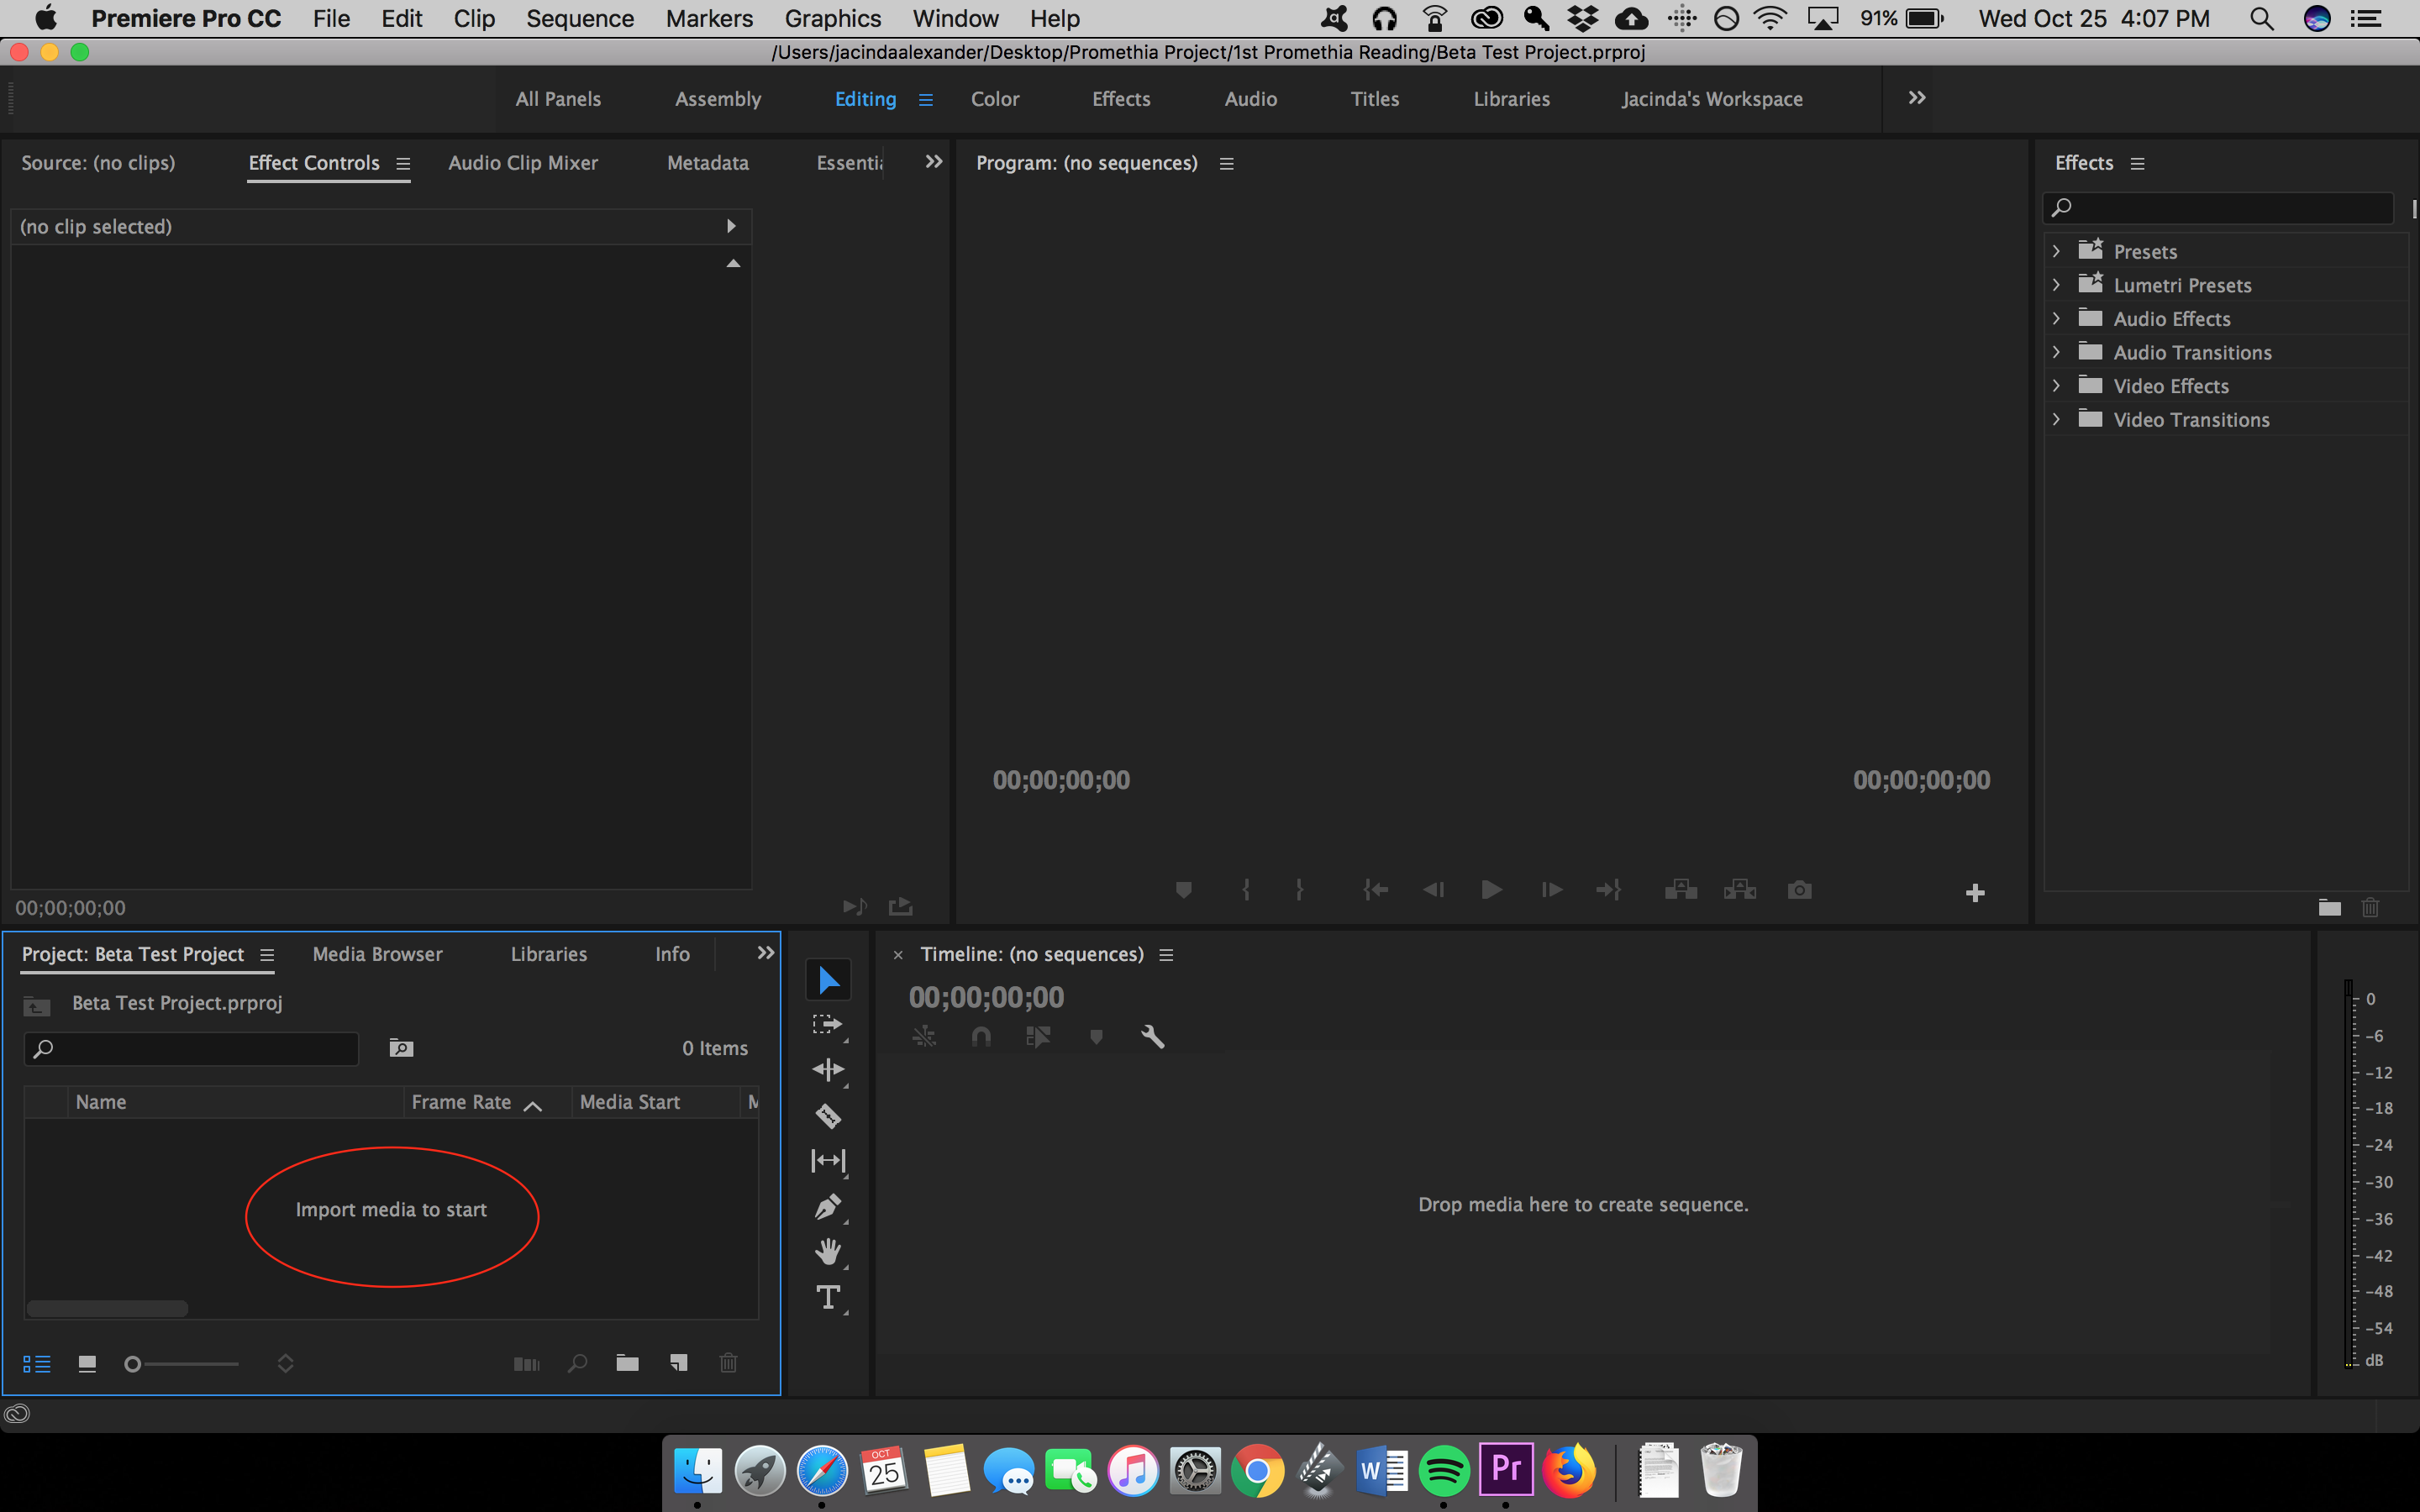
3. Create a new project and name it (Default pre-set is fine if you don’t know your camera settings. If you do, select the appropriate preset)
*3.1 Save your project under a folder in your computer or storage device.
Create a Sequence
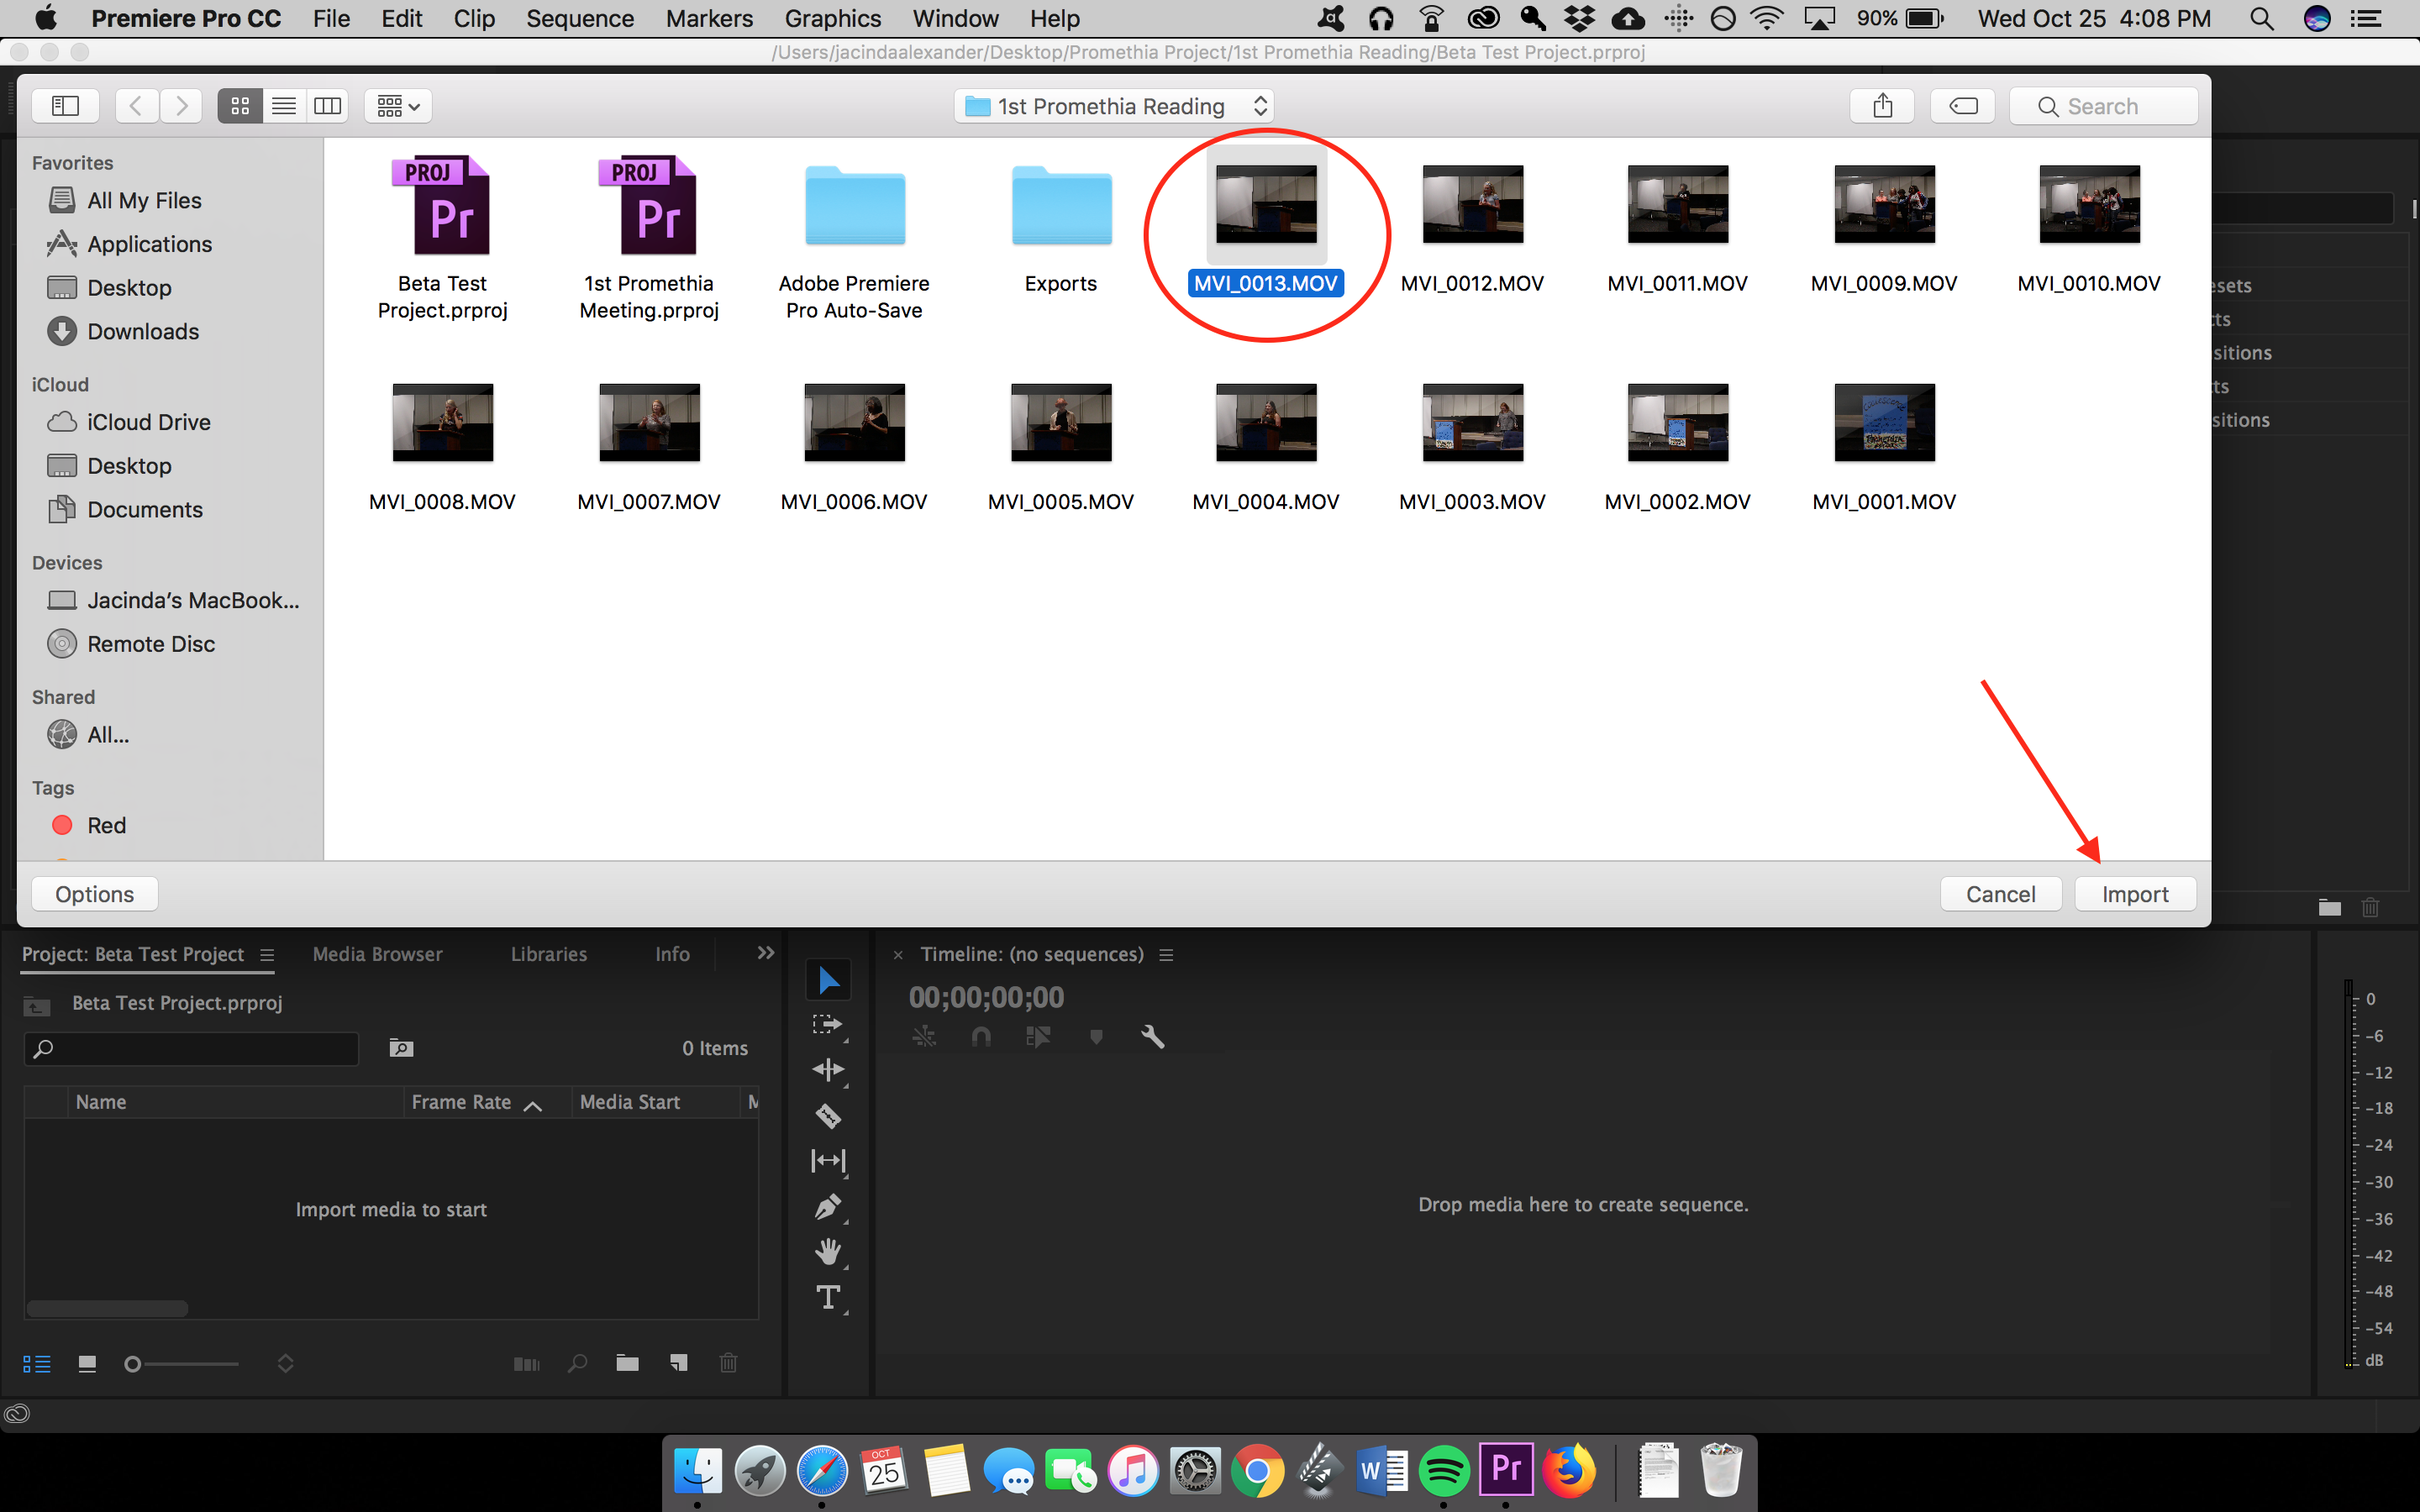
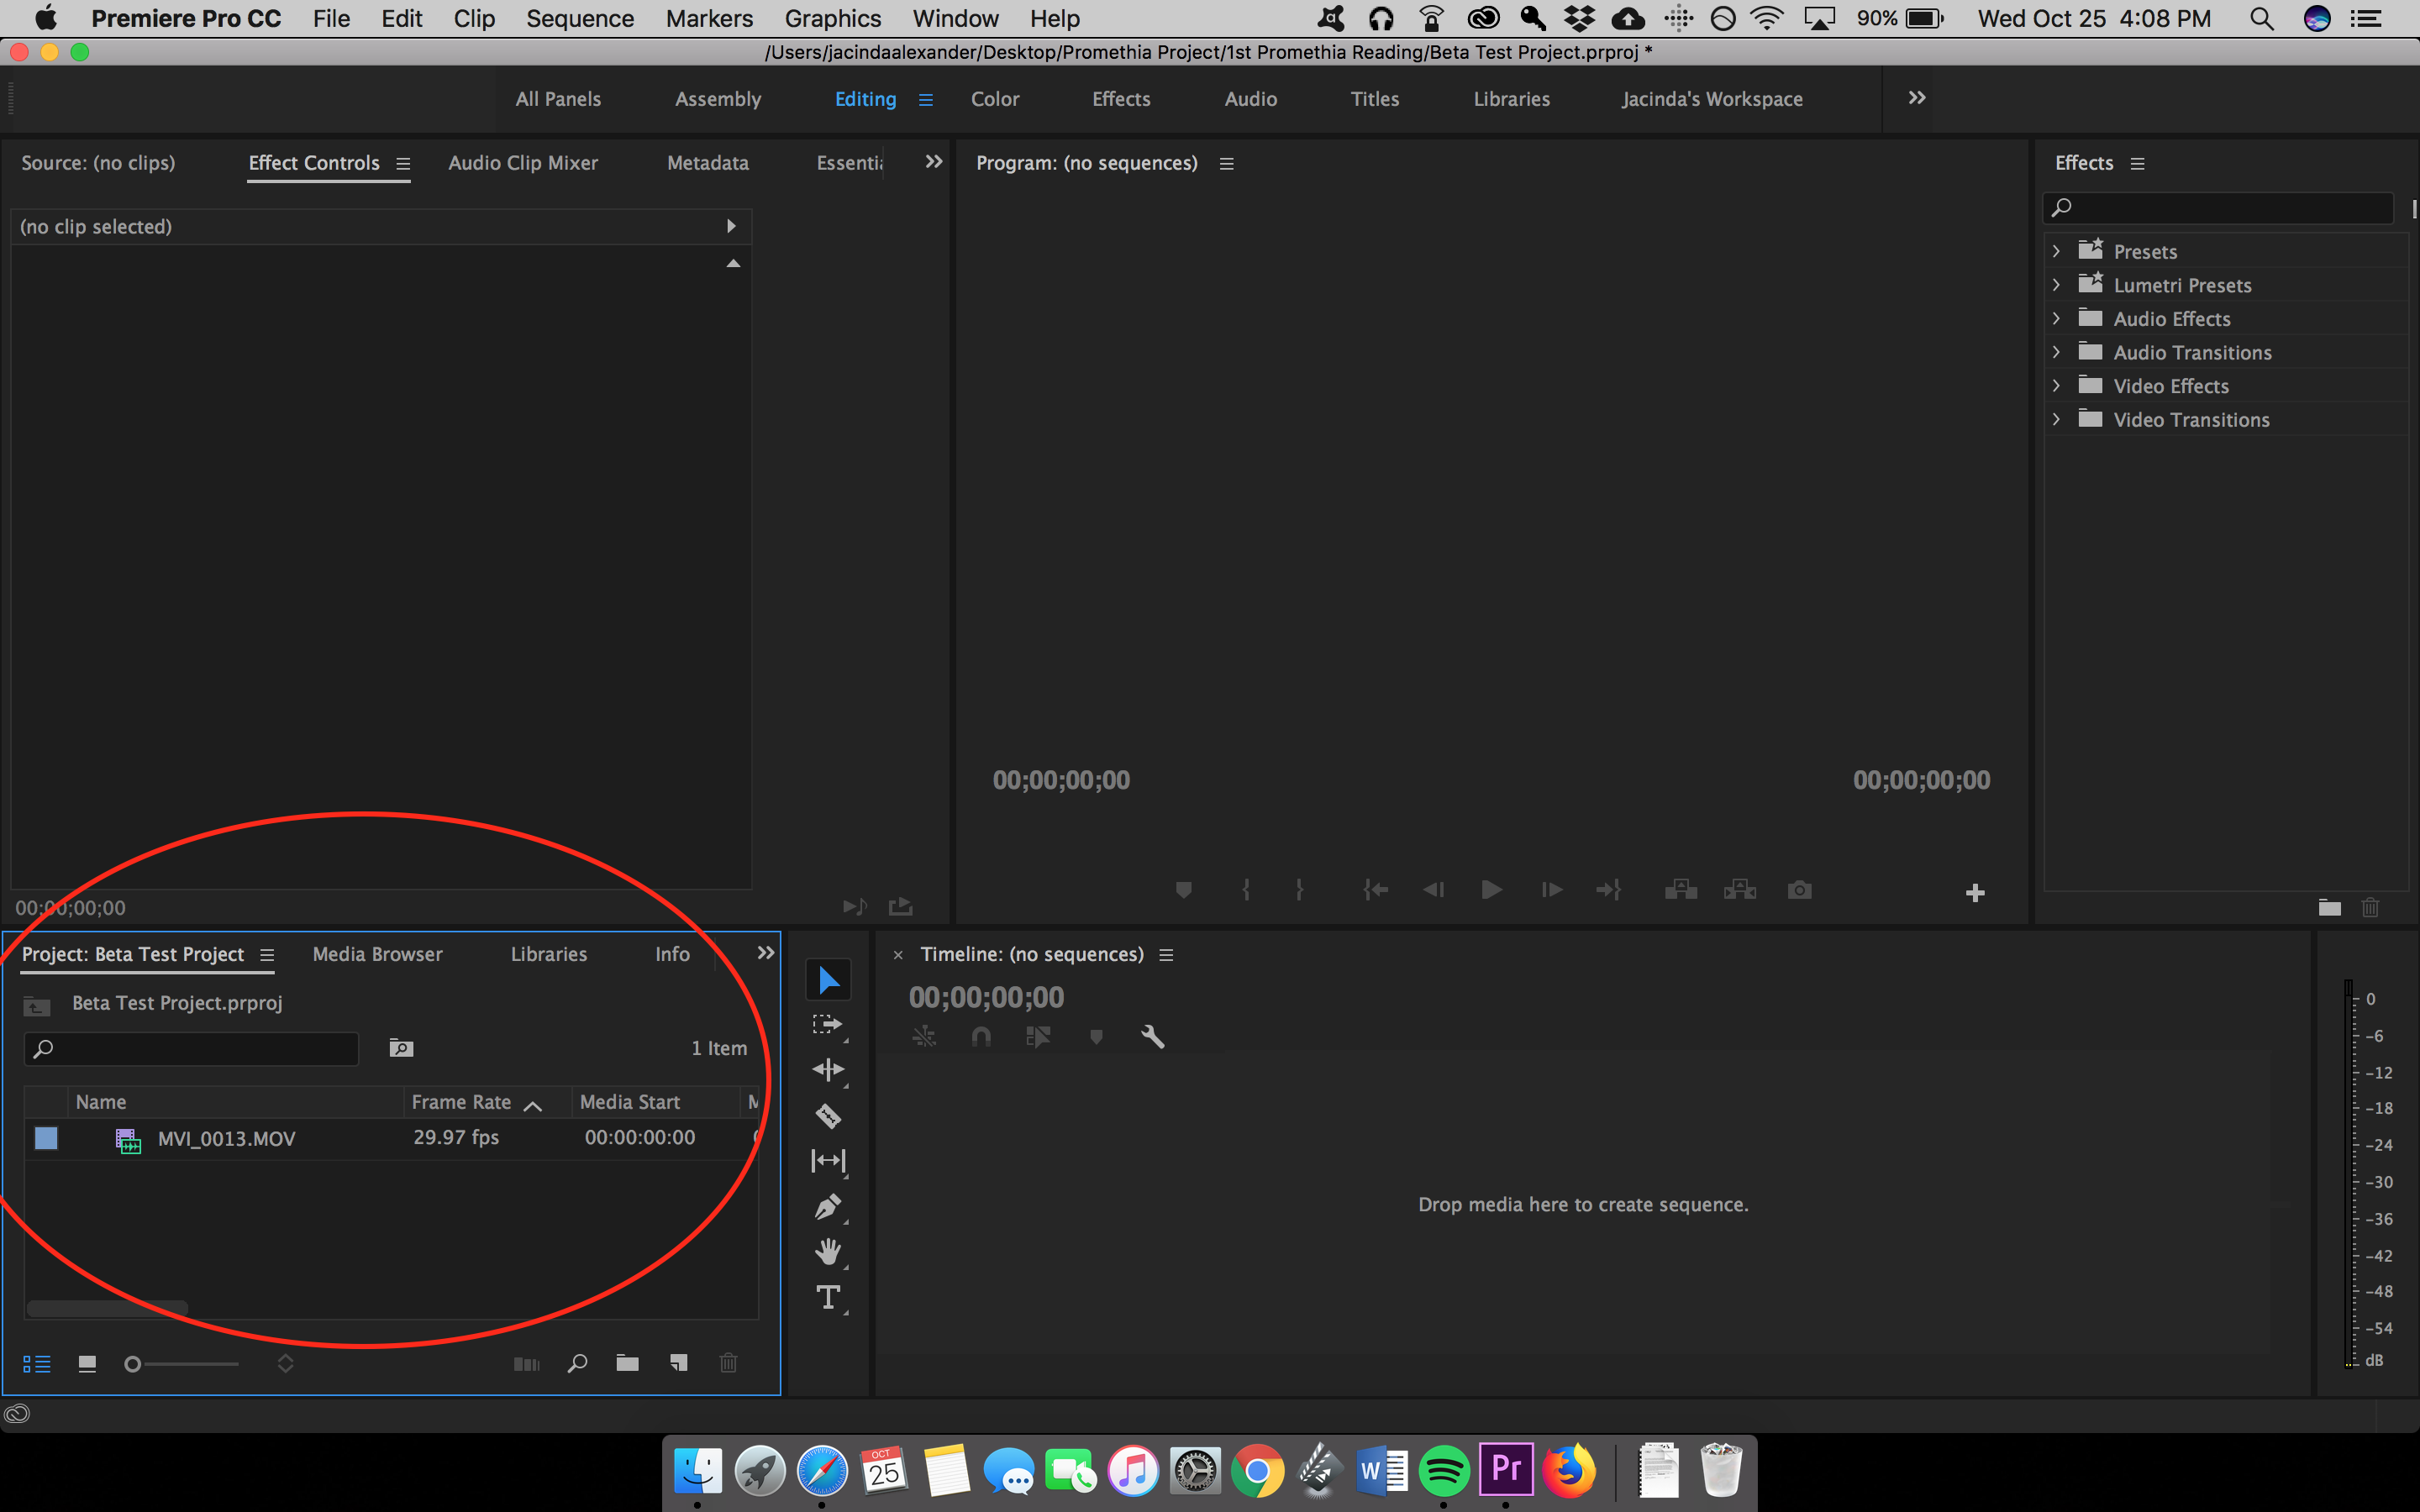
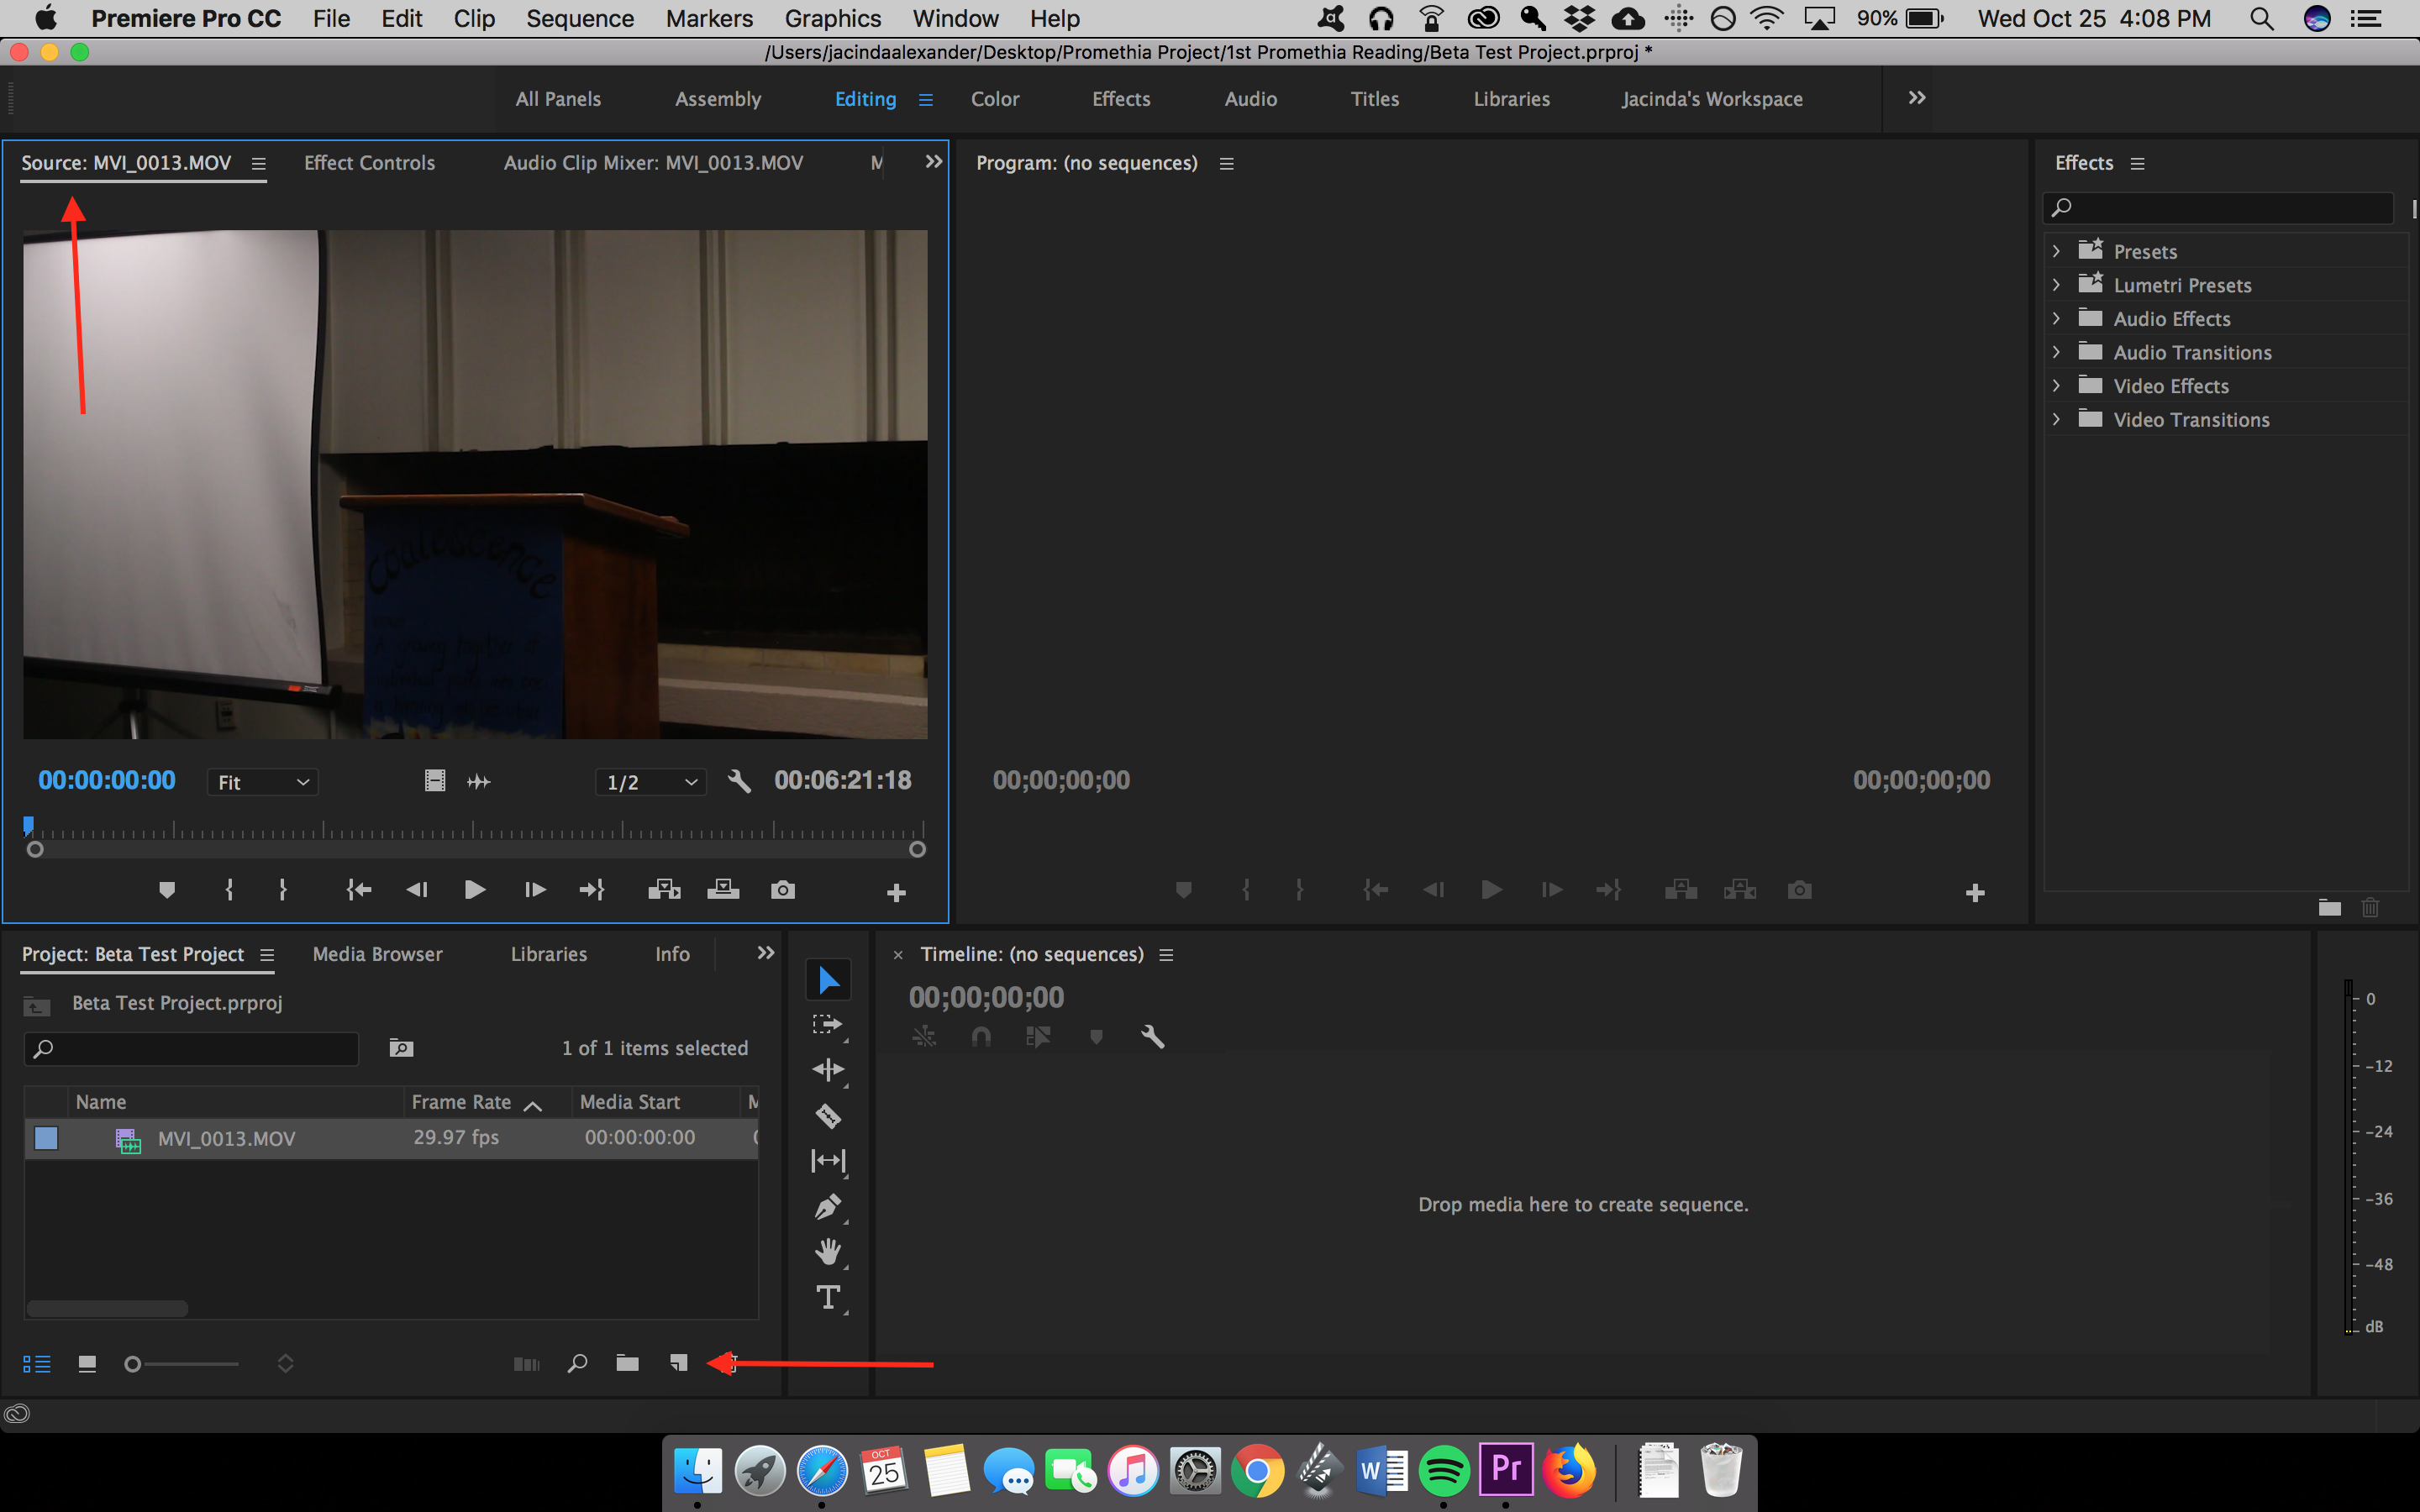
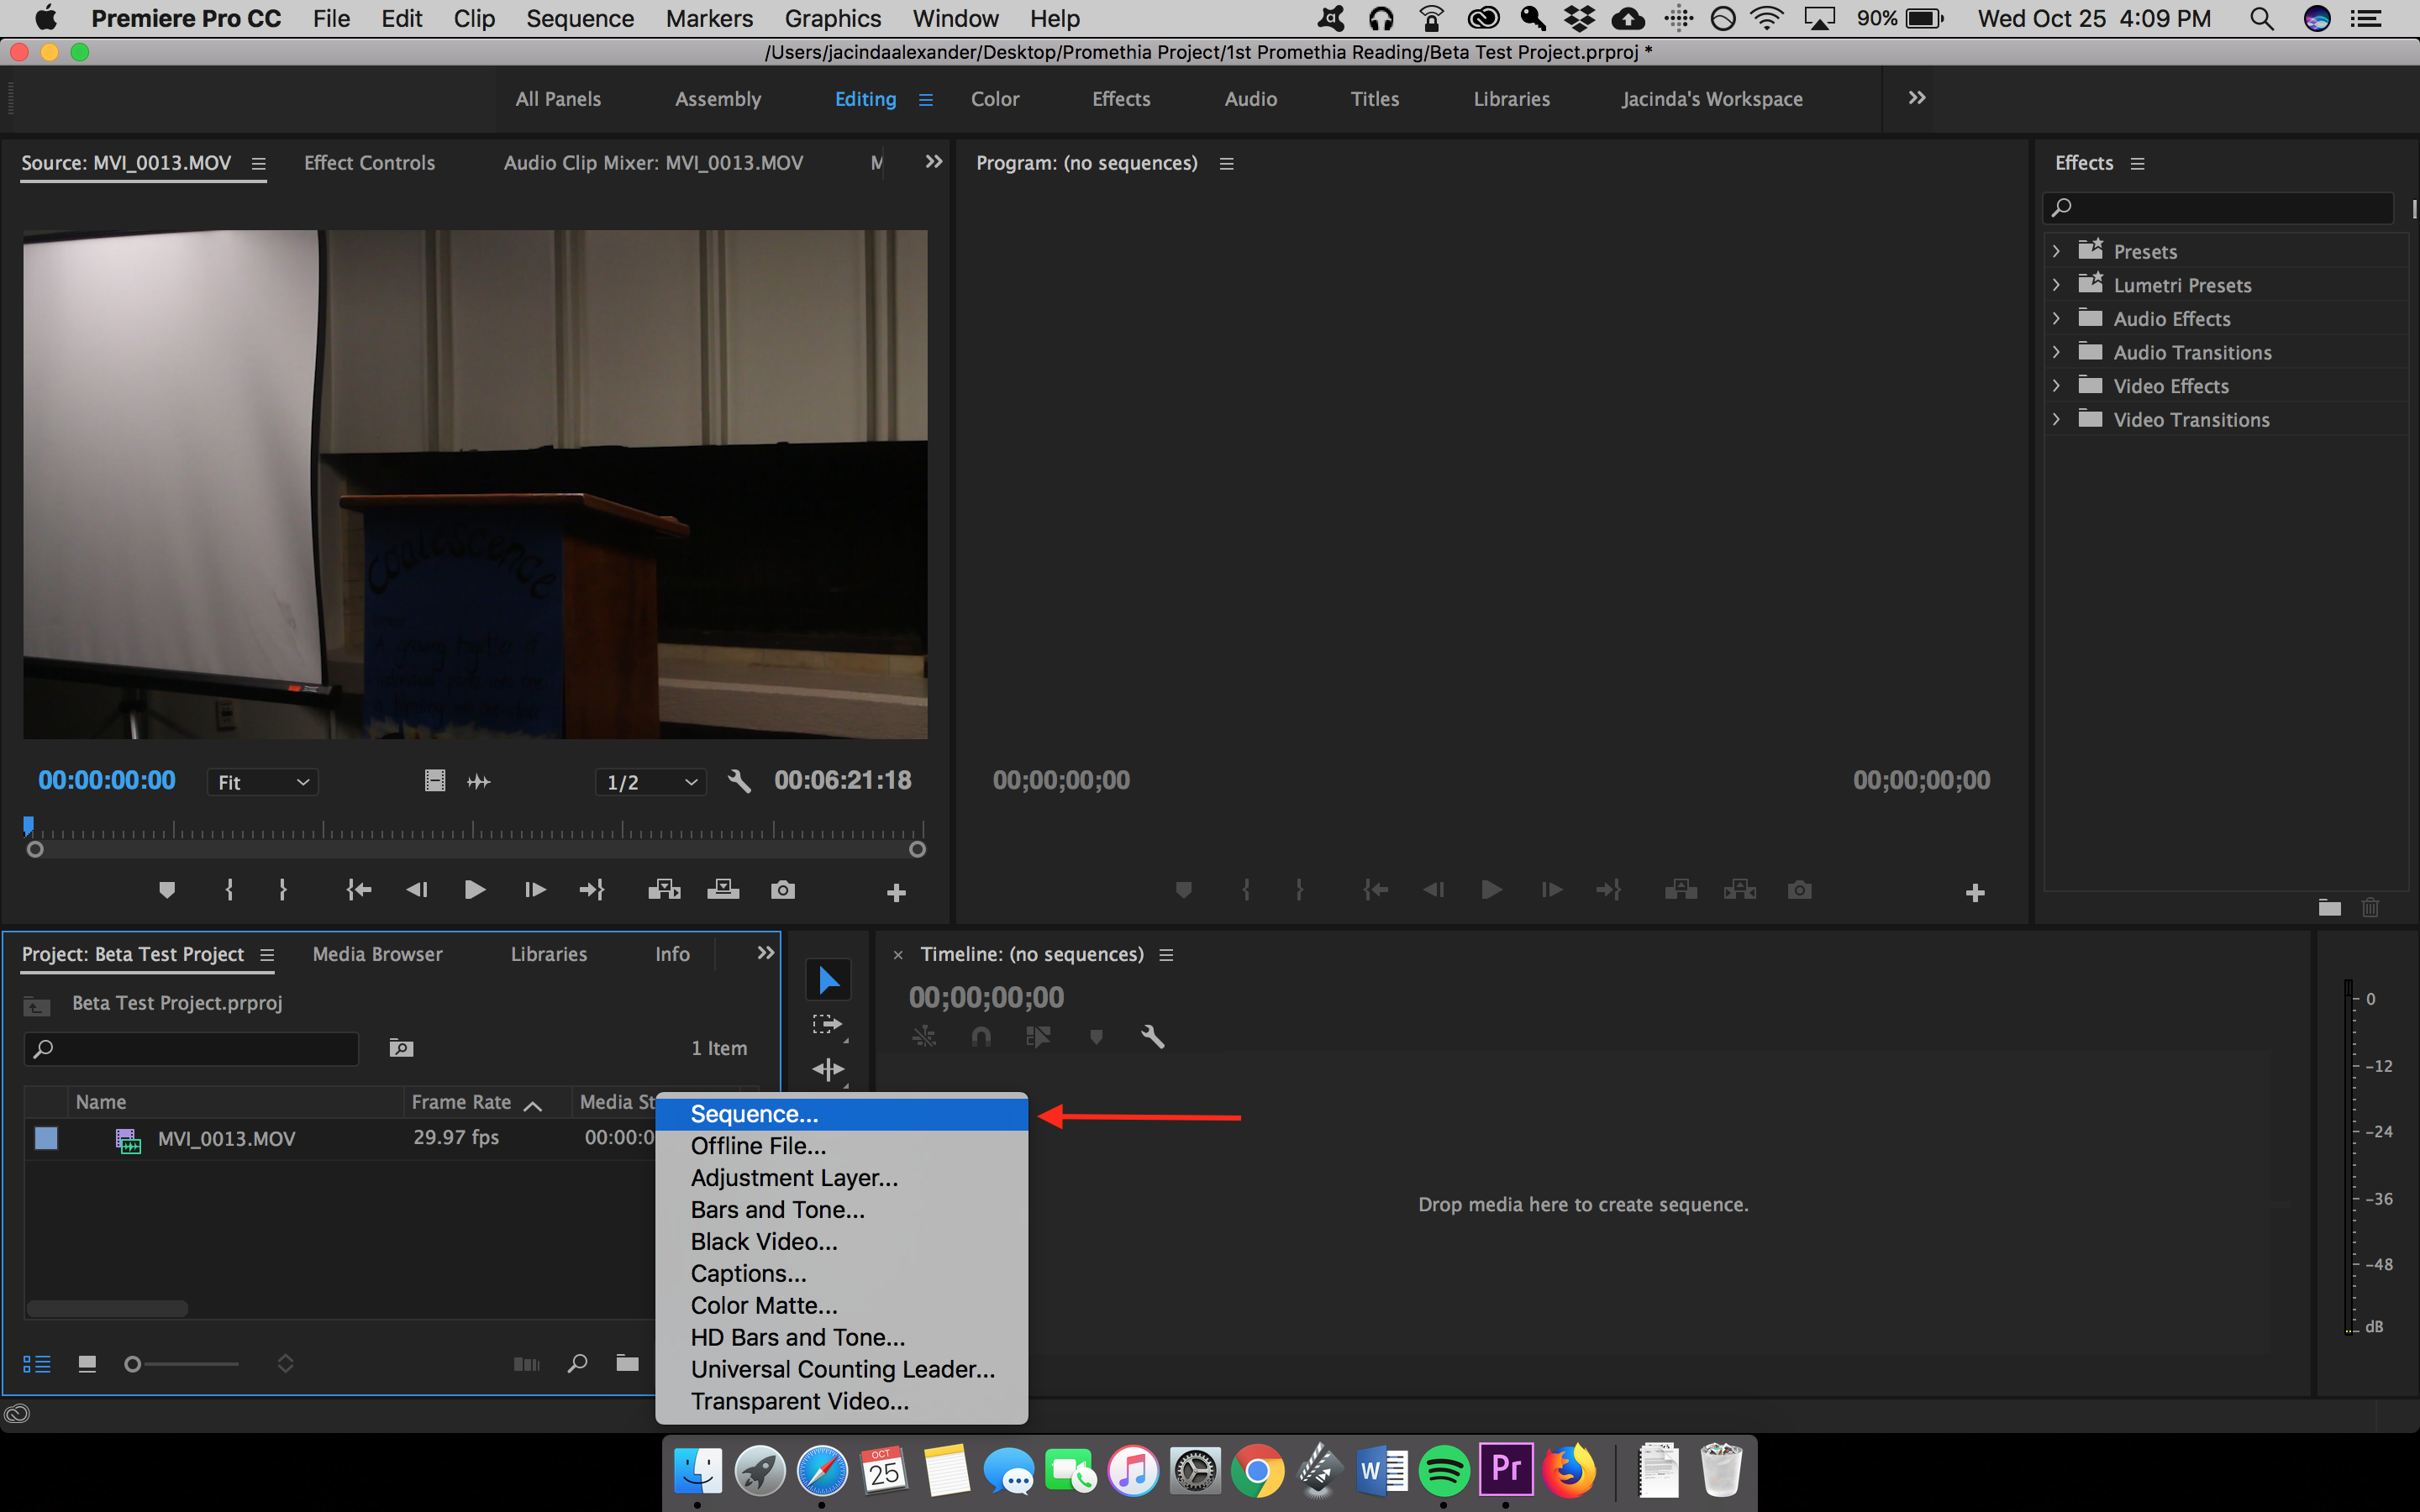
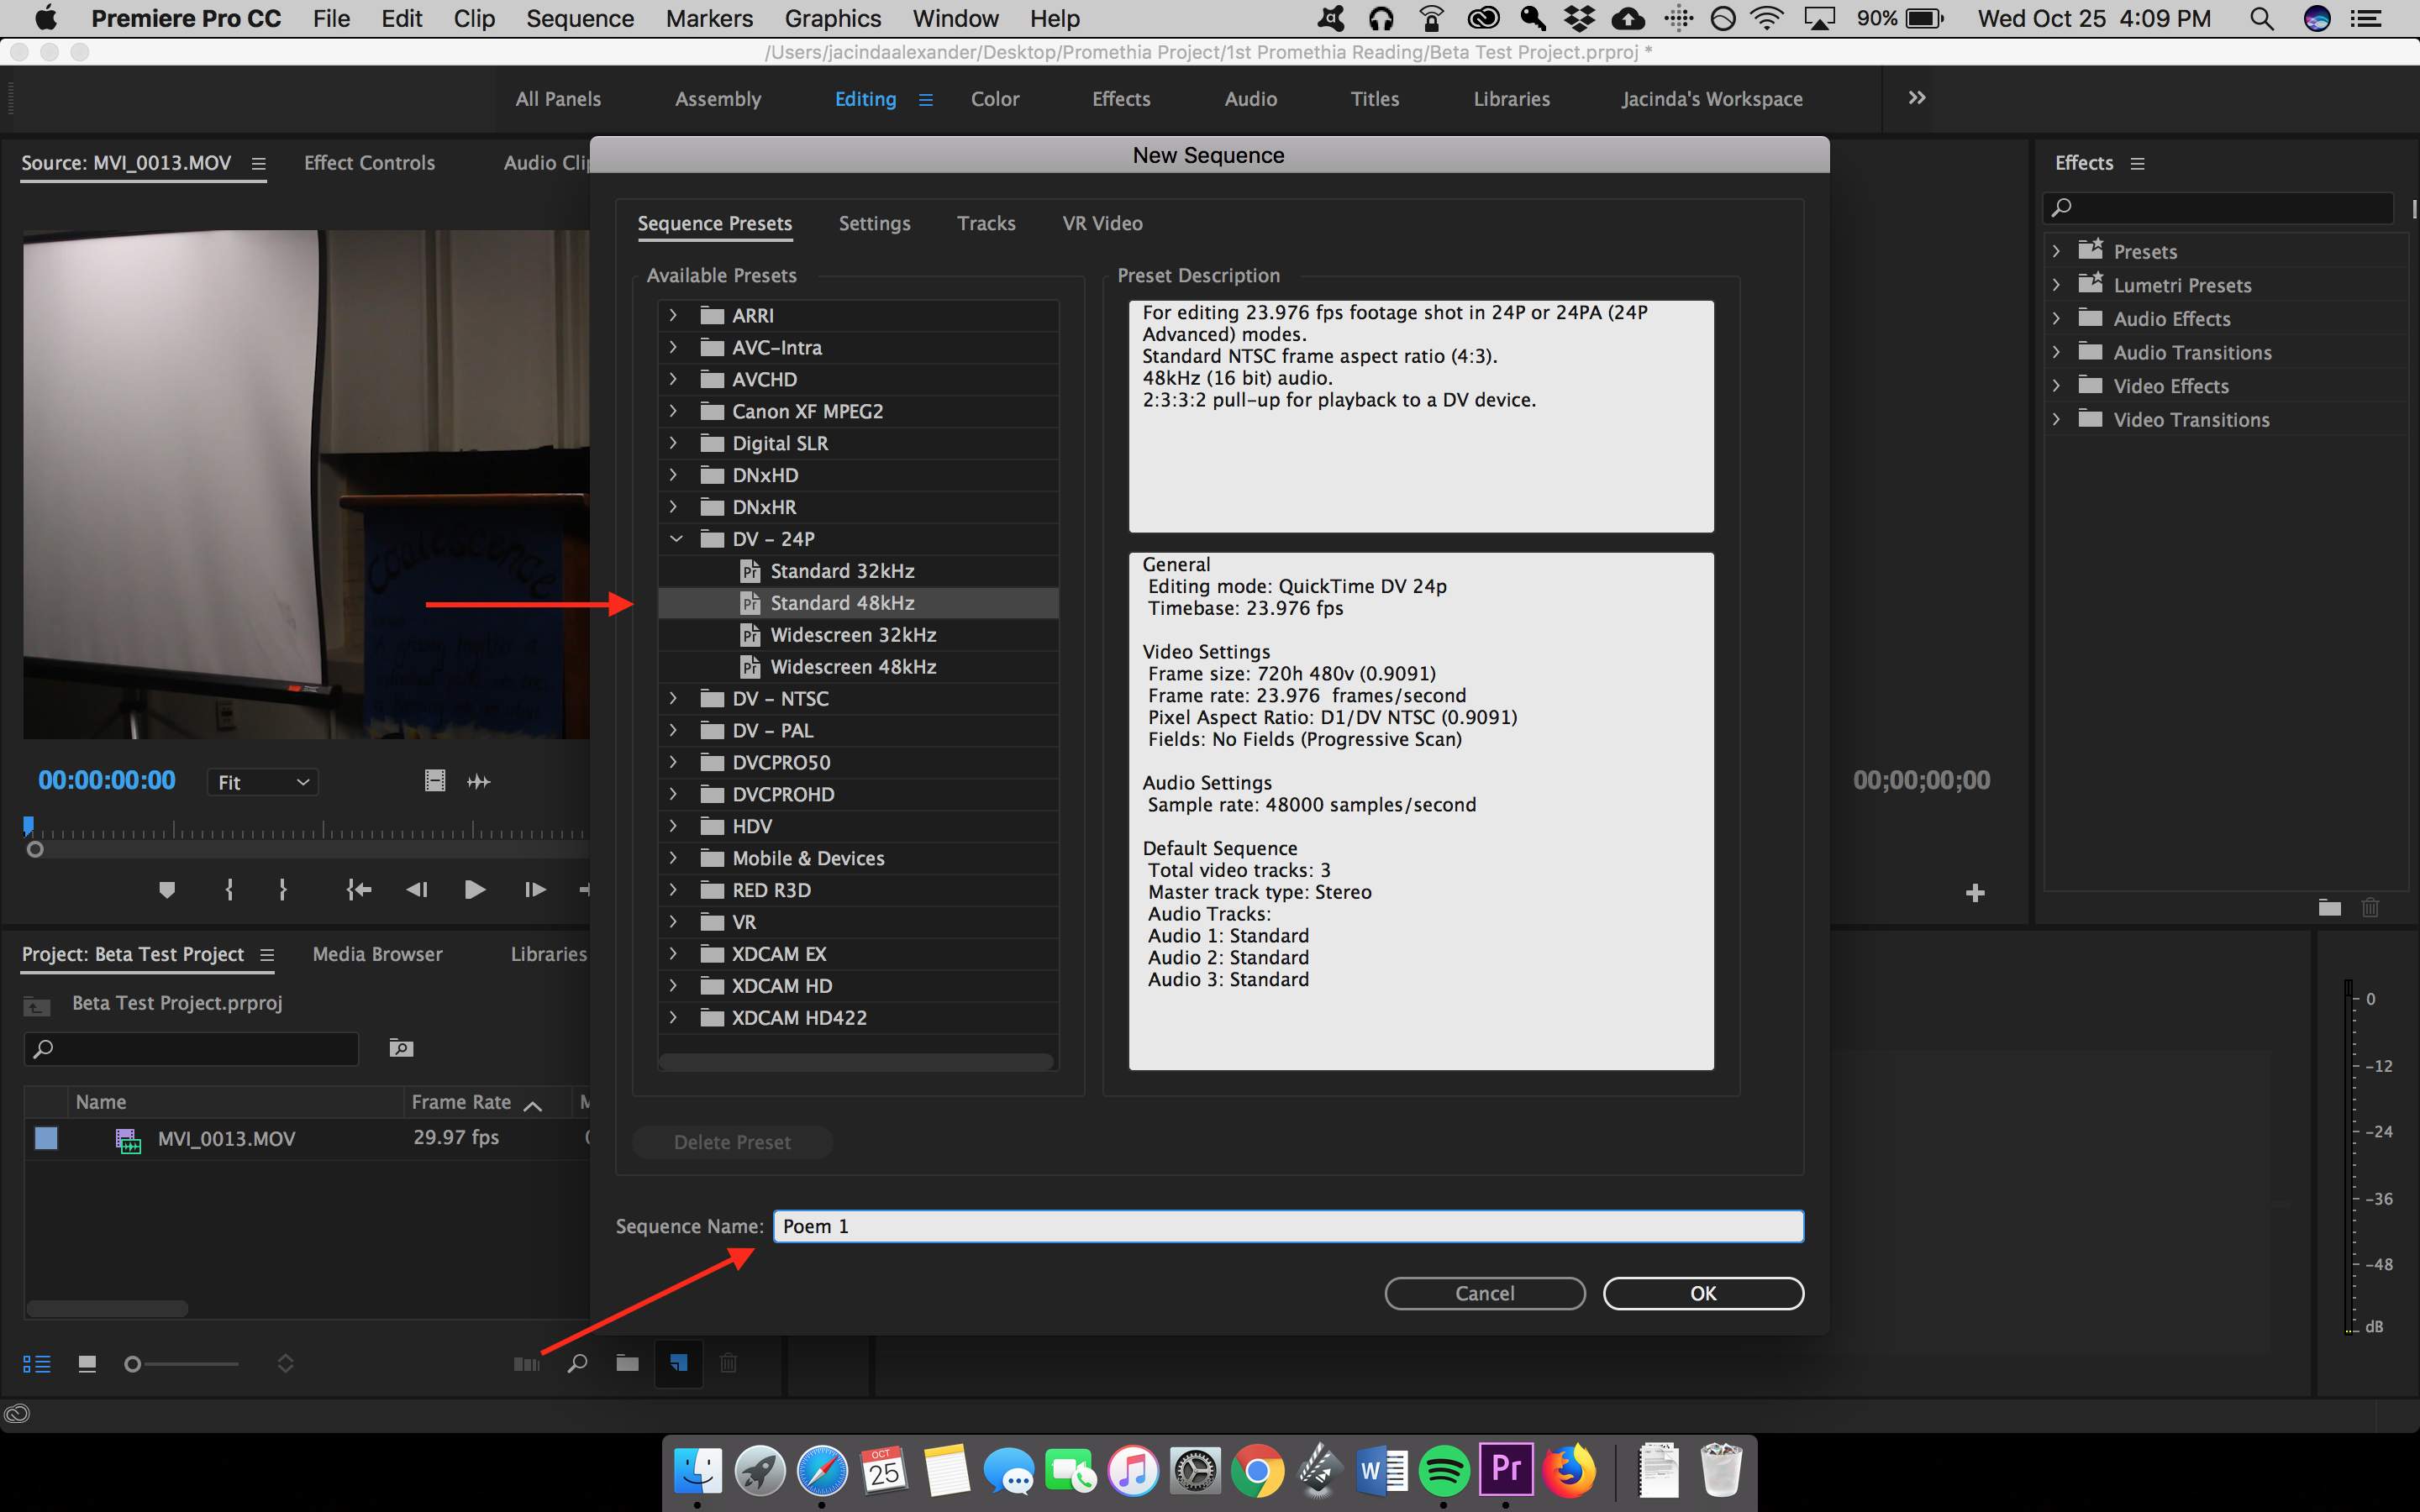
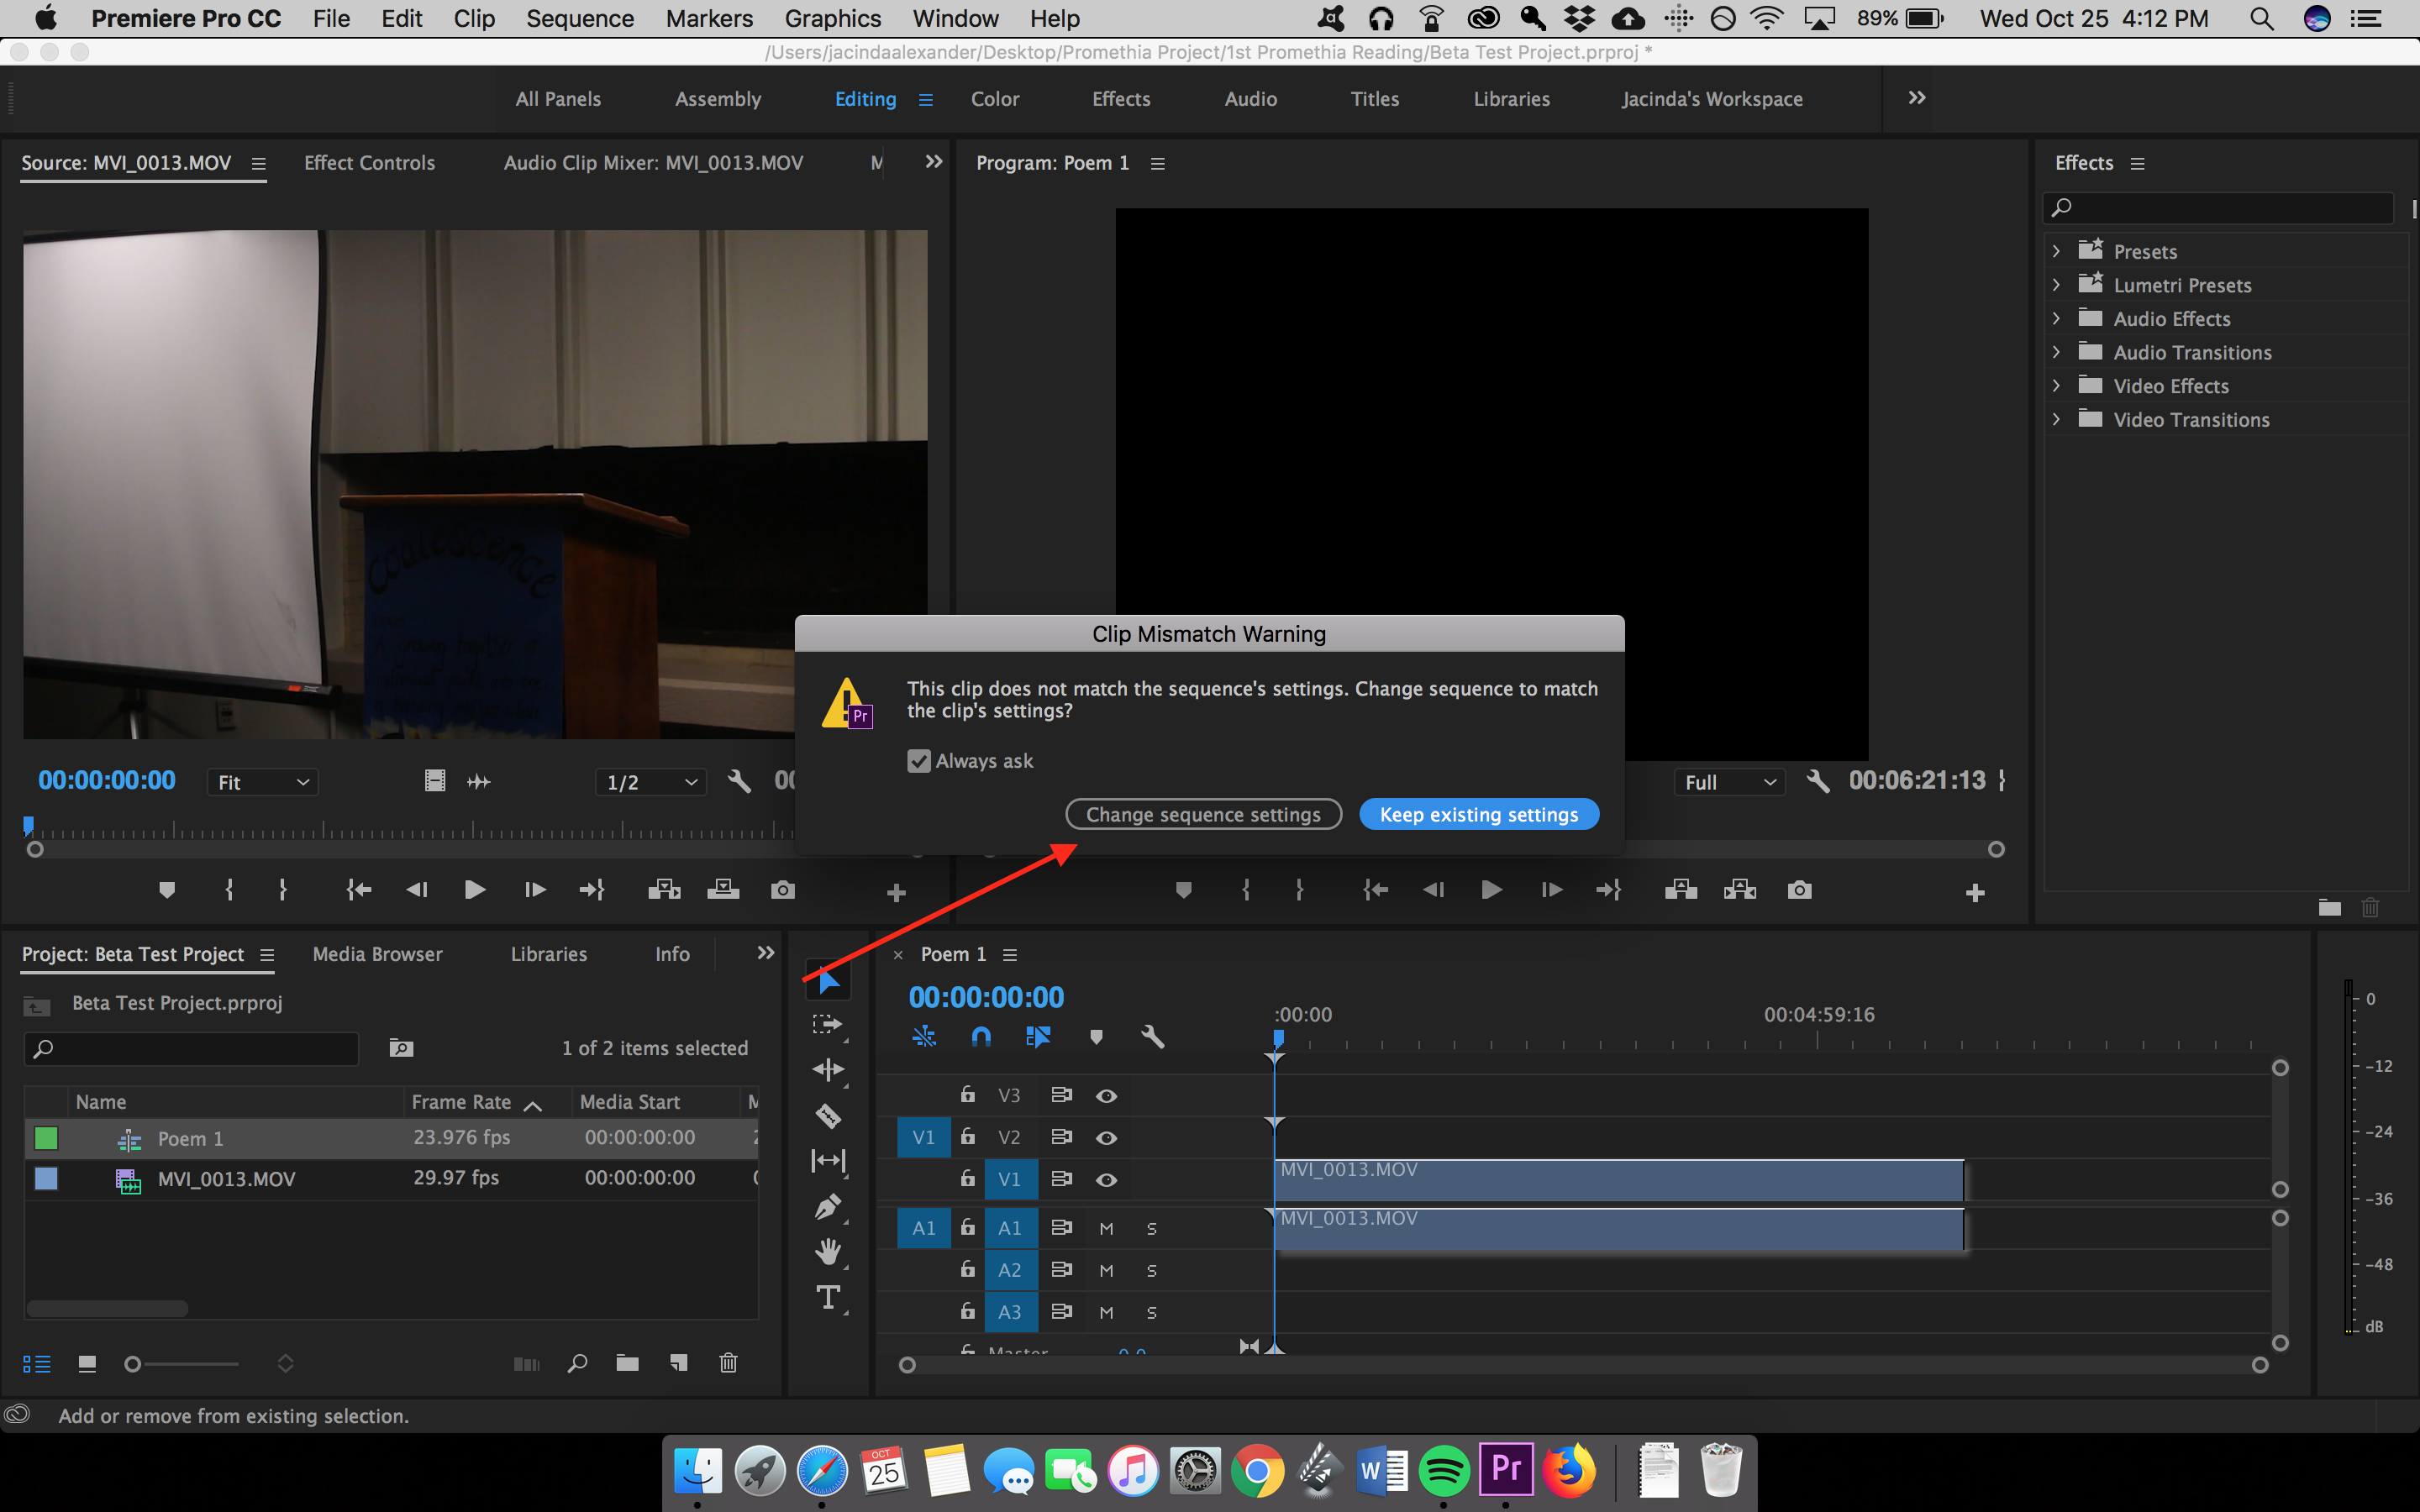
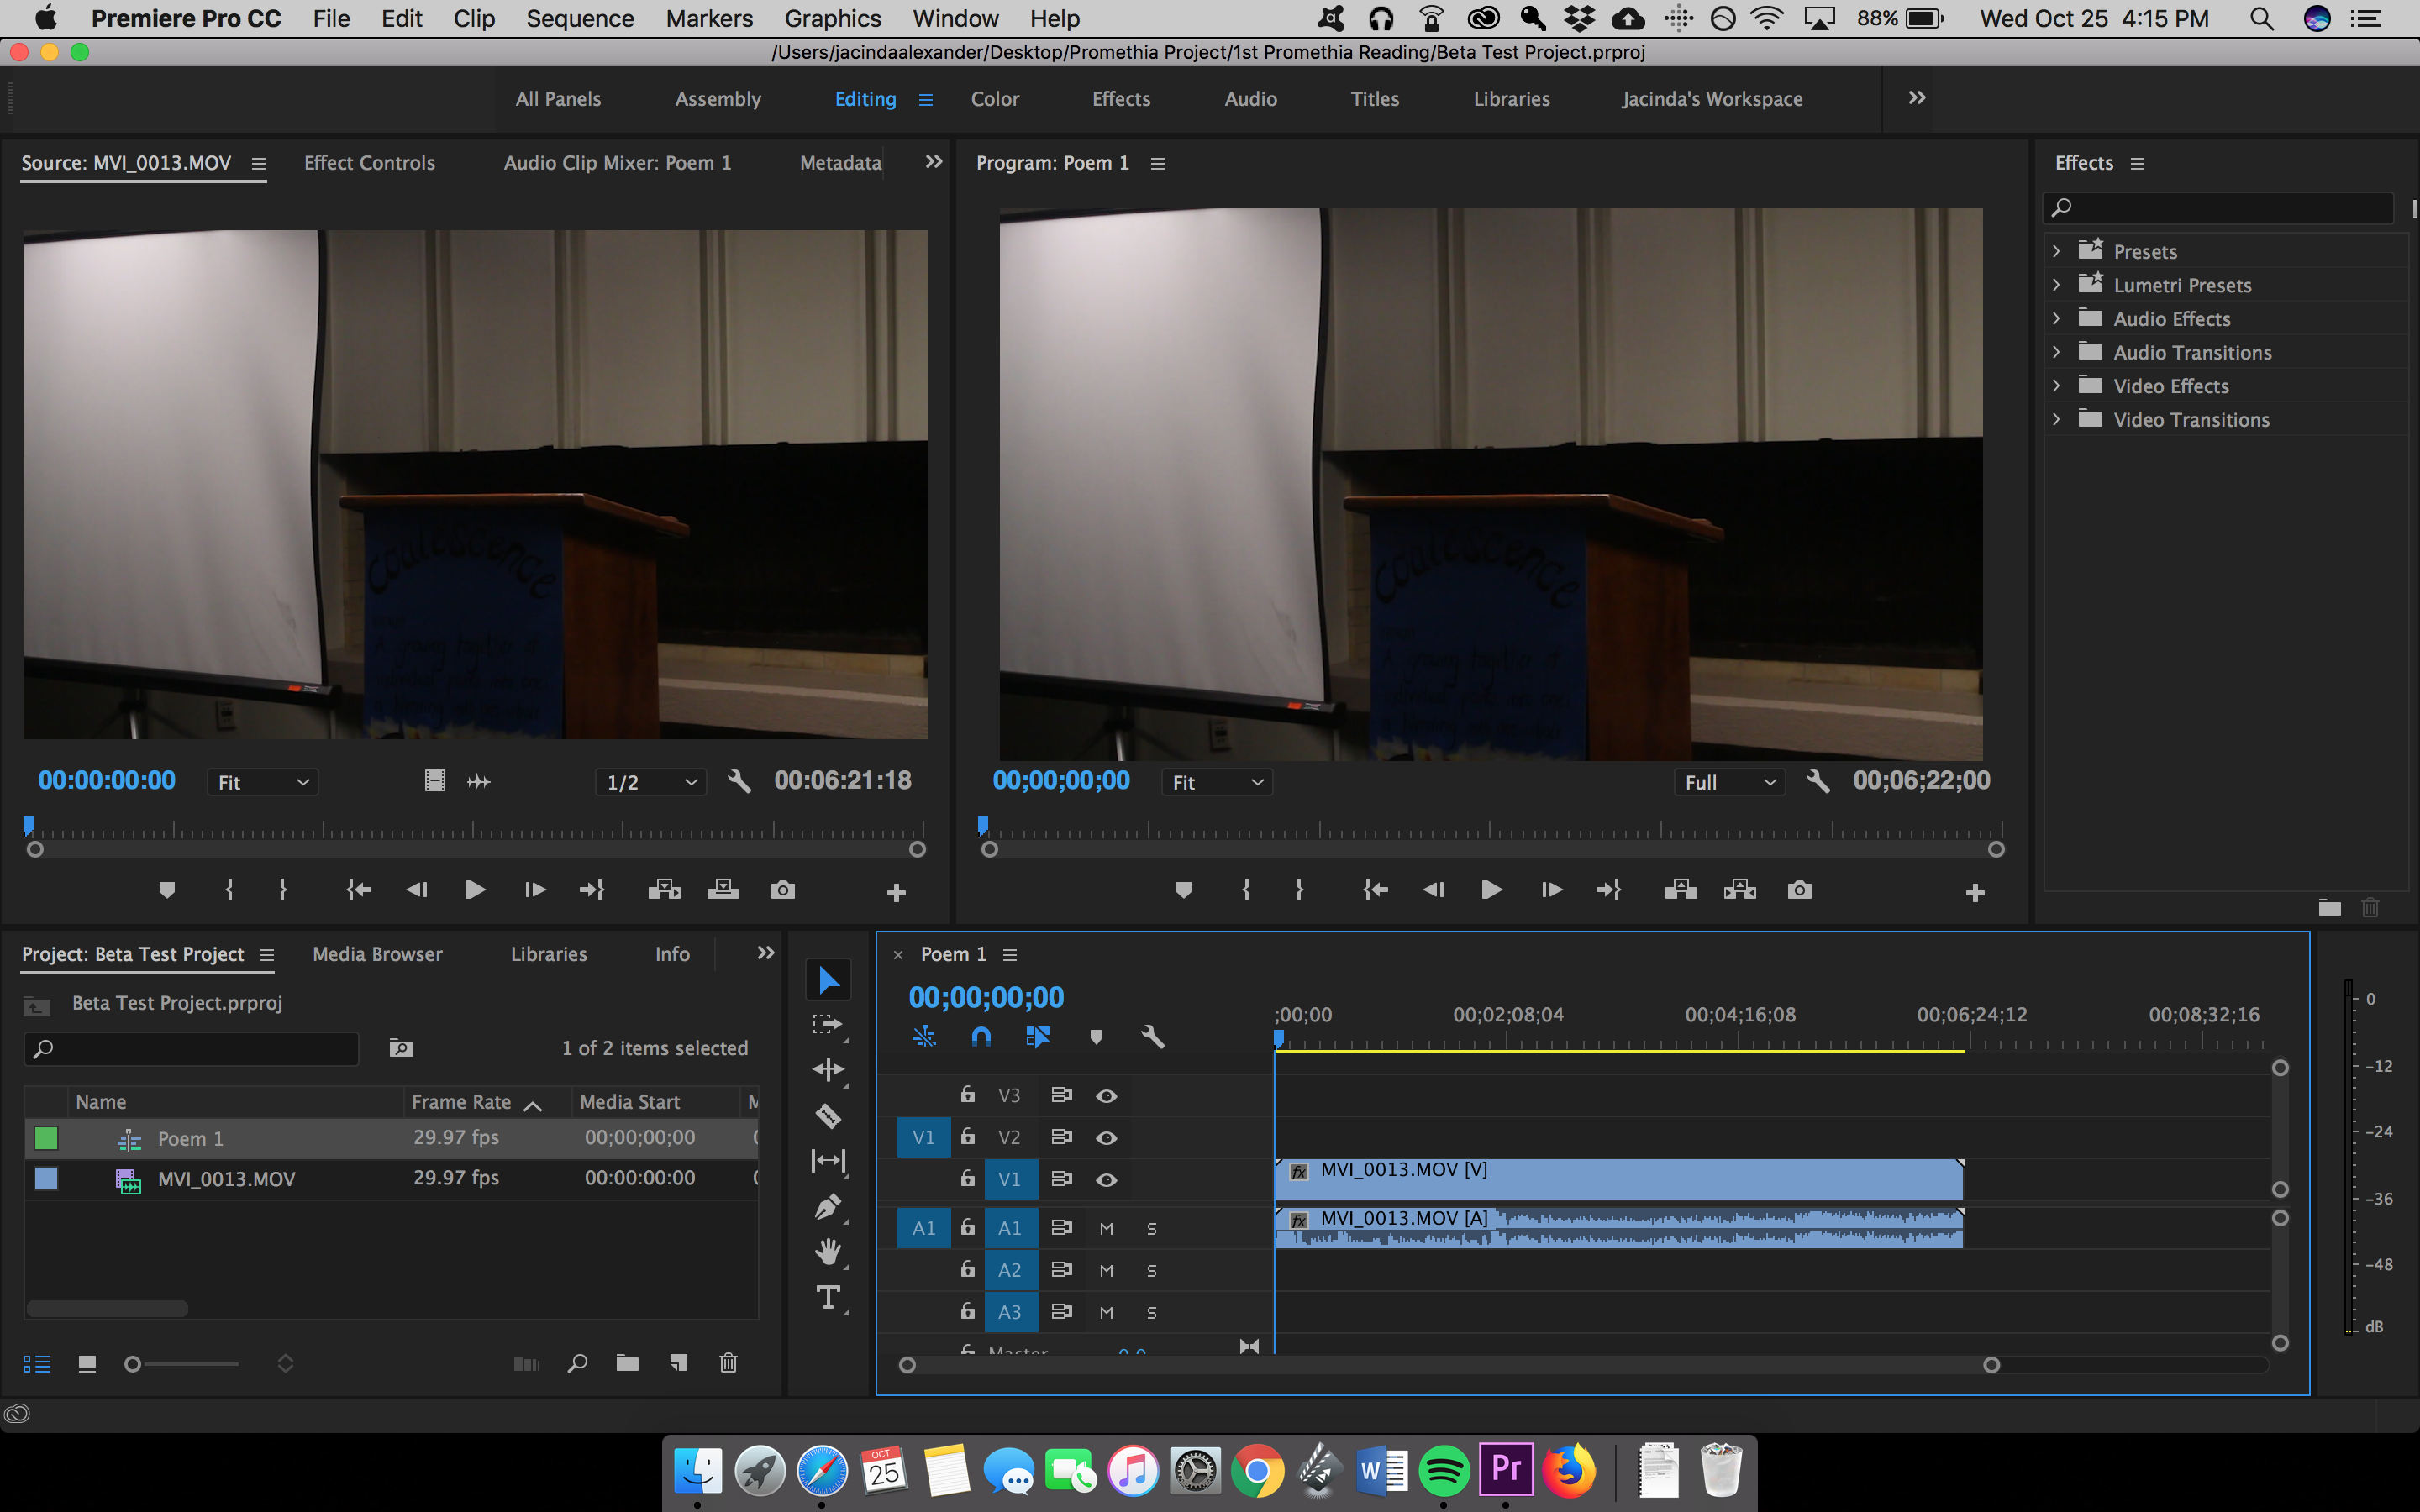
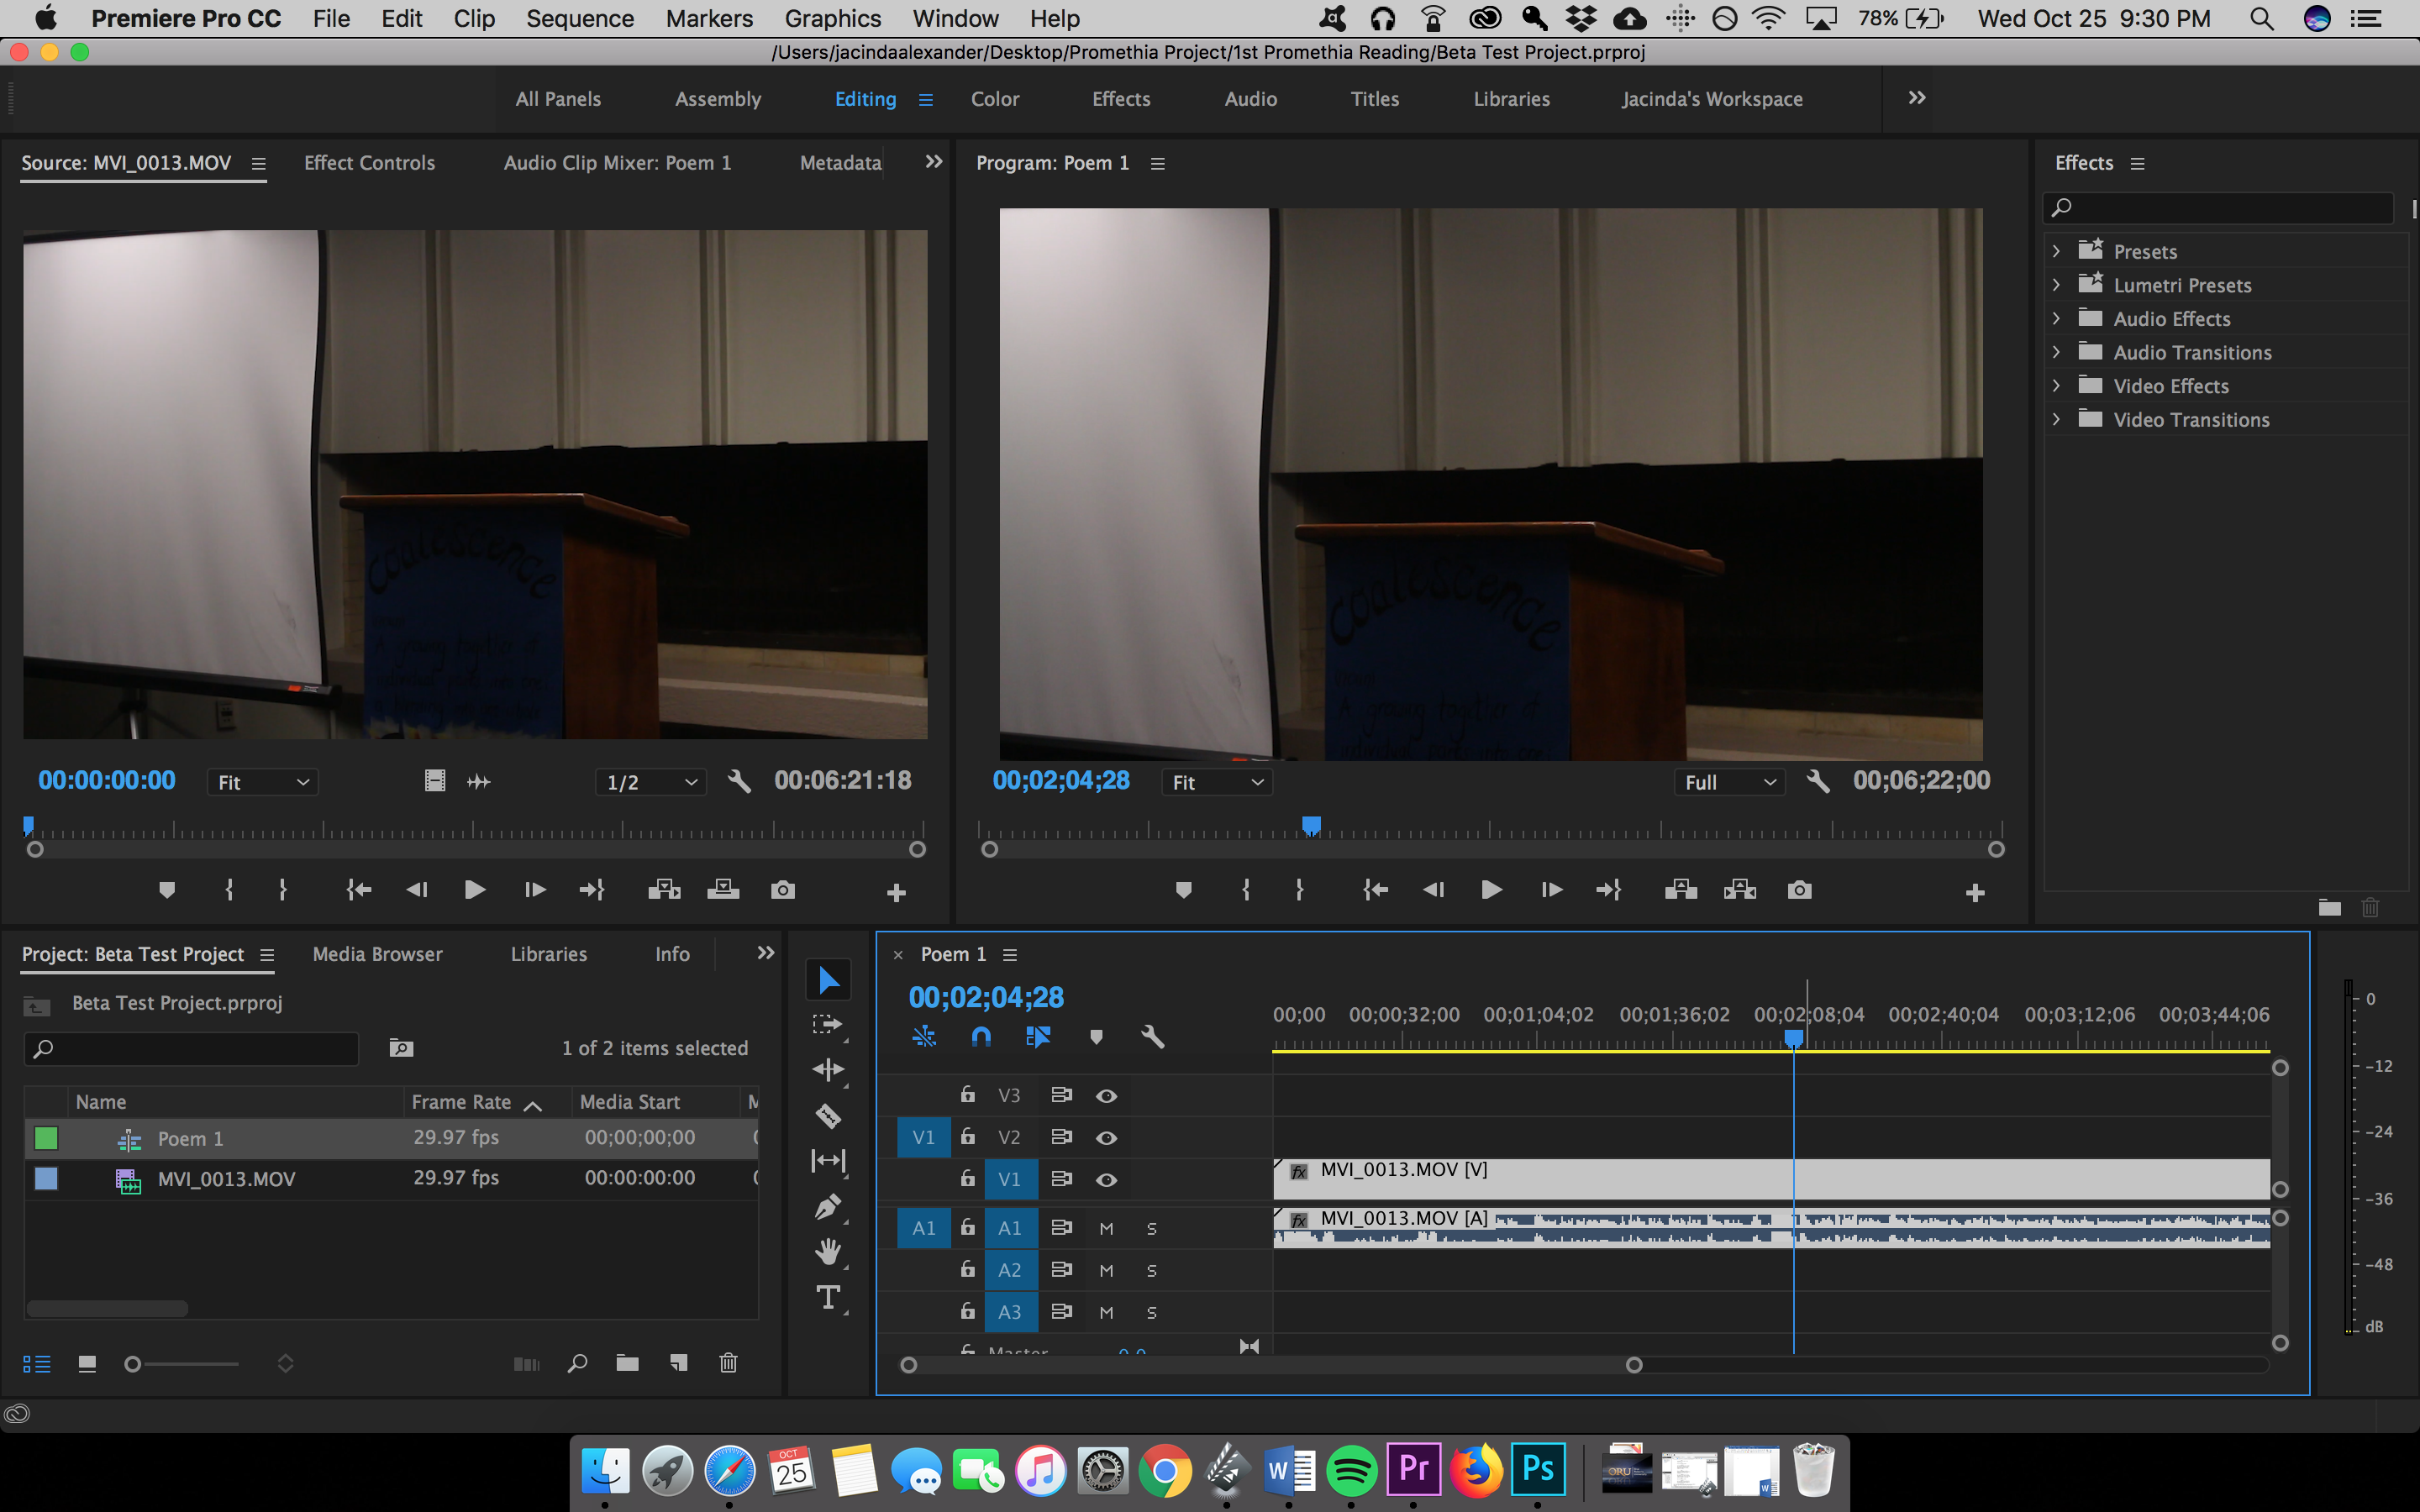
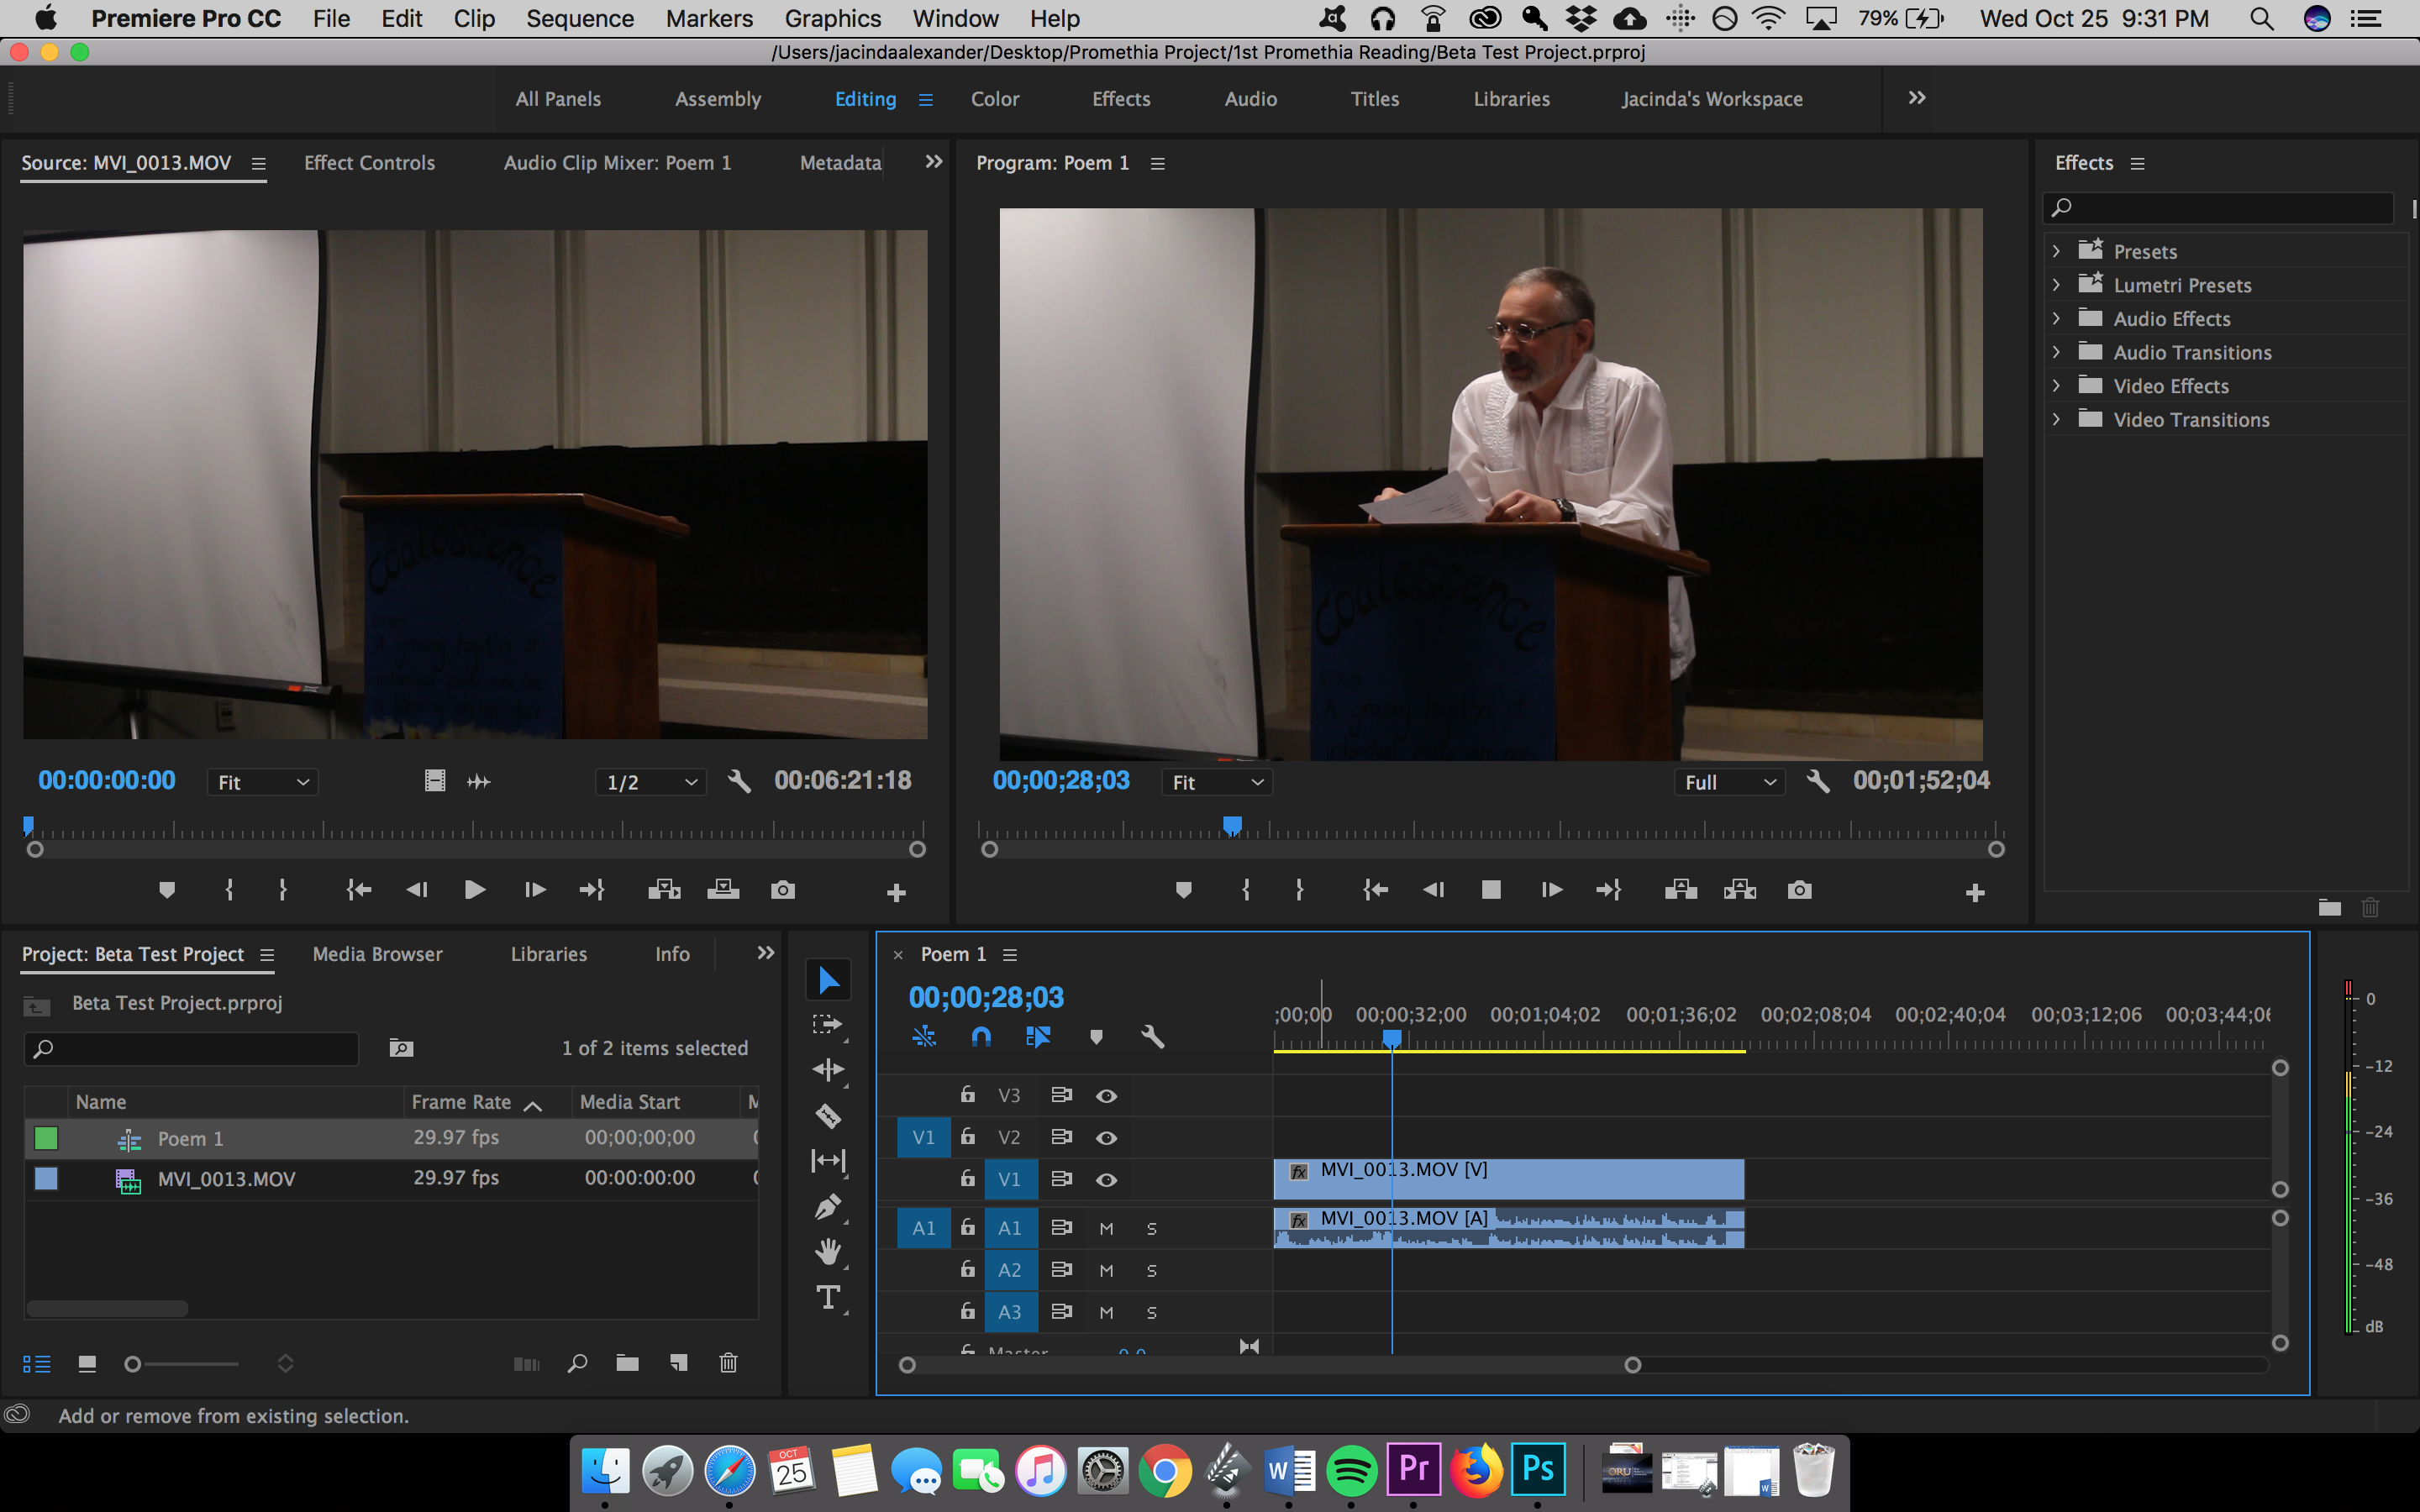
1. Import clip(s) into the project
2. Select New Items and pick create a New Sequence
3. Double-click on the clip you want
4. Look at the Source Panel Scroll through the clip using your mouse
4.1 *Want to shorten the clip within the Source Panel? Hit the “I” and “O” button for “In” and “Out”.
5. Drag the clip from the Source Panel to the Timeline
5.1 *If “Clip Mismatch Warning” pops up, select “change sequence setting”. If not, continue on.
Edit the Look of the Clip
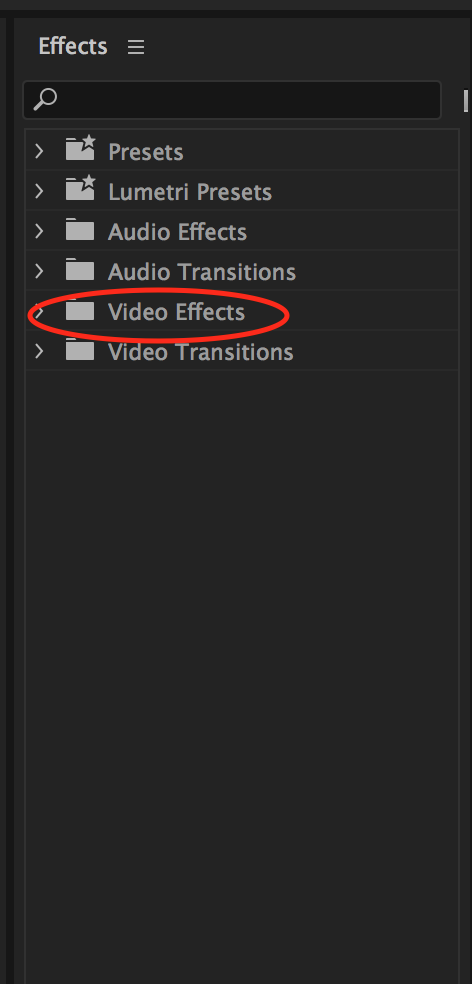
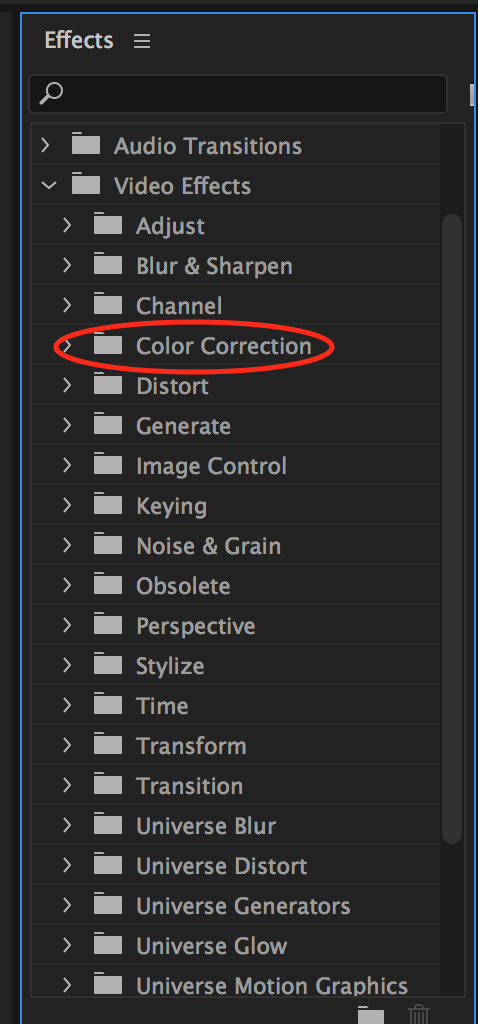
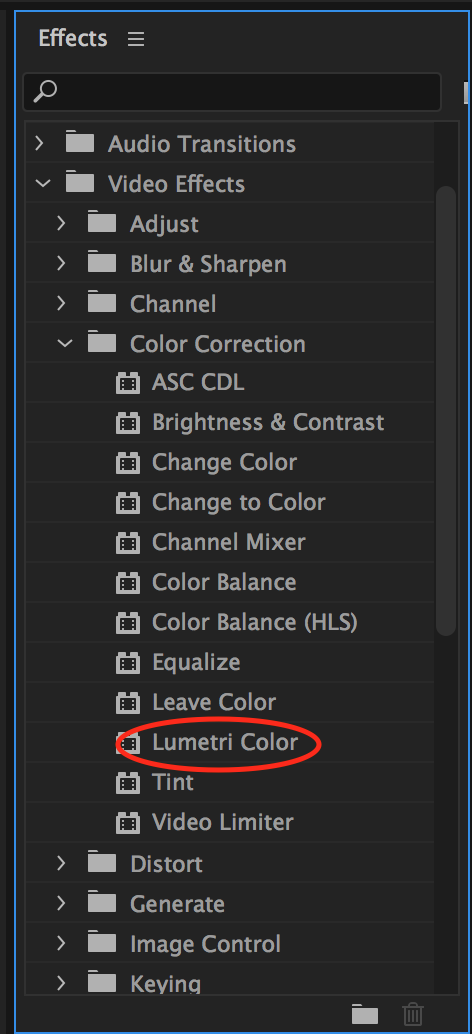
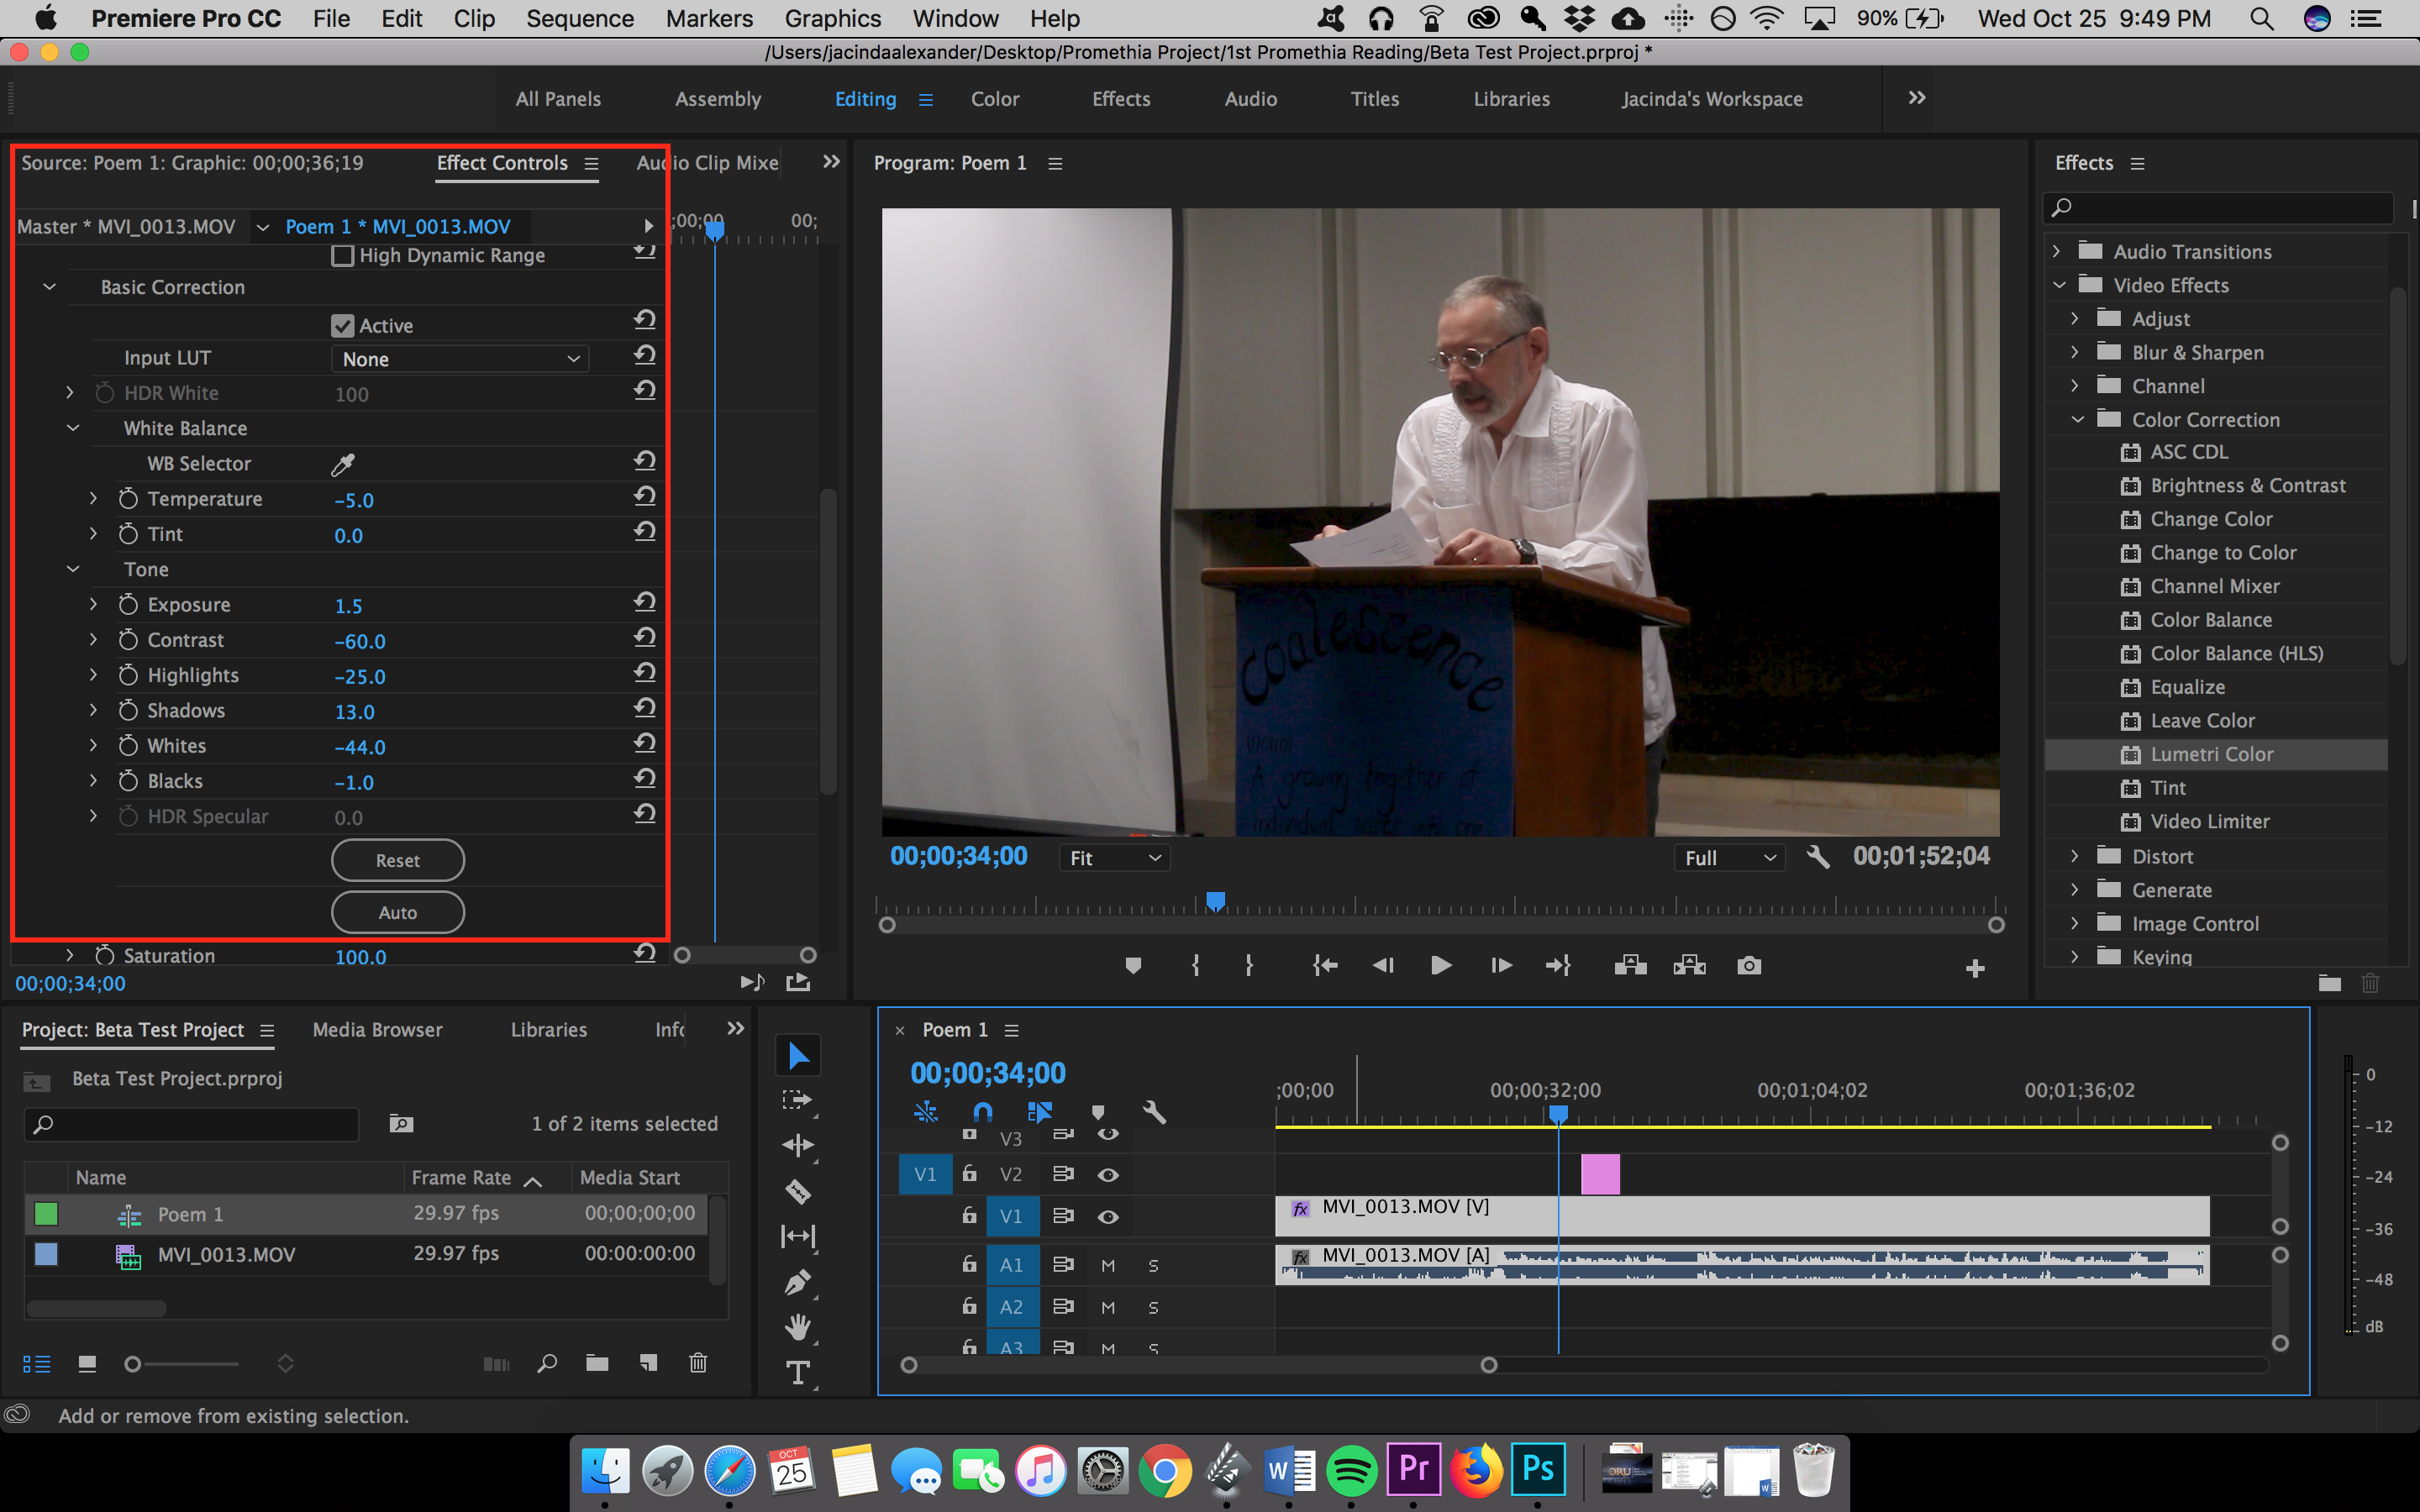
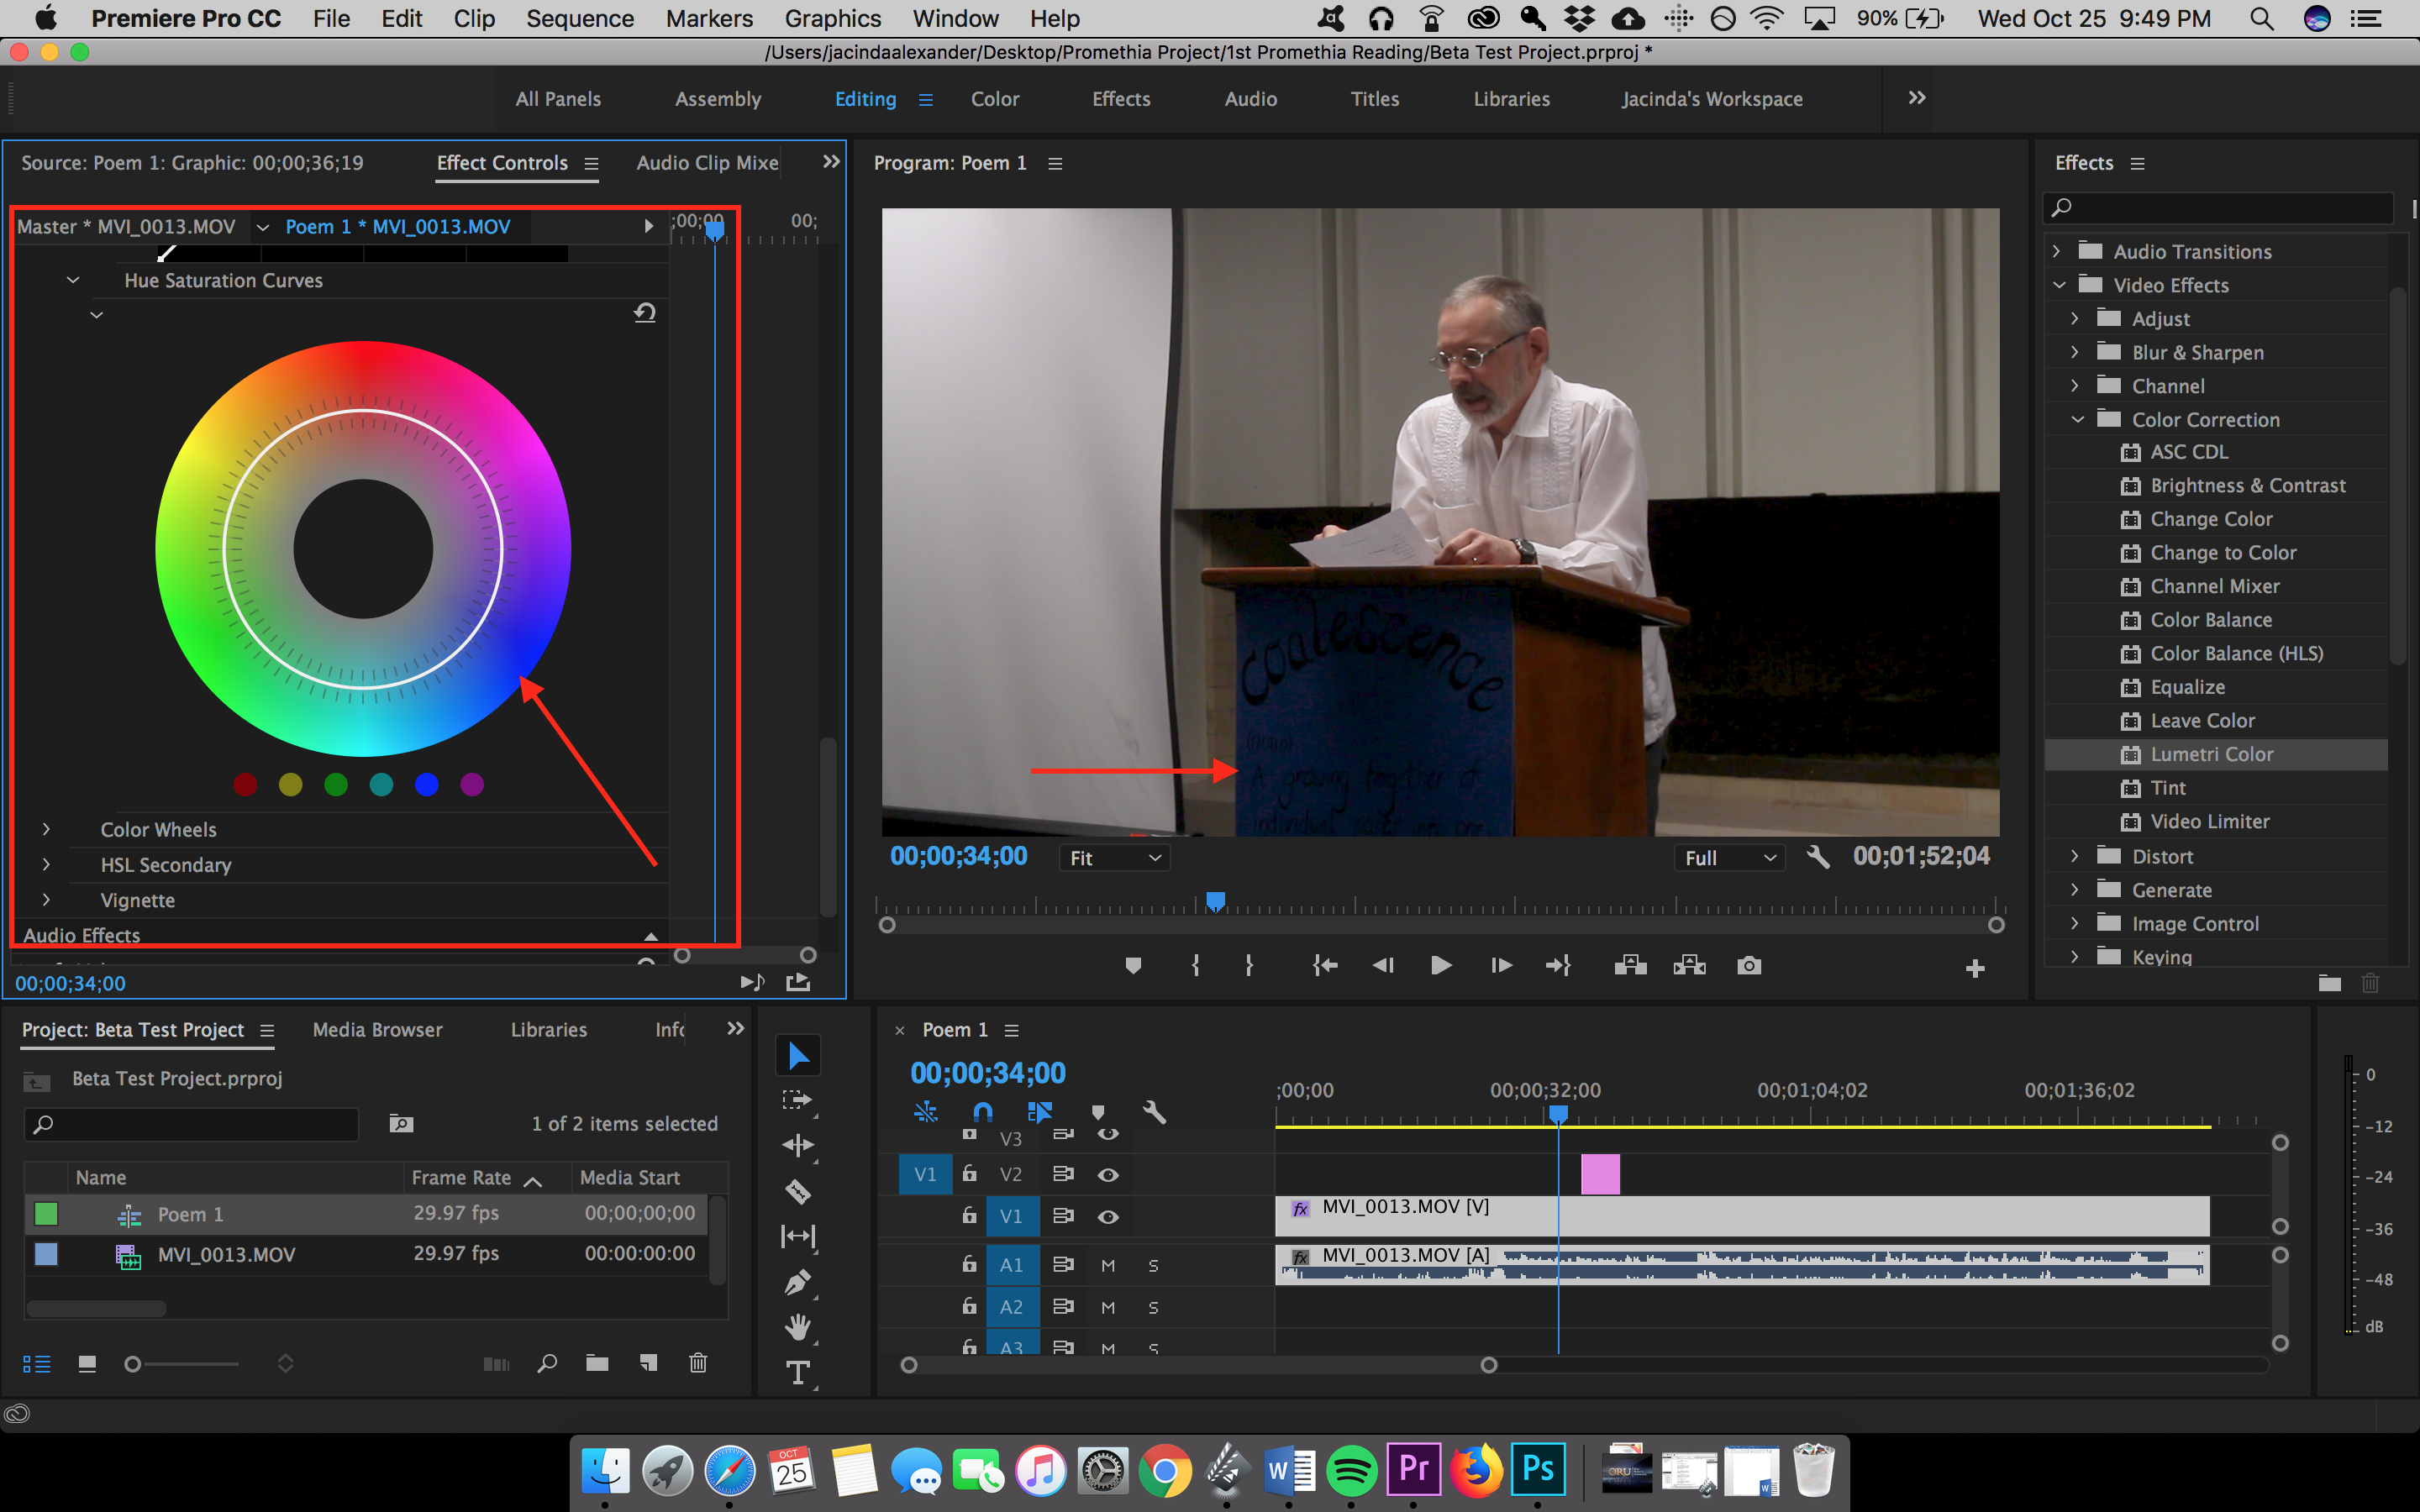
1. Go to the Effects Panel
2. Click on Video Effects-Color Correction- and select Lumetri Color
3. Drag and place the “Lumetri Color” on the clip in the timeline
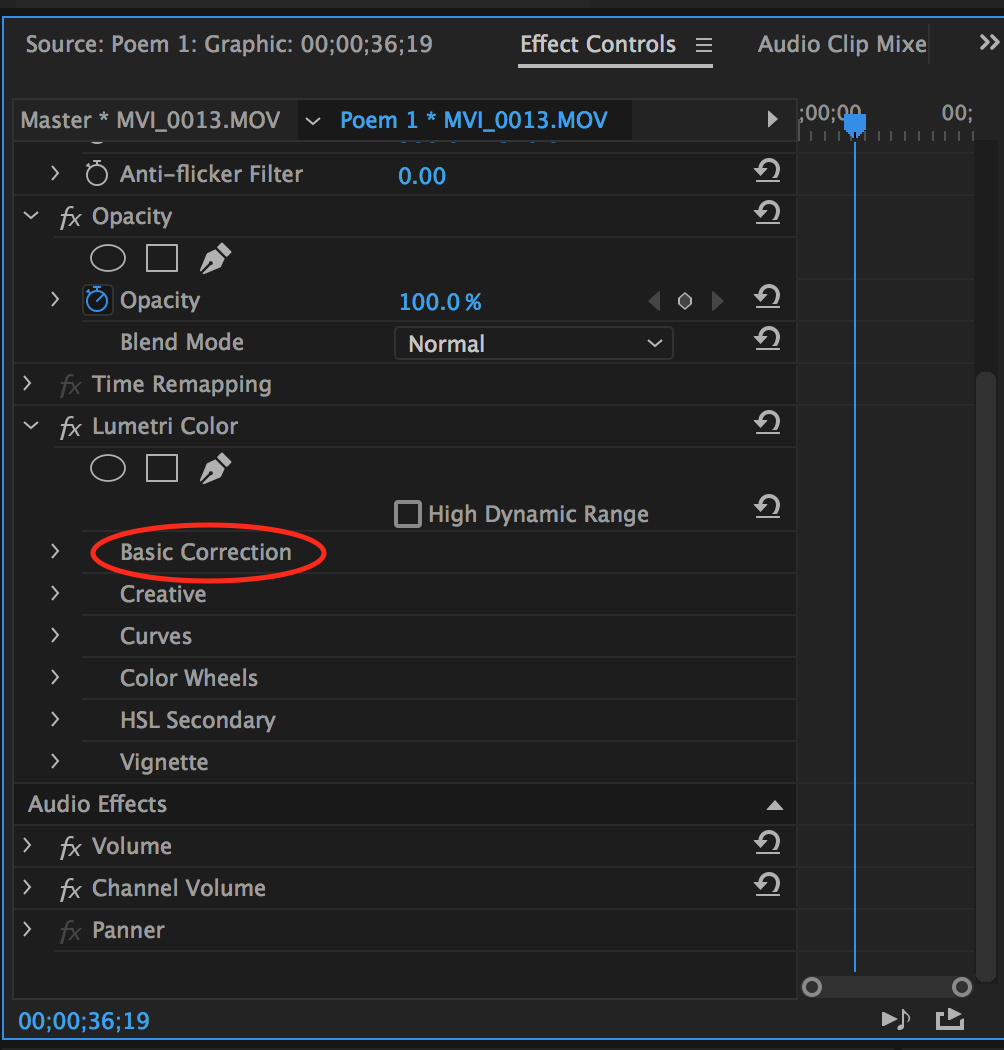
4. Double click on the clip to open Effect Controls
5. Look at the Source Panel
6. Select Basic Correction and use the different options to create a desire effect
Note: Since color correcting is a deep subject to explore, play with the different effects in order to find the look that matches what you're looking for. This is trial and error.
Add Text to Video

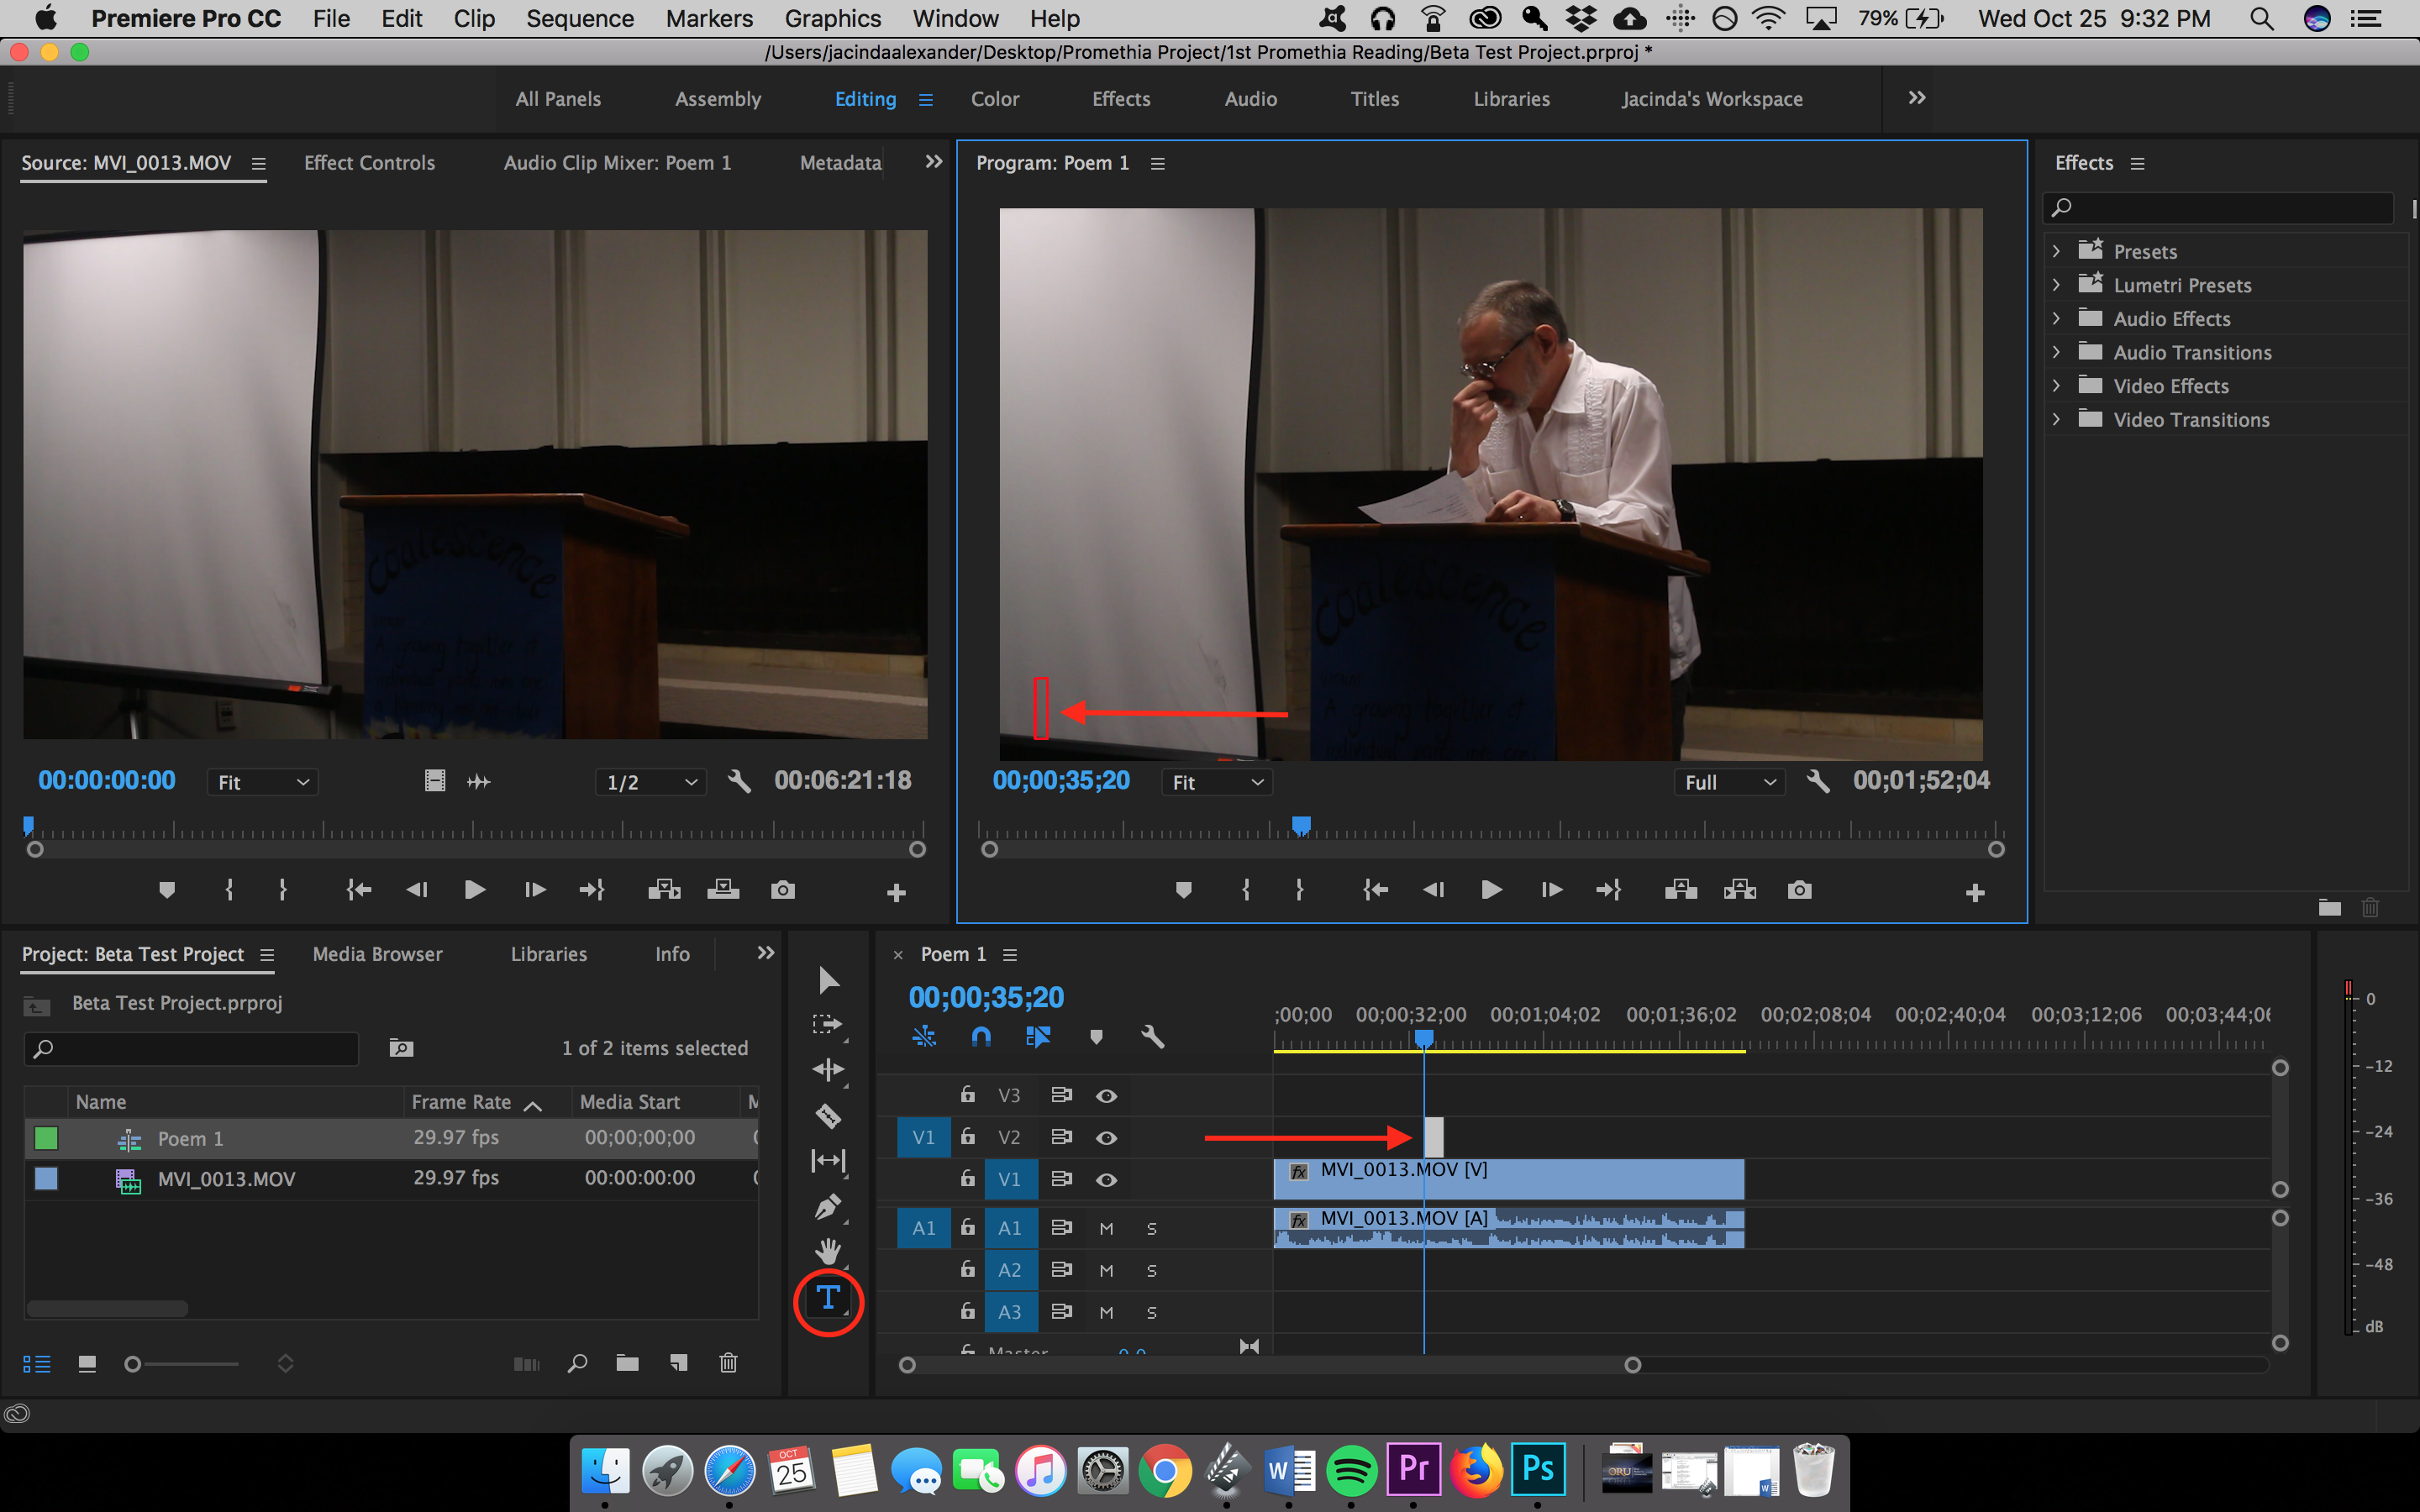
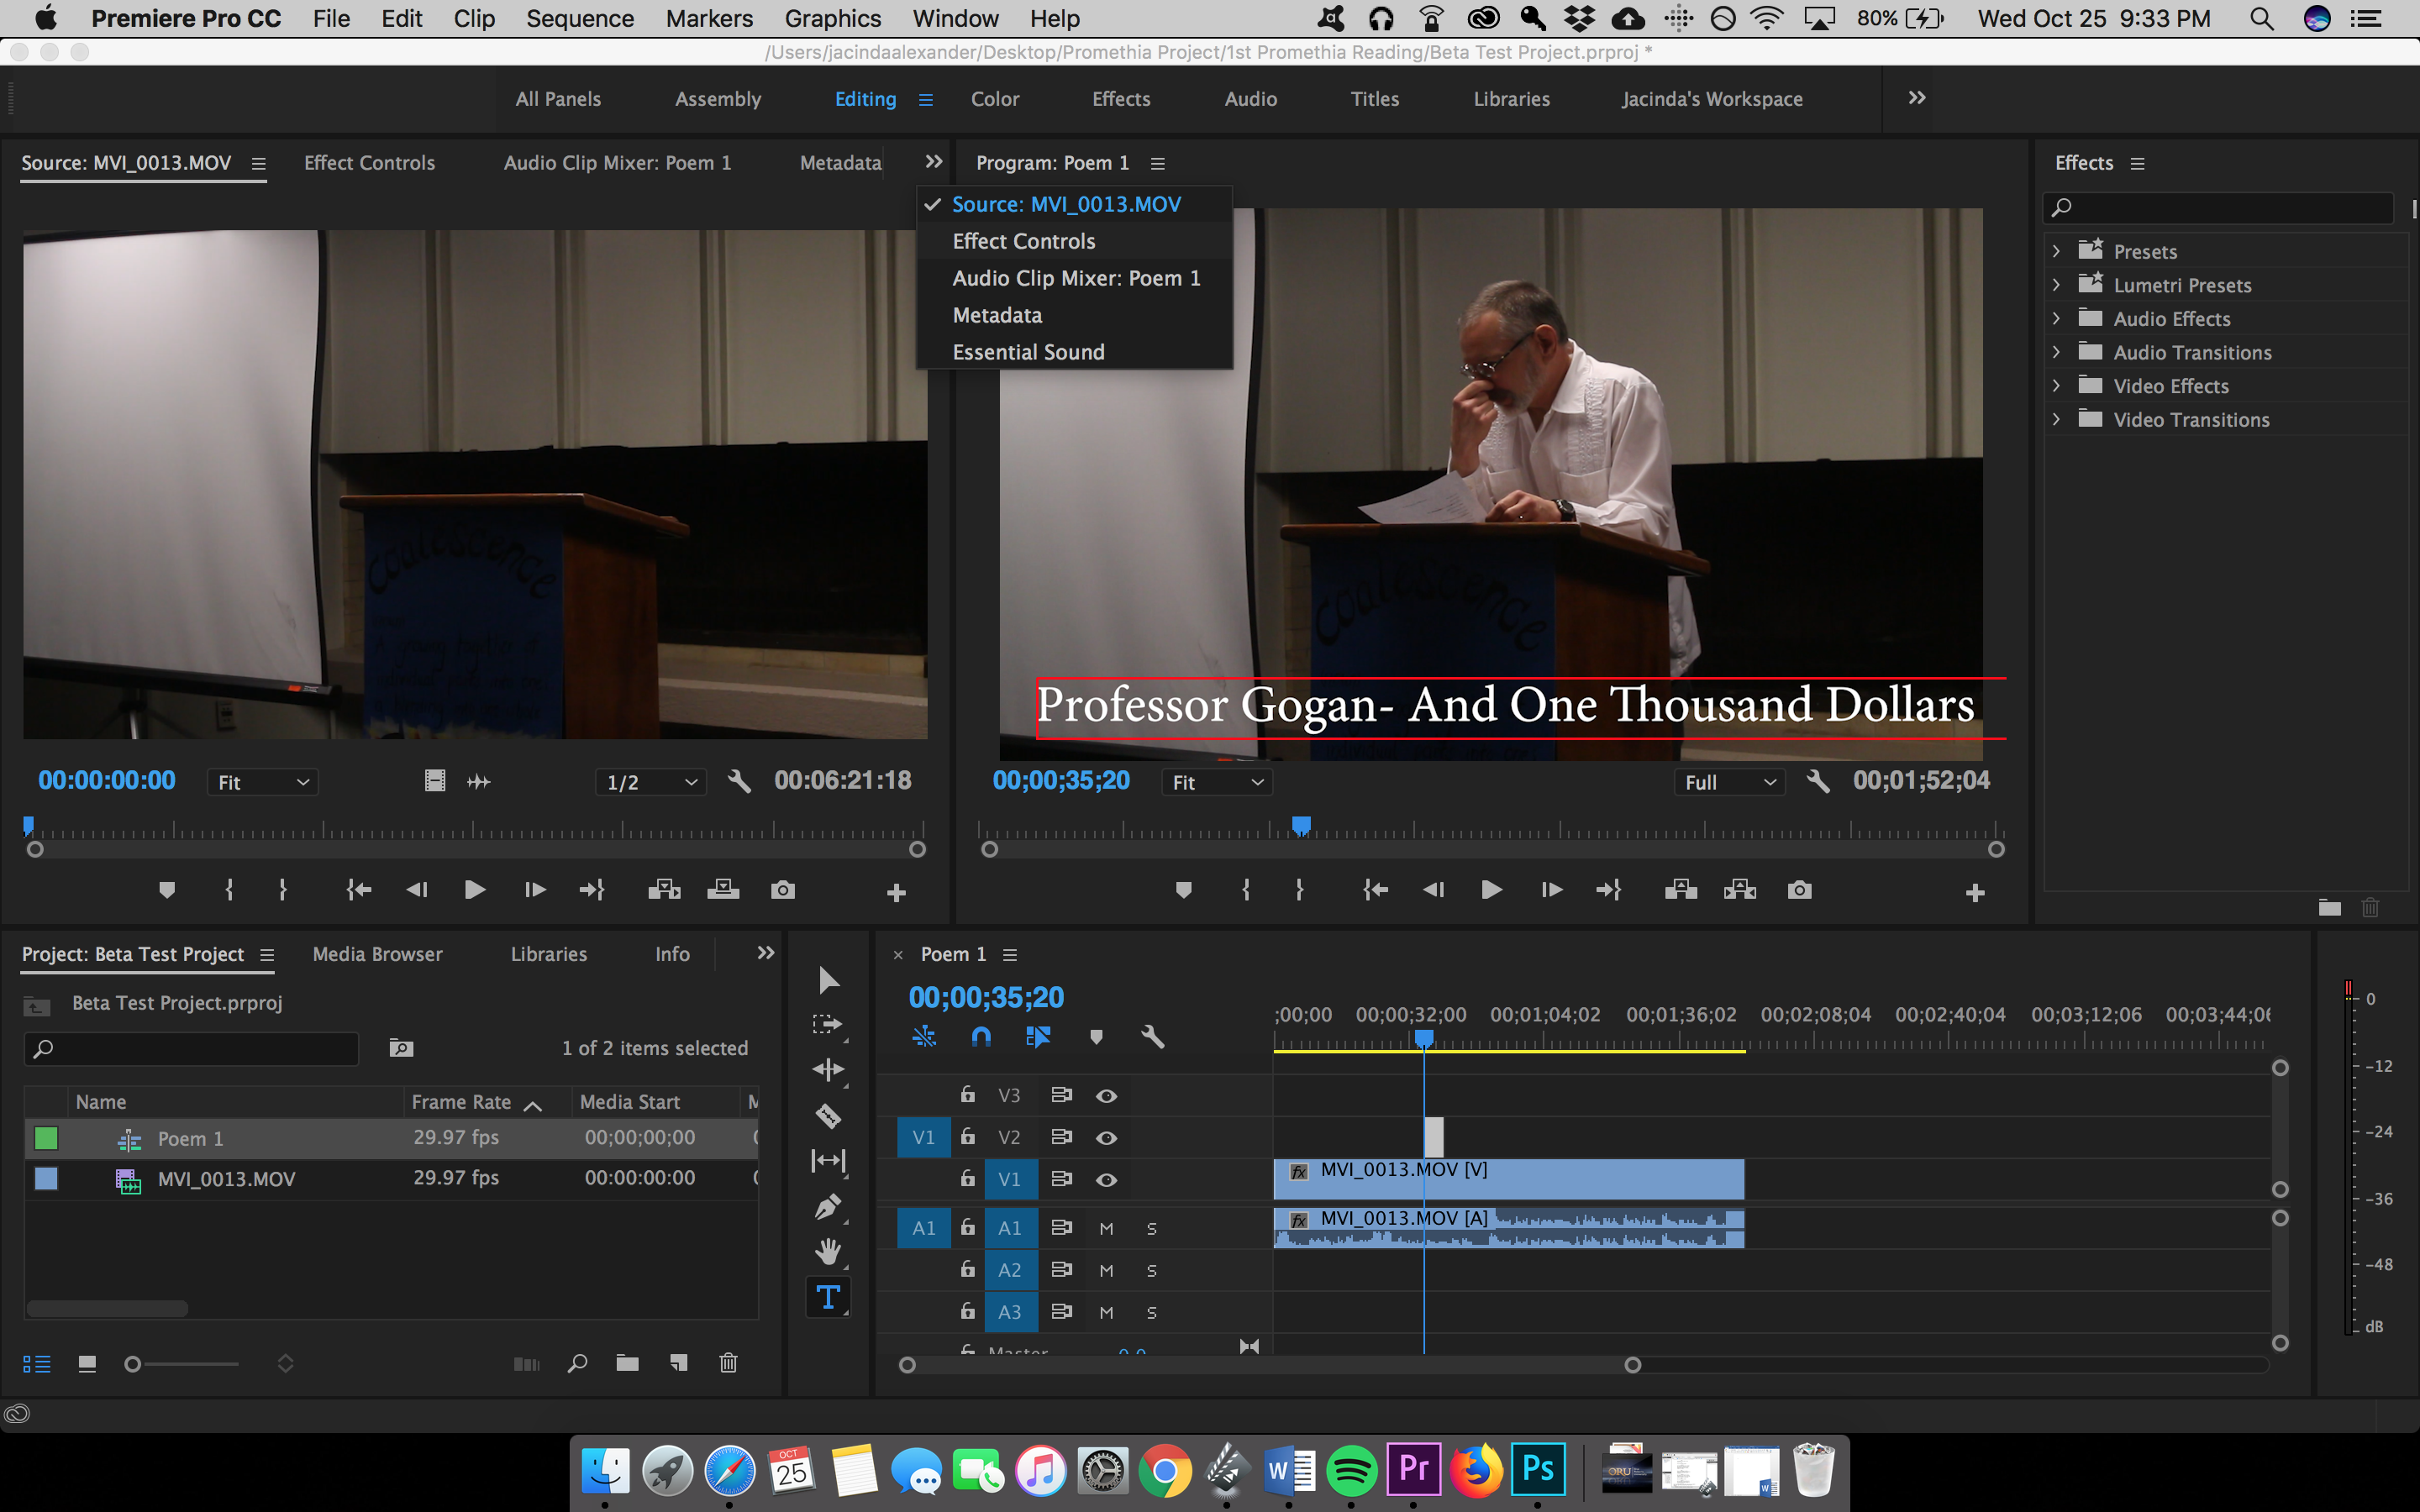
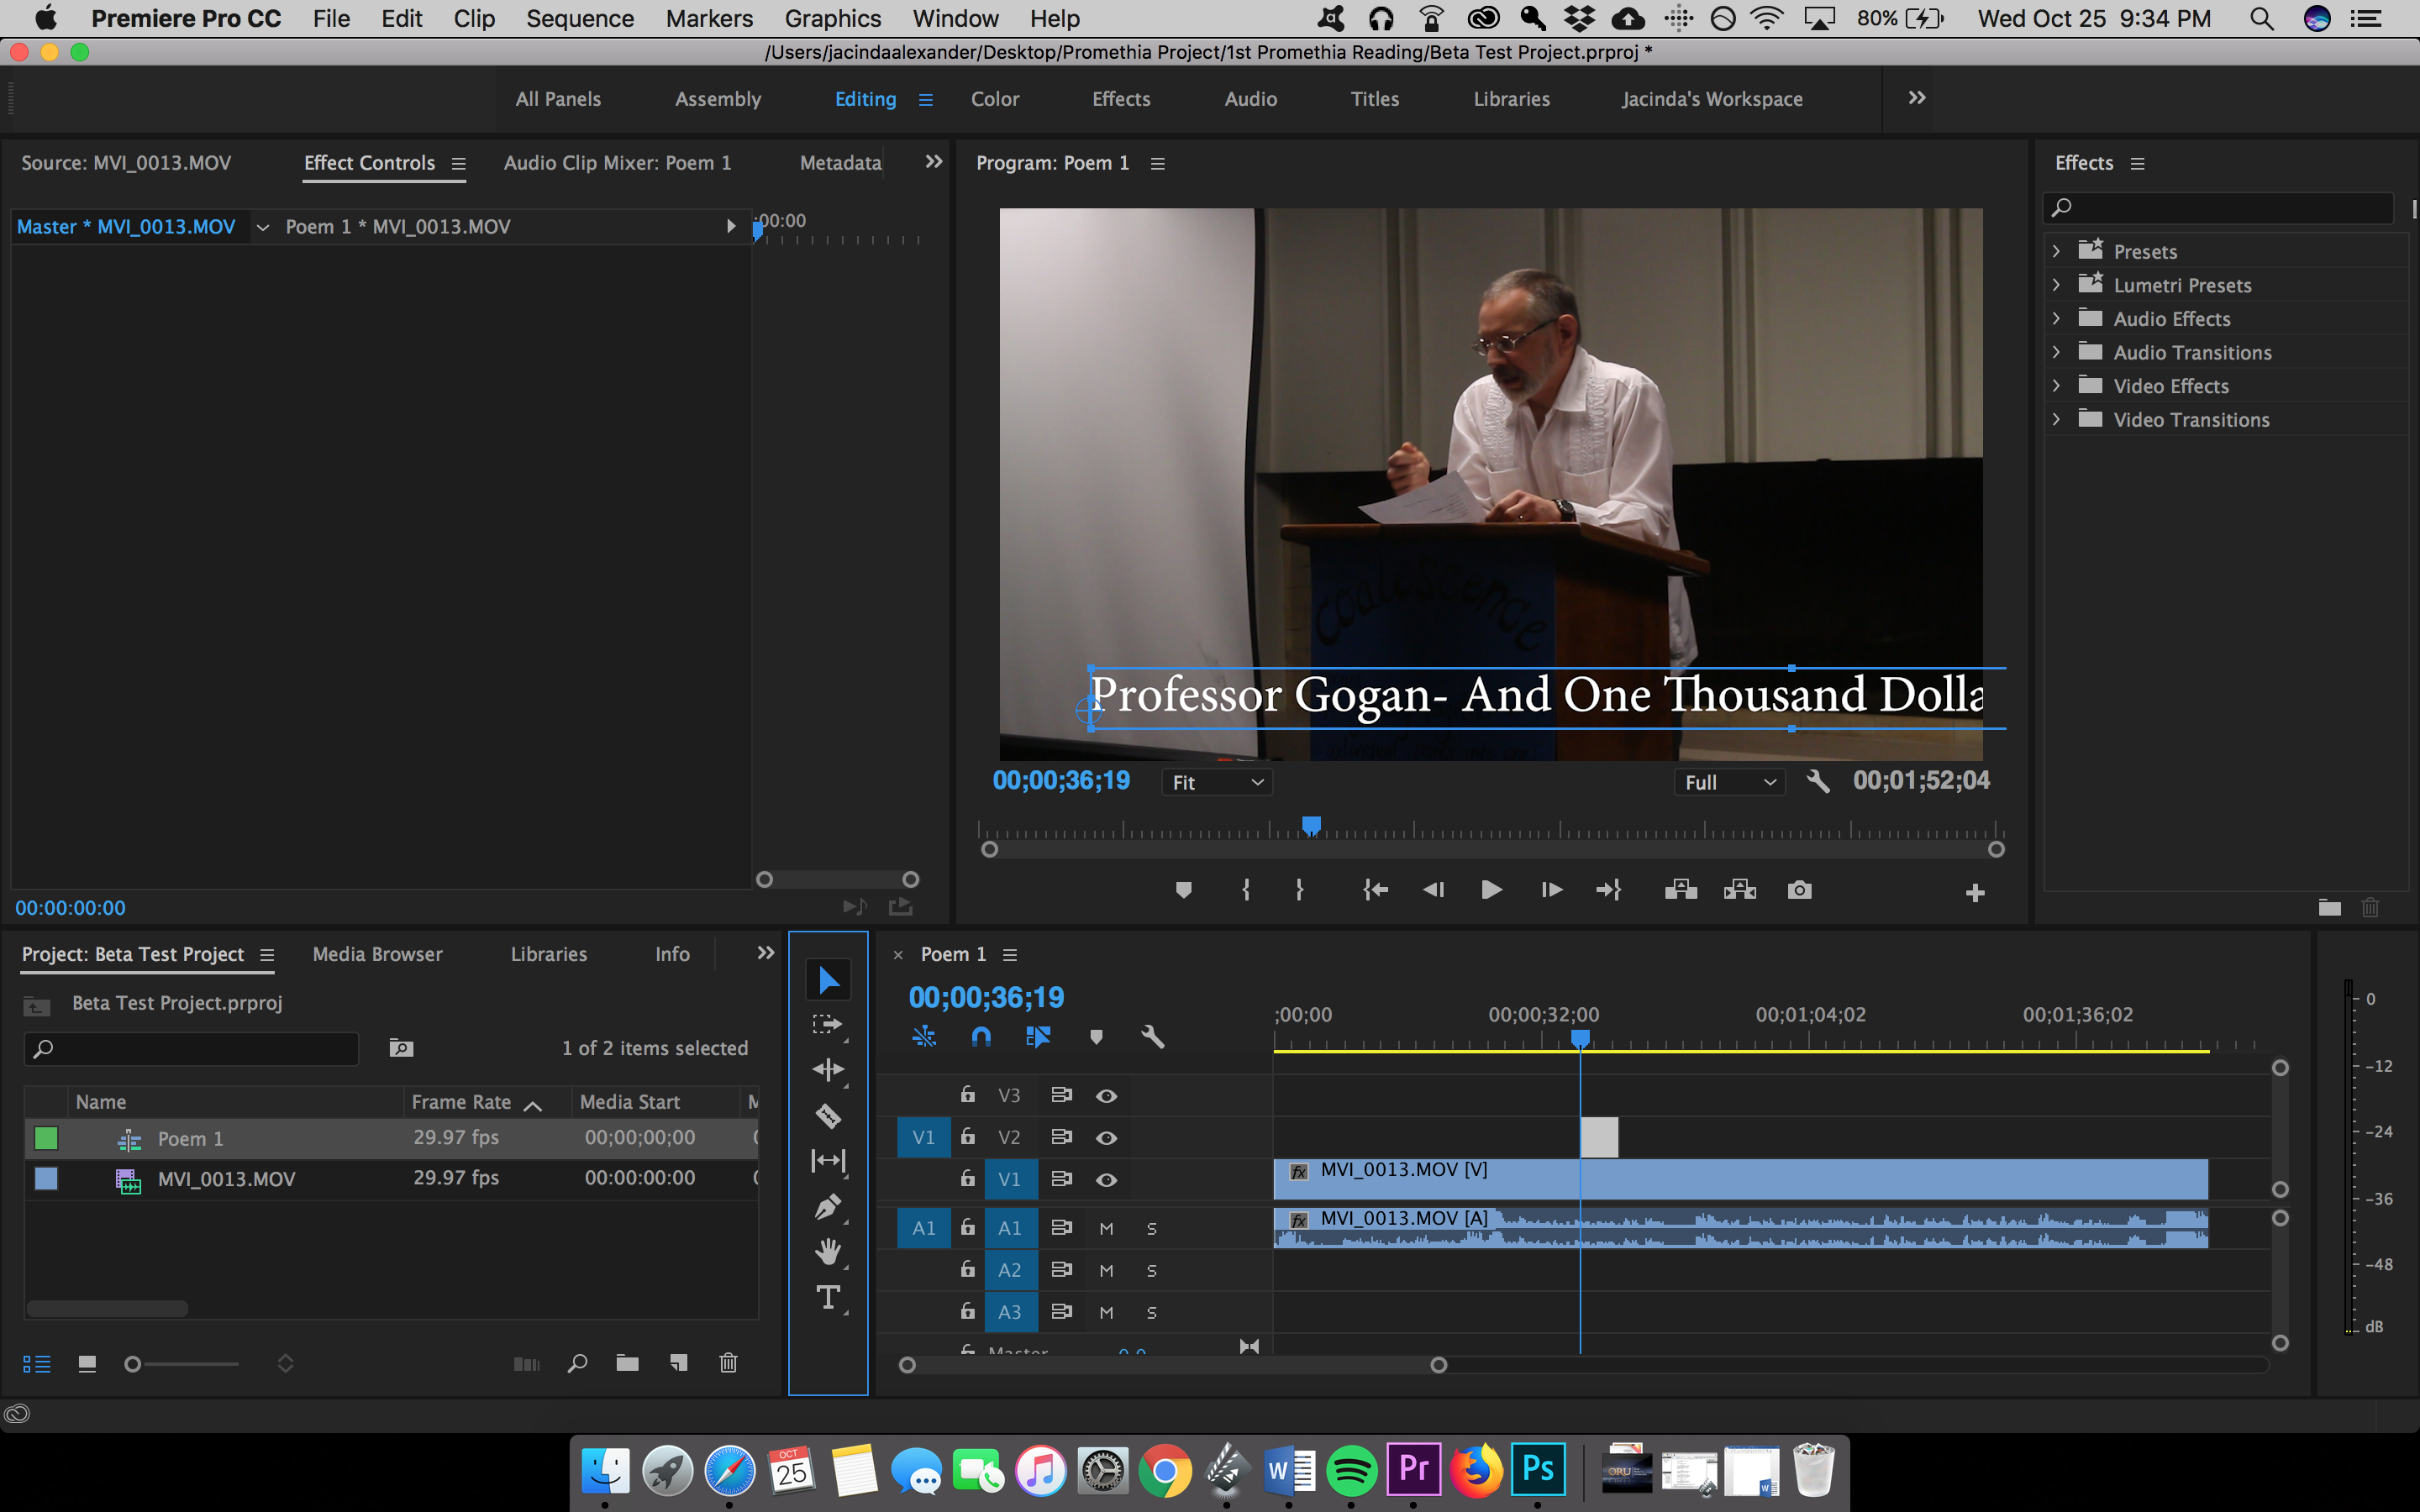
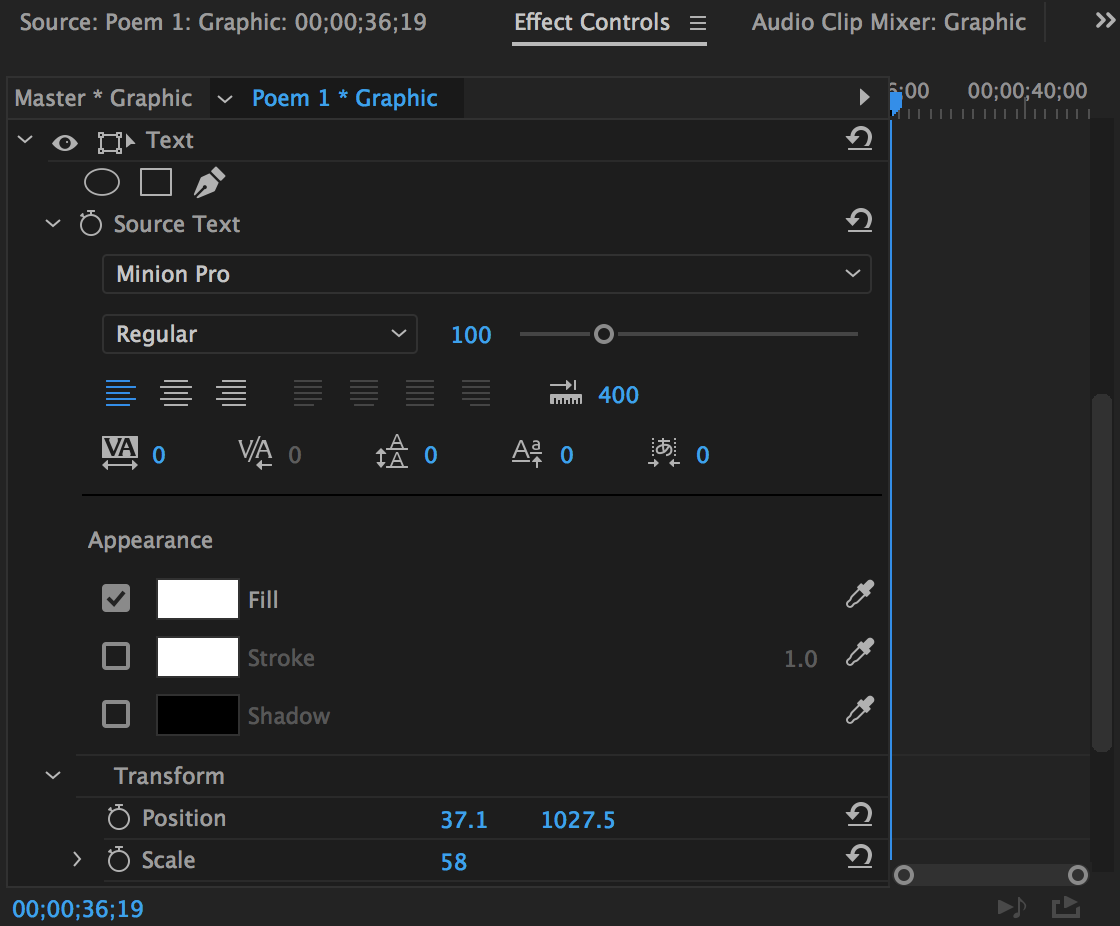
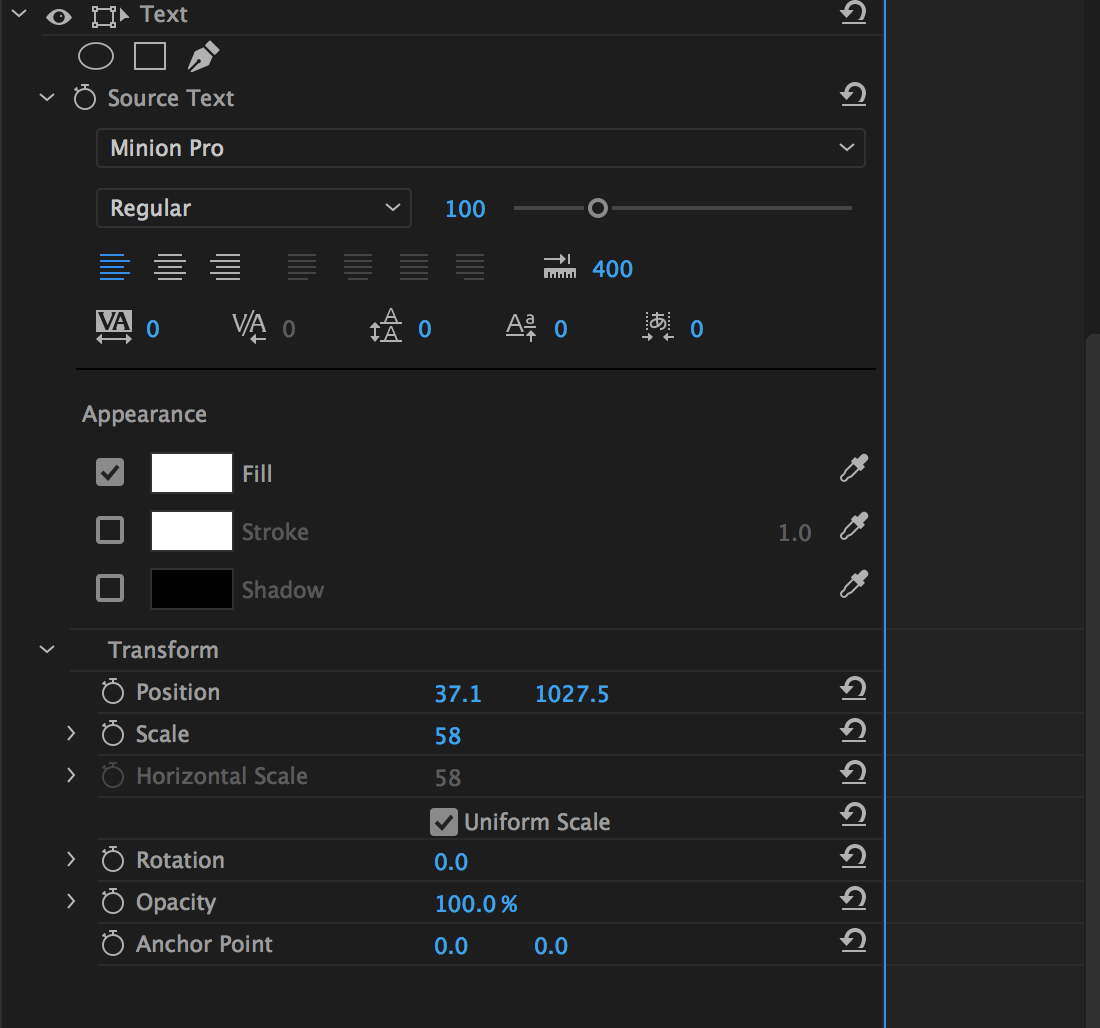
1. Click on the “T” in the toolbar or Press the “T” button on the Mac
2. Click on the video in the Program box
3. Type out what you want to say
*Need to shrink the text?
1. Click on the Selection Tool or press V on the Mac.
2. Hold the Shift key and select a corner from the text box to make the adjustments
*Want to change the duration of the text?
1. Select the text in timeline.
2. Move the cursor to the beginning and/or end of the clip and wait for a red tool to appear.
3. Drag the text out for the need duration
Want to edit the text's appearance?
1. Double-Click on the text in the timeline.
2. Go to Effect Controls.
3. Select Source Text for different effects
4. Hit the check box besides Shadow for the drop shadow effect
Note: Select the desires choices for the text as needed, whether it's for the color or font.
Edit the Audio
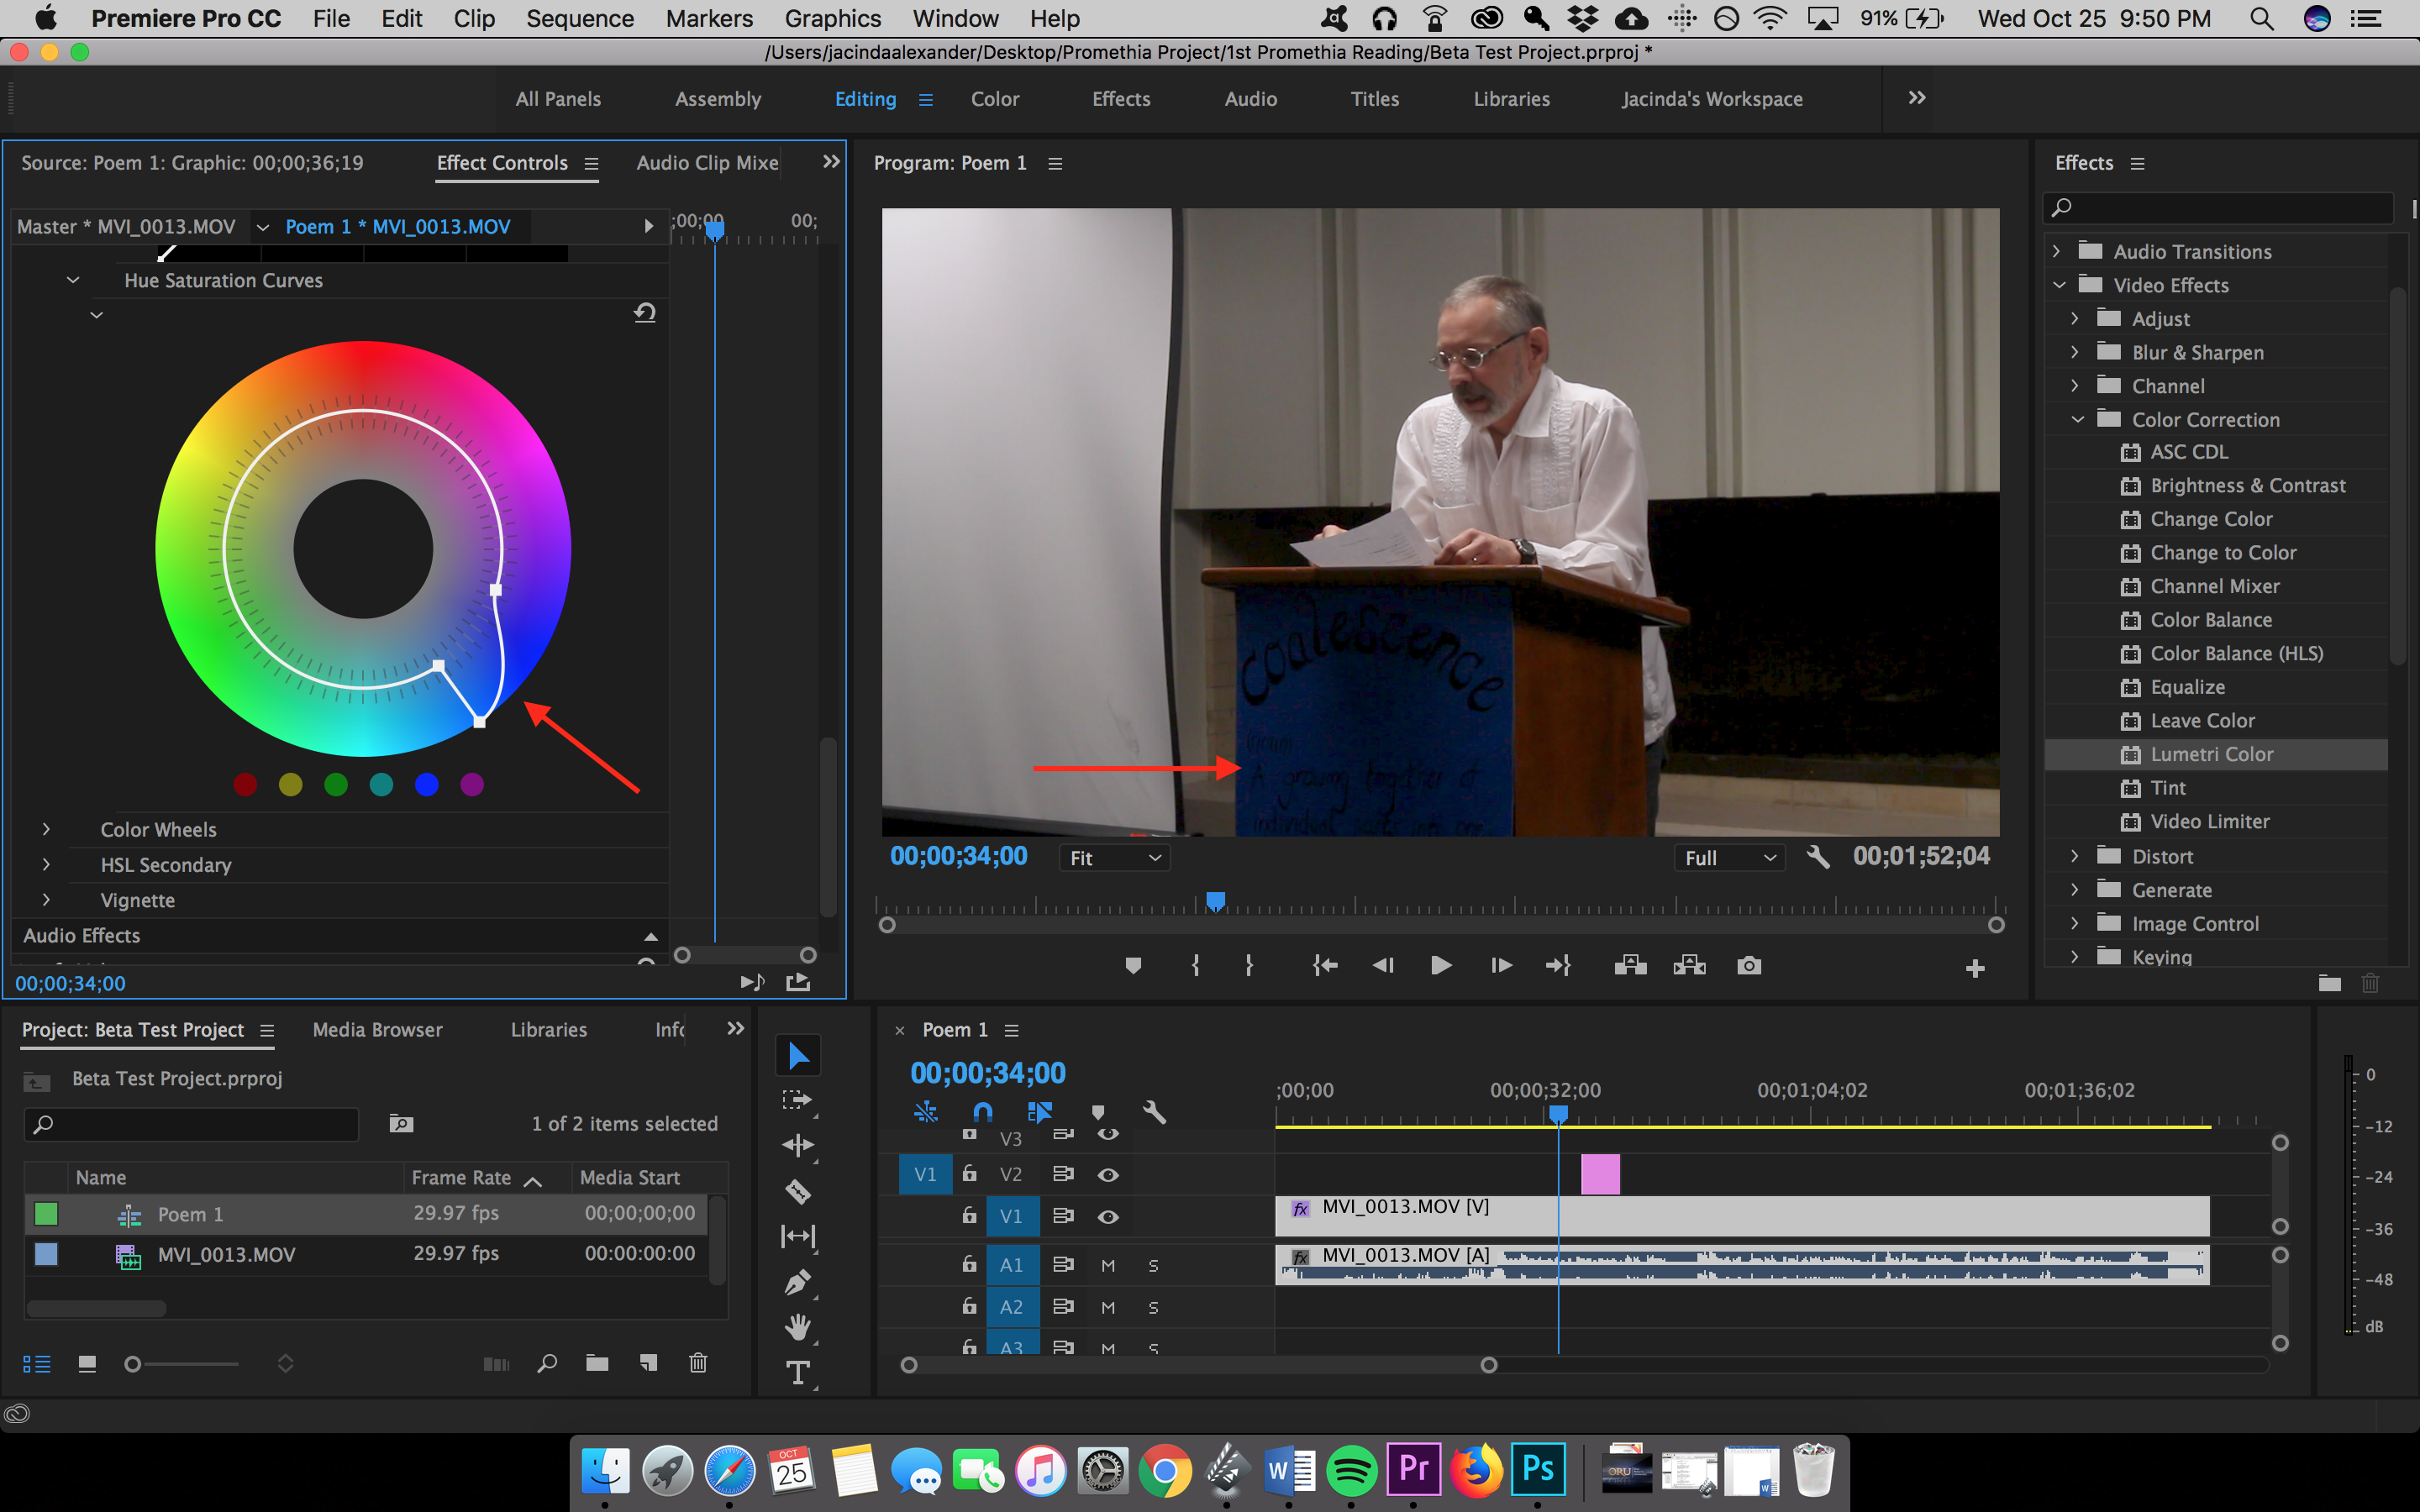
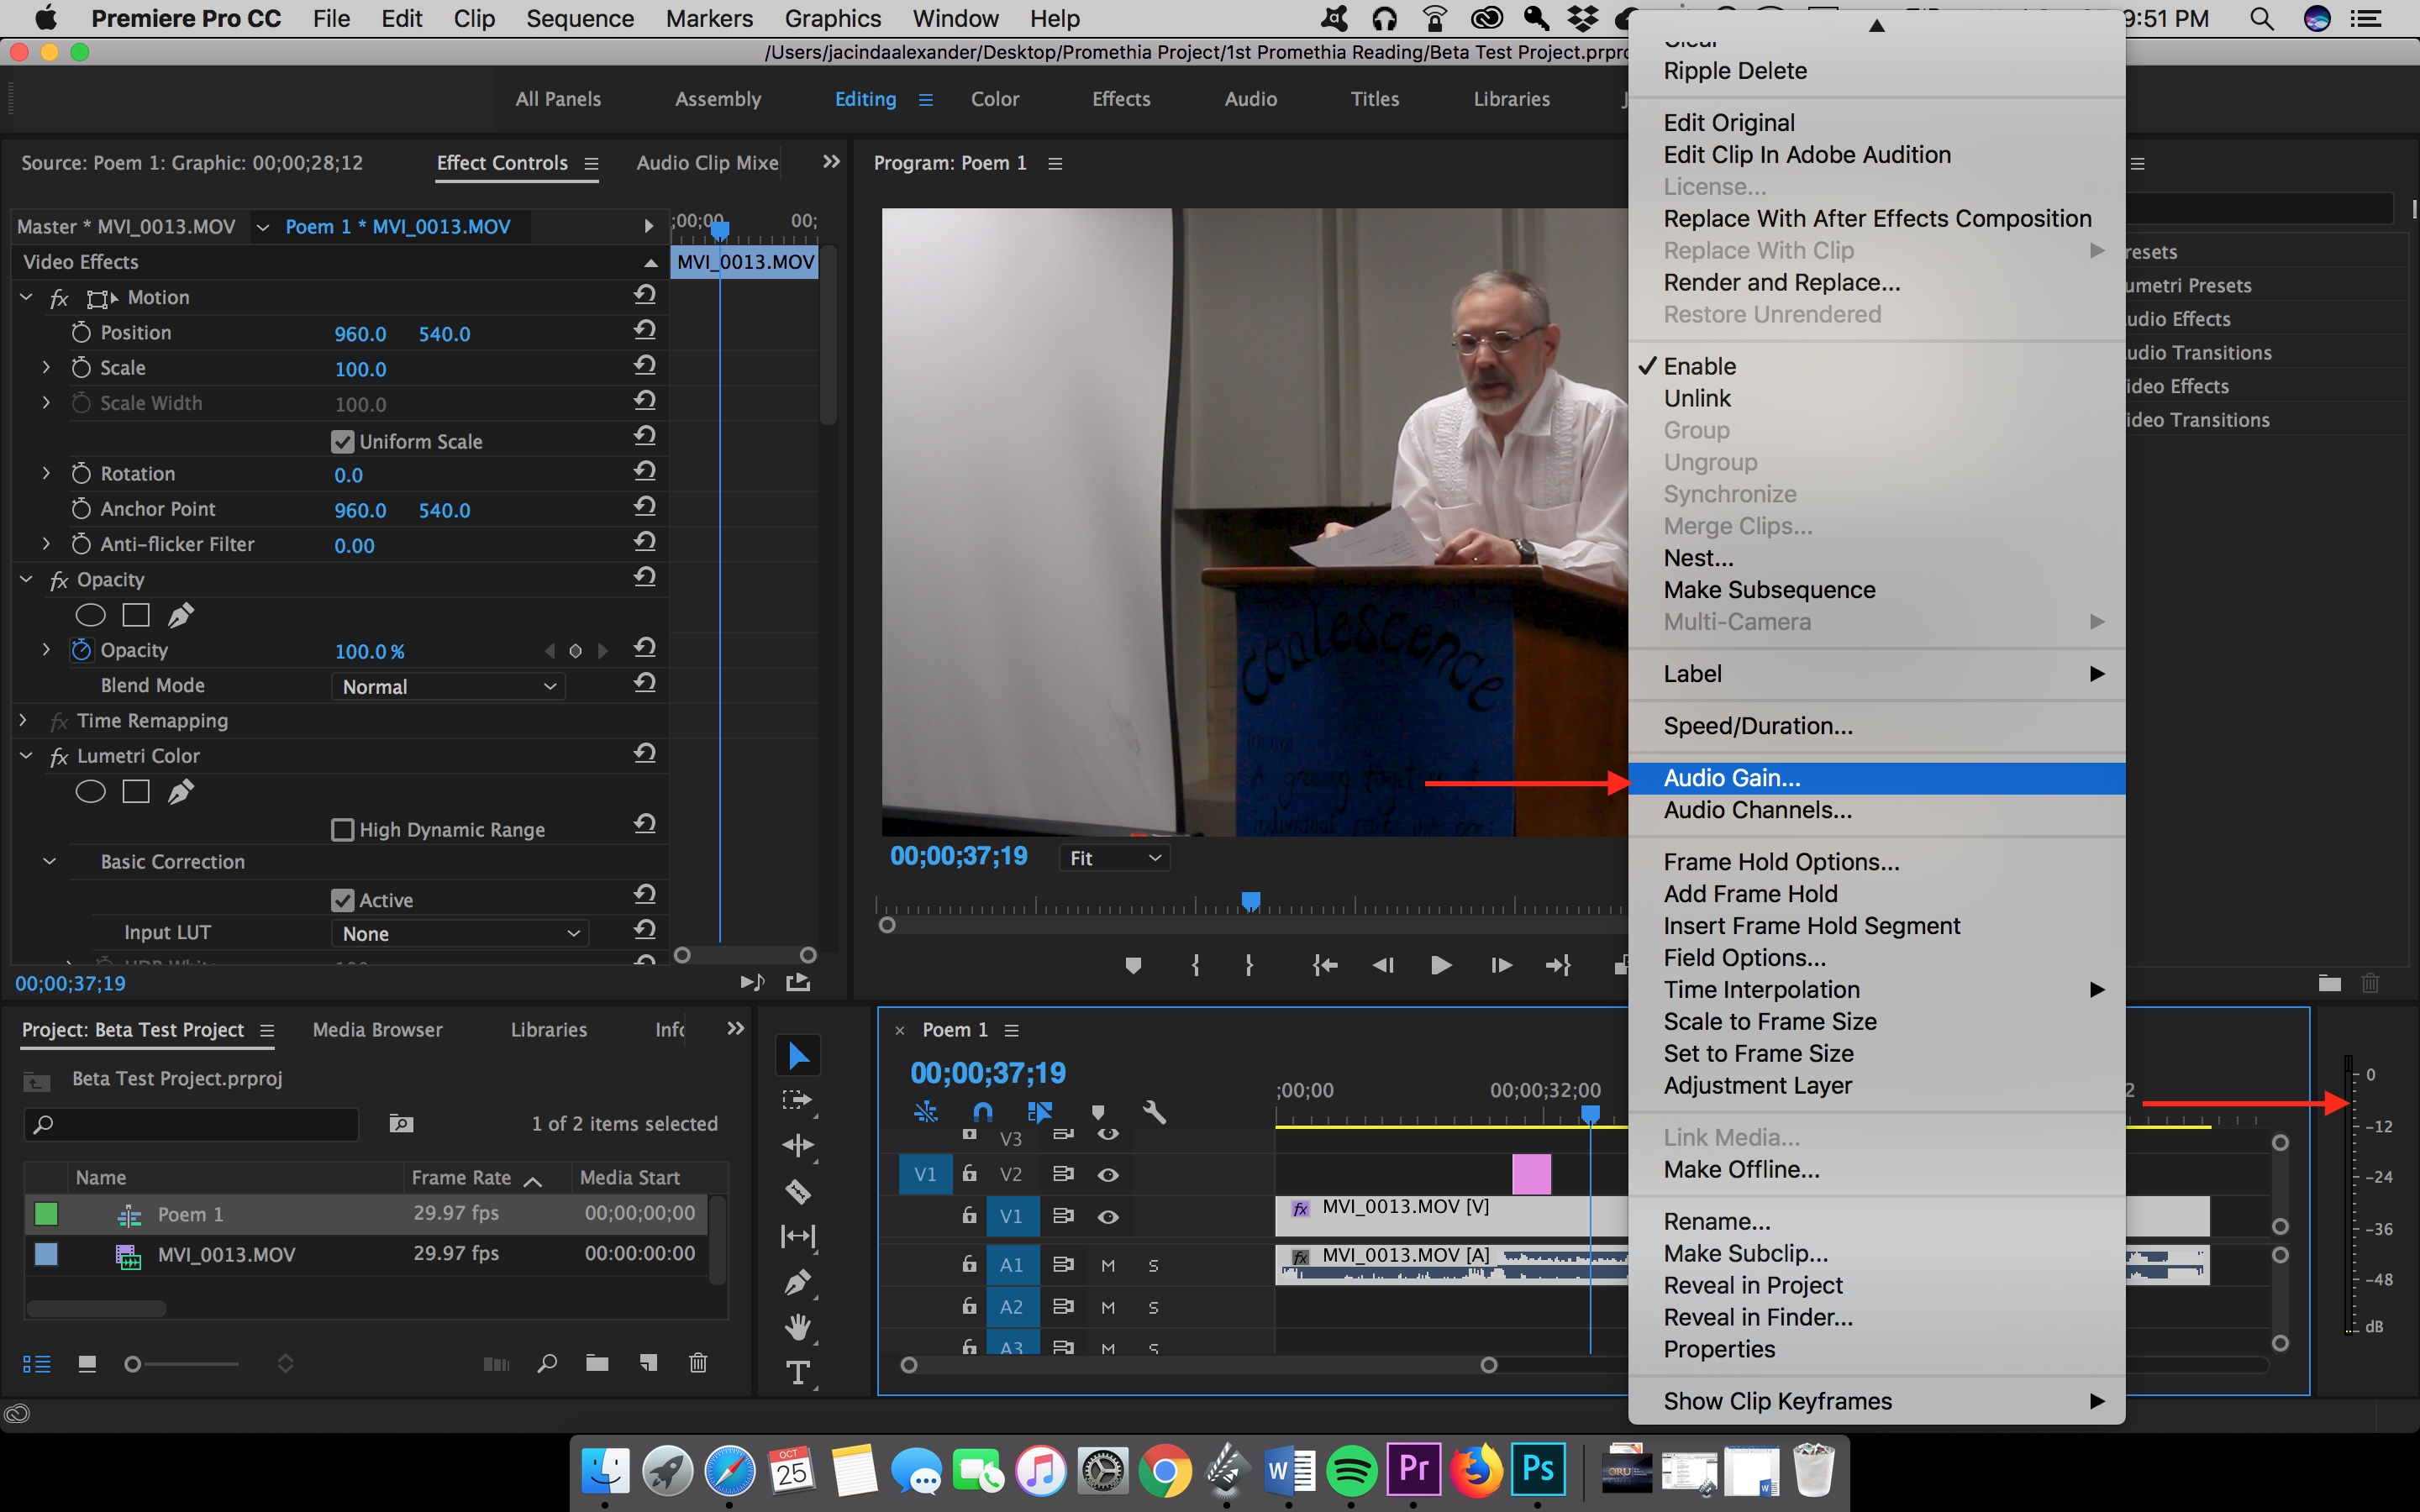
1. Select the clip in the Timeline
2. Move the cursor to the audio clip and right click on it
3. Select Audio Gain
4. Adjust as needed.
Note (When adjusting for audio, if a person is speaking, the levels needs to be between -6 and -12 db. If it’s too low, add some db/gain. If it’s too high, take some away. If music is involved, the same levels are needed with the dialogue and music blending together. )