How to Design a Water Palette
by Julie80 in Craft > Digital Graphics
21 Views, 0 Favorites, 0 Comments
How to Design a Water Palette

Learn how to use the cuboids and copy offset tool to make a personalised palette for 3D printing and use for painting in SelfCAD
How to Design a Water Palette
Learn how to design a water palette using SelfCAD, a powerful 3D modeling and CAD software. SelfCAD serves as a versatile tool, empowering enthusiasts and architects alike to reimagine and customize the water palette process. The interactive tutorial for this article can be accessed here; https://www.selfcad.com/tutorials/6n6o4b2c5j5r2k415lc3d2l731f1m1y5p2y2
To access the software, visit https://www.selfcad.com/,
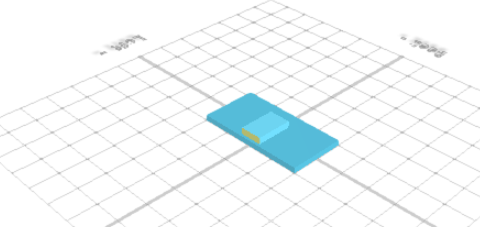
From the 3D shapes category on the Toolbar, choose Cube
Set Width to 200, Height to 10

Click to finalize Cube
From the 3D shapes category on the Toolbar, choose Cube
Set Width to 40, Height to 20, Depth to 65, Position y to 2, position z to 12.5
Click to finalize Cube

Click to activate Face Selection
Click on highlighted region to select it
Click Move on the Toolbar
Set y to 6
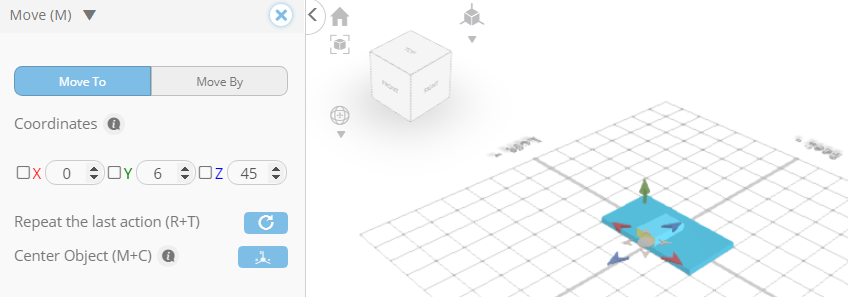
Click ‘X’ to close Transformation panel
Click highlighted part on selection cube to turn off region selection
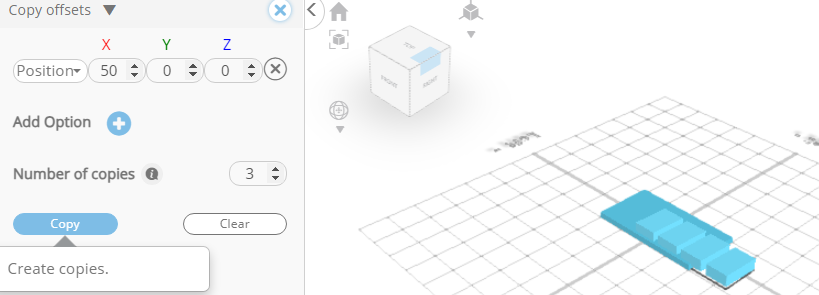
From the Tools category on the Toolbar choose Copy offsets
Set x to 50
Set Amount of copies to 3
Click Copy button to create copies
Click ‘X’ to close copy offsets panel
Click Move on the Toolbar
Set x to 0
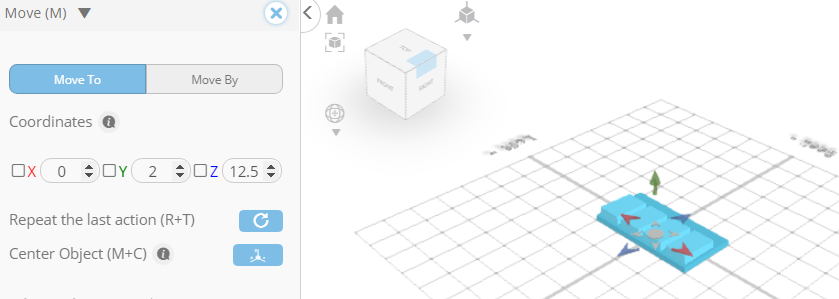
Click ‘X’ to close Transformation panel
From the Edit Menu on the Top Toolbar choose Group
From the 3D shapes category on the Toolbar, choose Cube
Set Width to 15, Height to 20, Depth to 25, Position x to -87, Position y to 2, position z to -35
Click to finalize cube

Click to activate face selection
Click on highlighted region to select it
Click Move on the Toolbar
Set y to 6

Click ‘X’ to close Transformation panel
Click highlighted part on selection cube to turn off region selection
From the Tools category on the Toolbar choose Copy offsets
Set x to 20
Set Amount of copies to 8
Click Copy button to create copies

Click ‘X’ to close copy offsets panel
From the Edit Menu on the Top Toolbar choose Group
From the 3D shapes category on the Toolbar, choose Cylinder
Set Top Radius to 8, Bottom Radius to 6, Height to 30, Position x to 90, position z to -35

Click to finalize Cylinder
From the Edit Menu on the Top Toolbar choose click Select All
Click Stitch & Scoop on the Toolbar
From the Tool panel choose Difference
Choose group-1, group-2, mesh-16 to subtract
Click to finalize Difference
