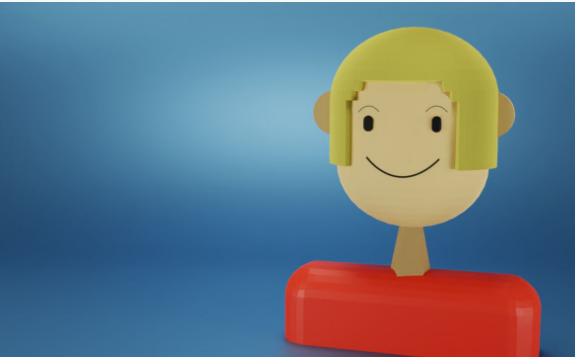
How to Design a UX/UI Face Using SelfCAD
by Julie80 in Design > Digital Graphics
50 Views, 1 Favorites, 0 Comments
How to Design a UX/UI Face Using SelfCAD

Learn How to Design a UX/UI Face Using SelfCAD with the help of this article
How to Design a UX/UI Face Using SelfCAD
When designing a UI/UX face for any digital application, the tools and software chosen can greatly influence the ease, efficiency, and creativity of the process. SelfCAD, a comprehensive, user-friendly 3D modeling software, stands out as an excellent choice for this task. This tutorial explores the step-by-step process of designing a UX/UI face using SelfCAD, highlighting the software's intuitive features, powerful tools, and flexibility. By delving into the specifics of SelfCAD's capabilities, we aim to provide a clear, practical guide for designers, both novice and experienced, to create compelling and functional interfaces that enhance user experience.
To access the interactive tutorial to this article, visit https://www.selfcad.com/tutorials/4u42o1w2q2nq2135473c3b2s2c1p2e3s2616
Once you’ve launched the editor;
From the 3D Shapes category on the toolbar choose capsule; Set top radius to 50, bottom radius to 50, height to 150, horizontal segments to 64, vertical segments to 22, position y to 100
Click to finalize capsule
Click scale on the toolbar; Set z to 66, Set y to 126 using highlighted gizmo
Click ‘x’ to close transformation panel
From the 3D Shapes category on the toolbar choose capsule; Set top radius to 3, bottom radius to 3, height to 10, position x to 20, position y to 200, position z to 30
Click to finalize capsule
Click copy button to copy selected objects
Click move on the toolbar; Set x to -23 using highlighted gizmo
Click ‘x’ to close transformation panel
From the 3D Shapes category on the toolbar choose shape generator; Set top radius to 5, bottom radius to 15, height to 50, position y to 90
Click to finalize shape generator
From the 3D Shapes category on the toolbar choose cube; Set width to 170, height to 95, depth to 50
Click to finalize cube
From the modify category choose fillet; Set intensity to 24, level to 7
Click to finalize fillet
From the 3D Shapes category on the toolbar choose cylinder; Set top radius to 15, bottom radius to 15, height to 5, position x to 50, position y to 184, rotation x to 90
Click to finalize cylinder
Click copy button to copy selected objects
Click move on the toolbar; Set x to -52 using highlighted gizmo
Click ‘x’ to close transformation panel
Click on mesh 4 to select it. Click on mesh 16(1) to deselect
Click to activate face selection; Click on highlighted region to select it
From the modify category on the toolbar choose extrusion; Set use vertex normals to true,
Click highlighted part on selection cube to turn off region selection
Click on mesh 12, 16(1), 16, 8(1), 8, shape 1 to select
Click stitch & scoop on the toolbar; From the panel choose union
Click to finalize union
As you continue honing your design skills, remember that SelfCAD offers a wealth of resources to support your learning journey. To deepen your understanding and explore more advanced features, consider checking out the interactive tutorials (https://www.selfcad.com/tutorials) available on the SelfCAD website. The tutorials page provides a treasure trove of guides, tips, and tricks that cater to designers of all levels.
More structured learning experience can also be accessed at the SelfCAD Academy (https://www.selfcad.com/academy/curriculum/), https://www.youtube.com/@3dmodeling101, and 3D Modeling 101 series (https://www.youtube.com/playlist?list=PL74nFNT8yS9DcE1UlUUdiR1wFGv9DDfTB). This comprehensive resource offers in-depth courses taught by industry experts, allowing you to master the intricacies of SelfCAD at your own pace.