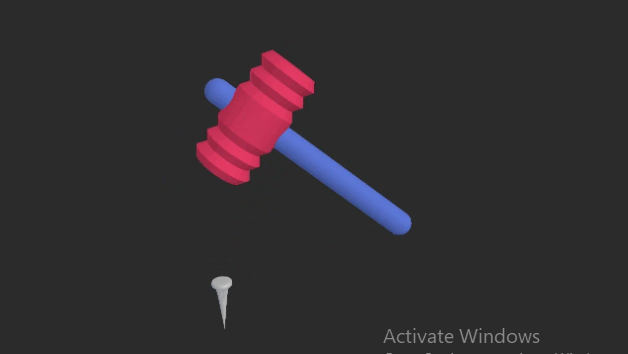
How to Design a Toy Hammer and Nail With SelfCAD
by Julie80 in Design > Digital Graphics
113 Views, 0 Favorites, 0 Comments
How to Design a Toy Hammer and Nail With SelfCAD

Learn how to design a toy hammer and nail with SelfCAD
How to Design a Toy Hammer and Nail with SelfCAD
Welcome to this tutorial where we'll explore the exciting world of 3D design by creating a toy hammer using SelfCAD. SelfCAD is a powerful online 3D modeling and slicing software that offers intuitive tools suitable for beginners and advanced users alike. This project is not only fun but also serves as a fantastic introduction to the fundamentals of 3D modeling, including basic shapes, manipulation techniques, and assembly.
The interactive tutorial to this article can be accessed at https://www.selfcad.com/tutorials/723g276p2g5nl31k734q3h3h161m6dr1x3z2
Once you’ve launched the editor;
From the 3D Shapes Category on the Toolbar, choose capsule. Set Top Radius to 10, Bottom Radius to 10, Height to 200
Click to finalize Capsule
From the 3D Shapes Category on the Toolbar, choose cylinder. Set Top Radius to 25, Bottom Radius to 25, Horizontal segments to 14, Position y to 130, Rotation z to 90
Click to finalize Cylinder
Click to activate Edge selection
Click selection settings button to change selection settings. Set Loop selection to true
Click on highlighted edge to select loop from the object
Click ‘x’ to close selection swings panel
Click Scale on the Toolbar. Set y to 40. Set z to 40
Click ‘x’ to close Transformation panel
Click on highlighted region to deselect it.
Click Color picker button to change color of selected object. Click Red button
Click OK button to confirm color change
Click highlighted part on selection cube to turn off region selection
Click on mesh 4 to select it. Click on mesh 8 to deselect it
Click Color picker button to change color of selected object. Click Blue button
Click OK button to confirm color change
Click on mesh-8 to select it
Click Stitch & Scoop on the Toolbar
From the Tool panel choose Union
Click to finalize Union
From the 3D Shapes Category on the Toolbar, choose cone. Set Radius to 5, Height to 50, Position x to 30, Rotation x to 180
Click to finalize cone
From the 3D Shapes Category on the Toolbar, choose cylinder
Set Top Radius to 9, Bottom radius to 9, Height to 5, Position x to 30, Position y to 48
Click to finalize cylinder
Click on mesh 12 to select it
Click Stitch & Scoop on the Toolbar
From the Tool panel choose Union
Click to finalize Union
From the Modify category on the Toolbar choose Round object
Set Smoothness to 2
Click to finalize Round object
Click Color picker button to change color of selected object
Click silver button
Click OK button to confirm color change
Complete!
As you continue honing your design skills, remember that SelfCAD offers a wealth of resources to support your learning journey. To deepen your understanding and explore more advanced features, consider checking out the interactive tutorials (https://www.selfcad.com/tutorials) available on the SelfCAD website. The tutorials page provides a treasure trove of guides, tips, and tricks that cater to designers of all levels.
More structured learning experience can also be accessed at the SelfCAD Academy (https://www.selfcad.com/academy/curriculum/) and 3D Modeling 101 series (https://www.youtube.com/playlist?list=PL74nFNT8yS9DcE1UlUUdiR1wFGv9DDfTB). This comprehensive resource offers in-depth courses taught by industry experts, allowing you to master the intricacies of SelfCAD at your own pace.