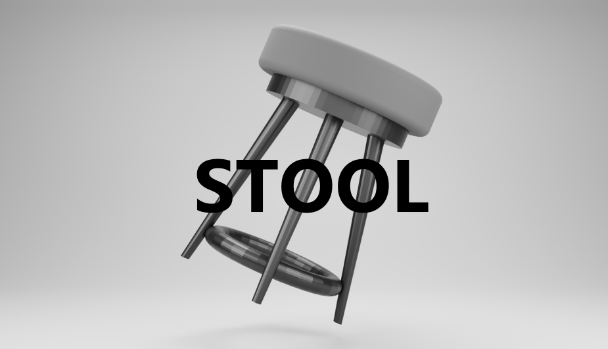
How to Design a Stool Using SelfCAD
by Julie80 in Craft > Digital Graphics
9 Views, 0 Favorites, 0 Comments
How to Design a Stool Using SelfCAD
Learn How to Design a Stool Using SelfCAD with the help of this article
How to Design a Stool Using SelfCAD
The art of 3D modeling offers endless possibilities for creativity and practical application. Among the myriad of objects one can design, a stool stands out as a perfect project for beginners and intermediate designers alike. It combines the challenge of precision with the opportunity for aesthetic expression. In this tutorial, we will delve into the process of designing a stool using SelfCAD, an intuitive and powerful online 3D modeling software.
SelfCAD is renowned for its accessibility and comprehensive toolset, making it an ideal choice for those new to 3D design as well as seasoned professionals. By embarking on the project of creating a stool, you will not only become familiar with the essential functions of SelfCAD but also gain valuable insights into product design, from conceptualization to execution.
To access the interactive tutorial to this article, visit https://www.selfcad.com/tutorials/4tr3i4y214n5az6v1u6y6728u455x43q4q34
Once you’ve launched this editor;
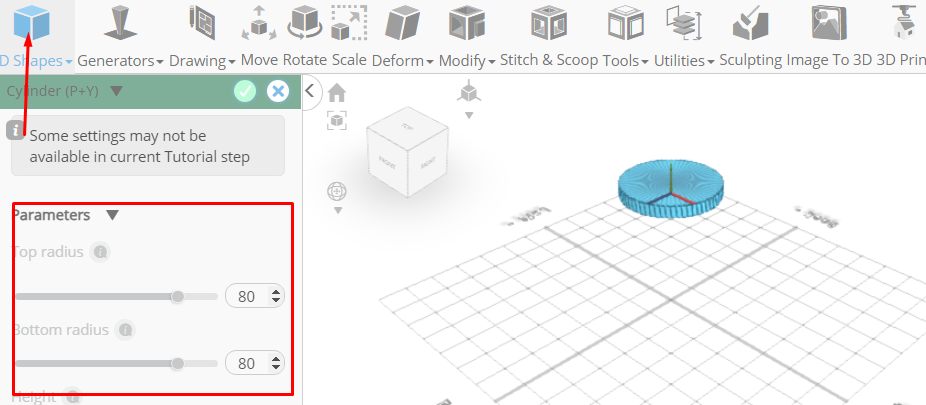
From the 3D Shapes category on the toolbar choose cylinder; Set top radius to 80, bottom radius to 80, height to 20, vertical segments to 64, position y to 200
Click to finalize cylinder
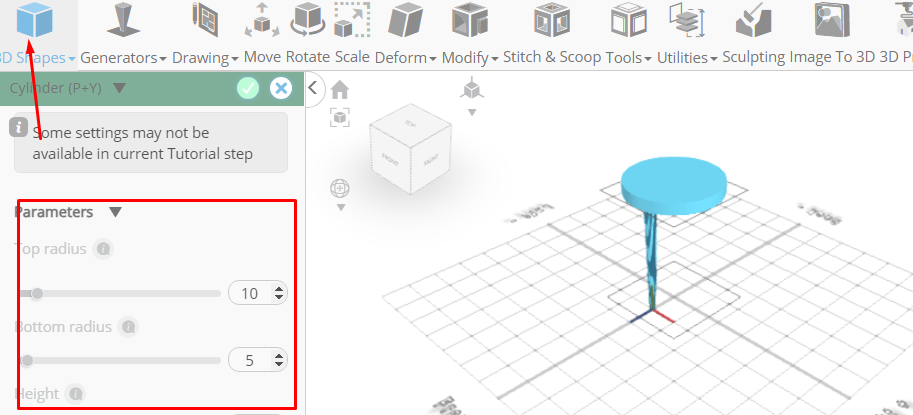
From the 3D Shapes category on the toolbar choose cylinder; Set top radius to 10, bottom radius to 5, height to 200, position z to 50
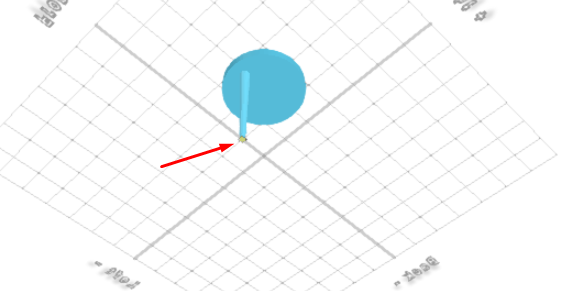
Click to finalize cylinder
Click to activate polygon selection; Click on highlighted region to select it
Click move on the toolbar; Set z to 90
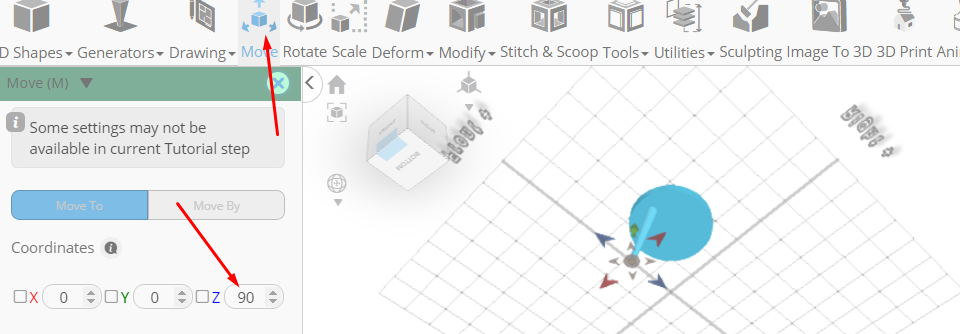
Click ‘x’ to close transformation panel
Click on highlighted region to deselect it
From the tools category on the toolbar choose copy offsets; Set operation to pivot, Set amount of copies to 3, Click copy button to create copies
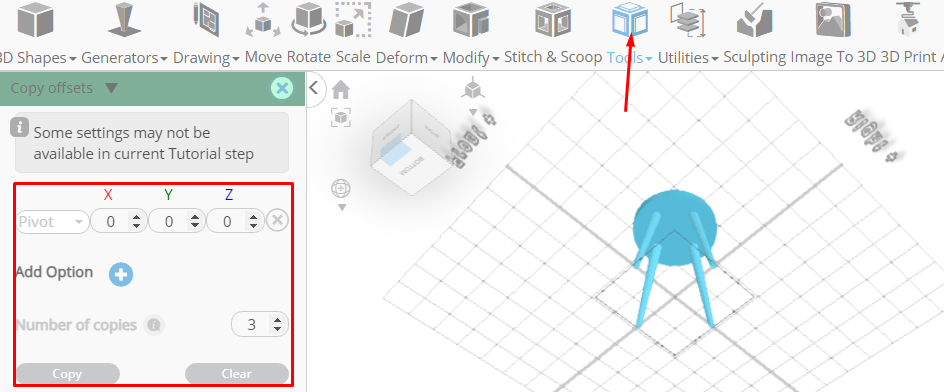
Click ‘x’ to close copy offsets panel
From the 3D Shapes category on the toolbar choose torus; Set ring radius to 70, tube radius to 10, tubular segments to 32, radial segments to 32, position y to 25
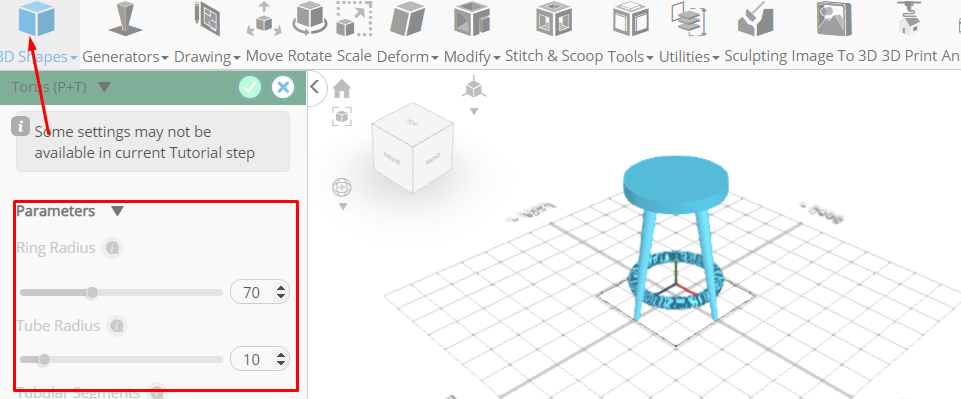
Click to finalize torus
Click on mesh 8(3), 8(1), 8(2), 8, 4 to select
Click stitch & scoop on the toolbar; From the tool panel choose union
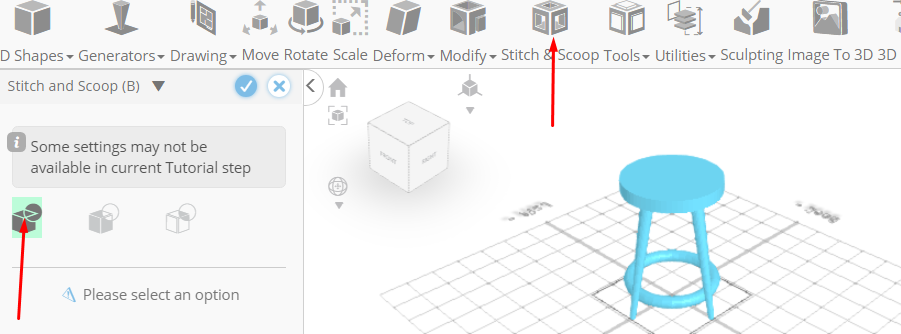
Click to finalize union
From the 3D Shapes category on the toolbar choose cylinder; Set top radius to 100, bottom radius to 100, height to 50, vertical segments to 64, position y to 220
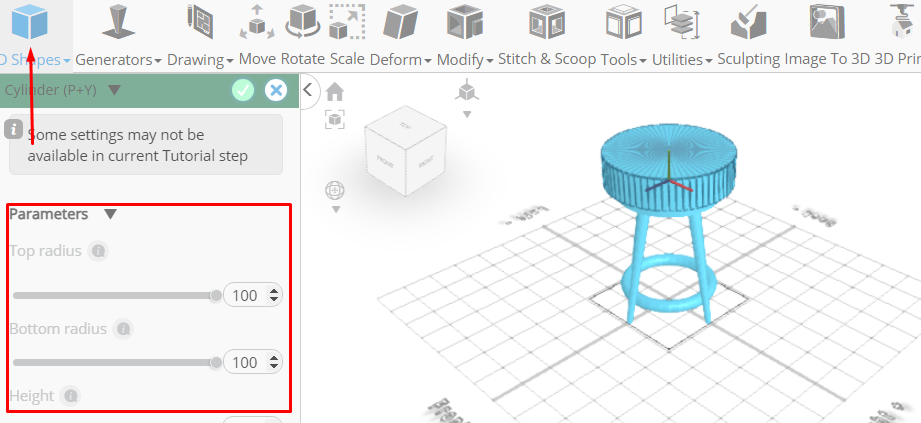
Click to finalize cylinder
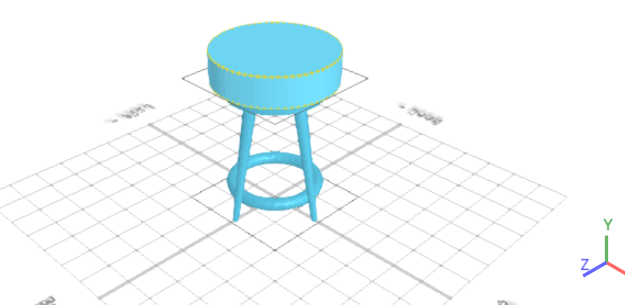
Click to activate edge selection; Click on highlighted region to select it
From the modify category choose fillet; Set level to 10
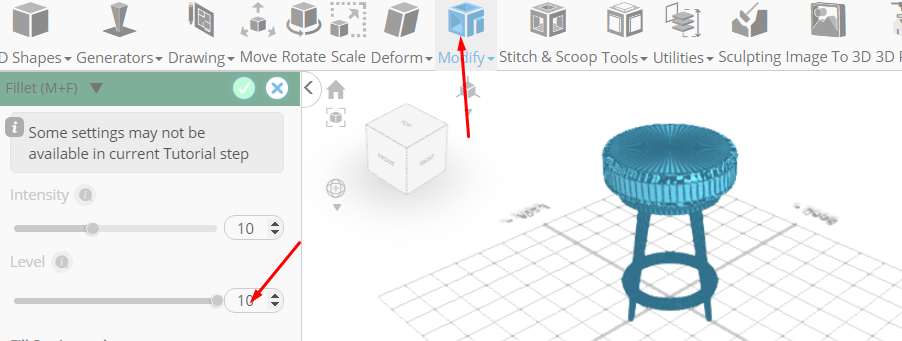
Click to finalize fillet
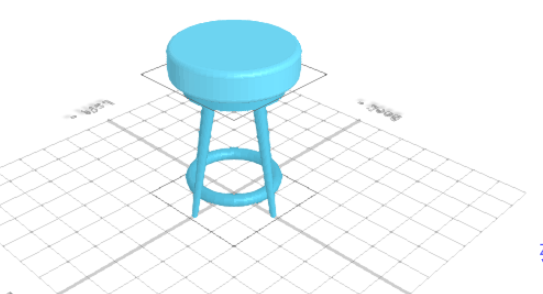
Click highlighted part on selection cube to turn off region selection
As you continue honing your design skills, remember that SelfCAD offers a wealth of resources to support your learning journey. To deepen your understanding and explore more advanced features, consider checking out the interactive tutorials (https://www.selfcad.com/tutorials) available on the SelfCAD website. The tutorials page provides a treasure trove of guides, tips, and tricks that cater to designers of all levels.
More structured learning experience can also be accessed at the SelfCAD Academy (https://www.selfcad.com/academy/curriculum/), https://www.youtube.com/@3dmodeling101, and 3D Modeling 101 series (https://www.youtube.com/playlist?list=PL74nFNT8yS9DcE1UlUUdiR1wFGv9DDfTB). This comprehensive resource offers in-depth courses taught by industry experts, allowing you to master the intricacies of SelfCAD at your own pace.