How to Design a Simple Metal Door Handle Using SelfCAD
by Julie80 in Design > Digital Graphics
95 Views, 0 Favorites, 0 Comments
How to Design a Simple Metal Door Handle Using SelfCAD
Learn How to Design a Simple Metal Door Handle Using SelfCAD with the help of this tutorial
How to Design a Simple Metal Door Handle Using SelfCAD
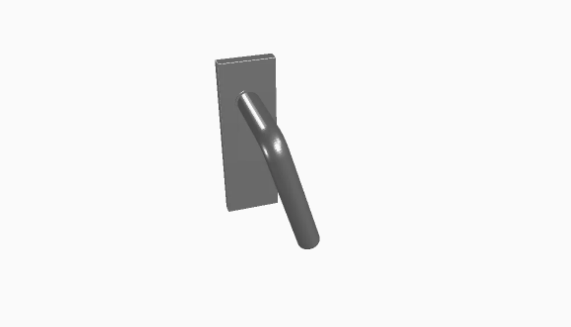
Welcome to this tutorial on crafting a simple metal door handle using SelfCAD. A door handle may seem like a small detail, but it's a crucial element in the aesthetic and functionality of any space. Whether you're designing for interior décor or industrial applications, mastering the art of creating door handles opens up a world of design possibilities.
In this tutorial, we'll walk you through the process of conceptualizing, designing, and refining a metal door handle from scratch. With SelfCAD's powerful array of modeling tools and intuitive interface, you'll be able to bring your vision to life with precision and ease. Whether you're a seasoned designer or just starting out, this tutorial will equip you with the skills and knowledge to create custom door handles that elevate any environment.
To access the interactive tutorial to this article, visit https://www.selfcad.com/tutorials/a1r6cv5l1r3u694ll4m2j2l2c734xd6q6q1l
Once you’ve launched the editor;
From the 3D Shapes category on the Toolbar choose Cube; Set Width to 50, Height to 150, Depth to 10
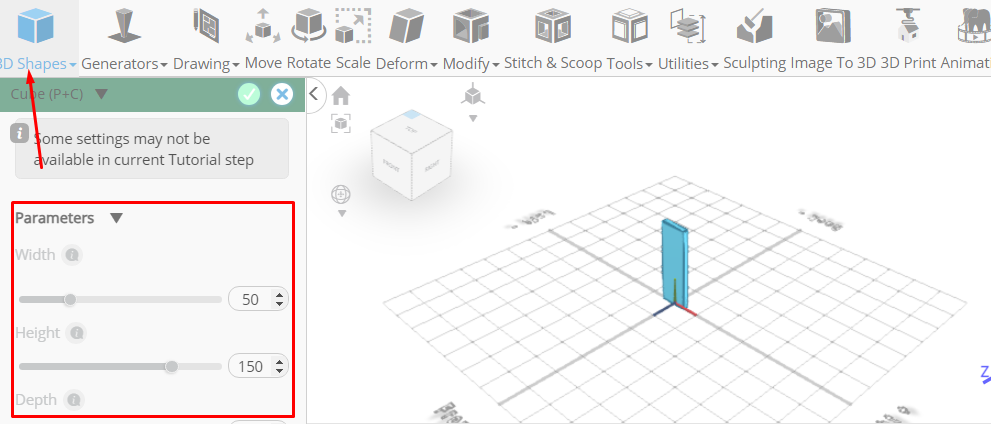
Tick the checkmark to finalize Cube
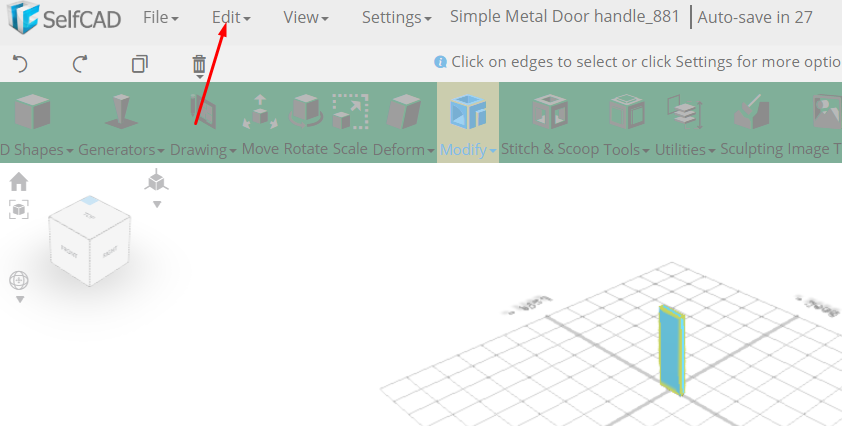
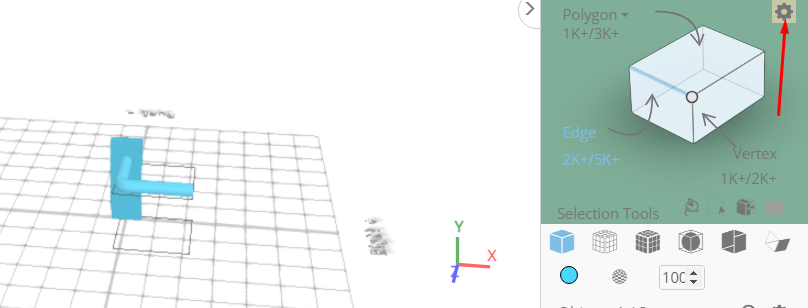
Click to activate Edge selection
From the Edit Menu on the Top toolbar choose Select All
From the Modify category on the Toolbar choose Fillet; Set Intensity to 1, Level to 5
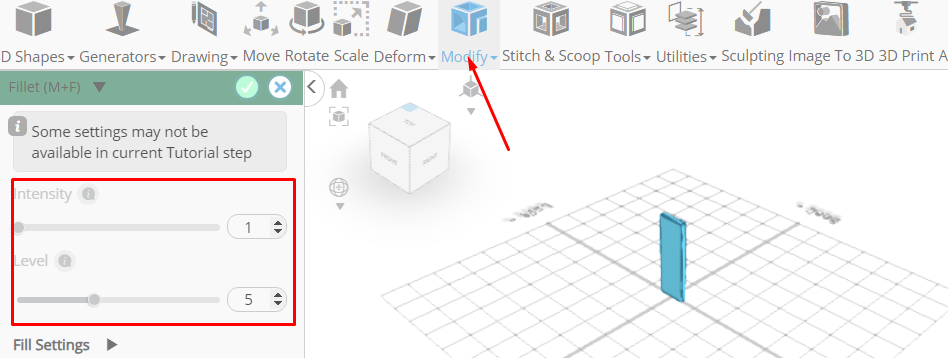
Tick the checkmark to finalize Fillet
From the 3D Shapes category on the Toolbar choose Cylinder; Set Top Radius to 12, Bottom radius to 12, Height to 12, Vertical segments to 64, Position y to 100, Rotation x to 90
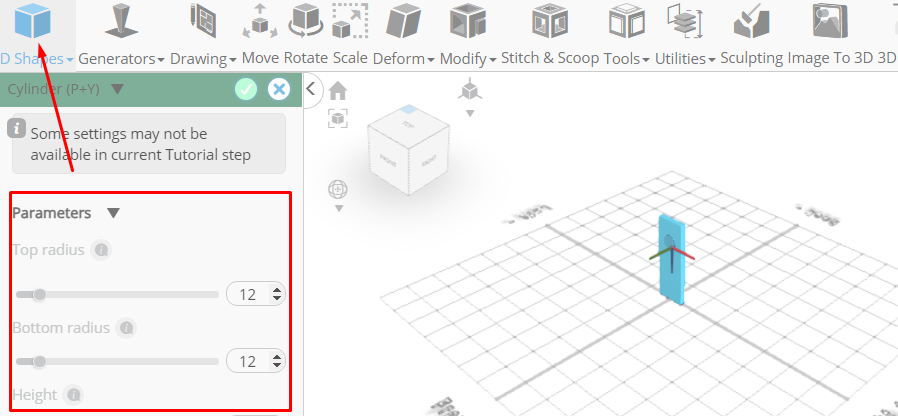
Tick the checkmark to finalize cylinder
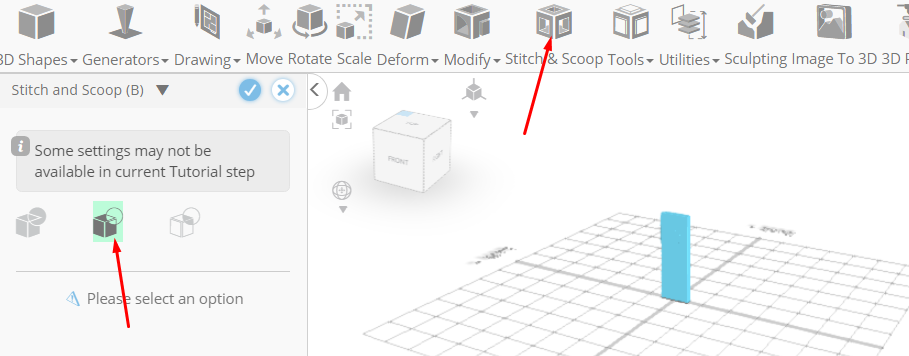
Click highlighted part on selection cube to turn off region selection, Click on mesh 4 to select it
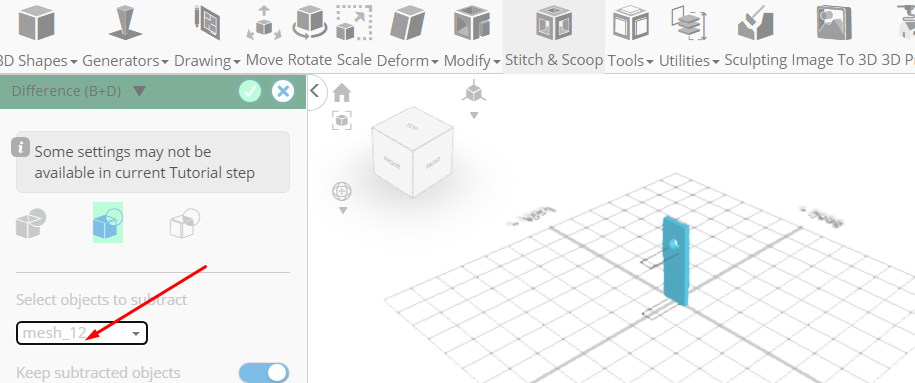
Click Stitch & Scoop on the Toolbar; From the Tool panel choose Difference
Choose mesh 8 to subtract and set keepSubtractedObject to true
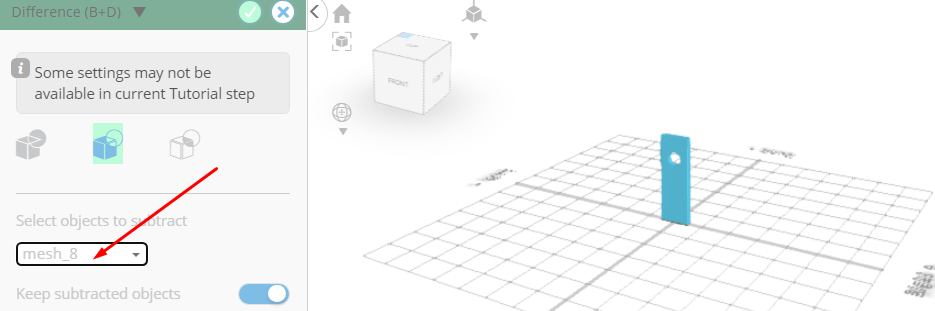
Tick the checkmark to finalize Difference
From the 3D Shapes category on the Toolbar choose Cylinder; Set Top Radius to 10, Bottom radius to 10, Height to 75, Vertical segments to 64, Position y to 102, Position z to 30, Rotation x to 90

Tick the checkmark to finalize cylinder
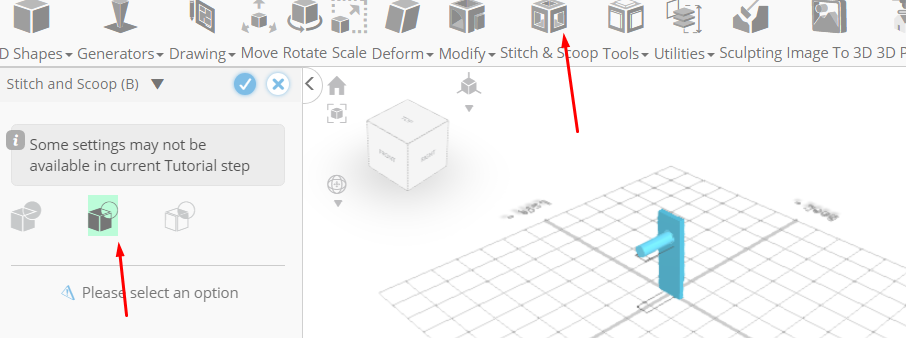
Click on mesh 8 to select it
Click Stitch & Scoop on the Toolbar; From the Tool panel choose Difference
Choose mesh 12 to subtract and set keepSubtractedObject to true
Tick the checkmark to finalize Difference
Click on Difference 2 to deselect it and activate Polygon selection
Click on highlighted region to select it
From the Modify category on the Toolbar choose Extrusion; Set Extrusion Amount to 1

Click Add Option to add next macro step
Set operation to rotate, Set y to -5, Set Amount of copies to 18
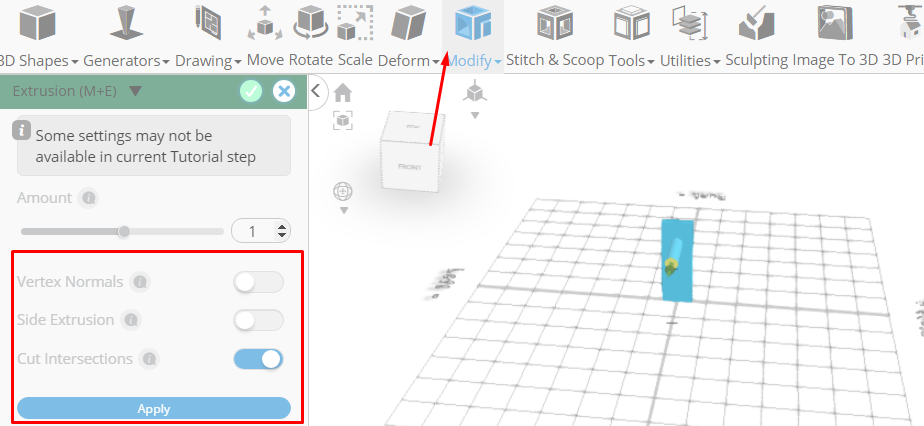
Tick the checkmark to finalize Extrusion
From the Modify category on the Toolbar choose Extrusion, Set Extrusion Amount to 100
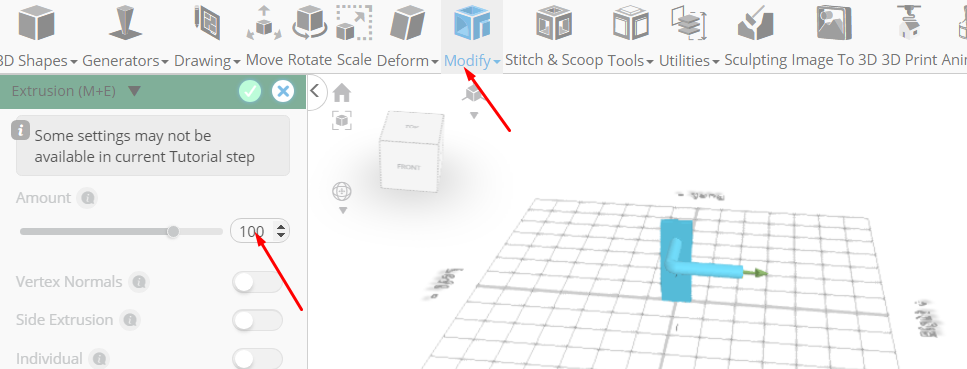
Tick the checkmark to finalize Extrusion
Click on highlighted region to deselect it and Click to activate Edge selection
Click on the gear icon to open the advanced selection tools
Set Loop selection to true
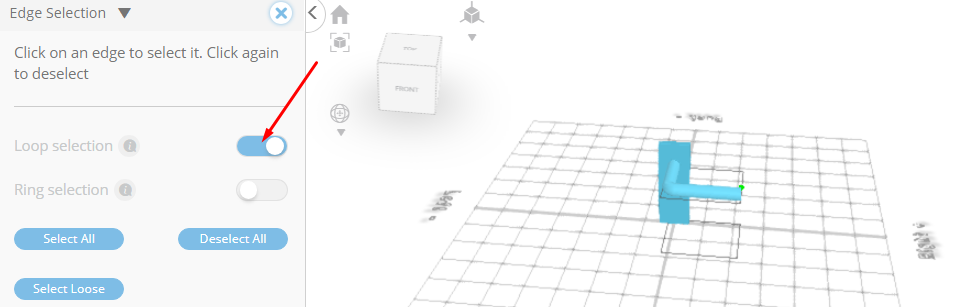
Click on highlighted edge to select loop from the object
Click on highlighted edge to select loop from the object
From the Modify category on the Toolbar choose Fillet; Set Intensity to 4.9, Level to 10
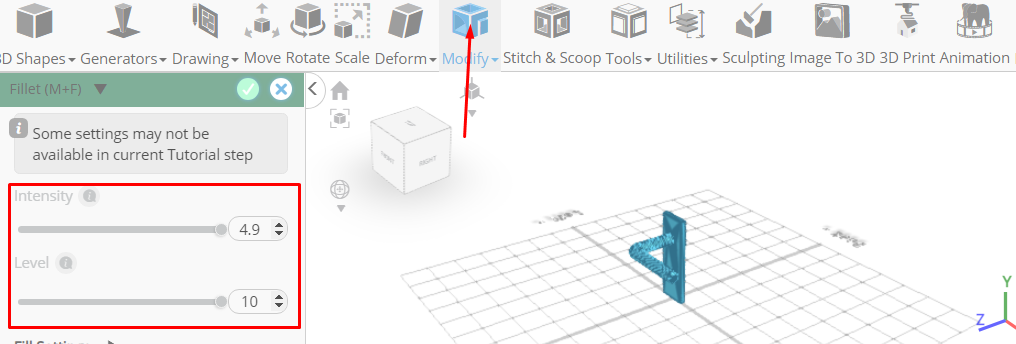
Tick the checkmark to finalize Fillet and turn off region selection
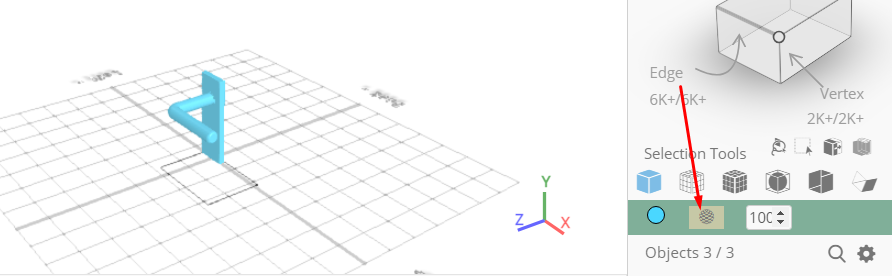
Click on difference 2, difference 1, to select it
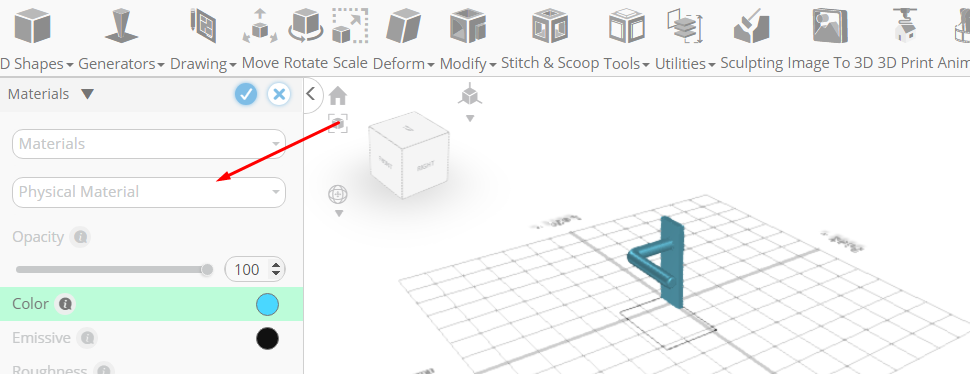
From the right panel choose materials
Set material type to physical material
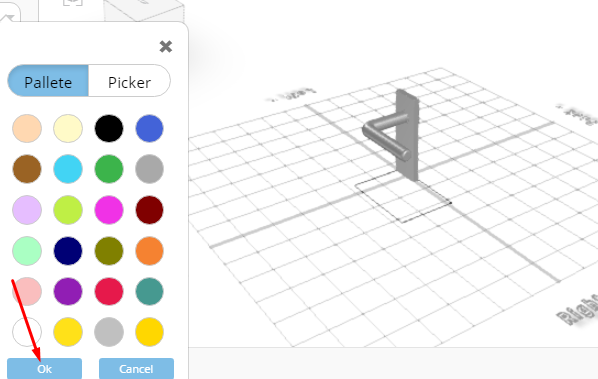
Click color button to change material color; Click White button to change material color
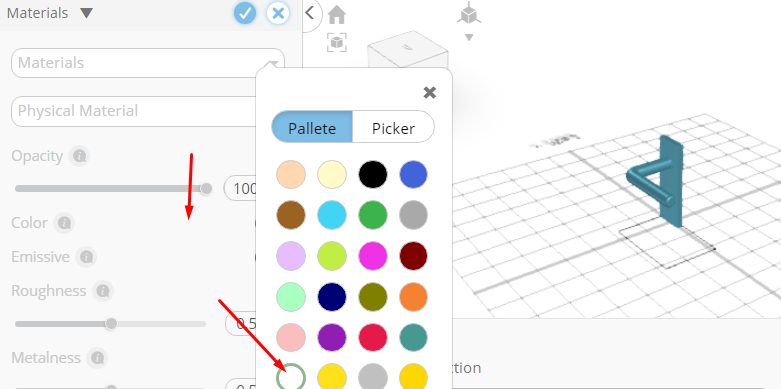
Click OK to confirm color change
Set Metalness to 0.6
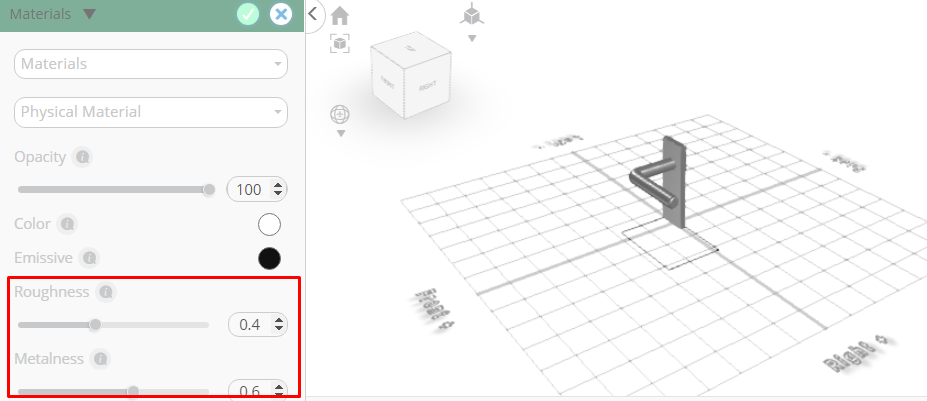
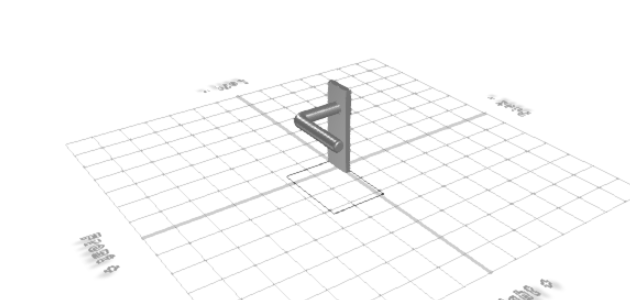
Tick the checkmark to finalize Materials
As you continue honing your design skills, remember that SelfCAD offers a wealth of resources to support your learning journey. To deepen your understanding and explore more advanced features, consider checking out the interactive tutorials (https://www.selfcad.com/tutorials) available on the SelfCAD website. The tutorials page provides a treasure trove of guides, tips, and tricks that cater to designers of all levels.
More structured learning experience can also be accessed at the SelfCAD Academy (https://www.selfcad.com/academy/curriculum/), https://www.youtube.com/@3dmodeling101, and 3D Modeling 101 series (https://www.youtube.com/playlist?list=PL74nFNT8yS9DcE1UlUUdiR1wFGv9DDfTB). This comprehensive resource offers in-depth courses taught by industry experts, allowing you to master the intricacies of SelfCAD at your own pace.