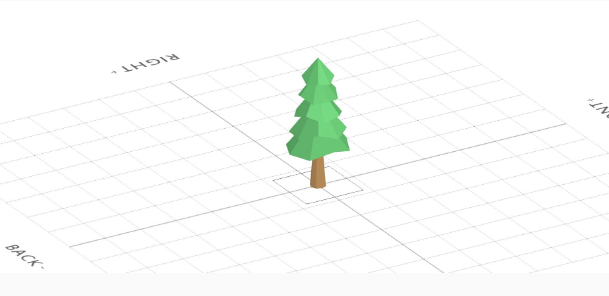
How to Design a Pine Tree With SelfCAD
by Julie80 in Design > Digital Graphics
110 Views, 0 Favorites, 0 Comments
How to Design a Pine Tree With SelfCAD

Learn how to design a pine tree with SelfCAD
How to Design a Pine Tree with SelfCAD
In this tutorial, we'll guide you through the step-by-step process of creating a realistic pine tree from scratch. This project not only serves as an engaging creative endeavor but also offers valuable insights into the intricacies of 3D modeling, including shape manipulation, texturing, and detailing techniques.
To access the interactive tutorial to this article, visit https://www.selfcad.com/tutorials/5m6t2s1h4i67284f5e3j2c5d6t3d6573581b
Once you’ve launched the editor;
From the 3D Shapes Category on the Toolbar, choose cylinder. Set Top Radius to 5, Bottom Radius to 10, Height to 60, Vertical segments to 8
Click to finalize Cylinder
Click Color picker button to change color of selected object. Click Brown button
Click OK button to confirm color change
From the 3D Shapes Category on the Toolbar, choose cone. Set Radius to 40, Height to 50, Horizontal segments to 8, Position y to 50
Click to finalize cone
Click Color picker button to change color of selected object
Click Green button
Click OK button to confirm color change
Click to activate vertex selection. Click on highlighted region to select it.
Click Move on the Toolbar. Set y to 60 using highlighted gizmo
Click on highlighted region to deselect it. Click on highlighted region to select it.
Set y to 55
Click ‘x’ to close Transformation panel
Click on highlighted region to deselect it.
From the Tools category on the Toolbar choose copy offsets. Set y to 20. Click Add Option to add next macro step
Set Operation to scale. Set x to -10, y to -5, z to -10. Click Add Option to add next macro step. Set Operation to rotate. Set y to 30. Set Amount of copies to 4
Click Copy button to create copies
Click ‘x’ to close copy offsets panel
From the Utilities category on the Toolbar choose Combine. Set Method to Union
Click to finalize Combine
From the Modify Category on the Toolbar choose Resolution. Set Detail Level to 0
Click to finalize Resolution
From the Modify Category on the Toolbar choose Simplify object
Click to finalize Simplify object
Click on mesh-4 to select it
From the Utilities category on the Toolbar choose Combine. Set Method to Union
Click to finalize Combine
Complete!
As you continue honing your design skills, remember that SelfCAD offers a wealth of resources to support your learning journey. To deepen your understanding and explore more advanced features, consider checking out the interactive tutorials (https://www.selfcad.com/tutorials) available on the SelfCAD website. The tutorials page provides a treasure trove of guides, tips, and tricks that cater to designers of all levels.
More structured learning experience can also be accessed at the SelfCAD Academy (https://www.selfcad.com/academy/curriculum/), https://www.youtube.com/@3dmodeling101, and 3D Modeling 101 series (https://www.youtube.com/playlist?list=PL74nFNT8yS9DcE1UlUUdiR1wFGv9DDfTB). This comprehensive resource offers in-depth courses taught by industry experts, allowing you to master the intricacies of SelfCAD at your own pace.