How to Design a Kid’s Desk Using 3D CAD Software
by Julie80 in Design > Digital Graphics
58 Views, 0 Favorites, 0 Comments
How to Design a Kid’s Desk Using 3D CAD Software

Learn How to Design a Kid’s Desk Using 3D CAD Software with the help of this article
How to Design a Kid’s Desk Using 3D CAD Software
A kid’s desk is more than just a piece of furniture. It is a space where children can learn, create, and grow. Designing one requires careful consideration of size, ergonomics, and functionality to ensure it meets a child’s needs. With the help of SelfCAD, a powerful 3D modeling software, designers can easily bring their ideas to life. Unlike traditional design methods that rely on manual drawings and physical prototypes, SelfCAD allows users to create, modify, and visualize their designs digitally, making the process more efficient and precise.
In this article, we will explore the step-by-step process of designing a kid’s desk using SelfCAD. From shaping the structure and adding storage compartments to refining details like rounded edges for safety, each stage of the design process will be covered. Whether you are a beginner or an experienced designer, this guide will help you create a functional and stylish desk tailored to a child’s needs.
To access the interactive tutorial to this article, check out https://www.selfcad.com/tutorials/214q2m5m6g3t4l185494j27z4k14636535u5
Once you’ve launched the editor;
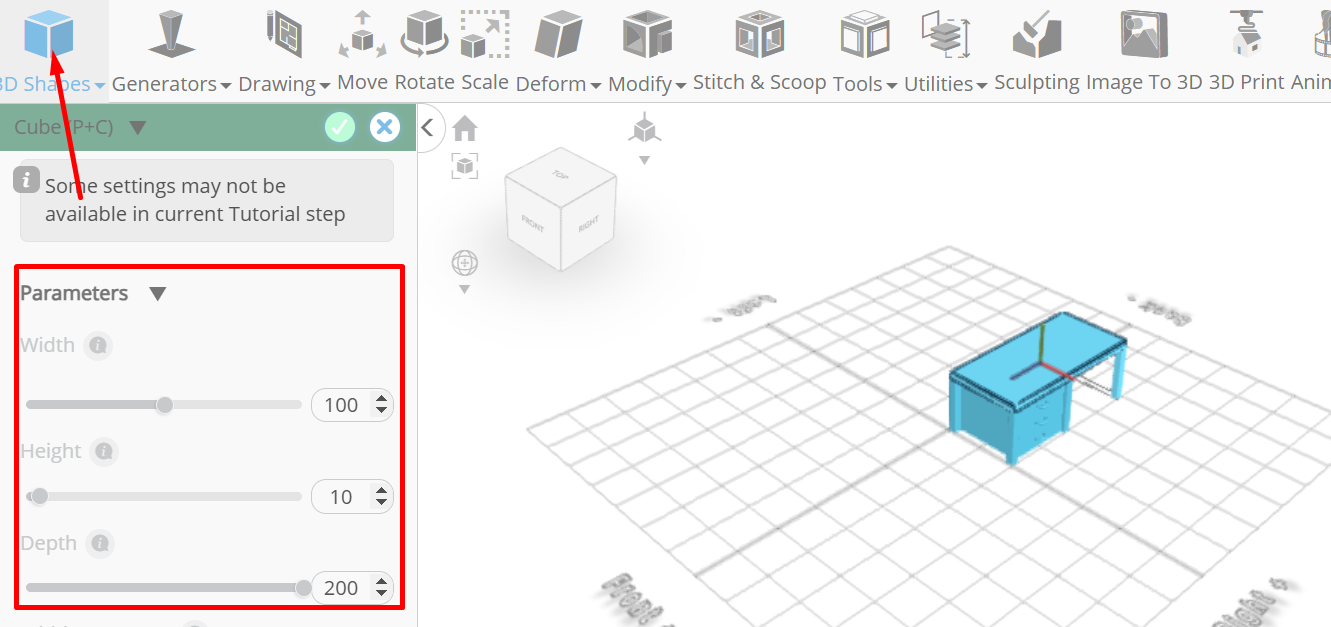
From the 3D Shapes category on the toolbar choose cube; Set width to 10, height to 70, depth to 10, position x to 5, position z to -5.
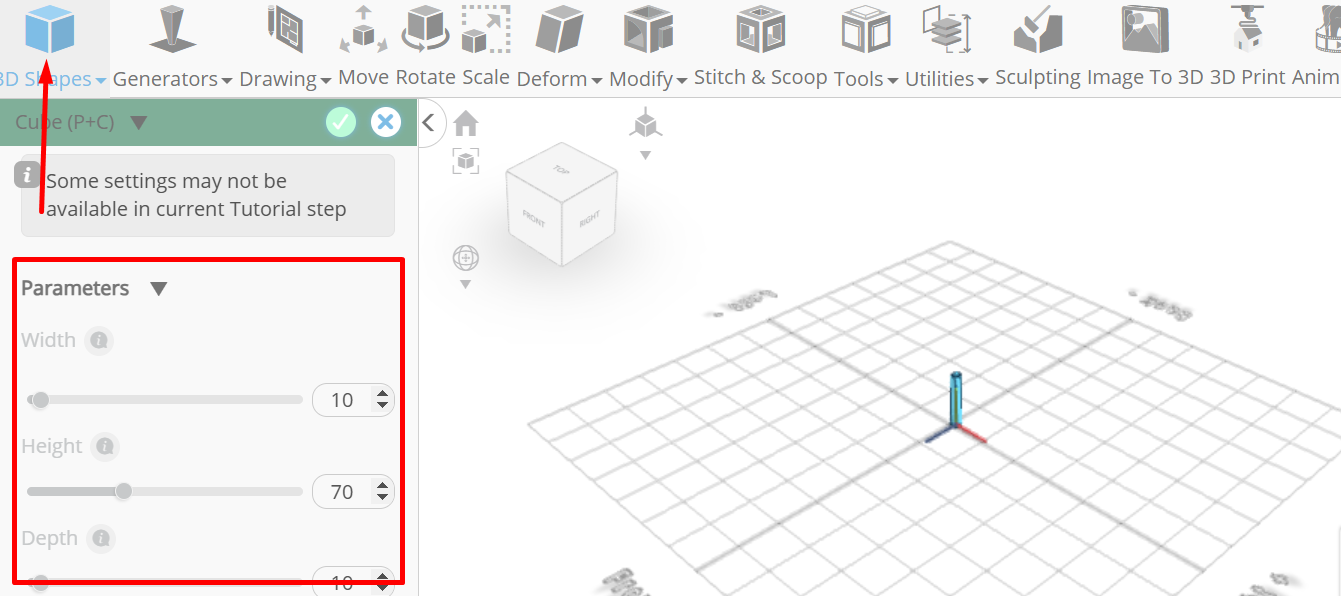
Click to finalize cube
Click to activate edge selection; Click on highlighted region to select it

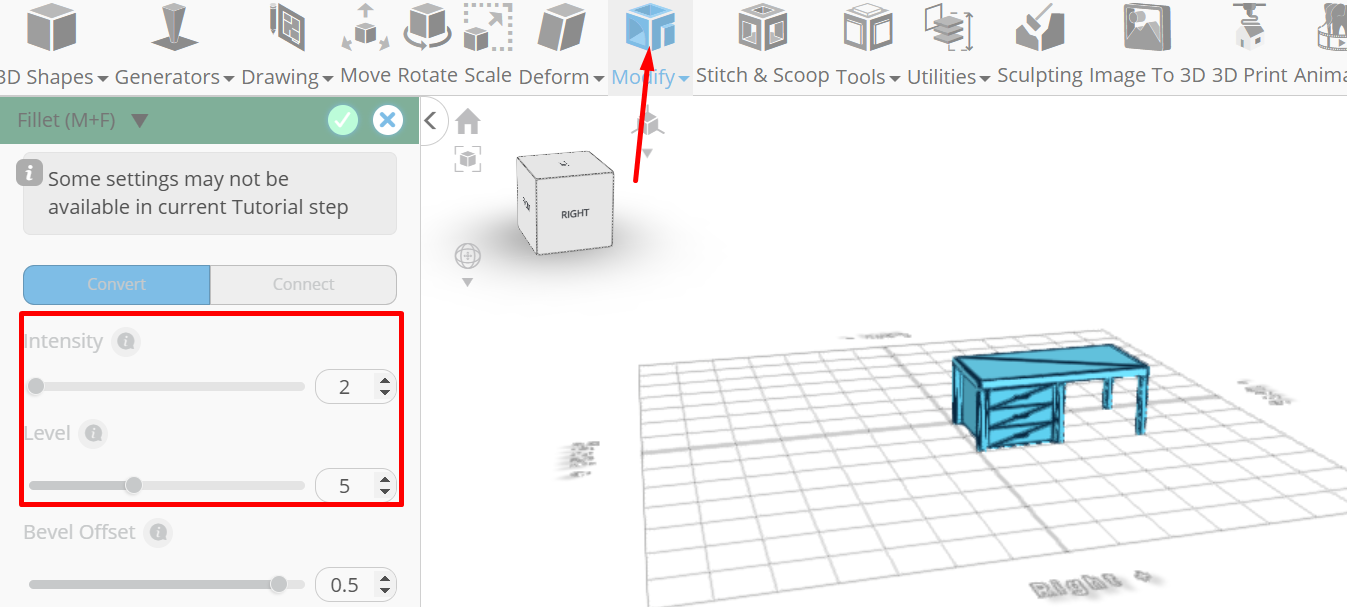
From the modify category on the toolbar choose fillet; Set intensity to 2, level to 5

Click to finalize fillet
Click copy button to copy selected objects
Click move on the toolbar; Set x to 95.
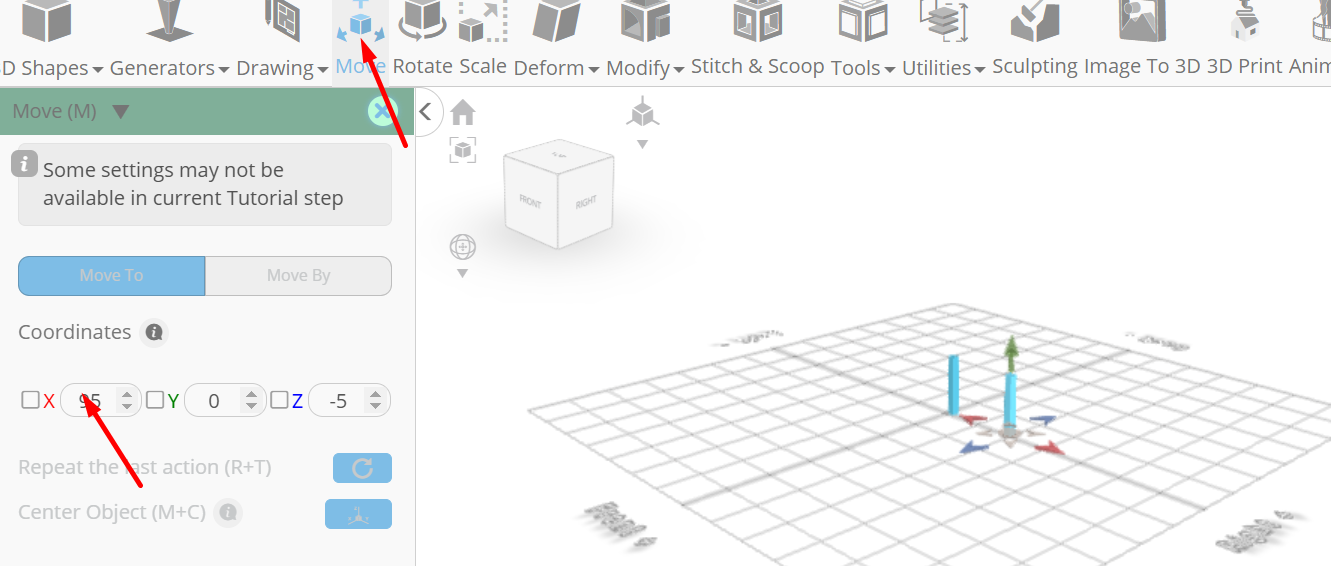
Click ‘x’ to close transformation panel
From the 3D Shapes category on the toolbar choose cube; Set width to 90, height to 70, depth to 80, position x to 50, position z to -50
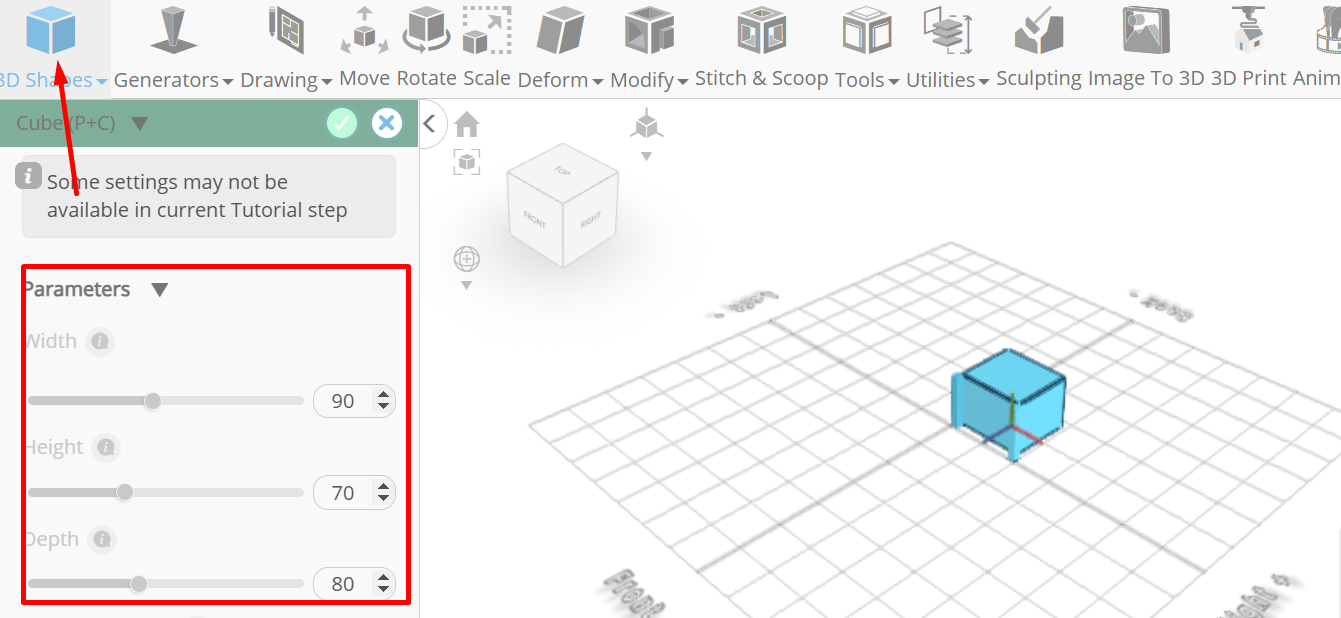
Click to finalize cube
Click to activate face selection; Click on highlighted region to select it

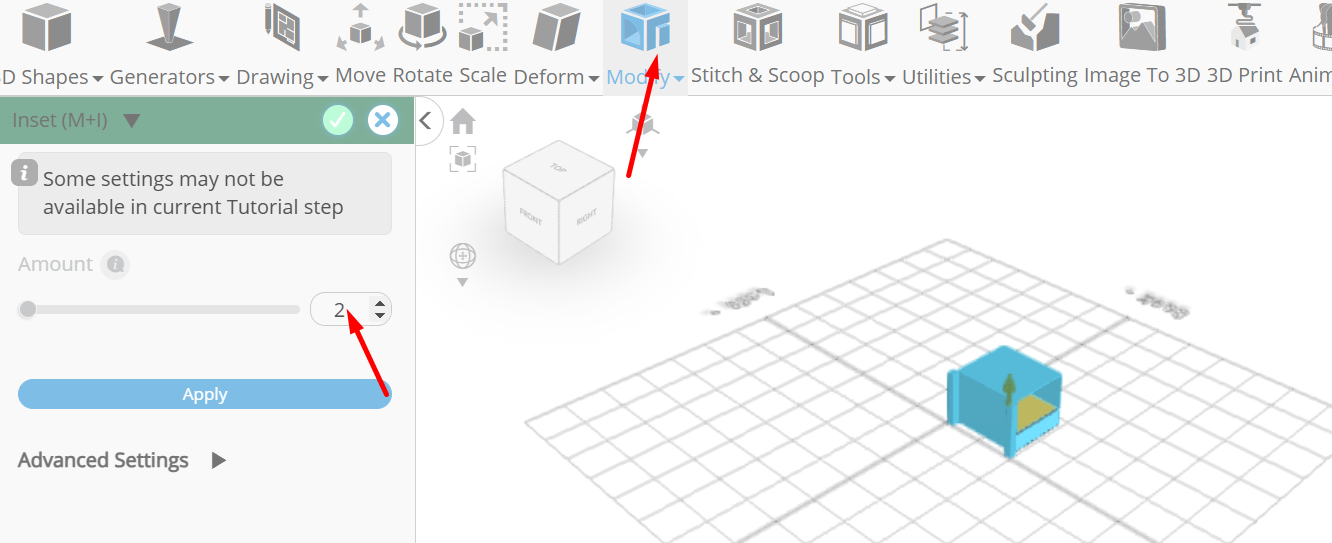
From the modify category on the toolbar choose inset; Set inset amount to 2.
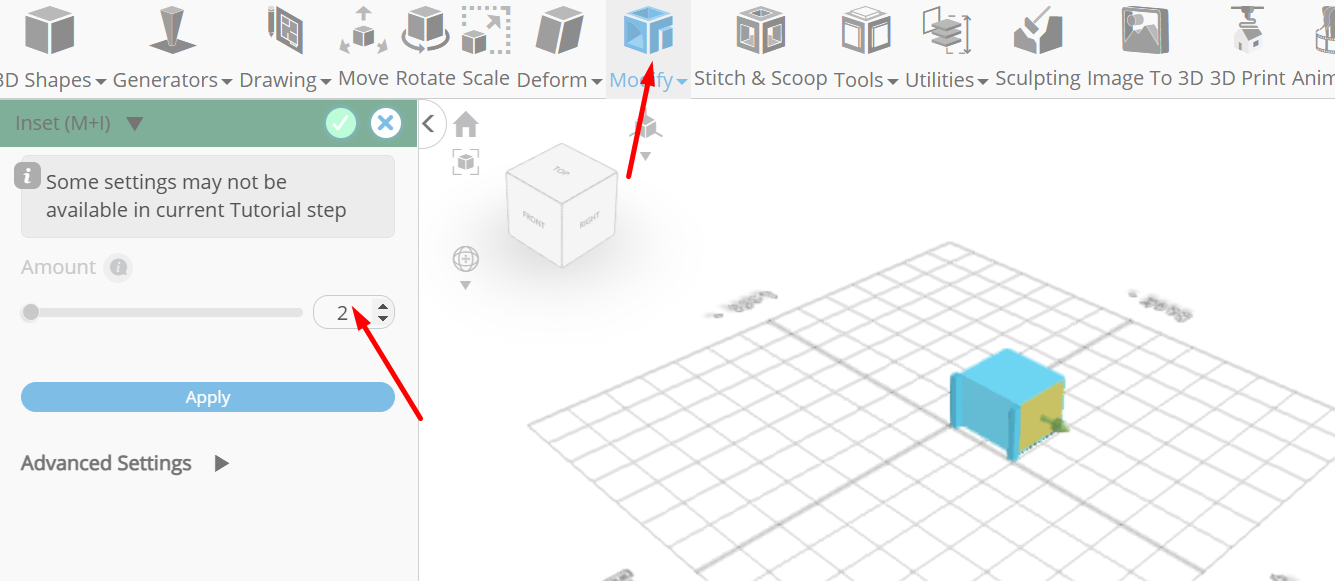
Click to finalize inset
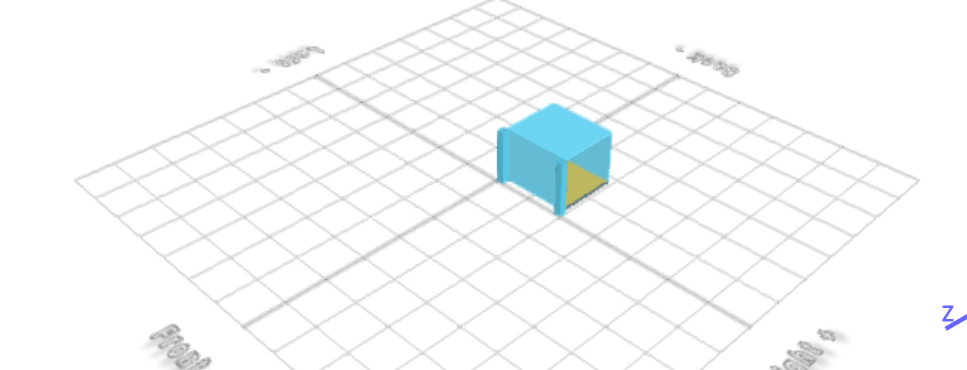
From the modify category on the toolbar choose extrusion; Set extrusion amount to -88.
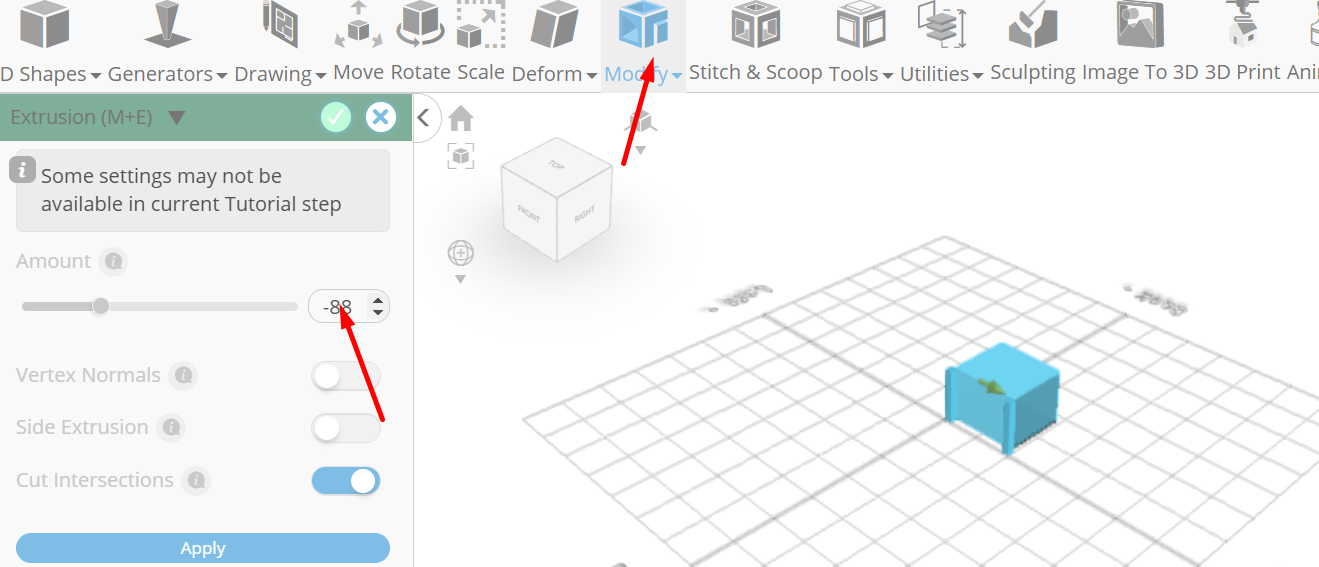
Click to finalize extrusion, click on highlighted region to deselect it
Click on highlighted region to select it
Click copy button to copy selected objects
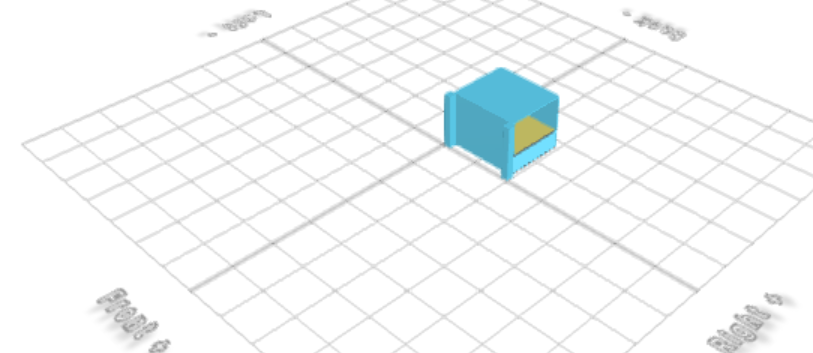
From the modify category on the toolbar choose add thickness; Set thickness to 22.
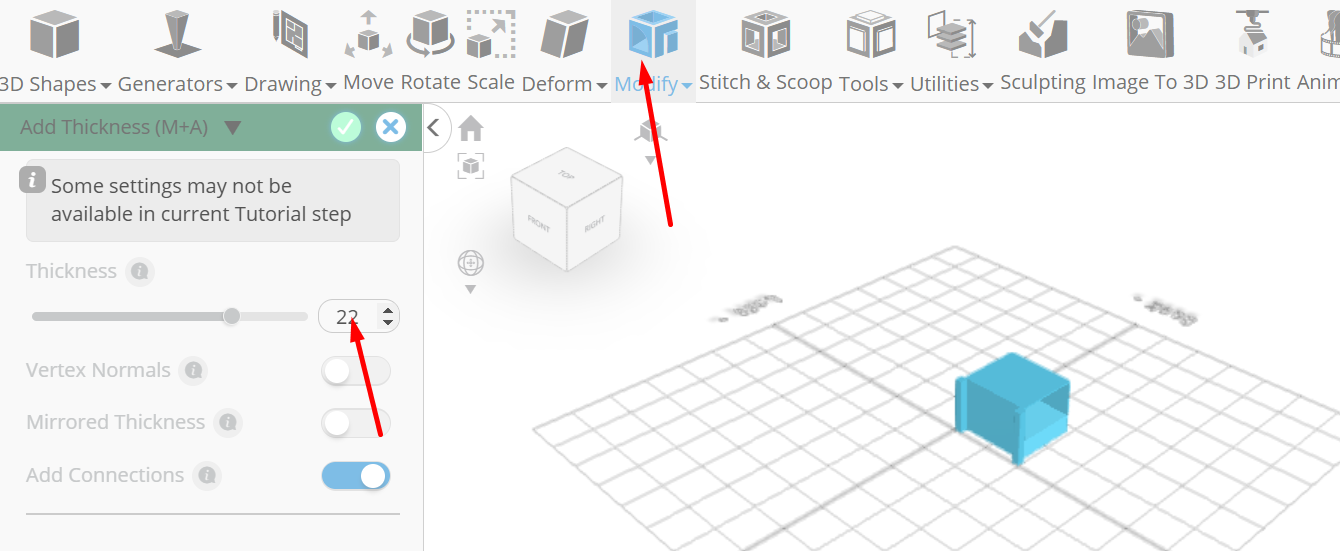
Click to finalize add thickness
Click on highlighted region to select it
From the modify category on the toolbar choose inset; Set inset amount to 2.
Click to finalize inset
From the modify category on the toolbar choose extrusion; Set extrusion amount to -20
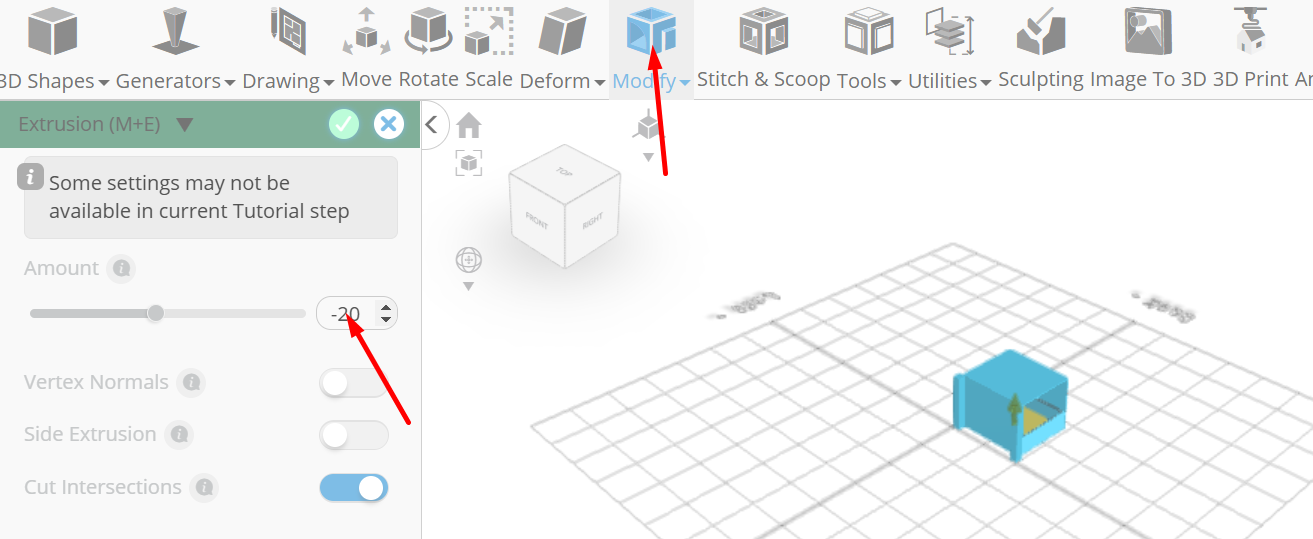
Click to finalize extrusion
Click on highlighted region to deselect it
From the 3D Shapes category on the toolbar choose torus; Set ring radius to 7, tube radius to 2, tubular segments to 12, arc to 180, position x to 100, position y to 12, position z to -50, rotation y to 90.
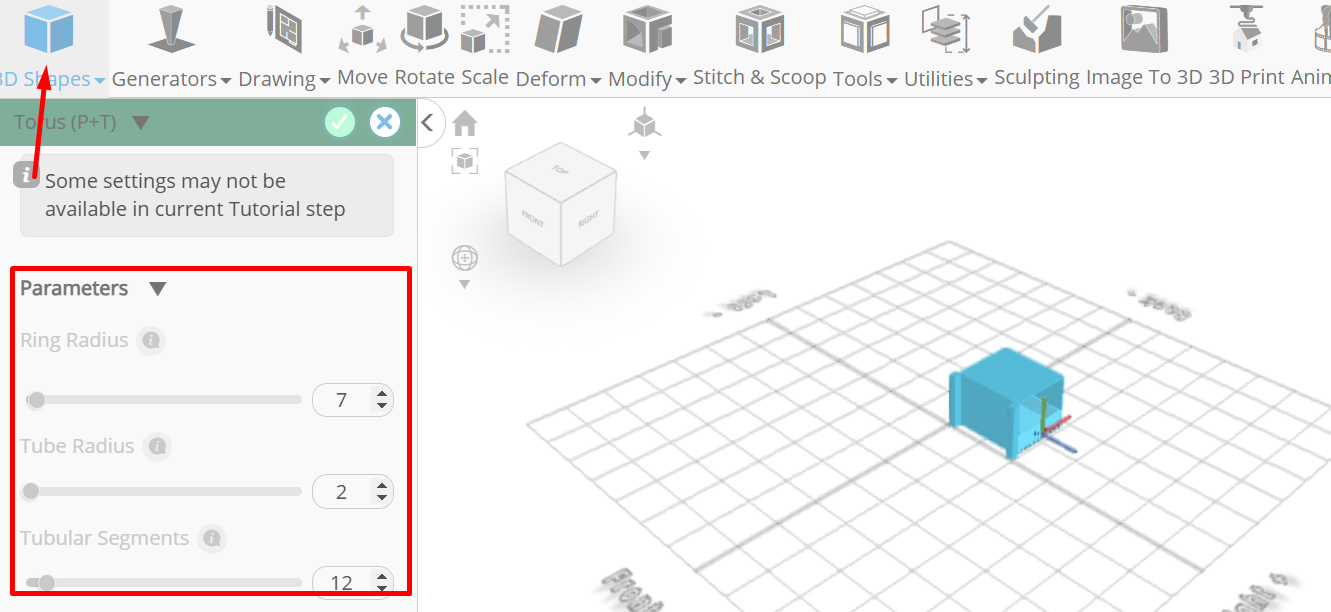
Click to finalize torus
Click highlighted part on selection cube to turn off region selection, click on mesh 8(1) to select it
Click stitch & scoop on the toolbar; From the tool panel choose union.
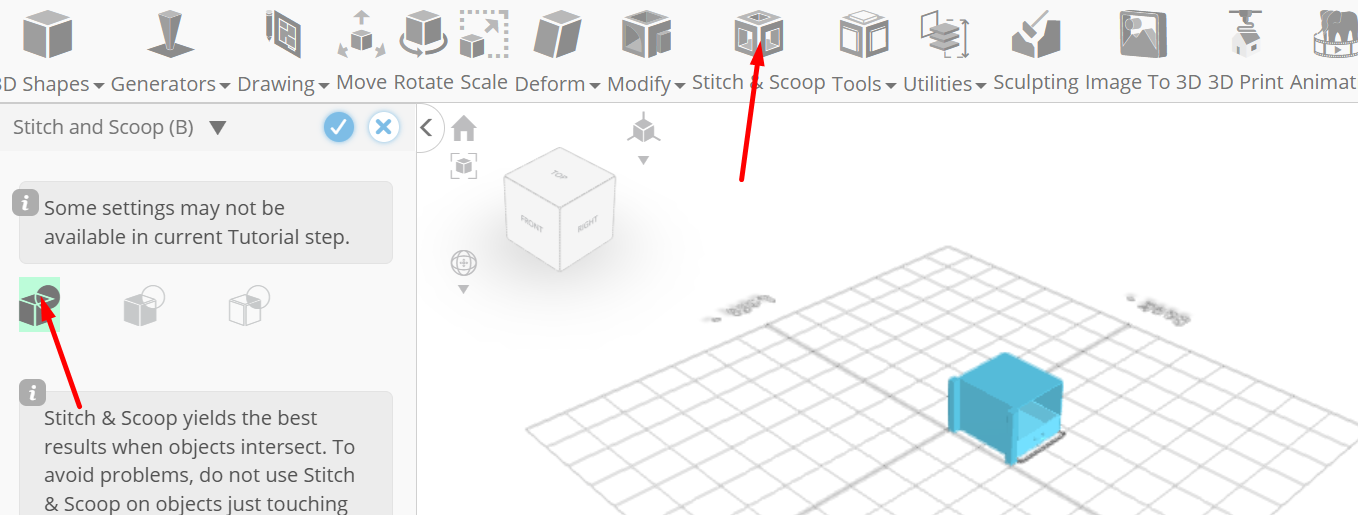
Click to finalize union
Click copy button to copy selected objects
Click move on the toolbar; Set y to 24
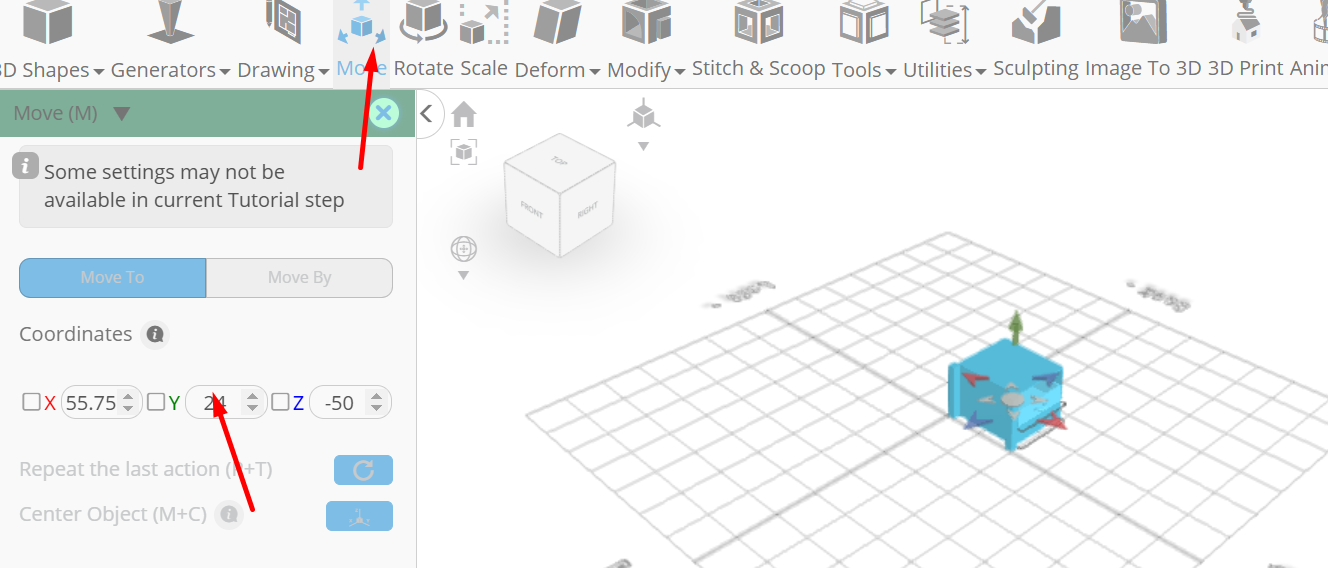
Click ‘x’ to close transformation panel
Click copy button to copy selected objects
Click move on the toolbar; Set y to 46
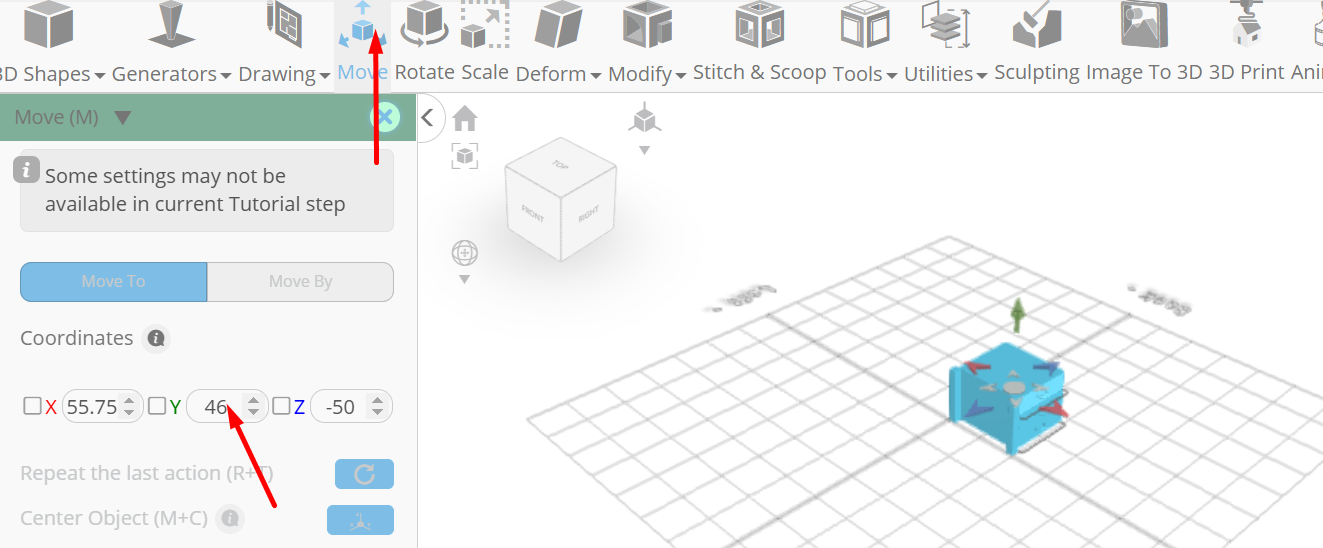
Click ‘x’ to close transformation panel
Click on mesh 4(1), 4 to select. Click on union 1(2) to deselect, Click copy button to copy selected objects
Click move on the toolbar; Set z to -95
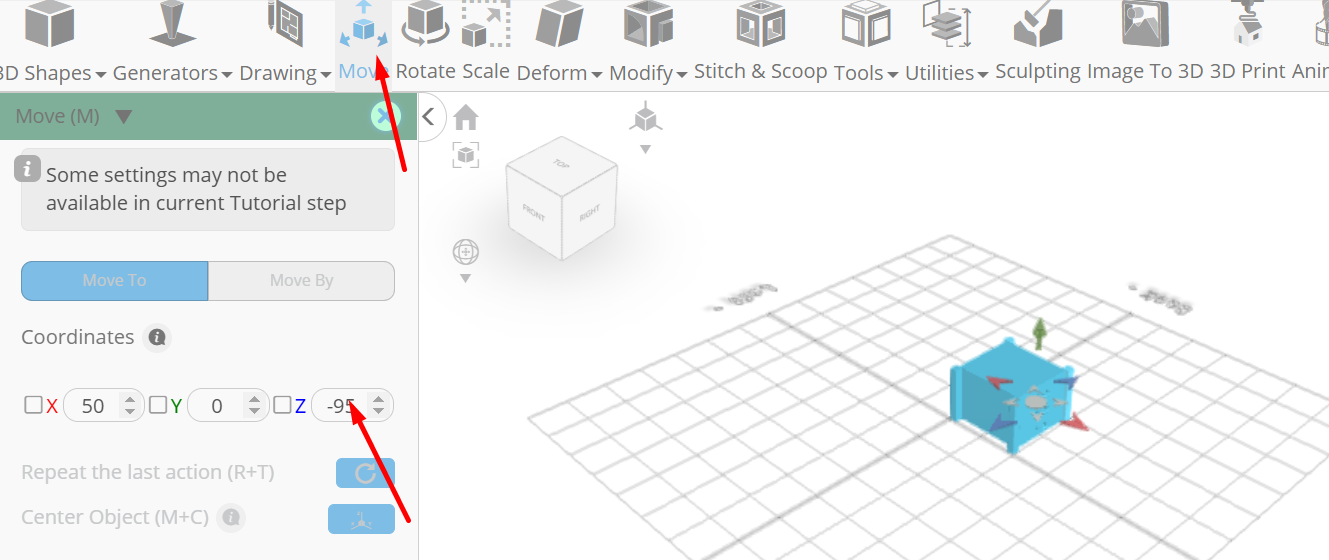
Click ‘x’ to close transformation panel
Click copy button to copy selected objects
Click move on the toolbar; Set z to -195
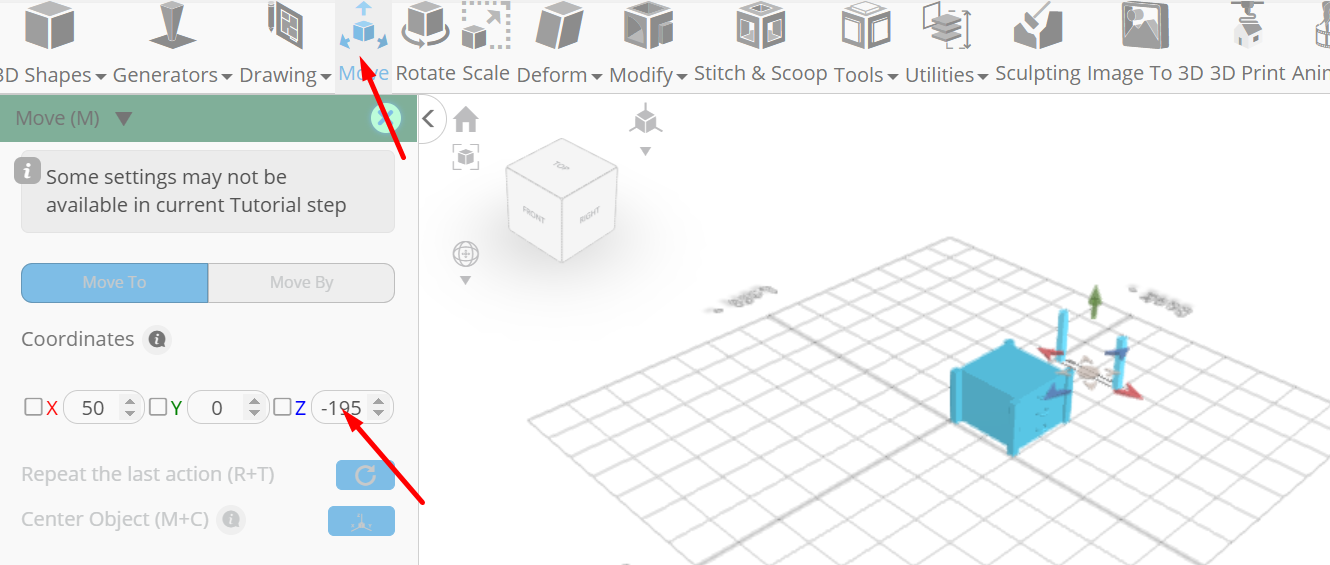
Click ‘x’ to close transformation panel
From the 3D Shapes category on the toolbar choose cube; Set height to 10, depth to 200, position x to 50, position y to 70, position z to -100
Click to finalize cube
Click to activate edge selection; Click on highlighted region to select it
From the modify category on the toolbar choose fillet; Set intensity to 2, level to 5.
Click to finalize fillet
As you continue honing your design skills, remember that SelfCAD offers a wealth of resources to support your learning journey. To deepen your understanding and explore more advanced features, consider checking out the interactive tutorials (https://www.selfcad.com/tutorials) available on the SelfCAD website. The tutorials page provides a treasure trove of guides, tips, and tricks that cater to designers of all levels.
More structured learning experience can also be accessed at the SelfCAD Academy (https://www.selfcad.com/academy/curriculum/), https://www.youtube.com/@3dmodeling101, and 3D Modeling 101 series (https://www.youtube.com/playlist?list=PL74nFNT8yS9DcE1UlUUdiR1wFGv9DDfTB). This comprehensive resource offers in-depth courses taught by industry experts, allowing you to master the intricacies of SelfCAD at your own pace