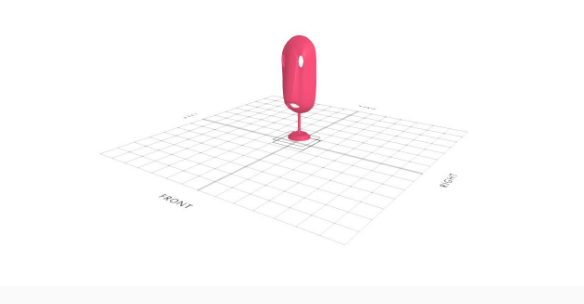
How to Design a Human Face Minimal Home Decor Using SelfCAD
by Julie80 in Design > Digital Graphics
81 Views, 0 Favorites, 0 Comments
How to Design a Human Face Minimal Home Decor Using SelfCAD

Learn How to Design a Human Face Minimal Home Decor Using SelfCAD with the help of this tutorial
How to Design a Human Face Minimal Home Decor Using SelfCAD
Creating unique pieces such as a human face minimal home decor often requires a blend of artistic vision and technical skill. With the advent of user-friendly 3D modeling software like SelfCAD, even those without extensive design experience can craft stunning, minimalistic home decor. This tutorial will explore the process of designing a human face minimal home decor piece using SelfCAD, guiding you through the essential steps from conceptualization to final product, while highlighting the features that make SelfCAD an ideal tool for this creative endeavor.
To access the interactive tutorial to this article, visit https://www.selfcad.com/tutorials/5u2p3y1n6336k5r59o2a4i271n43d6473m4i
Once you’ve launched the editor;
From the 3D Shapes category on the toolbar choose capsule; Set top radius to 50, bottom radius to 50, height to 200, horizontal segments to 4, vertical segments to 7, arc to 180
Click to finalize capsule
Click solid+wireframe button to set rendering mode
From the modify category on the toolbar choose edit details; Drag highlighted edge to highlighted line to add edge
Drag highlighted edge to highlighted line to add edge
Drag highlighted edge to highlighted line to add edge
Drag highlighted edge to highlighted line to add edge
Click to finalize edit details
Click to activate face selection; Click on highlighted region to select it
From the modify category choose extrusion; Set extrusion amount to 15
Click to finalize extrusion
From the deform category on the toolbar choose skew; Set z to -15
Click ‘x’ to close transformation panel
Click on highlighted region to deselect it
Click on highlighted region to select it
From the modify category on the toolbar choose inset; Set inset amount to 3
Click to finalize inset
Click delete button to delete selected object
Click to activate polygon selection; Click on highlighted region to select it
Click delete button to delete selected object
From the modify category on the toolbar choose add thickness; Set thickness to -2, use mirrored thickness to true
Click to finalize add thickness
From the modify category on the toolbar choose round object; Set smoothness to 2
Click to finalize round object
Click move on the toolbar; Set y to 76.93, z to 6.26 using highlighted gizmo
Click ‘x’ to close transformation panel
From the generators category on the toolbar choose shape generator; Set top radius to 23, bottom radius to 31, number of edges to 16, height to 10
Click + button to add new segment
Set top radius to 4, bottom radius to 4, height to 61; Set position y to 9, position z to -17
Click to finalize shape generator
Click stitch & scoop on the toolbar; From the tool panel choose union
Click to finalize union
Click color picker button to change color of selected object; Click red
Click OK
Click solid button to set rendering mode
As you continue honing your design skills, remember that SelfCAD offers a wealth of resources to support your learning journey. To deepen your understanding and explore more advanced features, consider checking out the interactive tutorials (https://www.selfcad.com/tutorials) available on the SelfCAD website. The tutorials page provides a treasure trove of guides, tips, and tricks that cater to designers of all levels.
More structured learning experience can also be accessed at the SelfCAD Academy (https://www.selfcad.com/academy/curriculum/), https://www.youtube.com/@3dmodeling101, and 3D Modeling 101 series (https://www.youtube.com/playlist?list=PL74nFNT8yS9DcE1UlUUdiR1wFGv9DDfTB). This comprehensive resource offers in-depth courses taught by industry experts, allowing you to master the intricacies of SelfCAD at your own pace.