How to Design a Basket Using 3D CAD Software
by Julie80 in Design > 3D Design
50 Views, 0 Favorites, 0 Comments
How to Design a Basket Using 3D CAD Software

Learn How to Design a Basket Using 3D CAD Software with the help of this article
How to Design a Basket Using 3D CAD Software
Designing a custom basket in 3D can be both a creative and practical project, especially with tools like SelfCAD that make digital modeling approachable for all skill levels. This article will walk through the process of designing a basket using SelfCAD, from shaping the base, the sides and the mouth of the basket. Along the way, we’ll explore useful features such as the twist tools, as well as tips for ensuring your model is ready for 3D printing. Whether you're new to 3D design or looking to refine your modeling skills, this guide offers a clear path to creating a functional and printable basket.
To access the interactive tutorial to this article, check out; https://www.selfcad.com/tutorials/3w3d6q3h3h4p1o1fg6x4t5wi3uf3o6lf7642
Once you’ve launched the editor;
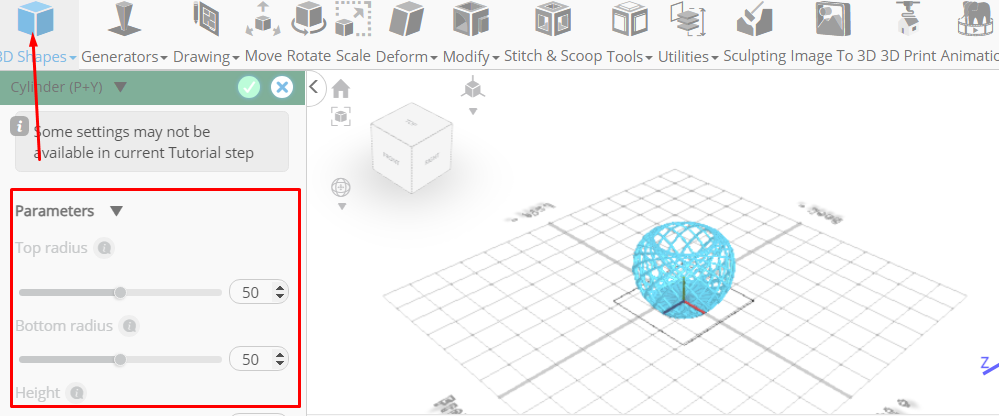
From the 3D Shapes Category on the Toolbar choose Torus. Set Ring Radius to 80, Tube Radius to 2, Rotation z to -30
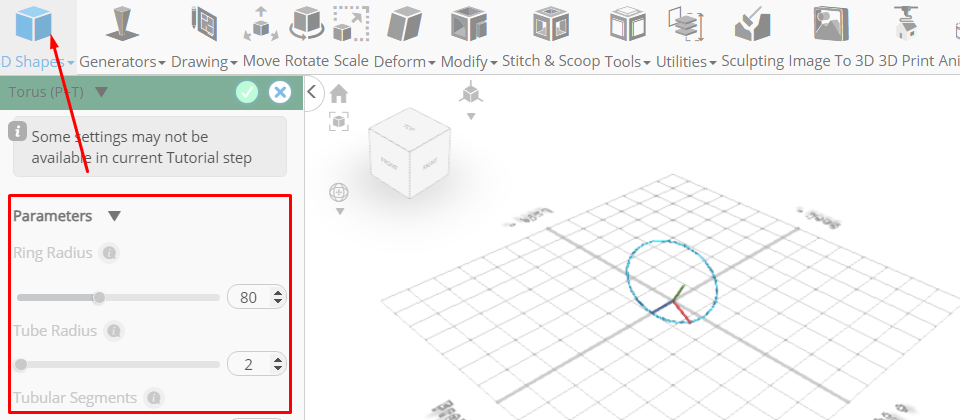
Click to finalize Torus
From the Deform Category on the Toolbar choose Bend. Set x to 39
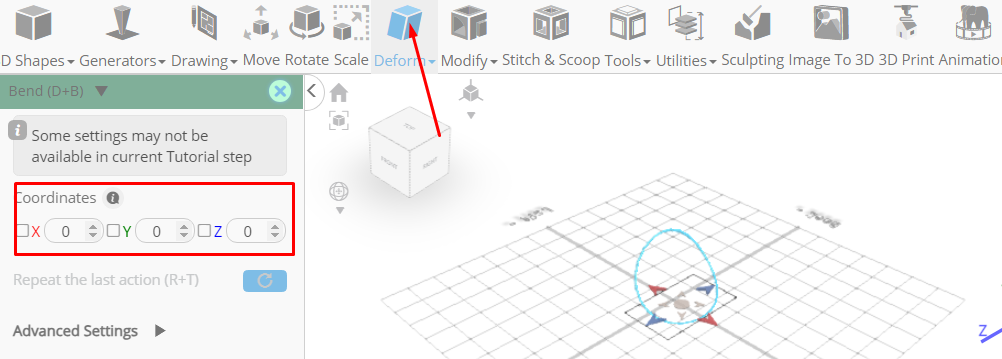
Click ‘x’ to close Transformation panel
From the Tools category on the Toolbar choose Copy Offsets; Set Operation to Rotate, y to 100, Amount of copies to 20, Click Copy button to create copies
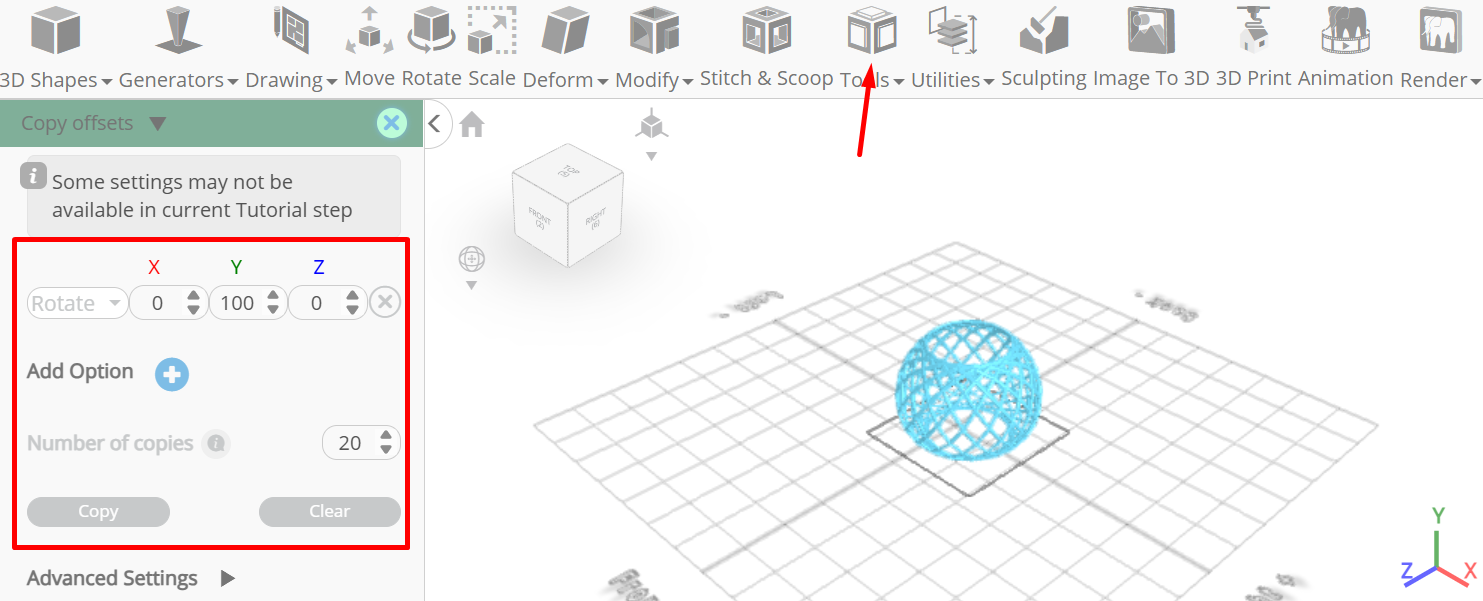
Click ‘x’ to close copy offsets panel
Click Rotate on the Toolbar. Set z to 180
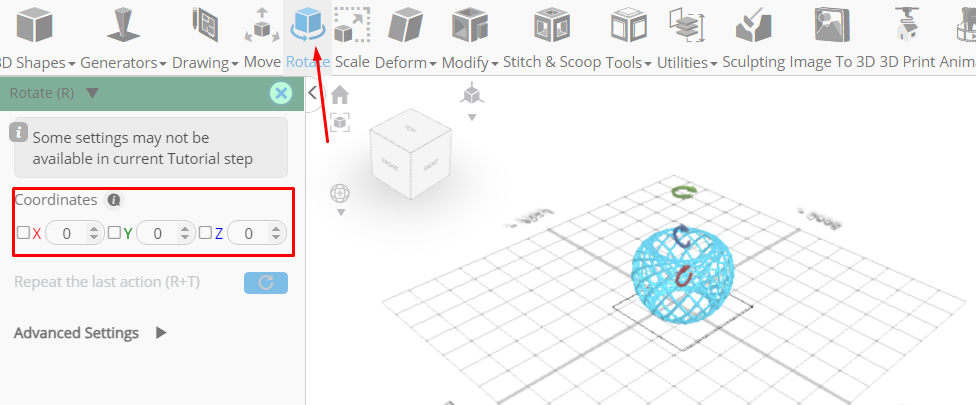
Click ‘x’ to close Transformation panel
From the 3D Shapes Category on the Toolbar choose Cylinder. Set Height to 5, Position x to 21
Click to finalize Cylinder
From the 3D Shapes Category on the Toolbar choose Torus. Set Tube Radius to 3, Tubular segments to 16, Position x to 20, Position y to 119
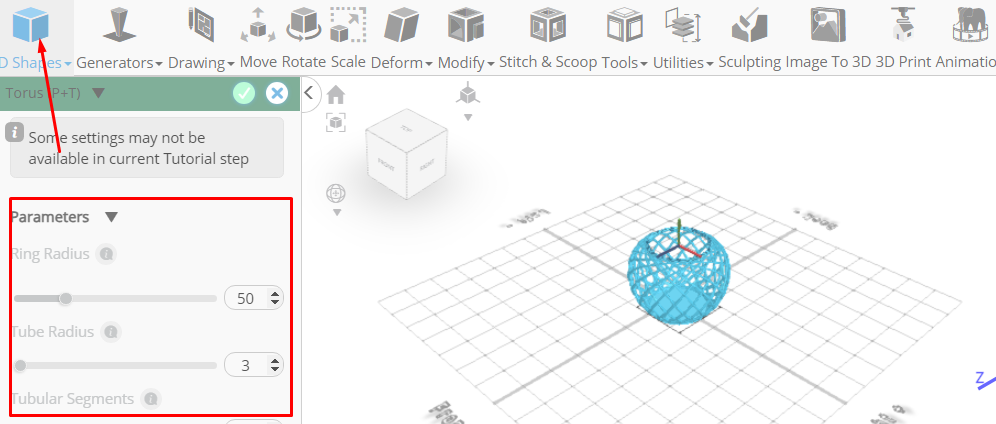
Click to finalize Torus
Click on mesh 8, mesh 4(17, 6, 10, 3, 13, 14, 20, 7, 9, 18, 16, 11, 5, 4, 12, 15, 19, 8) to select them
Click Stitch & Scoop on the Toolbar. From the Tool panel choose Union
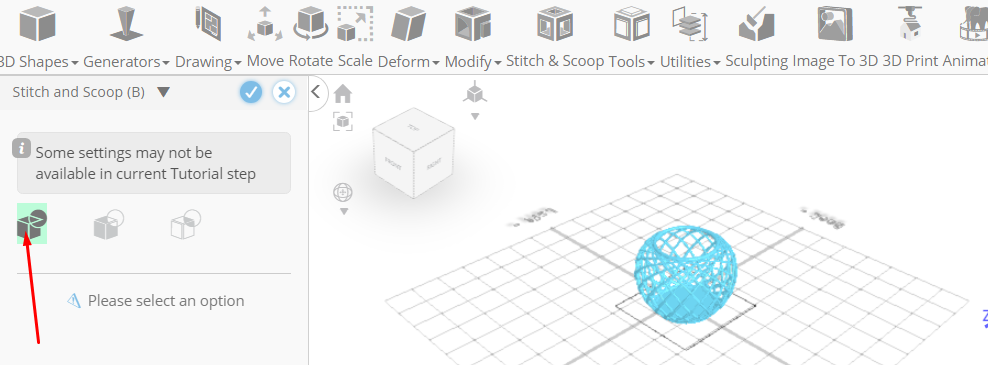
Click to finalize Union
Click Isolate button to isolate selected objects
Click Color picker button to change color of selected object. Click Brown button
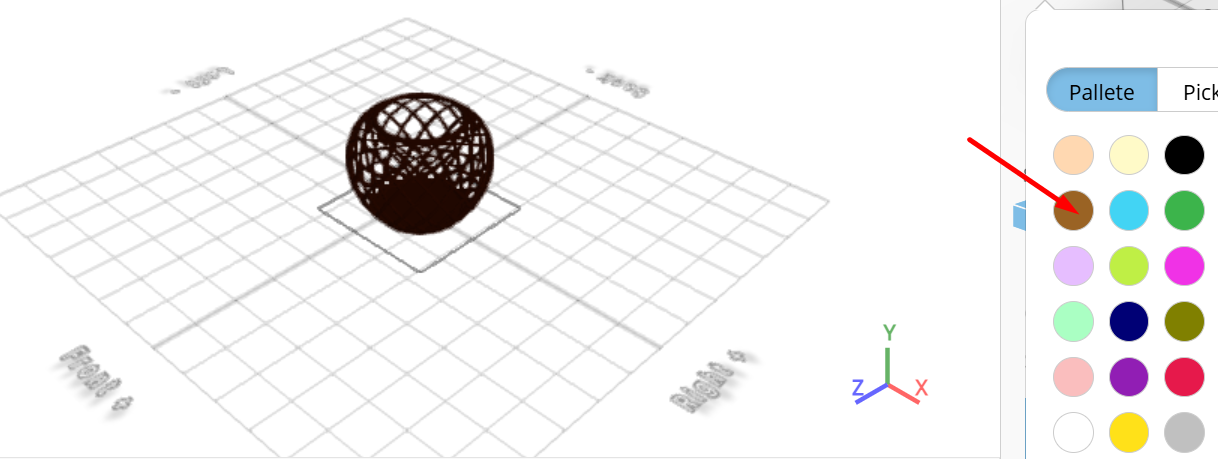
Click OK to confirm color change
As you continue honing your design skills, remember that SelfCAD offers a wealth of resources to support your learning journey. To deepen your understanding and explore more advanced features, consider checking out the interactive tutorials (https://www.selfcad.com/tutorials) available on the SelfCAD website. The tutorials page provides a treasure trove of guides, tips, and tricks that cater to designers of all levels.
More structured learning experience can also be accessed at the SelfCAD Academy (https://www.selfcad.com/academy/curriculum/), https://www.youtube.com/@3dmodeling101, and 3D Modeling 101 series (https://www.youtube.com/playlist?list=PL74nFNT8yS9DcE1UlUUdiR1wFGv9DDfTB). This comprehensive resource offers in-depth courses taught by industry experts, allowing you to master the intricacies of SelfCAD at your own pace.