How to Design a Basic Logo in Photoshop (York College)
by jerrytrann in Craft > Digital Graphics
5150 Views, 9 Favorites, 0 Comments
How to Design a Basic Logo in Photoshop (York College)

Ready?
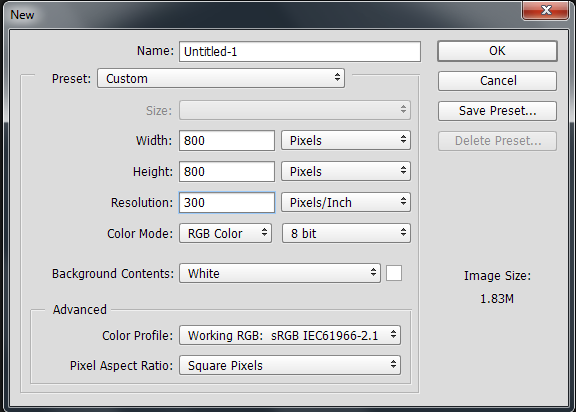
1. Go to File and select New
a. Change the width and height to 800 Pixels
b. Change the resolution to 300 Pixels/Inch
c. Change the background content to White, press OK
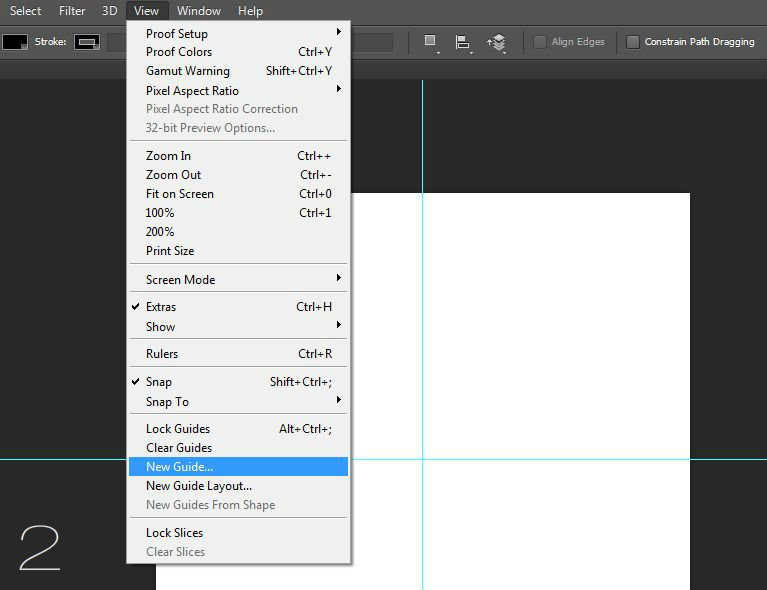
2. Go to View and select New Guide
a. Check Horizontal and type in 50%, press OK
b. Go to View and select New Guide again
c. Check Vertical and type in 50%, press OK
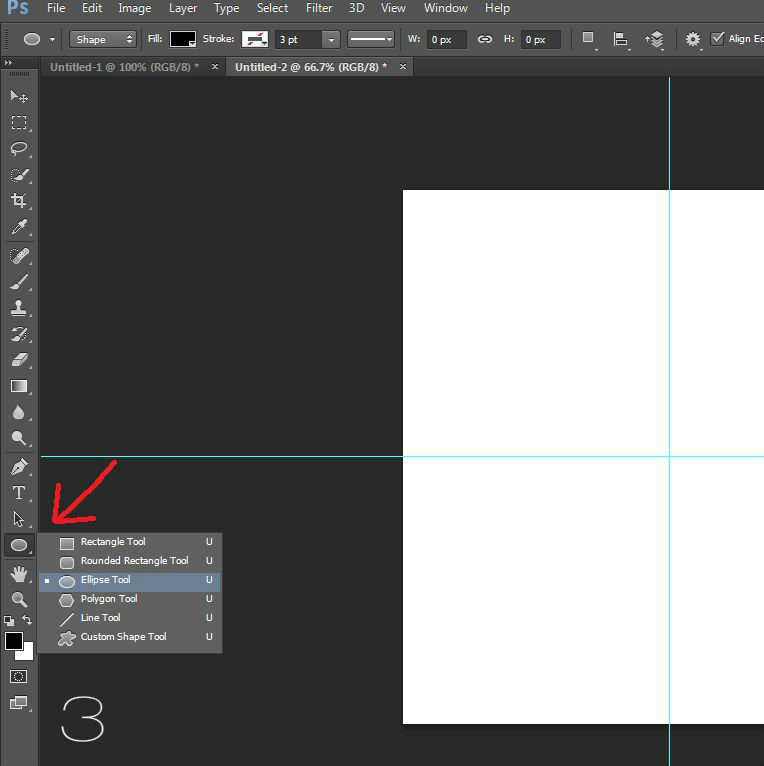
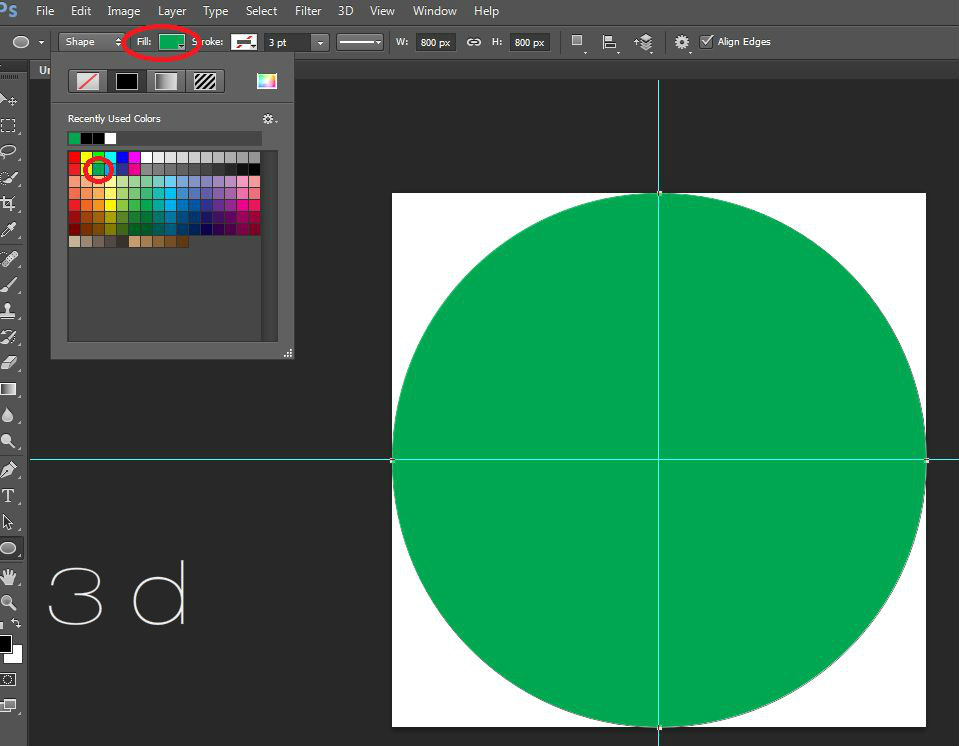
3. Select the Ellipse Tool located on the left tool bar
(Hint: you have to right click the icon)
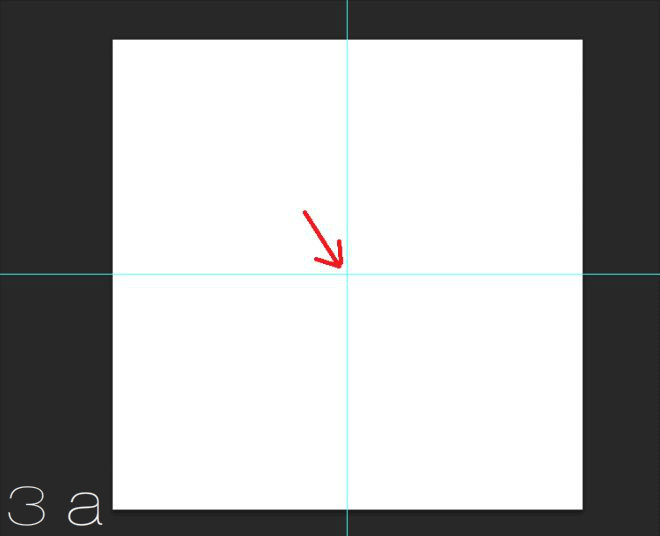
a. Put your cursor in the middle of the axis and click
(Hint: the center of your circle will show up here so try to make it as accurate as possible)
b. Type in 800 for width and height
c. Check From Center, press OK
d. Go to Fill (located at the top tool bar) and select CMYK Green, press the Enter key
(Hint: The color is on the third column, second row)
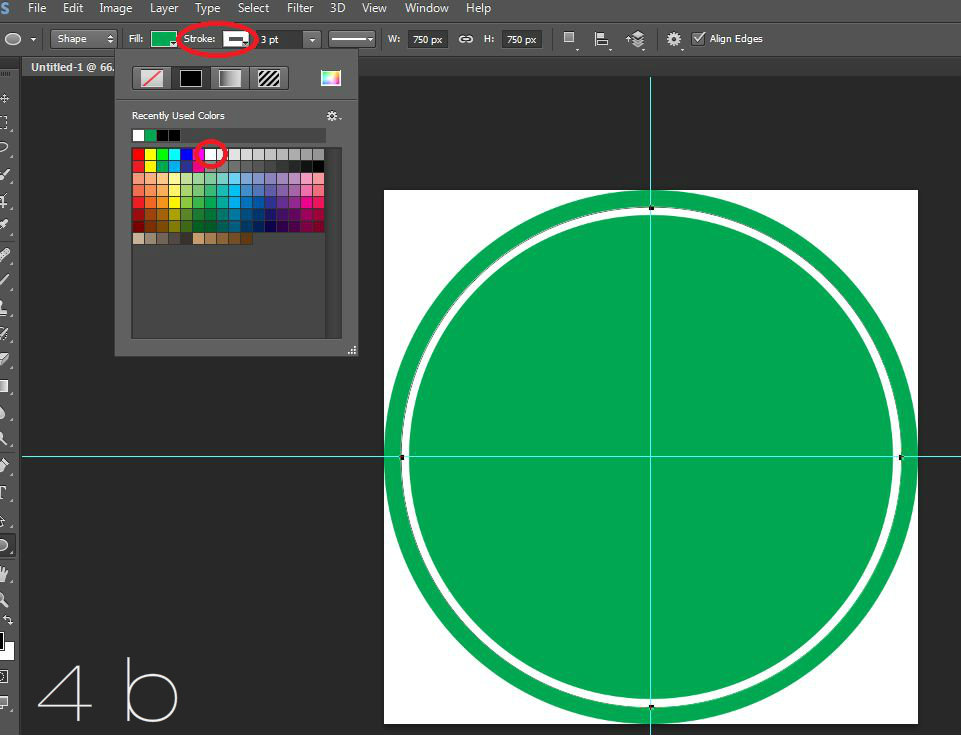
4. Click on the center again like Step 3a
a. Type in 750 for width and height, press OK
b. Go to Stroke and select White, press the Enter key
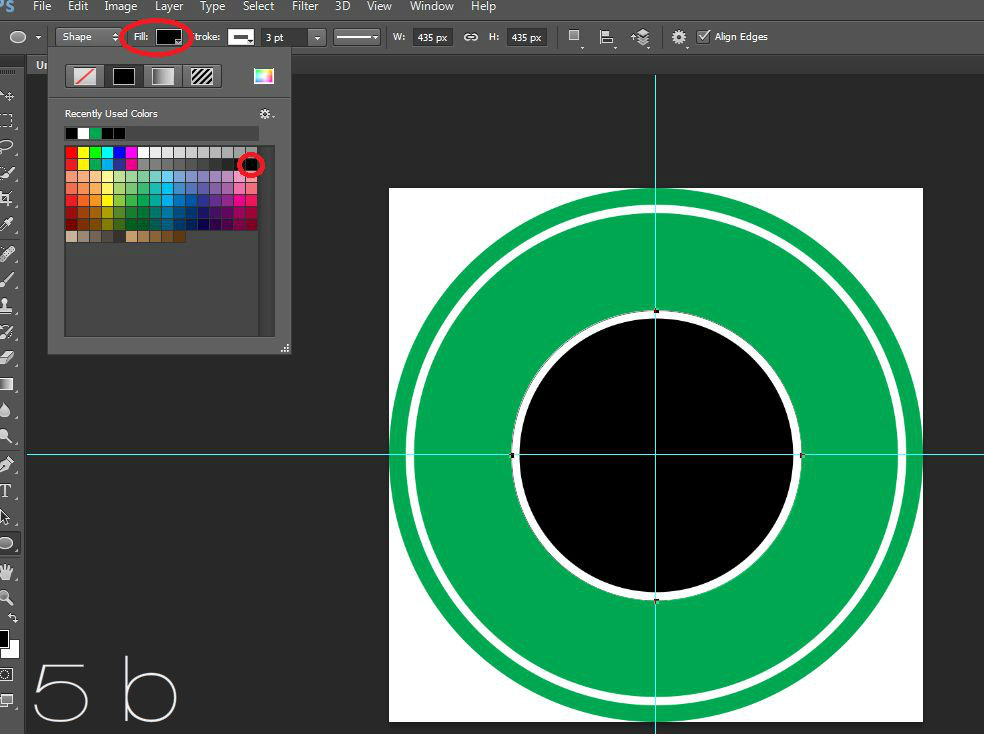
5. Click on the center again like Step 3a
a. Type in 435 for width and height, press OK
b. Go to Fill and select Black, press the Enter key
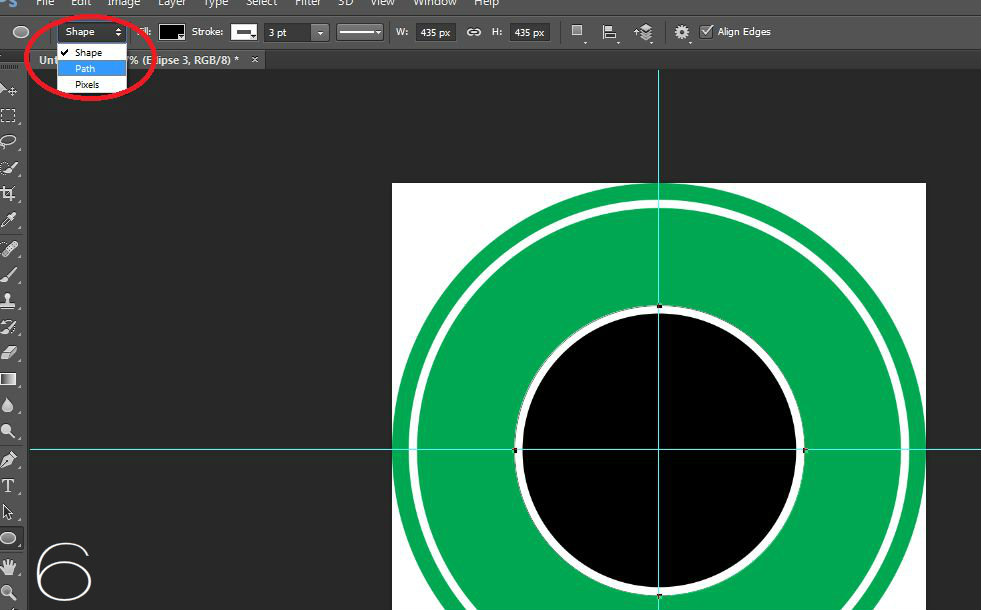
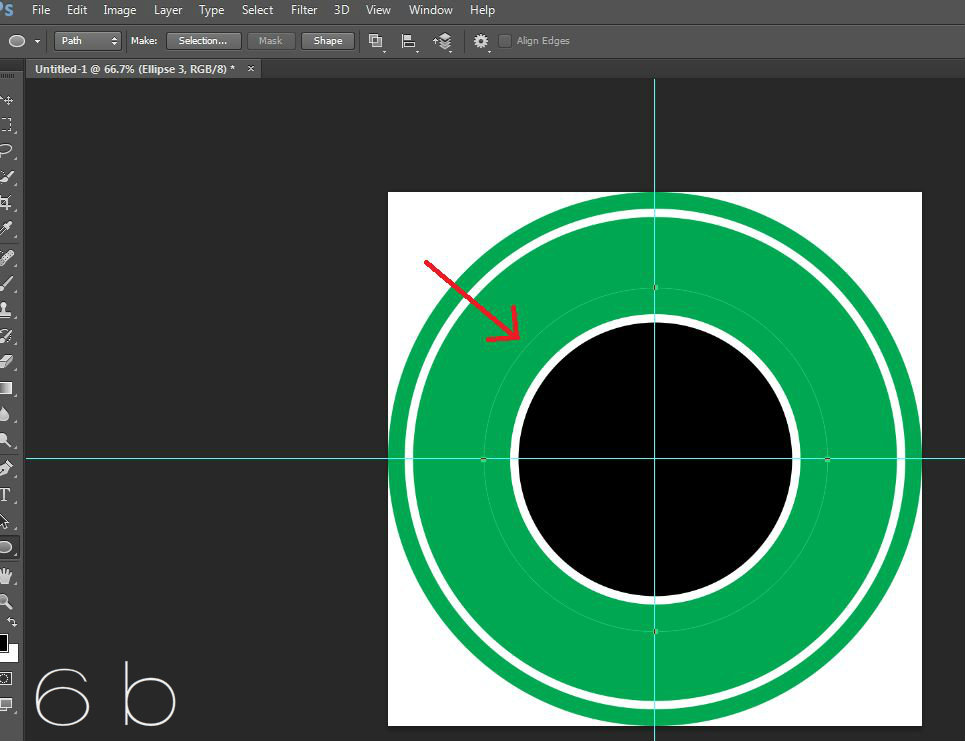
6. Go to the top tool bar, select Shape, and change it to Path
a. Click on the center again like step 3a
b. Type in 515 for width and height, press OK
(Hint: the thin line outside the black circle is the Path)
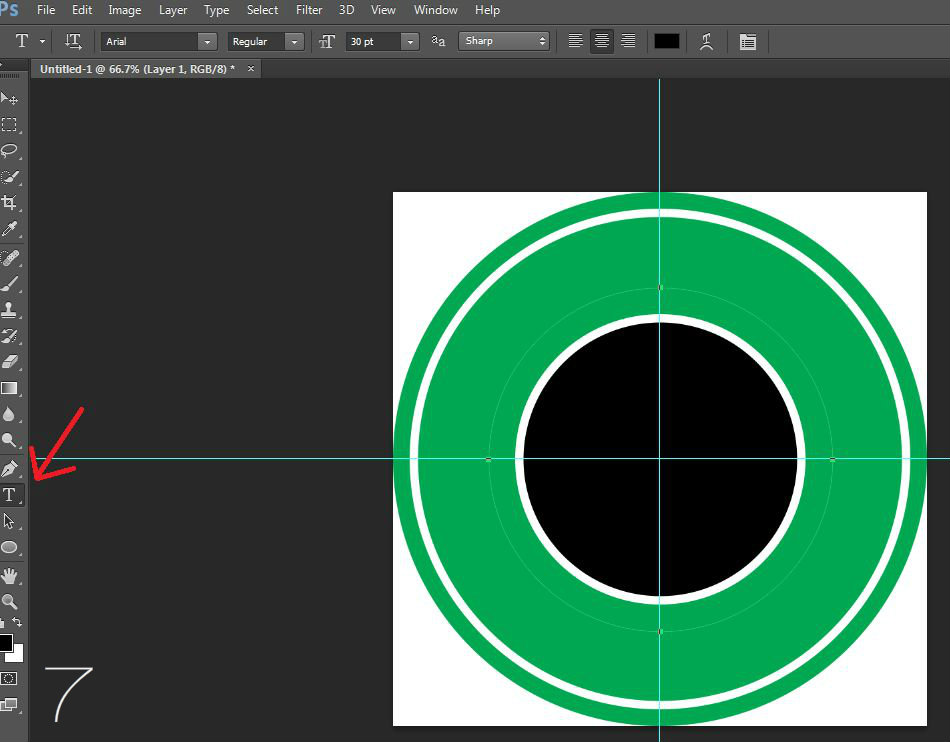
7. Select the Type Tool located on the left tool bar
a. Go to the top tool bar and change the font to Arial, size to 30 pt, and alignment to Center
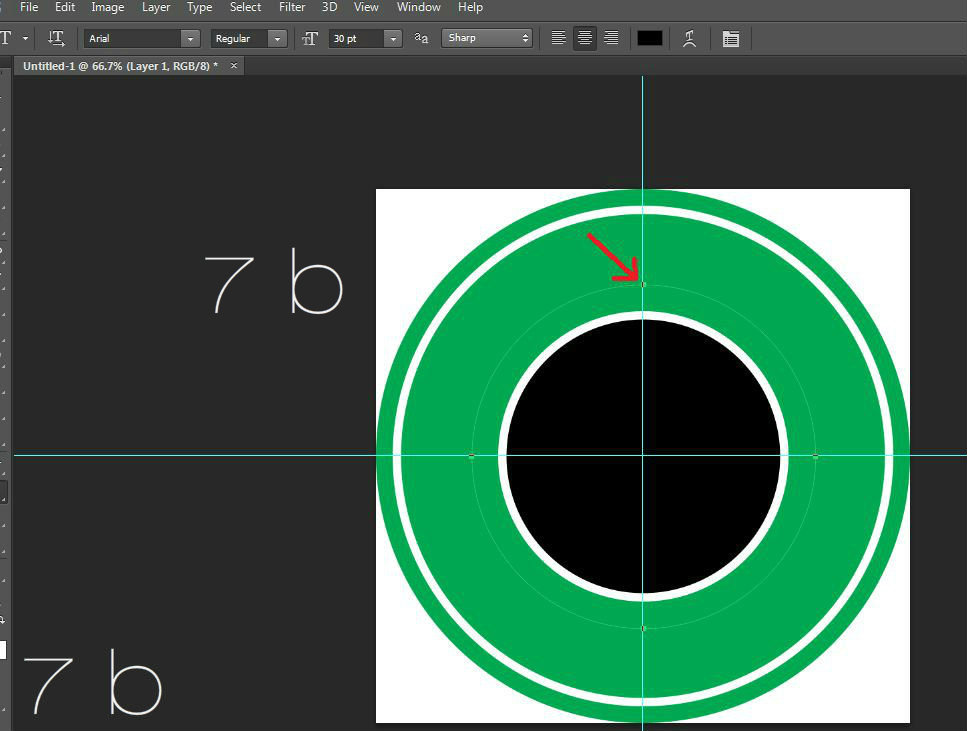
b. Put the cursor over where the vertical line crosses the Path on the top half of the circle and click
(Hint: you should see a squiggly line appear on the cursor)
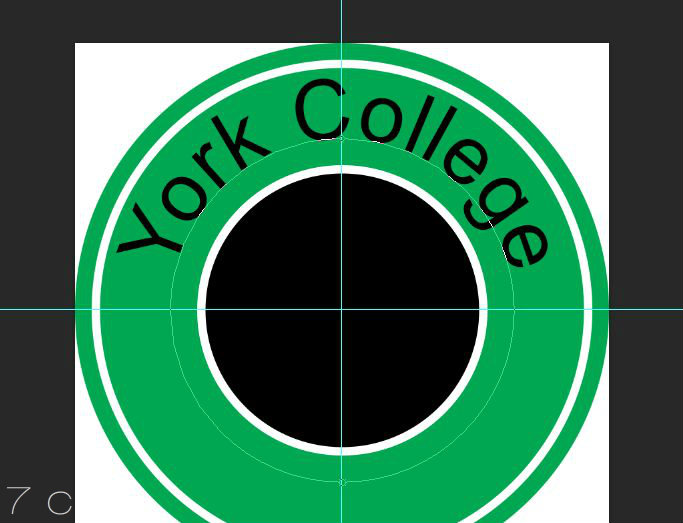
c. Type in York College, press the Enter key
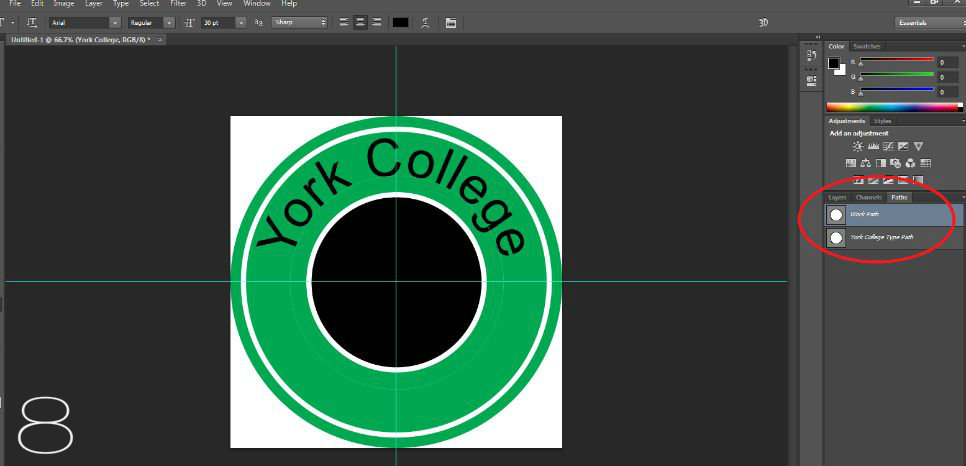
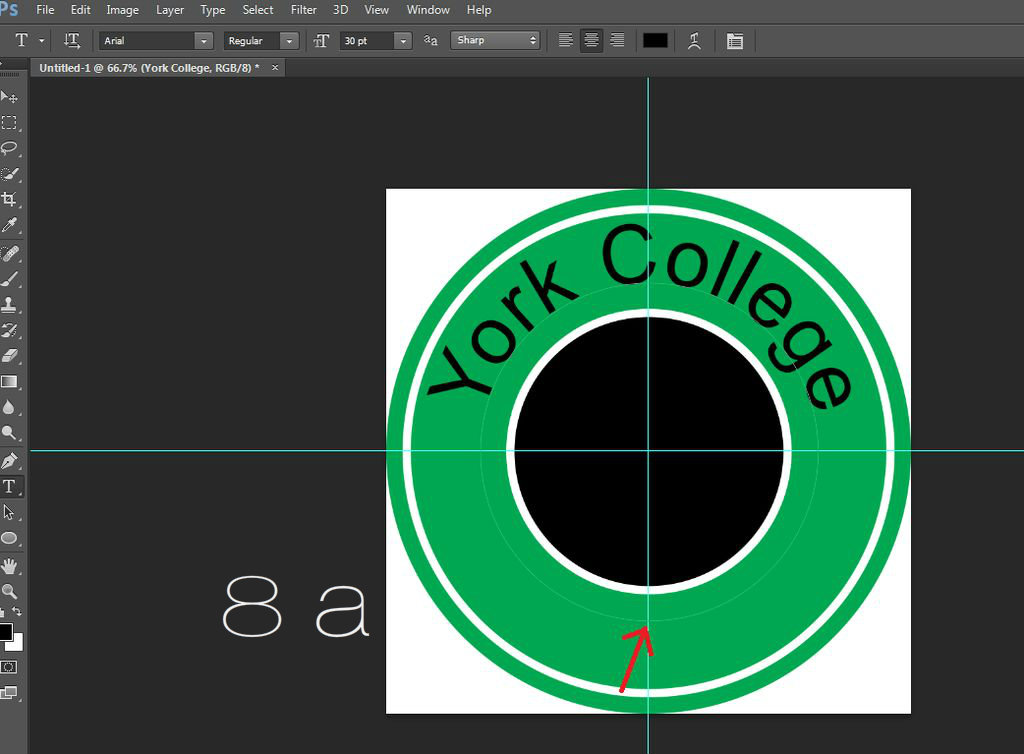
8. Select Work Path under the Paths tab located on the right
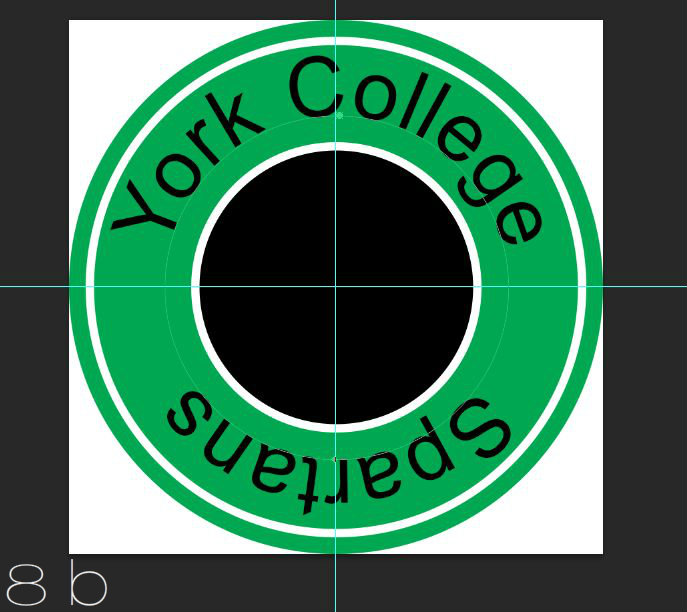
a. Put the cursor over where the vertical line crosses the Path on the bottom half of the circle and click
b. Type in Spartans, press the Enter key
(Hint: the text will appear upside down for now)
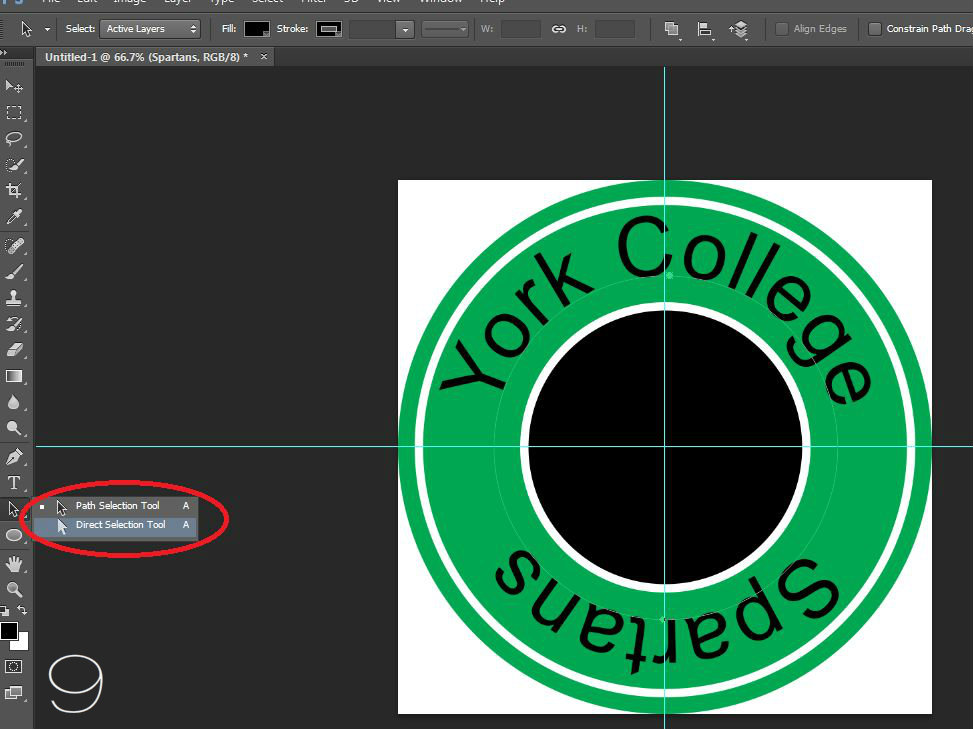
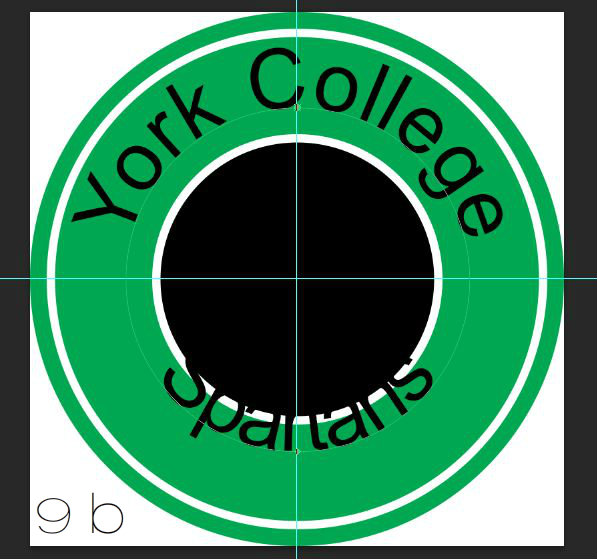
9. Select the Direct Selection Tool located on the left tool bar
a. Put the cursor over the letters located on the bottom left box
(Hint: the cursor should change into two black arrows)
b. Click and hold down, then drag up slowly, let go when text is right side up
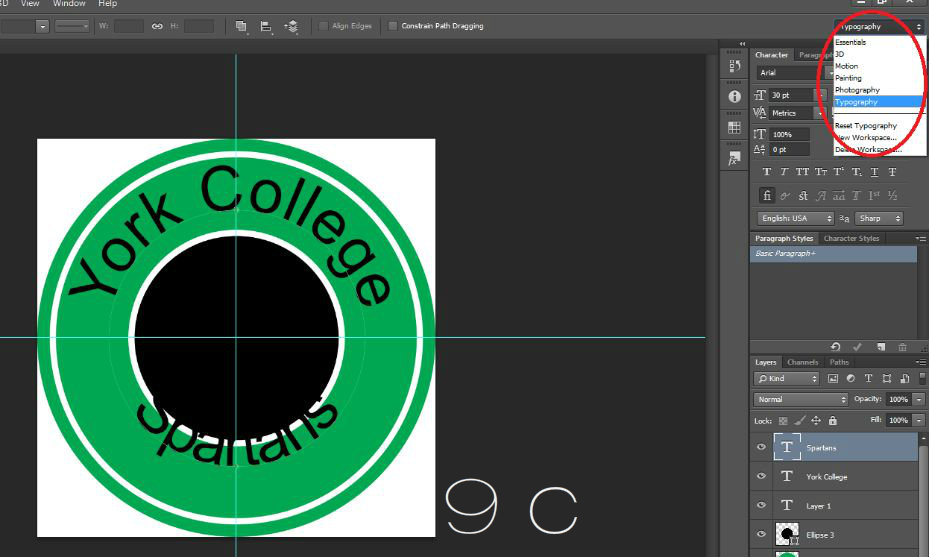
c. Click on Essentials located at the top right and change to Typography
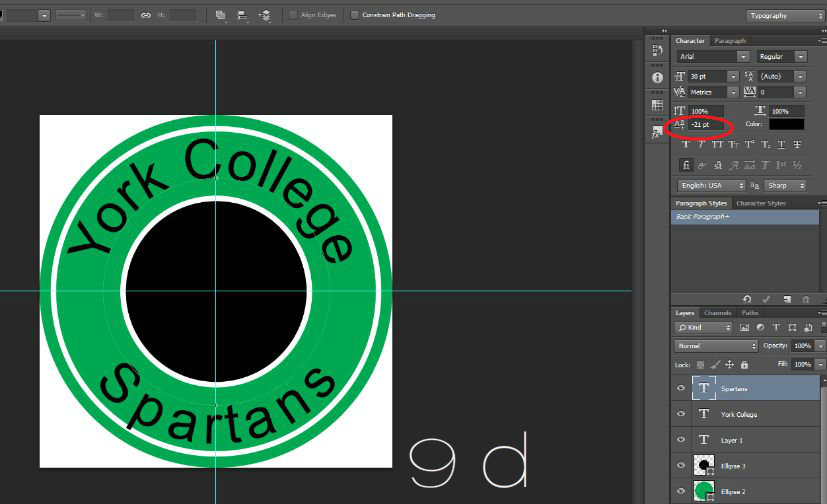
d. Go to Baseline Shift and type in -21, press the Enter key
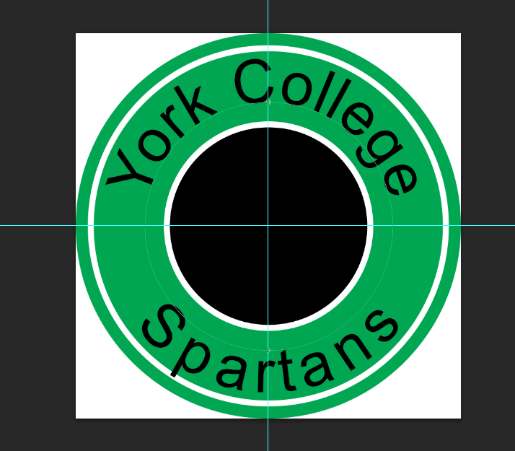
10. Go to File and select Save As
a. Next to File Name type in Basic Logo
b. Next to Save as type select JPEG
c. Press Save
d. A box will appear, press OK