How to Design Japanese Footwear Using 3D CAD Software
by Julie80 in Design > 3D Design
47 Views, 0 Favorites, 0 Comments
How to Design Japanese Footwear Using 3D CAD Software

Learn How to Design Japanese Footwear Using 3D CAD Software with the help of this article
How to Design Japanese Footwear Using 3D CAD Software
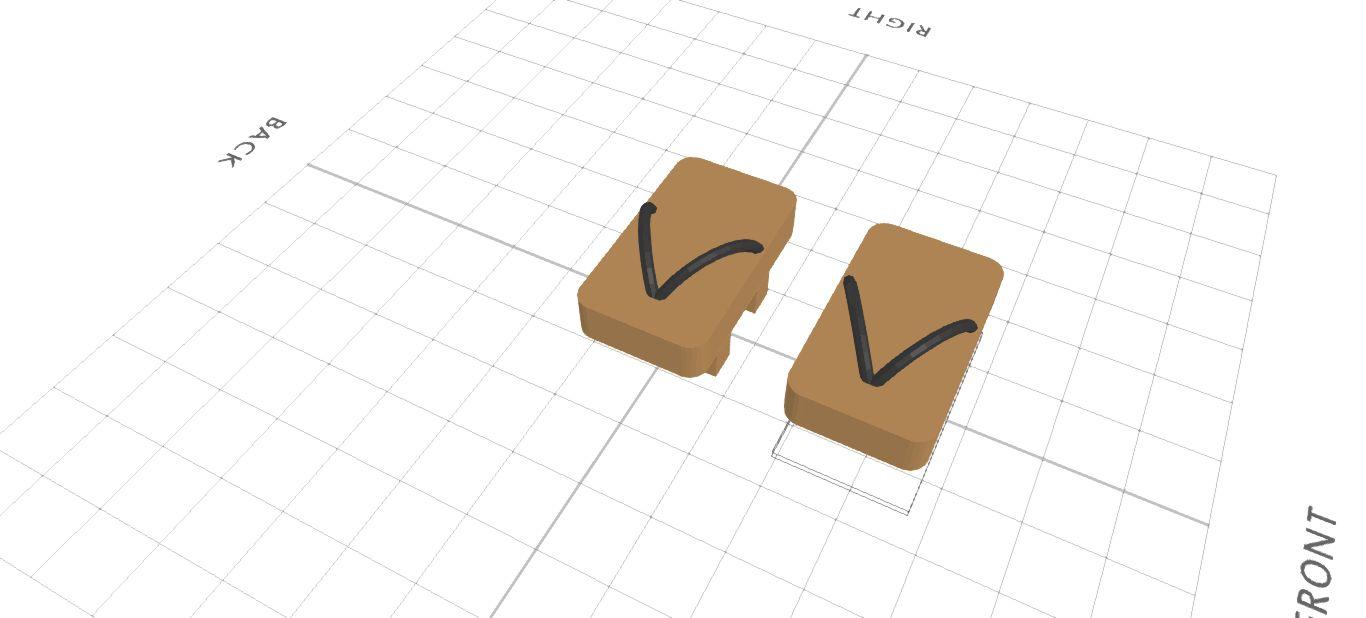
Designing traditional Japanese footwear, such as geta or zori, requires a blend of cultural appreciation, aesthetic sensitivity, and technical skill. These iconic shoe styles are not only deeply rooted in Japanese history but also embody unique structural and ergonomic features that have influenced fashion and design around the world. With modern 3D modeling tools like SelfCAD, it’s now possible to recreate and adapt these classic footwear designs digitally, combining tradition with innovation.
In this tutorial, we will explore the process of designing Japanese footwear using SelfCAD, detailing each step from concept to completion. We’ll discuss how to incorporate traditional design elements, such as elevated soles and thong straps, while ensuring comfort and functionality. By the end, readers will have a thorough understanding of how to use SelfCAD to bring a piece of Japanese heritage to life in the form of carefully crafted, culturally respectful 3D footwear models.
To access the interactive tutorial to this article, check out https://www.selfcad.com/tutorials/722di1a156t6k66y70186j3y62712mm6k4e1
Once you’ve launched the editor;
From the 3D Shapes category on the toolbar choose cube; Set width to 155, height to 30, depth to 90, width segment to 5, position y to 45
Click to finalize cube
Click solid+wireframe button to set rendering mode
Click to activate face selection; Click on highlighted region to select it
From the modify category on the toolbar choose inset; Set inset amount to 5
Click add option to add next macro step; Set operation to extrusion, amount to 40
Click to finalize inset
Click on highlighted region to deselect it
Click to activate edge selection; Click on highlighted region to select it
From the modify category on the toolbar choose fillet; Set intensity to 15, level to 8
Click to finalize fillet
From the 3D Shapes category on the toolbar choose torus; Set ring radius to 44, tube radius to 4, radial segments to 10, arc to 123, position x to -16, position y to 70, position z to 21, rotation x to -95, rotation y to -31, rotation z to -34
Click to finalize torus
From the utilities category on the toolbar choose mirror; Set create copy to true, Set direction to back, offset to -2
Click to finalize mirror
Click highlighted part on selection cube to turn off region selection; Click on mesh 8(1) to select it
Click color picker button to change color of object; Click black
Click ok
Click on mesh 4 to select it. Click on mesh 8, mesh 8(1) to deselect it
Click color picker button to change color of object; Click brown
Click ok
Click solid button to set rendering mode; From the edit menu on the top toolbar click select all
Click stitch & scoop on the toolbar; From the tool panel choose union
Click to finalize union
From the utilities category on the toolbar choose mirror; Set create copy to true, offset to 26
Click to finalize mirror
As you continue honing your design skills, remember that SelfCAD offers a wealth of resources to support your learning journey. To deepen your understanding and explore more advanced features, consider checking out the interactive tutorials (https://www.selfcad.com/tutorials) available on the SelfCAD website. The tutorials page provides a treasure trove of guides, tips, and tricks that cater to designers of all levels.
More structured learning experience can also be accessed at the SelfCAD Academy (https://www.selfcad.com/academy/curriculum/), https://www.youtube.com/@3dmodeling101, and 3D Modeling 101 series (https://www.youtube.com/playlist?list=PL74nFNT8yS9DcE1UlUUdiR1wFGv9DDfTB). This comprehensive resource offers in-depth courses taught by industry experts, allowing you to master the intricacies of SelfCAD at your own pace.