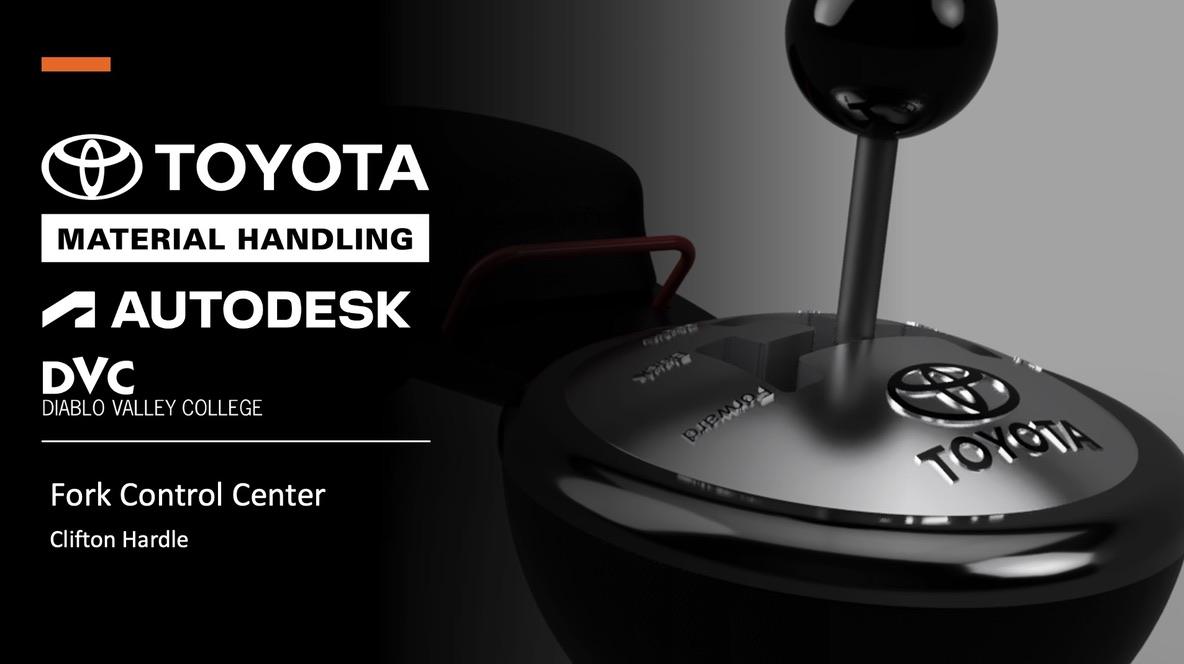
How to Design Forklift Controls
Welcome to my Instructable on how to design intuitive fork controls for a forklift.
I'm a student at Diablo Valley College and will be walking you through my process of research, identifying a problem, ideating solutions, and creating a sweet model using Fusion 360.
This is part of a design competition sponsored by Toyota Material Handling and Autodesk.
Supplies
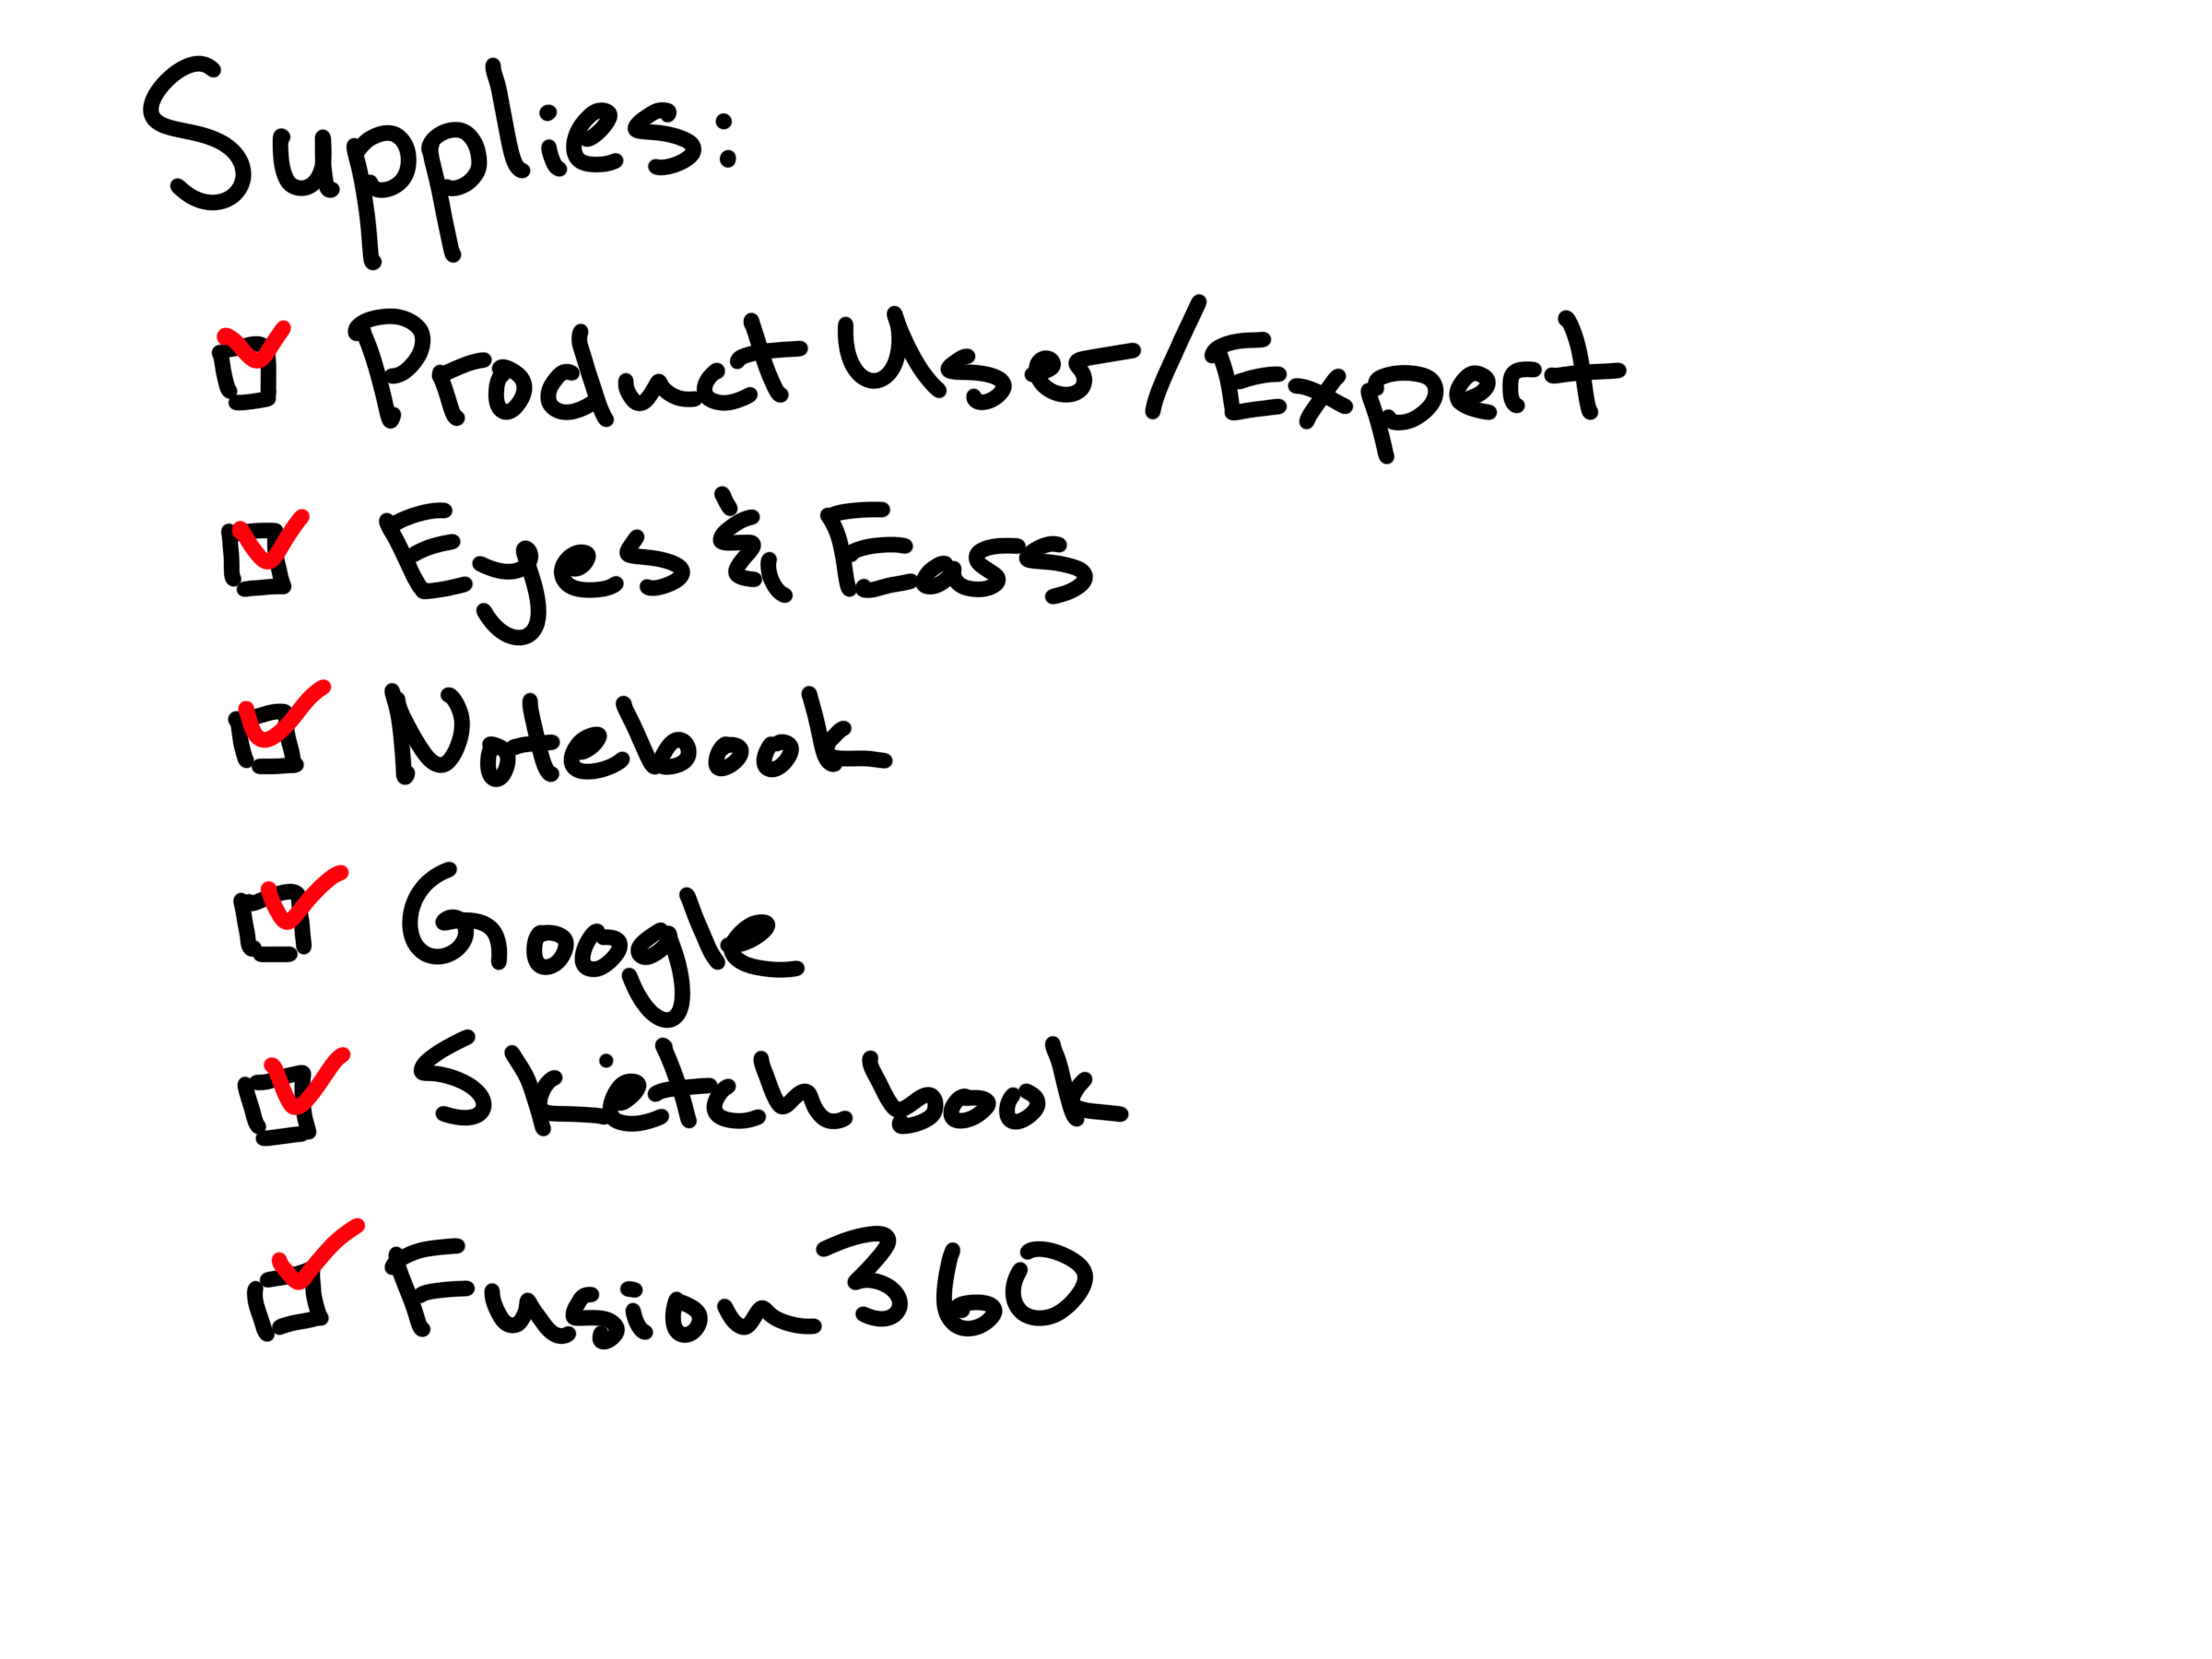
Here are some basic supplies you'll need to understand your problem and develop a solution:
- A product user or subject matter expert
- Your eyes and ears
- A notebook
- Sketchbook
- Fusion 360
Get to Know a User
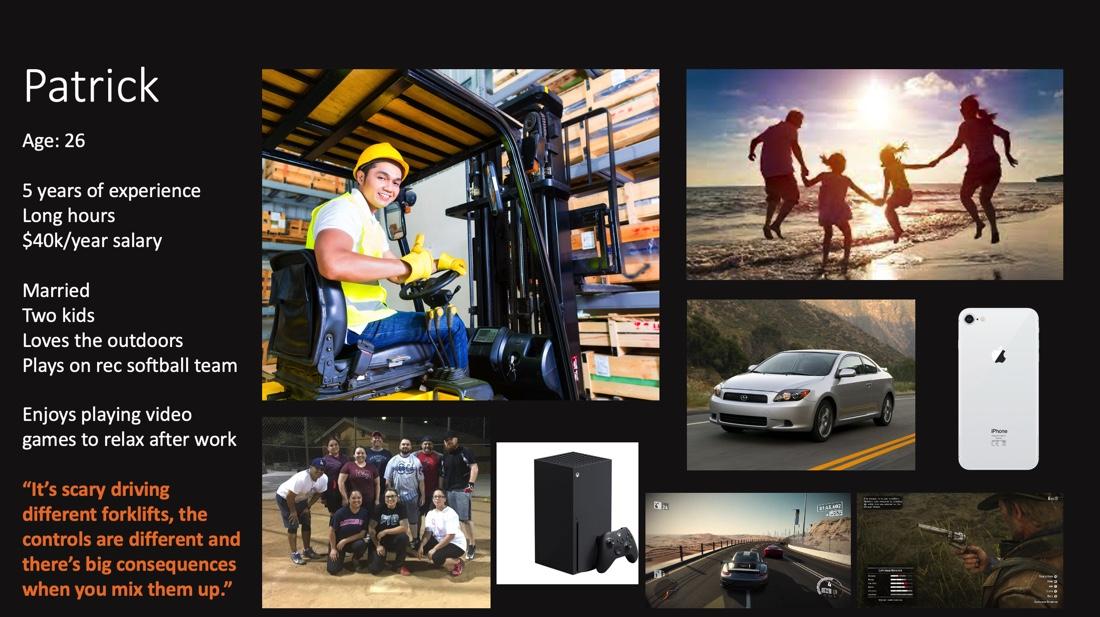
To understand any problem, and to figure out where you can add the most value, it's imperative you speak with someone who familiar with the topic. This is where you need your notebook, ears and eyes. My user is Patrick, he's been driving forklifts for a few years. He's a pleasant guy, takes pride in his work, has a small family and enjoys unwinding with some video games.
During conversations and research a theme arose, "It's scary driving different forklifts, the controls are different for various forklifts and there are big consequences when you mix them up."
Bingo!!! We have a problem.
Validate the Problem
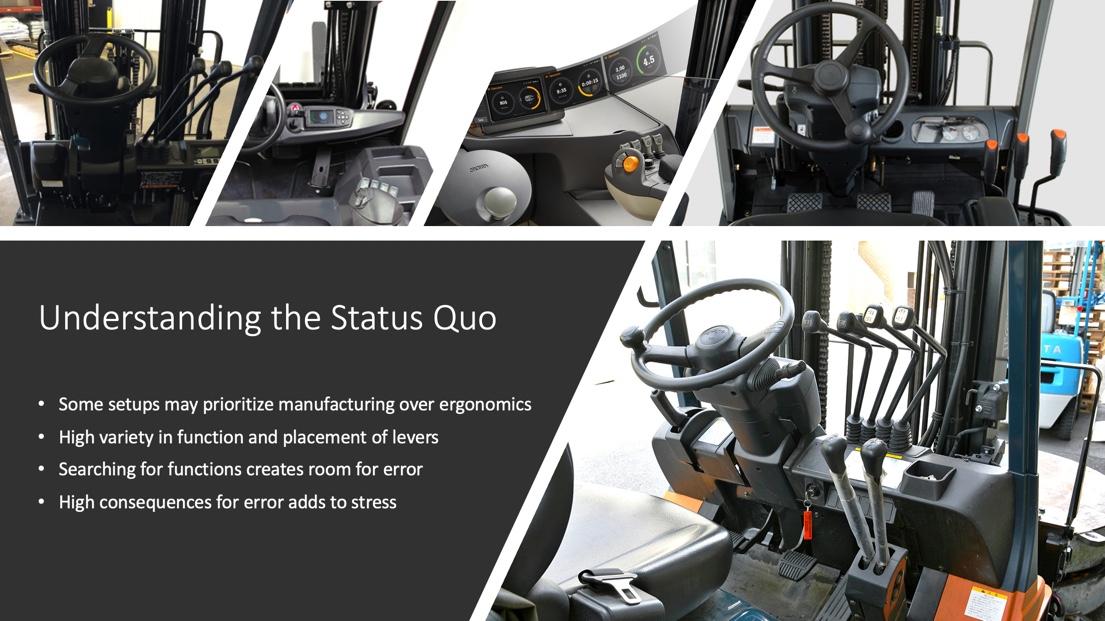
The variety of controls seemed like a potential problem to solve. Further research revealed a huge variety of controls. I found that even among similar setups, levers in similar locations might serve different functions. Operators arms were swinging all over the place in some cases and the visual and physical field of search seemed ripe for error.
Find Inspiration
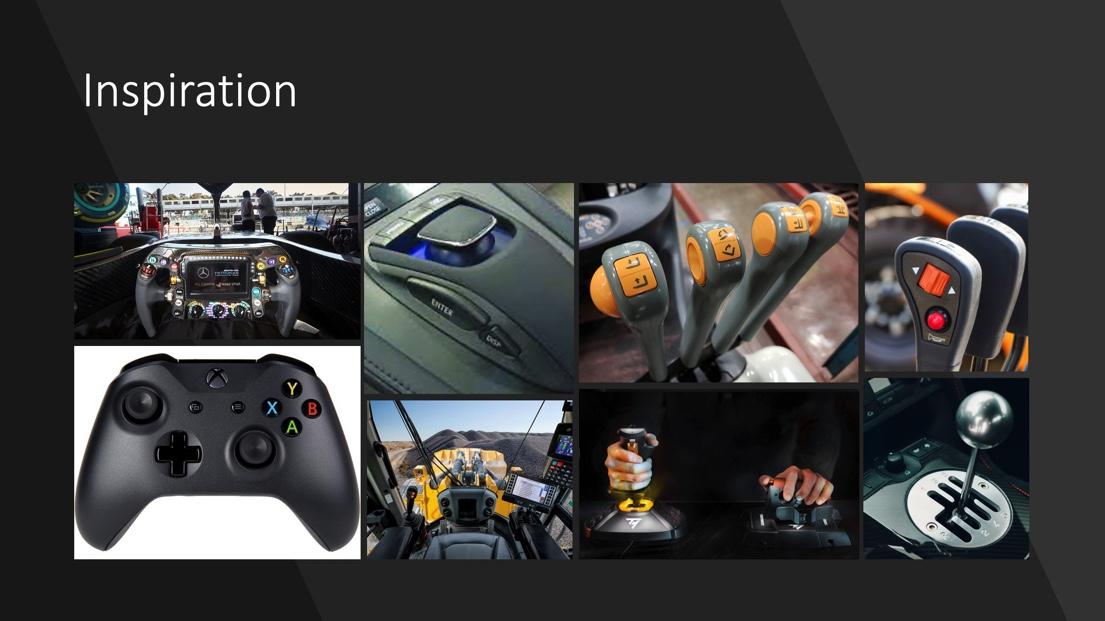
In my search for inspiration I looked for different control devices that Patrick may be familiar with, or that were being used in other types of machinery.
-Video game controllers and joysticks were interesting in that almost any movement in the universe could be narrowed down to a single, or combination of buttons on a handheld object.
-Automotive controllers, for infotainment or shifting, seemed to be obvious and familiar parallels.
-I noticed joysticks were common in other types of heavy machinery.
Sketch Out Ideas
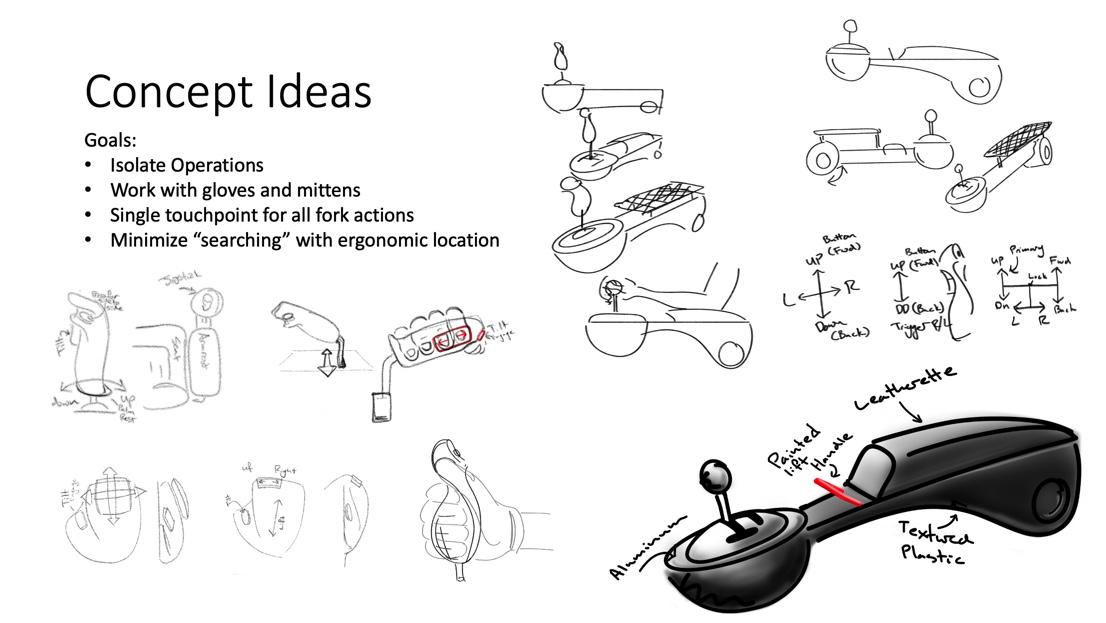
You'll need to come up with a lot of ideas, the more the merrier.
I gave myself some guidelines to help with my idea of minimizing error:
- Isolate operations
- Must work with gloves and mittens
- Create a single touchpoint for all fork actions
- Minimize "searching" by placing in an ergonomic location
Start drawing stuff, draw it from different angles, think through materials and touchpoints, get some feedback. Just draw, draw, draw, draw. It's difficult at first, then the more you draw, the more the ideas come.
Once you have something you like, think through the materials and add some color.
I chose to continue on with a design utilizing a gated joystick on a pivoting, padded armrest. This design limits the opportunity for error, limits movement and searching, and is located in an ergonomic position.
Create a Model in Fusion 360
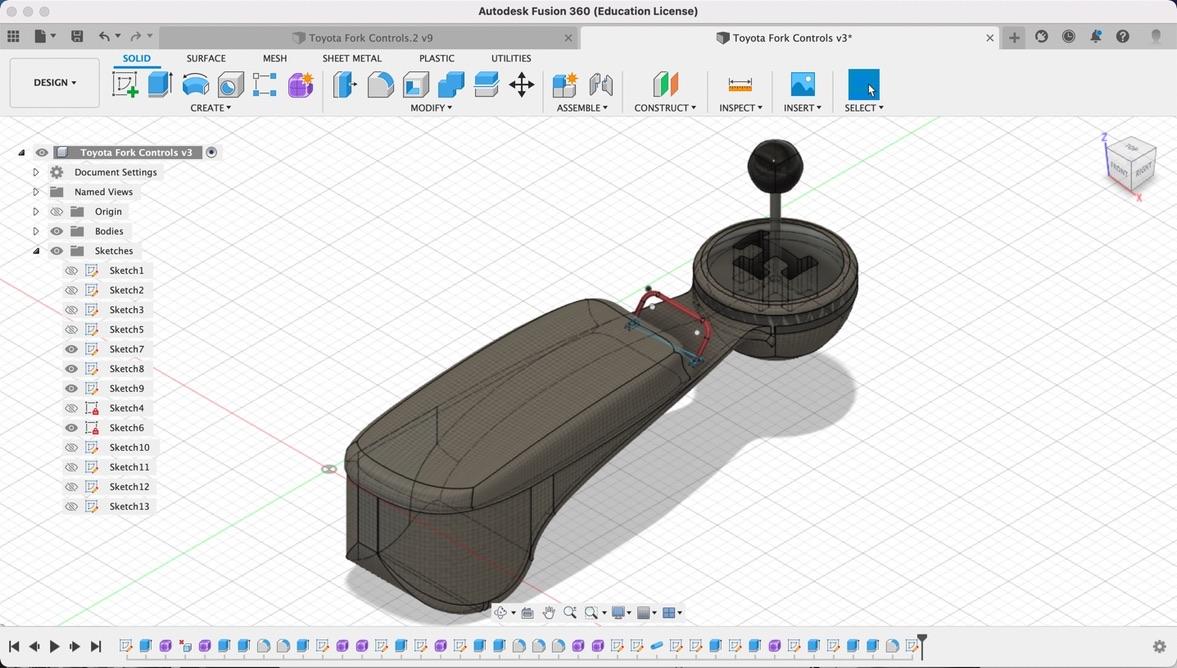
Fusion 360 makes creating 3D models a breeze. Seriously!!!
Select a sketch surface, place a shape, extrude, cut shapes from shapes, fillet here, add a quadball there. Creating a high quality model takes almost no time.
You can even add materials and colors as you think through your design to create a realistic 3D model.
Render Your Model in Fusion and Photoshop for Easy Reference
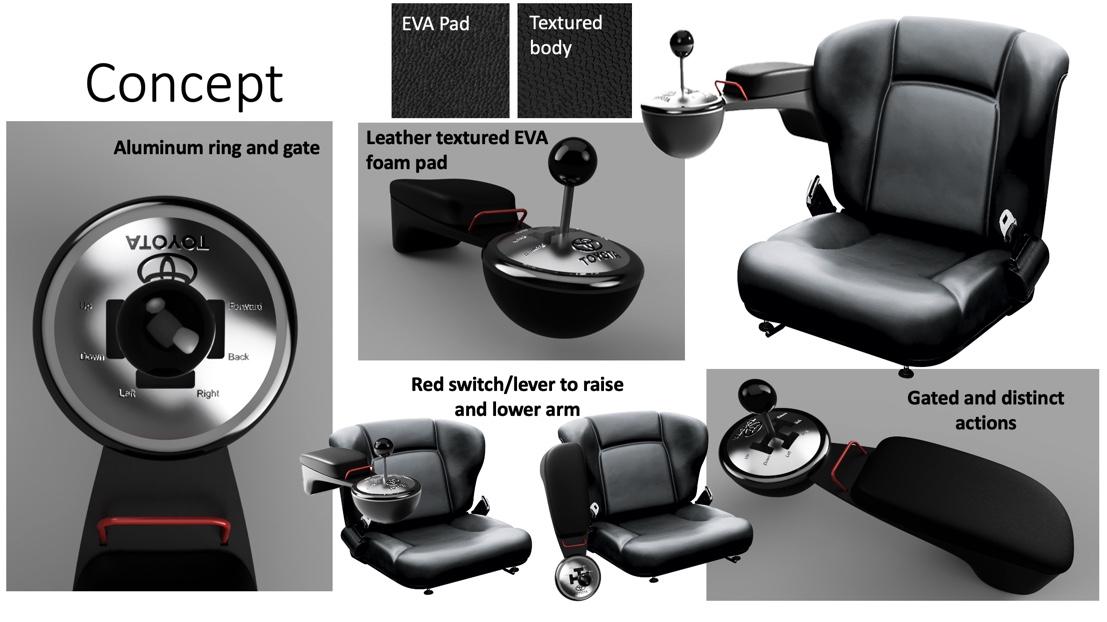
Now that you've built your model you'll want to create some realistic renders to help convey your vision.
Thankfully, Fusion 360 lets you add materials and textures for some super realistic renders.
With Photoshop, it's easy to place your renders in the intended environment to convey your ideas.
Create some some sweet visuals, call out your materials, highlight some features and voila!!! You've succesfully designed a new product based on real human input.