How to Design 3D Darts With SelfCAD
by Julie80 in Design > 3D Design
114 Views, 0 Favorites, 0 Comments
How to Design 3D Darts With SelfCAD

Learn How to Design 3D Darts using SelfCAD with the help of this tutorial
How to Design 3D Darts with SelfCAD
This tutorial will explore the fascinating intersection of traditional darts and 3D technology, focusing on how 3D modeling enhances the design, customization, and experience of the game. By utilizing advanced software tools, players can create personalized dart designs, simulate gameplay, and even analyze performance with unprecedented accuracy. Whether you are a seasoned dart player seeking to elevate your game or a hobbyist intrigued by the possibilities of 3D technology, this exploration of 3D darts promises to illuminate the future of this beloved sport.
To access the interactive tutorial to this article, visit https://www.selfcad.com/tutorials/6y3b4t60261p13w3z4364v6e30223j1at521
Once you’ve launched the editor;
From the 3D Shapes category on the toolbar choose Cylinder; Set Height to 1, Vertical segments to 64, Position x to -150, Position y to 100
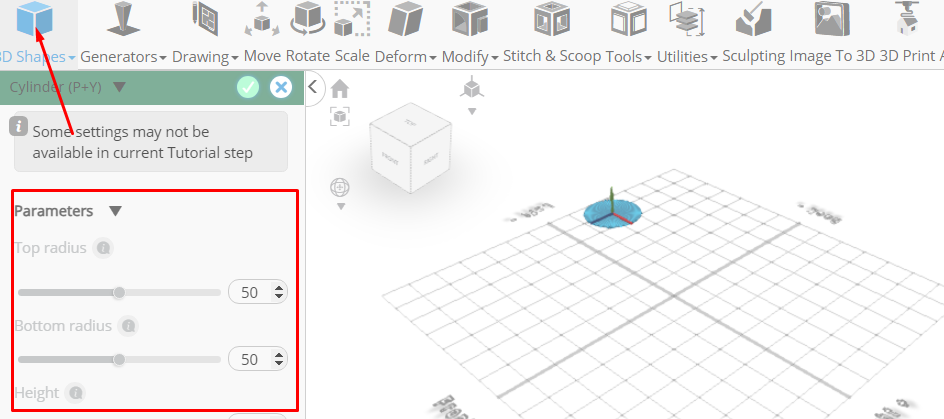
Tick the checkmark to finalize cylinder
From the Deform category on the Toolbar choose Taper; Set Plane to Left/Right, Set z to -85
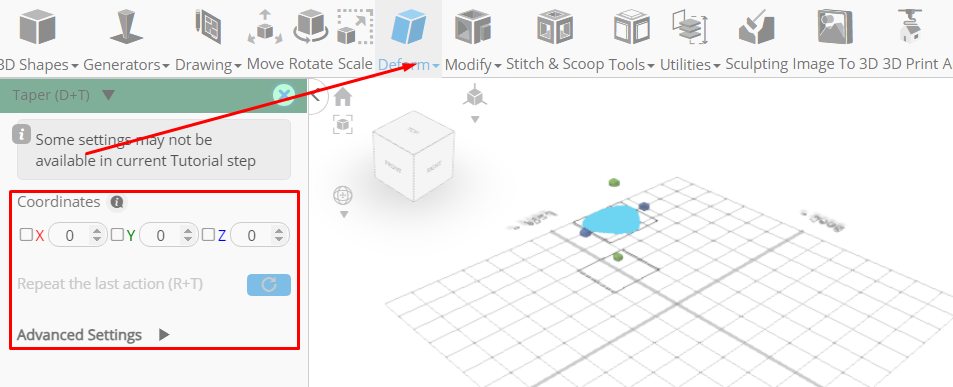
Click ‘x’ to close Transformation panel
Click copy button to copy selected objects
Click Rotate on the Toolbar , Set x to 90
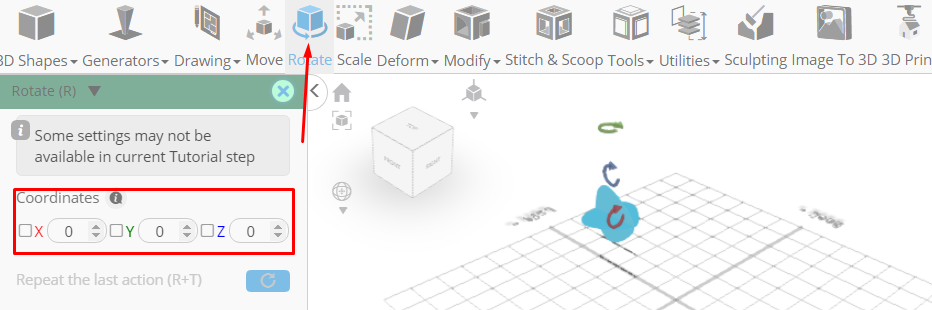
Click ‘x’ to close Transformation panel
From the 3D Shapes category on the toolbar choose Cylinder; Set Top radius to 1, Bottom radius to 5, Height to 150, Vertical segments to 64, Position x to -25.5, Position y to 95.5, Rotation z to 90
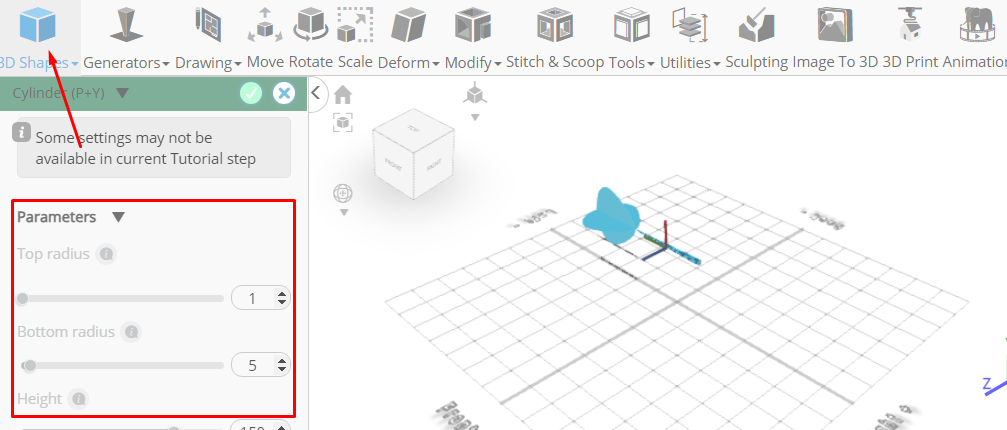
Tick the checkmark to finalize cylinder
From the 3D Shapes category on the Toolbar choose capsule; Set Top radius to 6, Bottom radius to 6, Height to 50, Position x to 35, Position y to 94.5, Rotation z to 90
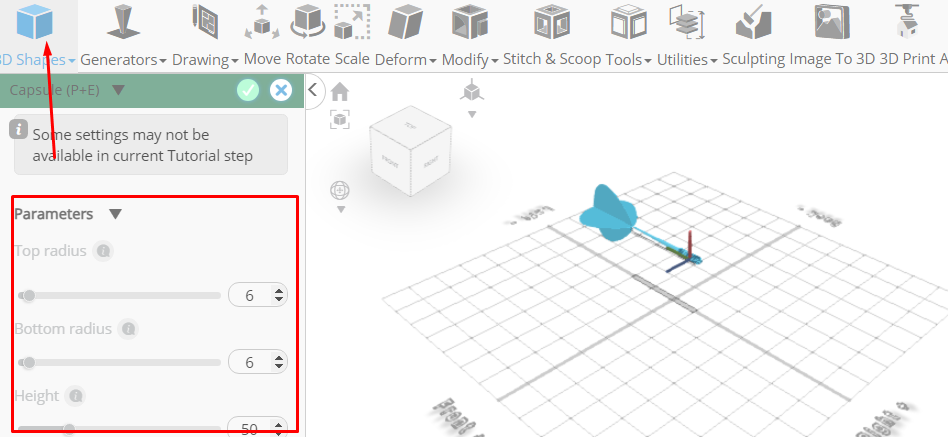
Tick the checkmark to finalize capsule
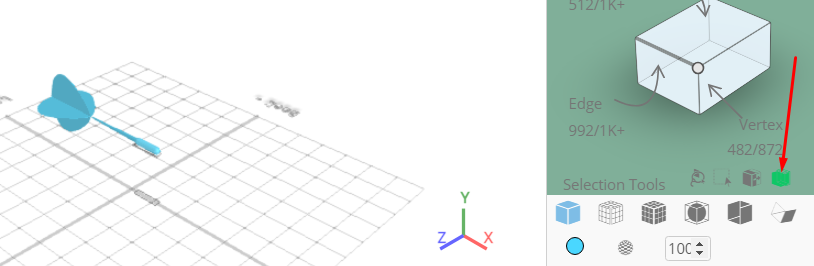
From the right panel choose cube selection
Set Right to 20
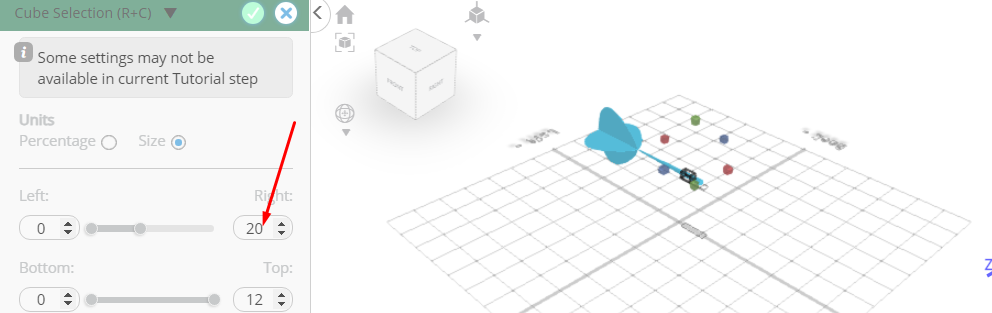
Tick the checkmark to finalize cube selection
Click Delete button to delete selected object
From the Modify category on the Toolbar choose Add thickness; Set thickness to 1.5, use mirrored thickness to true
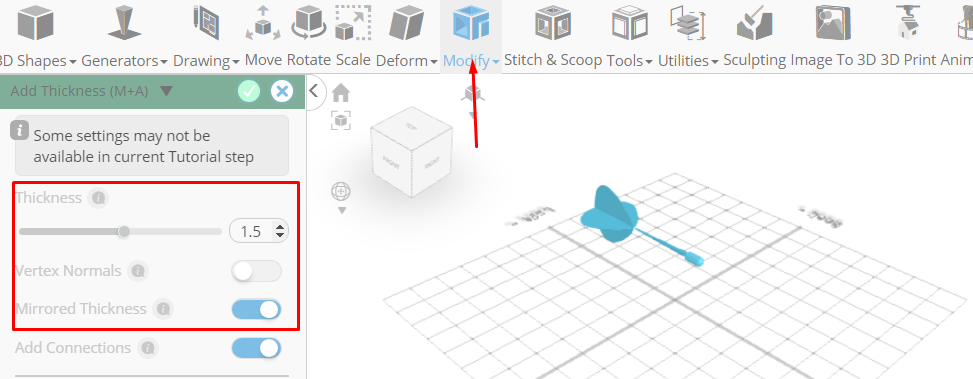
Tick the checkmark to finalize add thickness
From the 3D Shapes category choose Cone; Set radius to 4.5, Height to 80, Horizontal segments to 30, vertical segments to 30, position x to 75, position y to 96, rotation z to -90
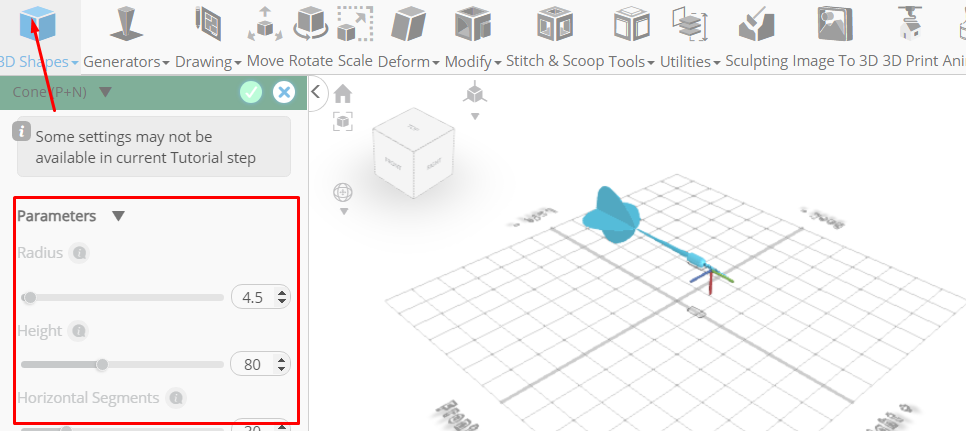
Tick the checkmark to finalize cone
From the 3D Shapes category choose Torus; Set Ring radius to 8, tube radius to 1, tubular segments to 25, radial segments to 64, position x to 33, position y to 91.4, rotation z to 90
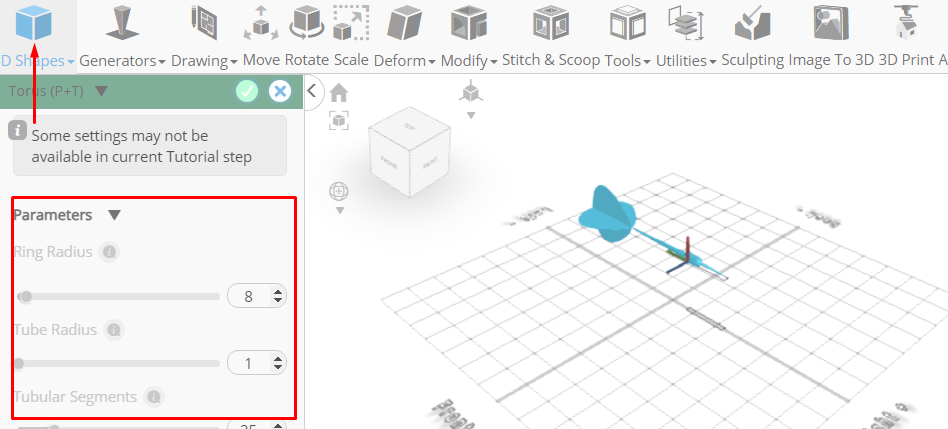
Tick the checkmark to finalize torus
Click highlighted part on selection cube to turn off region selection
From the tools category on the toolbar choose copy offsets; Set x to 3, Set amount of copies to 6, Click copy button to create copies
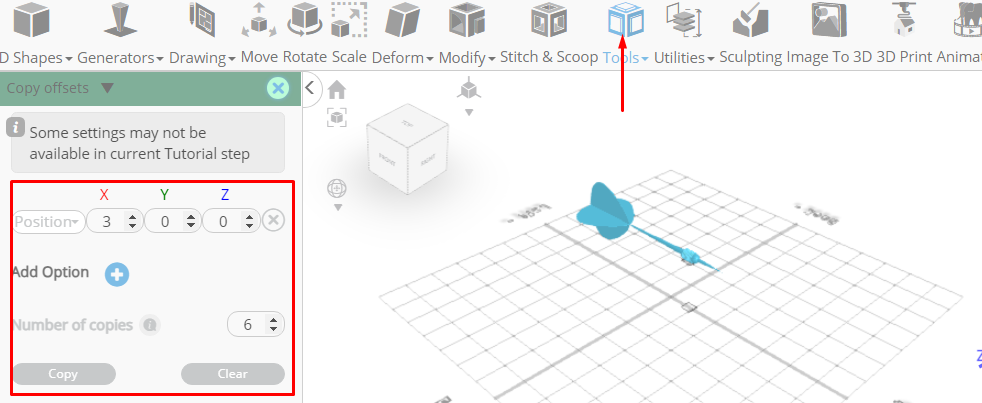
Click ‘x’ to close copy offsets panel
From the edit menu on the top toolbar choose Group
Click on mesh 12 to select it
Click stitch & scoop on the toolbar. From the tool panel choose Difference; Choose group 1 to subtract
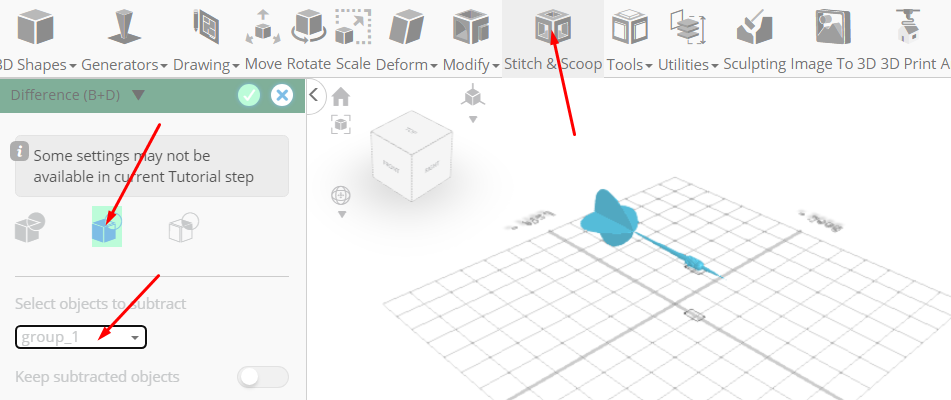
Tick the checkmark to finalize difference
Click on mesh 4, 4(1), 8, 16 to select
Click stitch & scoop on the toolbar ; From the tool panel choose union

Tick the checkmark to finalize union
As you continue honing your design skills, remember that SelfCAD offers a wealth of resources to support your learning journey. To deepen your understanding and explore more advanced features, consider checking out the interactive tutorials (https://www.selfcad.com/tutorials) available on the SelfCAD website. The tutorials page provides a treasure trove of guides, tips, and tricks that cater to designers of all levels.
More structured learning experience can also be accessed at the SelfCAD Academy (https://www.selfcad.com/academy/curriculum/), https://www.youtube.com/@3dmodeling101, and 3D Modeling 101 series (https://www.youtube.com/playlist?list=PL74nFNT8yS9DcE1UlUUdiR1wFGv9DDfTB). This comprehensive resource offers in-depth courses taught by industry experts, allowing you to master the intricacies of SelfCAD at your own pace.