How to DIY 32 Band LED Audio Music Spectrum Analyzer Using Arduino Nano at Home #arduinoproject
by DKArdu in Circuits > Arduino
1874 Views, 6 Favorites, 0 Comments
How to DIY 32 Band LED Audio Music Spectrum Analyzer Using Arduino Nano at Home #arduinoproject
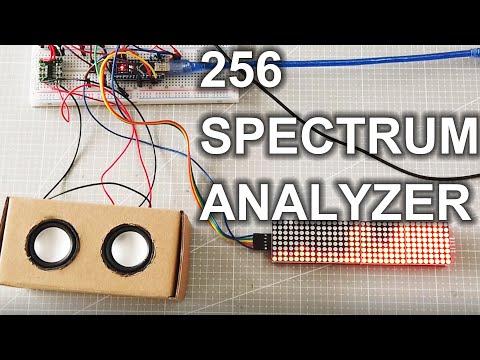
Today we will make a 32 band LED Audio Music Spectrum Analyzer at Home using Arduino, it can shows frequency spectrum and play muisc at the same time.
Note
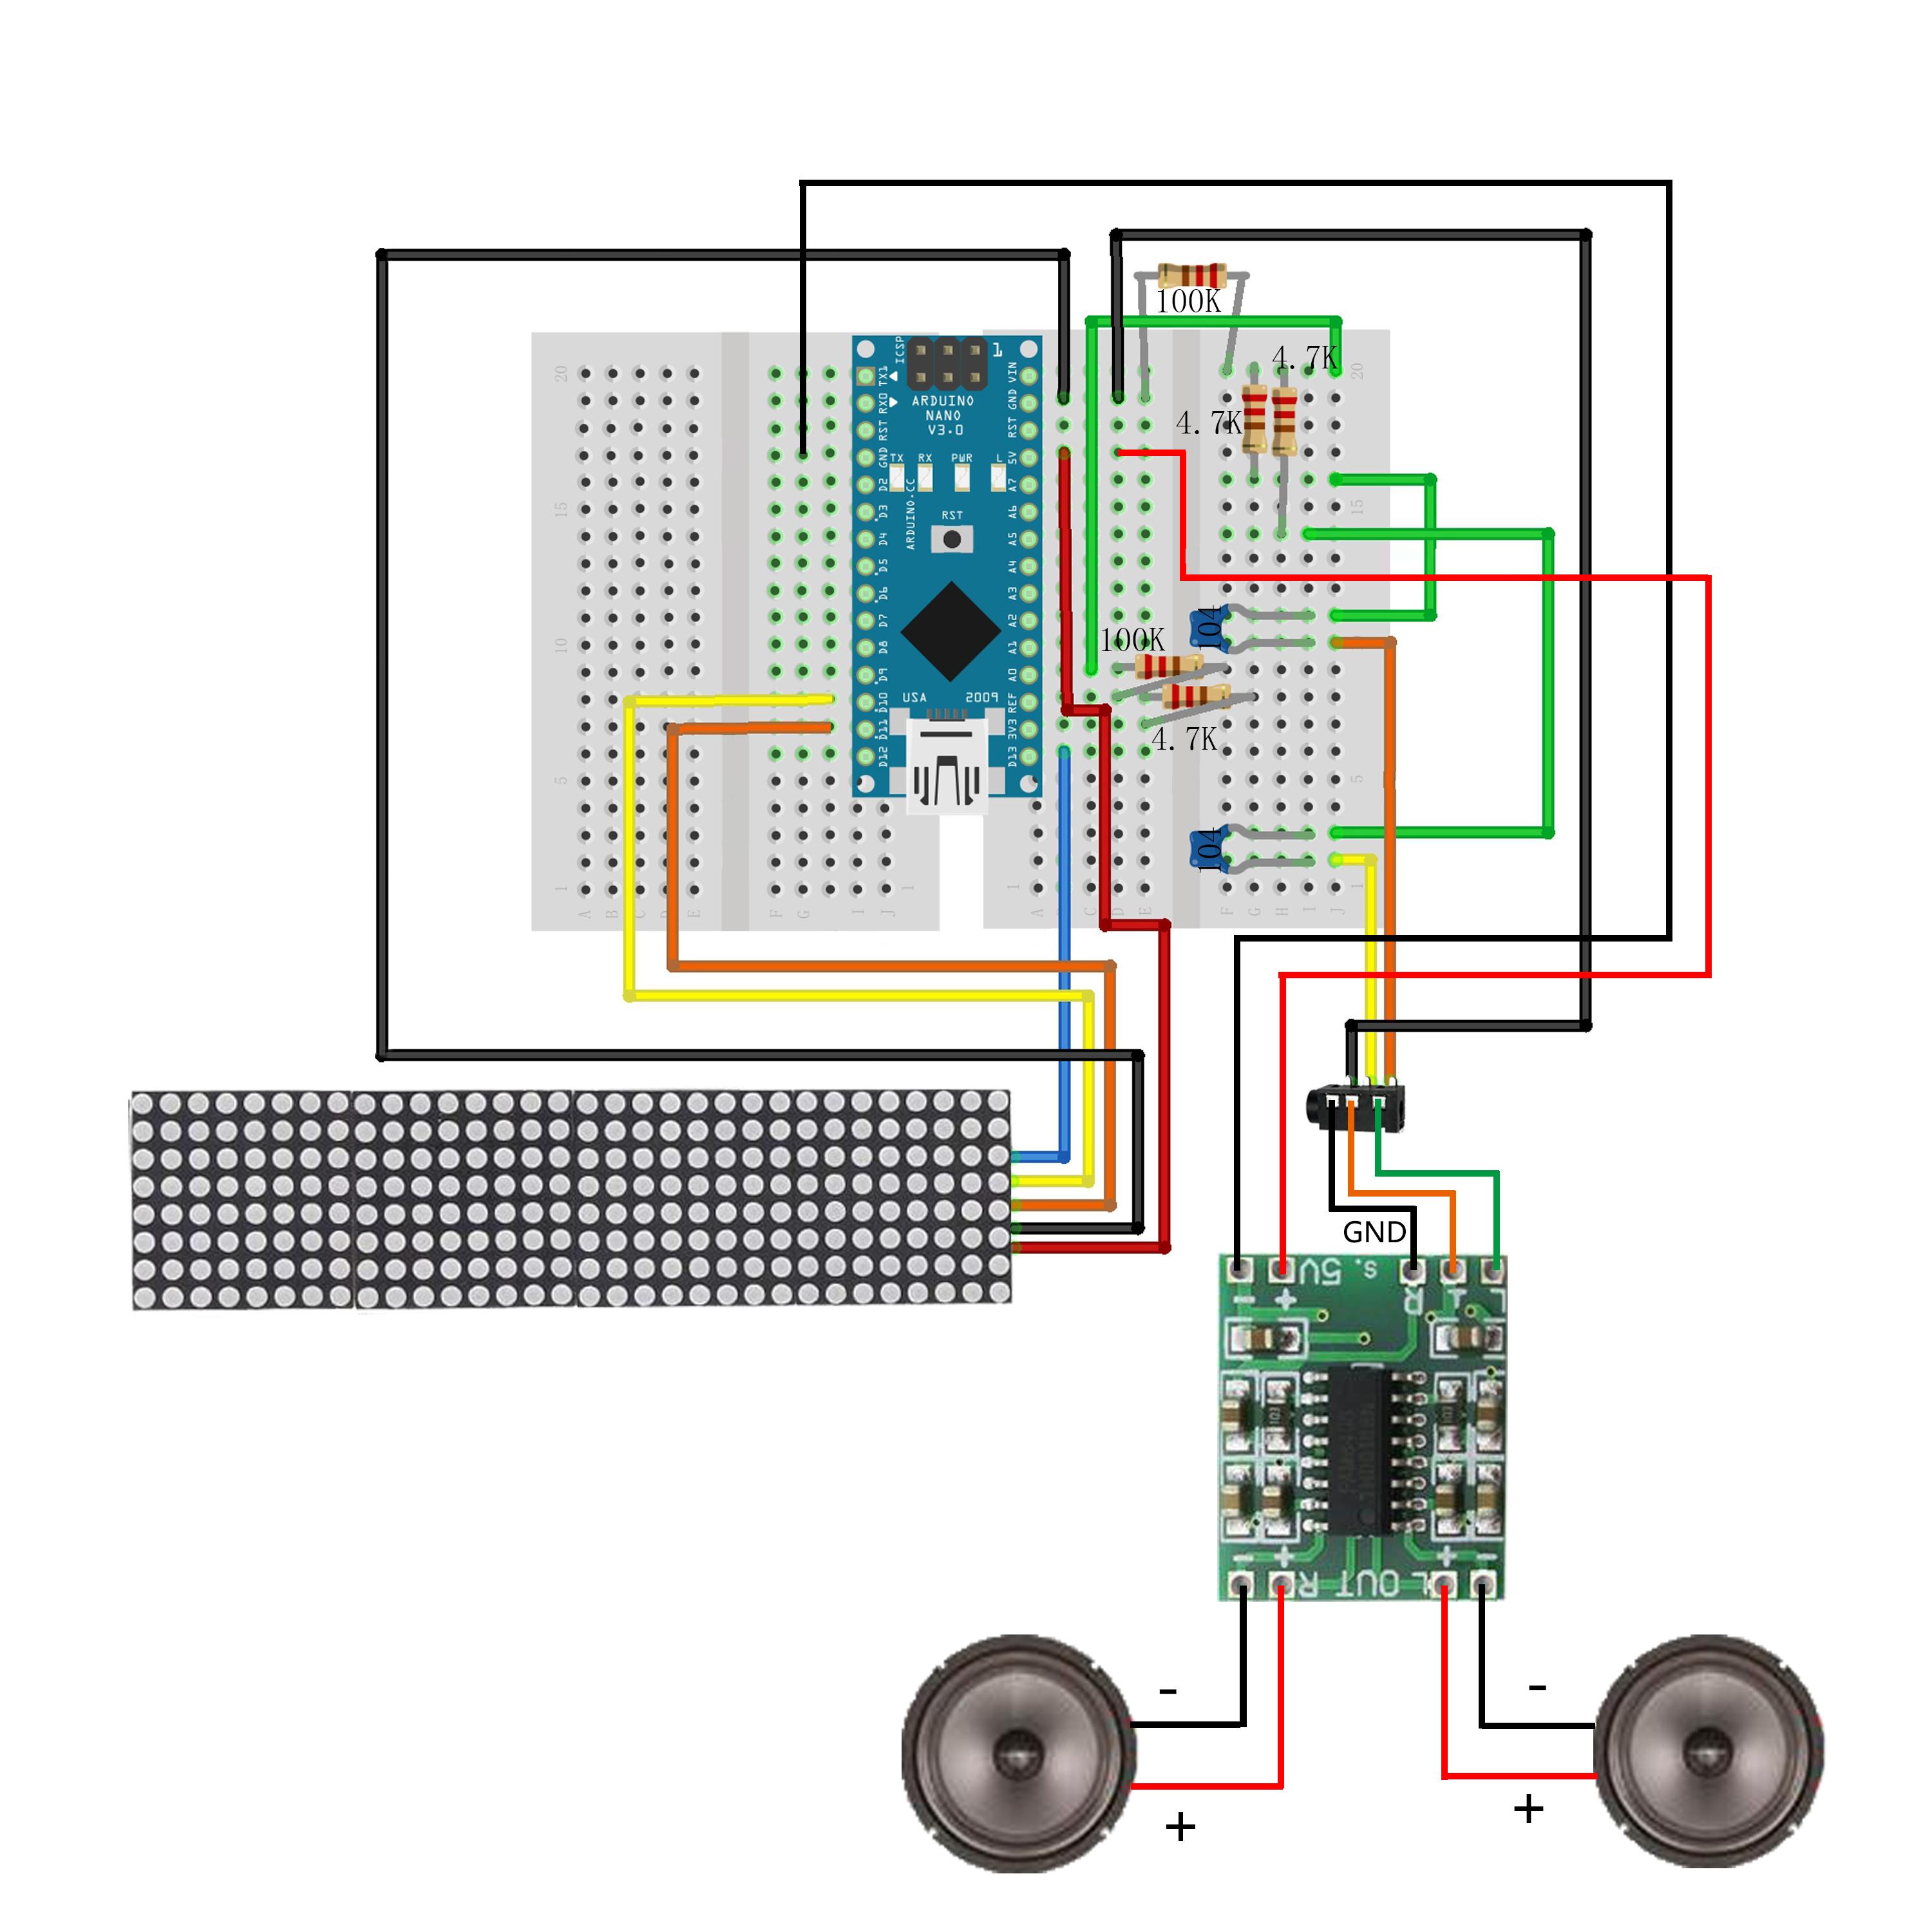
The max7219LED must be connected in front of the 100k resistor, otherwise the noise of the speaker will be very high.
Components
Thefollowing parts were used in this project:
Arduino Nano, https://amzn.to/3hB8Pwf
Two 100K resistors, https://amzn.to/2OSGlBW
Three 4.7K resistors, https://amzn.to/2OSGlBW
Two 104 capacitances (104 = 100000pF = 100nF = 0.10μF),
4 in 1 Max7219 dot matrix led, https://amzn.to/3jcCL2G
PJ-320D 3.5MM audio socket,
Jumper wires, https://amzn.to/3jCHhZd
Breadboard, https://amzn.to/33yEavN
3W PAM8403 Class D Audio Amplifier and Two speakers,
The version of Arduino IDE used is 1.8.12
Code:
► GitHub (scheme and sketch): https://github.com/DKARDU/spectrum-
Circuit Diagram
Production
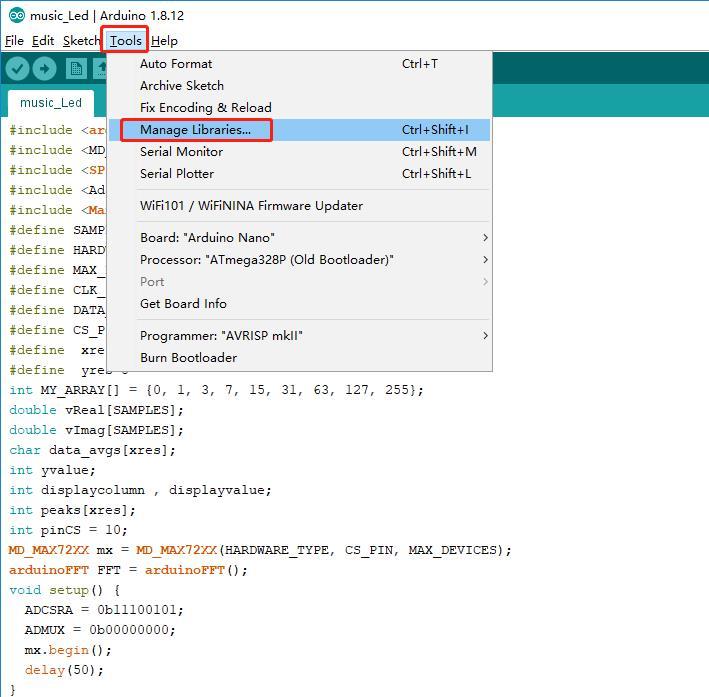
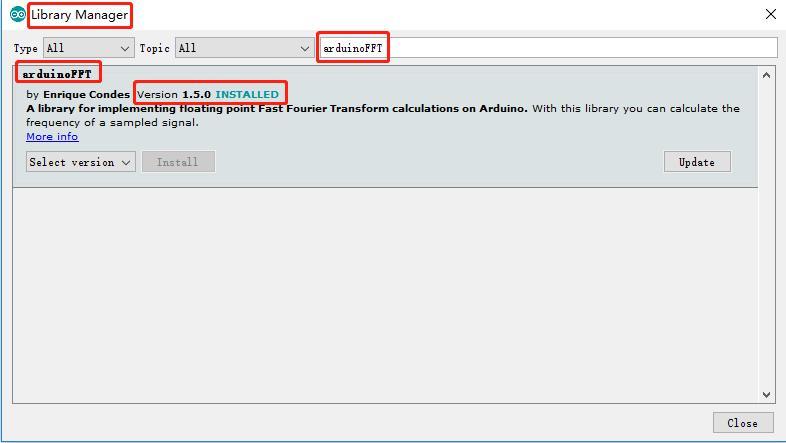
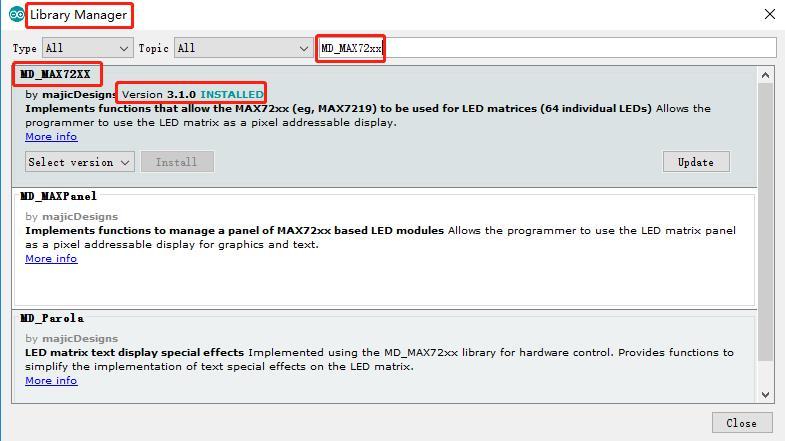
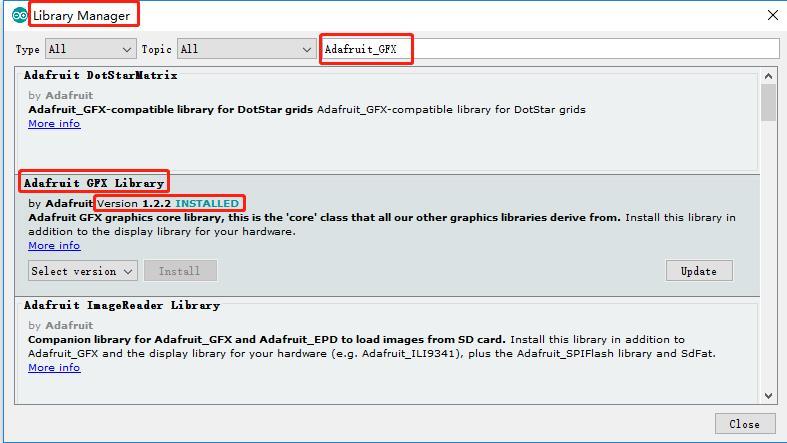
1. Install Library file: Open "Tools"-"Library Manager" in the Arduino development software, then search for arduinoFFT, MD_MAX72xx and Adafruit_GFX, then install them.
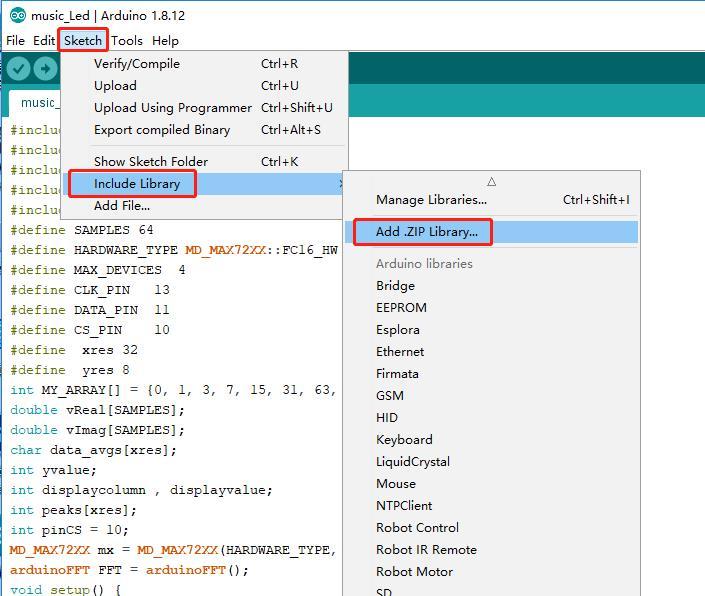
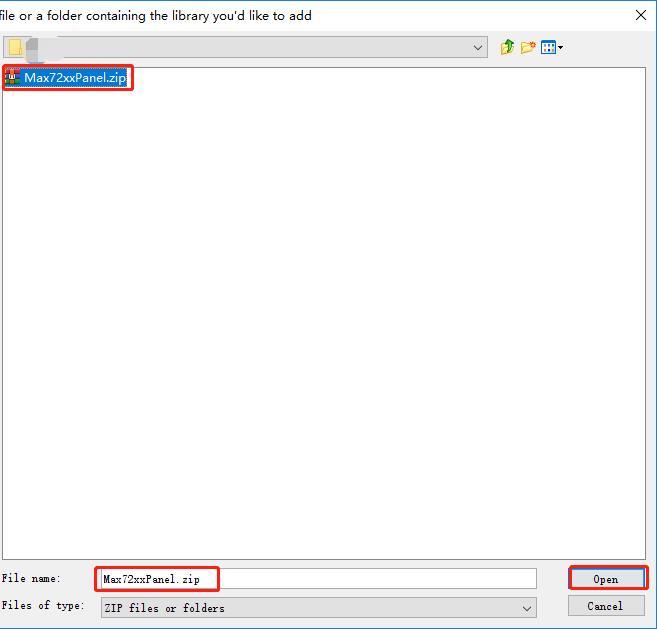
2. Install Library file: Open "Sketch"- "Include Library"-"Add .ZIP Library……" in the Arduino development software, then add Max72Panel.zip
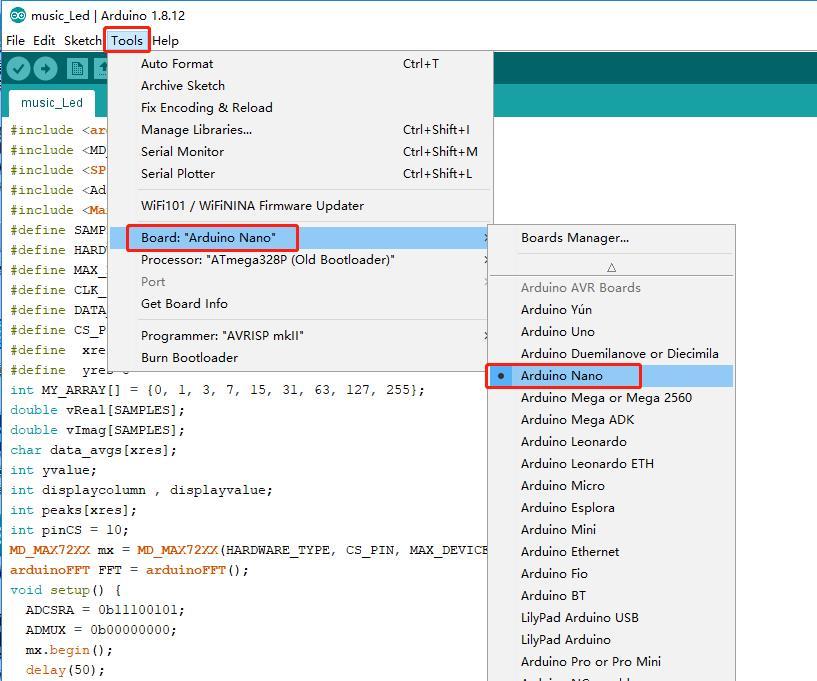
3. Select the development board as Arduino Nano, this is choose the right.
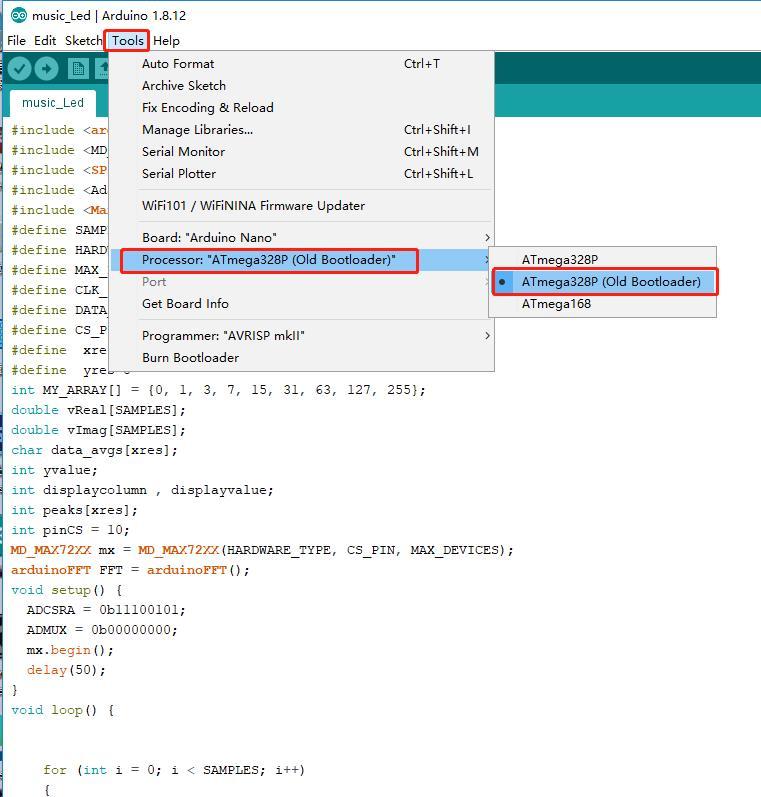
4. Select the processor as ATmega328P(Old Bootloader), this is to choose the right.
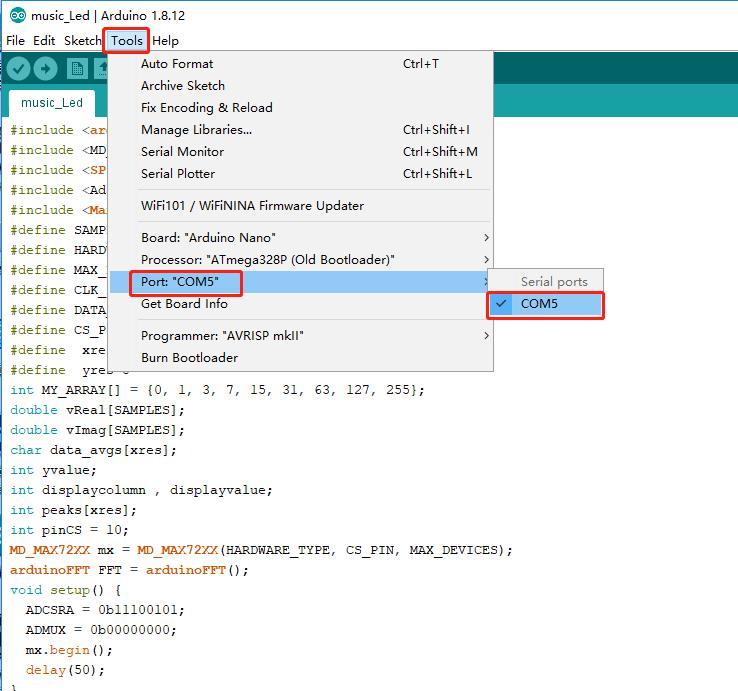
5. Then select the port, this port should be the same as what you see in the device manager, so that you can burn the code into the development board.