How to Cut Out Text From an Image in Adobe Photoshop
73974 Views, 16 Favorites, 0 Comments
How to Cut Out Text From an Image in Adobe Photoshop
This tutorial will demonstrate how to cut out text from an image using any version of Adobe Photoshop.
Open Adobe Photoshop
Open Adobe Photoshop on your computer by clicking on the icon and wait for the program to load.
Open a New Document
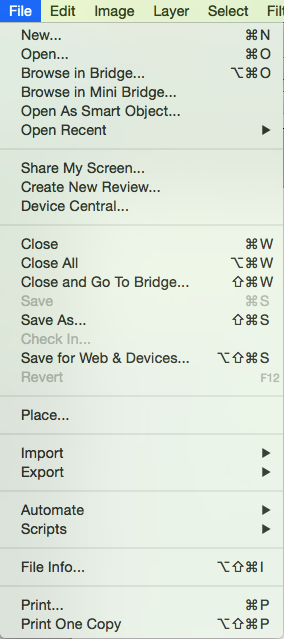
Open a new document by selecting "New..." from the File drop down menu at the top of the window.
Adjust Settings
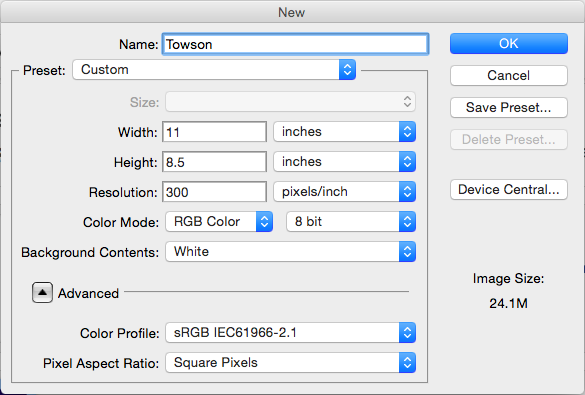
Adjust the settings. This includes naming the document appropriately, entering the width and height of the document, and setting the resolution at 300 pixels/inch.
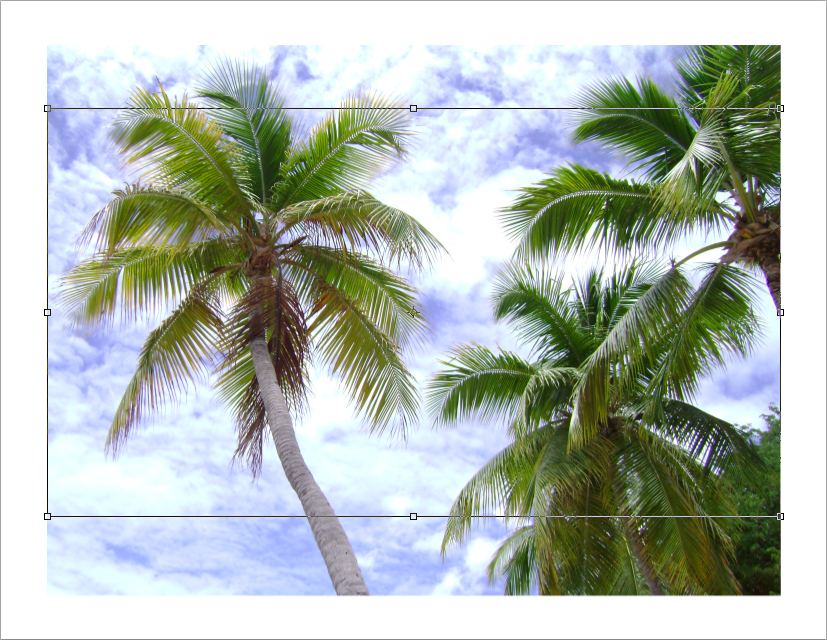
Place an Image

Select "Place..." from the File drop down menu at the top of the window to place an image into the document. Then, select an image from your computer that you would like to use for this project.
Adjust Image
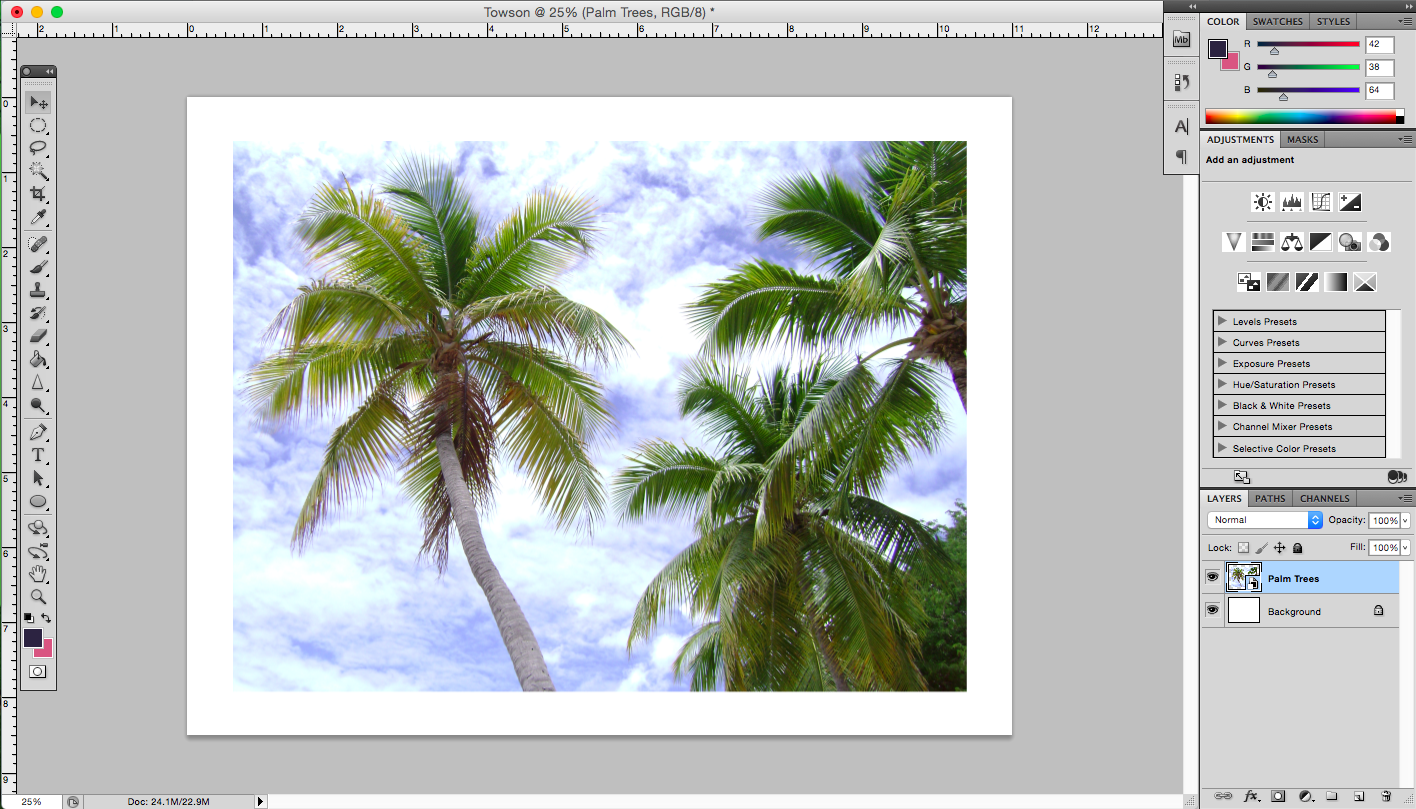
The image will be positioned in the center of document. In order to make the box around the image disappear, simply select the arrow icon from the top of the tool bar to place the image.
Add Text Box

To add text, click on the "T" icon from the tool bar and then drag out a text box starting from the top left corner of the placed image.
Enter Text
To enter the text, simply start typing with the keyboard.
Adjust Text
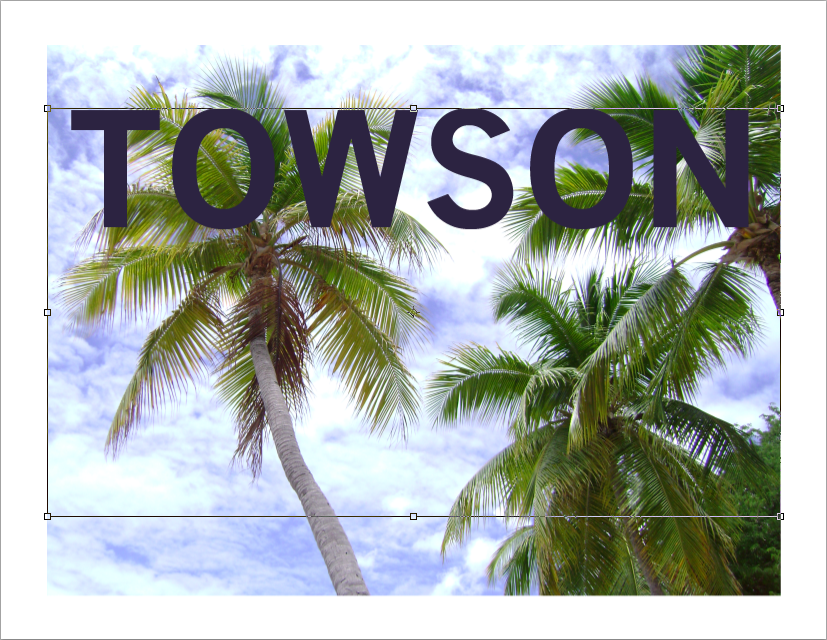
Use the toolbar at the top of the window to adjust the size, position, font, or color of the text. You will need to have the text layer at the bottom right of the window selected in order to see the options for editing text at the top of the window.
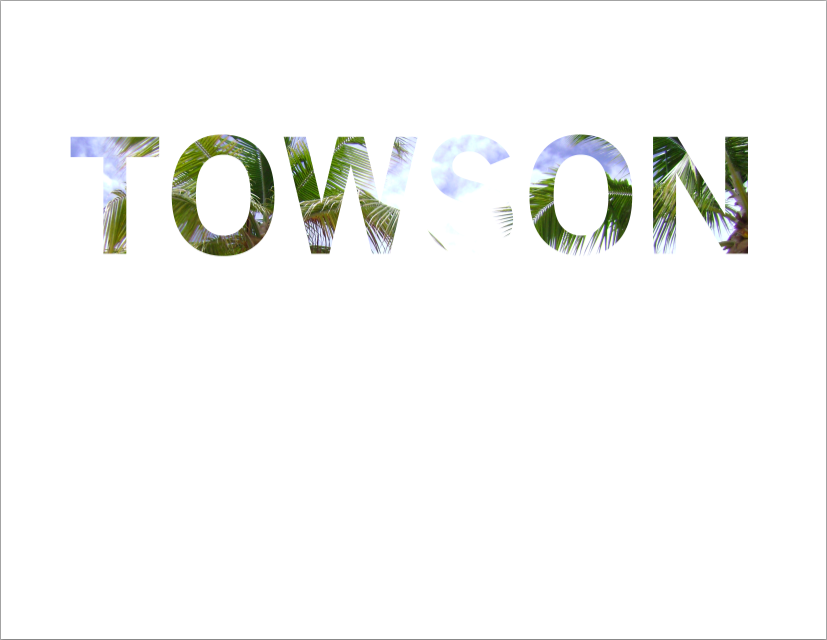
Create Clipping Mask
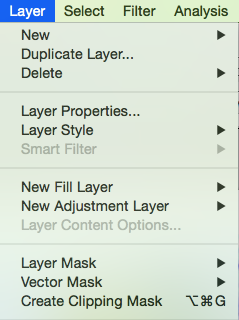
To cut out the text, make sure the image layer is above the text layer in the menu at the bottom right. If it is not, you can drag the image layer to the top of the list. Once everything is in the right order, select "Create Clipping Mask" from the Layers drop down menu at the top of the window.
Finish Project
Now that the project is complete, you may save the document on your computer or discard it by closing the Photoshop window.