How to Create and Write to a File in Java
by HowToJava in Circuits > Software
646 Views, 3 Favorites, 0 Comments
How to Create and Write to a File in Java
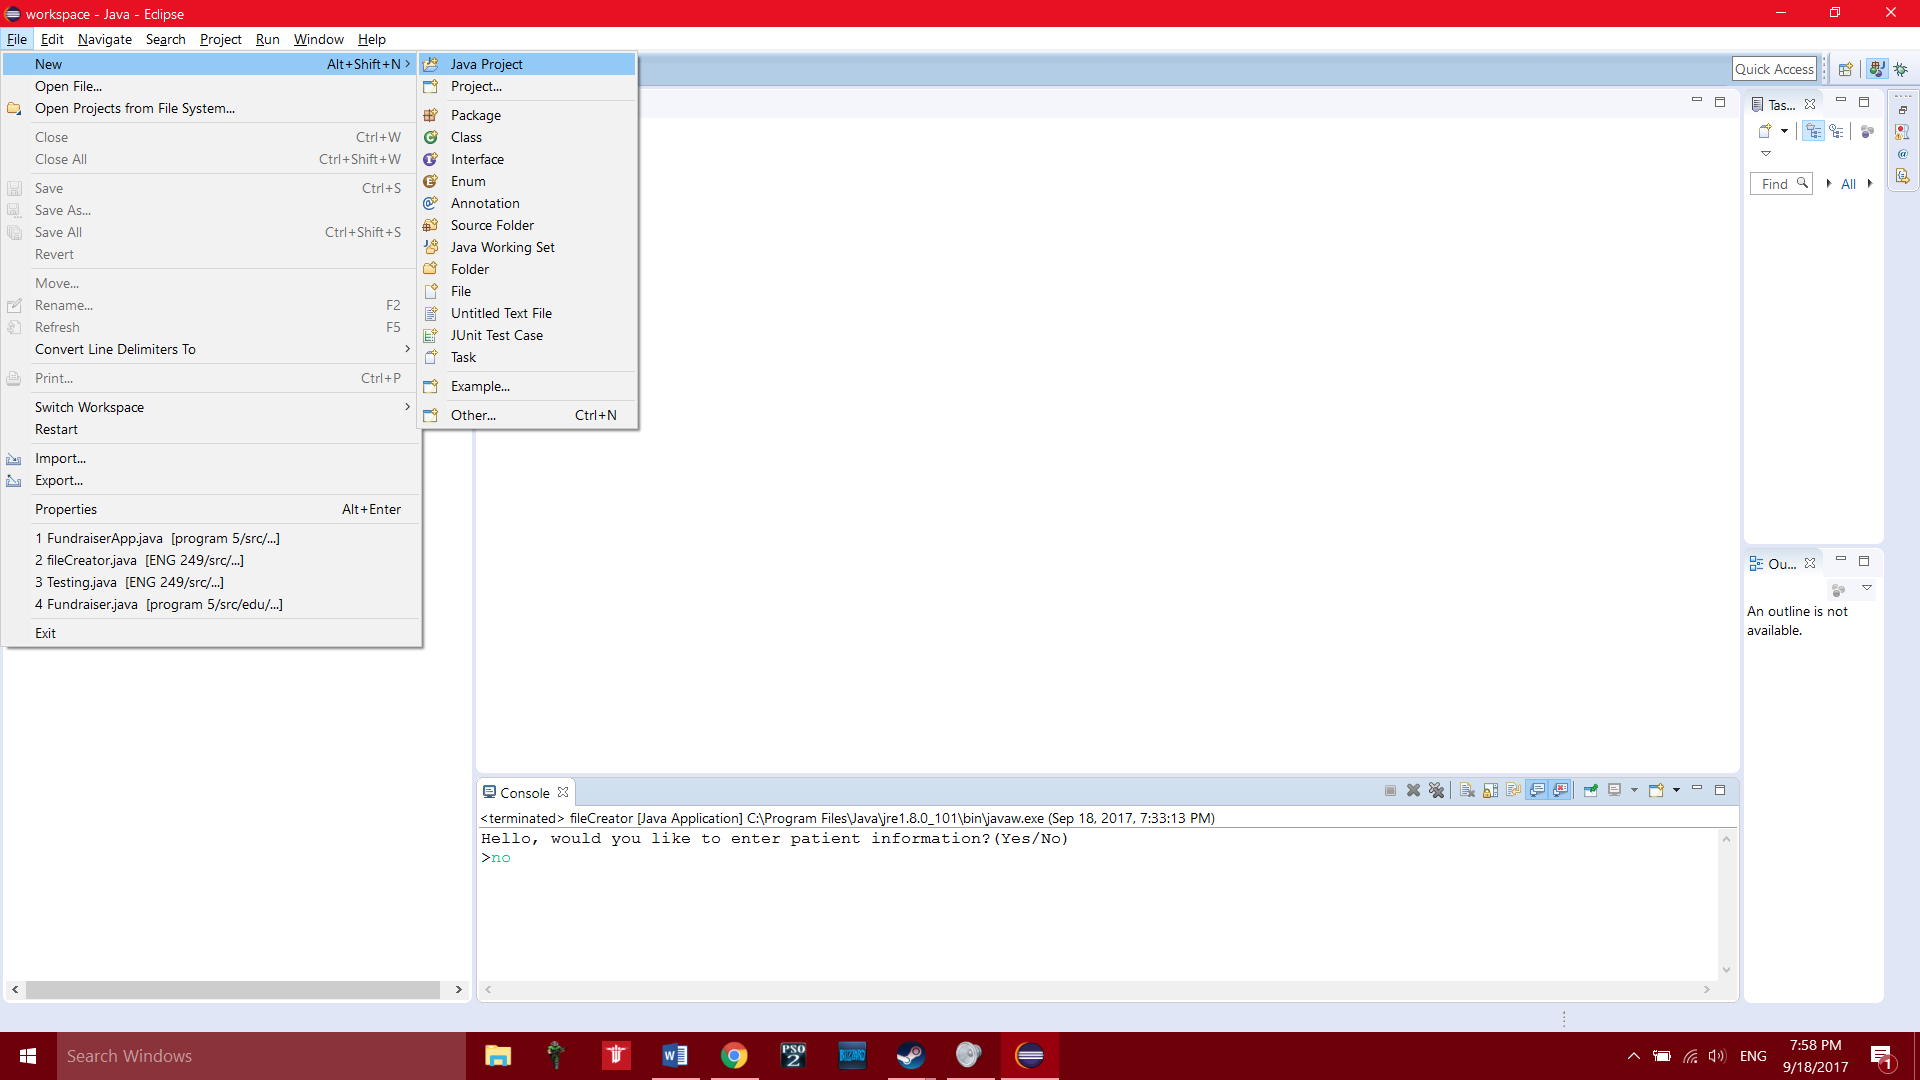
Our program instructions will be a step by step guide on how to create and write to a file. For this demo, we will assume we are making a medical document to record a person’s information. You can modify this to fit your needs later, but it’s probably best to try our way first for familiarity.
Step 1: Creating a New Java Project


The first thing we need to do is create a new Java project in eclipse.
Name your new project whatever you like and create it. Next, make sure to create a package in your new project, and then create a new class inside the package. When you create the class, check the box for public static void main so you have your main generated automatically.
Your project should look something like this when you’re done. The names won’t be the same but the layout should be. We’ll begin creating our program now. First you’ll need to create the actual file we’ll be using to store information.
Step 2: Creating File/Importing Functions
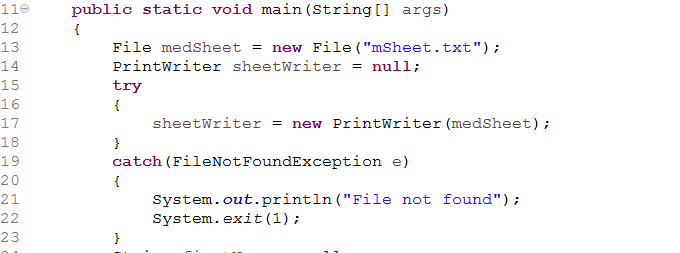

The first line of the program is where we create our file. By using a “File” object type, we create the file called “mSheet.txt”.
PrintWriter is the class we use to actually write to our file. Once we have created the PrintWriter object, we need to create a try catch instance. As you can see, the program “tries” to make sheetWriter a new PrintWriter for our file object. The catch is in place in case something goes wrong and the system needs to shut down, hence the “System.exit(1)”. You may notice that eclipse gives you an error even if you have typed this correctly. This means you need to import the File, PrintWriter, and FileNotFoundException functions into your java project. You’ll also need to import scanner for this program, so we’ll go ahead and do it now.
Make sure to place the import statements above public class so it works properly.
Step 3: Creating/Declaring Variables

Now we begin creating variables for our program. We need to be able to record a person’s name and birth date so we make variables for the necessary information. Here we also create a Scanner object to record the data our user enters and store it in a variable. The yesOrNo variables will be used in an “if” statement and in a while loop.
Step 4: Creating Print Statements/Setting Up While Loop


Here we create a print statement to ensure the user wants to continue. The “>” simply creates and arrow below the question when it appears in the console. It’s a simple indicator to the user that they need to type something. Next we use the first yesOrNo to take the input from the user.
The if statement checks to make sure the value of YesOrNo is “yes” so it can execute the while loop. The while loop is created by giving it a condition. The loop will continue until the value of yesOrNo2 is not “yes”. The .equalsIgnoreCase ensures that even if the user enters an uppercase “yes” or “no”, it will be counted as valid.
Step 5: Filling the While Loop
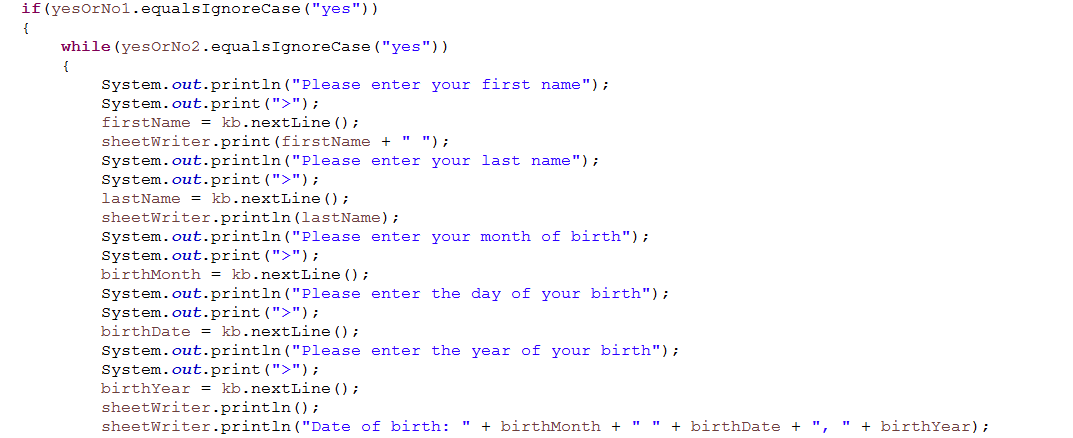

Now that we have the while loop created, we’re going to start filling it. We need print statements for each piece of information we want to get from a user. After each question, we also need to use our keyboard object.. As you can see, firstName = kb.nextLine() will store the user’s input in that variable. Each “sheetWriter.print” writes the information stored in the variables to our file. We continue on like this until we have accounted for all variables. In the final line, the birth date information is formatted so it will appear on the file like so: Month, date, year.
At the end of the loop we ask the user if they would like to stop or keep entering more information. The loop takes the user’s answer and determines if the loop will keep running. Outside of the loop we make sure to use the .close() function on sheetWriter to make sure there is no more processes running.
Step 6: Finishing Touches
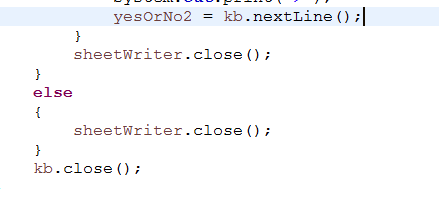
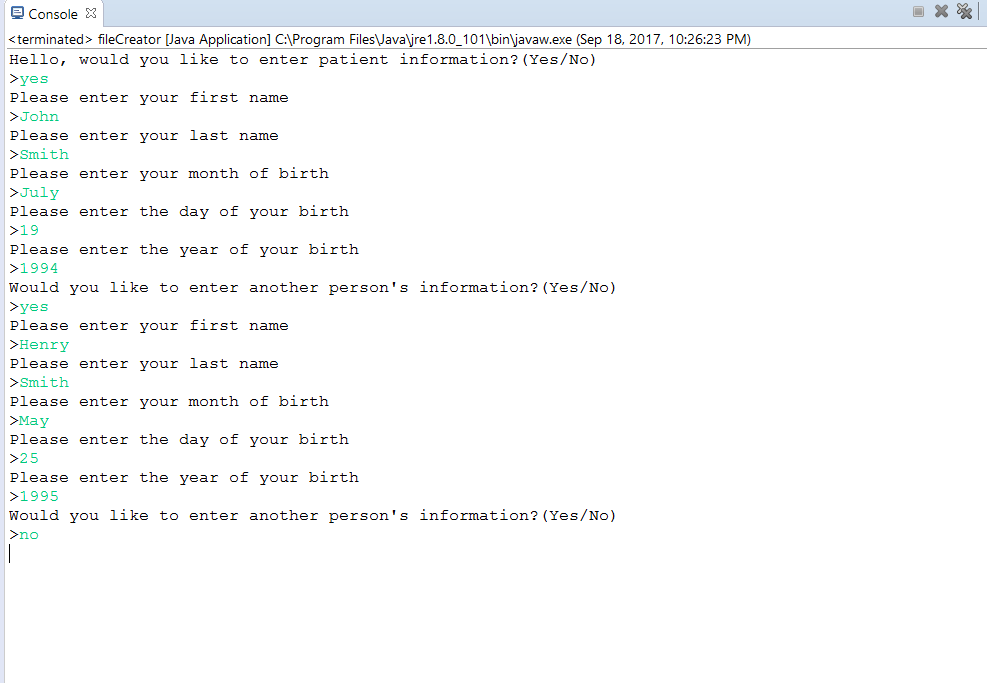
Finally, we write the “else” statement outside of the loop. This is the other half of the check performed by the “if” statement. If the user did not type “yes” at the beginning, they would be sent down to here. The statement simply closes the file writer just like the end of the while loop, but instead of performing any other actions, it simply closes the program. Outside of the else statement we must also close the keyboard variable.
Above is a picture of console output demonstrating how your program should run if created properly. As you can see, the program will continue to ask the user for information until it is told “no”.
Step 7: Finding You File

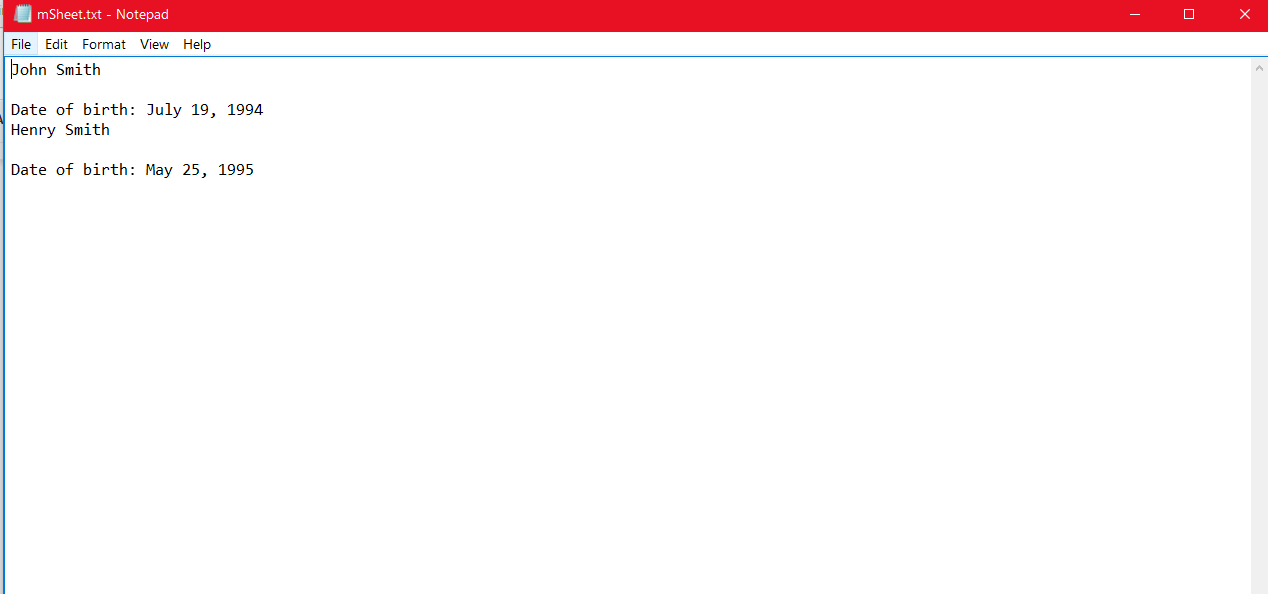
In order to find the file you created, you must go to your eclipse workspace and find the directory for your project.
Our file msheet.txt is here just as it should be. Upon inspection, it has all of the patient info that we recorded.
That’s all there is to this guide on creating a file. Hopefully you’ll feel encouraged to edit and recreate this program for your own learning experience!