How to Create and Use Microsoft Office Building Blocks
by AubreyB9 in Circuits > Microsoft
1538 Views, 17 Favorites, 0 Comments
How to Create and Use Microsoft Office Building Blocks
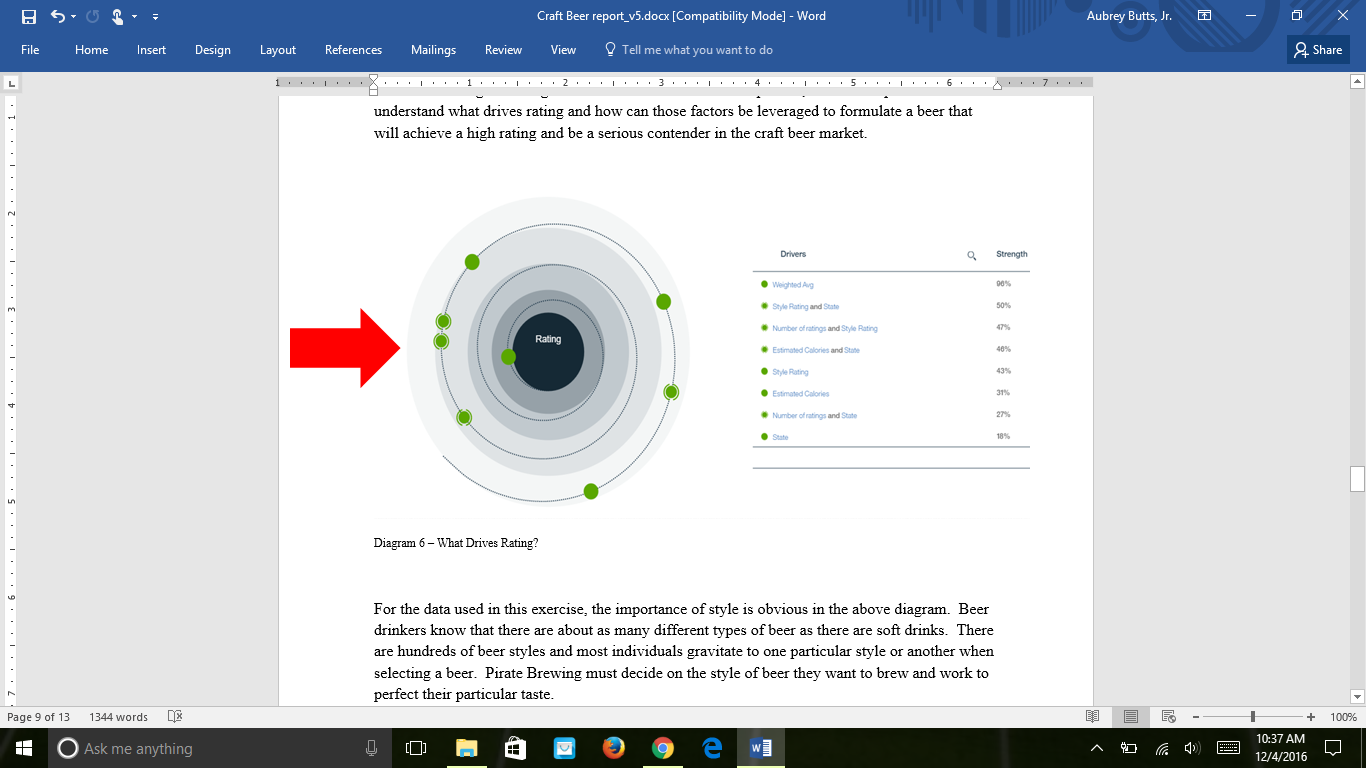
For this tutorial I will instruct Microsoft Office users on how to add and use content to Building Blocks. The above image featured by the red arrow is the content that I will be adding. The same concept apply to all types of content that one may wish to add to Building Blocks
The objective of creating Microsoft Office Building Blocks is to construct reusable pieces of content. This tool is particularly useful in work where items are used repeatedly. To understand Building Blocks, you must first comprehend galleries and Quick Parts. Galleries group Building Blocks. Quick Parts are assigned galleries used to lay out Building Blocks that you want to view in the menu. All Building Blocks are assigned to Quick Parts. Here you can add selected content or locate existing document elements that you wish to use.
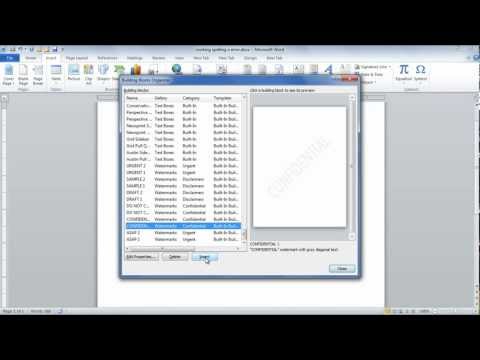
The YouTube video above is very helpful. However, it is very fast paced. I was able to learn the task exclusively from its content but had to rewind and pause several times. This Instructables page will demonstrate the steps provided at a more user-friendly rate. Similar to the video I have visuals of each step. Alternatively, the content that I chose to add to Building Blocks is an image rather than text and I incorporated screenshots and text in my tutorial instead of video. Each step includes screenshots marked with arrows, circles, and/or highlighting to help users focus on important information.
Select the Content Needed to Create the Building Block
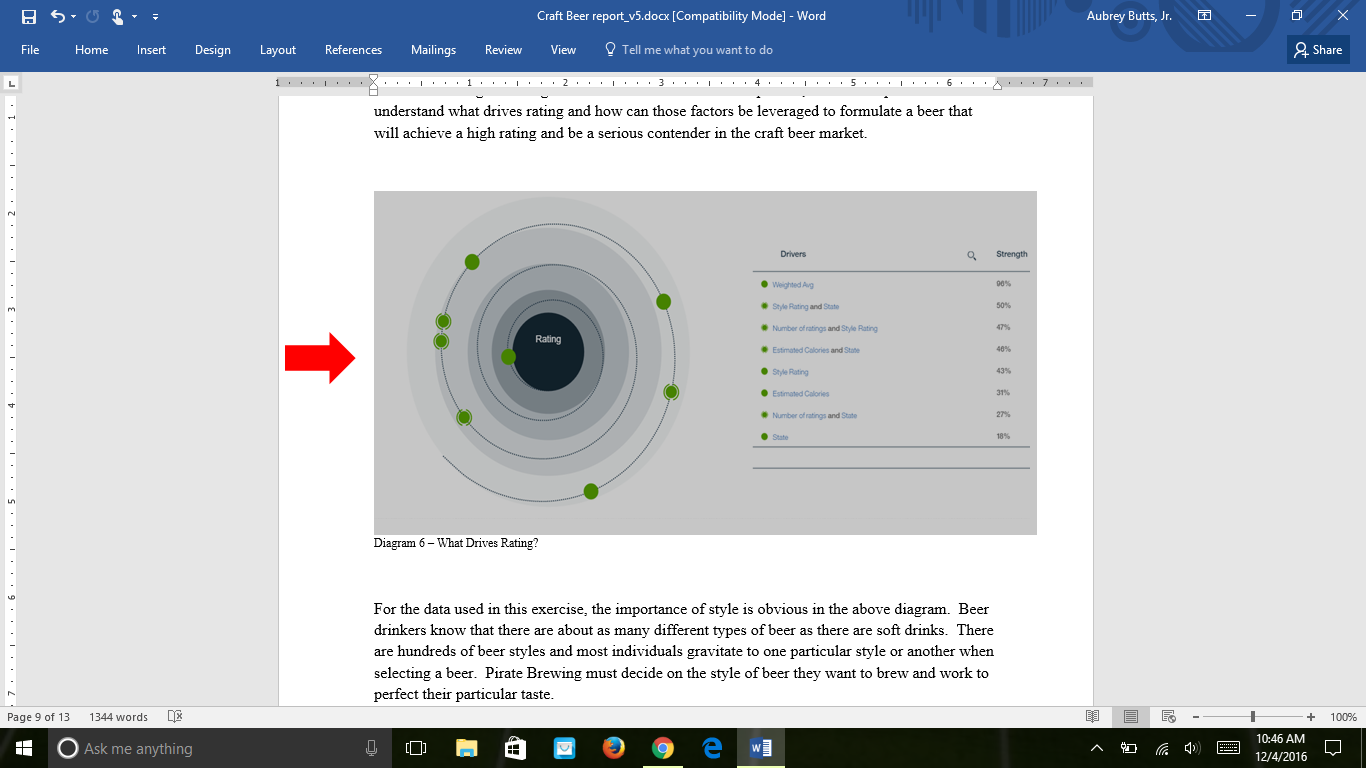
Use the cursor to select the desired content. The red arrow points out that the image's area is now shaded. This indicates that the content needed to create the Building Block has been successfully selected.
Click the Insert Tab
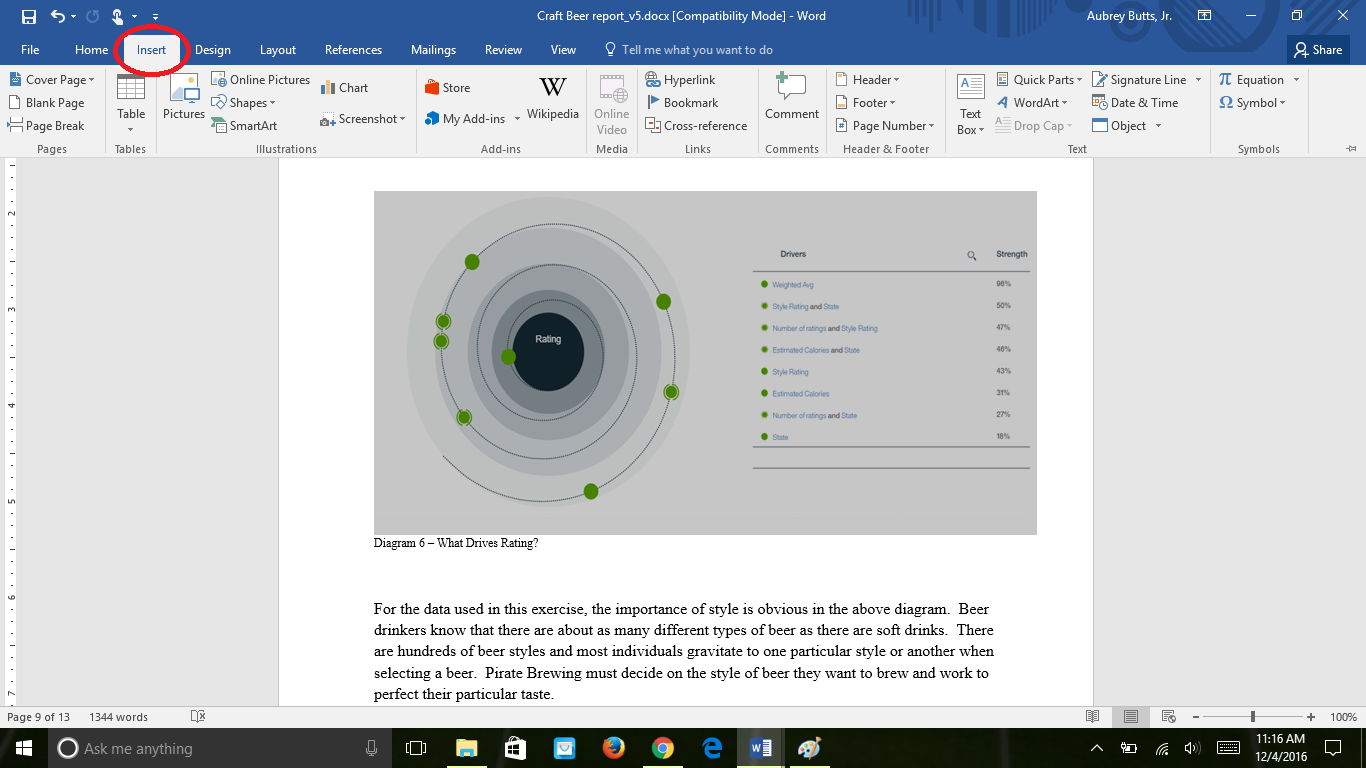
As indicated by the red circle click the Insert tab.
Click the Quick Parts Drop Down Button
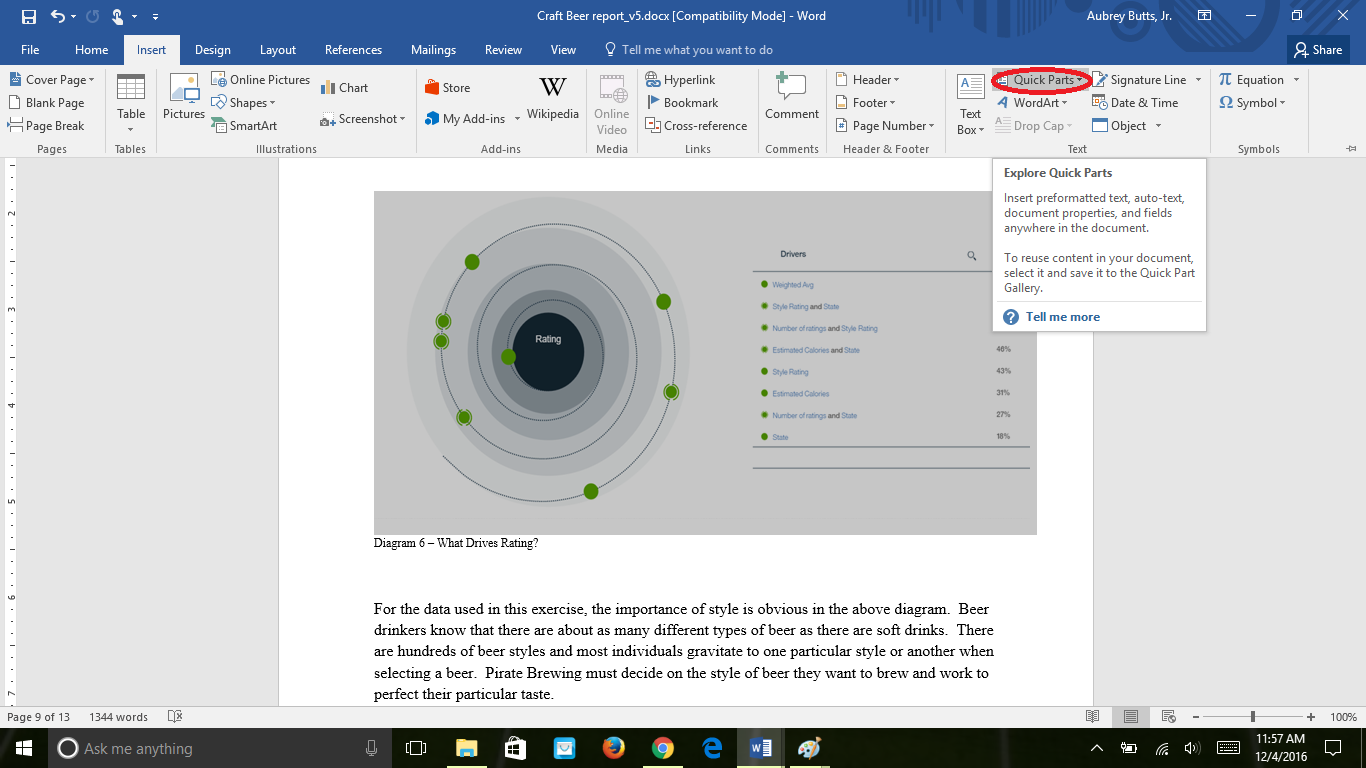
As indicated by the red arrow, click the Quick Parts drop down button.
Click Save Selection to Quick Parts Gallery
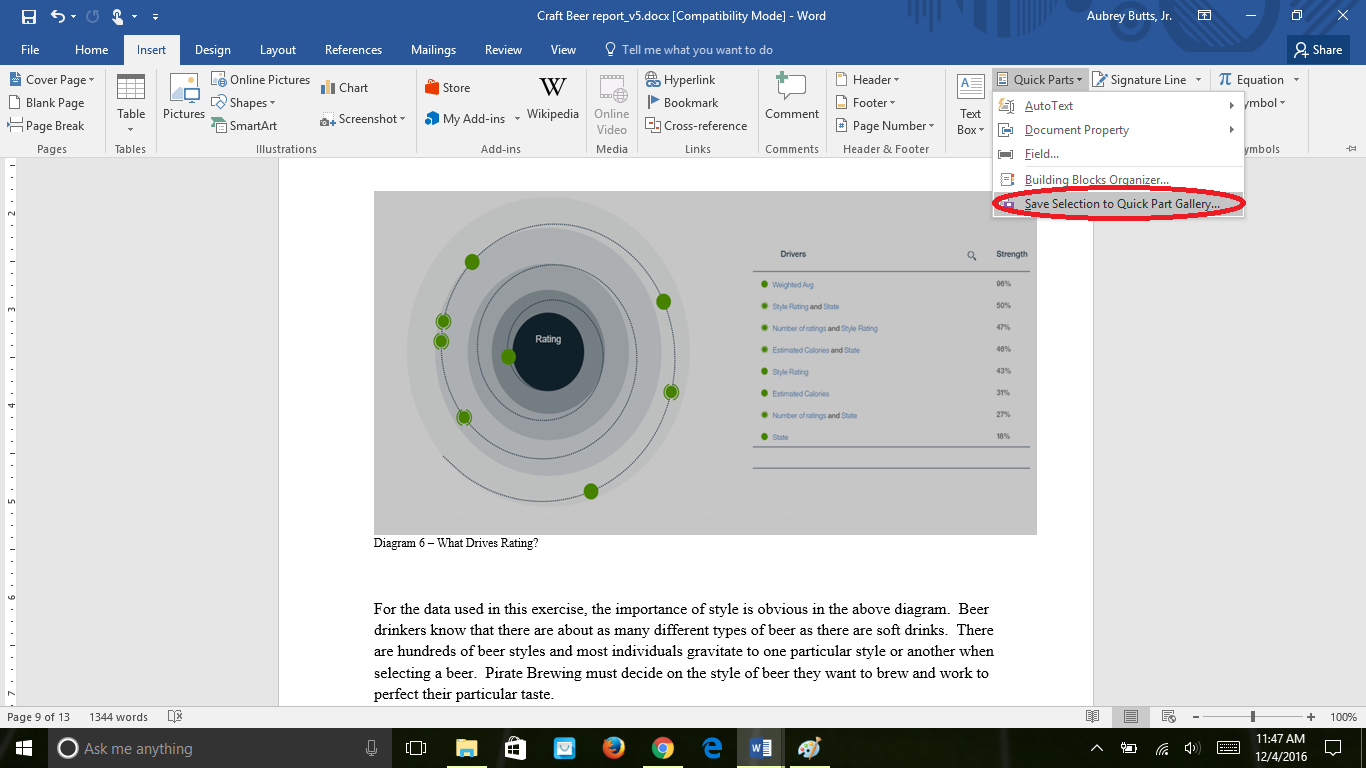
As indicated by the red circle click Save Selection to Quick Parts Gallery from the drop down menu.
Name the Building Block
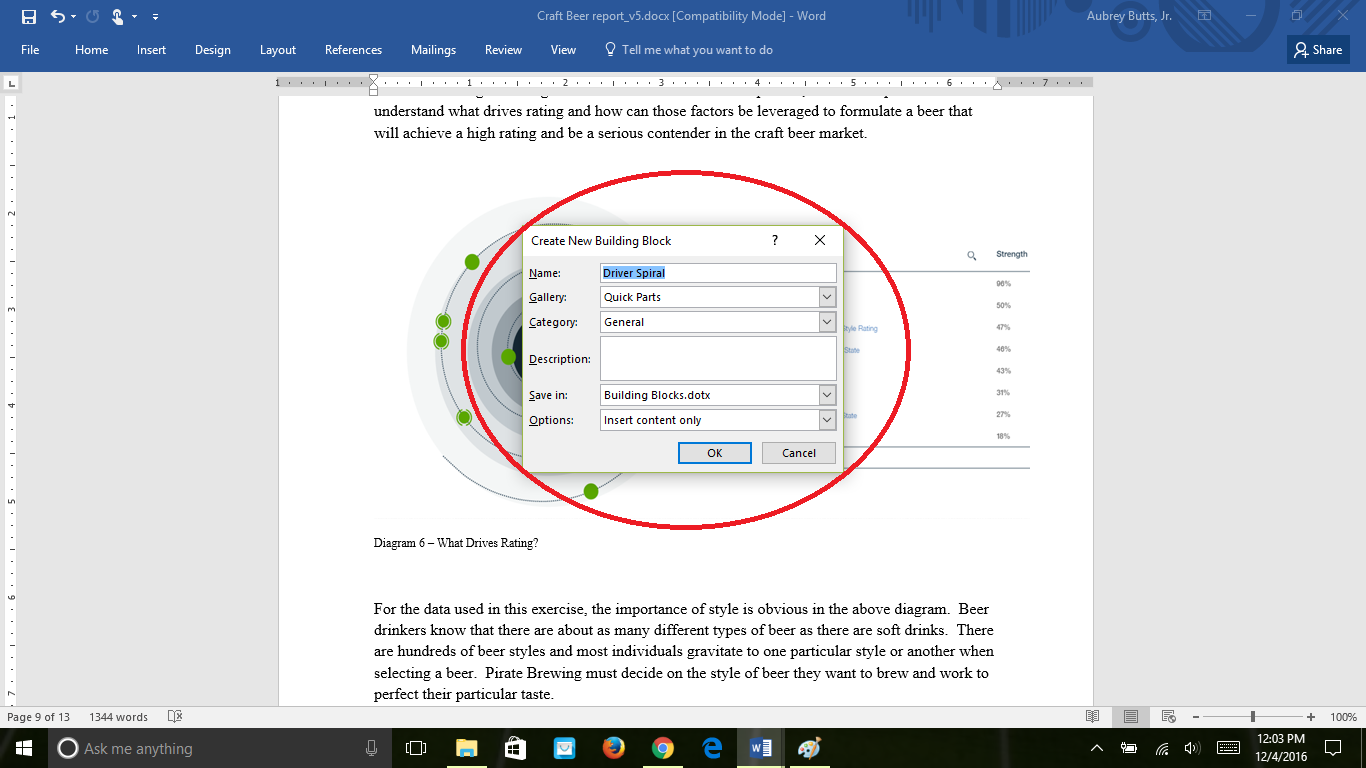
As indicated by the red circle a dialogue box will appear. In the Name space, add a title for the Building Block. For this tutorial the image is named Driver Spiral(highlighted in blue).
Select a Gallery
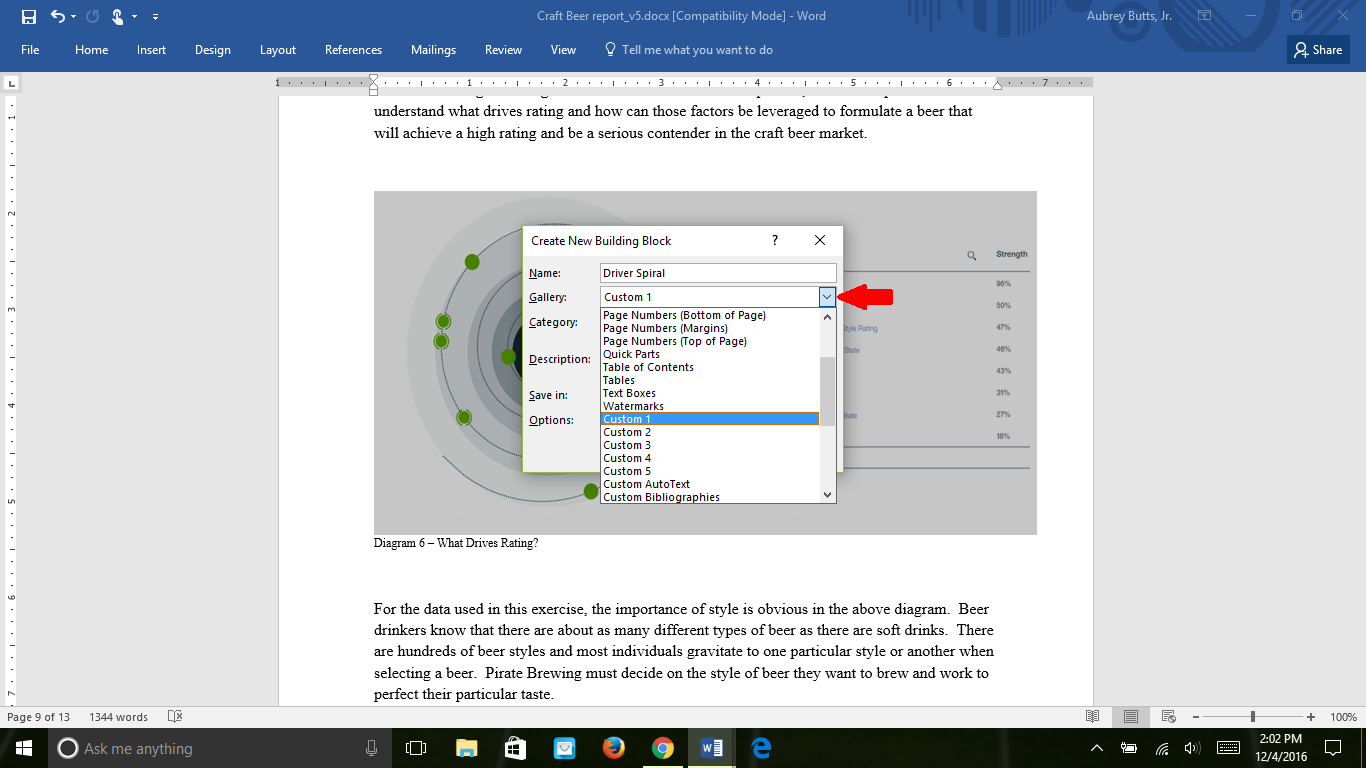
As indicated by the red arrow, click the Gallery drop down button. Select a Gallery. The chosen Gallery for this tutorial is named Custom 1(highlighted in blue).
Select a Category
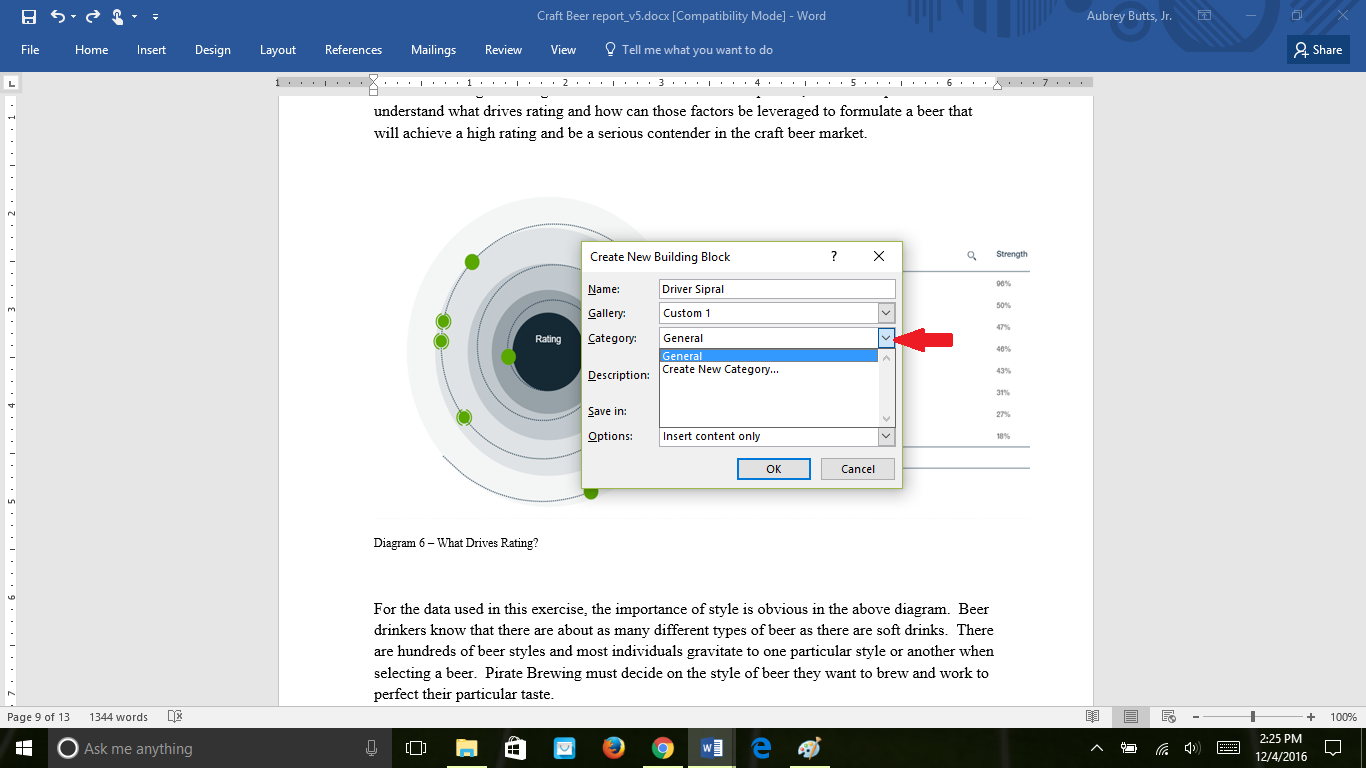
As indicated by the red arrow, click the Category drop down button. Select a Category. The chosen Category for this tutorial is named General(highlighted in blue).
Add a Description
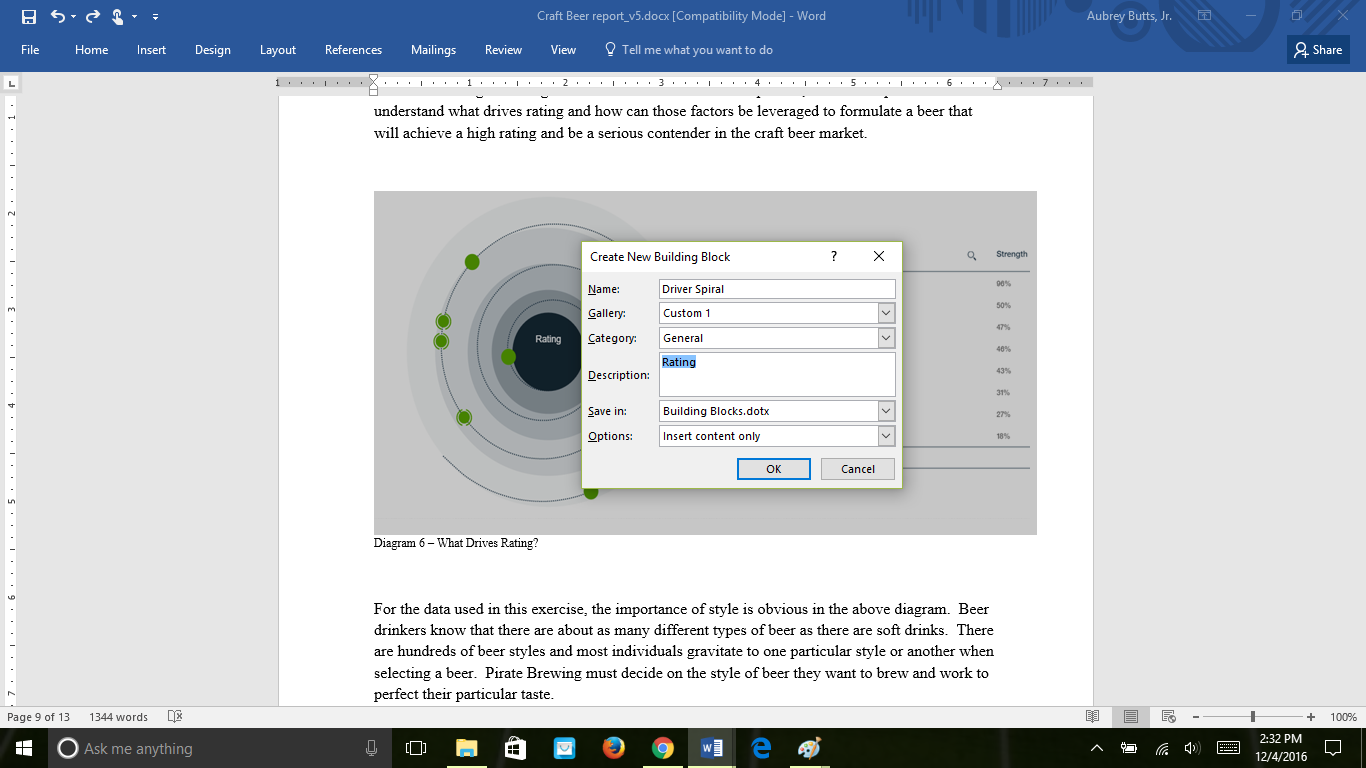
In the Description space, add a description of the Building Block. The chosen Description for this tutorial is named Rating(highlighted in blue).
Choose Where to Save the Building Block
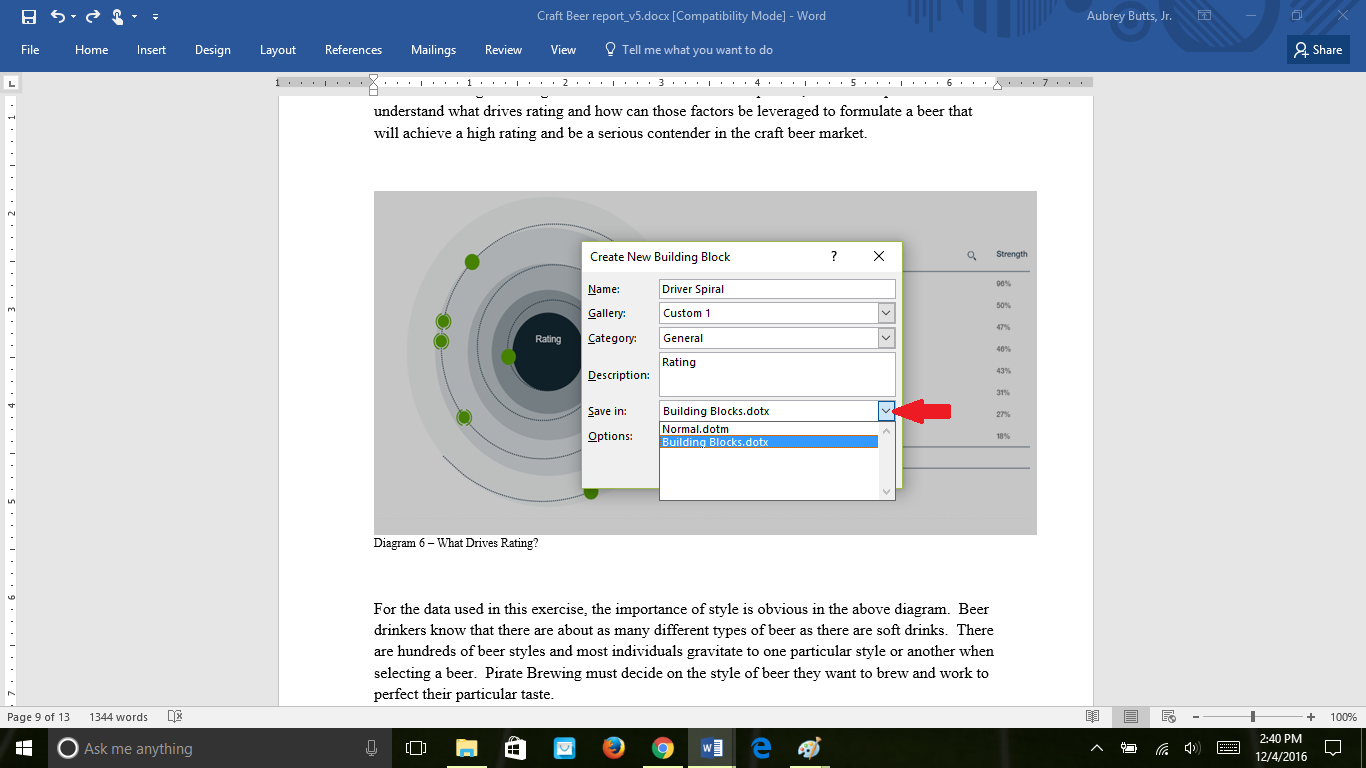
As indicated by the red arrow, click the Save drop down button. Select a Save option. The chosen Save in option for this tutorial is named Building Blocks(highlighted in blue). This is where the saved Building Block will be located.
Choose How the Content Will Be Inserted
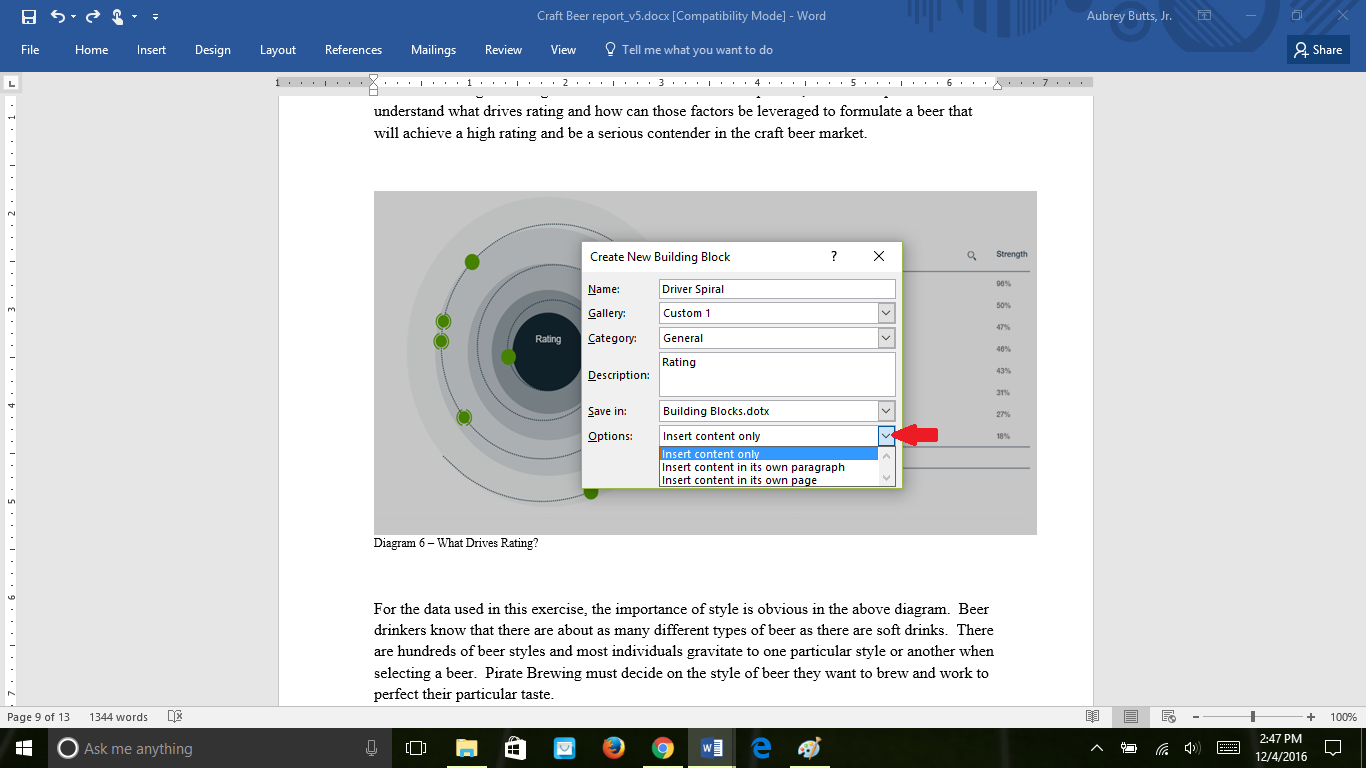
As indicated by the red arrow, click the Options drop down button. Select an Option. The chosen Option for this tutorial is named Insert content only(highlighted in blue). This is where the saved Building Block will be located.
Save the Building Block
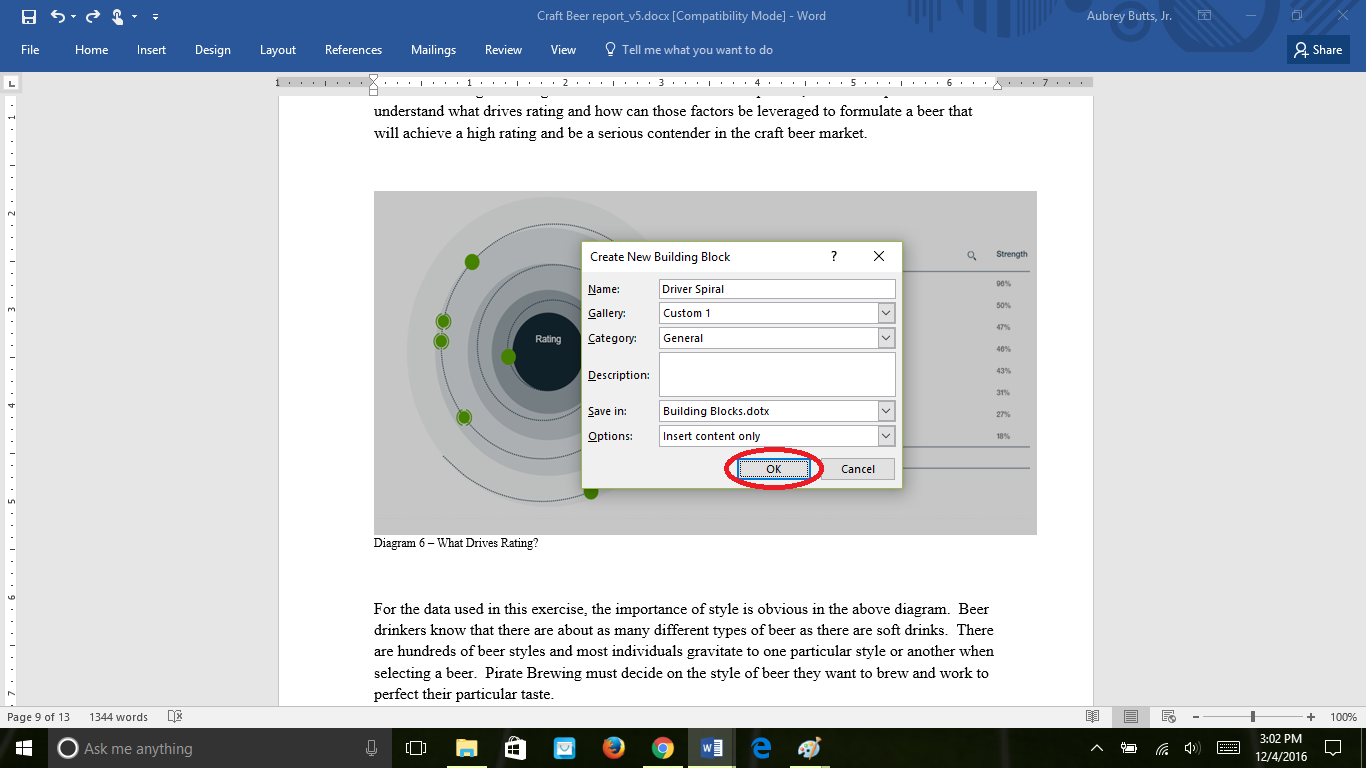
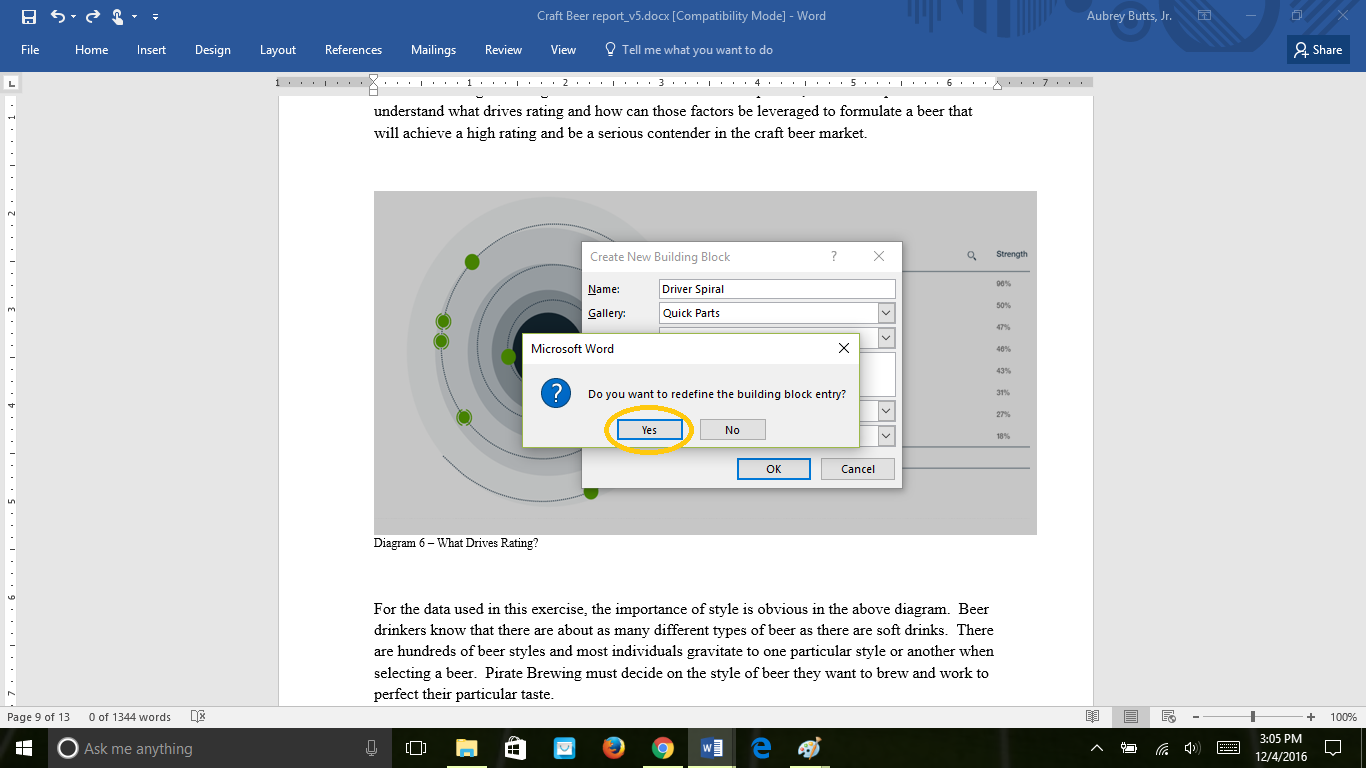
As indicated by the red circle click OK; then as indicated by the yellow circle Yes. The Building Block is now saved and ready for use.
Select Location to Insert Content
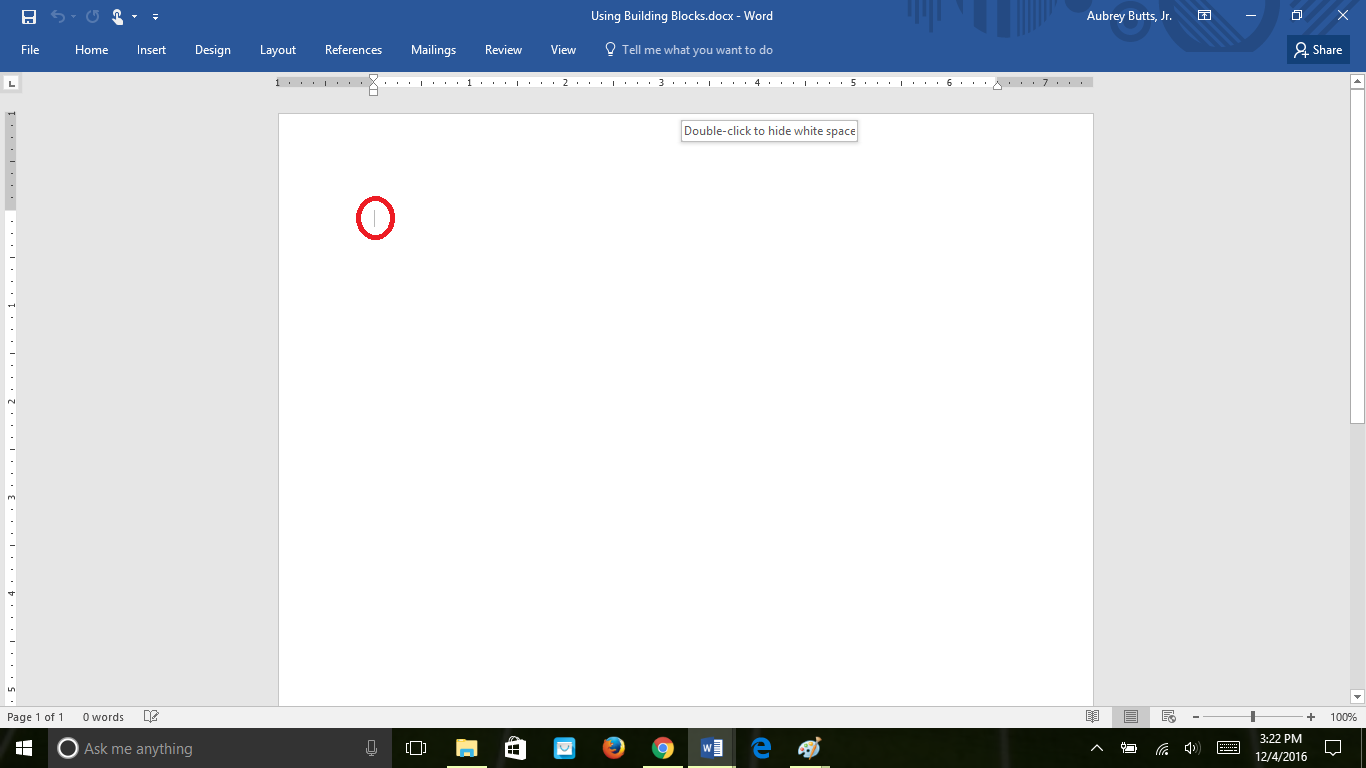
Here the focus shifts to using the Building Block that was just created.
Use the cursor to select the desired location of the content. The red circle shows where the image will be inserted.
Click the Insert Tab
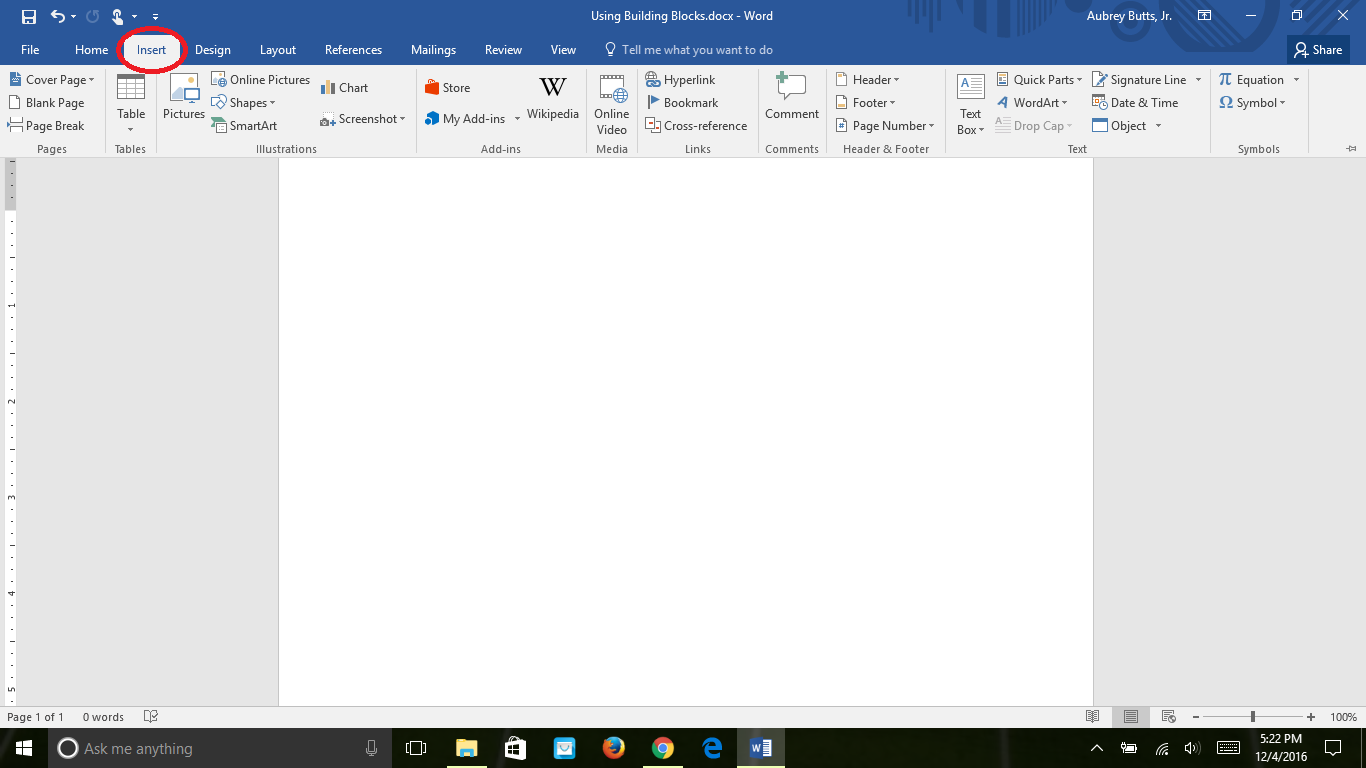
As indicated by the red circle click the Insert tab.
Click the Quick Parts Drop Down Button
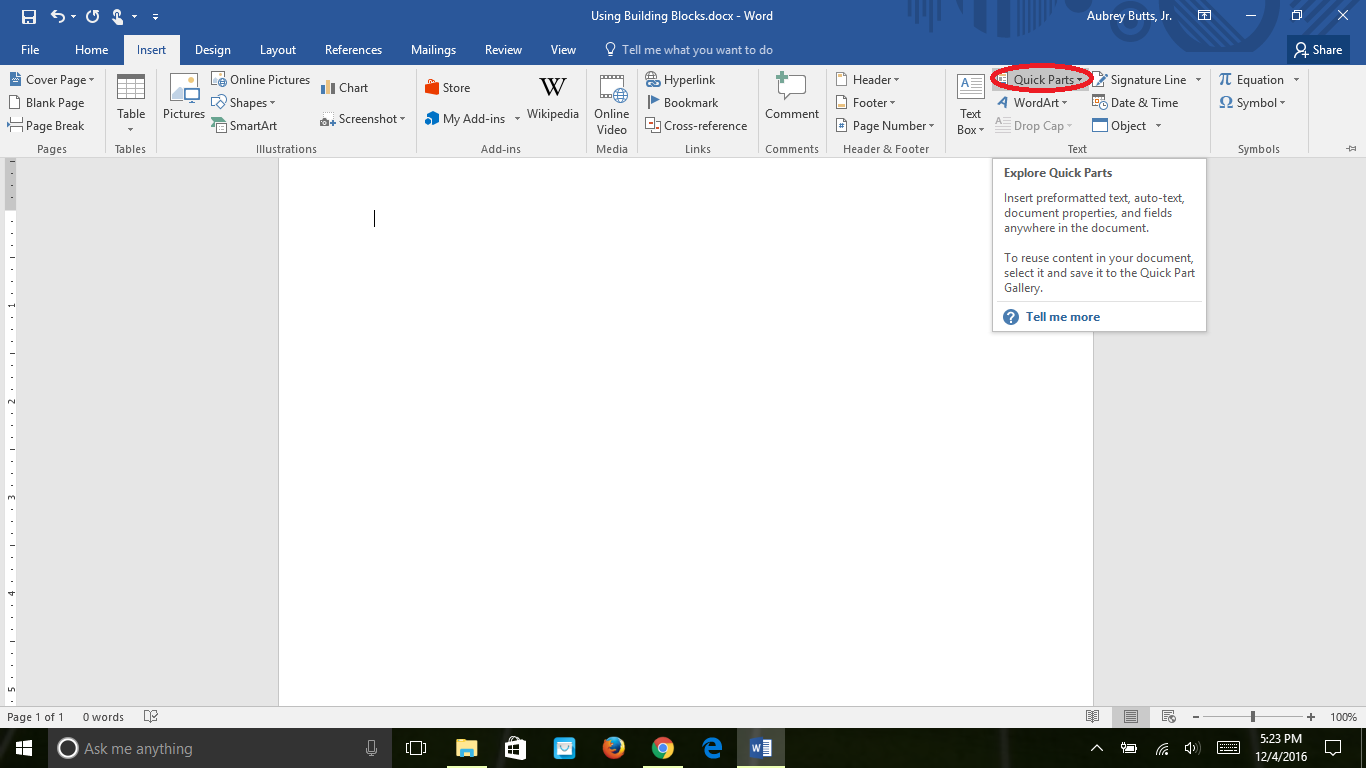
As indicated by the red arrow, click the Quick Parts drop down button.
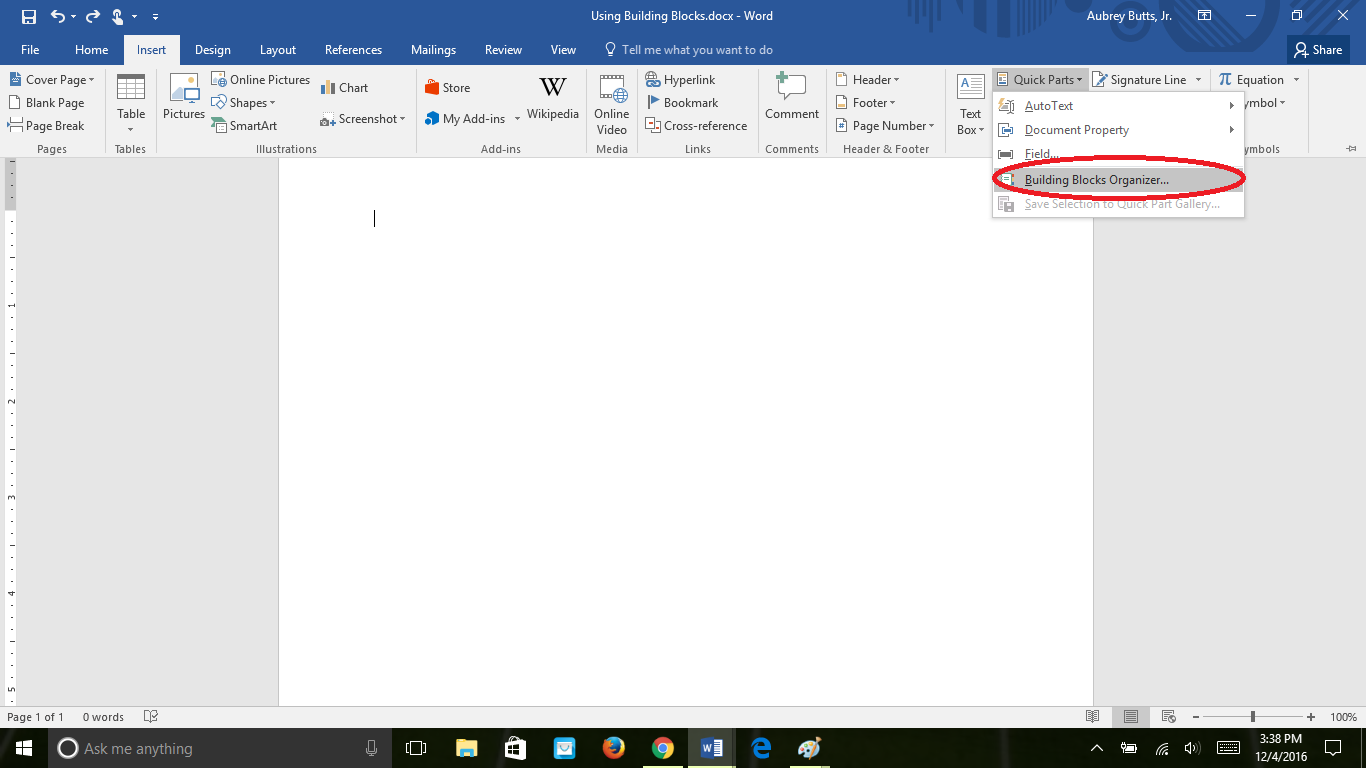
As indicated by the red circle click Building Blocks Organizer from the drop down menu.
Select the Building Block
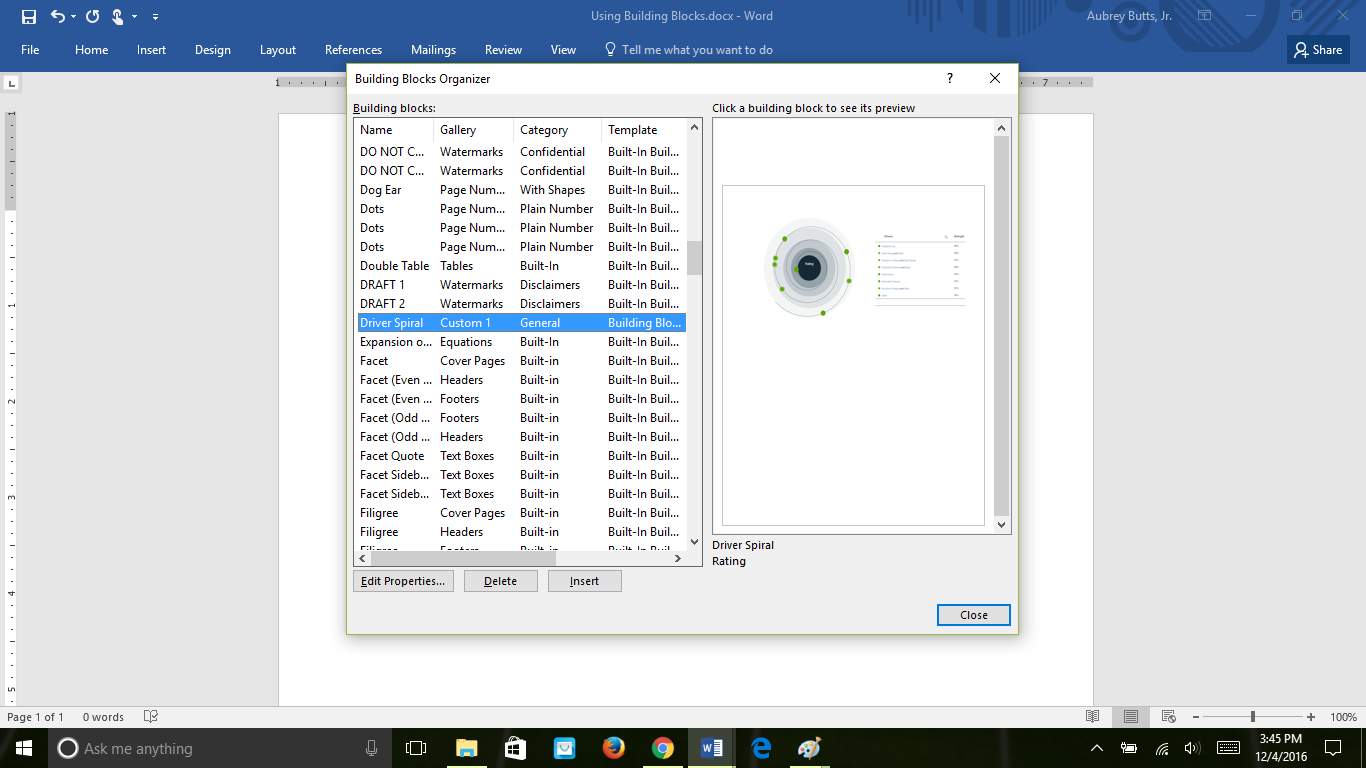
The Building Blocks are in alphabetical order. Scroll down and select Driver Spiral(highlighted in blue).
Click the Insert Button.
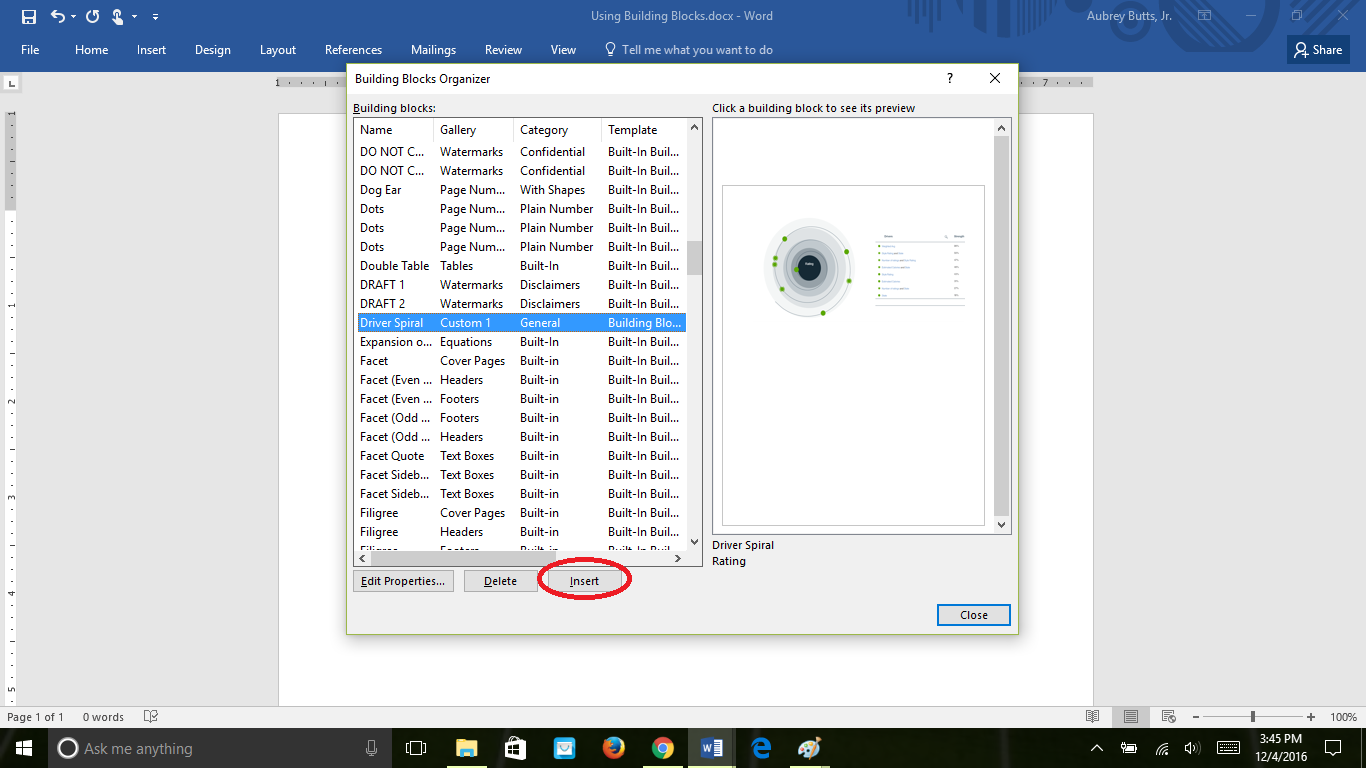
As indicated by the red circle click the Insert button.
Task Complete!
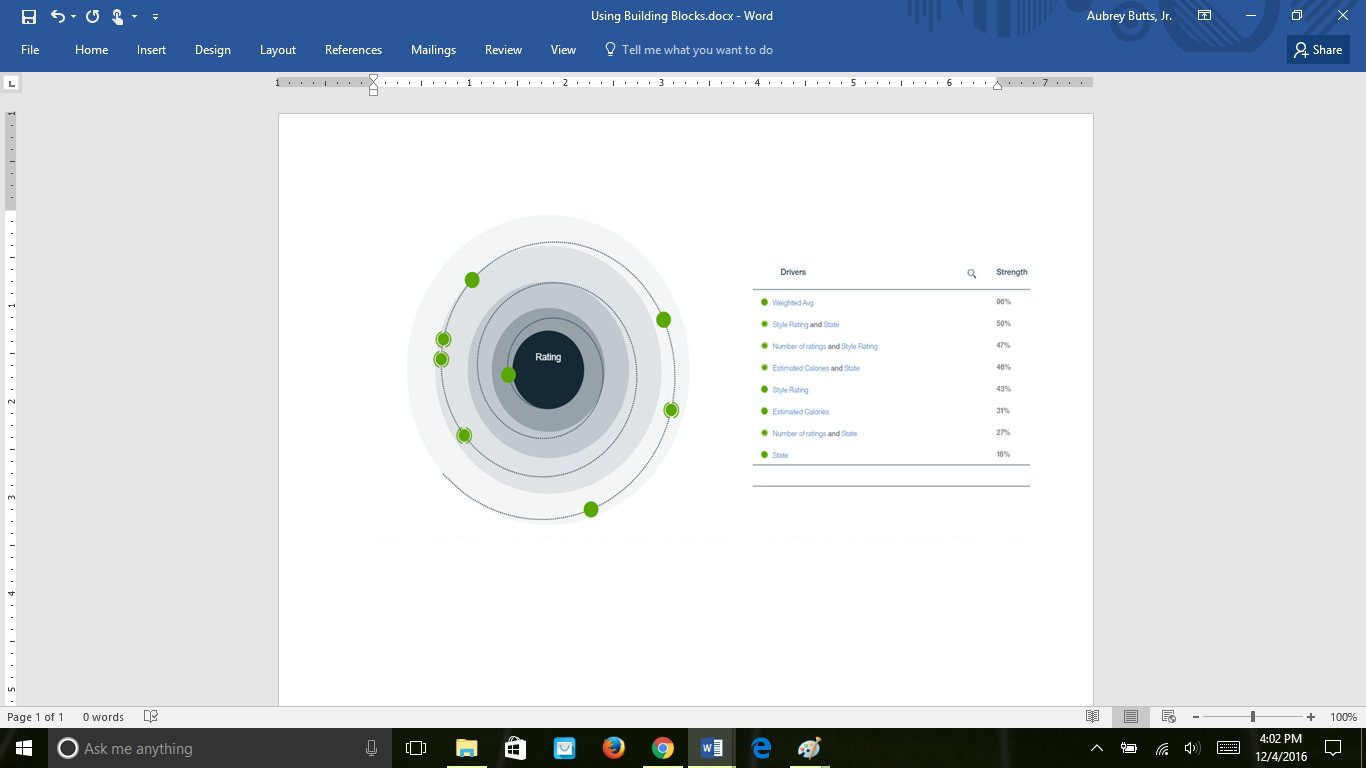
The image has successfully been inserted using the Building Block that was just created!