How to Create an Automatic NERF Launcher
by asadmlalani in Circuits > Arduino
741 Views, 2 Favorites, 0 Comments
How to Create an Automatic NERF Launcher
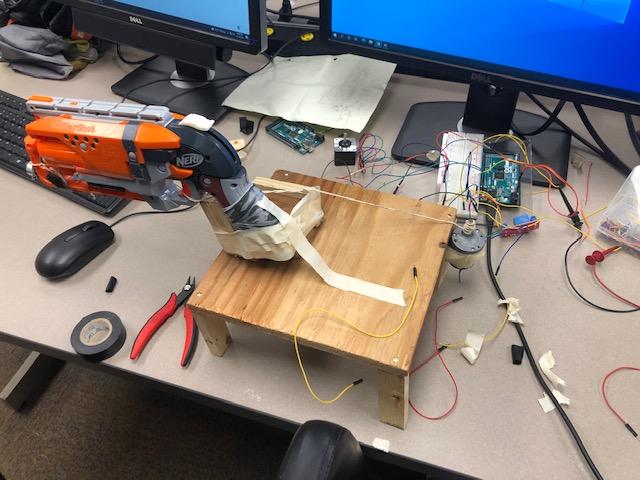
This project will show you how to create an automatic NERF launcher. You can use it to prank your friends or family while they are not suspecting! It will really catch them by surprise. If there is a [#] next to a word or phrase, this is the citation for it. References are at the end of the instructable.
Supplies
Supplies that you will need:
1. A Nerf Gun[7]
2. an HC-SR04 Sensor[1]
3. An Arduino Mega 2560[2]
5. A relay circuit[4]
6. A DC Motor[6]
7. A 12 V to 24 V Power Supply(like a battery or a DC Power Supply)[5]
8. Tape
9. String
10. Jumper wires
11. Breadboard[3]
12. A tripod stand(or you can make your own, which is what was done here).
13. Screwdriver.
Observe How the Schematic Above Is Labeled
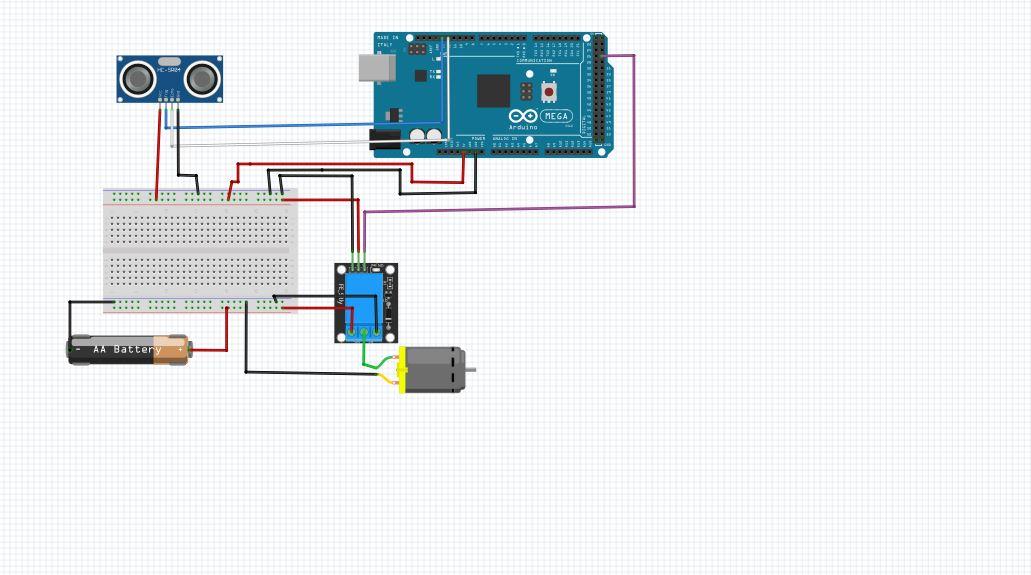
Make sure that you observe the schematic properly. If you don't wire everything correctly, then you may cause a short to your circuit, which doesn't immediately damage your equipment, can do so over a period of time. The purpose of the schematic here is to show how the various components are wired so that your motor can properly function. The schematic was made using Fritzing, as well as sources from [5], [6], [8], for the battery, motor and relay respectively.
Begin Wiring the 5 V and 12 V Sources.
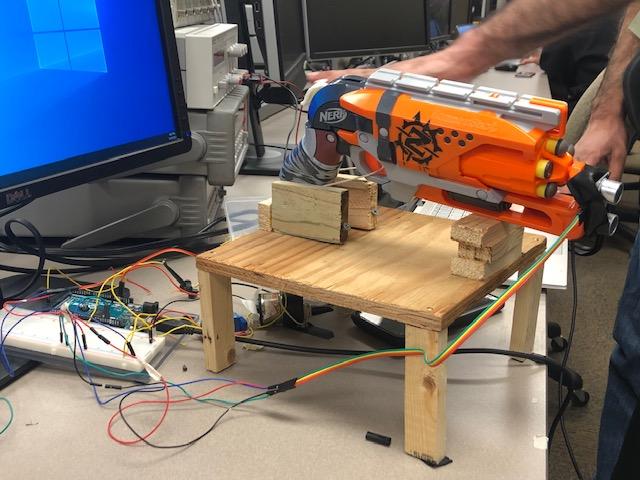
Make sure that you wire the 5V and the 12V supply to different areas on the breadboard. This is to prevent any issues with wiring from happening in general. So, wire the 5V supply that the Arduino provides on one side of the breadboard, and wire the 12 V supply on the other side of the breadboard. There should be one positive terminal and one negative terminal for each of the voltage sources.
Wire the Ultrasonic Sensor
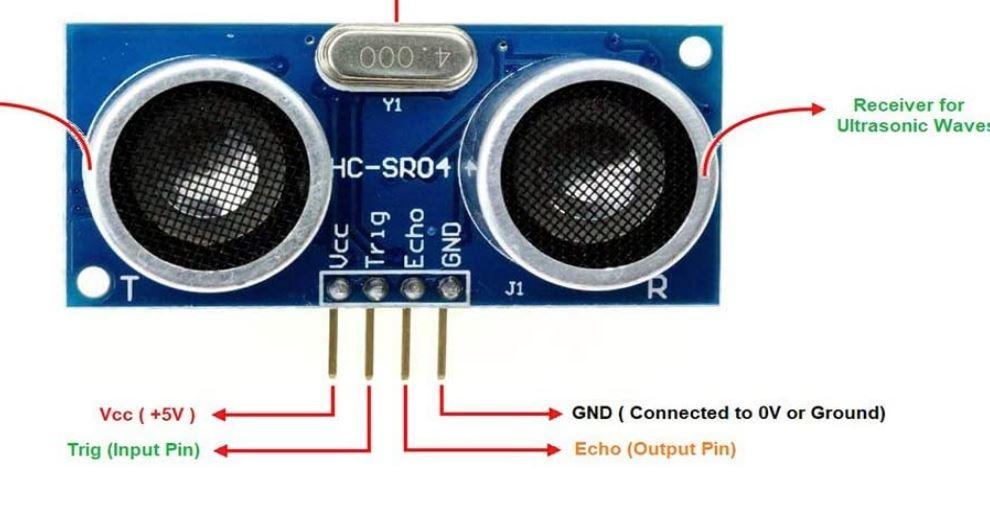
The ultrasonic sensor has 4 inputs: The 5 V, the Ground, the Echo, and the Trigger. The 5V and Ground go on the 5V rails, Trigger goes on pin 13, and Echo goes on pin 12(of the Arduino). Picture was from [1].
Wire the 5V Side of the Relay Circuit
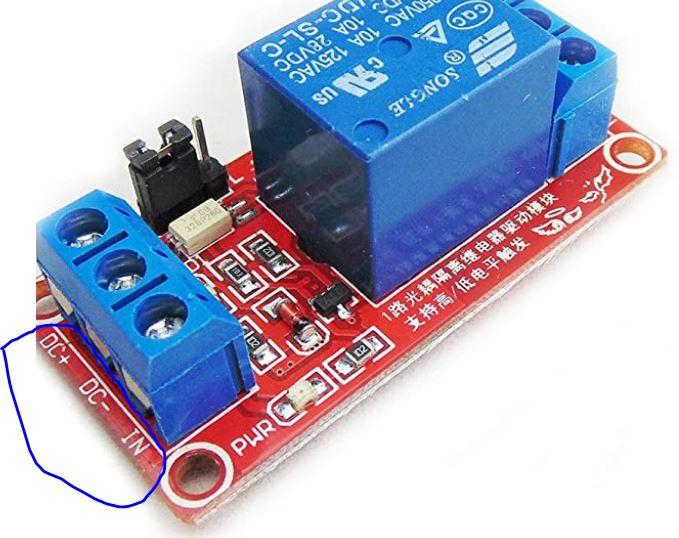
+DC goes to the 5V red rail, -DC goes to the 5V ground rail, and the IN goes to Pin 27 of the Arduino Mega. Translating from the picture to the actual relay, 5V is +DC, GND is -DC and S is Signal. Slightly different name, but the same concept. Note: You may have to unscrew and re-screw the wire holders in order to tightly make the connection. The picture was originally from [4].
Wire the 12V Side of the Relay
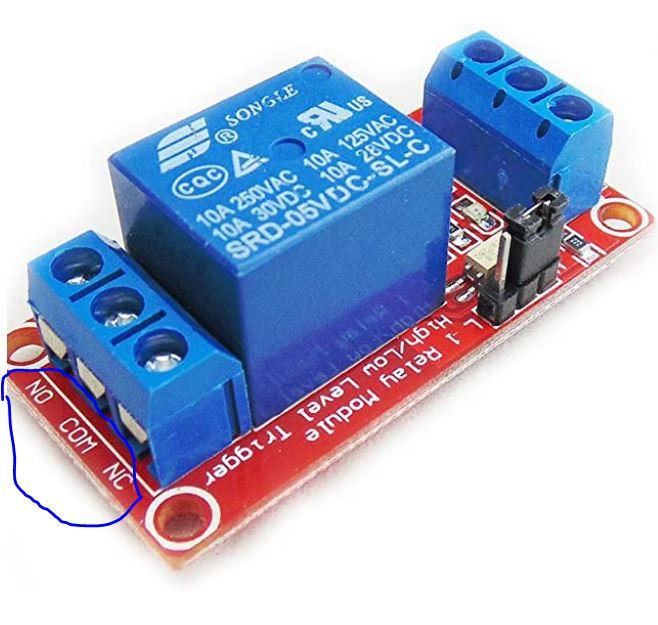
Wire NO to the 12V power source/battery, NC to the 12V ground, and COM to the DC Motor. Note, you may have to unscrew and rescrew each holder of the relay to tightly hold a wire. Picture was originally from [4].
Copy and Paste the Arduino Code Into the IDE

You can download the IDE here: https://www.arduino.cc/en/software
The IDE basically allows for all the components to work together, with the Arduino as the central component of it all. Make sure that the right microcontrollers are selected under "Tools" of the IDE(they should both be 2560). Also, note that the correct COM port is selected. The correct COM Port will only be available once the Arduino is plugged into the PC via the provided cable. The Dropdown menu in the "Tools" section will specify this.
Downloads
Add the String to the Motor and Tape Everything Down
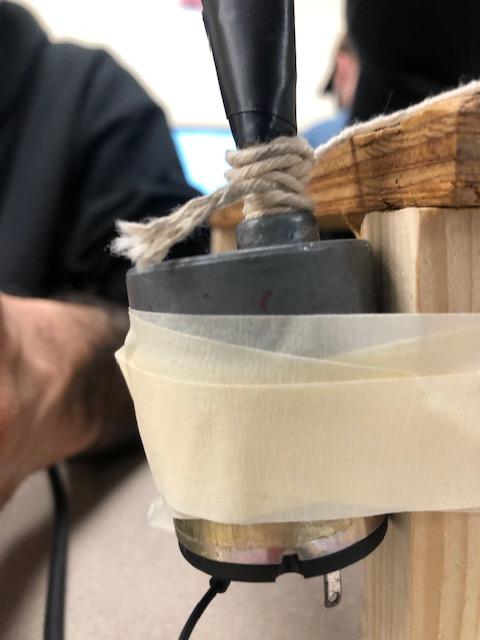
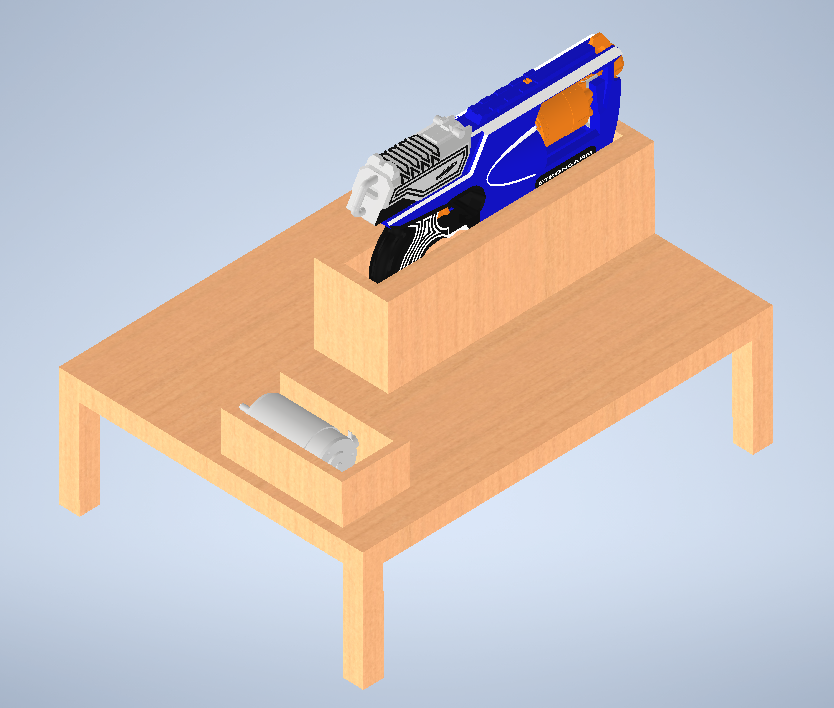.png)
Be sure to add as much tape as you possibly can, in order to make your structure stable. Not enough tape can cause instability. Be sure to place the motor and the string next to the trigger of the Nerf Launcher so that when it gets activated, the sensor can push the trigger. The CAD Design on the right shows a general idea of how to tape everything. The motor has to be attached to the trigger via the string in order for the contraption to work. The CAD Design got inspiration from sources [9] and [10].
Watch Your Prank in Action!
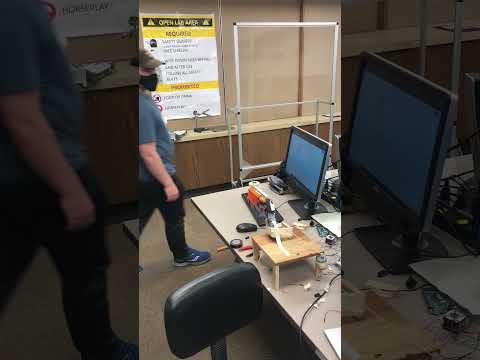
Have fun and watch your prank in action! We are not responsible for any type of injuries caused in the creation of this project, or the usage of this project. The prank in action is shown in the initial video of this step: Another video going more into depth about the Nerf Launcher is shown here: https://youtu.be/nHcXr0VXpjE
References
Below are a few of the sources where the products were found if you want to find those directly. The citations are in IEEE format.
Sources:
[1] "Helonge Ultrasonic Sensor Module,5 Pcs HC-SR04 Ultrasonic Sensor Distance Module for Arduino UNO MEGA2560 Nano Robot XBee ZigBee and Electornial DIY." Amazon. https://www.amazon.com/Helonge-Ultrasonic-Module%E... (accessed December 14, 2021).
[2] "ELEGOO MEGA R3 Board ATmega 2560 + USB Cable Compatible with Arduino IDE Projects RoHS Compliant." Amazon. https://www.amazon.com/ELEGOO-ATmega2560-ATMEGA16U... (accessed December 14, 2021).
[3] "Smraza Basic Starter Kit with Breadboard, Power Supply, Jumper Wires, Resistors, LED, Compatible with Arduino R3, Mega2560, Nano, Raspberry Pi." Amazon. https://www.amazon.com/Smraza-Breadboard-Resistors... (accessed December 14, 2021).
[4] "HiLetgo 2pcs 5V One Channel Relay Module Relay Switch with OPTO Isolation High Low Level Trigger." Amazon. https://www.amazon.com/dp/B00LW15A4W?psc=1&ref=ppx... (accessed December 14, 2021).
[5] "LiCB A23 23A 12V Alkaline Battery (5-Pack)." Amazon. https://www.amazon.com/LiCB-23A-Alkaline-Battery-5... (accessed December 14, 2021).
[6] "AUTOTOOLHOME 6-12V Mini DC Motor High Torque Gear for Traxxas R/C and Power Wheels PCB DIY Electric Drill." Amazon. https://www.amazon.com/AUTOTOOLHOME-Torque-Traxxas... (accessed December 14, 2021).
[7] "Nerf N Strike Elite Strongarm Toy Blaster With Rotating Barrel, Slam Fire, And 6 Official Nerf Elite Darts For Kids, Teens, And Adults(Amazon Exclusive)." Amazon. https://www.amazon.com/Nerf-N-Strike-Elite-Stronga... (accessed December 14, 2021).
[8] S. Campbell. "HOW TO SET UP A 5V RELAY ON THE ARDUINO." Circuit Basics. https://www.circuitbasics.com/setting-up-a-5v-rela... (accessed December 14, 2021).
[9] D. Moroney. "Nerf Gun." Grab Cad. https://grabcad.com/library/nerf-gun-1 (accessed December 16, 2021).
[10] "DC Motors." McMaster. https://www.mcmaster.com/dc-motors/voltage~12v-dc/... (accessed December 16, 2021).