How to Create a Time Sheet Using Google Sheets
by tlmonro in Teachers > University+
3283 Views, 1 Favorites, 0 Comments
How to Create a Time Sheet Using Google Sheets

Using a pin, paper, or even your memory to keep track of your employee's work hours is no longer an issue. Business owners have now incorporated the use of Google Sheets to keep track of employees' time and billing information. Using Google Sheets to create a time card, your business and employees can terminate the turmoil of figuring out how many days and hours they worked and the amount on the paychecks.
Supplies
You will need the following items before you begin:
1 ) A working computer
2 ) Internet access
3 ) A google Drive account
By the end of this tutorial, you will be able to complete a Time Sheet using Google Sheets successfully.
Disclaimer - Presentations are intended for educational purposes only and do not replace independent professional judgment. Statements of fact and opinions expressed are those of the creator. The video provided within this demonstration is for convenience only. I do not sponsor, endorse or otherwise approve any of the equipment, software, or other products used. While every effort and care is taken in preparing the content of this site, creator disclaims all warranties, express or implied, as to the accuracy of the information in any of the content. It also (to the extent permitted by law) shall not be liable for any losses or damages arising from the use of, or reliance on, the information on this demonstration. It is also not liable for any losses or damages arising from the use of, or reliance on, this demonstration or the internet generally.
Getting Started
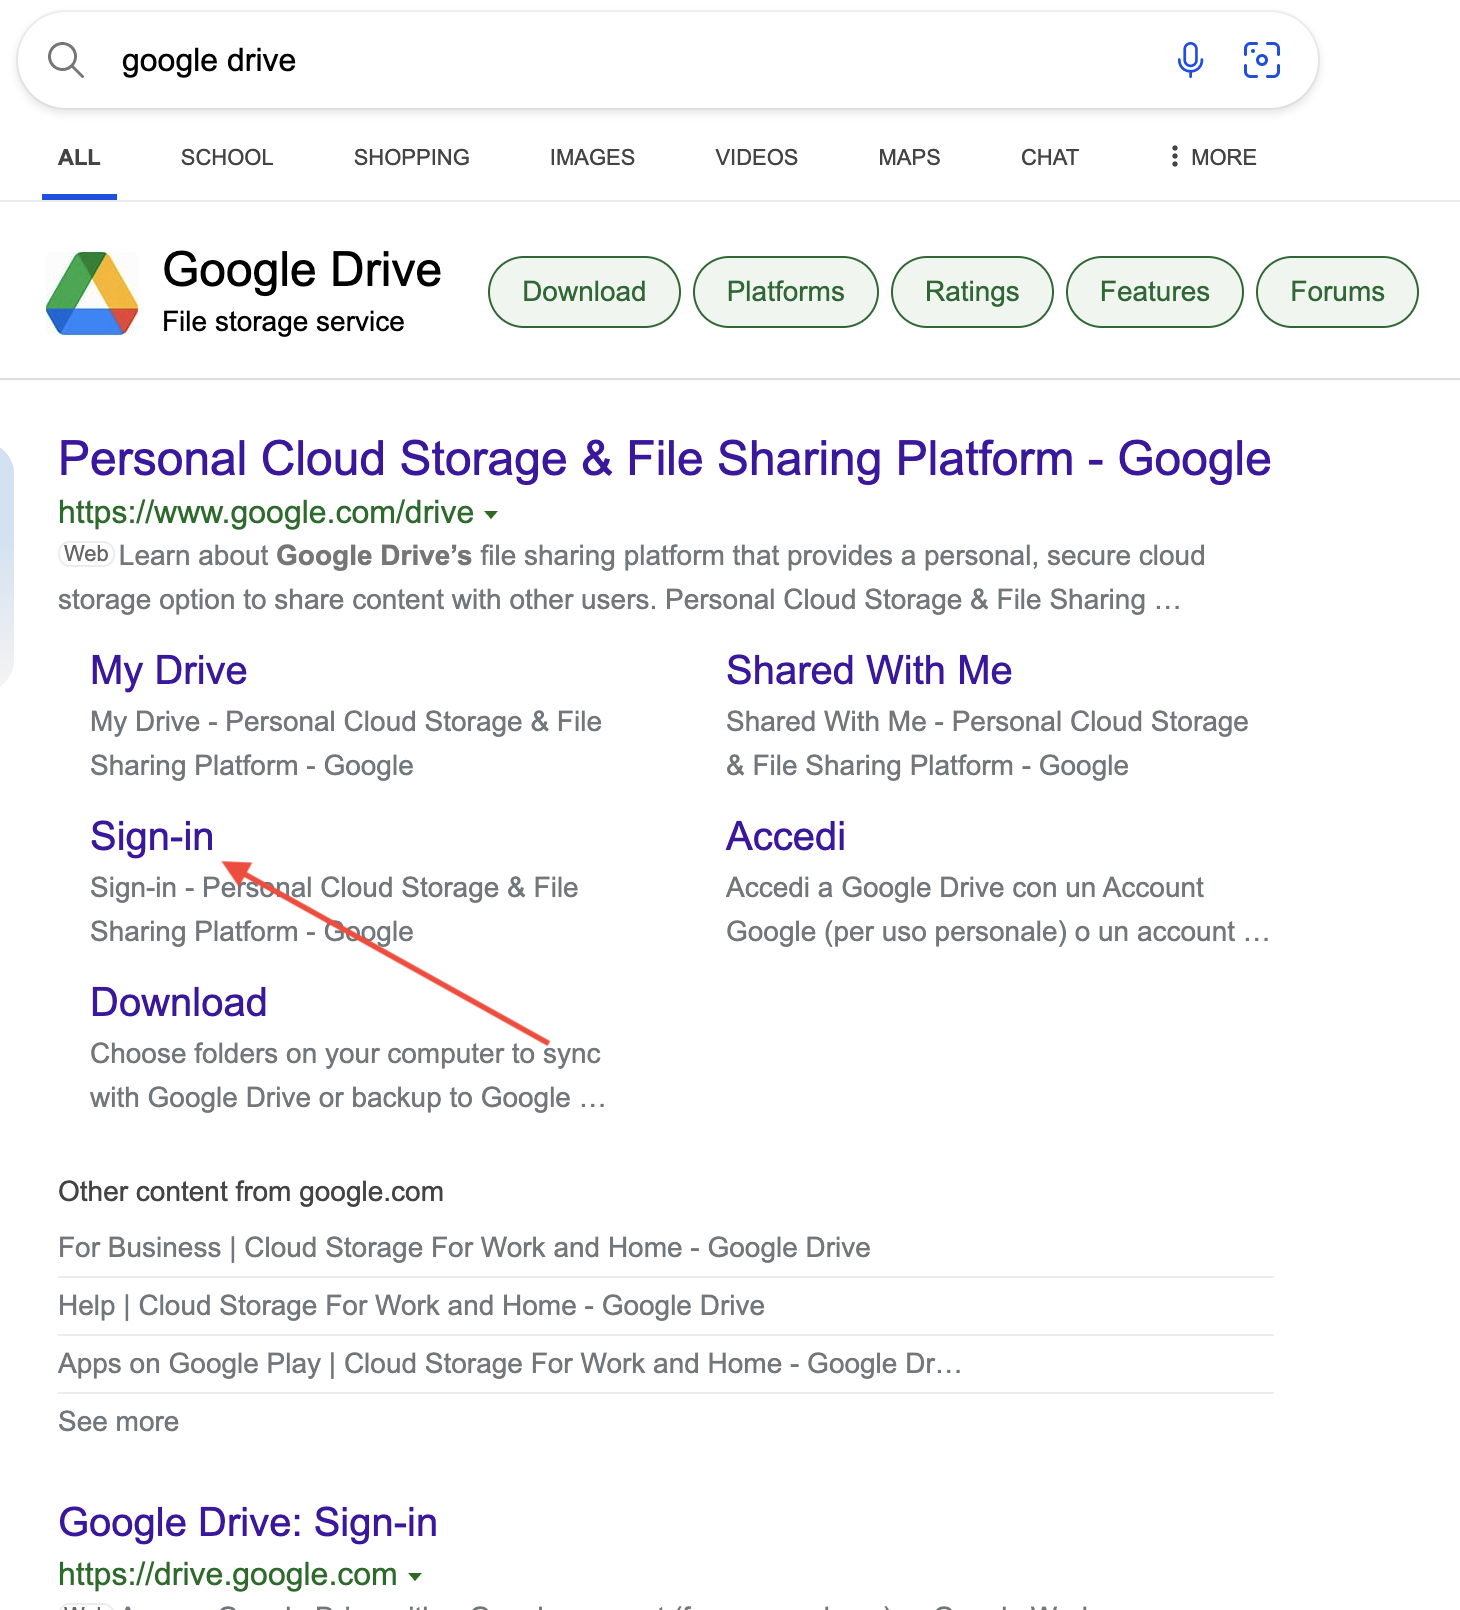
1.) Turn on your computer and open a web browser of your choice. (Examples: Google Chrome, Firefox, Edge, Etc.)
2.) Once you have opened your web browser, type "Google Drive" in the search bar and hit enter on your keyboard.
3.) Upon your search completion, navigate to the sign-in page and log in to your google drive. (NOTE: If you don't have a Google Drive account, you must create one and log in.)
Proceed to Step 2.
Create a New Google Sheet
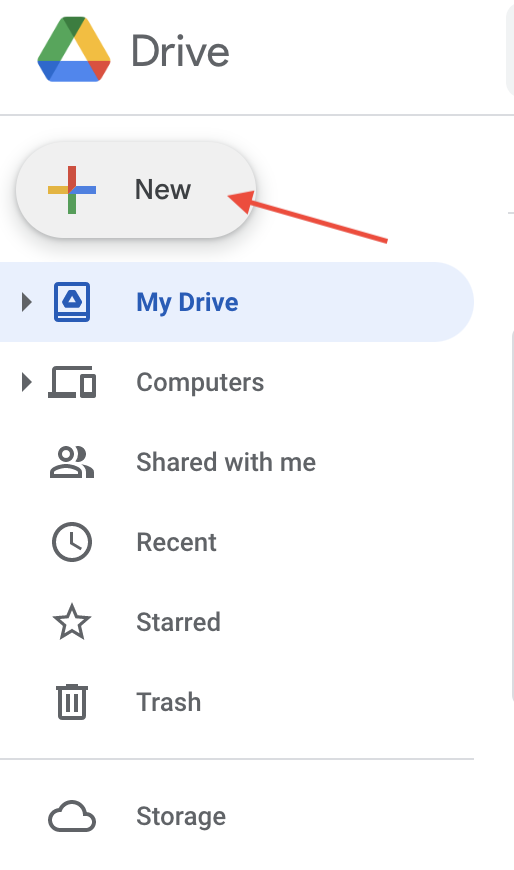
Once you have logged on to your Google Drive account, in the upper left portion of your screen, you will find an Icon labeled: + New
Click on the + New Icon.
You are now about to create a + New Google Sheet.
Proceed to Step 3.
Selecting From Created Templates
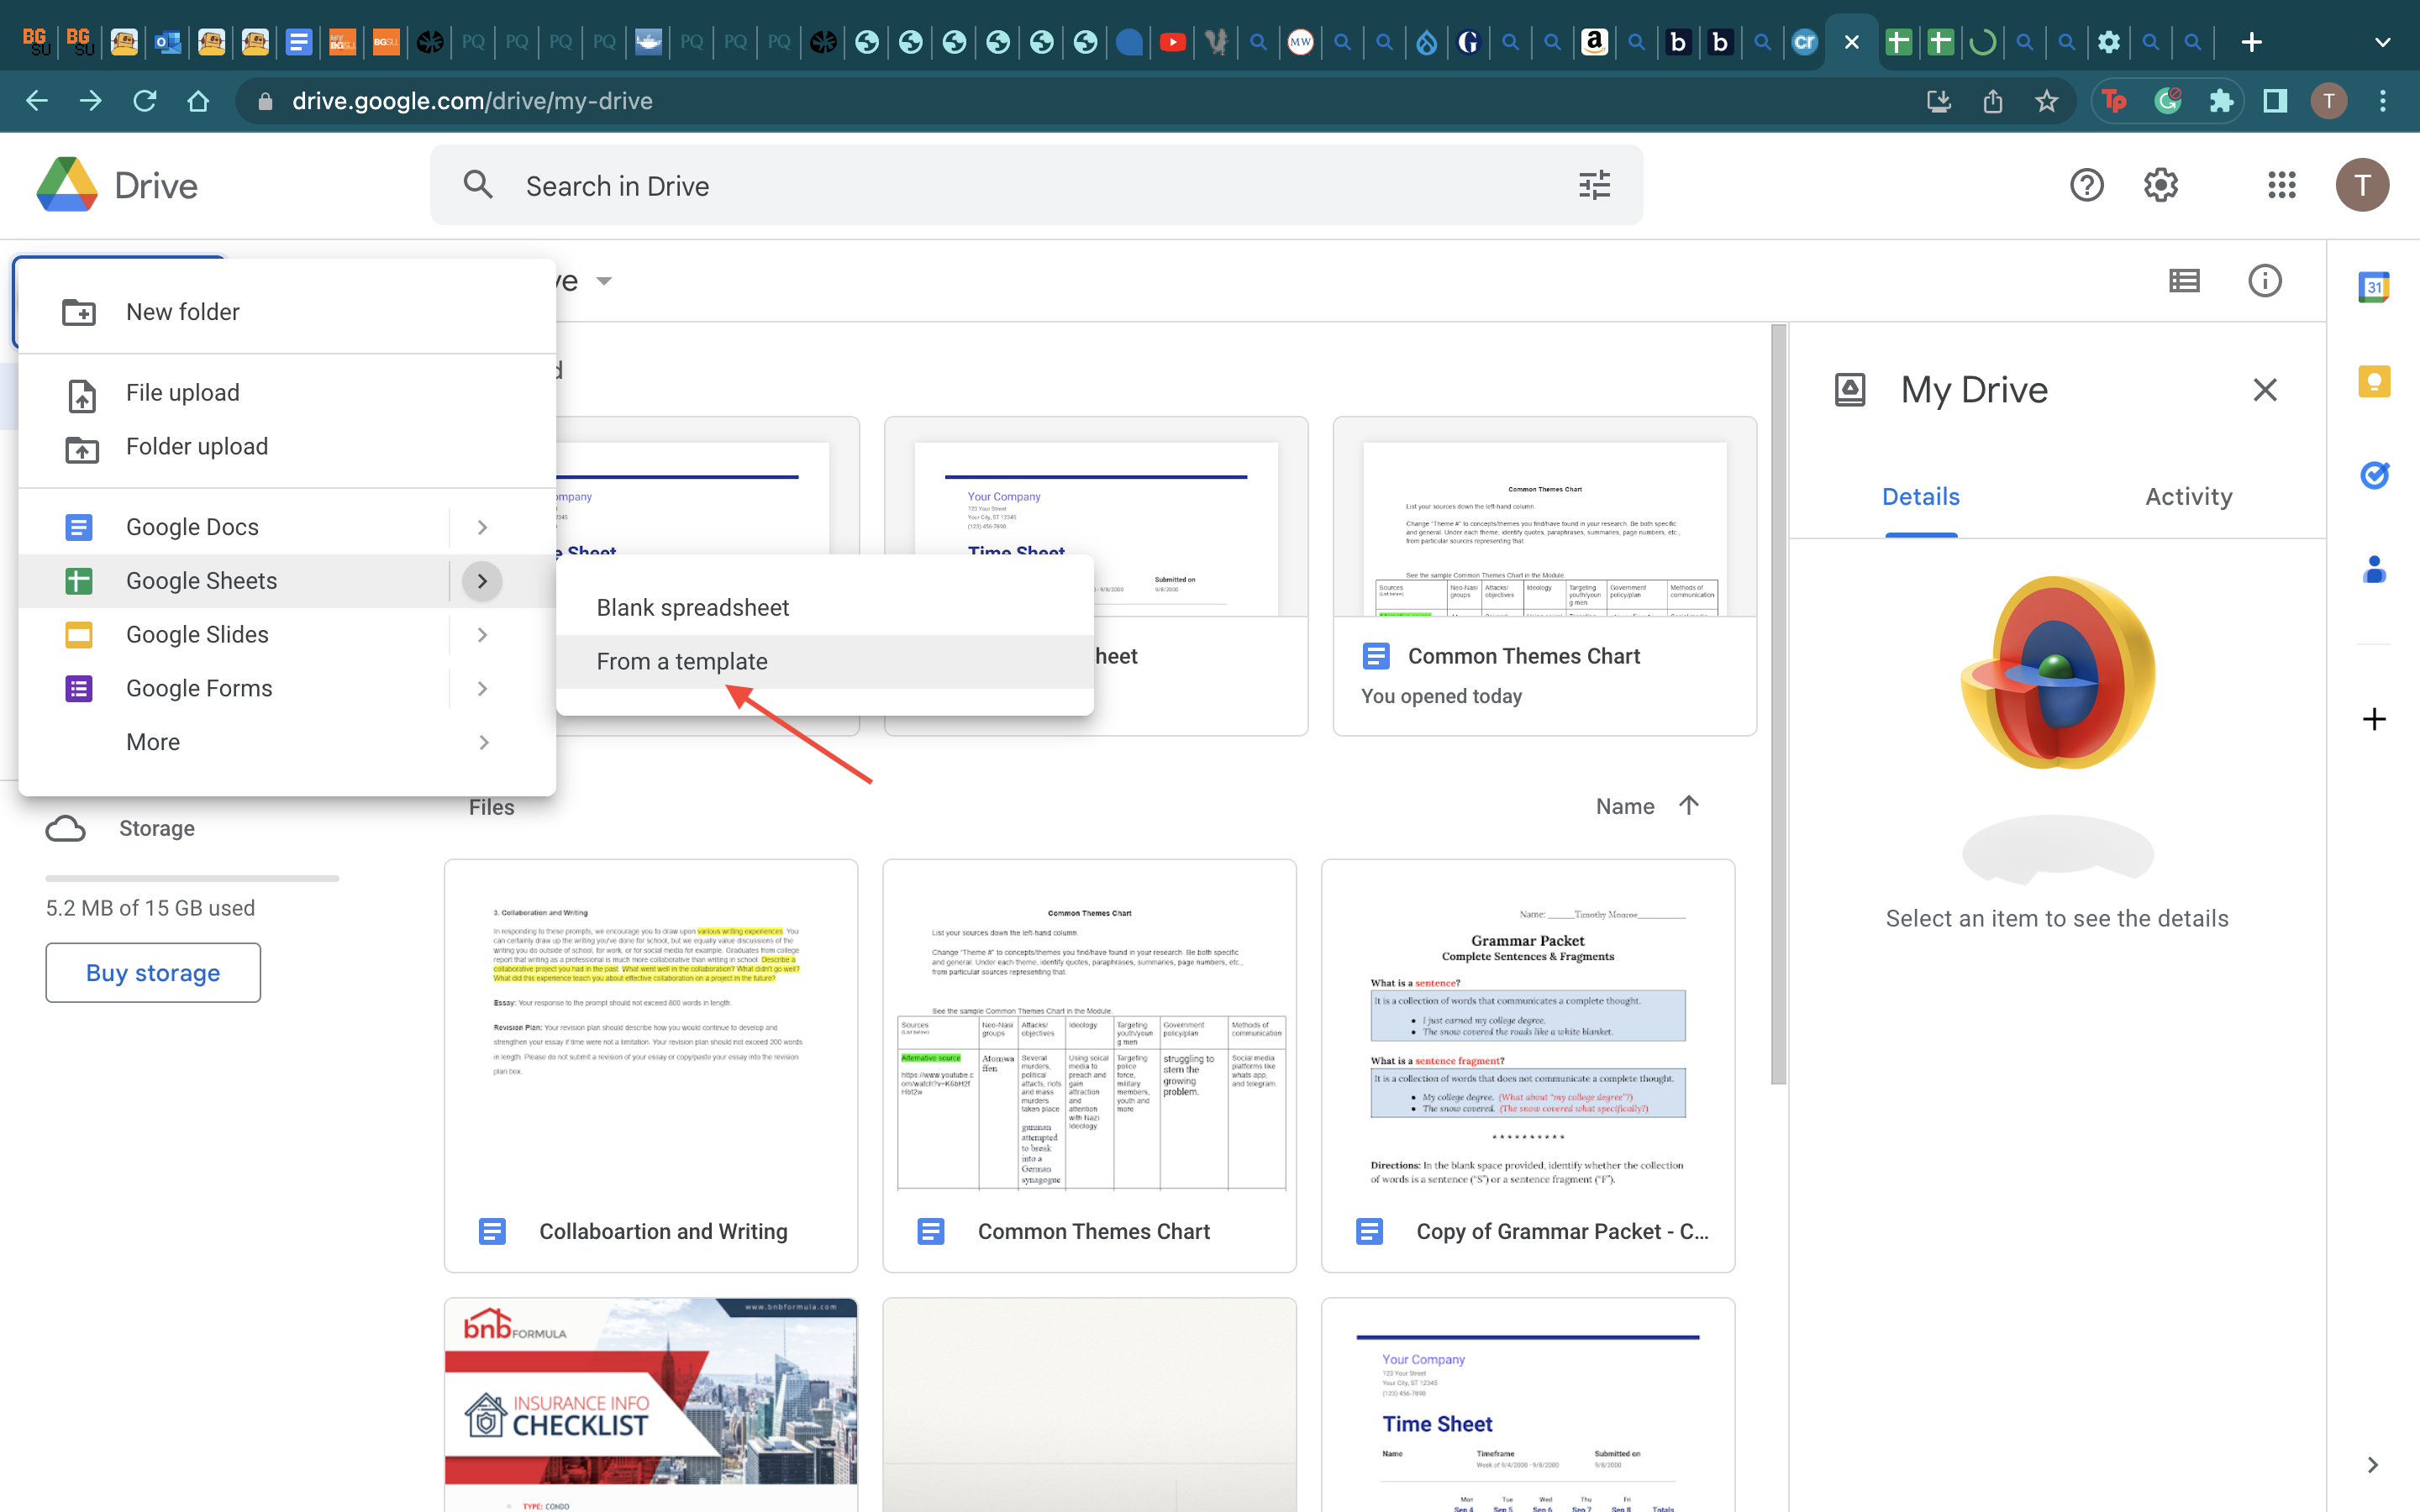
Once you have selected the + New Icon, you will hover your mouse over the arrow next to "Google Sheets."
When hovering over the arrow, a new drop-down will prompt you to select from two options.
Selected the bottom option labeled "From a Template."
Proceed to Step 4.
Open Weekly Time Sheet
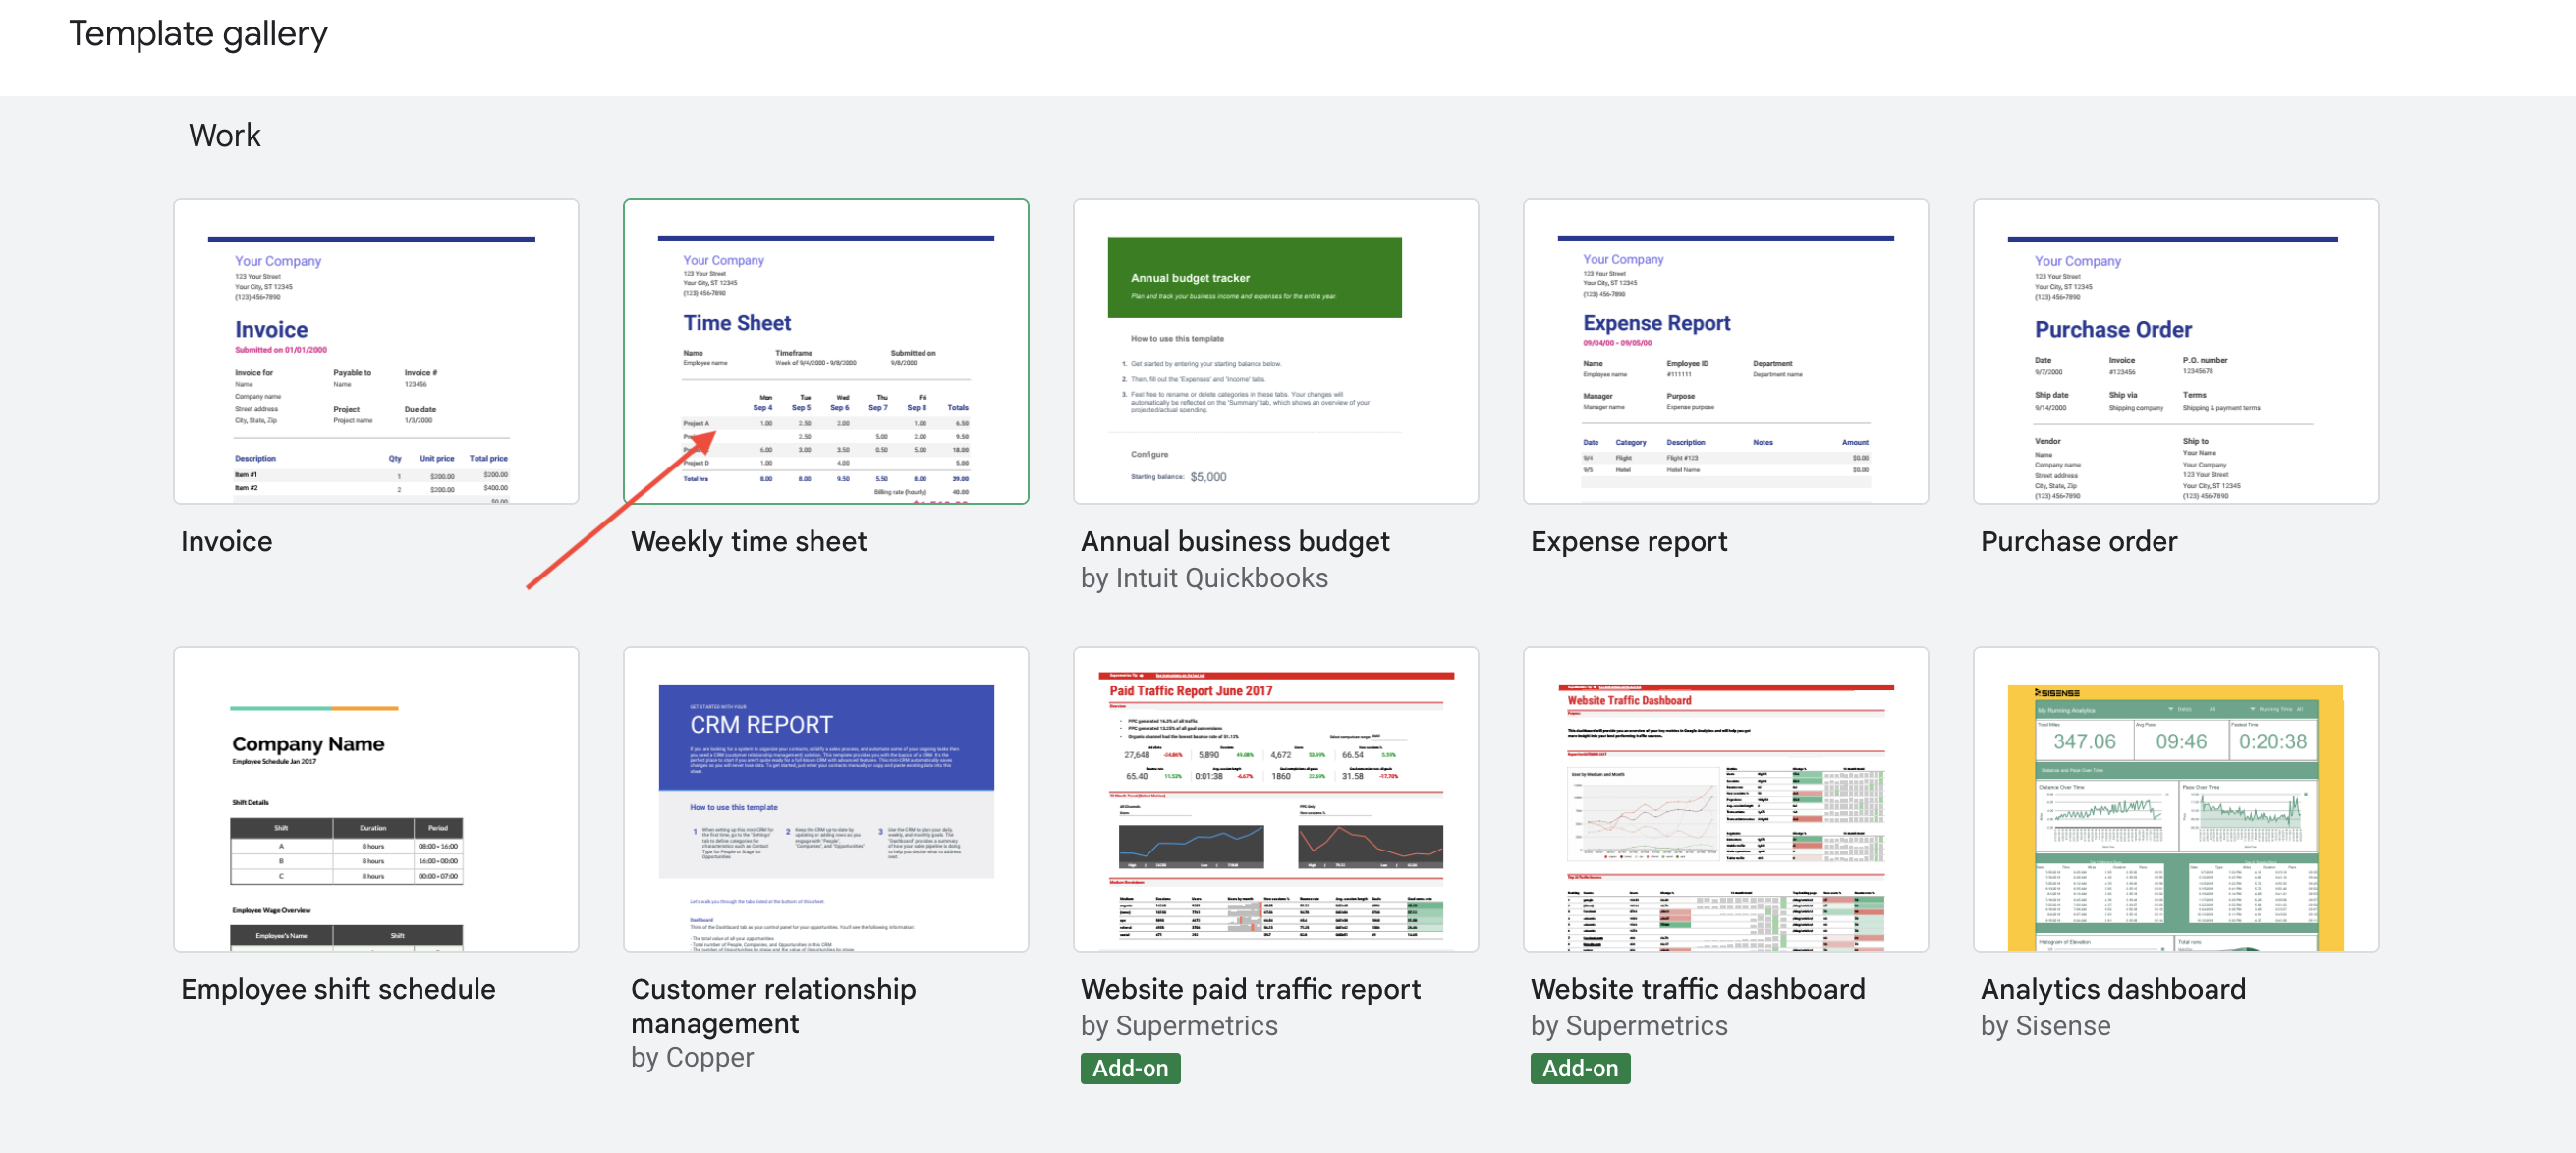
1 ) Now that you have opened the template gallery scroll down until you locate the "work" category.
2 ) Select and open the "Weekly Time Sheet."
Proceed to Step 5.
Filling in Your Time Sheet
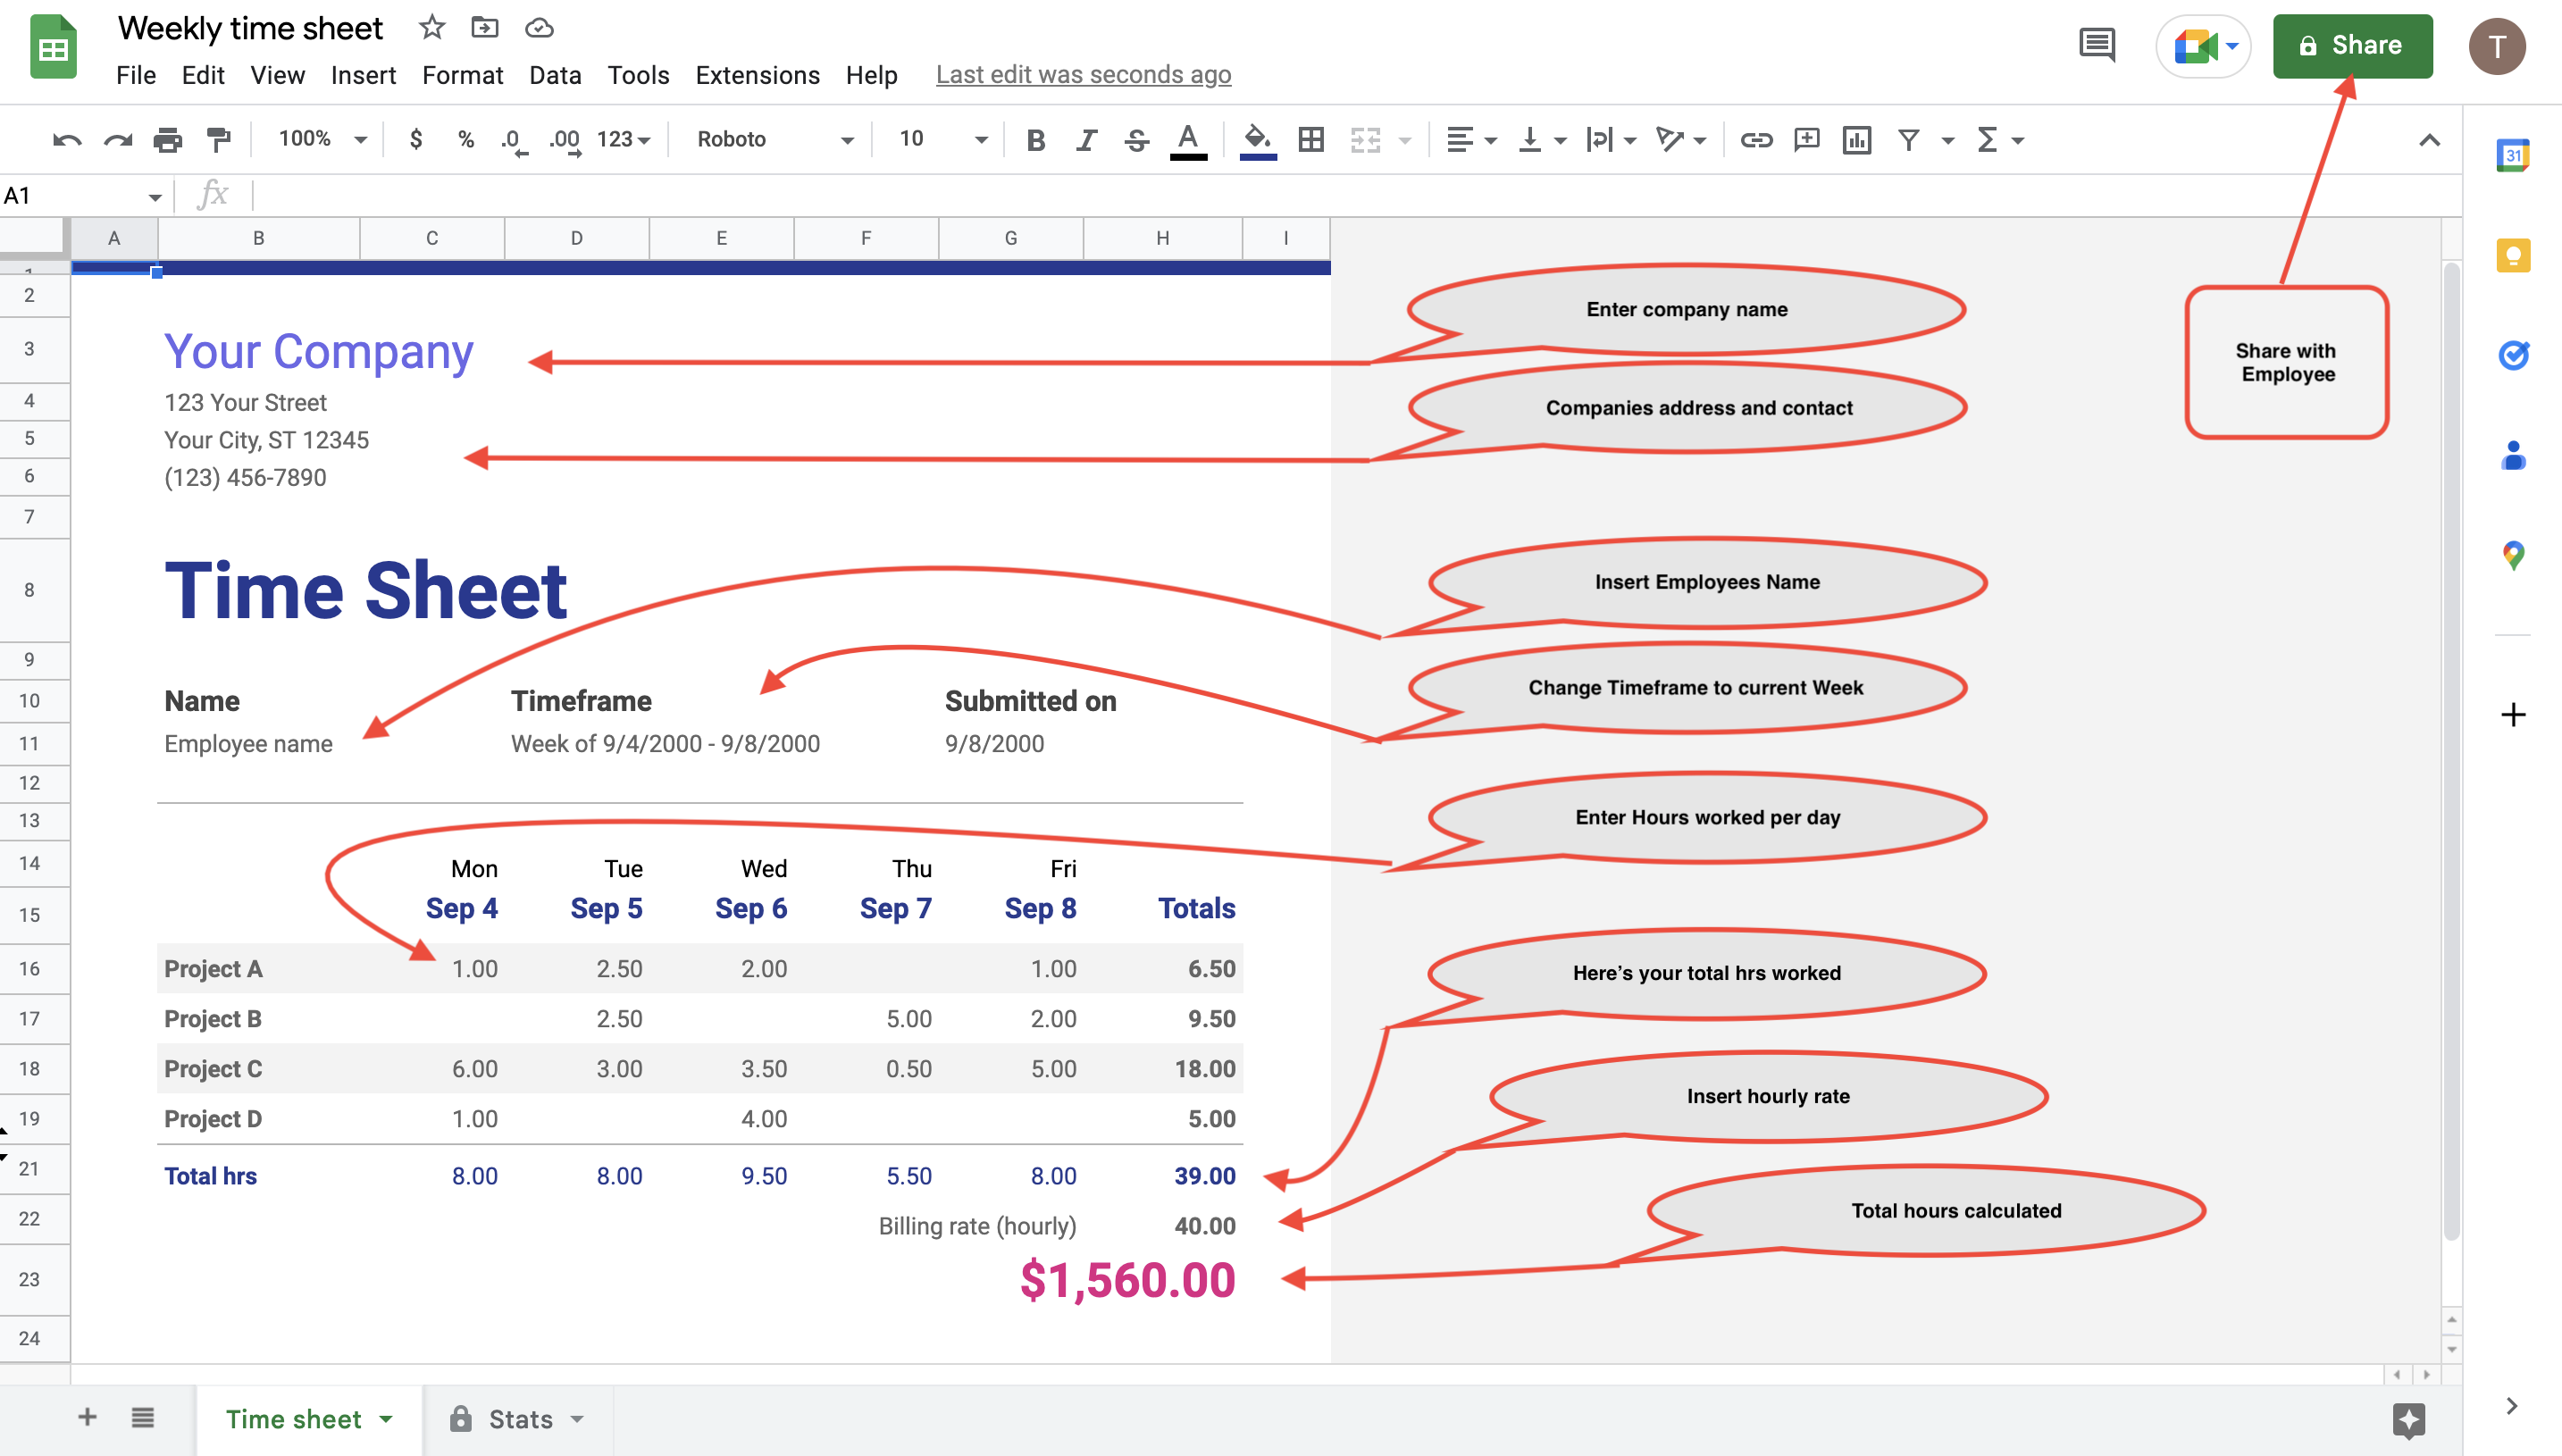
Congratulations, you have opened your new weekly time sheet. In this step, I will walk you through how to customize and input data into the time sheet. (BONUS: I will also show you how to share your time sheet with employees or other managers)
1 ) Click on the "Your Company" Cell and change it to your company name.
2 ) Below your company name, type the company address and contact into the cell.
3 ) Below "Name" enter your employee name or your name into the cell.
4 ) Below "Timeframe" enter the current work week date. An example is provided in the image.
5 ) Enter the number of hours you or your employee worked under the day of the week.
6 ) Insert the hourly rate (billing rate per hr) for yourself or your employee.
7 ) At the very bottom, the system will auto-calculate the total hours worked by the hourly rate.
8 ) In the Top Right corner of your screen, you will find a Green Share button. Click the Share button and enter in the email address you wish to share the Time Sheet with.
(Cell stands for the little box or rectangle inside the spreadsheet.)
Proceed to Step 6 for a video demonstration.
Putting It All Together
In this video, I demonstrate step-by-step instructions on creating a Time Sheet using Google Sheets.
Thank you for taking the time to watch my video. I hope that following these steps will reduce time and confusion when tracking hourly work and pay.