How to Create a MIDI Map for the BCD3000 in Traktor Pro
62105 Views, 12 Favorites, 0 Comments
How to Create a MIDI Map for the BCD3000 in Traktor Pro
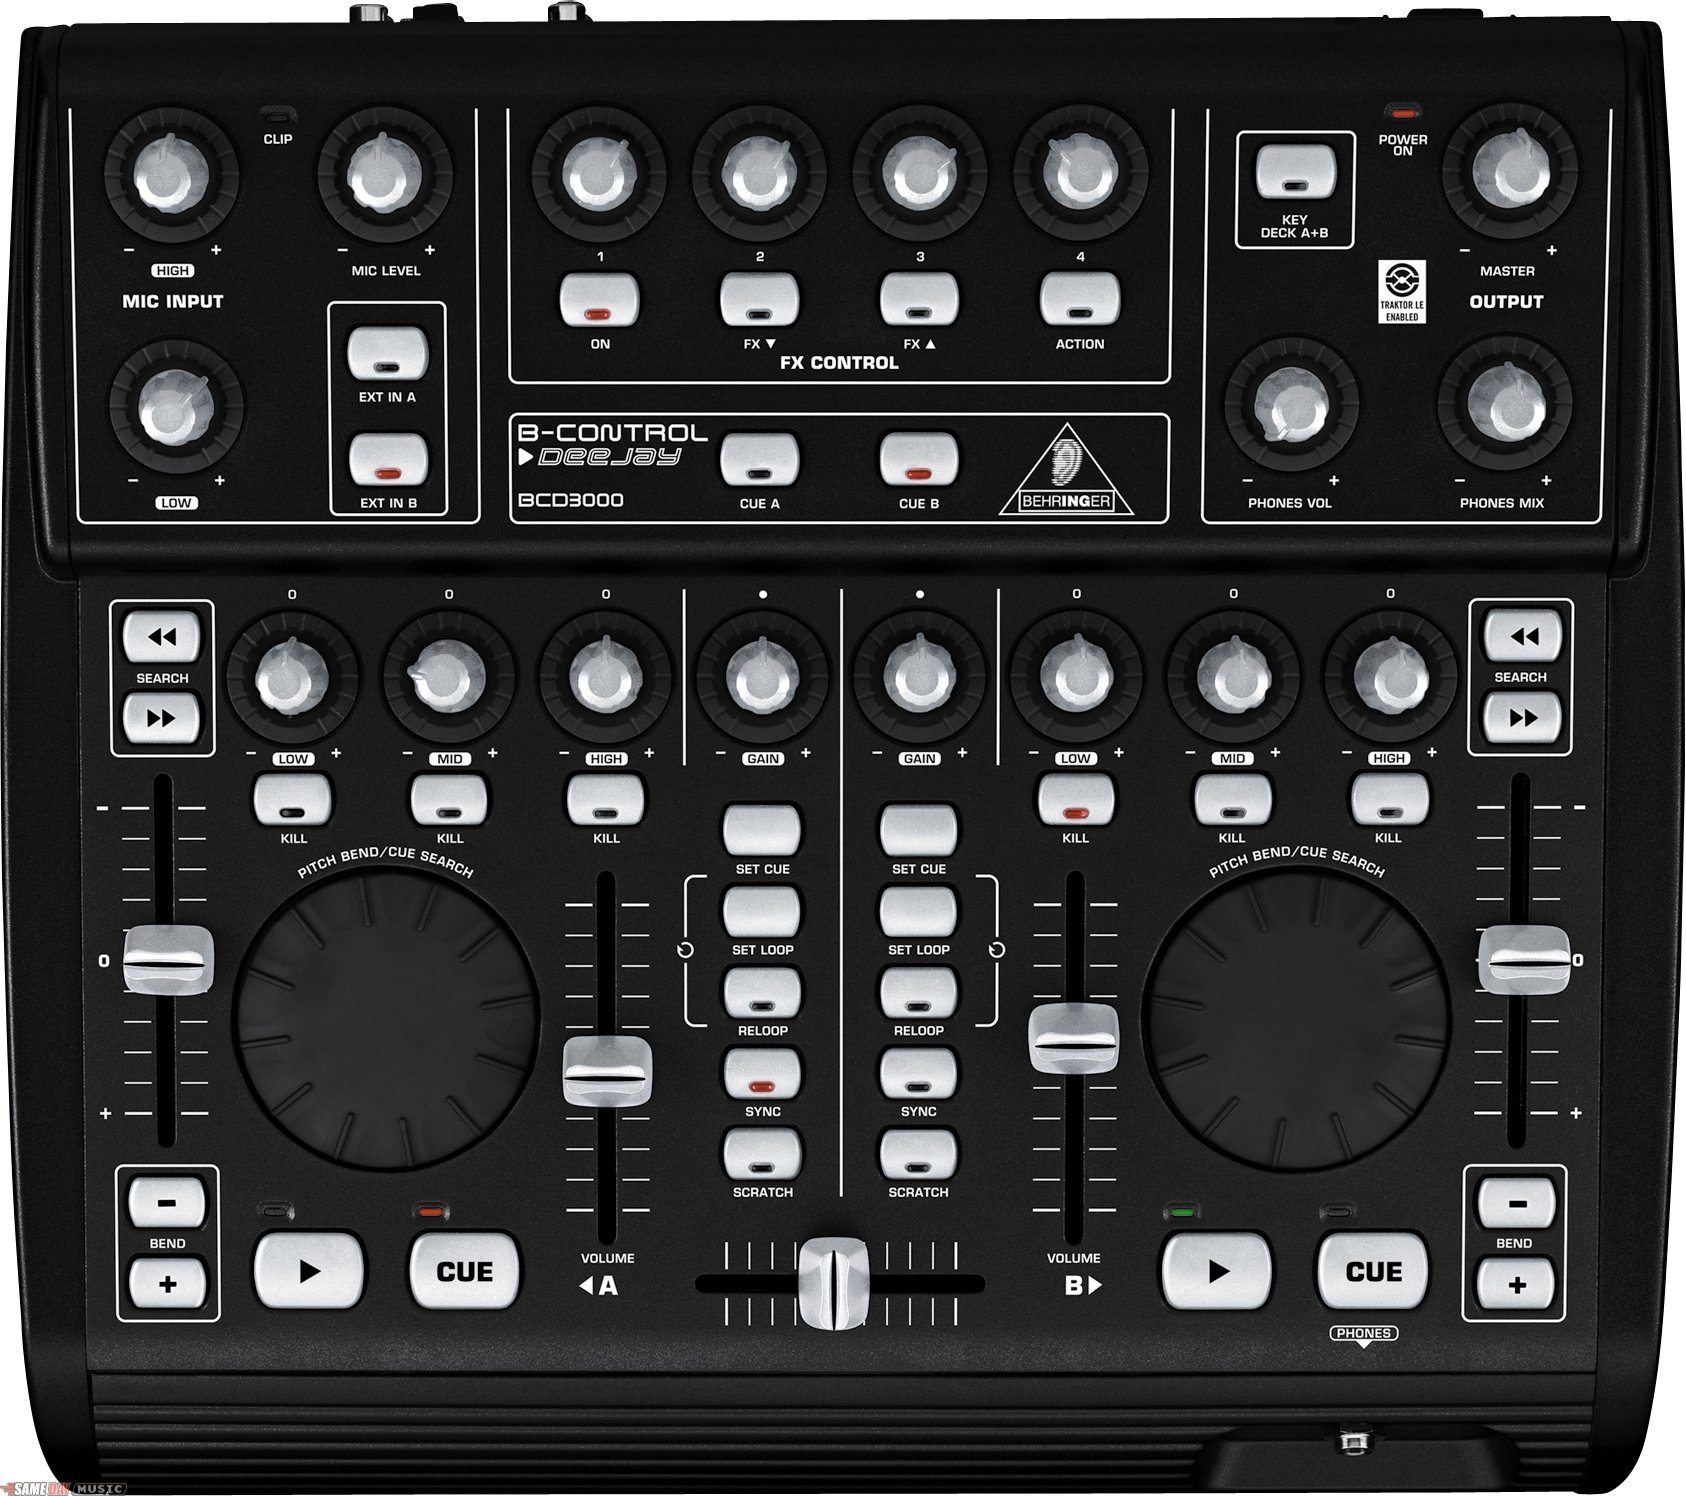
This will take you through step-by-step in creating your own custom tsi MIDI maps in Traktor Pro for Behringer's DEEJAY BCD3000.
Reading Essentials
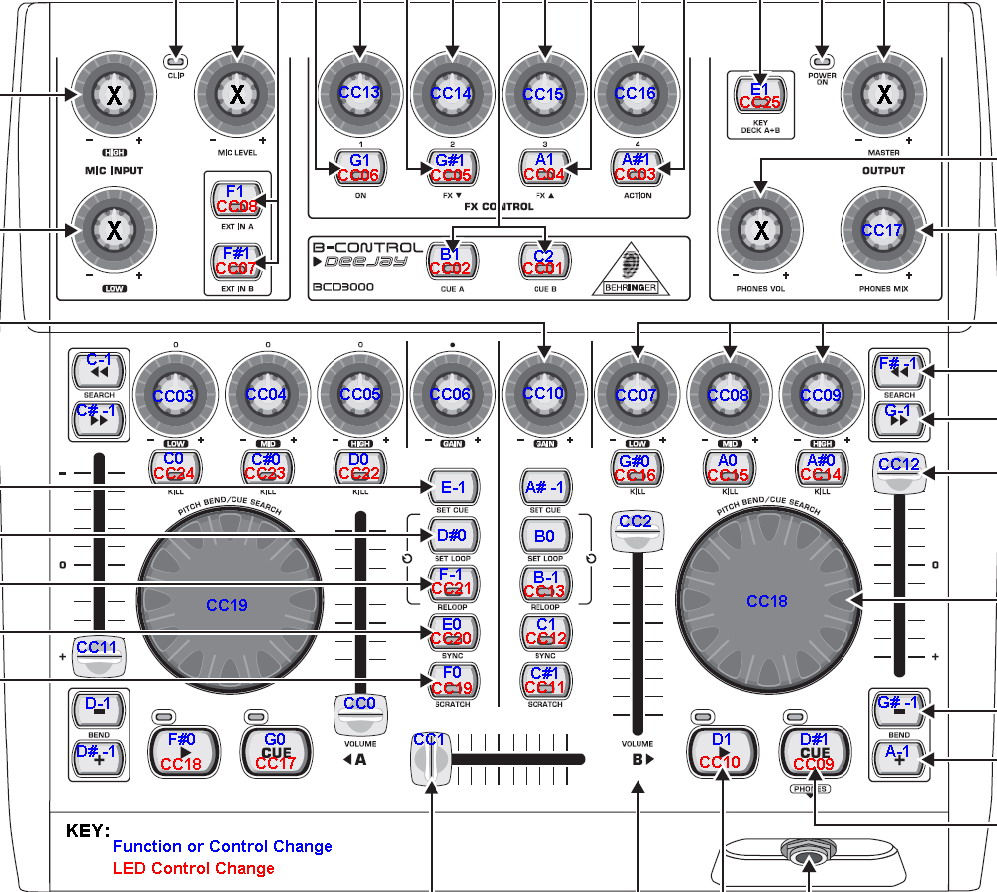
-Read the Traktor Manual, sections 15.1.2 & 15.1.3
(located in C:\Program Files\Native Instruments\Traktor\Documents)
-Get the Behringer manual
Pages 14 & 15 contain the information needed. For reference about the keys see page 7.
-Get the Traktor Bible and the TSI Viewer, both useful tools.
-Use my BCD3000 Midi Commands Cheatsheet for quick reference
Steb-by-Step
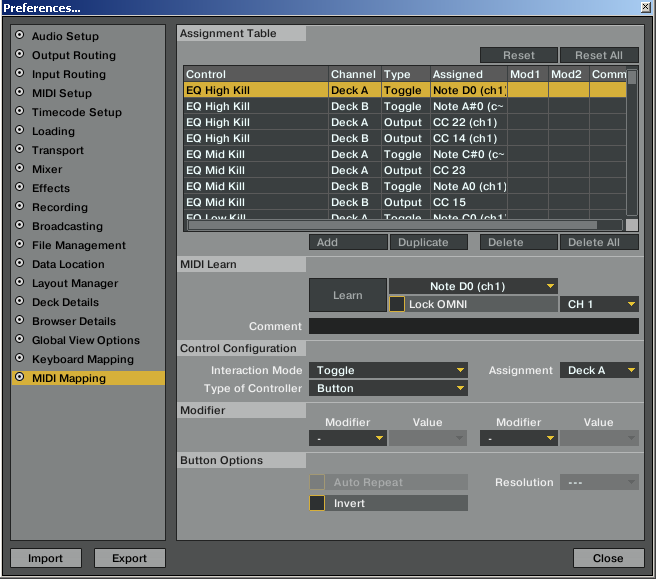
1.Start Traktor Pro
2.Click on Preferences
3.Click on Midi Mapping
4.Click Delete All to start fresh. You may want to save first. *(See step 14)
5.Click Add and select the function you wish to control
6.Highlight that newly added Control
7.Click on Learn and move the button/knob you want to program
8.Unclick Learn
9.Under Control Configuration select the Interaction Mode *(see Control Types)
10.Assign Deck (if needed)
11.If the Button has an LED, highlight the Control and click Duplicate. Then change the Interaction Mode to Output and change the MIDI key *(see LED Buttons)
12.Select the Modifier (if needed) *(see Modifiers)
13.Repeat from Step 5 for additional controls
14. Save by clicking "Export" on the bottom left, and select only "MIDI mapping"
Control Types
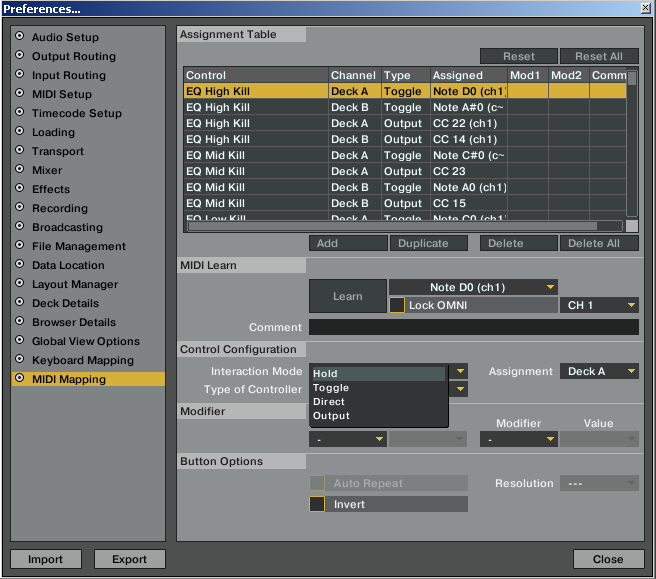
-Hold: This is what you select if you want the key to press every time you want action. Ex: Pitch Bend
-Toggle: This is the common one selected for most buttons you want in on/off states. Such as the LED's. Ex: Play
-Trigger: Similar to hold. Press once for action. Ex: Loop Set
-Direct: Used for selecting fader, knobs, and jogs.
Reference:
(Traktor Manual, section 15.1.2)
-Toggle: This is the common one selected for most buttons you want in on/off states. Such as the LED's. Ex: Play
-Trigger: Similar to hold. Press once for action. Ex: Loop Set
-Direct: Used for selecting fader, knobs, and jogs.
Reference:
(Traktor Manual, section 15.1.2)
LED Buttons
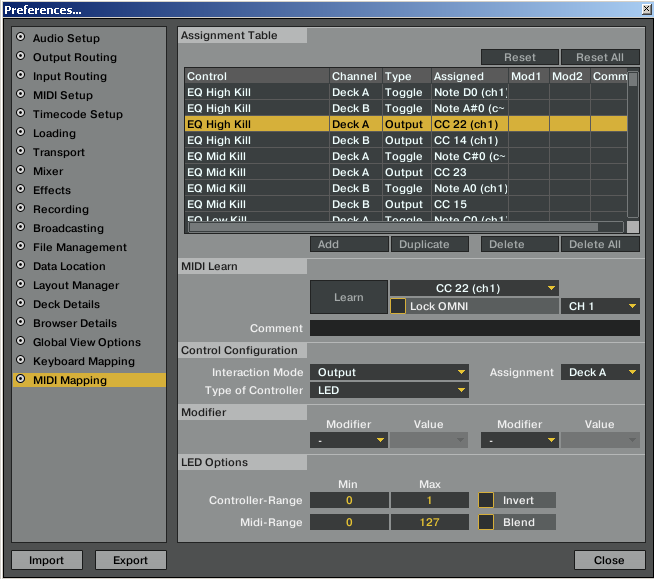
When you set up a button with a LED you need to send an output midi signal to the unit to turn on the LED.
1.Highlight the Control and click Duplicate
2.Change the Interaction Mode to Output
3.Change the assigned MIDI key in the pull-down menu next to Learn. The numbers start with CC. Use the manual and my cheat-sheet to find the corresponding number
Reference:
(Behringer manual, Page 15)
1.Highlight the Control and click Duplicate
2.Change the Interaction Mode to Output
3.Change the assigned MIDI key in the pull-down menu next to Learn. The numbers start with CC. Use the manual and my cheat-sheet to find the corresponding number
Reference:
(Behringer manual, Page 15)
Modifiers
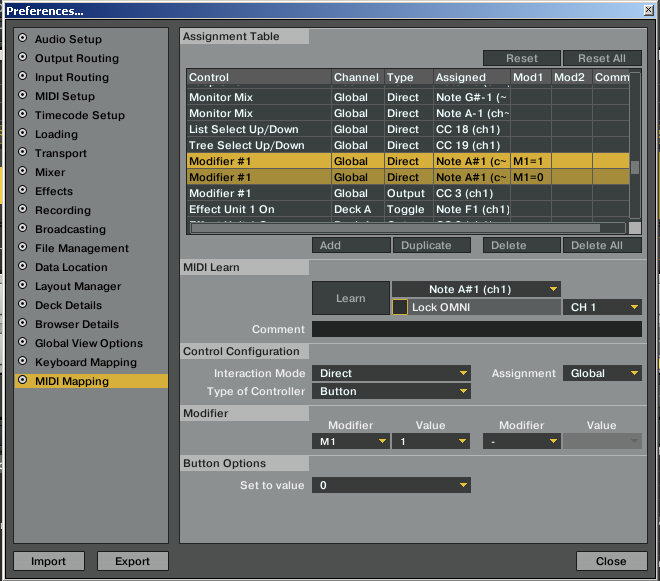
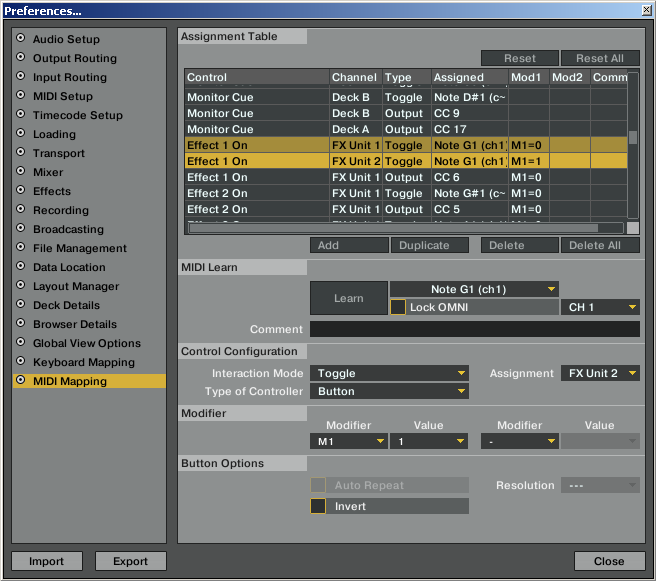
A Modify key is like holding Shift. You can then double or more every control.
1.Click Add and select Modifier then Modifier #1
2.Learn the button
3.Select Set to Value to 1
4.I find Interaction Mode is best set to Hold
5.If you want to permanent switch (toggle) a Modifier you have to set Interaction Mode to Direct.
In addition you must duplicate your Modifier-Button to toggle (off) the Modifier.
ex:
-Modifier #1, Interaction Mode: Direct, Type: Button, M1=0, Set to value: 1
-Modifier #1, Interaction Mode: Direct, Type: Button, M1=1, Set to value: 0
6.When the control is to be to be modified or shifted, learn it and assign it, and set the Modifier to M1 and the Value to 1
7.When you press the key alone, make sure you change the Modifier to M1 and Value 0
Note: LED buttons can only respond to one command. Modifiers will not alter the LED light unless set to.
Reference:
(Traktor Manual, section 15.1.2)
Tips and Tricks
-Save changes often with different names.
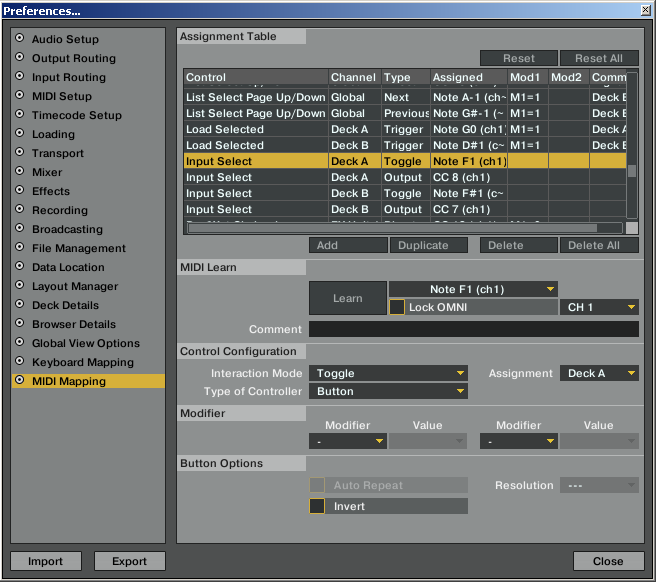
-EXT IN A/EXT IN B can be mapped to midi features as well, but if you want to use external sources you must select Input Select and assign the proper deck.
You also need to set the Input Routing in Traktor Pro. Select BCD3000-1 in the left channel and BCD3000-2 in the right channel of Input Channel A. If you want to use the Inputs for B, route them though with 3&4.
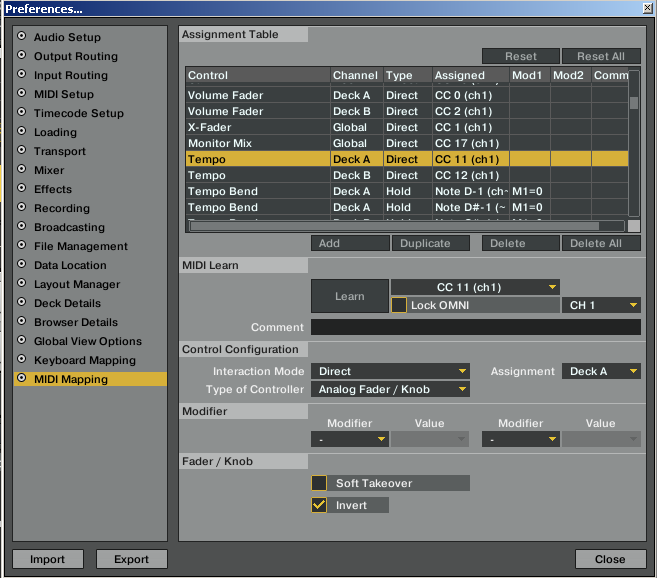
-Knobs & Faders: The Tempo faders need to be inverted by default. Analog work smoothest.
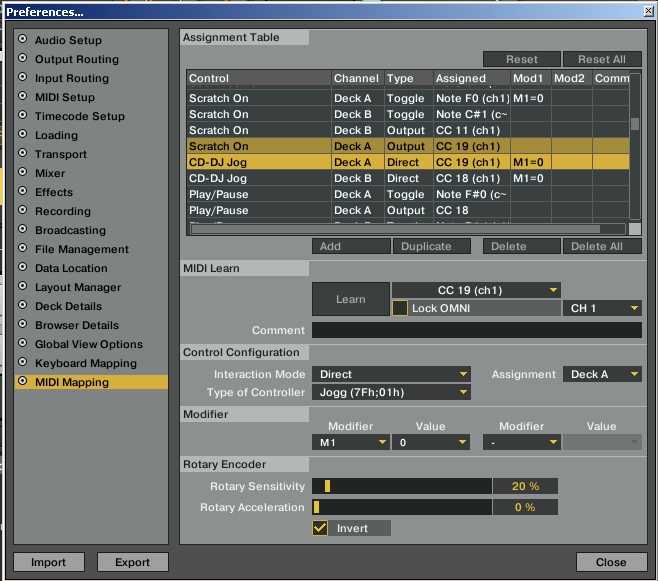
-Jog Wheel Types:
(7Fh;01h) is faster, best for scratching.
(3Fh;41h) is finer, better for browsing.
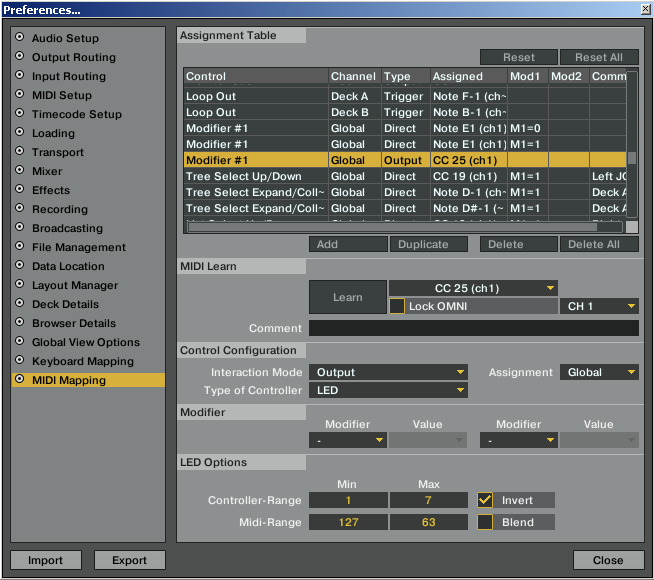
-To have a LED light only when held set:
Controller Range Min = 1 Max = 7
Midi-range Min = 127 Max = 63
Check Invert
-To have a Led light blink with the beat:
1.Click "Add"
2.Select "Output"
3.Click on Beat Phase Monitor
4.Assign the deck
5.Select the corresponding CC
-Join the BCD Fan Forums and share your tips
http://raritiesvault.net/bcd3000